Loading ...
Loading ...
Loading ...
13
:
The cooker hood must not
be fitted above stoves with a
radiant top plate.
:
We recommend that at least
two people install this hood.
:
Do not tile, grout or silicone
this hood to the wall.
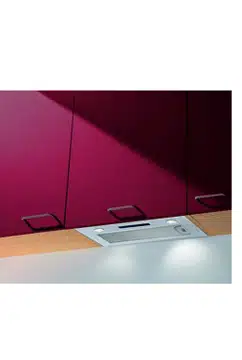
1) Your Baumatic Cooker Hood should only be fitted into the underside of a
dedicated cabinet / kitchen unit. Do NOT position it any less than 700 mm
(70 cm) above the hob.
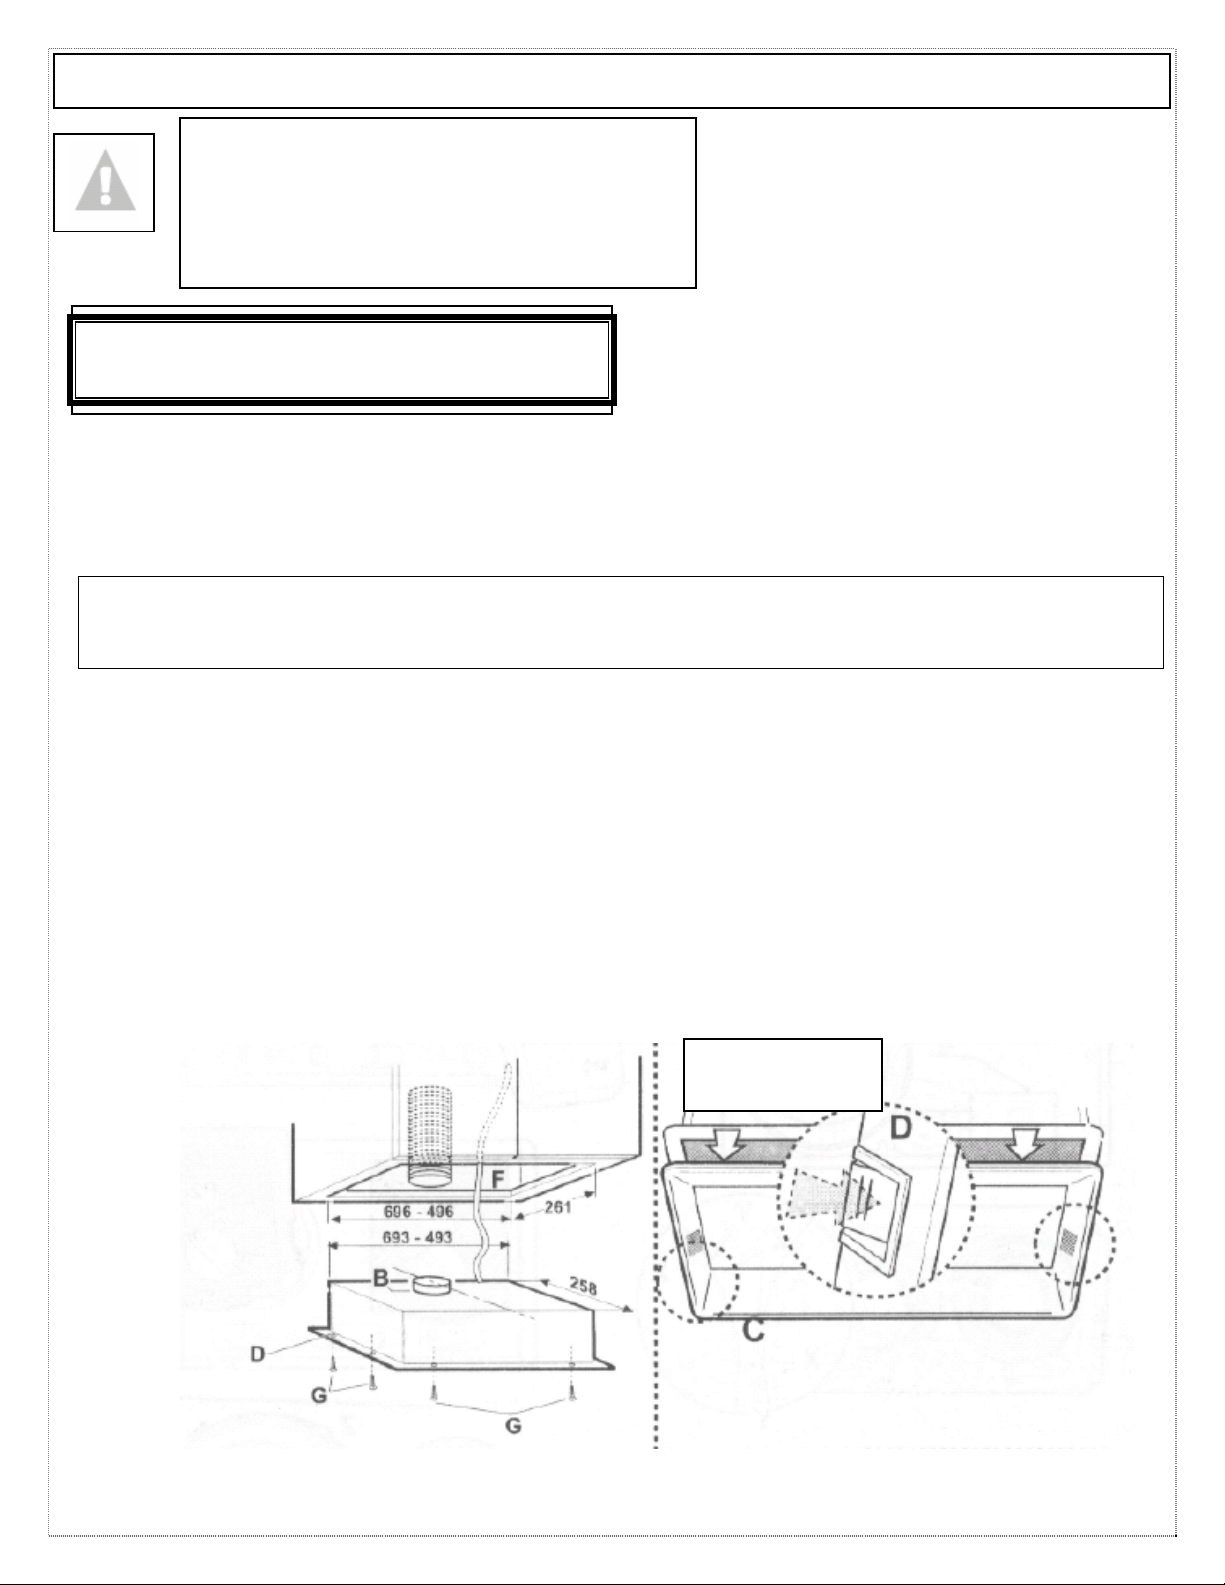
2) Remove the metal anti-grease grille.
Preparing the cabinet. Note: ‘(E)’ will appear at the beginning of an instruction
concerning how to fit the unit for the extraction function. YOU MUST USE DUCTING OF
125mm diameter with a minimum cross section of 150 sq cm.
3) Create an opening in the bottom of the cabinet to insert the cooker hood
and (E) drill a hole in the top of the cabinet to fit the discharge
(extraction) tube.
4) (E) Connect the cooker hood to an external pipe, predispose the
electrical connection.
5) Remove the grill or the anti-grease filter. Remove the frame ‘C’ provided
by pressing on the two release hooks (‘D’ in picture).
6) A) - Insert the cooker hood into the opening. Note – your cooker hood
may come with either 8 fixing screws (as shown in figure below) or with
lateral clasps (see figure on next page).
INSTALLATION INSTRUCTIONS
–
installin
g
y
our Cooker Hood
PLEASE NOTE THAT YOU WILL HAVE
TO DECIDE BEFORE INSTALLING YOUR
COOKER HOOD THAT YOU CAN ADAPT
IT AS AN EXTRACTION FAN. PLEASE
SEE BOXED NOTE BELOW ON
PREPARING THE CABINET
.
Frame Release
ALL SCREWS, RAWLPLUGS, ETC.
COME WITH YOUR COOKER HOOD!
Loading ...
Loading ...
Loading ...