Remove lid from hopper at top and fill with whole, roasted beans. Place lid back on hopper.
Select grind size by holding top of hopper and twisting. (1 = fine, 15 = coarse)
Plug into 110V outlet.
Choose number of cups by twisting dial and press OXO button to start Grinder.
While you are waiting for your beans to grind, please read on for additional features and functions.
Regularly clean the burrs of your Grinder with a brush to avoid clogging and to lengthen the life of the product. See “Cleaning, Care and Storage” on pg. 16 for more details.
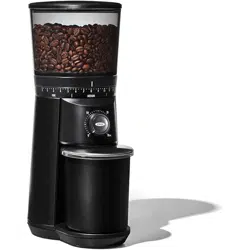
Meet Your Coffee Grinder
ICONS
Familiarize yourself with the different scenarios you may encounter when using your Grinder. You can also reference the Troubleshooting section on pg. 17 for more information.
‘Cups’ selection mode. See pg. 11.
‘Grams’ selection mode. See pg. 12.
Portafilter icon for manual/portafilter mode. See pg. 12.
No beans warning—beans are not reaching the grinding burrs. Unplug the Grinder and dislodge stuck beans. If hopper is empty, fill with fresh beans.
Overheat warning—Grinder is too hot. Grinder will pause function for a few minutes to cool down. Once the warning icon disappears, the Grinder will be ready to use again.
-or
Stalled motor warning—something may be stuck in the burrs. Unplug your Grinder and clean the burrs according to instructions on pg 16. If problem persists, use cleaning granules
Tare is not done properly or a component (stainless steel plate, container, lid) is missing. Refer to “To Switch Grinder Container” section on pg. 13.
The Particulars of Grinding
TO SET GRIND SIZE
Optimal grind size depends on many factors including brewing method, roast darkness, bean type and freshness, and more. Experiment with different grind settings to achieve the brew that best suits your taste. If your coffee tastes too bitter, try a coarser grind size. If your brew is weak, adjust to a finer grind size.
1. Remove lid from hopper and fill with whole, roasted beans. Place lid back on hopper.
2. Grip the hopper from the top and slowly rotate to adjust the grind size setting (1 = fine, 15 = coarse). See chart below for grind setting recommendations.
NOTE: Adjust the grind size while the motor is running to prevent jamming.
3. Plug into 110V outlet.
4. See pg. 11 for instructions on grinding by number of cups, and pg. 12 for instructions on grinding by grams or grinding manually
GRIND SIZE SETTING RECOMMENDATIONS
TO GRIND COFFEE
The Grinder lets you grind in 3 modes: cups, grams and manual/portafilter. In cups and grams mode the Grinder weighs output with an integrated scale to ensure consistent and accurate results. In manual/portafilter the integrated scale is disabled.
Note:
• When in “cups” or “grams” mode, make sure to always have the stainless steel plate, the container and the lid on the base when grinding. If they are absent, the Grinder will not work properly. Refer to the Troubleshooting section for more details (pg. 17).
• Once Grinder has started, the display will show the weight increasing until it reaches the desired weight.
• Do not touch the container or shake the Grinder while grinding as it will affect the reading on the scale.
• Grinder will go into sleep mode after 20 seconds of no activity.
• You cannot adjust the number of cups or grams while grinding, but you can stop the grinding process at any time by pushing the OXO button.
To Switch Between Modes
When you first plug it in, the Grinder will default to “cups mode.” To change to a different mode, hold down the OXO button for ~3 seconds, then twist the dial to select your preferred mode. Your Grinder will then default to the last mode used, even after being unplugged.
Cups Mode
To grind based on the number of cups you wish to brew (up to 12):
1. Press the OXO button once to wake up your Grinder. Press and hold the OXO button for ~3 seconds to enter the mode selection menu.
2. Twist dial to select cups mode, then press the OXO button to select.
3. The scale will measure and display the number of cups in the ground coffee container. Twist the dial to select the total number of cups you would like in the ground coffee container.
For example, if there are 2 cups of ground coffee in the container, and you want a total of 8 cups of ground coffee, the number “2” will be displayed with a solid white ring around the OXO button. When you twist the dial, the ring will flash, and you can select the number “8”. When the grinding cycle is complete, you will have enough coffee in the container for 8 cups.
4. Press OXO button to grind.
OXO recommends using approximately 8 grams of ground coffee per cup (5 fl oz). If you want to adjust the pre-programmed setting to be a little less strong or a little stronger, use the strength adjuster (see “To Adjust Coffee Strength” on pg. 13).
Note: Coffee dosage recommendations are based on the SCAA gold cup ratio designed for optimal extraction and strength.
Grams Mode
If you already know how many grams you need for your favorite brewing method, you can grind by grams by selecting your desired quantity, from 1 to 125 grams.
1. Press the OXO button once to wake up your Grinder. Press and hold the OXO button for ~3 seconds to enter the mode selection menu.
2. Twist dial to select grams mode, then press the OXO button to select.
3. The scale will measure and display the number of grams in the ground coffee container. Twist the dial to select the total number of grams you would like in the ground coffee container.
For example, if there are 16 grams of ground coffee in the ground coffee container, and you want a total of 65 grams of ground coffee, the number “16” will be displayed with a solid white ring around the OXO button. When you twist the dial, the ring will flash, and you can select the number “65”. When the grinding cycle is complete, you will have 65 grams of ground coffee in the ground coffee container.
4. Press OXO button to grind.
Manual/Portafilter Mode
You can disable the Grinder’s built-in scale if you want to manually determine the amount of coffee to grind or if you want to grind directly into a portafilter ( ). In the manual mode, the display selection is disabled: you cannot select cups or grams.
Once manual mode is selected, you can grind into the ground coffee container or a different container, or you can remove the ground coffee container and place a portafilter under the chute. For more information see “To Switch Ground Coffee Container” on pg. 13.
Press OXO button to start grinding.
Press OXO button again to stop grinding.
TO ADJUST COFFEE STRENGTH
If you find your coffee too weak or too strong, you can fine tune the dosage for next time.
1. Move the Strength Adjuster to the right to add a little more ground coffee, or to the left for a little less. Each position of the Strength Adjuster represents a change of one gram per cup.
For example, if you select 4 cups and move the Strength Adjuster one position to the right, the Grinder will produce an additional 4 grams. (4 x 8 grams + 4 x 1 gram = 36 grams)
TO SWITCH GROUND COFFEE CONTAINER or ZERO THE SCALE
The Grinder is designed and programmed to work with the steel plate, ground coffee container and lid it comes with.
If you prefer to grind in a different container than the one provided with the unit, you will have to tare the machine (which will set the scale to zero) with the new container on the scale.
Place the container you decide to use on the base. It can be a different container or our container without the lid or the steel plate, whatever combination works for you.
Press and hold the OXO button. You will pass the mode selection screen. After the mode selection, you will see a 3 second countdown. Keep holding during the countdown. When the countdown reaches “0”, the Grinder will tare with the new container, display “0 g” or “0 cup” and be ready to grind.
The Grinder is now tared with the container you selected. If unplugged, the Grinder will remember this tare. If you decide to use a different container or switch back to the one provided with the Grinder, repeat steps 1 and 2 with new container.
TO REMOVE/REPLACE HOPPER
Always unplug power cord from outlet before removing or replacing bean hopper.
To Remove Hopper:
Press down on and hold hopper release lever on back of Grinder with one hand.
Keep pressing lever and twist hopper counterclockwise with other hand until the arrow lines up with the icon.
Lift hopper with lid straight up and off of the Grinder.
To Replace Hopper:
Make sure there is no coffee debris on the flat surface around the burrs. For cleaning instructions, please see pg. 16.
Align icon on hopper with the arrow above release button. If you do not align the icon with the arrow, the hopper will not be installed properly and the Grinder will not work.
Gently slide hopper straight down onto Grinder. The hopper should seat easily and sit straight. If hopper sits crookedly, remove and try again until it sits straight.
Twist hopper clockwise until the arrow aligns with the icon and release button clicks into place.
NOTE: The bean hopper is designed with a “trap door” that automatically closes when the hopper is removed. The “trap door” allows for easy bean changing and mess-free cleaning.
Good Tips
• Freshly ground coffee is key to making better coffee. OXO recommends grinding coffee immediately before brewing.
• If you don’t grind regularly, make sure to clear the ground coffee from the chute before each use, as some older coffee dust may be sitting inside your Grinder and will affect the quality of your next batch. Without adding beans to the hopper, select 1 cup and grind. Discard the grounds. You are now to ready to grind your fresh beans.
• Coffee flavor and strength is a personal preference. Vary the type of coffee beans, amount of coffee and fineness of grind to achieve the flavor you prefer.
• Do not store beans in the bean hopper for an extended period of time.
• A grind size that is too fine can cause filters/brew baskets to clog and/or overflow. If you experience this, try a coarser grind size.
• Use fresh beans. Old/dry beans will create static. Excess static can lead to dust sticking to walls of Grinder.
Cleaning, Care and Storage
Before cleaning, OXO recommends running the Grinder for 10 seconds with an empty bean hopper to help clear beans/grounds from the burrs and grounds chute.
1. Always unplug power cord from power outlet before cleaning.
2. Unlock and remove bean hopper from Grinder by pressing down on hopper release lever and twisting hopper counter-clockwise. See pg. 14 for full instructions.
3. Carefully remove any beans from between Grinder burrs
4. Lift metal burr handle, and twist counter-clockwise. Pull handle straight up to remove upper burr.
5. Clean upper burr, lower burr and grounds chute with a small bristle brush.
6. Align indents in upper burr with tabs inside lower burr. Push upper burr straight into grinder and turn handle clockwise, until you hear a “click.”
Note: Continue pressing down while turning handle to ensure upper burr engages with lower burr.
7. To test proper burr installment, pull metal burr handle straight up. If properly installed, burr will stay in place.
8. Wash the ground coffee container, bean hopper and both lids in warm water and mild detergent, rinse and dry thoroughly.
9. Wash and dry stainless steel plate and wipe free any coffee grounds sitting under plate.
10. Replace bean hopper by aligning icon with arrow, then gently seat hopper straight down.
11. Wipe Grinder exterior with a soft, damp cloth.
Note: Do not use abrasive pads or harsh chemicals to clean Grinder. Do not wash any part of your Grinder in the dishwasher.
Troubleshooting
Problem
Possible Cause
Solution
Grinder does not start after pressing the OXO button
Grinder not plugged in
Plug power cord into 110V outlet.
Bean hopper not attached properly
Gently remove and re-install bean hopper ensuring it is seated properly.
Grinder overheated
Grinder will pause function for a few minutes to cool down. Once the warning icon disappears, the Grinder will be ready to use again.
If you see “ ” and nothing happens, scale is not tared properly.
Check that stainless steel plate, ground container and lid are on the scale.
Tare scale again. Refer to the “To Switch Grinding Container” section on pg. 13.
Grinder stops mid-cycle
No beans in hopper
Fill hopper with fresh coffee beans.
Foreign item trapped in burrs
Unplug power cord and remove hopper. Inspect hopper, upper and lower burrs. Remove any foreign objects. Refer to Cleaning and Care section.
Grinder overheated
Grinder will pause function for a few minutes to cool down. Once the warning icon disappears, the Grinder will be ready to use again.
Grinder is louder than normal
Grinder blocked with foreign item
Unplug power cord and remove hopper. Inspect hopper, upper and lower burrs. Remove any foreign objects. Refer to Cleaning and Care section on pg. 16.
Grinder starts but produces no coffee grounds
No beans in hopper
Fill hopper with fresh coffee beans.
Hopper out feed is blocked
Unplug power cord and remove hopper. Inspect hopper, upper/lower burrs and grounds chute for blockage.
Grounds chute is clogged
Unplug power cord and remove hopper. Use a small flexible brush to clean grounds chute.
Grinder won’t let me select the number of cups/grams I want
The integrated scale is detecting coffee in the ground coffee container
Select the number of total cups/ grams you want in the ground coffee container. See pg. 11-12 for more details.
The scale is not tared properly and it thinks there is coffee in the ground coffee container
Check that stainless steel plate, container and lid are on the scale.
Tare scale again. Refer to the “To Switch Grinding Container” section on pg. 13.
Grinder display is not showing “0” when empty container is on the base/scale
Tare has not been done with the container you’re trying to use
Tare scale with the container you are trying to use. Refer to the “To Switch Your Ground Coffee Container” on pg. 13.
#1 What is the best grind setting for french press?
Depending on your beans, I'd say 9 or higher. I use 9 for a Chemex which is probably a little too coarse for the Chemex, and 5 for an Aeropress.
#2 Does the receiving container fit tightly so that grinds cannot escape while grinding?
It does, but you must push the container in until it pops into place.
#3 Find that the slower the grinder the better the taste - what speed does this grind at?
Conical burr grinders (like this) do not generate much heat so no problem. The flat disc burr grinder do generate heat and can effect taste.
#4 Can this be utilized for flax seeds & spices, as well?
Never use your coffee grinder for anything but coffee unless you want coffee that tastes like spices and seeds. I would use a separate grinder or mortar & pestle. This grinder is made for coffee.
#5 Is the hopper easy to clean? Our old grinder (not this brand) had a hopper that could not be removed from the base, therefore couldn’t be cleaned.
Very easy to clean! The hopper can be removed from the base to facilitate cleaning. Additionally, if you should experience a clog, the hopper can be removed without having to empty it. Awesome burr grinder!


 ). In the manual mode, the display selection is disabled: you cannot select cups or grams.
 icon.
icon. 
 icon and release button clicks into place.

 icon with arrow, then gently seat hopper straight down.
  ” and nothing happens, scale is not tared properly.