Loading ...
Loading ...
Loading ...
6
Daily Use
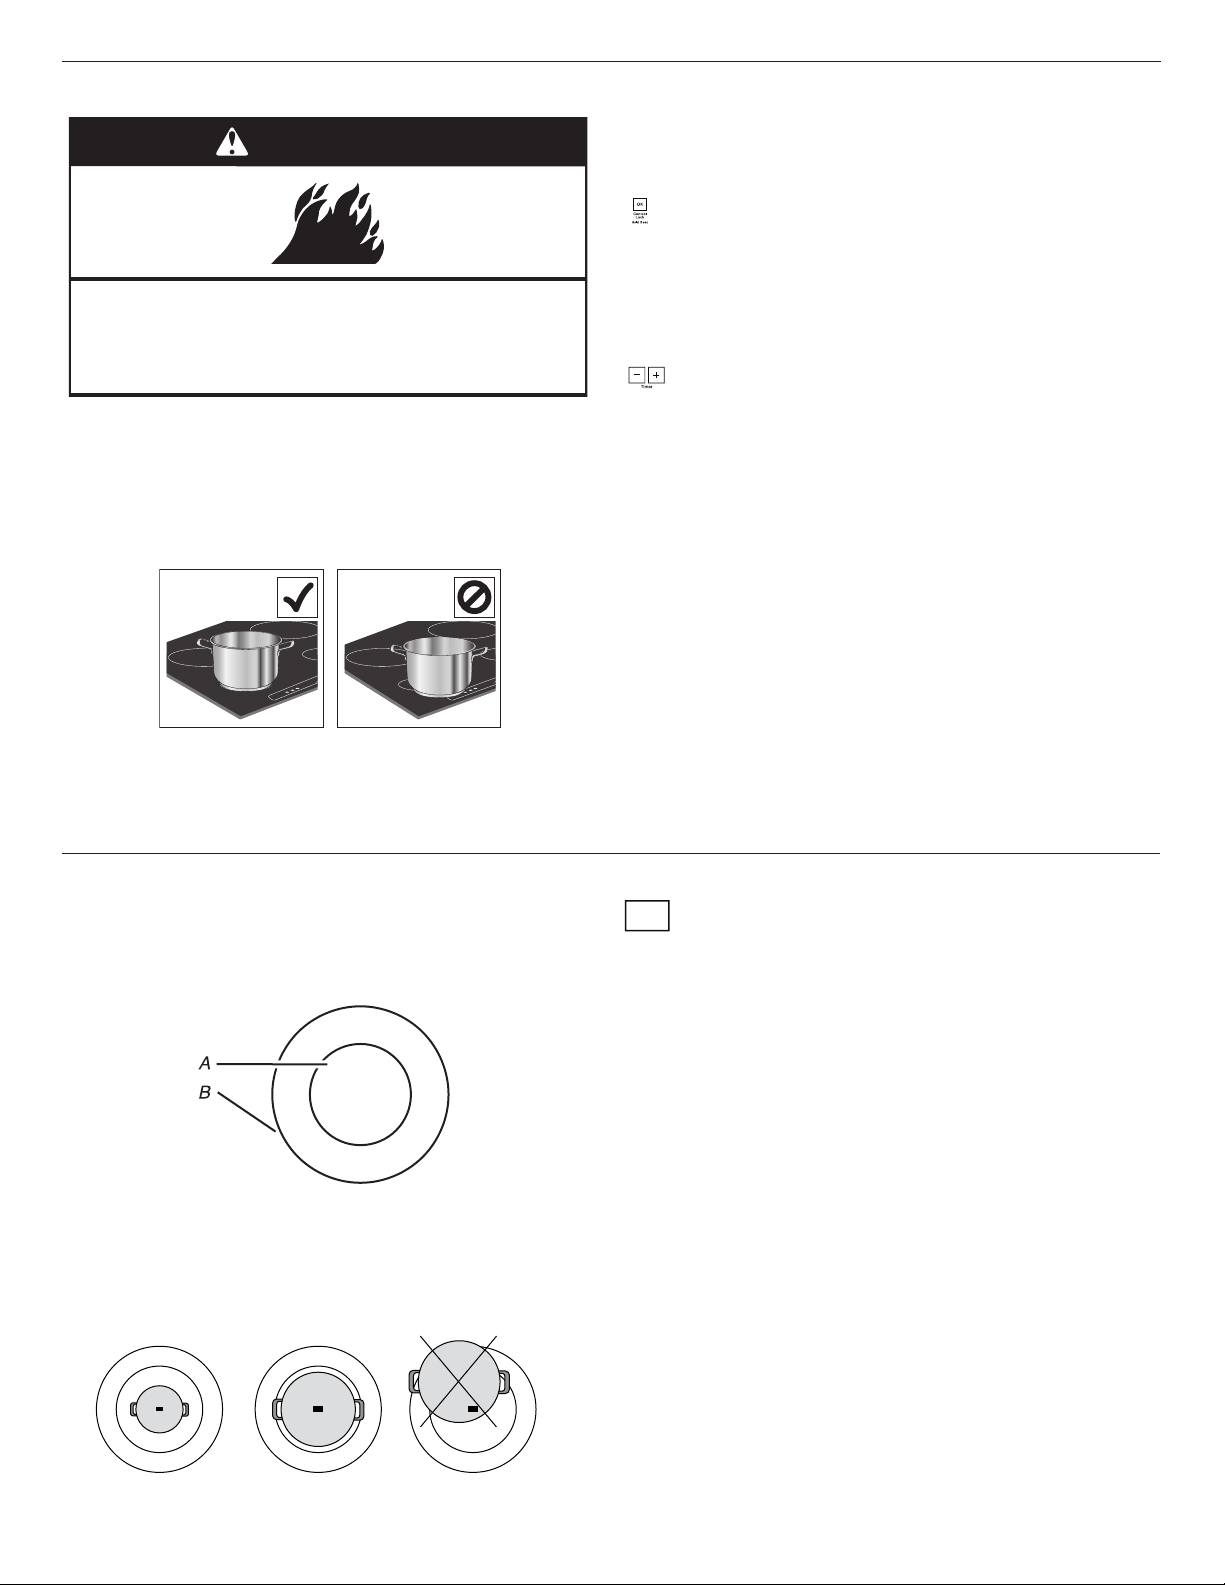
POSITIONING
Do not cover the control panel symbols with the cooking pot.
NOTE: In the cooking zones close to the control panel, it is
advisable to keep pots and pans inside the markings (taking both
the bottom of the pan and the upper edge into consideration, as
this tends to be larger).
This prevents excessive overheating of the keypad. When grilling
or frying, please use the rear cooking zones.
To Use:
Press “ON/OFF” for at least one second to turn on the desired
cooking zone. A dot light and a dash (“-”) will be shown on
display. Press the “+” or “−” button of the required cooking zone
to adjust the power. At rst the level “5” will be shown in line with
the area.
The “Boost“ button can be used to select the quick heating
function. Letter “P” will appear on display.
To deactivate the cooking zones:
Select the “ON/OFF” button of the cooking zone desired.
CONTROL PANEL LOCK
To lock the settings and prevent it from being switched on
unintentionally, press and hold the OK/Key lock button for
3seconds. A beep and an indicator light above the symbol
indicates that this function has been activated. The control panel
is locked except “ON/OFF” of each cooking zone.
To unlock the controls, repeat the activation procedure.
TIMER
The cooktop has a Timer. The Timer can be set in minutes up to
99 minutes.
To Use Timer:
1. Press “+” button to select the desired time.
NOTE: Press and hold the + or - buttons for a few seconds to
quickly scroll through the time.
2. After releasing the button, the timer countdown will start in
3 seconds.
3. If needed to adjust the time, press + button to increase the
time or - button to decrease the time.
4. When countdown is over, timer tone will sound. The display
will indicate 00 and chime will play some times.
Then the display will turn off.
To Cancel:
Press “-” button until display shows “00” or press simultaneously
“-” and “+” for 5 seconds.
Functions
EXTENDIBLE ZONE (DOUBLE ZONE)
Depending on the diameter of the container, the zone adapts itself
automatically, turning on partially (inner zone) or completely (outer
zone). For more information, refer to the minimum diameter table.
IMPORTANT: Place the pot making sure that its center
corresponds to the center of the cooking zone in use (as shown
below).
Assist
ASSISTED COOKING
The “Assist” button activates the special functions. Place the
pot in position and turn on the cooking zone. Press the “Assist”
button. “A” will appear on the display.
The indicator for the rst special feature available for the cooking
zone will light up.
Select the desired special function by pressing the “Assist” button
one or more times.
The function is activated once the "OK" button has been pressed
to conrm.
To deactivate the special functions, press “ON/OFF” button.
If you want to change the special function press the “ON/OFF”
button and repeat the procedure.
ASSISTED MELT
This function allows you to bring food to the ideal temperature for
melting and to maintain the condition of the food without risk of
burning. This method does not damage delicate foods such as
chocolate, and helps prevent food from sticking to the pot/pan.
ASSISTED SIMMER
This function is ideal for maintaining a simmering temperature,
allowing you to cook food for long periods. Ideal for long-cooking
recipes (rice, sauces, soups) with liquid sauces.
WARNING
Fire Hazard
Turn off all controls when done cooking.
Failure to do so can result in death or fire.
A. Single size
B. Dual size
Loading ...
Loading ...
Loading ...