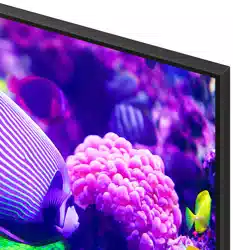
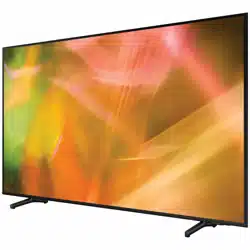
Reference file: Samsung UA75AU8000WXXY 75 Inch Crystal UHD 4K Smart TV
Additionally, the document applies to other Samsung models: UA43AU7000, UA50AU7000, UA55AU7000, UA58AU7000, UA65AU7000, UA70AU7000, UA75AU7000, UA43AU7100, UA50AU7100, UA55AU7100, UA58AU7100, UA65AU7100, UA75AU7100, UA43AU7200, UA50AU7200, UA55AU7200, UA58AU7200, UA65AU7200, UA75AU7200, UA43AU7500, UA50AU7500, UA55AU7500, UA65AU7500, UA43AU7700, UA50AU7700, UA55AU7700, UA65AU7700, UA70AU7700, UA75AU7700, UA43AU8000, UA50AU8000, UA55AU8000, UA60AU8000, UA65AU8000, UA70AU8000, UA75AU8000, UA85AU8000, UA50AU8080, UA55AU8080, UA65AU8080, UA43AU8100, UA50AU8100, UA55AU8100, UA60AU8100, UA65AU8100, UA70AU8100, UA75AU8100, UA85AU8100, UA43AU8200, UA55AU8200, UA65AU8200, UA75AU8200, UA43AU9000, UA50AU9000, UA55AU9000, UA65AU9000, UA75AU9000, UA43AU9070, UA55AU9070, UA65AU9070, UA43AUE60, UA50AUE60, UA55AUE60, UA58AUE60, UA65AUE60, UA43AUE70, UA50AUE70, UA55AUE70, UA58AUE70, UA65AUE70, QA43Q60A, QA50Q60A, QA55Q60A, QA65Q60A, QA75Q60A, QA85Q60A, QA43Q65A, QA50Q65A, QA55Q65A, QA65Q65A, QA75Q65A, QA85Q65A, QA55Q70A, QA65Q70A, QA75Q70A, QA85Q70A, QA50Q80A, QA55Q80A, QA65Q80A, QA55QN85A, QA65QN85A, QA75QN85A, QA85QN85A, QA55QS85A, QA65QS85A, QA75QS85A, QA85QS85A, QA43QN90A, QA50QN90A, QA55QN90A, QA65QN90A, QA75QN90A, QA85QN90A, QA98QN90A, UA43AU7000K, UA50AU7000K, UA55AU7000K, UA58AU7000K, UA65AU7000K, UA70AU7000K, UA70AU8000K, UA75AU7000K, UA43AU8000K, UA50AU8000K, UA55AU8000K, UA60AU8000K, UA65AU8000K, UA75AU8000K, UA85AU8000K, UA43AU8100K, UA50AU8100K, UA55AU8100K, UA60AU8100K, UA65AU8100K, UA70AU8100K, UA75AU8100K, UA85AU8100K, UA43AU9000K, UA50AU9000K, UA55AU9000K, UA65AU9000K, QA43Q60AAK, QA50Q60AAK, QA55Q60AAK, QA65Q60AAK, QA75Q60AAK, QA85Q60AAK, QA43Q60ABK, QA50Q60ABK, QA55Q60ABK, QA65Q60ABK, QA75Q60ABK, QA85Q60ABK, QA55Q70AAK, QA65Q70AAK, QA75Q70AAK, QA85Q70AAK, QA50Q80AAK, QA55Q80AAK, QA65Q80AAK, QA55QN85AAK, QA65QN85AAK, QA75QN85AAK, QA85QN85AAK, QA50QN90AAK, QA55QN90AAK, QA65QN90AAK, QA75QN90AAK, QA85QN90AAK, QA98QN90AAK
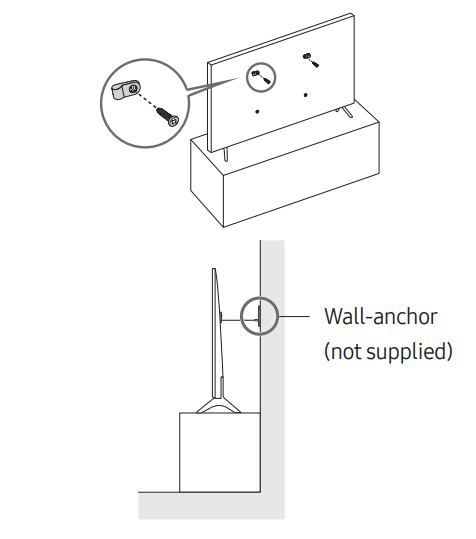
 If you mount this TV on a wall, follow the instructions exactly as set out by the manufacturer. If it is not correctly mounted, the TV may slide or fall and cause serious injury to a child or adult and serious damage to the TV.
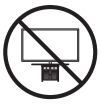
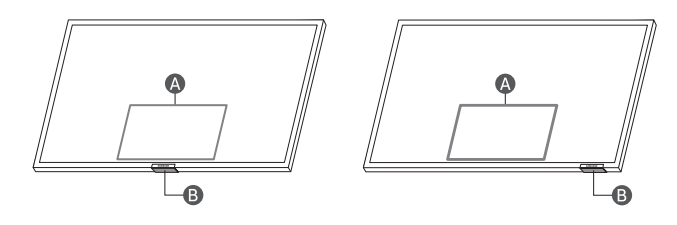
 Control menu
 TV Controller button / Remote control sensor
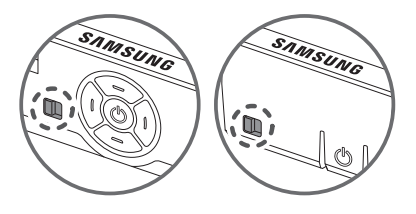
 >
> Settings > e-Manual > Troubleshooting or FAQ
 +
+  buttons together for 10 seconds.