OWNER'S MANUAL
TROUBLESHOOTING GUIDE
WARNING: TO REDUCE RISK OF PERSONAL INJURY - UNPLUG CLEANER BEFORE SERVICING.
Cleaner won’t run
1. Power cord not firmly plugged into outlet.
2. Blown fuse or tripped breaker.
- 2. Check fuse or breaker in home. Replace fuse/ reset breaker.
3. Needs service.
- 3. Call Customer Service: 1-800-321-1134.
4. Thermal Protector activated.
- 4. Allow cleaner to cool for 30 min.
Cleaner won’t pick up or low suction
Performance Indicator* light has turned red
1. Dirt cup not installed correctly.
- 1. Review dirt cup removal and replacement.
2. Dirt cup full.
3. Brushroll worn.
4. Broken or worn belt.
5. Clogged filter.
- 5. Remove filter and clean.
6. Nozzle/brushroll clogged.
- 6. Check nozzle/brushroll; remove obstruction/ clog.
7. Hose clogged.
- 7. Remove hose; remove clog.
Dust escaping from cleaner
1. Dirt cup full.
2. Dirt cup not installed correctly.
- 2. Review dirt cup removal & replacement.
3. Hose not installed correctly.
- 3. Review hose installation.
4. Filter not installed completely.
- 4. Review filter removal & replacement.
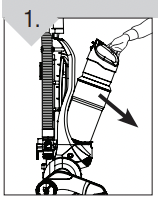
CAUTION: Do not lift unit from floor to use hose, loose items may become entangled in the rotating brushroll.
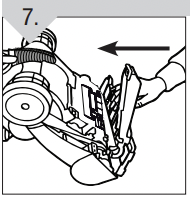
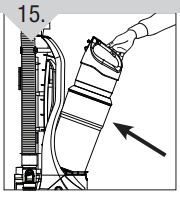
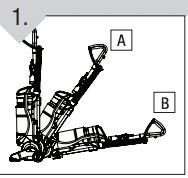
TO USE HOSE AND ATTACHMENTS
Remove the hose from hose caddy.
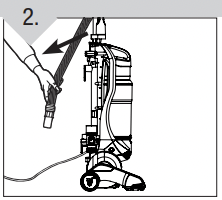
Choose any of the handy accessories or use the hose alone.
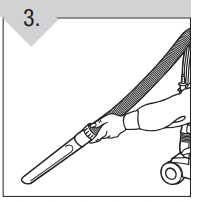
Simply push the attachment firmly onto the hose end. To remove tool, twist and pull apart gently.
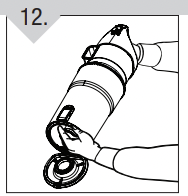
BELT OR BRUSHROLL: REMOVAL & REPLACEMENT
TOOL REQUIRED: PHILLIPS SCREWDRIVER
WARNING: TO REDUCE THE RISK OF INJURY FROM MOVING PARTS - UNPLUG BEFORE CHANGING BELT OR BRUSHROLL.
TO REMOVE BELT
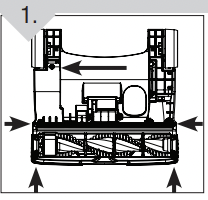
Lay the cleaner flat and flip it to expose the nozzle base. The base should lay flat and face up. Remove the five (5) screws.
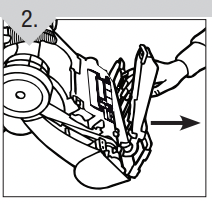
Pull and lift the nozzle guard off
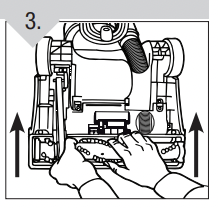
Lift and remove the brushroll. Dispose of the old belt.
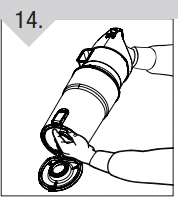
TO REPLACE BELT OR BRUSHROLL
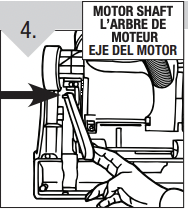
Slide belt onto motorshaft
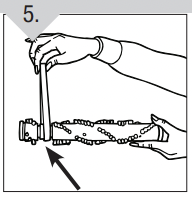
Place new belt in area of brushroll without bristles.
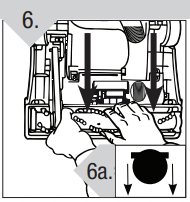
With new belt in place, pull and slide brushroll into nozzle making sure that the brushroll end caps are in the correct orientation (6a inset). Rotate brushroll manually to make sure belt is properly aligned.
Reattach nozzle guard.
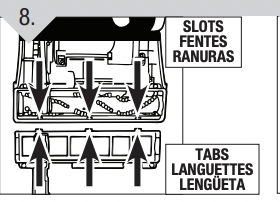
Secure by aligning the three (3) tabs in the base slots.
Replace all five (5) screws to secure nozzle guard.
REPLACE THE FILTER CARTRIDGE
Return filter cartridge to base of cleaner.
Click button back into place to lock filter cartridge in base of cleaner.
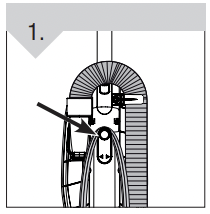
CLEAN THE AIR DIRECTOR
To remove Air Director, rotate 1/4 turn counterclockwise.
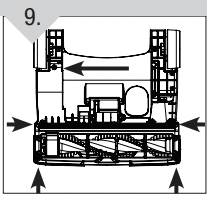
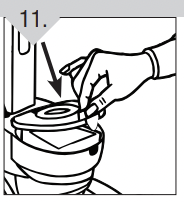
REPLACE DIRT CUP

Pull out and wipe with a damp cloth to clean.
Dry and return the Air Director to the dirt cup. Rotate 1/4 turn clockwise to lock in place.
Return dirt cup to cleaner.
REGULAR MAINTENANCE: Each time the dirt cup is emptied, the filter should be cleaned. Tap the filter firmly against the inside of a trash can until the dirt stops falling from the filter. (Filter will be discolored after use, this will not affect the filter’s performance.) Do not brush the filter. The cleaning instructions may vary depending on the dirt conditions. In some cases, more or less cleaning of the filter may be required.
An internal thermal protector has been designed into your cleaner to protect it from overheating. When the thermal protector activates the cleaner will stop running. If this happens proceed as follows:
1. Turn cleaner OFF and disconnect it from the electrical outlet.
2. Empty dirt cup.
3. Inspect the nozzle and bag inlet openings for any obstructions. Clear obstructions if present.
4. When cleaner is unplugged and motor cools for 30 minutes, the thermal protector will deactivate and cleaning may continue.
If the thermal protector continues to activate after following the above steps, your cleaner may need servicing.
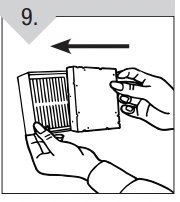
DIRT CUP & FILTER: REMOVAL & REPLACEMENT
WARNING: TO REDUCE THE RISK OF INJURY FROM MOVING PARTS, UNPLUG BEFORE REMOVING OR REPLACING FILTER.
NOTE: For best performance, replace filter every 6 months. Please use reminder label located on filter cap to record replacement date.
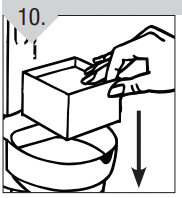
EMPTY DIRT CUP
Lift dirt cup release button on top of dirt cup to remove dirt cup.
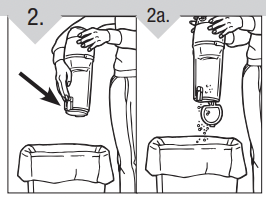
Hold dirt cup over garbage can and press clean release dirt cup button to empty. Make sure container bottom center opening is clear of debris. Snap dirt cup bottom back into place after emptying.
Click the button on the base of the cleaner toward the outside edges to unlock the filter cartridge, then put away the filter cover.
REMOVE FOAM FILTER
Lift the filter cartridge out of the base cleaner.
Remove the foam filter from the filter cartridge.
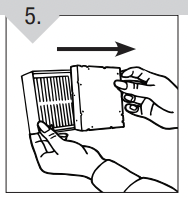
CLEAN PLEATED FILTER
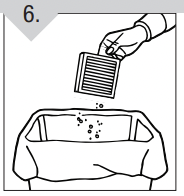
Tap the pleated filter on the inside of a garbage bin to remove excess dust and dirt from the filter. Replace the filter every 6 months
RINSE PLEATED FILTER
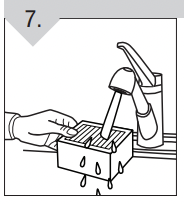
Hold the pleated filter upside down under running water to rinse. Allow filter to dry for at least 24 hours before replacing in filter cartridge.
RINSE FOAM FILTER
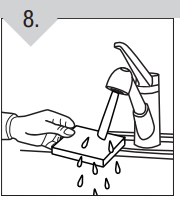
Hold the foam filter under running water to rinse. Allow filter to dry for at least 24 hours before replacing in filter cartridge.
REPLACE FOAM FILTER
Return foam filter to filter cartridge.
HOW TO OPERATE
CORD RELEASE
Turn quick cord release for easy cord removal. To Use: Plug into electrical outlet. For convenient storage: Wrap cord on cord hooks. Attach the plug end to the cord.
ON/OFF PEDAL
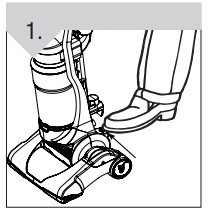
Plug cord into electrical outlet. Turn cleaner on by depressing foot pedal located on the back left side of the cleaner.
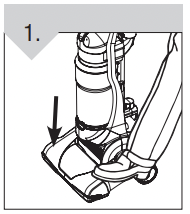
Pull back handle to tilt back. Press on the front of nozzle if needed.
FLOOR/CARPET CLEANING
CARRY HANDLE
Use the carry handle to move the cleaner from room to room.
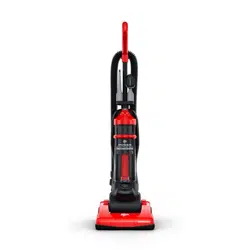
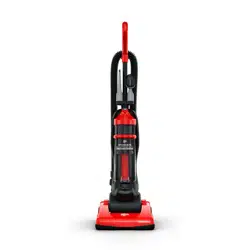
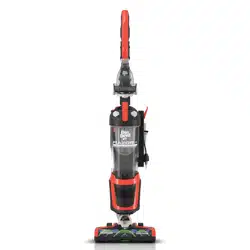
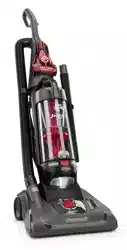
FEATURES
FRONT VIEW/AVANT/PARTE FRONTAL BACK VIEW/ARRIÈRE/PARTE POSTERIOR
 .
. 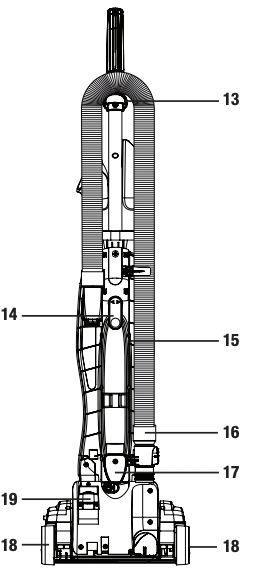
1. Handle Grip
2. Stretch Hose
3. Dust Brush*
4. Tool Caddy*
5. Dirt Cup Release Button
6. Baffle
7. Dirt Cup
8. Filter
9. Nozzle
10. Bumper
11. Performance Indicator
12. Crevice Tool*
13. Hose Clip
14. Quick Release Cord Hook
15. Power Cord
16. Lower Hose Connector
17. Lower Cord Wrap
18. Wheels
19. On/Off Pedal
*On select models only
HOW TO ASSEMBLE
TOOL REQUIRED: PHILLIPS OR FLAT HEAD SCREWDRIVER
* Fixed handle or telescopic handle depends on selected model.
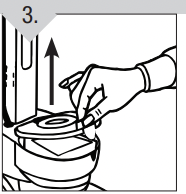
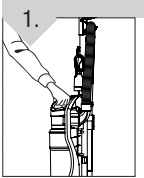
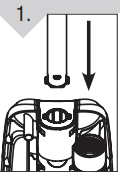
ATTACH FIXED HANDLE*
Remove dirt cup from body of cleaner.

Slide handle into hole on top of cleaner.
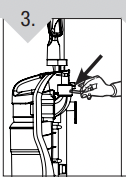
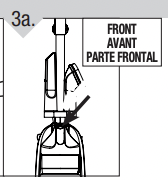
Insert screw through hole (located under tool caddy) on back of cleaner (Diagram 3). Place bolt onto end of screw coming through back panel and tighten to secure handle (Diagram 3a).
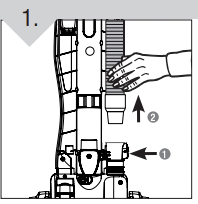
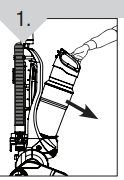
ATTACH TELESCOPIC HANDLE*
Insert handle into body of cleaner.
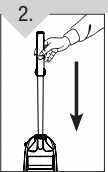
Push down firmly until handle locks into place.
FOR STORAGE
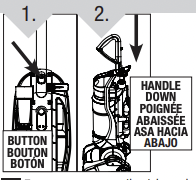
For storage, press the telescopic handle release button on the back of the cleaner and push handle down.
FOR REGULAR USE
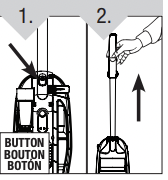
For regular use, push the telescopic handle release button and pull handle up.
SECURE BACK HOSE
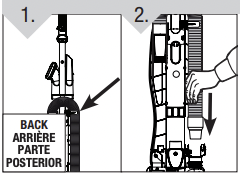
Wrap hose around back of hose caddy. Push hose wand down into the right side of cleaner.
TOOL STORAGE
Attach crevice tool and dust brush to tool caddy.

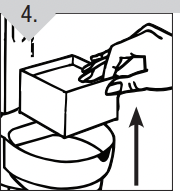
Replace dirt cup by tilting back until it snaps into place.
LIMITED WARRANTY
To the consumer, Royal Appliance Mfg. Co. warrants this product to be free of defects in material or workmanship commencing upon the date of the original purchase. Refer to the data plate label on your product for the length of warranty and save your original sales receipt to validate start of warranty period.
If the product should become defective within the warranty period, we will repair or replace any defective parts free of charge. The complete machine must be delivered prepaid to any ROYAL® Authorized Sales & Warranty Service Station. Please include complete description of the problem, day of purchase, copy of original sales receipt and your name, address and telephone number. If you are not near a Warranty Station, call the factory for assistance at USA & Canada: 1-800-321-1134. Use only genuine Royal ® replacement parts.
The warranty does not include unusual wear, damage resulting from accident or unreasonable use of the product. This warranty does not cover accessories or attachments. This warranty does not cover unauthorized repairs. This warranty gives you specific legal rights and you may also have other rights (Other rights may vary from state to state in the USA).
IMPORTANT: USE ONLY GENUINE ROYAL® REPLACEMENT PARTS
SAFETY INSTRUCTIONS
WARNING: TO REDUCE THE RISK OF FIRE, ELECTRIC SHOCK OR INJURY:
• Do not leave appliance when plugged in. Unplug from outlet when not in use and before cleaning or servicing.
• Do not use outdoors or on wet surfaces. Electrical shock could occur.
• Do not allow to be used as a toy. Not intended for use by children age 12 and under. Close supervision is necessary when used near children. To avoid injury or damage, keep children away from product, and do no allow children to place fingers or other objects into any openings.
• Use only as described in this manual. Use only manufacturer’s recommended attachments and products.
• Do not use with damaged cord or plug. If appliance is not working as it should, has been dropped, damaged, left outdoors, or dropped into water, return it to a service center for inspection. Call 1-800-321-1134 for the nearest service center.
• Do not pull or carry by cord, use cord as handle, close a door on cord, or pull cord around sharp edges or corners. Do not place product on cord. Do not run appliance over cord. Keep cord away from heated surfaces.
• Do not unplug by pulling on cord. To unplug, grasp the plug, not the cord.
• Do not handle plug or appliance with wet hands.
• Do not put any objects into openings. Do not use with any opening blocked; keep free of dust, lint, hair, and anything that may reduce air flow.
• Do not use sharp objects to clean out hose as they can cause damage.
• Keep hair, loose clothing, fingers, and all parts of body away from openings and moving parts.
• Do not pick up anything that is burning or smoking, such as cigarettes, matches, or hot ashes.
• Do not use without dirt cup and filters in place.
• Turn off all controls before unplugging.
• Look on your vacuum cleaner and follow all label and marking instructions.
• Use extra care when cleaning on stairs. To avoid personal injury or damage, and to prevent the cleaner from falling, always place cleaner at bottom of stairs or on floor. Do not place cleaner on stairs or furniture, as it may result in injury or damage.
• Do not use to pick up flammable or combustible liquids, such as gasoline, or fine wood sandings, or use in areas where they may be present.
• Keep the vacuum cleaner on the floor. Only the hand-held vacuum cleaners may be set on furniture.
• Vacuum cleaner must be in the upright position to lift the rotating brush off the carpet when doing above floor cleaning.
• Brushroll continues to turn while product is turned on and handle is in the upright position. To avoid damage to carpet, rugs, and flooring, avoid tipping cleaner or setting it on furniture, fringed area rugs, or carpeted stairs during tool use.
• Do not use an extension cord with this vacuum cleaner.
• Store the vacuum cleaner indoors. Put the vacuum cleaner away after use to prevent tripping accidents.
• Operate cleaner only at voltage specified on date plate on back of cleaner.
CAUTION: TO REDUCE THE RISK OF DAMAGE:
• Avoid picking up hard, sharp objects with this product, as they may cause damage.
• Store appropriately indoors in a dry place. Do not expose machine to freezing temperatures.
• Do not use sharp objects to clean out hose as they can cause damage.