Loading ...
Loading ...
Loading ...
INSTALLATION INSTRUCTIONS
Step 4-3. Installing Remote Blowers
10
MODEL NUMBER: HYEX-1.0/HY-EX-1.4
MAXIMUM CFM: 1000 CFM/1400 CFM
VOLTS/HERTZ/AMPS: 115VAC, 60 Hz, 2.9A (HYEX-1.0) and 3.3A (HYEX-1.4)
REQUIRED DUCT SIZE: HYEX-1.0: 8” Round (51 sq. in. equiv.) / HYEX-1.4: 10” Round (80 sq. in. equiv.)
FLAT OR LOW SLOPE ROOF
1. For flat roofs or roofs having pitch less than 1 ½” rise
in 12”, mount blower on roof curb. See Figure 1
2. Install the blower with discharge pointing down slope
and away from prevailing winds.
3. Use flashing and roofing mastic to seal the unit to
prevent leaks.
4. Cut holes for ducting and electrical wiring as shown
in Figure 2.
Figure 1
Figure 2
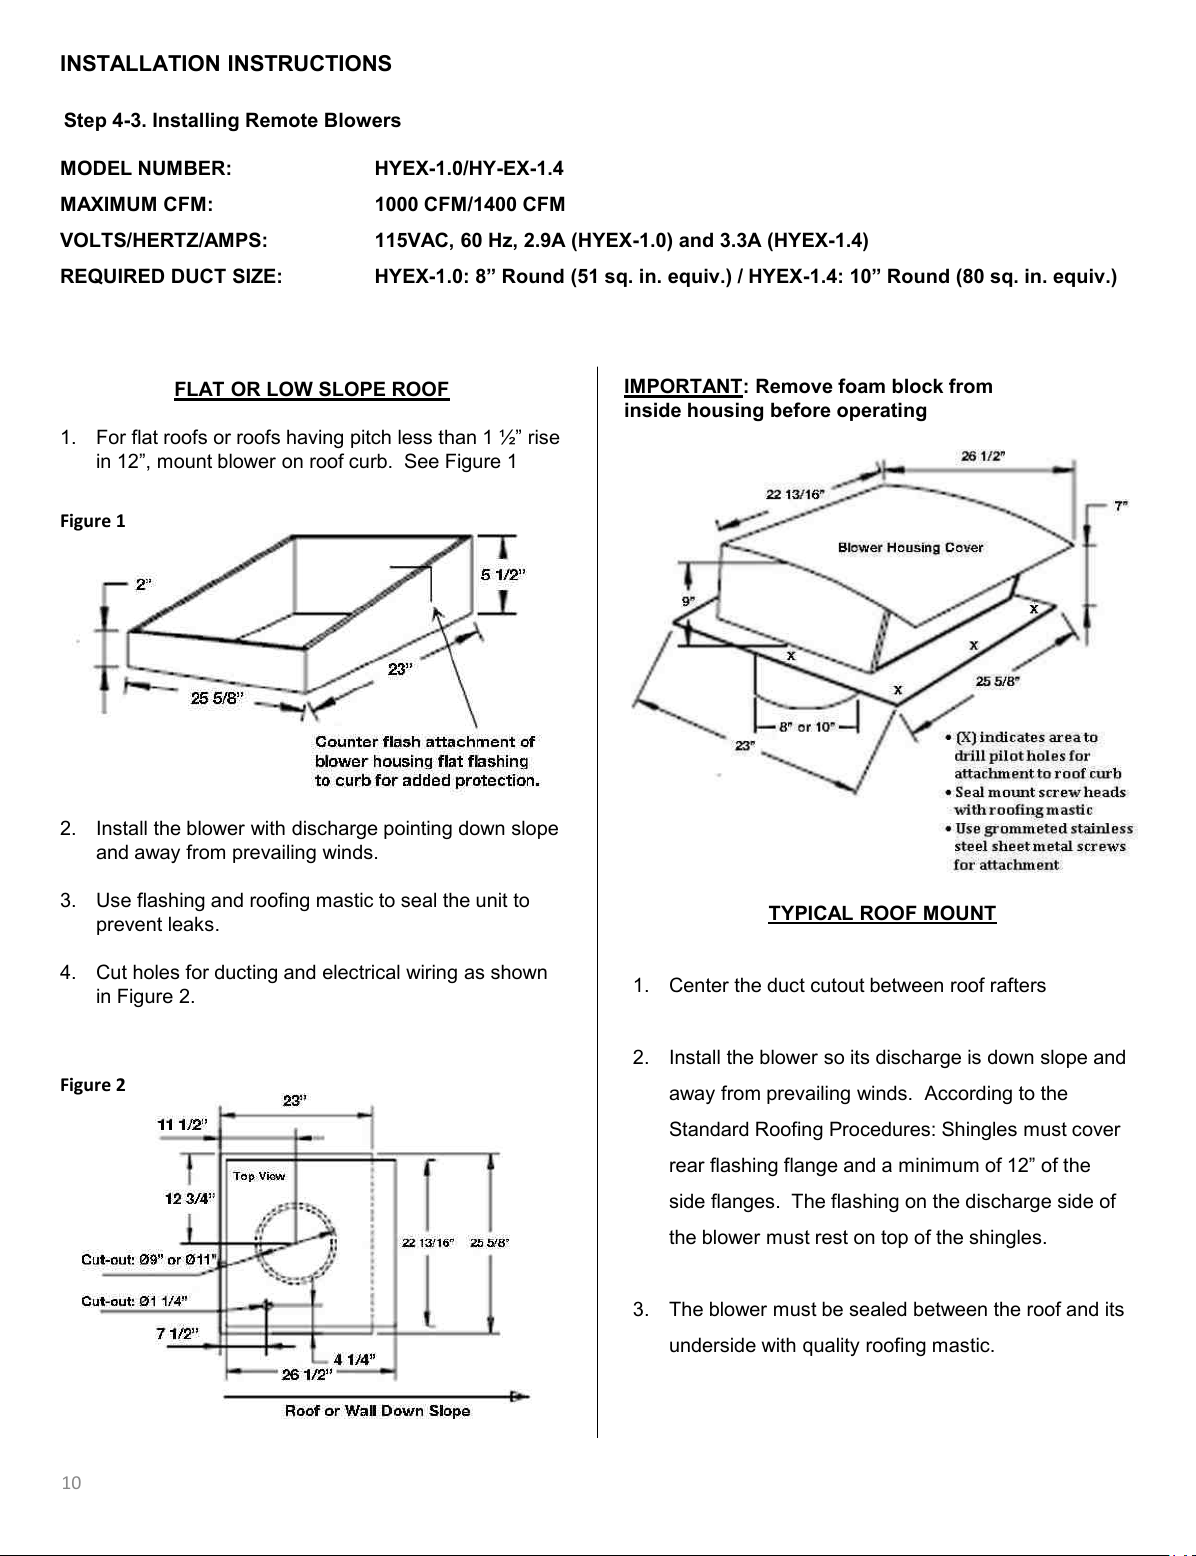
IMPORTANT: Remove foam block from
inside housing before operating
TYPICAL ROOF MOUNT
1. Center the duct cutout between roof rafters
2. Install the blower so its discharge is down slope and
away from prevailing winds. According to the
Standard Roofing Procedures: Shingles must cover
rear flashing flange and a minimum of 12” of the
side flanges. The flashing on the discharge side of
the blower must rest on top of the shingles.
3. The blower must be sealed between the roof and its
underside with quality roofing mastic.
Loading ...
Loading ...
Loading ...