Loading ...
Loading ...
Loading ...
40
Using the Menu Screen (Continued)
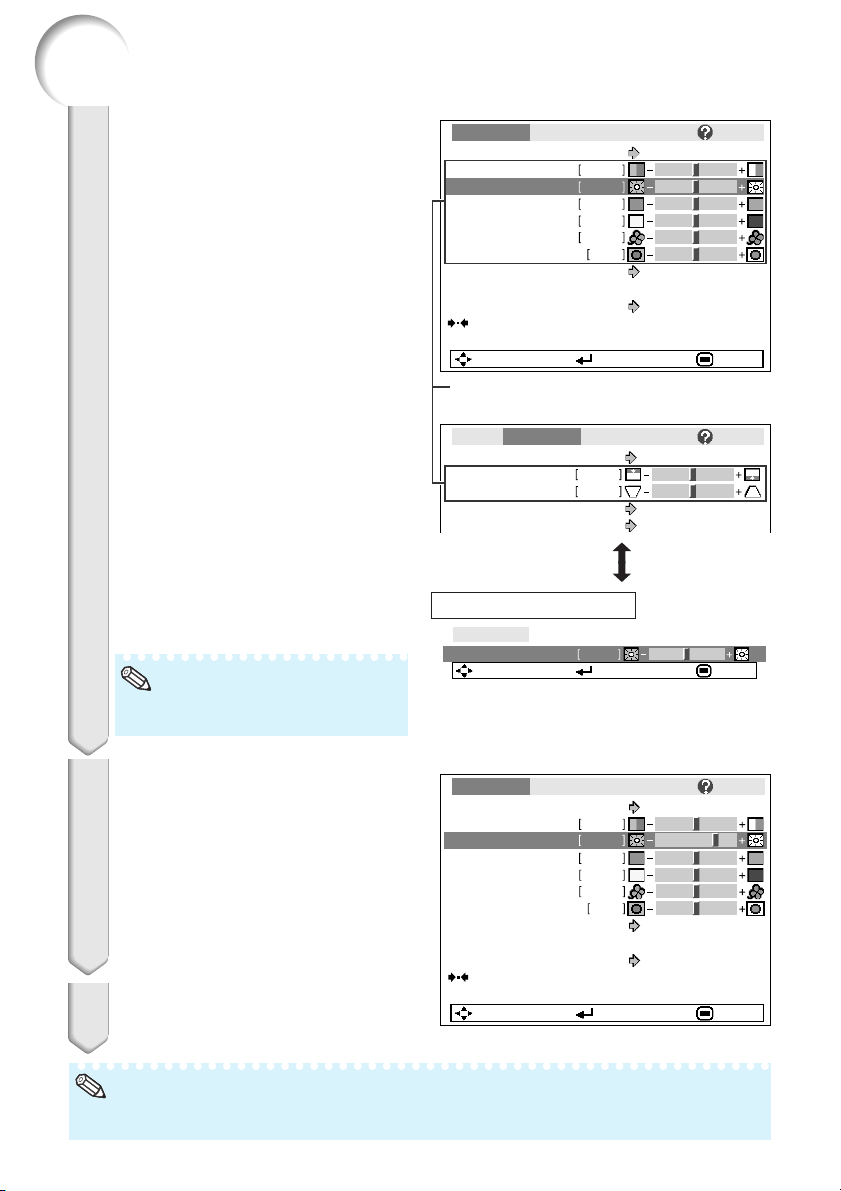
Press P or R and select “Bright”
to adjust.
• The selected item is highlighted.
•Press ENTER again to return to the pre-
vious screen.
Press O or Q to adjust the item
selected.
• The adjustment is stored.
Press MENU/HELP.
• The menu screen will disappear.
3
4
5
0Bright
Picture
SEL./ADJ. Rtn. Menu END
Picture Mode
Contrast 0
0
Standard
SEL./ADJ. Single ADJ END
Picture SCR PRJ Net. Help
0
0
Red
Blue
CLR Temp
BrilliantColor
TM
C.M.S. Setting
C.M.S.
Lamp Setting
0
1
On
Bright
Reset
15Bright
Note
Picture Mode
Standard
SEL./ADJ. Single ADJ END
Pict. SCR-ADJ PRJ Net. Help
Resize
Image Shift 0
0
Keystone
OSD Display
Bk d L
On
Auto Keystone On
Stretch
Picture Mode
Contrast 0
0
Standard
SEL./ADJ. END
Picture SCR PRJ Net. Help
0
0
Red
Blue
CLR Temp
BrilliantColor
TM
C.M.S. Setting
C.M.S.
Lamp Setting
0
1
On
Bright
Reset
Bright 0
Items to be adjusted
•Menu buttons do not function while the projector is operating the “Auto Sync”, “Break Timer”,
“FREEZE”, or “AV MUTE” functions.
Note
To adjust the projected
image while watching it
Press ENTER.
• The selected item (e.g. “Bright”) is dis-
played by itself at the bottom of the
screen.
•When pressing P or R, the following item
(“Red” after “Bright”) will be displayed.
The item displayed by itself
Press ENTER.
Loading ...
Loading ...
Loading ...