
1
Quick Start Guide
Solar Panel

32
Welcome
Thank you for choosing the Arlo Solar Panel.
Getting started is easy.
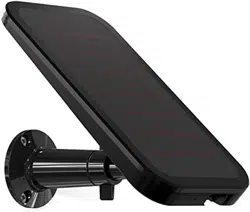
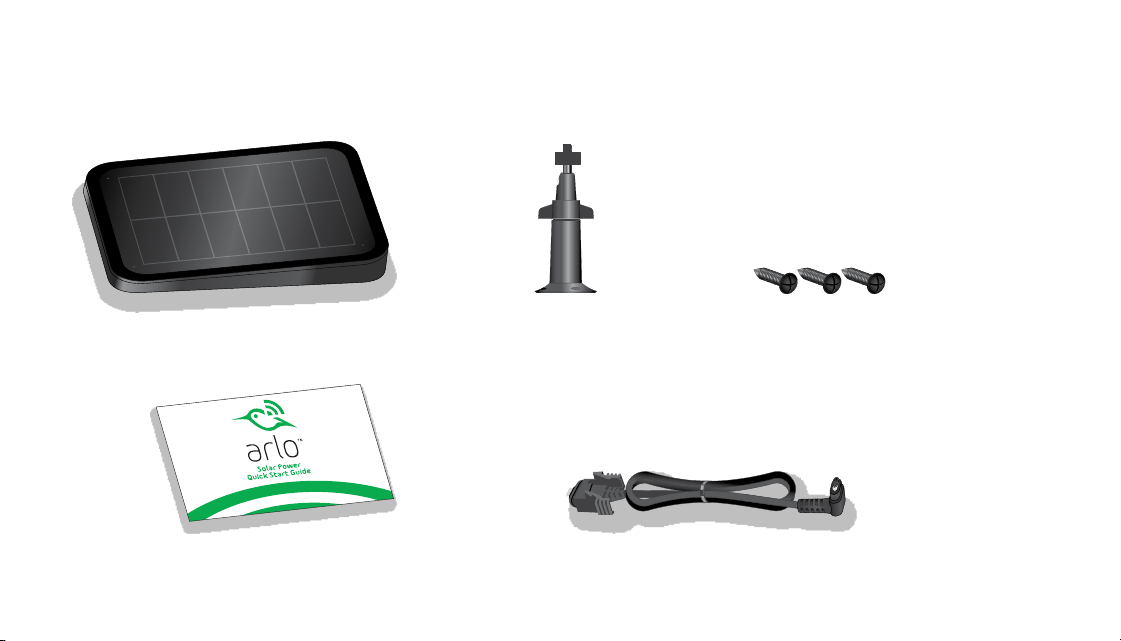
What’s Included
Solar panel
Power cable
Screws (3)
Mount
Quick Start Guide
32
Welcome
Thank you for choosing the Arlo Solar Panel.
Getting started is easy.
What’s Included
Solar panel
Power cable
Screws (3)
Mount
Quick Start Guide
54
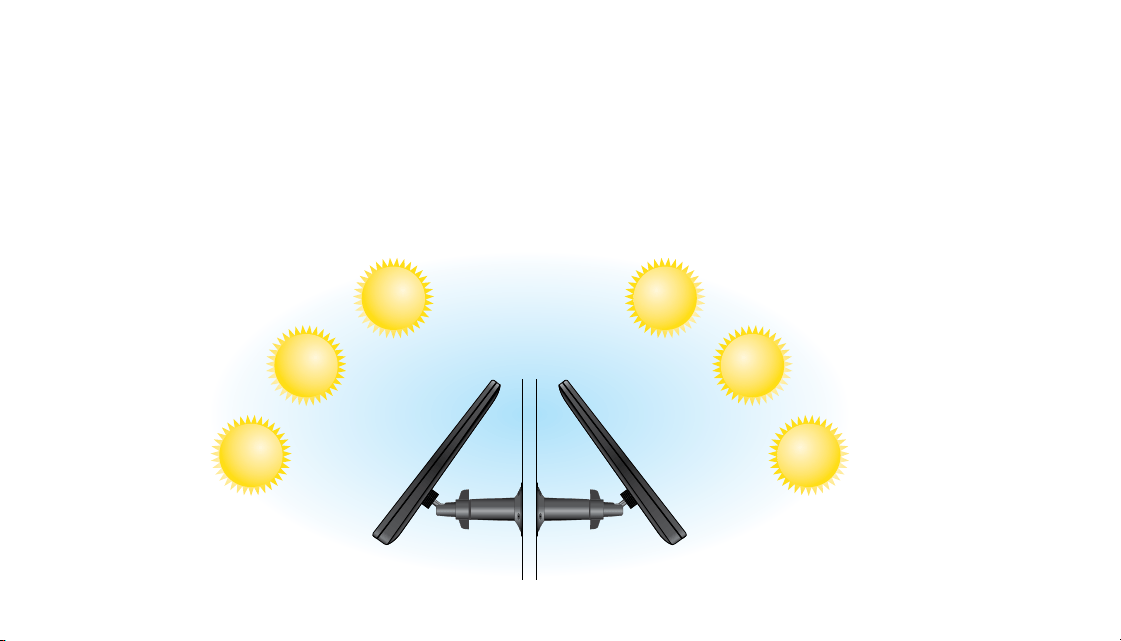
Position Your Arlo Solar Panel
The amount of energy that the solar panel can produce is aected by how much sunlight the
solar panel receives, weather conditions, and dust or debris. A solar panel in the same location
might produce a dierent amount of energy at noon in December than at noon in June.
Similarly, the same panel might produce more energy in one geographic location and less in
another. In both situations, the dierence is based mainly on the amount of sunlight that the
solar panel receives.
To optimize the eectiveness of your solar panel, do the following:
• Choose a location for your solar panel that gets the most sunlight throughout the year.
• Wipe the panel every few months to remove dust or debris that might aect the solar
energy harvesting eciency of the panel.
June
June
December
December
Northern Hemisphere Southern Hemisphere

54
Position Your Arlo Solar Panel
The amount of energy that the solar panel can produce is aected by how much sunlight the
solar panel receives, weather conditions, and dust or debris. A solar panel in the same location
might produce a dierent amount of energy at noon in December than at noon in June.
Similarly, the same panel might produce more energy in one geographic location and less in
another. In both situations, the dierence is based mainly on the amount of sunlight that the
solar panel receives.
To optimize the eectiveness of your solar panel, do the following:
• Choose a location for your solar panel that gets the most sunlight throughout the year.
• Wipe the panel every few months to remove dust or debris that might aect the solar
energy harvesting eciency of the panel.
June
June
December
December
Northern Hemisphere Southern Hemisphere
76
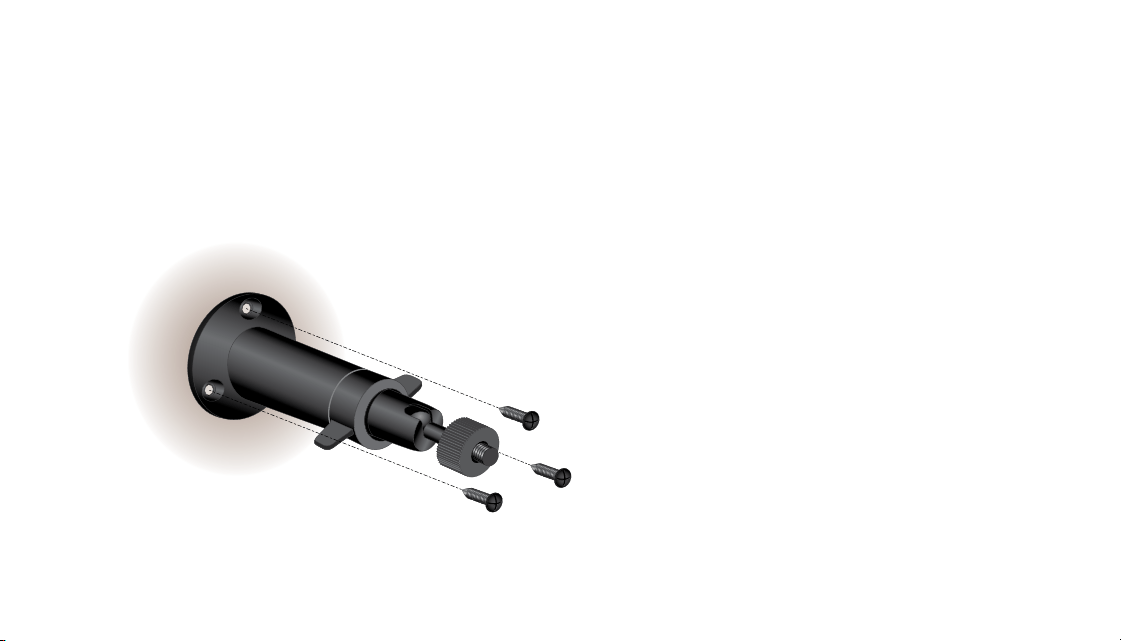
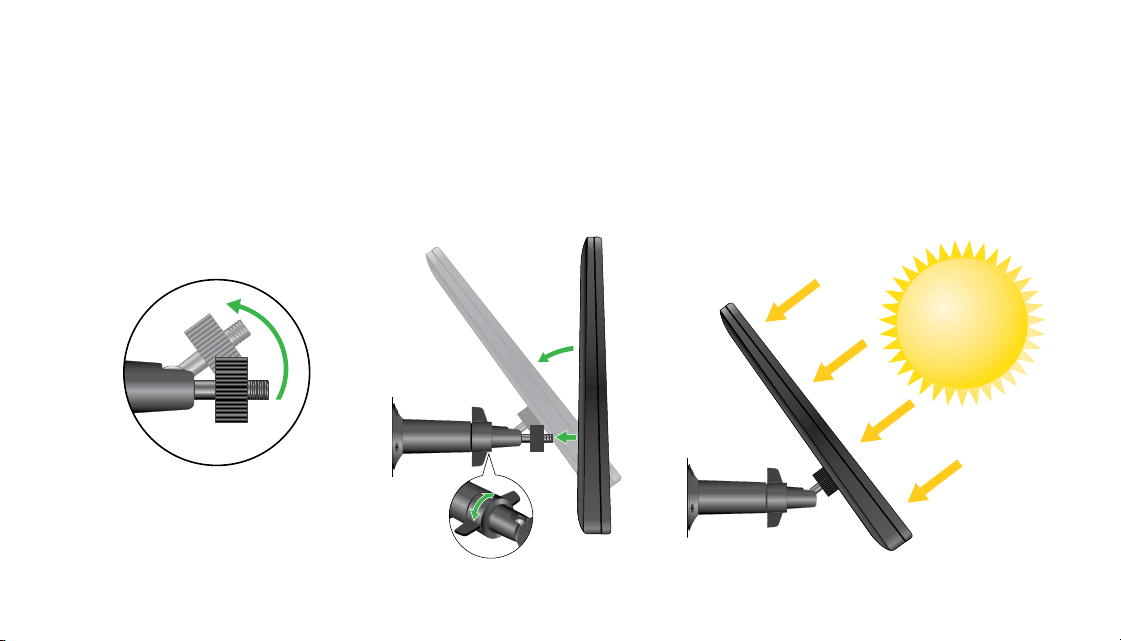
3. Attach your solar panel to the mount.
4. Adjust the angle of the solar panel on the mount to receive maximum sunlight.
1. Place the mount near your Arlo Pro or Arlo Go camera.
2. Secure the mount with the screws provided in the package.
Install Your Solar Panel
76
3. Attach your solar panel to the mount.
4. Adjust the angle of the solar panel on the mount to receive maximum sunlight.
1. Place the mount near your Arlo Pro or Arlo Go camera.
2. Secure the mount with the screws provided in the package.
Install Your Solar Panel
98
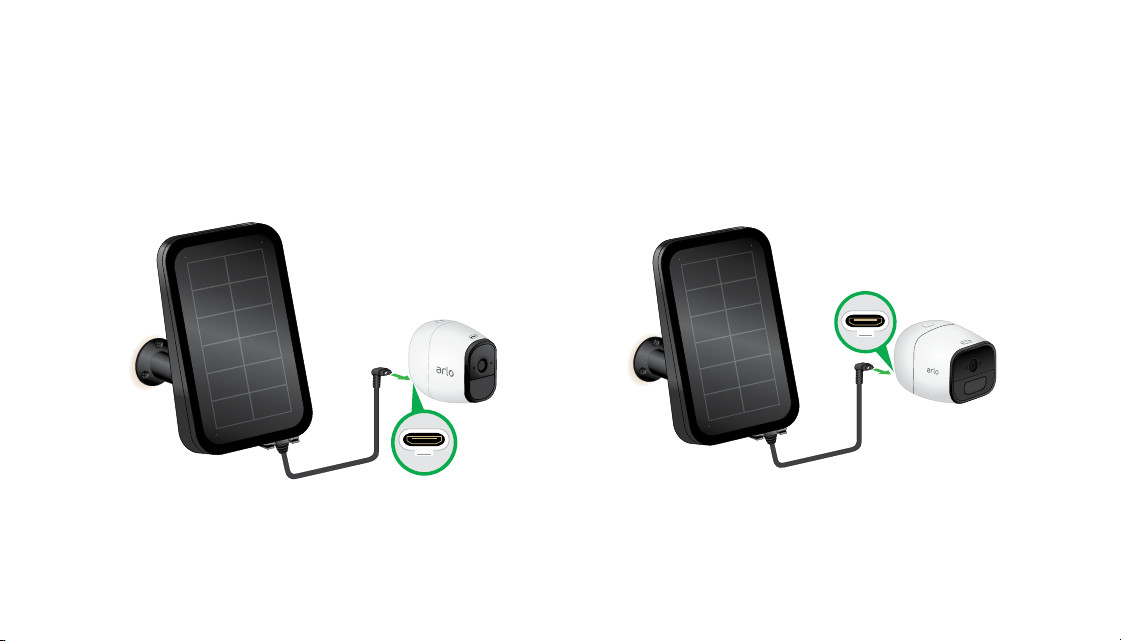
3. Connect the other end of the cable to your Arlo camera.
Arlo Pro
Arlo Go
Connect Your Solar Panel to Your Camera
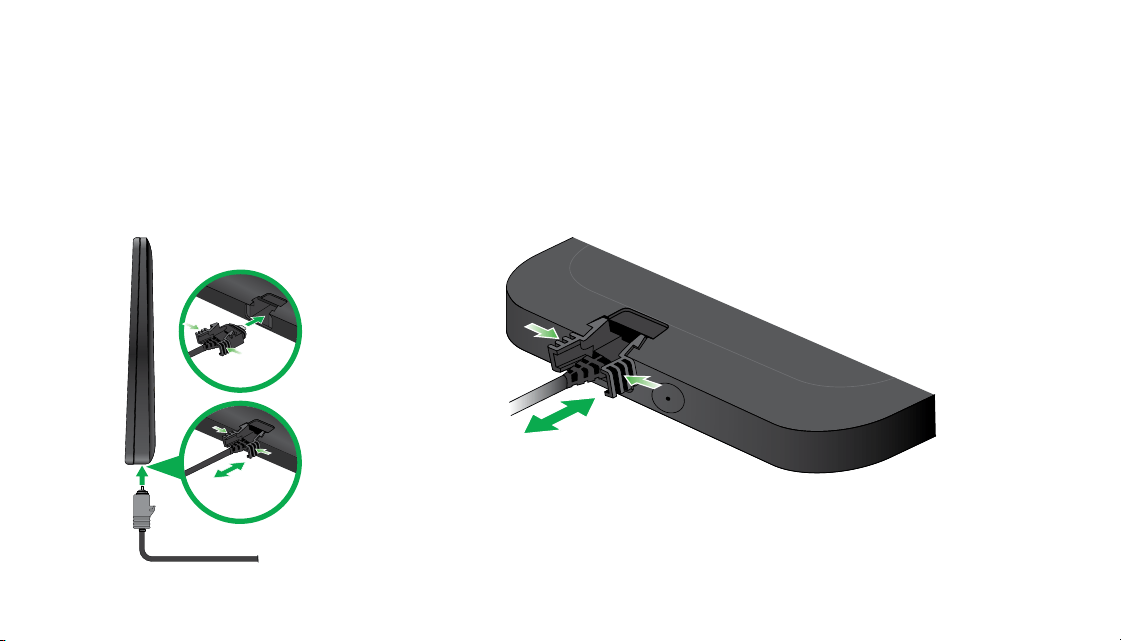
1. Align the power cable end with the clips on the solar panel back.
2. Pinch the clip on the connecter and insert the cable end into the port on the solar panel.
98
3. Connect the other end of the cable to your Arlo camera.
Arlo Pro
Arlo Go
Connect Your Solar Panel to Your Camera
1. Align the power cable end with the clips on the solar panel back.
2. Pinch the clip on the connecter and insert the cable end into the port on the solar panel.


12
NETGEAR INTL LTD
Building 3, University Technology Center
Curraheen Road, Cork, Ireland
350 East Plumeria Drive
San Jose, CA 95134, USA
August 2017
©NETGEAR, Inc., NETGEAR, the NETGEAR Logo, and Arlo are trademarks of NETGEAR, Inc. Any non‑NETGEAR trademarks
are used for reference purposes only.
Si ce produit est vendu au Canada, vous pouvez accéder à ce document en français canadien à arlo.com/docs.
(If this product is sold in Canada, you can access this document in Canadian French at arlo.com/docs.)
For the current EU Declaration of Conformity, visit http://kb.netgear.com/11621.
For regulatory compliance information, visit http://www.netgear.com/about/regulatory/.