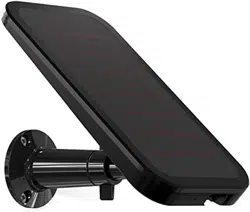

Solar panel
with cable
Mount
Mounting
screws
What’s in the box
Cable holder
Solar Panel Charger
Arlo Technologies, Inc.
2200 Faraday Avenue, Suite 150
Carlsbad, CA 92008 USA
Arlo Technologies Intl. Ltd
Ground Floor, Building 3
University Technology Centre
Curraheen Road, Cork T12 EF21 Ireland
May 2020
© Arlo Technologies, Inc. Arlo, Arlo logo, and Every Angle Covered are
trademarks of Arlo Technologies, Inc. Any other trademarks are for reference
purposes.
Si ce produit est vendu au Canada, vous pouvez accéder à ce document en
français canadien à arlo.com/docs.
(If this product is sold in Canada, you can access this document in Canadian
French at arlo.com/docs.)
For regulatory compliance information including the EU Declaration of
Conformity, visit www.arlo.com/about/regulatory/.
Double-sided
tape

Need help?
We are here for you.
Visit www.arlo.com/support for quick answers and
resources:
• How-to videos
• Troubleshooting tips
• The Arlo Support phone number for your location
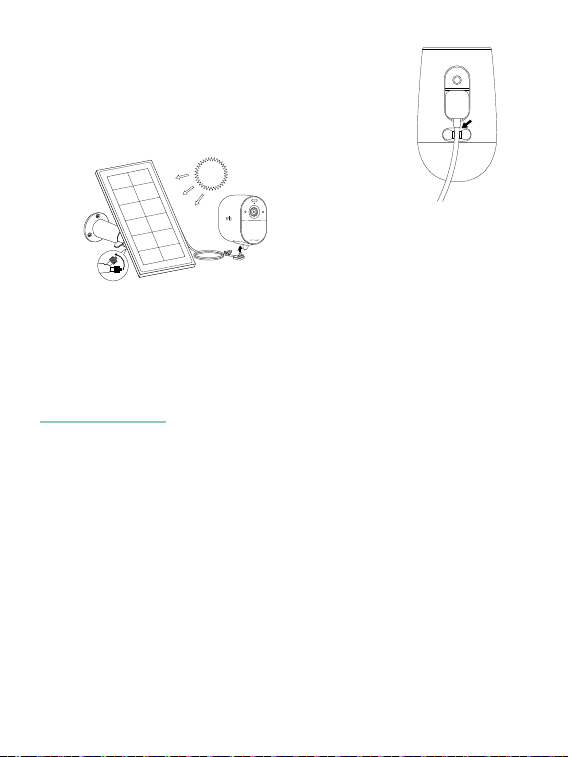
1. Install the mount near your
camera.
2. Attach your solar panel to the
mount.
3. Remove the backing from one
side of the double-sided tape
and stick the tape onto your
camera near the charging port.
4. Remove the backing from the
other side of the tape and
press the cable holder onto the
tape.
5. Make sure that the cable holder is
securely attached to your camera.
Set up your Solar Panel Charger
6. Connect the solar panel cable to
your camera’s micro USB charging
port and press the cable into the
cable holder.
Need help?
We are here for you.
Visit www.arlo.com/support for quick answers and
resources:
• How-to videos
• Troubleshooting tips
• The Arlo Support phone number for your location
1. Install the mount near your
camera.
2. Attach your solar panel to the
mount.
3. Remove the backing from one
side of the double-sided tape
and stick the tape onto your
camera near the charging port.
4. Remove the backing from the
other side of the tape and
press the cable holder onto the
tape.
5. Make sure that the cable holder is
securely attached to your camera.
Set up your Solar Panel Charger
6. Connect the solar panel cable to
your camera’s micro USB charging
port and press the cable into the
cable holder.
Solar panel
with cable
Mount
Mounting
screws
What’s in the box
Cable holder
Solar Panel Charger
Arlo Technologies, Inc.
2200 Faraday Avenue, Suite 150
Carlsbad, CA 92008 USA
Arlo Technologies Intl. Ltd
Ground Floor, Building 3
University Technology Centre
Curraheen Road, Cork T12 EF21 Ireland
May 2020
© Arlo Technologies, Inc. Arlo, Arlo logo, and Every Angle Covered are
trademarks of Arlo Technologies, Inc. Any other trademarks are for reference
purposes.
Si ce produit est vendu au Canada, vous pouvez accéder à ce document en
français canadien à arlo.com/docs.
(If this product is sold in Canada, you can access this document in Canadian
French at arlo.com/docs.)
For regulatory compliance information including the EU Declaration of
Conformity, visit www.arlo.com/about/regulatory/.
Double-sided
tape