Loading ...
Loading ...
Loading ...
PACKING LIST
Hedge Trimmer Cutting Head - Chain Saw Cutting Head
Blade Covers - Telescopic Pole w/Should Strap - Rear
Handle - Instruction Manual
WARNING: If any parts are damaged or missing do not operate this
product until the parts are replaced. Failure to heed this warning
could result in serious personal injury.
If any parts are damaged or missing, please call 1-800-313-5111 for
assistance.
UNPACKING
This product requires assembly.
Carefully remove the product and any accessories from the box.
Make sure that all items listed in the packing list are included.
Inspect the product carefully to make sure no breakage or damage
occurred during shipping.
Do not discard the packing material until you have carefully inspected
and satisfactorily operated the product.
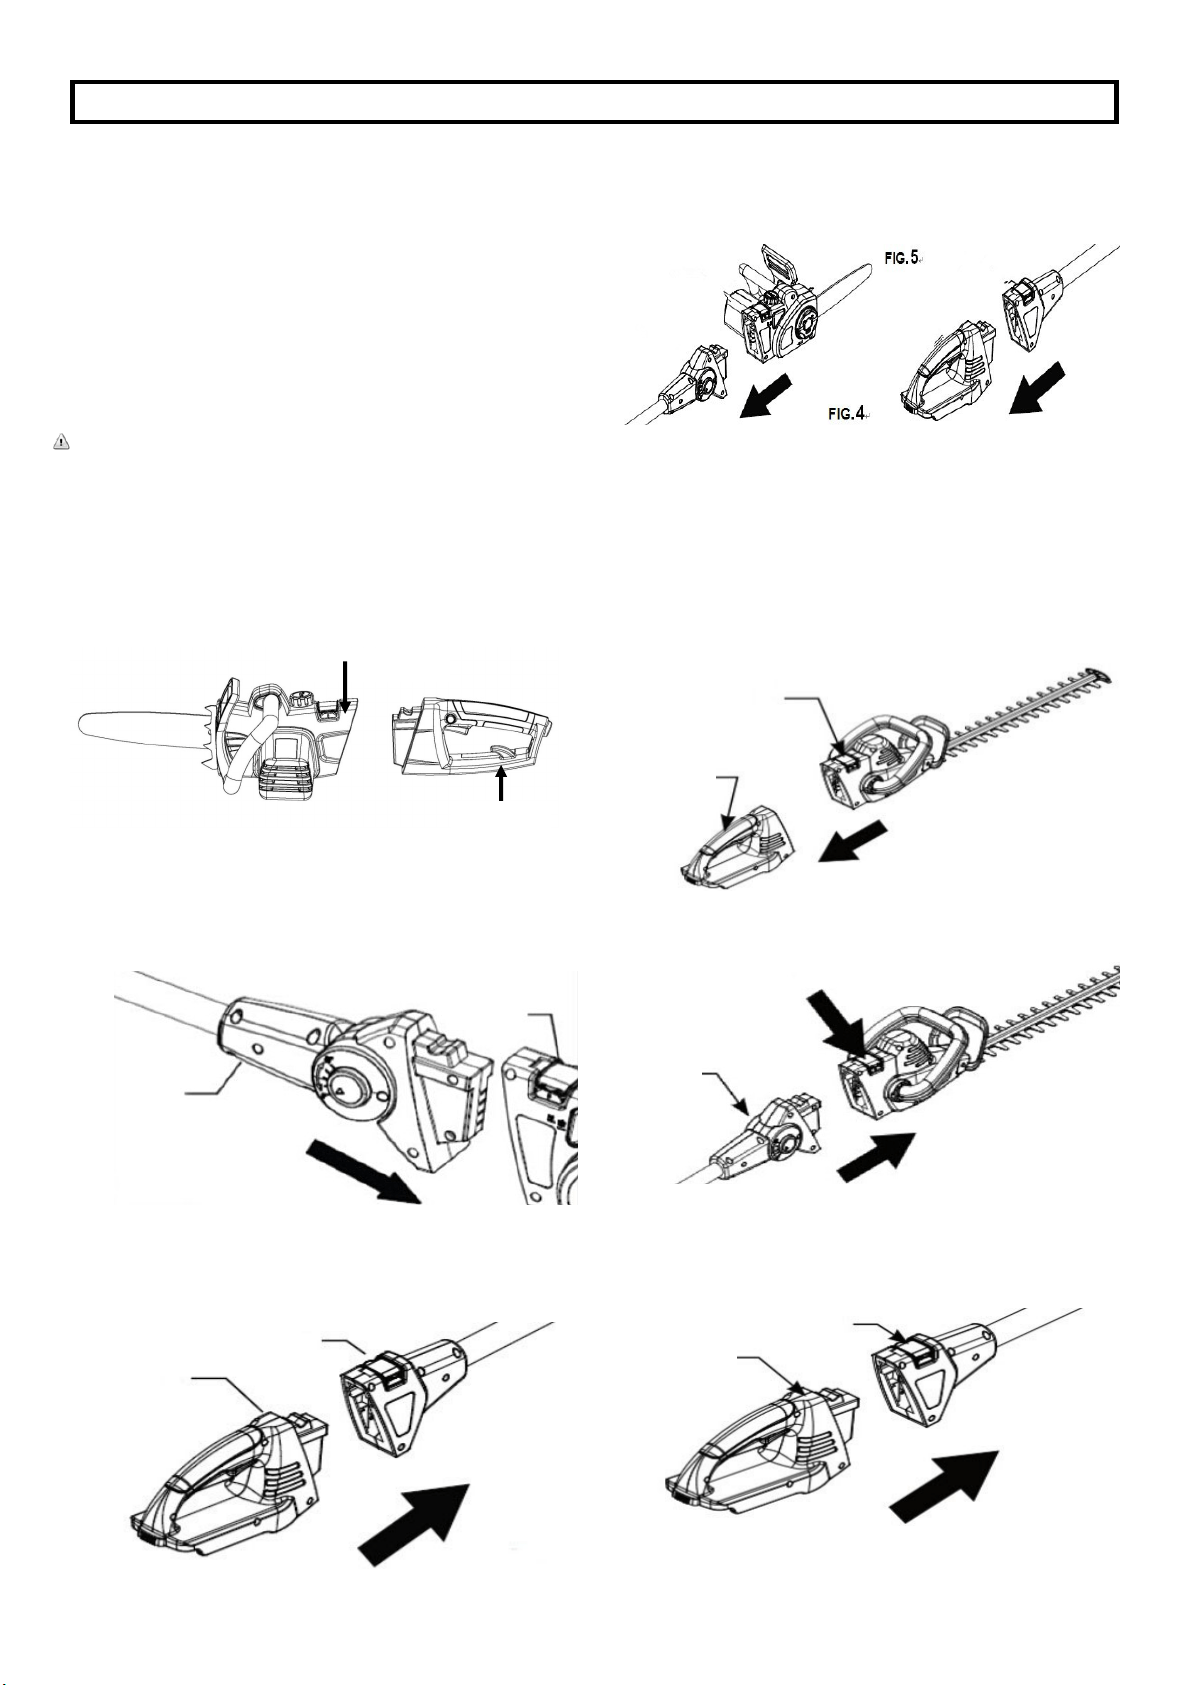
ASSEMBLY
4
CONVERTING FROM CHAIN SAW TO POLE SAW
1. Lift the quick release button. Pull to remove the handle from the
cutting head. (Fig. 1)
2. Insert the telescopic pole into the chain saw cutting head. Press
down the quick release button. Make sure the release button
snaps firmly to lock the parts securely. (Fig. 2)
3. Insert the rear handle into the end of the telescopic pole. (Fig. 3)
Press down the quick release button. Ensure the release button
snaps firmly into position to lock the handle securely.
CONVERTING FROM POLE SAW TO CHAIN SAW
1. Disconnect rear handle and cutting head from ends of tele-
scopic pole by lifting the quick release button and pulling straight
out. (Fig. 4-5)
2. Insert the rear handle directly into the chainsaw cutting head .
When fully inserted, press down the quick release button.
Make sure the button snaps in firmly and securely, locking the
parts together.
CONVERTING FROM HEDGE TRIMMER TO POLE HEDGE
TRIMMER
1. Lift the quick release button. Pull to remove the handle from the
cutting head. (Fig. 6)
2. Insert the telescopic pole into the hedge trimmer cutting head.
(Fig. 7) Press the quick release button into a locked position.
3. Insert the rear handle into the end of telescopic handle. (Fig. 8)
Press down the quick release button. Ensure the release button
snaps firmly into position to lock the handle securely.
Pole
FIG. 2
Quick Release
Button
FIG. 3
Pole
Rear
Handle
FIG. 6
Quick Release
Button
Rear
handle
Quick Release
Button
Pole
FIG. 7
FIG.8
Rear
Handle
Quick Release
Button
FIG. 1
Quick release button
Rear handle
Loading ...
Loading ...
Loading ...