Loading ...
Loading ...
Loading ...
Installation
NOTE: The air-conditioner should be installed on a flat surface with at least 300mm
clearance all around, including from the top of the unit as it is important that the air outlet
is not blocked. Power supply must be nearby.
WARNING: THIS APPLIANCE MUST BE INSTALLED, OPERATED AND STORED
IN A ROOM WITH A FLOOR AREA LARGER THAN 11m
2
Do not install and use the appliance in the bathroom or other humid environments.
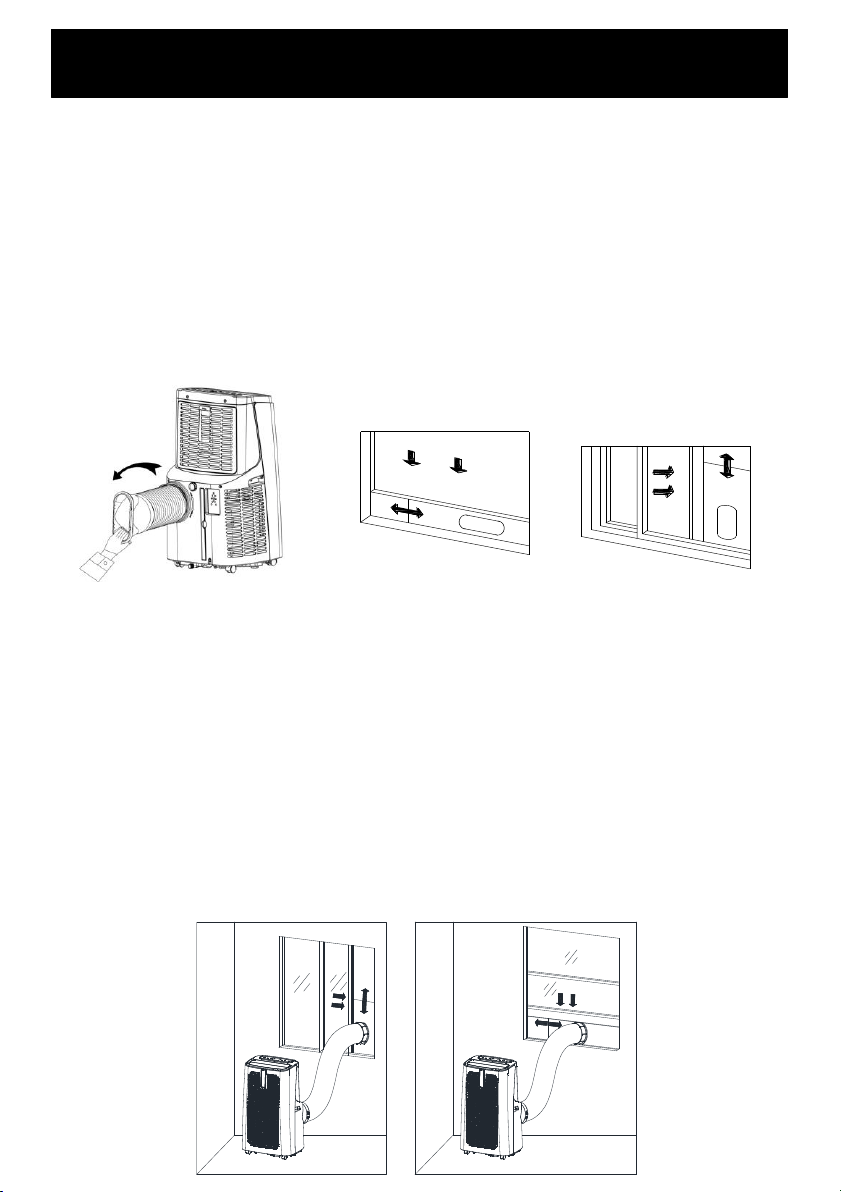
Install the heat pipe assembly (as shown in Figure 1).
Screw the heat pipe assembly (exhaust fitting end) into the exhaust port on the rear panel
(counterclockwise).
Install the window sealing plate assembly
Half open the window, and mount the window sealing plate assembly to the window (as shown
in Figure 2 and Figure 3); the assembly can be placed in horizontal and vertical direction.
Pull various components of the window sealing plate assembly open, adjust their opening
distance to bring both ends of the assembly into contact with the window frame, and fix various
components of the assembly.
You may require a glazier to cut a hole in your window pane to fit the exhaust hose fixing clip.
Important Notice
The length of the exhaust hose shall be 280~1,500mm, and this length is based on the
specifications of the air conditioner. Do not use extension tubes or replace it with other
different hoses, or this may cause a malfunction. Exhaust must be unobstructed;
otherwise it may cause overheating.
Figure 1
Figure 2
Figure 3
Loading ...
Loading ...
Loading ...