Loading ...
Loading ...
Loading ...
Page 7
Operating Instructions
2. To rotate the bowl guard to its open position, grasp the separated handles on the bowl guard and move them,
together as one, clockwise to open/rotate the bowl guard. To close the bowl guard, grasp the separated
handles and move them together as one, counterclockwise to close/rotate the bowl guard back into a locked
position.
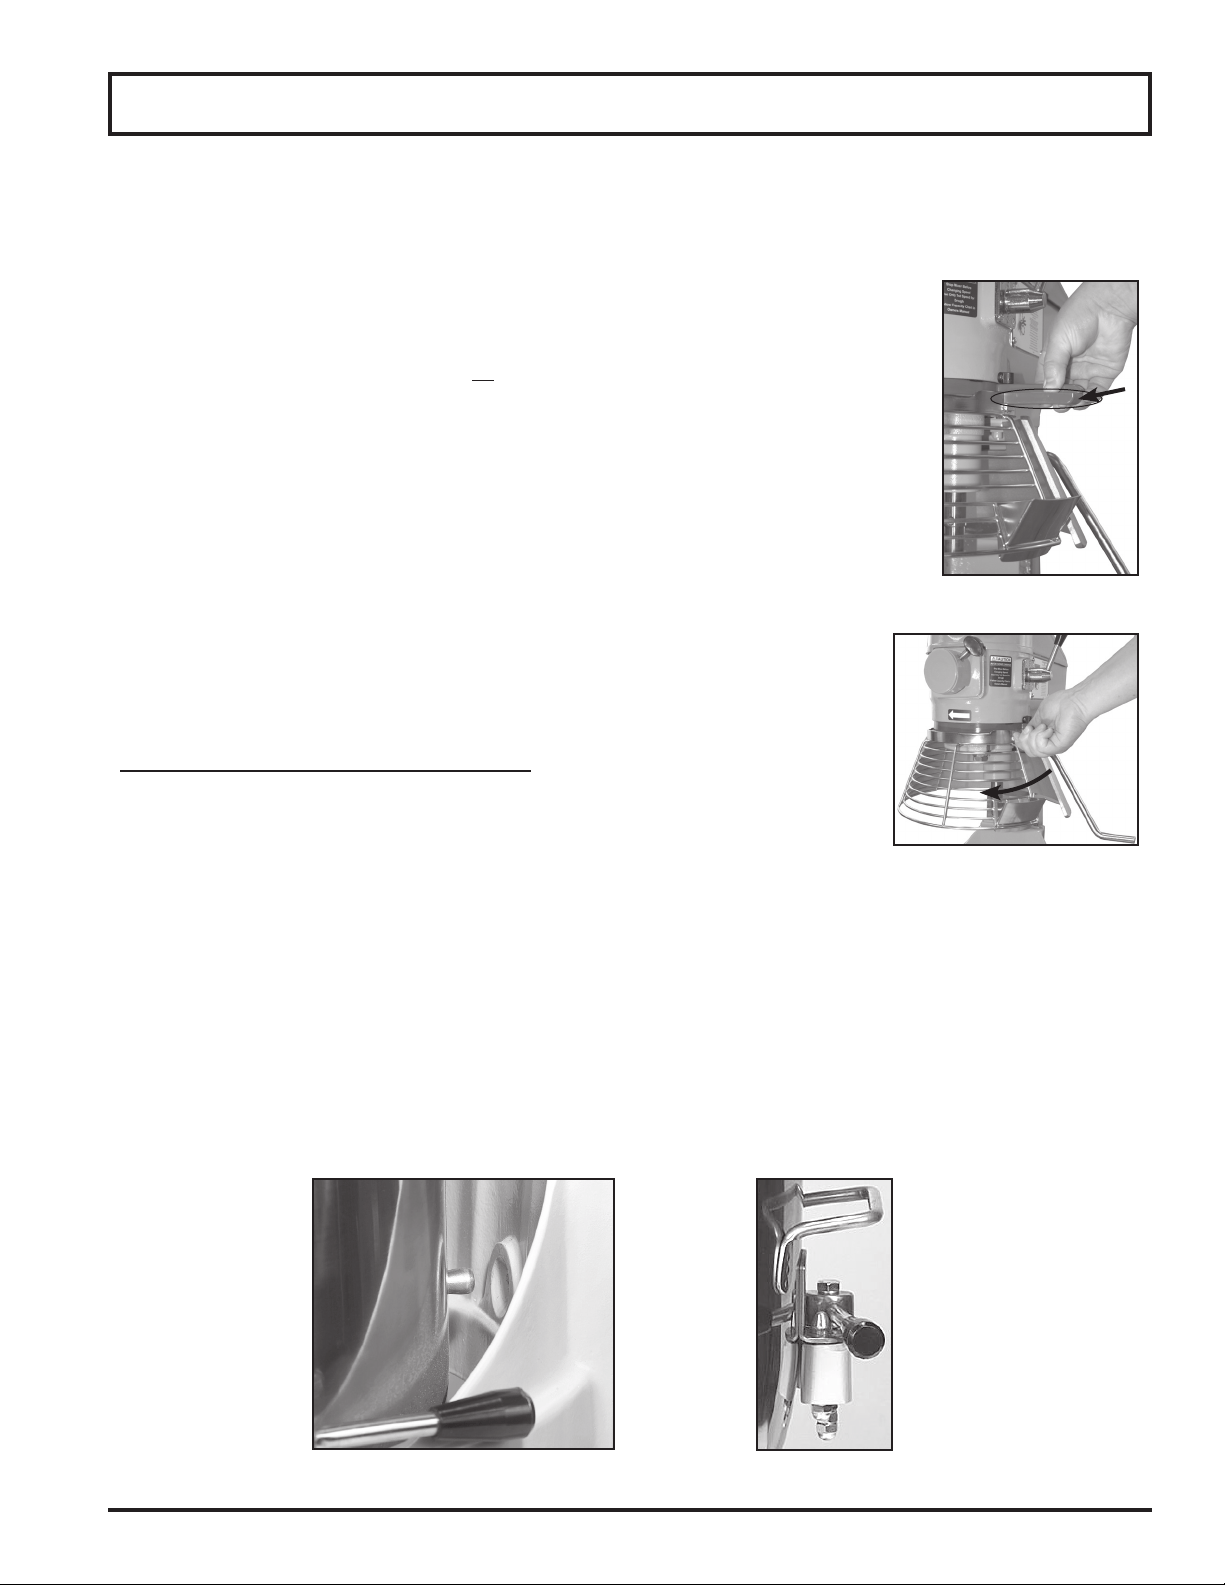
Removing and Attaching the Bowl Guard:
NOTE: Before removing or attaching the bowl guard, make sure the bowl is in the down/
lowered position and the agitator tool is off the shaft.
1. To remove the bowl guard for cleaning, push the lower part of the separated handle
out (clockwise) dividing the handle and releasing the guard from the rotation ring.
(see g. 7-1)
2. Once separated, take hold of the lower separated handle and continue turning the
guard clockwise until the bowl guard releases from the ring catch on the mixer.
(see g. 7-2)
3. To reattach the bowl guard, line up the ring catch on the left of the mixer; lift
guard gently into place and rotate the guard’s lower handle counterclockwise
until it snaps back into place with the upper part of the handle.
ATTACHING THE BOWL TO THE MIXER
NOTE: Install the bowl BEFORE attaching the agitators.
1. Lower the bowl by pulling the bowl lift lever forward and down to its resting
position. For models SP40 and SP60 rotate the bowl lift wheel
counterclockwise until it stops. For the SP62P and SP80PL press the down
arrow (blue button) to lower the bowl until it stops.
2. Lift the bowl by the bowl handles and
a. slowly position the locking pin (located on the rear of the bowl) into the hole in the
middle rear of the cradle (see g 7-3).
b. lower the bowl onto the pins located on either side of the bowl cradle.
3. Once the bowl is positioned on the cradle, secure the bowl by pulling each bowl clamp
forward until the bowl is locked tight (see g 7-4).
g. 7-1
g. 7-2
g. 7-3 g. 7-4
Loading ...
Loading ...
Loading ...