
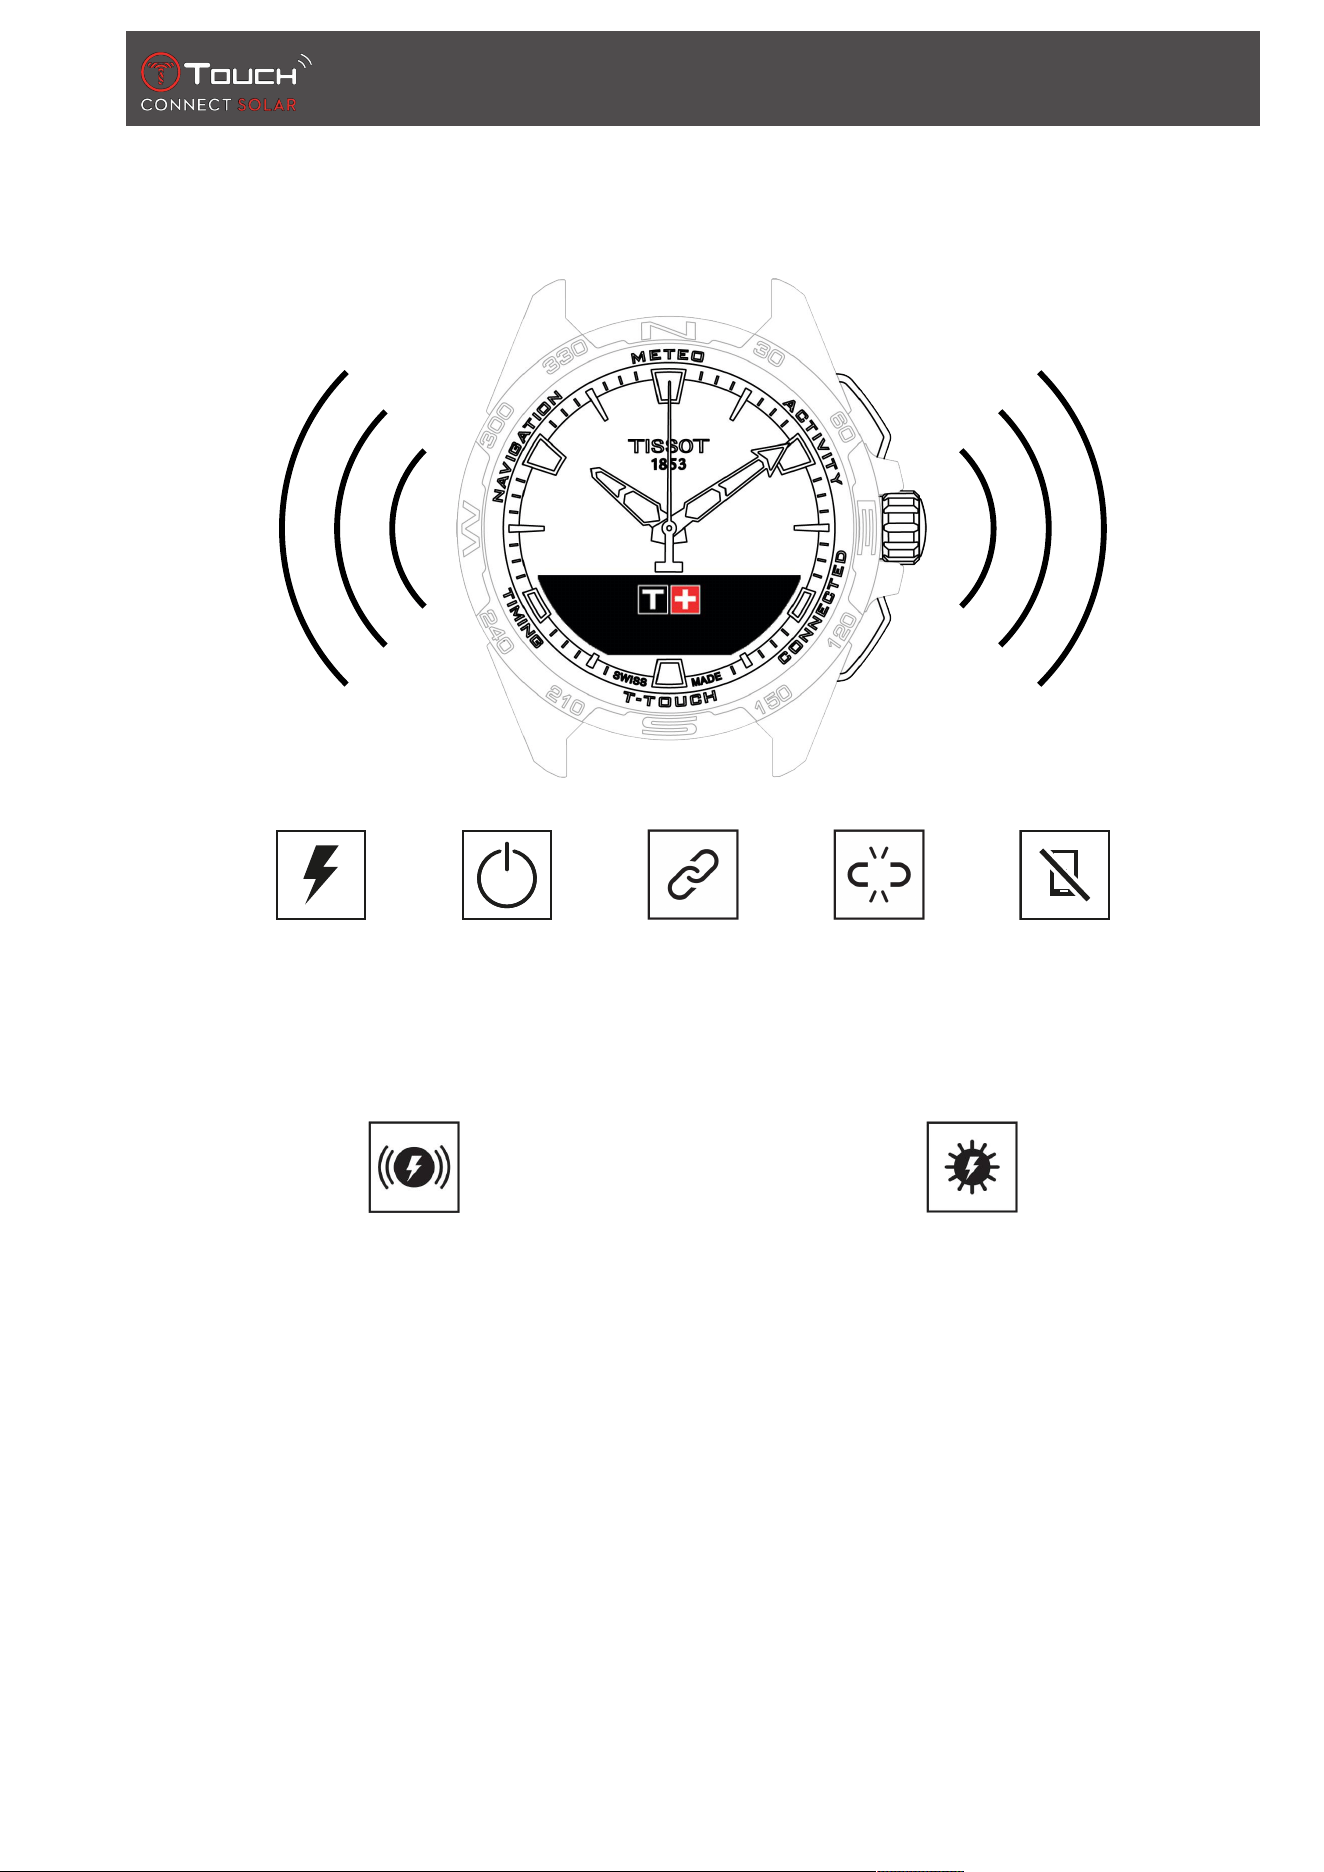
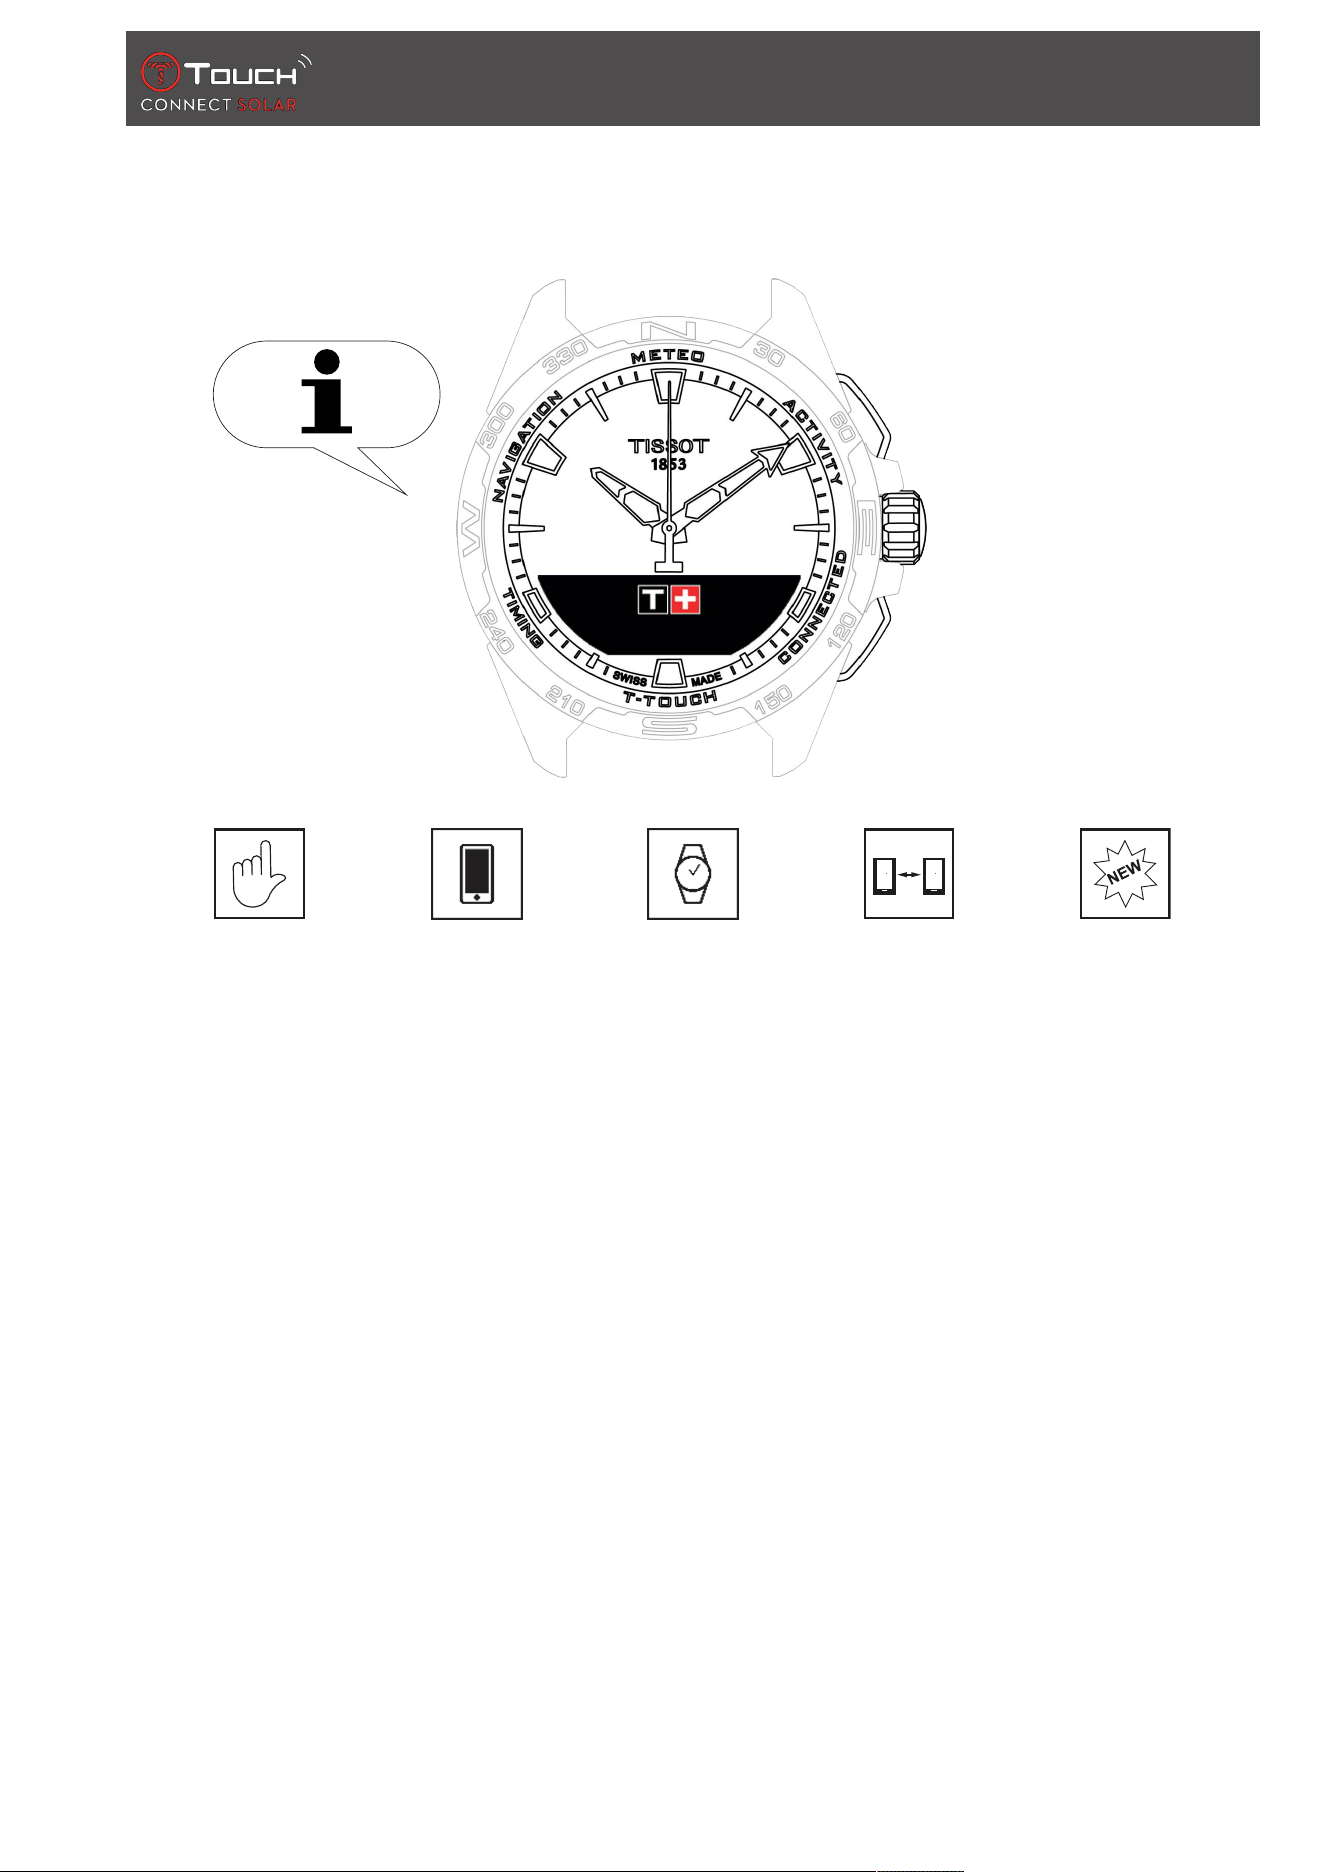
METEO
(Weather)
NAVIGATION
CLOCK
TIMING
(Timing and alarm)
T-TOUCH
General information
ACTIVITY
Sign in
CONNECTED
Documents
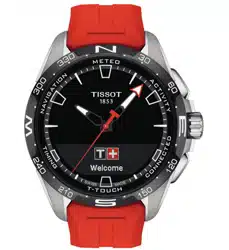
T-Touch Connect Solar
User’s Manual V6.2

Congratulations on having chosen a watch made by Tissot™, a Swiss company founded in Le Locle in 1853
and still based there today. Your watch has been made with the greatest of care, using fine-quality materials
and components, and is protected against shocks, temperature fluctuations, water and dust.

Contents
30.01.2023 3 / 64
CONTENTS
1 SIGN IN...................................................................................................................................
7
1.1 Charging.......................................................................................................................................................................
7
1.1.1 Cordless charger ......................................................................................................................................................... 7
1.1.2 Solar energy.................................................................................................................................................................. 9
1.2 Turning the watch on.............................................................................................................................................
9
1.3 Using the T-Touch Connect Solar paired with a smartphone................................................................
9
1.4 Using the T-Touch Connect Solar unpaired with a smartphone ..........................................................
12
1.5 Reconnecting the watch to the phone.............................................................................................................
14
2 CLOCK.....................................................................................................................................
15
2.1 TIME 1 and TIME 2 ...................................................................................................................................................
15
2.1.1 Set Time.......................................................................................................................................................................... 16
2.1.2 Timezone........................................................................................................................................................................ 16
2.1.3 Swap with Time 2 (Changing to the second time) ........................................................................................ 16
2.2 Date................................................................................................................................................................................
16
3 METEO (WEATHER)...............................................................................................................
19
3.1 BAROMETER ...............................................................................................................................................................
20
3.1.1 Calibrate relative pressure....................................................................................................................................... 20
3.1.2 Absolute pressure....................................................................................................................................................... 20
3.1.3 Glossary .......................................................................................................................................................................... 21
3.2 TEMPERATURE ...........................................................................................................................................................
22
4 ACTIVITY ................................................................................................................................
23
4.1 ACTIVITY.......................................................................................................................................................................
23
4.1.1 Start the activity .......................................................................................................................................................... 24
4.1.2 Description of the specific icons on the watch during the activity ......................................................... 24
4.1.3 Description of the specific watch screens during the activity................................................................... 25
4.1.4 Stop the activity .......................................................................................................................................................... 25
4.1.5 Activity history ............................................................................................................................................................. 25
4.1.6 T-Touch app specific screens................................................................................................................................. 26
4.1.7 Technical information ............................................................................................................................................... 26
4.2 BRING ME BACK........................................................................................................................................................
26
4.2.1 Start the Bring Me Back function ......................................................................................................................... 27
4.2.2 Changing mode for the "Bring Me Back" function........................................................................................ 27
4.2.3 Optimising the "Bring Me Back" route............................................................................................................... 27
4.2.4 Description of the specific watch screens on the way back....................................................................... 28
4.2.5 Description of the specific watch icons on the way back ........................................................................... 29
4.2.6 Automatic function stop.......................................................................................................................................... 29
4.2.7 Technical information ............................................................................................................................................... 30
4.3 DAILY STEPS................................................................................................................................................................
30
4.3.1 CALORIES....................................................................................................................................................................... 30
4.3.2 DISTANCE ...................................................................................................................................................................... 30
4.3.3 ACTIVITY PERIOD........................................................................................................................................................ 30
4.3.4 STEPS GOAL.................................................................................................................................................................. 30

Contents
4 / 64 30.01.2023
4.4 ALTIMETER...................................................................................................................................................................
31
4.4.1 ALTITUDE SETTING (Altitude calibration).......................................................................................................... 31
4.4.2 Glossary .......................................................................................................................................................................... 32
5 CONNECTED ..........................................................................................................................
35
5.1 Incoming call ..............................................................................................................................................................
35
5.2 NOTIFICATONS (message, e-mail, reminder, social media).....................................................................
36
5.3 FIND MY PHONE.......................................................................................................................................................
36
5.4 Find my watch............................................................................................................................................................
36
5.5 NBA ................................................................................................................................................................................
36
6 T-TOUCH ................................................................................................................................
37
6.1 QUICK SETTINGS.......................................................................................................................................................
37
6.1.1 "Bluetooth" (Quick setting of Bluetooth
®
)........................................................................................................ 38
6.1.2 "Sound" (Quick setting of sound) ........................................................................................................................ 38
6.1.3 "Vibration" (Quick setting of vibration) ............................................................................................................. 38
6.1.4 "BATTERY LEVEL" ........................................................................................................................................................ 39
6.1.5 "SOLAR ENERGY"........................................................................................................................................................ 39
6.2 WATCH SETTINGS ....................................................................................................................................................
39
6.2.1 "Pair with phone"........................................................................................................................................................ 39
6.2.2 "CONNECTION" (Connection settings) .............................................................................................................. 40
6.2.3 System............................................................................................................................................................................. 40
6.2.4 User profile.................................................................................................................................................................... 42
6.2.5 Calibration ..................................................................................................................................................................... 42
6.2.6 About............................................................................................................................................................................... 43
6.2.7 E-labelling...................................................................................................................................................................... 43
7 TIMING (TIMING AND ALARM) ..........................................................................................
45
7.1 CHRONO (Timing)....................................................................................................................................................
45
7.1.1 LAP (Lap timing).......................................................................................................................................................... 46
7.1.2 SPLIT (Intermediate timing).................................................................................................................................... 46
7.1.3 LOGBOOK ...................................................................................................................................................................... 46
7.2 TIMER ............................................................................................................................................................................
46
7.3 ALARM ..........................................................................................................................................................................
47
7.3.1 Setting an alarm.......................................................................................................................................................... 47
7.3.2 Change, activate or deactivate an alarm ........................................................................................................... 48
8 NAVIGATION .........................................................................................................................
49
8.1 Set mode......................................................................................................................................................................
49
8.2 Azimuth ........................................................................................................................................................................
50
8.3 Calibrate .......................................................................................................................................................................
50
8.4 Glossary ........................................................................................................................................................................
51
9 GENERAL INFORMATION.....................................................................................................
53
9.1 Basic operations ........................................................................................................................................................
54
9.2 Reset the password with a smartphone ..........................................................................................................
56
9.3 Resetting the password from the watch..........................................................................................................
57

Contents
30.01.2023 5 / 64
9.4 Compatibility ..............................................................................................................................................................
58
9.5 Versions and new features....................................................................................................................................
60
10 DOCUMENTS .........................................................................................................................
63

Contents
6 / 64 30.01.2023
PAGE LEFT INTENTIONALLY BLANK
SIGN IN
30.01.2023 7 / 64
1 SIGN IN
Charging Starting Connecting Unpaired Reconnecting
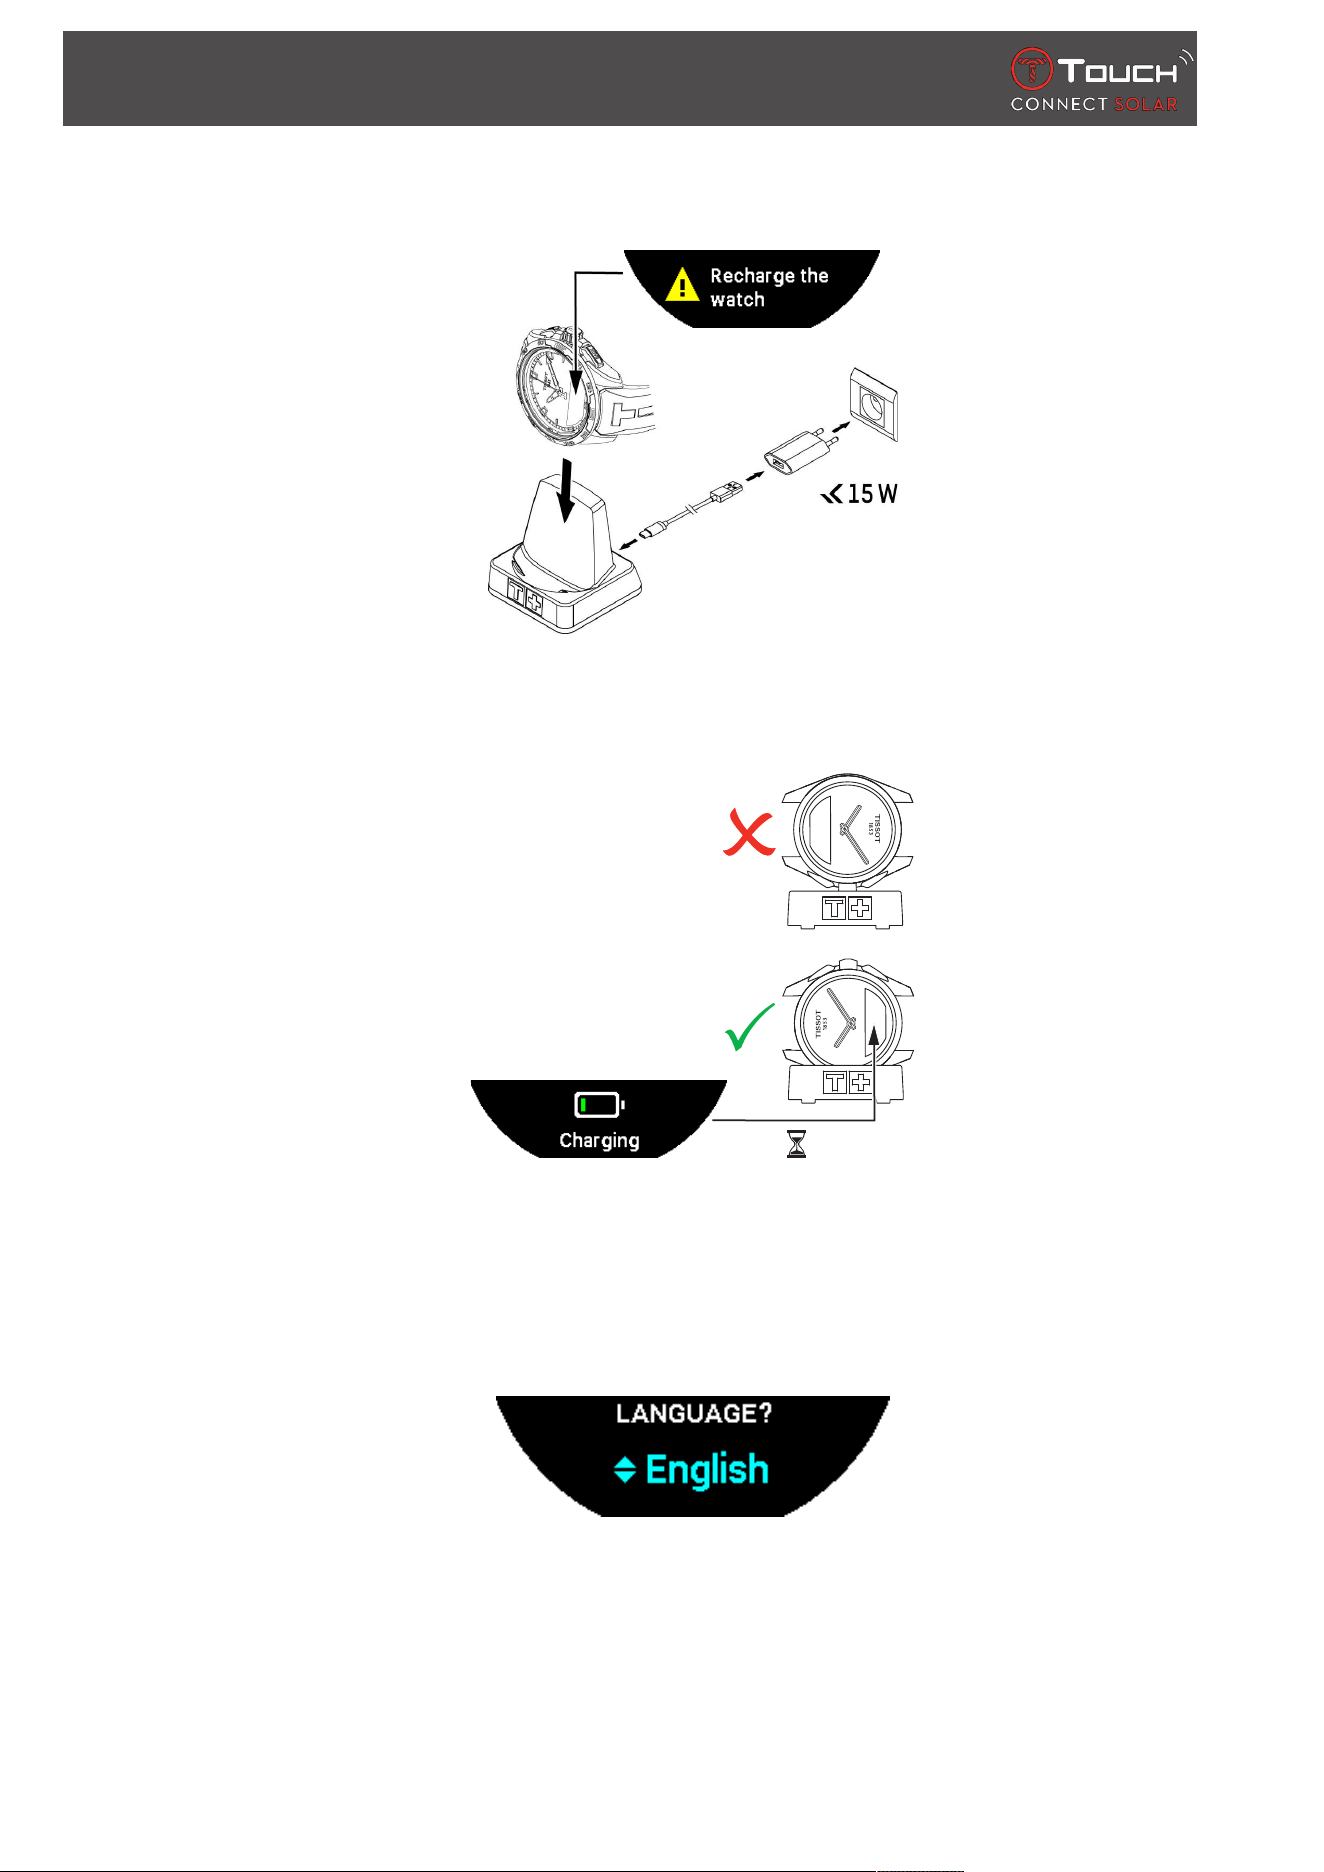
1.1 Charging
Charger Solar
1.1.1 Cordless charger
Do not use a USB adapter (not supplied) that provides power in excess of 15 Watts.
SIGN IN
8 / 64 30.01.2023
Do not use a cable or connector that is kinked, twisted, damaged or broken.
The first time you use your T-Touch Connect Solar, we recommend charging it with the T229 charger
supplied, being careful to position the T-Touch Connect Solar correctly on its charger and checking
that the "Charging" indicator is visible on the MIP screen.
When placed on the T229 cordless charger, the T-Touch Connect Solar charges fully in under 4 hours.
This cordless power supply is compliant with circuit PS1 as per standard EN 62368-1.
1
st
charge
1. Once the T-Touch Connect Solar battery is charged, briefly press the crown to select the watch
language.
2. Confirm your choice by briefly pressing the crown. You will be offered two watch operating
options: paired to a smartphone, or non-paired.
SIGN IN
30.01.2023 9 / 64
1.1.2 Solar energy
As its name indicates, the T-Touch Connect Solar uses light, especially sunlight, to recharge its battery
automatically and naturally. This has the advantage of prolonging the watch’s operating time.
Please note: Avoid close exposure (≤ 20 cm) of the watch to any light source. In no circumstances
should you do this in an attempt to make the battery charge faster.
1.2 Turning the watch on
1. Press the crown for 5 seconds, until the MIP screen lights up.
1.3 Using the T-Touch Connect Solar paired with a smartphone
Only paired mode provides access to all of the T-Touch Connect Solar’s functions.
Download the T-Touch Connect Solar app to the smartphone, and follow the connection information.
The T-Touch Connect Solar’s MIP screen will display:
"PAIR WITH PHONE?"
1. Using the crown, select "YES".

SIGN IN
10 / 64 30.01.2023
"Install the Tissot app."
1. Open the T-Touch Connect Solar app on the smartphone.
"Pair with T-Touch XXX"
1. The app will automatically be paired with the closest watch, and display the "PAIRING CODE". If
the code cannot be seen on the watch, or if the code displayed on the watch is different to that
displayed on the app, click on "CANCEL", and start over.
ð Note: this is not a verification step like the following one, but it enables you to select the right
watch if there are several in the vicinity.
"PAIRING CODE"
1. Confirm the pairing code on the T-Touch Connect Solar MIP screen and in the T-Touch Connect
Solar app.
ð NB: you only have 30 seconds to perform this action before the pairing process times out.
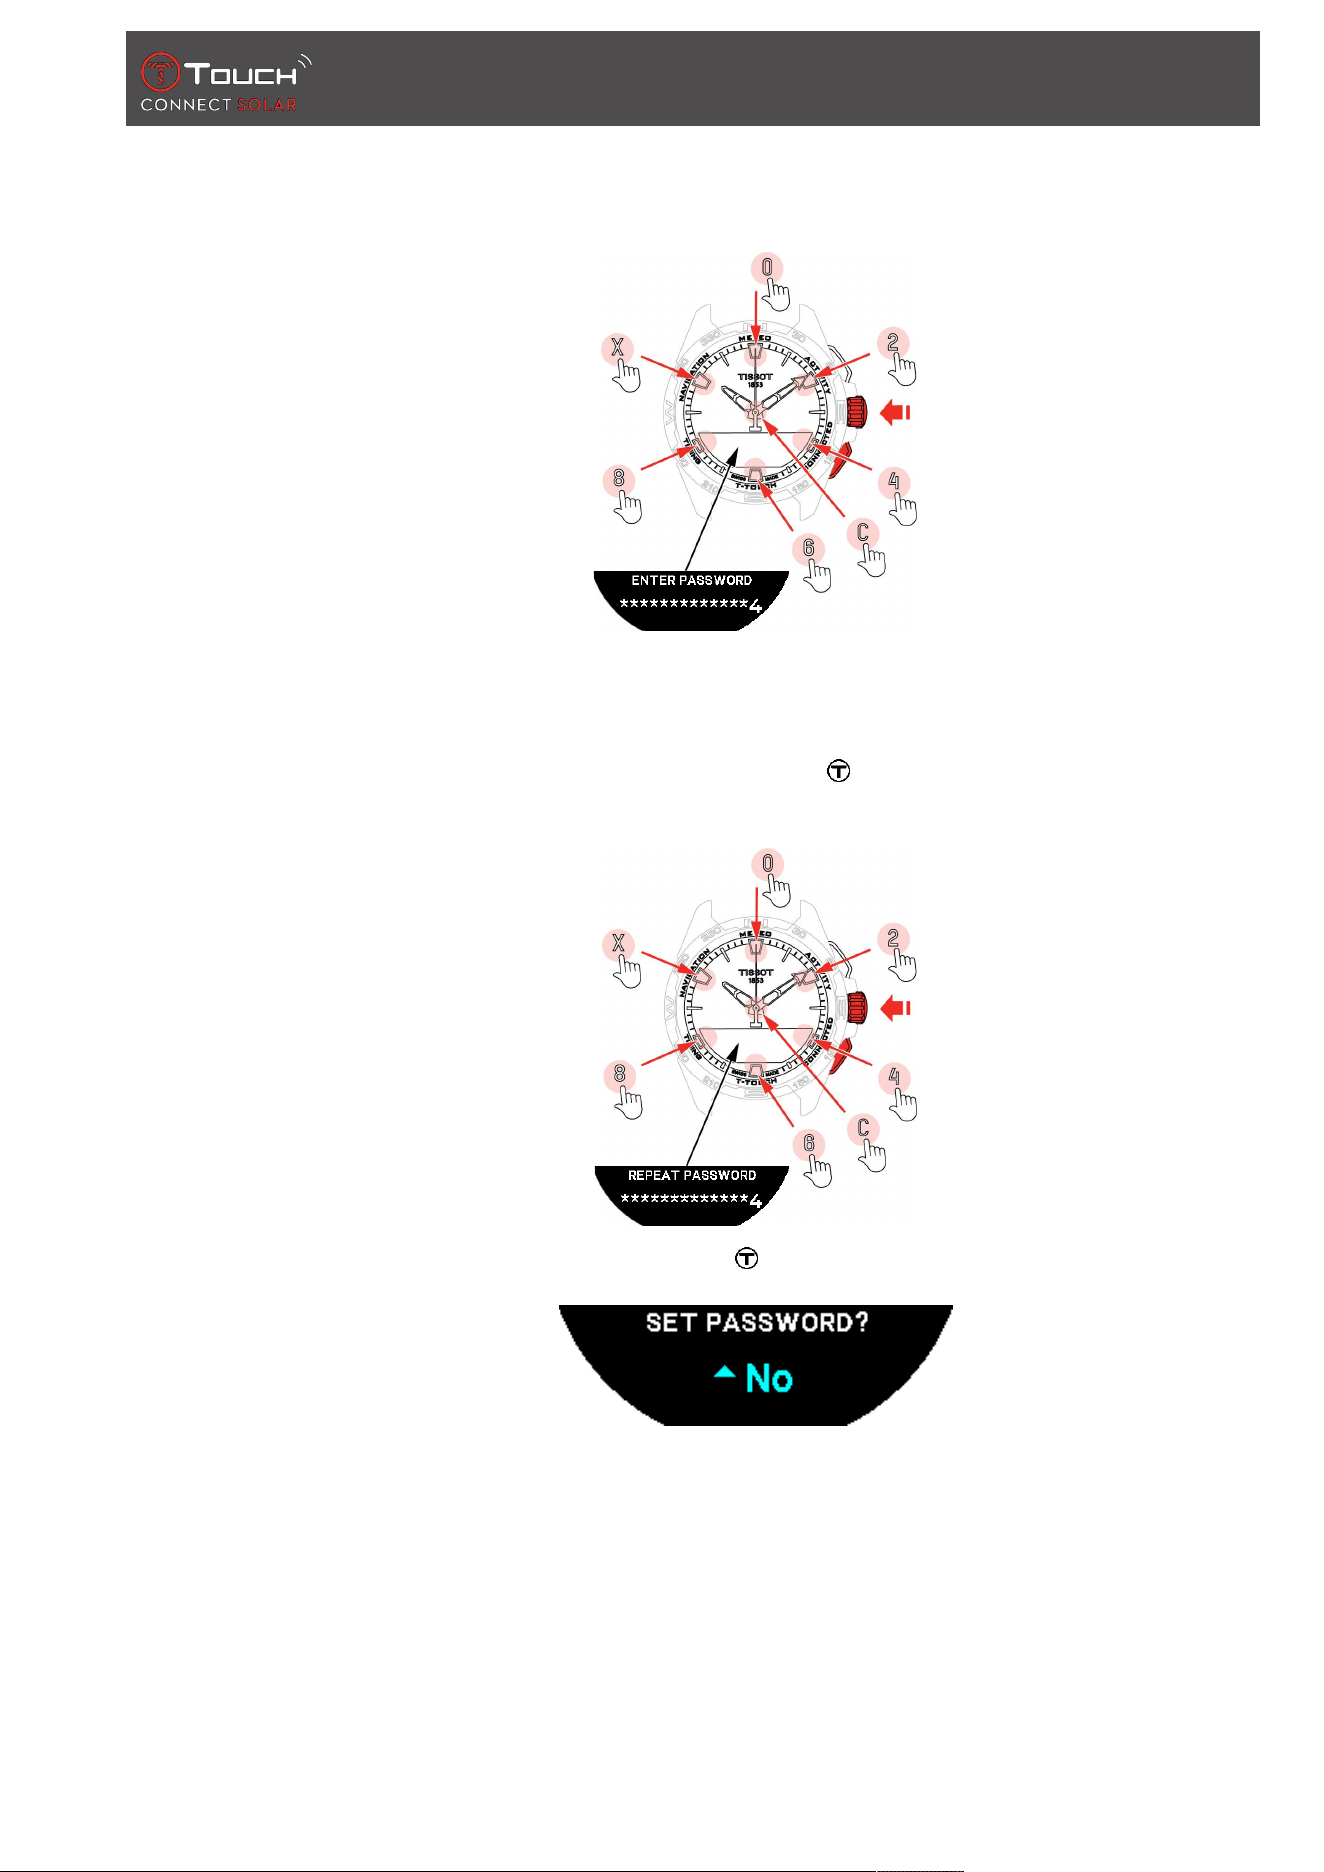
"SET PASSWORD?"
1. Up to version 6.2, use the crown to choose whether you want to secure the watch with a
password. Activating a password ensures that:
ð The content of the notifications received is not displayed on the watch, in order to safeguard
your privacy;
ð The watch menus are not accessible.
2. To set a password, select "Yes".
SIGN IN
30.01.2023 11 / 64
"ENTER CODE"
1. Use the touchpads to create the password, each zone corresponds to a character: 0, 2, 4, C, 6, 8
and X.
ð NB: minimum 6 digits, maximum 14.
2. Once you have entered the password, confirm using . You can go back at any time using the
BACK push-button.
3. Re-enter the password, then confirm using .
4. To opt out of setting a password, select "No" and proceed to the next step.
ð "Setting complete" will appear, meaning that the installation has been successfully completed.
ð The hands are positioned to the time, and the watch is automatically locked.
5. If you receive an error when attempting to pair your watch with the Tissot T-Connect app, select
the "Retry" option to restart the process.
6. If the problem persists, follow the steps below:
7. Uninstall the Tissot T-Connect app.
SIGN IN
12 / 64 30.01.2023
8. Reinitialise your watch (BACK > "CANCEL" push-button or T-TOUCH menu / SETTINGS /
System / Restore to factory settings).
9. From your watch's "Home" screen, press the crown .
10. Activate Bluetooth on your smartphone.
11. Delete your watch from the Bluetooth settings on your smartphone.
12. Activate your smartphone's internet connection.
13. Install the latest version of the Tissot T-Connect app.
14. Launch the app, and sign into your account to restart the process.
1.4 Using the T-Touch Connect Solar unpaired with a smartphone
The T-Touch Connect Solar's MIP screen will display:
"PAIR WITH PHONE?"
1. Using the crown, select "No".
"SET PASSWORD?"
1. Using the crown, choose if you want to secure the watch with a password. Activating the
password ensures the watch menus cannot be accessed.
2. To define a password, select "Yes".
"ENTER PASSWORD"
1. Use the touch zones to create your password. Each zone corresponds to a character: 0, 2, 4, C, 6,
8 and X.
ð NB: minimum 6 digits, maximum 14.
SIGN IN
30.01.2023 13 / 64
2. When you have entered the password, confirm with . You can return to the previous screen at
any point by using the BACK push-piece.
3. Enter the password a second time, then confirm with .
4. To avoid defining a password, select "No" and proceed to the next step.
5. Use the crown to adjust the watch settings manually:
"GENDER"
• Male, female or undefined.
"HEIGHT UNIT"
• Centimetres or Feet;
• Enter your height.

SIGN IN
14 / 64 30.01.2023
"WEIGHT UNIT"
• Kilograms or Pounds;
• Enter your weight.
"DATE FORMAT"
• DD.MM.YY (day.month.year) or MM.DD.YY (month.day.year).
"DATE OF BIRTH"
• Select the year, month and day.
"DATE"
• Enter today’s date.
"TIME FORMAT"
• 24-hour or 12-hour.
"TIME 1" (Time)
• Enter the time.
The message "Setup completed" appears, which means the installation has been successfully
completed.
The hands position themselves to the time you entered and the watch automatically self-locks.
1.5 Reconnecting the watch to the phone
When the watch is connected to the phone, this is indicated by the icon
When the watch is temporarily out of the phone's range, it will try to reconnect for a period of 2 hrs.
This is indicated by the icon. In this situation, you need only bring the watch to within a few
metres of the phone in order to reconnect, provided that the phone's bluetooth is active.
After this period, in order to save its battery, the watch will cut the bluetoothsignal; no connection
icon will be displayed. From version 2.0, you need only press one of the (BACK / START / ) buttons to
reactivate the signal. The icon will be immediately displayed.
Clock
30.01.2023 15 / 64
2 CLOCK
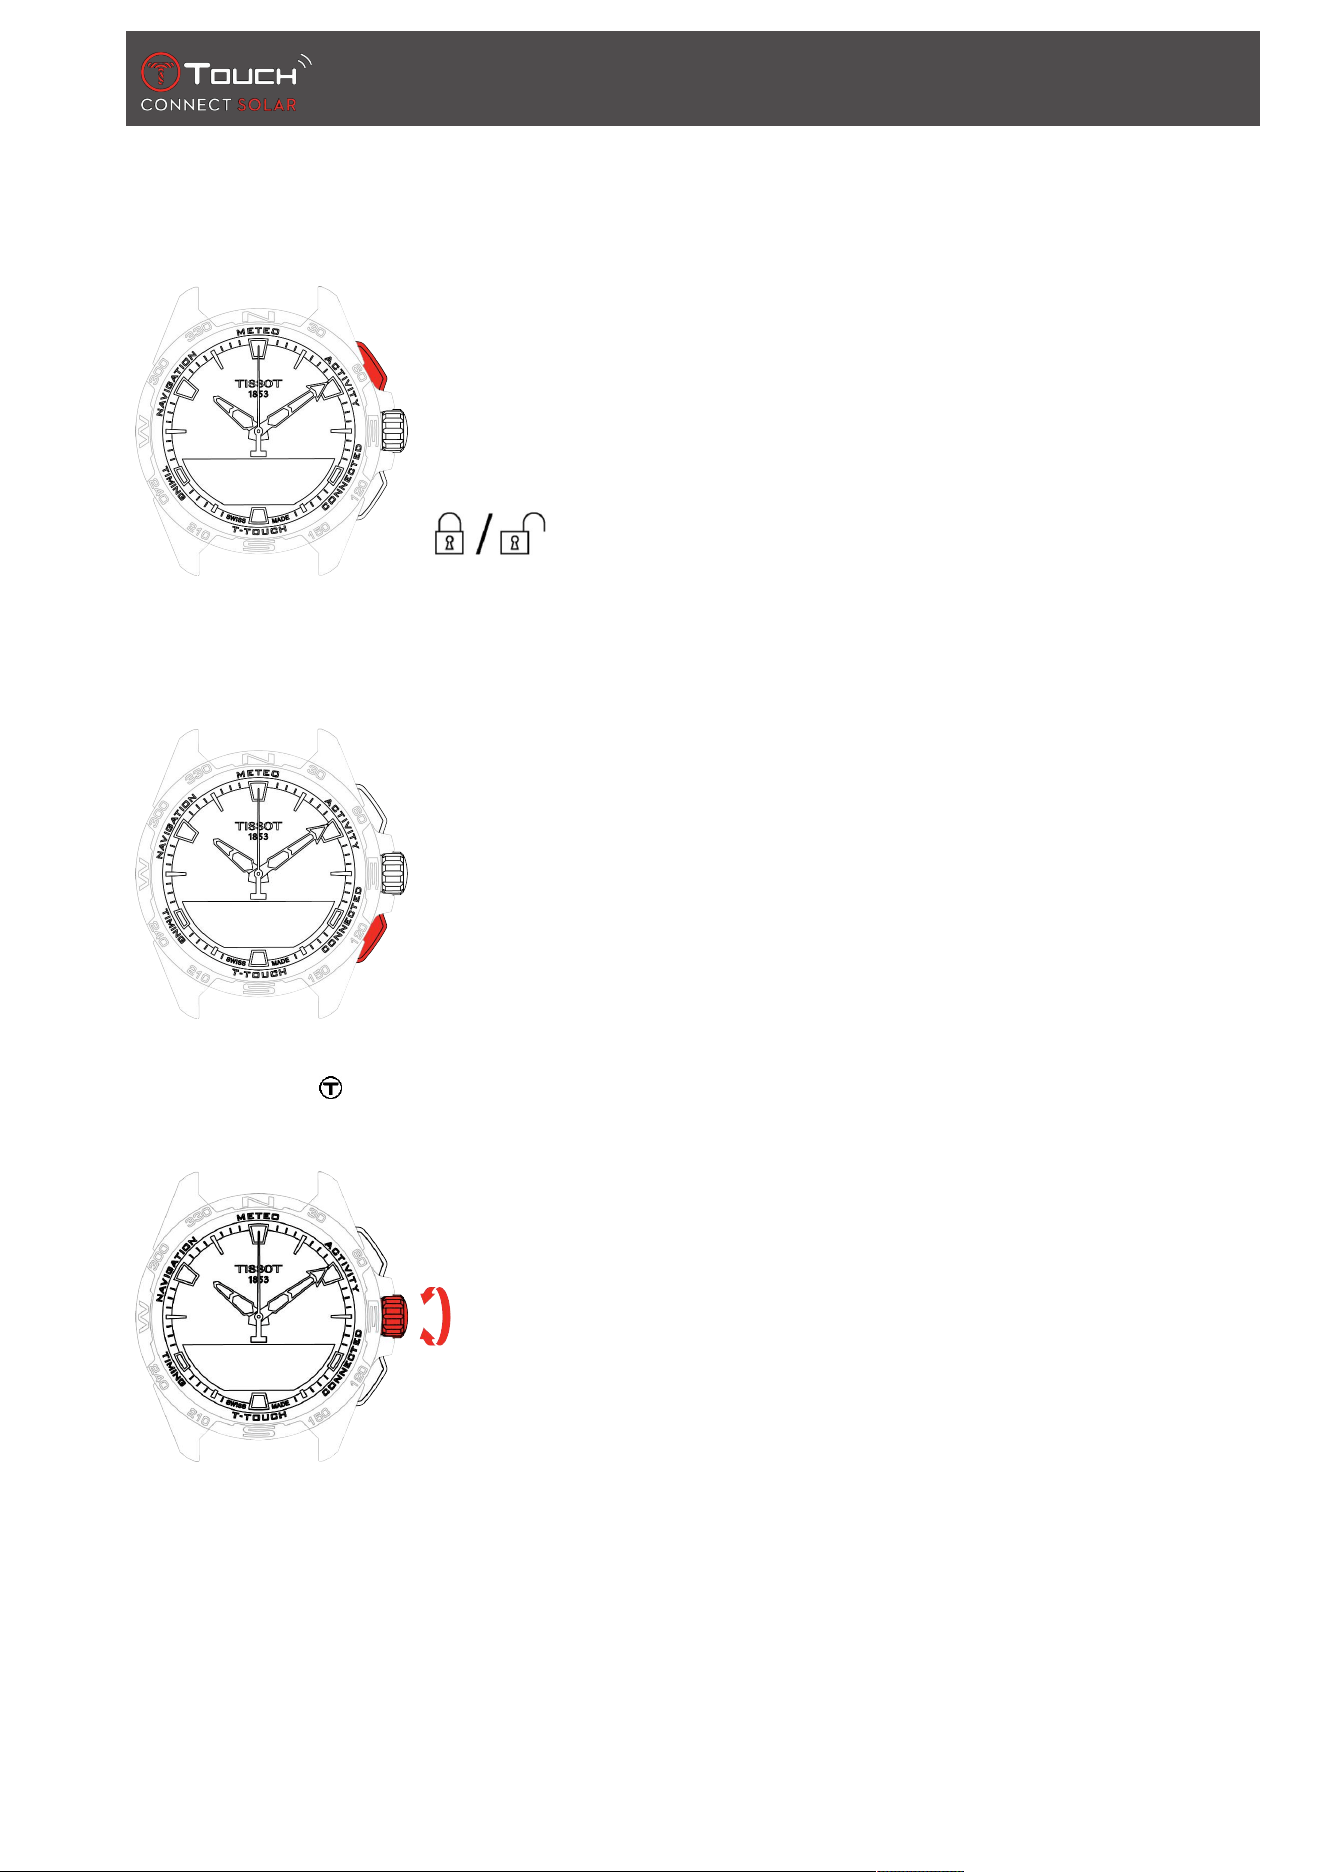
To access the "Clock" functions:
1. Unlock the watch with a long press on START.
2. Press the "Clock" touch zone.
ð Pressing and turning will give you access to the following functions:
Time Date
ð Please note: You can go backwards at any time by using the BACK push-piece.
2.1 TIME 1 and TIME 2
Non-paired time
Paired time T1 <-> T2
Clock
16 / 64 30.01.2023
2.1.1 Set Time
In unpaired mode
1. Turn to display TIME 1, press , the watch displays "Set time1"
2. Confirm by pressing
ð Using enter the time then confirm by pressing
2.1.2 Timezone
In paired mode
The watch has two times, TIME 1 and TIME 2, for which you can choose the desired time zone from a
list that can be modified on the Tissot smartphone app. The hands always display TIME 1.
The list of time zones contains:
• The "phone" time zone, which is the smartphone’s time zone.
• The "custom" time zone, which enables you to set the time manually
• The time zones of various cities and other places as listed on the T-Touch Connect Solar
smartphone app
Please note: When changing between summer and winter time, the watch will inform you of the
change 18 hours beforehand and will update itself automatically.
2.1.3 Swap with Time 2 (Changing to the second time)
The "Swap" function enables swapping between the times set in TIME 1 and TIME 2.
Please note that this function is available only when TIME 1 and TIME 2 have been set.
2.2 Date
The T-Touch Connect Solar watch is equipped with a calendar:
• : in paired mode the date is synchronised automatically with the watch.

Clock
30.01.2023 17 / 64
• : in unpaired mode, settings are entered manually:
1. Press
ð "Set Date?"
2. Press
3. Enter today’s date

Clock
18 / 64 30.01.2023
PAGE LEFT INTENTIONALLY BLANK
METEO (Weather)
30.01.2023 19 / 64
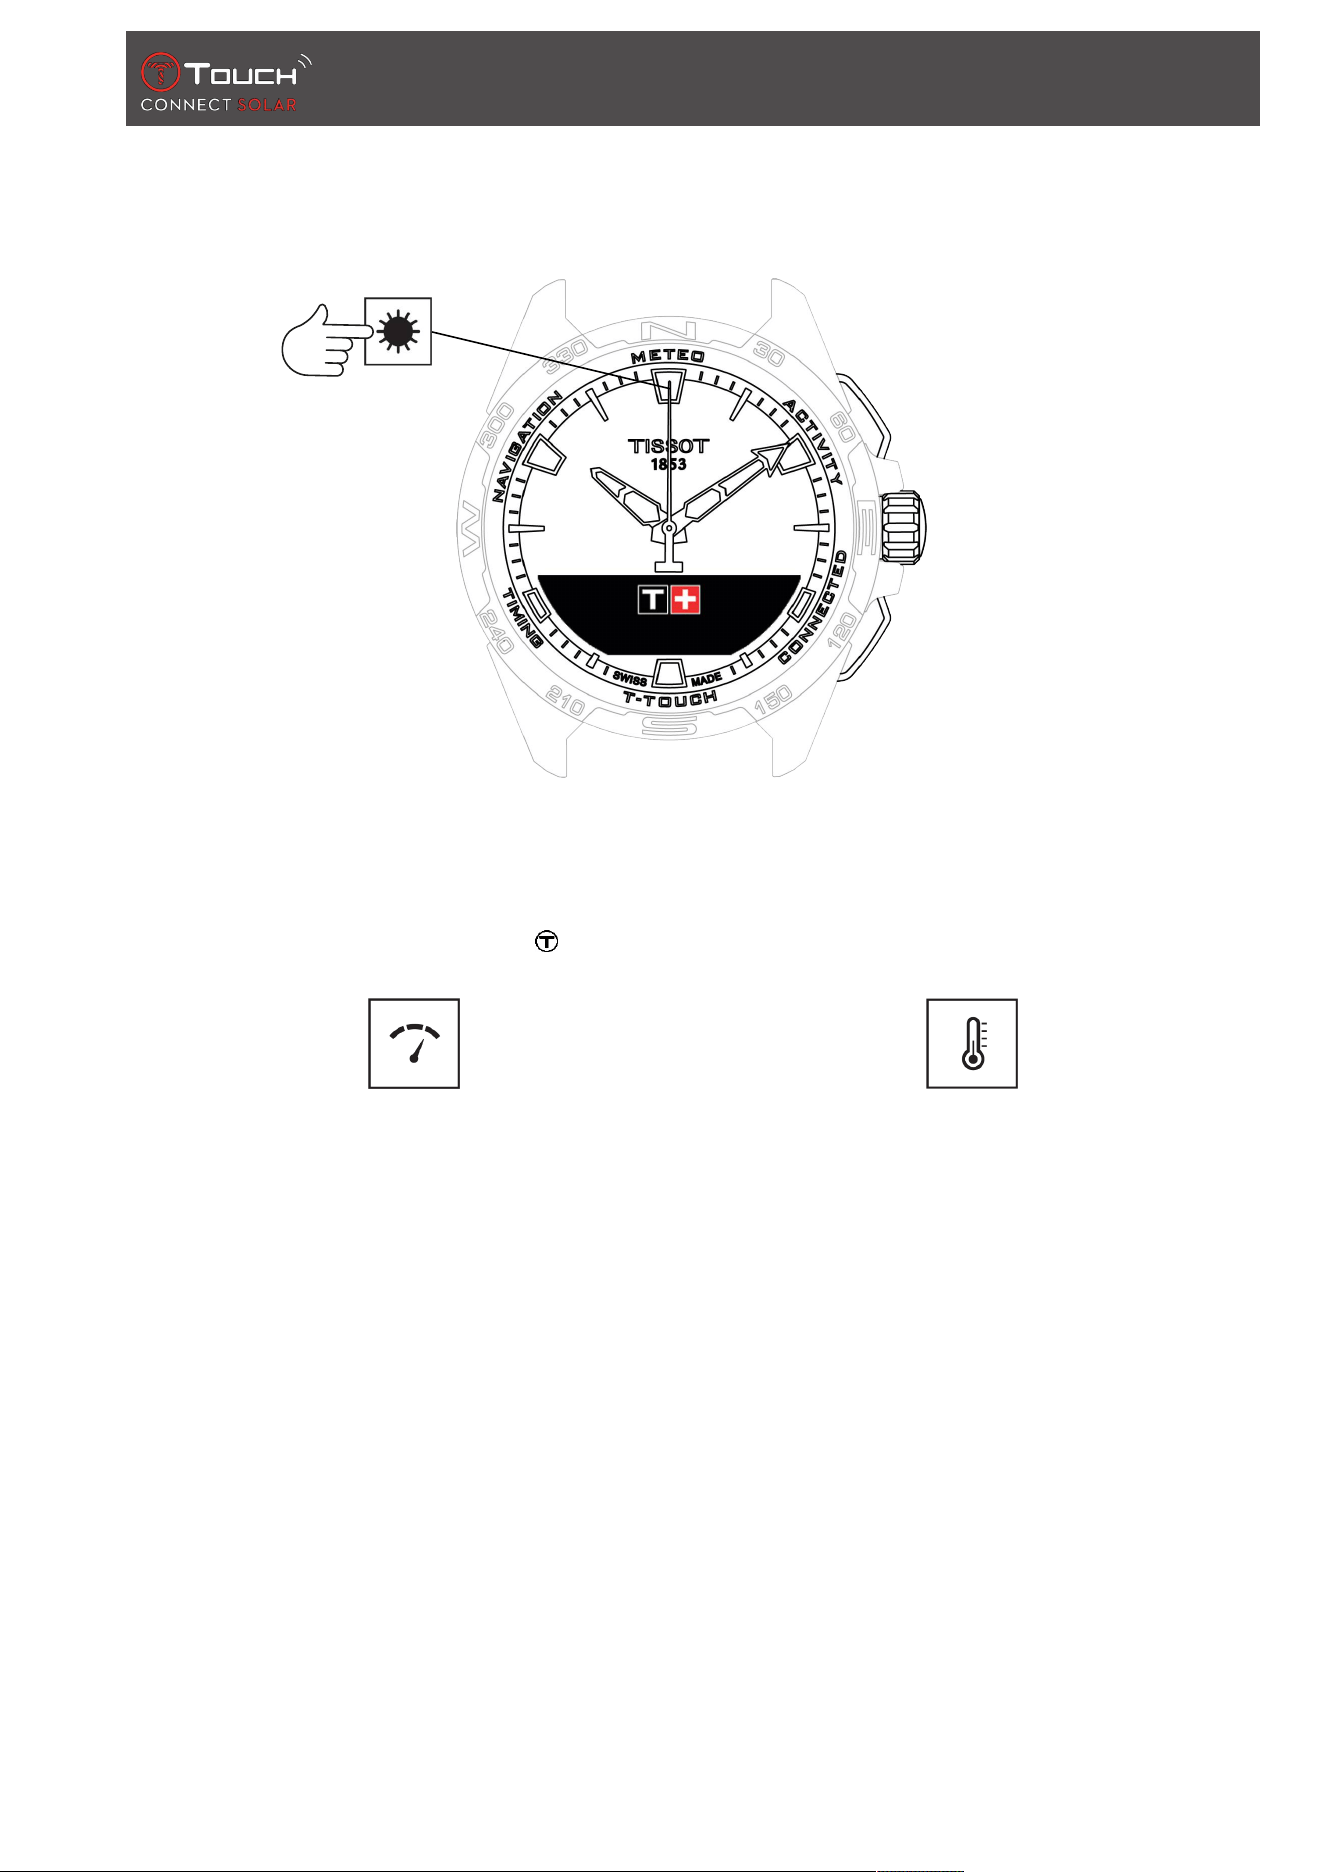
3 METEO (WEATHER)
To access the "METEO" (Weather) functions:
1. Unlock the watch with a long press on START.
2. Press the "METEO" touch zone.
ð Pressing and turning will give you access to the following functions:
Barometer Temperature
ð Please note: You can go backwards at any time by using the BACK push-piece.
METEO (Weather)
20 / 64 30.01.2023
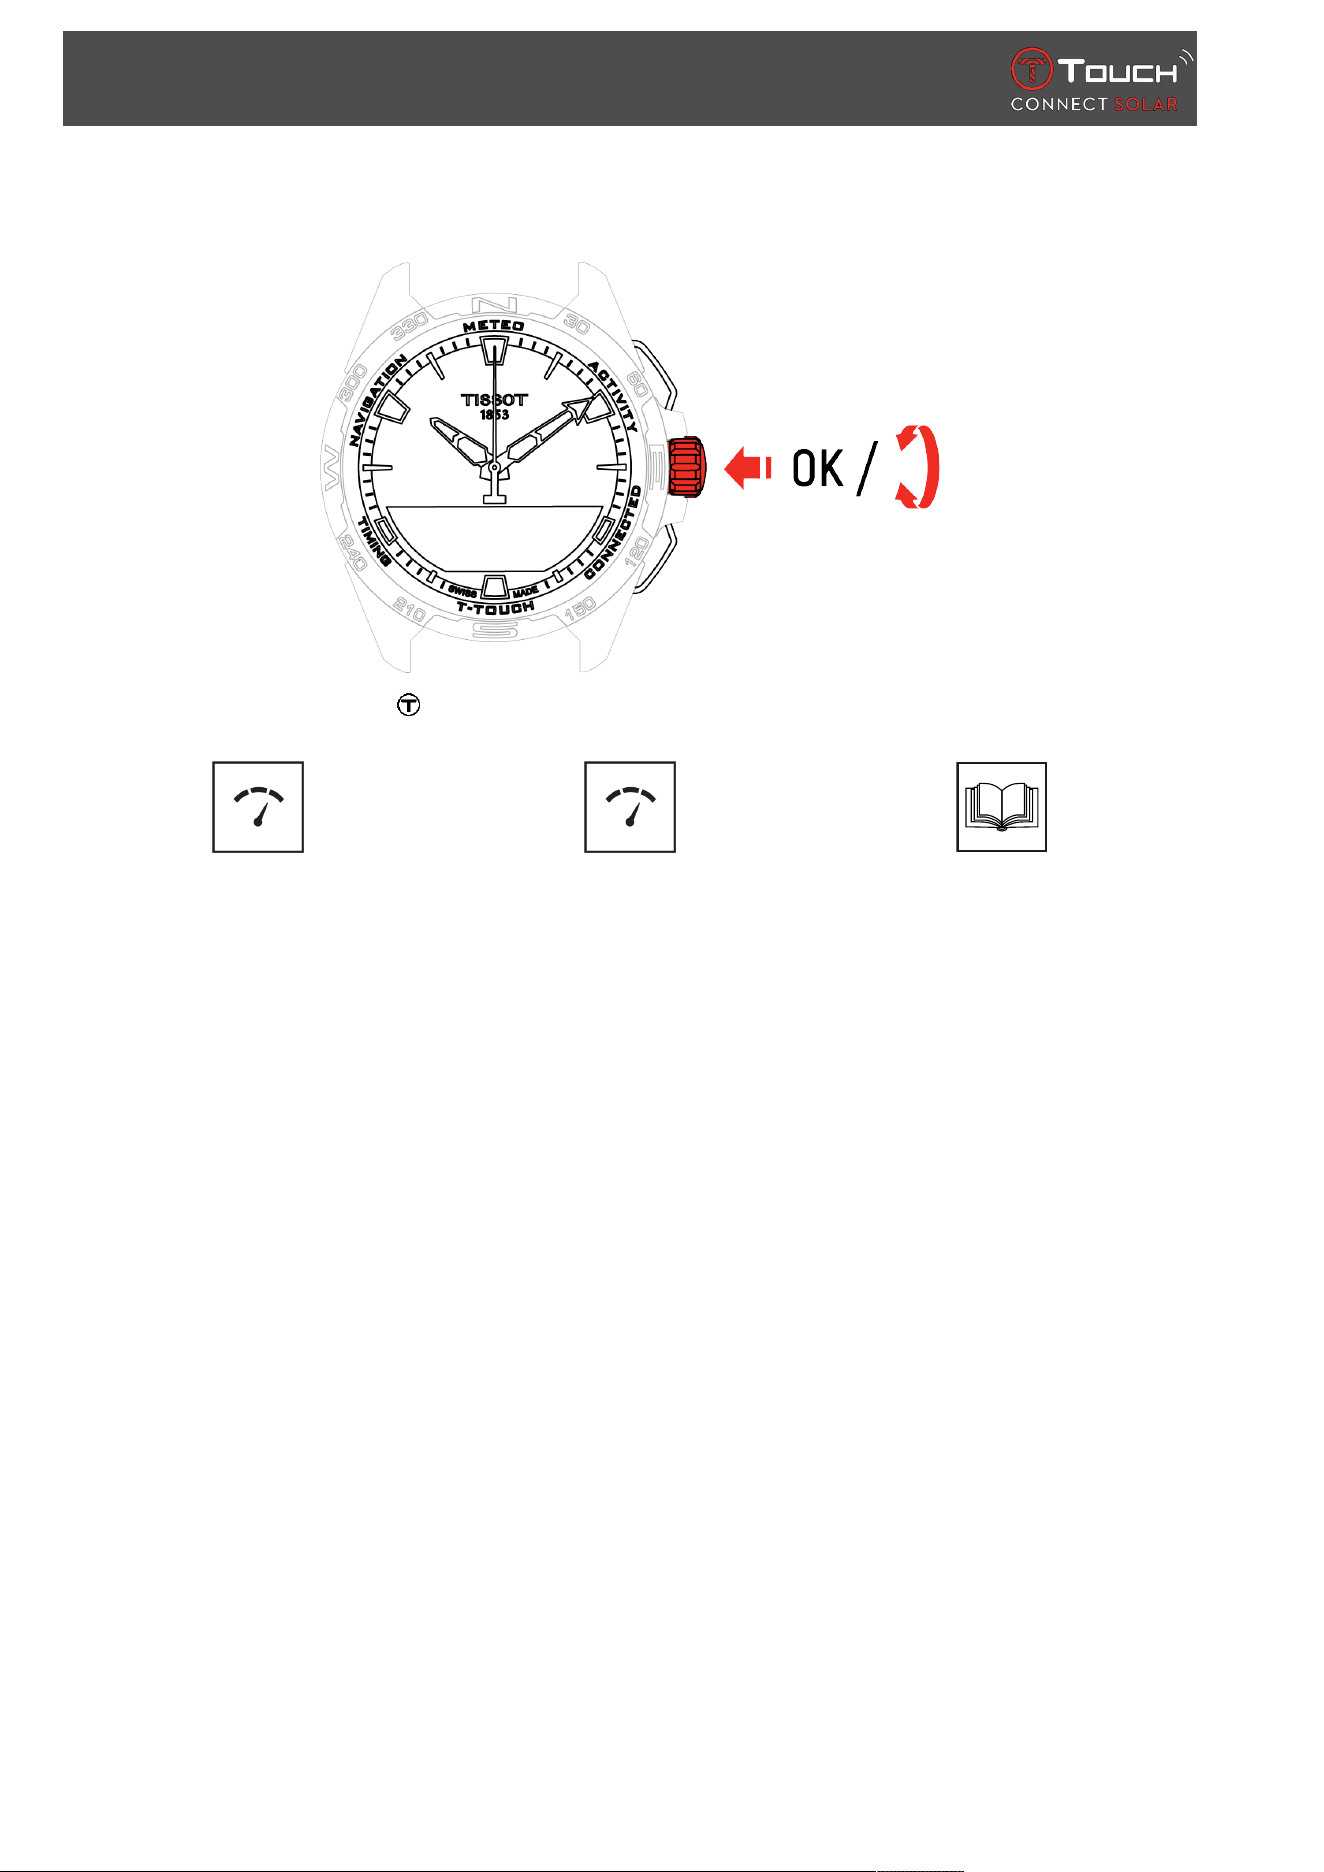
3.1 BAROMETER
Pressing and turning will give you access to the following functions:
R A
Relative pressure
Absolute pressure
Glossary
3.1.1 Calibrate relative pressure
Adjusting the relative pressure causes the displayed altitude to change. The relative pressure is
intentionally restricted to between 950 hPa and 1,100 hPa.
3.1.2 Absolute pressure
Absolute atmospheric pressure is the actual pressure at the time and place the measurement is taken,
and cannot be modified.
To obtain the most accurate barometer readings, you have the option to adjust the hemisphere and
climate zone based on your geographical location. In the "T-TOUCH" / "SETTINGS"/ " Calibration"/
"Altimeter" functions, select your climate zone either manually or automatically, using the simplified
METEO (Weather)
30.01.2023 21 / 64
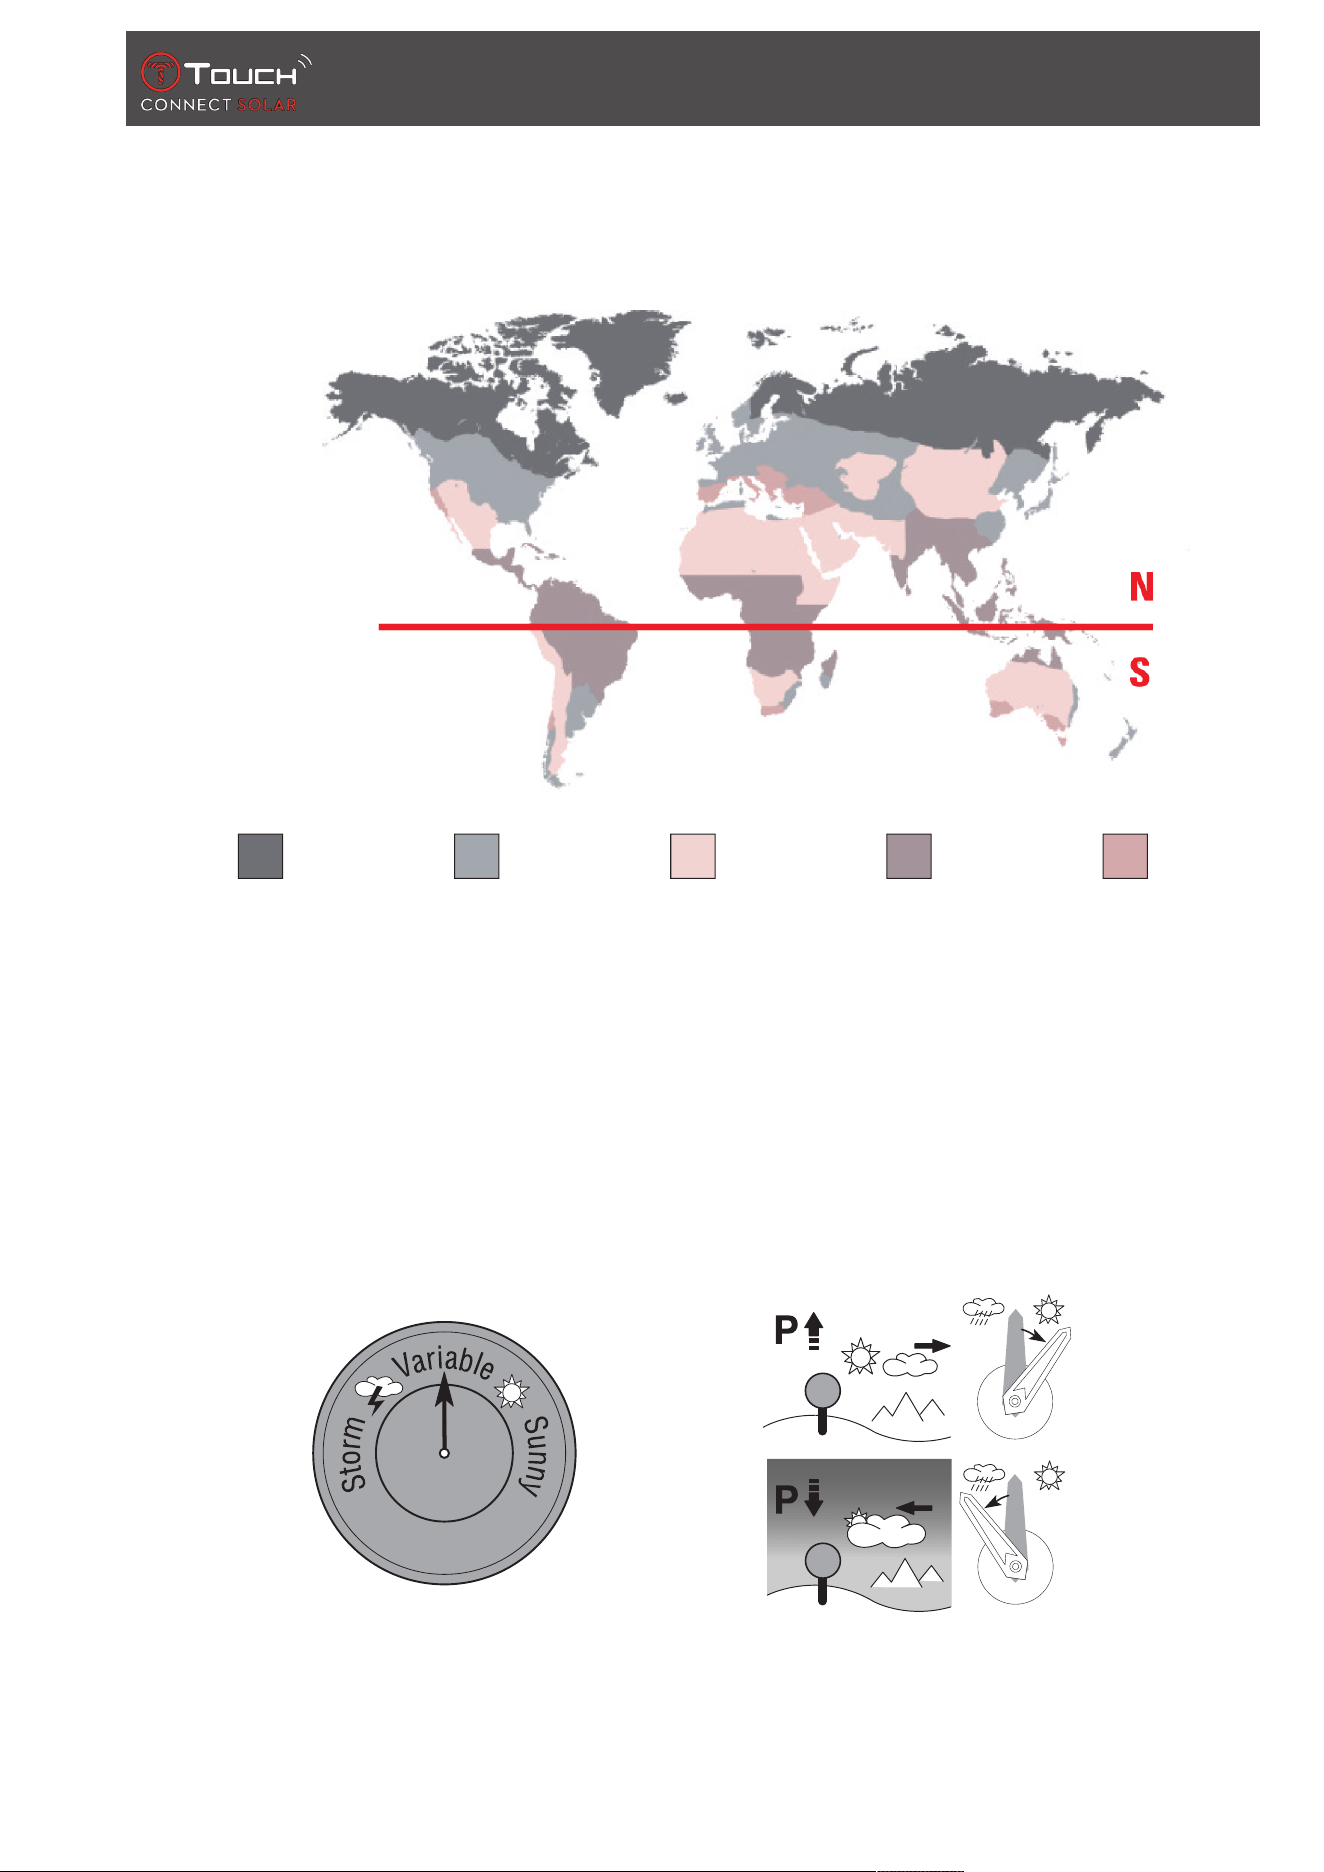
Koeppen climate classification (see illustration below). If the watch is not set ("Not Set"), the standard
atmosphere model is used: set temperature at sea level = 15°C, mean pressure at sea level:
1013.25hPa.
Polar Temperate Arid Tropical Mediterranean
3.1.3 Glossary
In Meteo mode, the hands are superimposed to indicate the weather trend. The advantage of the
barometer is that it enables the relative atmospheric pressure to be displayed. This relative pressure is
displayed in hectopascals.
Changes in the weather are related to variations in atmospheric pressure. When the atmospheric
pressure rises, the sky clears. The area is then referred to as one of "high pressure", or an "anticyclone".
When the atmospheric pressure falls, the sky clouds over. The area is then referred to as one of "low
pressure" or a "depression".
METEO (Weather)
22 / 64 30.01.2023
• The T-Touch Connect Solar watch measures these pressure variations and indicates the weather
trend with the hands, which can adopt the following 7 positions according to the weather
developments:
-6’: Sharp fall in pressure, rapid deterioration
-4’: Moderate fall in pressure, deterioration likely
-2’: Slight fall in pressure, slight deterioration likely
12h: No appreciable change in the weather
+2’: Slight rise in pressure, slight improvement likely
+4’: Moderate rise in pressure, improvement likely
+6’: Sharp rise in pressure, rapid improvement
The T-Touch Connect Solar program takes account of atmospheric pressure variation over the last 6
hours to calculate the trend to indicate. In addition, the pressure variation caused by a rapid change in
altitude is detected by the watch and compensated for automatically. It therefore has only a minimal
influence on the barometric trend. The T-Touch Connect Solar’s digital display shows the absolute and
relative atmospheric pressure values in hectopascals [hPa]. Absolute atmospheric pressure is the actual
pressure at the time and place the measurement is taken, and cannot be modified. Relative pressure is
a value relating to sea level, based on the local absolute atmospheric pressure. Barometers and
weather maps show relative pressure values. The relative pressure value depends on the climate zone
set, and can be preset on the watch. The relative pressure presetting is related to the altitude.
Measurement range: absolute pressure: 250 hPa to 1200 hPa
relative pressure: 950 hPa to 1100 hPa
Precision: absolute pressure: ± 3 hPa
Relative pressure: changes with the altimeter
Resolution: 1 hPa
Unit conversion: 1 hectopascal [hPa] = 1 millibar [mb]
3.2 TEMPERATURE
The temperature displayed is the temperature of the watch case. This is, in turn, affected by the body’s
temperature. This is why the temperature displayed may differ from the ambient temperature.
In order to display the actual ambient temperature, the watch must be removed from the wrist until no
longer affected by the body’s temperature (this takes around 15 to 30 minutes).
The temperature can be displayed in degrees Celsius [°C] or degrees Fahrenheit [°F].
Measurement range: -10°C to +60°C 14°F to 140°F
Accuracy: ± 1°C ± 1.8°F
Resolution: 1°C 1°F
ACTIVITY
30.01.2023 23 / 64
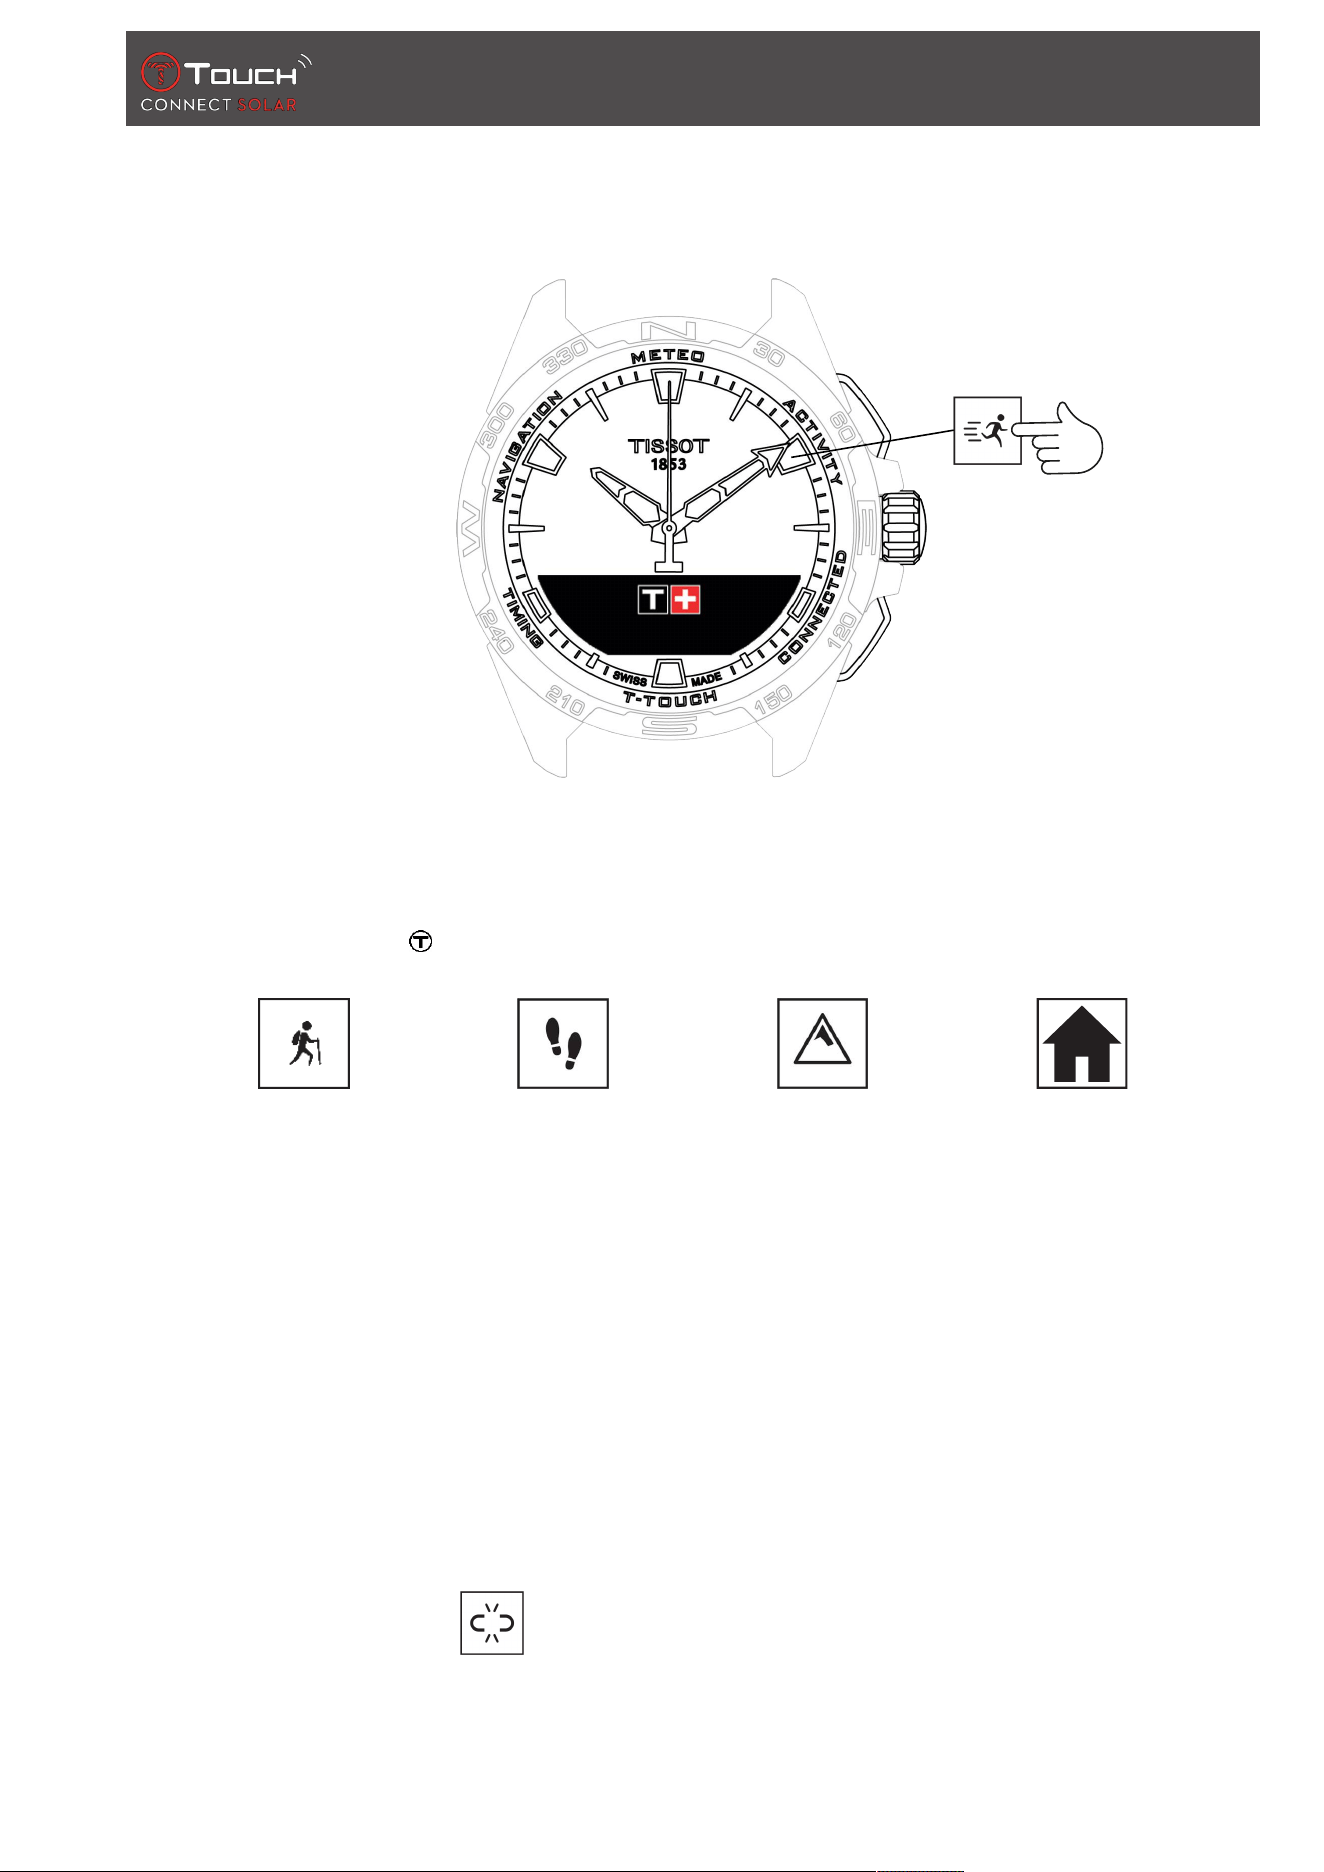
4 ACTIVITY
To access the "ACTIVITY" functions:
1. Unlock the watch with a long press on START
2. Press the "ACTIVITY" touch zone
ð Turning will give you access to the following functions:
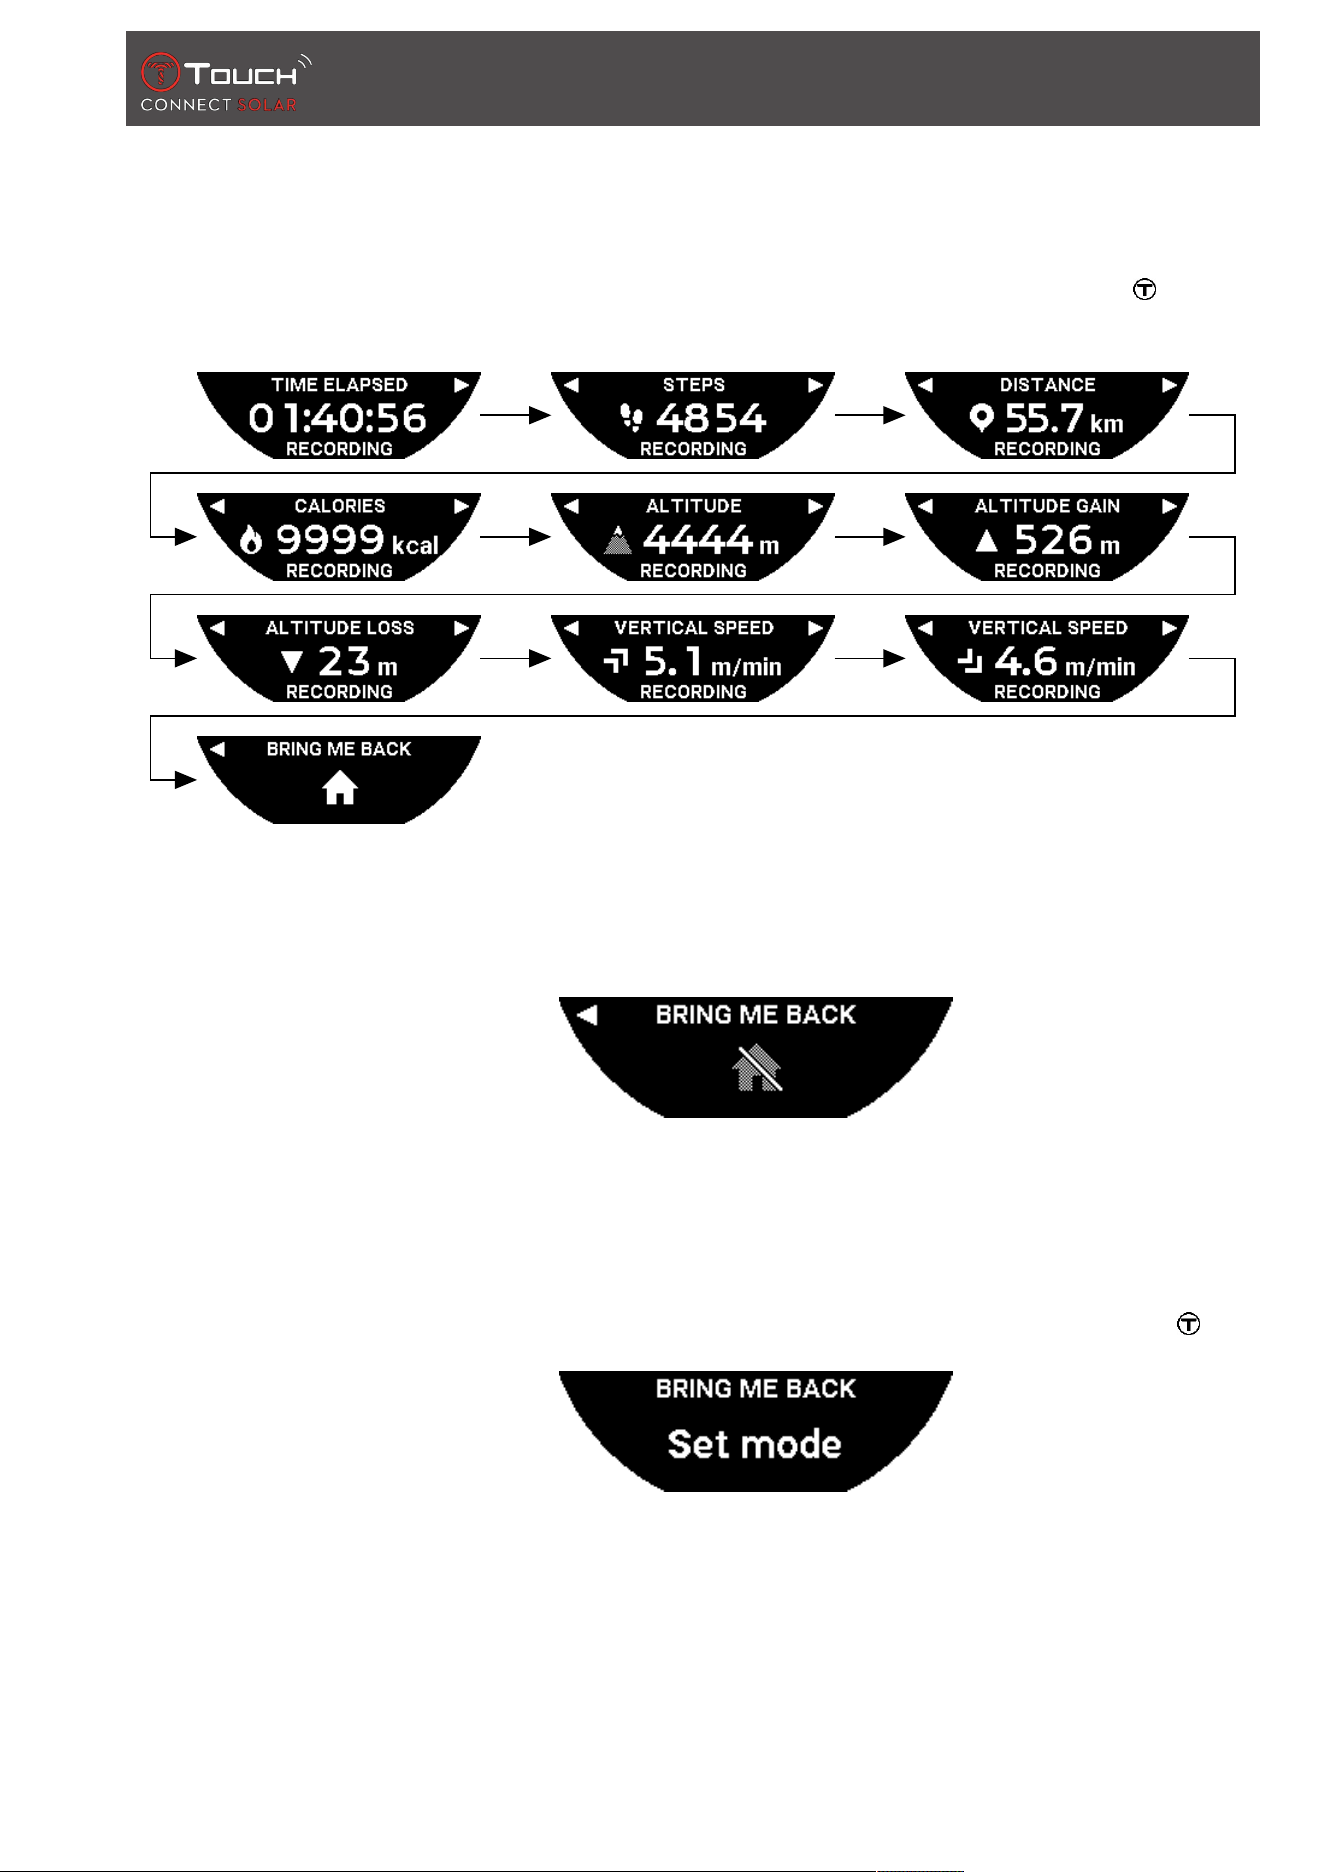
Daily steps AltimeterActivity Bring me back
ð Please note: You can go back at any time by using the BACK push-piece.
ð Please note: The "BRING ME BACK" function is only available if the "[ACTIVITY}23]" function is
operating.
4.1 ACTIVITY
The T-Touch Connect Solar enables you to record an outdoor activity using the "ACTIVITY" function
(e.g. when mountain hiking). This function indicates the elapsed time, the number of steps, the number
of calories, the current altitude, the cumulative elevation gains and losses, and the average vertical
ascent and descent speeds.
Notes:
This function is limited or unavailable in some parts of the world.
In non-paired mode , "ACTIVITY" does not have all the functions, and the GPS coordinates will
not be saved during the trip.
ACTIVITY
24 / 64 30.01.2023
4.1.1 Start the activity
ü The watch must be paired to the user's phone in order to be able to make full use of all the app's
functions. In addition, it is recommended to be logged into the data network, or have recently
logged in.
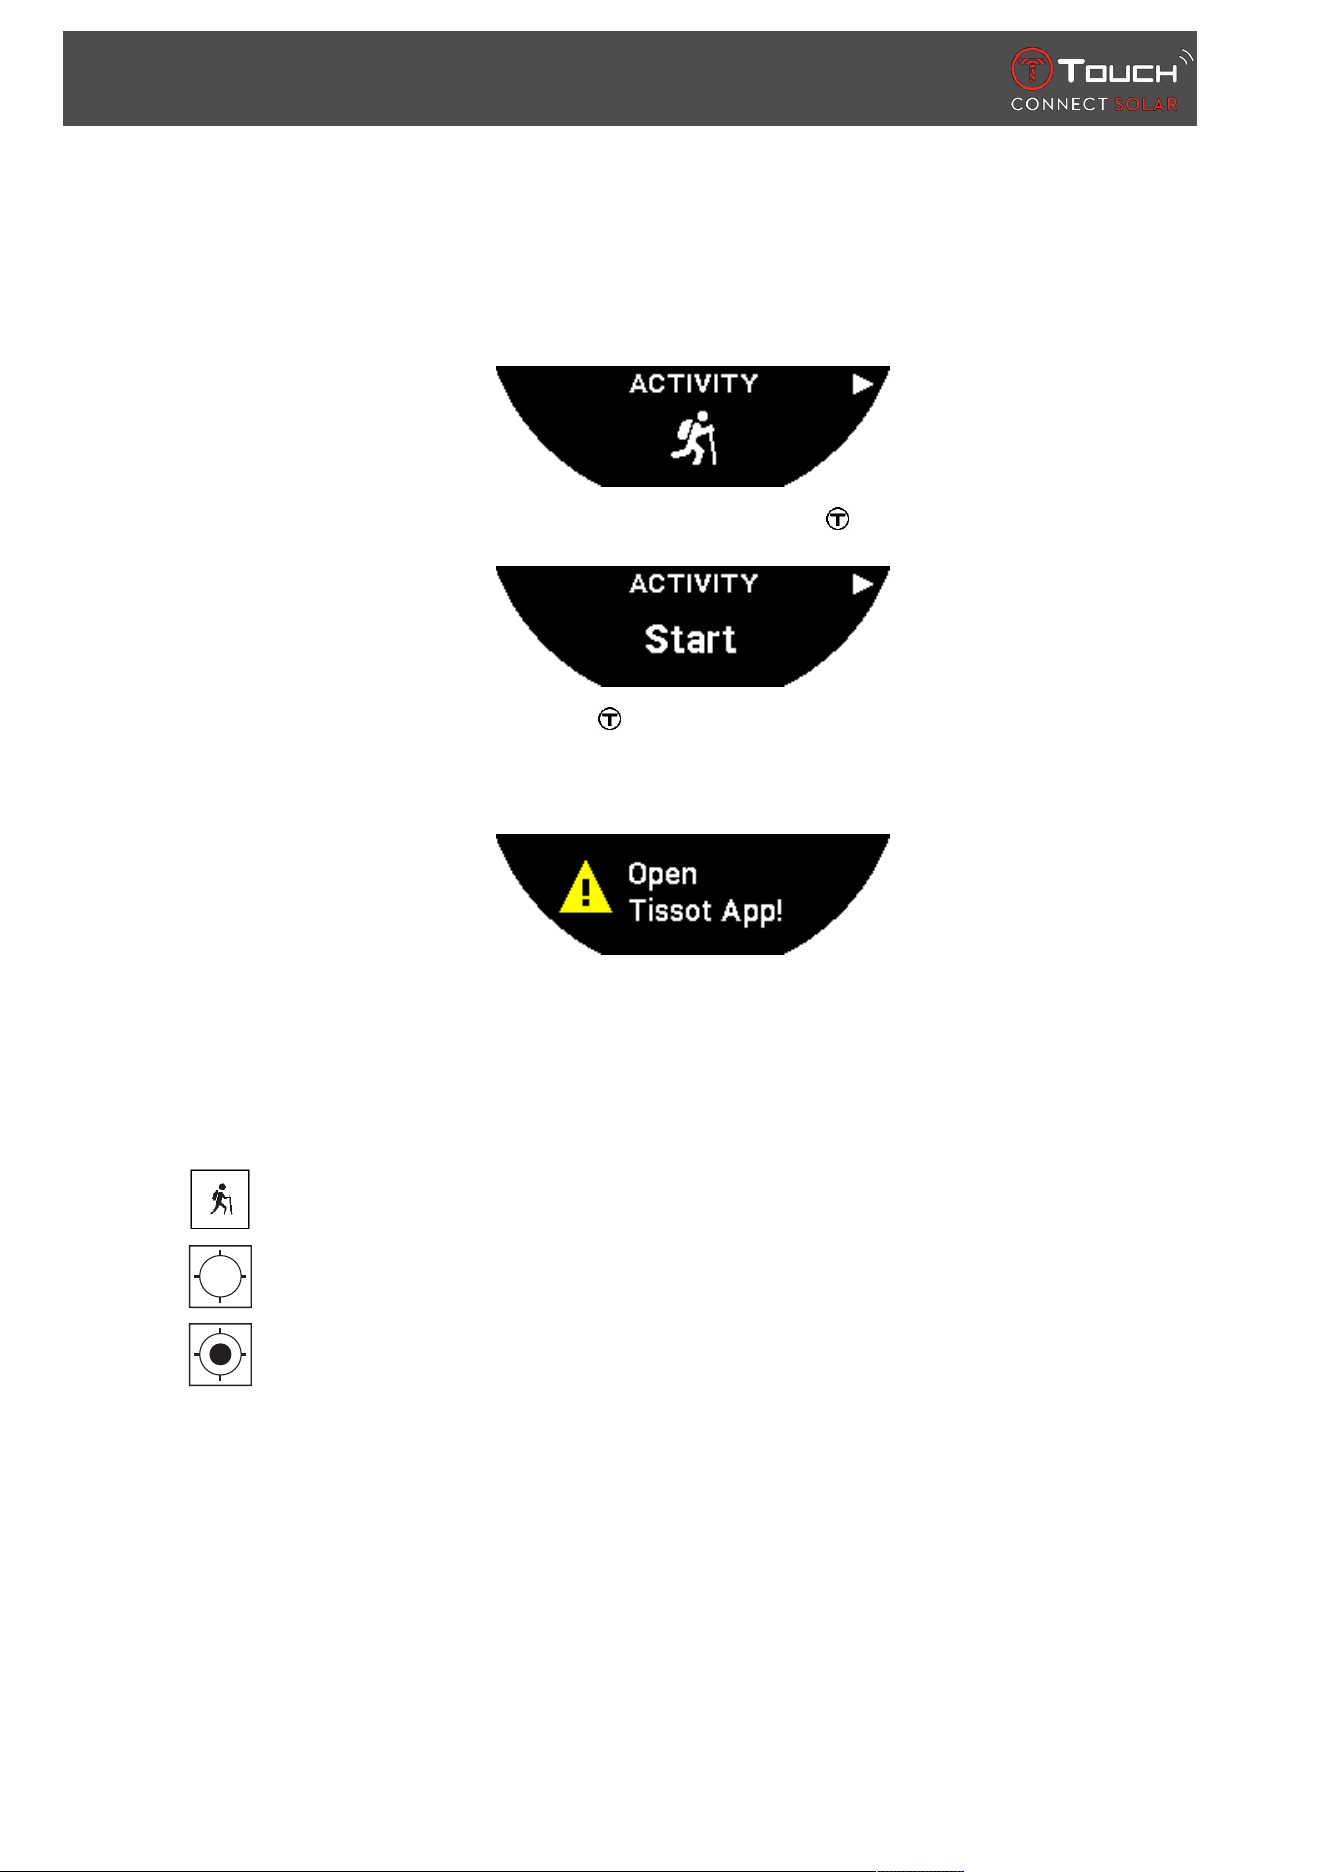
1. At the trip start point, select "ACTIVITY" by briefly pressing .
2. Start "ACTIVITY" by briefly pressing .
3. If the T-Touch app is in the background or closed, the watch screen will display the message
instructing the user to open it to activate it.
ð The T-Touch app must have the necessary permissions to use the phone's GPS function.
When the "ACTIVITY" is saved, you can pause the function at any time by briefly pressing the "START"
push-piece.
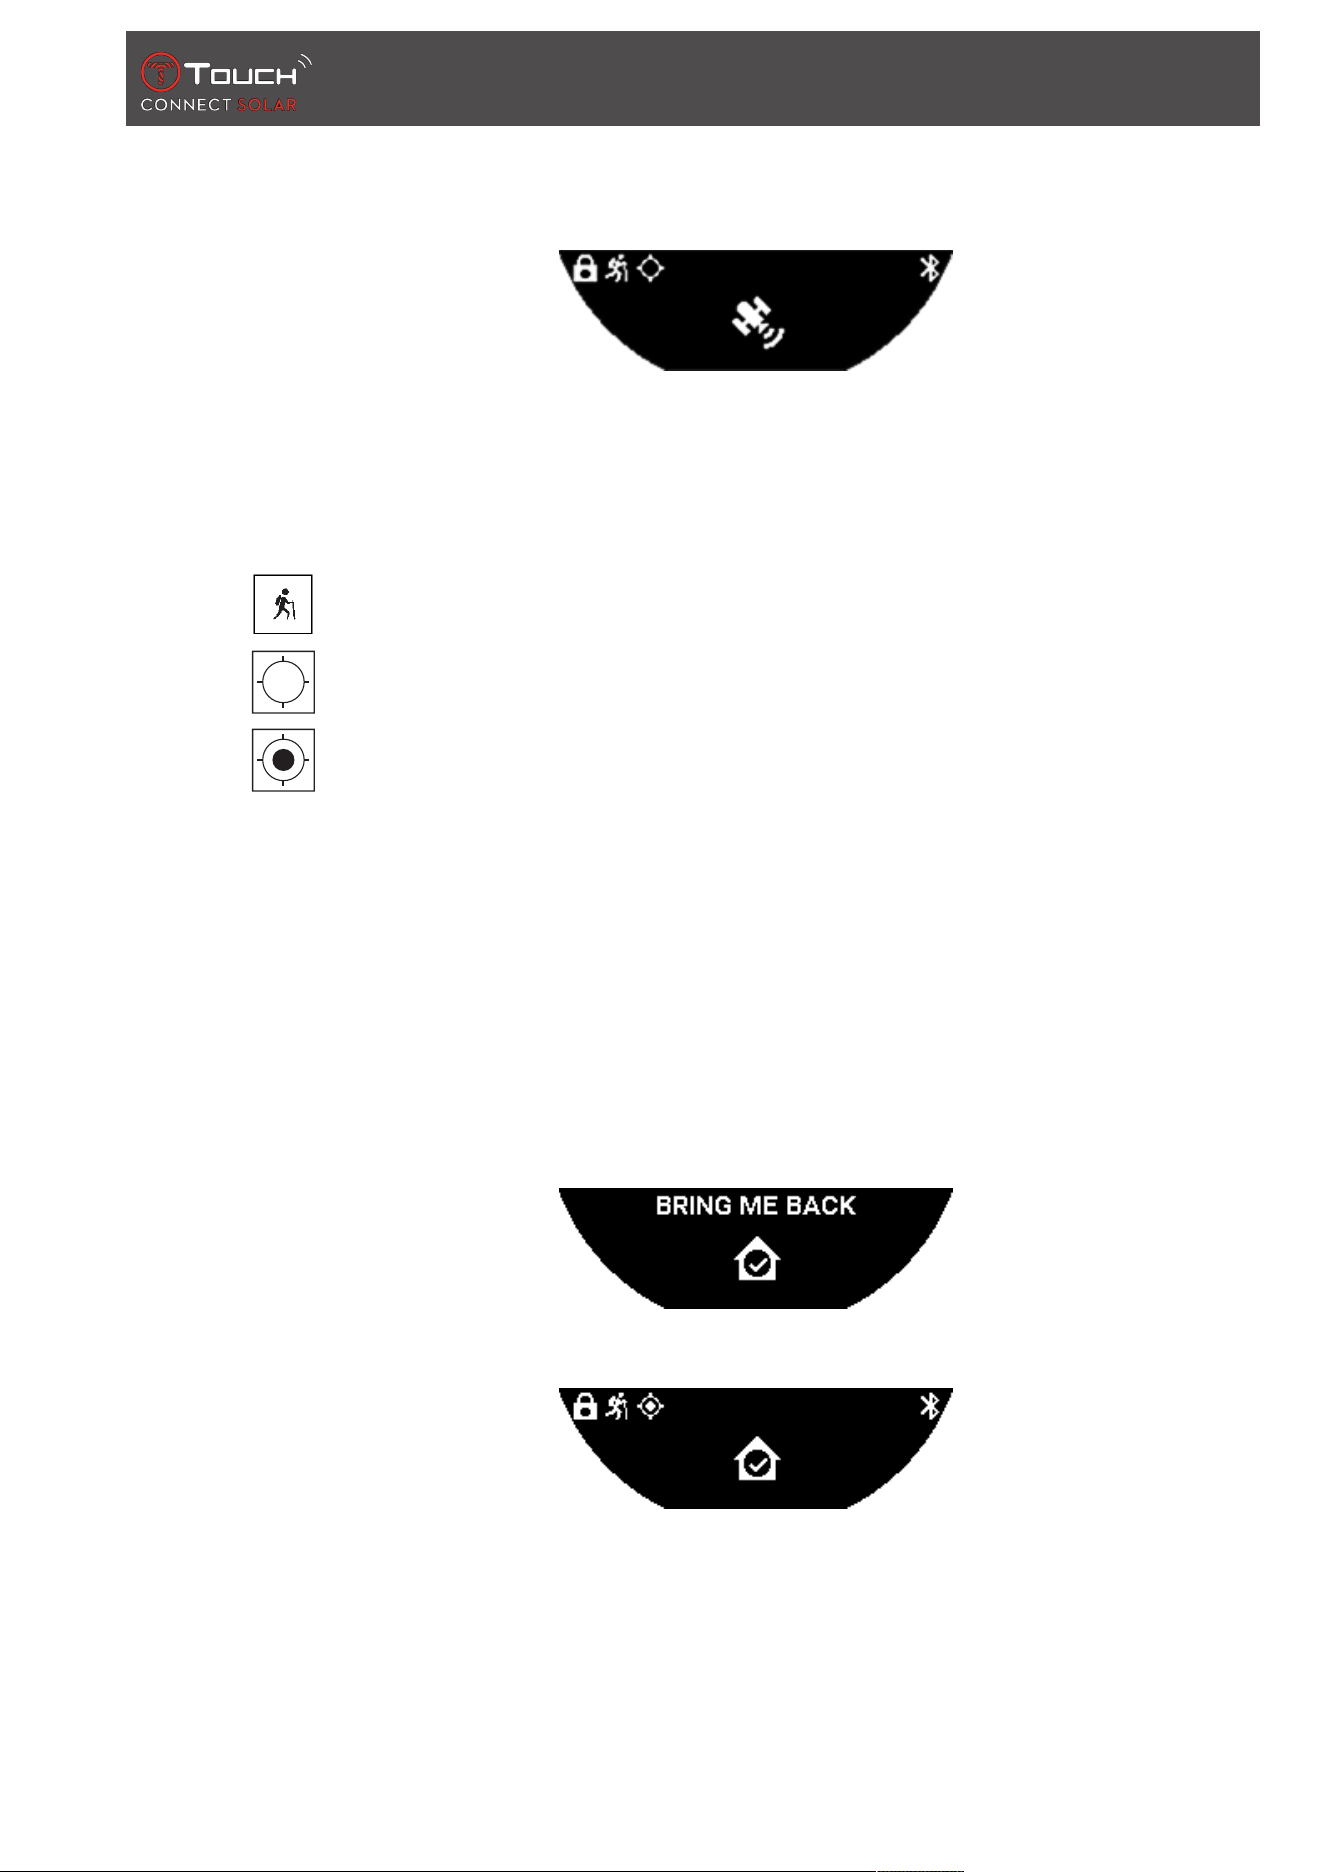
4.1.2 Description of the specific icons on the watch during the activity
: Activity tracking in progress;
: GPS signals insufficient;
: GPS signals active.
These two similar icons distinguish whether the GPS signal is active or lost. If the GPS signal is lost, the
activity tracker cannot save the coordinates.
If the GPS signal is lost, it is recommended to stop and wait a few minutes for the signal to return. But
according to the location (e.g.: in an enclosed valley or near steep slopes), there is no point waiting for
this signal to return; in this case it is preferable to continue on the route.
Note:
These icons are visible only in the top left of the watch screen when it is locked.
ACTIVITY
30.01.2023 25 / 64
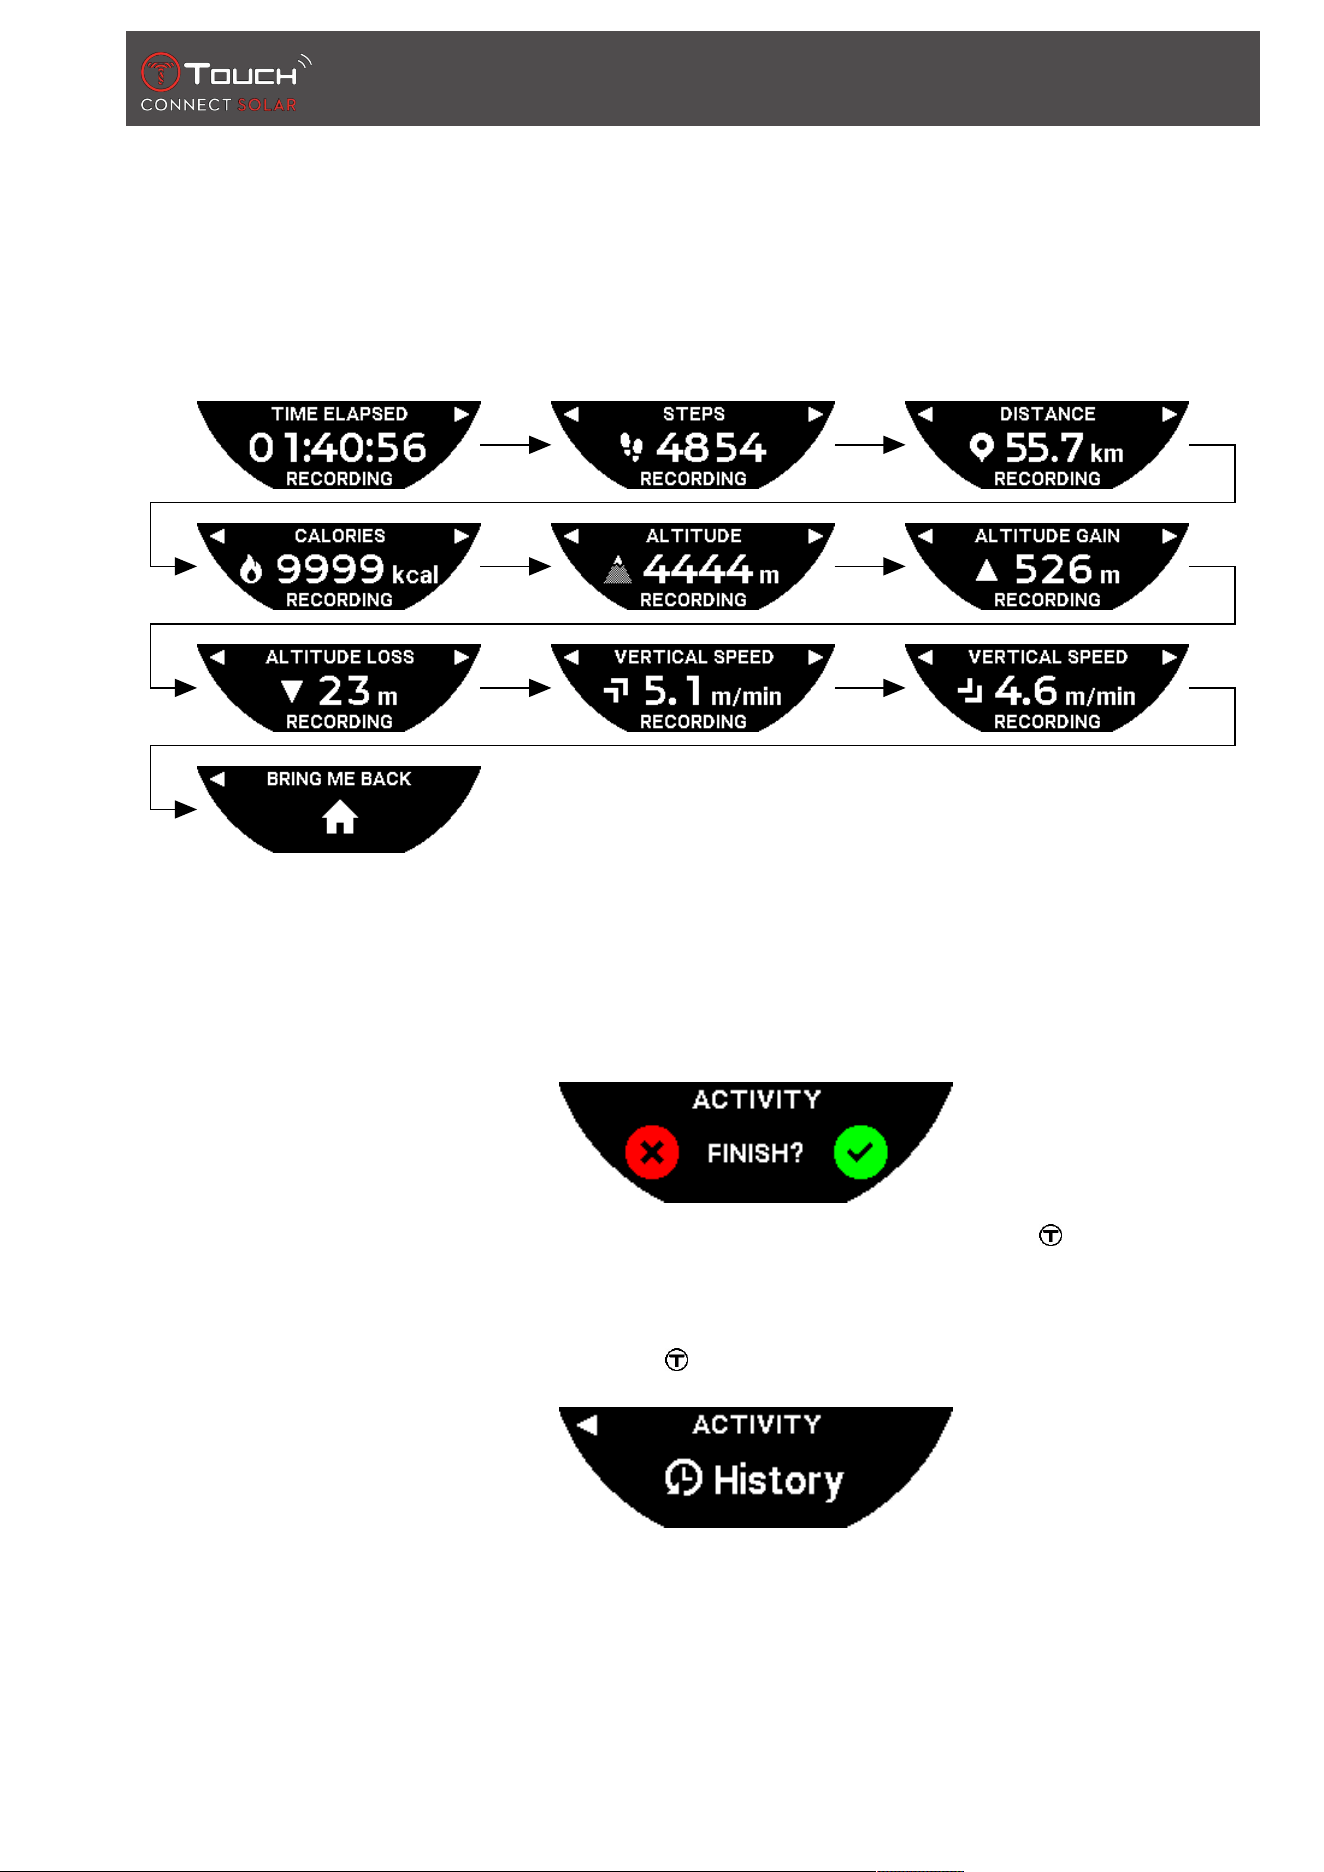
4.1.3 Description of the specific watch screens during the activity
During the trip, the "ACTIVITY" function displays the elapsed time, number of steps, total distance,
number of calories, current altitude, cumulative elevation gains and losses, average vertical ascent and
descent speeds, and access to the"[BRING ME BACK}26]" function.
4.1.4 Stop the activity
At the trip end point:
1. Stop the "ACTIVITY" function on the watch screen by briefly pressing the BACK push-piece.
2. Confirm the message by pressing on the watch screen, or press the crown .
4.1.5 Activity history
In the "ACTIVITY" function, press and turn to look up your history:
ACTIVITY
26 / 64 30.01.2023
4.1.6 T-Touch app specific screens
The T-Touch displays a trip history. Thanks to the saved GPS points, the plot is displayed on a
geographic map. The precision of the points is directly related to the quality of the phone's GPS
reception. A summary table also displays the following data: the start date and time, end date and
time, elapsed time, number of steps, total distance, number of calories, starting altitude, cumulative
elevation gains and losses, average vertical ascent and descent speeds.
4.1.7 Technical information
If the watch and phone are in paired mode, the "ACTIVITY" function saves all the data during the trip.
As soon as the trip has finished, this data can be viewed on the watch screens, and they are also
formatted in the app installed on the phone, for improved user-friendliness.
Notes:
This function is limited or unavailable in some parts of the world.
4.2 BRING ME BACK
The T-Touch Connect Solar guides you back to the start point of a trip being saved, either in a straight
line or following the waypoints on the recorded track (in reverse order). This function displays the
distance remaining on-screen, and the watch hands indicate the direction (azimuth) to follow.
DANGER
Risk of falling
The watch indicates the activity's start point as a straight line from the current position. This azimuth
should be interpreted with care in relation to the location's topography. This is to avoid slips or falls
(cliff, crevasse, body of water, impassable obstacle or other natural hazard).
Note:
The "BRING ME BACK" function is only available if the "[ACTIVITY}23]" function is operating.
ACTIVITY
30.01.2023 27 / 64
4.2.1 Start the Bring Me Back function
If you want to interrupt your trip, and want to return to the start point guided by the T-Touch Connect
Solar, you must start the "BRING ME BACK" function on the watch screen using the crown .
Note:
The "BRING ME BACK" function is usable as soon as a GPS point has been saved. If this is not the case,
the function is not available, and the following screen will be displayed:
4.2.2 Changing mode for the "Bring Me Back" function
There are two modes to choose from for the "Bring Me Back" function: direct or waypoints. Direct (or
linear) mode guides you back to the start point of a trip being saved, in a straight line. Waypoints
mode guides you back following the waypoints on the recorded track (in reverse order).
If the "BRING ME BACK" function is in operation, you can change the mode by briefly pressing .
4.2.3 Optimising the "Bring Me Back" route
You can opt to optimise the "Bring Me Back" route at any time, to follow the shortest path.
ACTIVITY
28 / 64 30.01.2023
If the "BRING ME BACK" function is in operation, you can optimise the route by pressing and turning
the crown .
4.2.4 Description of the specific watch screens on the way back
In direct mode, the distance remaining to the start point is displayed on the watch screen.
If the watch is locked, the following screen will be displayed:
In waypoints mode, the distance remaining to the next waypoint and the distance remaining to the
start point are displayed on the watch screen.
If the watch is locked, the following screen will be displayed:
On the way back to the start point, the watch uses the GPS signal to guide you. These data are
permanently calculated, and depend on the GPS signal received. Depending on the environment you
are in, the signal may be lost for a brief moment. In this case, the watch screen displays a flashing
satellite icon, to indicate that "GPS" reception is insufficient to guide you precisely.
ACTIVITY
30.01.2023 29 / 64
If the watch is locked, the following screen will be displayed:
If the GPS signal is lost, it is recommended to stop and wait a few minutes for the signal to return. But
according to the location (e.g.: in an enclosed valley or near steep slopes), there is no point waiting for
this signal to return; in this case it is preferable to continue on the route.
4.2.5 Description of the specific watch icons on the way back
: Activity tracking in progress;
: GPS signals insufficient;
: GPS signals active.
These two similar icons distinguish whether the GPS signal is active or lost.
If the GPS signal is lost, it is recommended to stop and wait a few minutes for the signal to return. But
according to the location (e.g.: in an enclosed valley or near steep slopes), there is no point waiting for
this signal to return; in this case it is preferable to continue on the route.
Note:
These icons are visible only in the top left of the watch screen when it is locked.
4.2.6 Automatic function stop
When you are approaching +/- 50m from your start point, the "BRING ME BACK" function finishes,
and the following message will be displayed on the watch screen:
If the watch is locked, the following screen will be displayed:
Note:
Please note that before returning the start point, if you stop the "ACTIVITY" function prematurely, the
"BRING ME BACK" function will also be interrupted.
ACTIVITY
30 / 64 30.01.2023
4.2.7 Technical information
This function uses a lot of the battery resources of the phone and the watch. If the phone no longer
has enough battery, the watch will continue to guide you. However, in this extreme emergency
situation, the minimum remaining life with just the watch battery cannot be indicated.
GPS signal detection is sensitive to electromagnetic disturbances and geographic location. It is really
necessary to hold the watch flat, facing upward and a long way from metal surfaces to obtain the best
possible GPS signal reception.
4.3 DAILY STEPS
In activity tracker mode, the T-Touch Connect Solar measures daily physical activity by counting the
number of steps taken.
These daily data are always calculated by reference to TIME 1, and changing TIME 1 automatically
causes the daily data to be refreshed.
For more detailed activity tracking, more data are estimated, such as distance covered, number of
calories burned and duration of activity.
Pressing and turning will give you access to the following data:
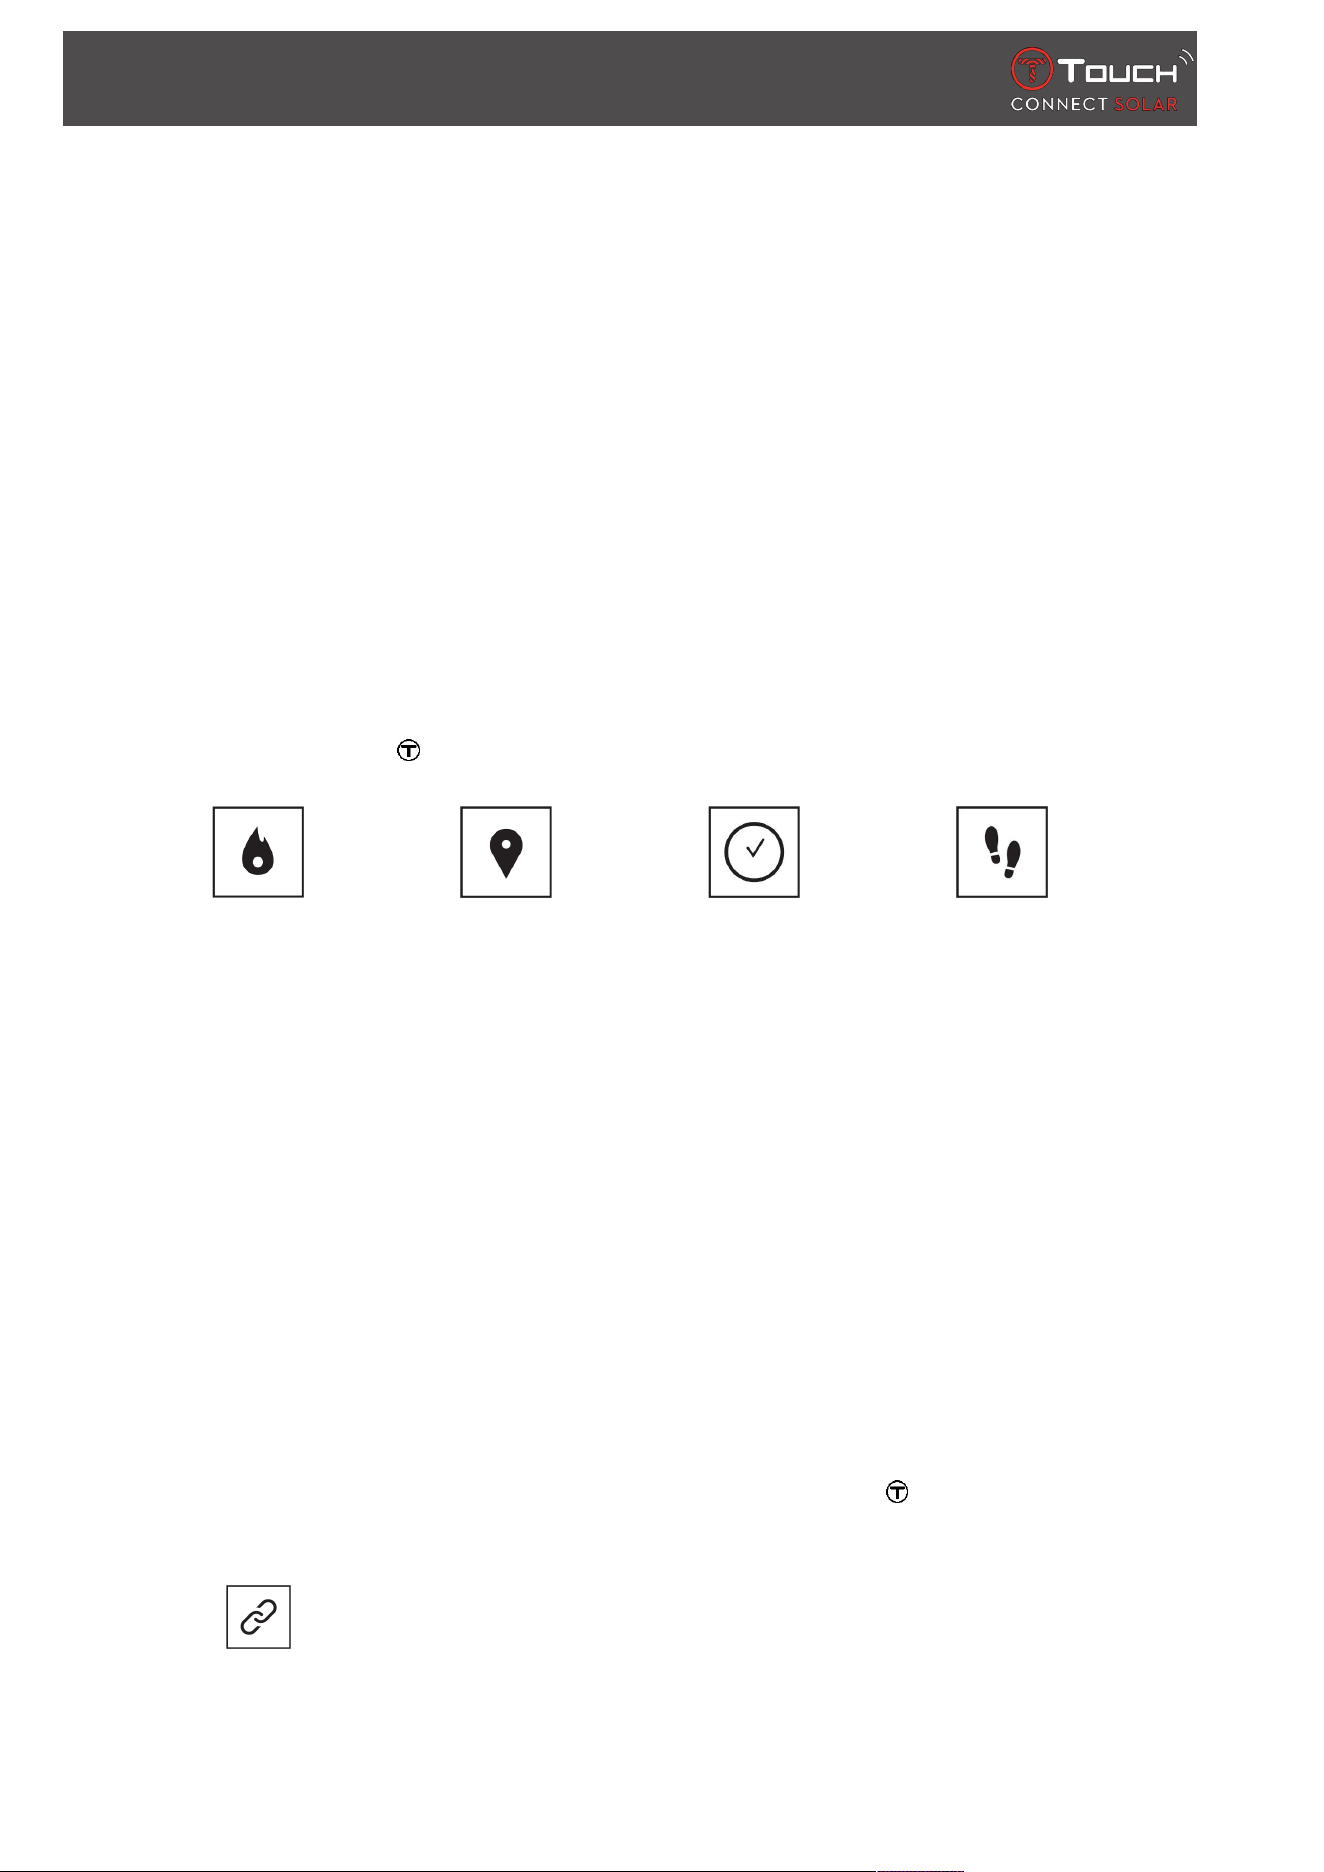
Steps goalCalories Distance Activity period
4.3.1 CALORIES
Displays the number of calories burned during the day.
4.3.2 DISTANCE
Displays the distance covered during the day, in kilometres (km) or miles (mi). This is calculated based
on the daily number of steps.
4.3.3 ACTIVITY PERIOD
Displays the duration of the day’s activity.
4.3.4 STEPS GOAL
The default daily steps goal is 5000. This figure can be altered by using .
When the day’s goal has been reached, a "goal alert" notification is displayed, accompanied by a beep
or a vibration. This notification can be personalised in the watch [Profile}42].
• : in paired mode
ACTIVITY
30.01.2023 31 / 64
The "STEPS GOAL" can also be set in the app. In addition, daily activity records for up to 10years can
be consulted in the app.
4.4 ALTIMETER
The watch automatically calibrates the altitude twice per day. The manual function is still available for
more precise operation.
Altitude Glossary
4.4.1 ALTITUDE SETTING (Altitude calibration)
"Calibrating" an altimeter means setting it to the known altitude at a particular point. You can reset the
altitude by using . Actual altitude values are displayed in various places: on signposts, and on
contour lines and spot elevations on maps. Altitude must be "calibrated" in relation to the ambient
atmospheric pressure.
Measurement range: - 400 mto+9000 m - 1312 ftto+29,527 ft
Resolution: 1 m 3 ft
Note: The average pressure at sea level is 1013.25 hPa.
ACTIVITY
32 / 64 30.01.2023
To obtain the most accurate altimeter function, you can adjust the hemisphere and climate zone based
on your geographical location. In the "T-TOUCH" / "SETTINGS" / " Calibration"/ "Altimeter" functions,
select your climate zone either manually or automatically, using the simplified Koeppen climate
classification (see illustration below). If the watch is not set ("Not Set"), the standard atmosphere
model is used: set temperature at sea level = 15°C, mean pressure at sea level: 1013.25hPa.
Polar Temperate Arid Tropical Mediterranean
4.4.2 Glossary
In altimeter mode, the T-Touch Connect Solar becomes a barometric altimeter and displays the
altitude in relation to the average sea level. The measurement unit used to display the altitude (m or ft)
is the unit that was selected in the options.
Note: Because pressure is used to calculate altitude, the altimeter is sensitive to variations in
atmospheric pressure as the weather changes. It is not unusual to observe differences in altitude of
100m in a single night. The value displayed can thus vary even though the altitude has not actually
changed.

ACTIVITY
30.01.2023 33 / 64
Change in the weather = pressure variation = change in the altitude displayed

ACTIVITY
34 / 64 30.01.2023
PAGE LEFT INTENTIONALLY BLANK
CONNECTED
30.01.2023 35 / 64
5 CONNECTED
To access the "CONNECTED" functions:
1. Unlock the watch with a long press on START.
2. Press the "CONNECTED" touch zone.
ð Pressing and turning will give you access to the following functions:
Call Notification Find phone Find watch NBA
ð Please note: You can go backwards at any time by using the BACK push-piece.
5.1 Incoming call
On receipt of an incoming call, you can:
• Put the watch in silent mode by pressing on the right of the MIP screen or pressing
• Reject the call by pressing on the left of the MIP screen or pressing BACK

CONNECTED
36 / 64 30.01.2023
5.2 NOTIFICATONS (message, e-mail, reminder, social media)
When the watch is paired with and connected to a smartphone, it can display notifications sent by the
smartphone (message, e-mail, call, social media). The choice of notifications to be sent from the
smartphone to the watch is made in the smartphone settings and depends on the smartphone’s
operating system.
On receipt of a notification, you can:
• Open the notification by pressing and turning to scroll through the notification. At the end, the
message "CLEAR?" is displayed, and pressing deletes the notification from the watch.
• To hide the notification, click on the BACK push-piece, and the notification will be stored in
"NOTIFICATIONS".
• If you do nothing, the notification remains visible on the MIP screen for 15 seconds, after which
time it is automatically stored in "NOTIFICATIONS".
To read or delete hidden and non-deleted notifications:
• When "NOTIFICATIONS" is displayed, confirm by pressing , and turn to browse through the
various notifications received.
• Open a notification by pressing , and turn to scroll through the notification. At the end, the
message "CLEAR" is displayed, and pressing deletes the notification from the watch.
5.3 FIND MY PHONE
If the watch is paired with and connected to a smartphone, it can make the phone ring in order to help
find it if it is hidden.
The "Start" screen will be displayed; activate the ringtone by pressing . If this located the phone, stop
the ringtone by pressing again.
Note: if the phone uses an iOS system, the ringtone volume depends on the setting on the phone. You
cannot make the phone ring if it is in silent mode.
5.4 Find my watch
If the watch is paired with and connected to a smartphone, it is possible to make the watch chime from
the T-Touch Connect Solar app, in order to find it.
5.5 NBA
In NBA mode, the watch displays the result of your favourite team’s latest match, as well as the date of
its next fixture.
1. Press and turn the crown to display your favourite team’s calendar.
ð Please note: Sign into the app to choose your favourite team, as well as to access more
information on the NBA season.
T-TOUCH
30.01.2023 37 / 64
6 T-TOUCH
To access the "T-TOUCH" functions:
1. Unlock the watch with a long press on START.
2. Press the "T-TOUCH" touch zone.
ð Pressing and turning will give you access to the following functions:
Quick settings
General settings
ð Please note: You can go backwards at any time by using the BACK push-piece.
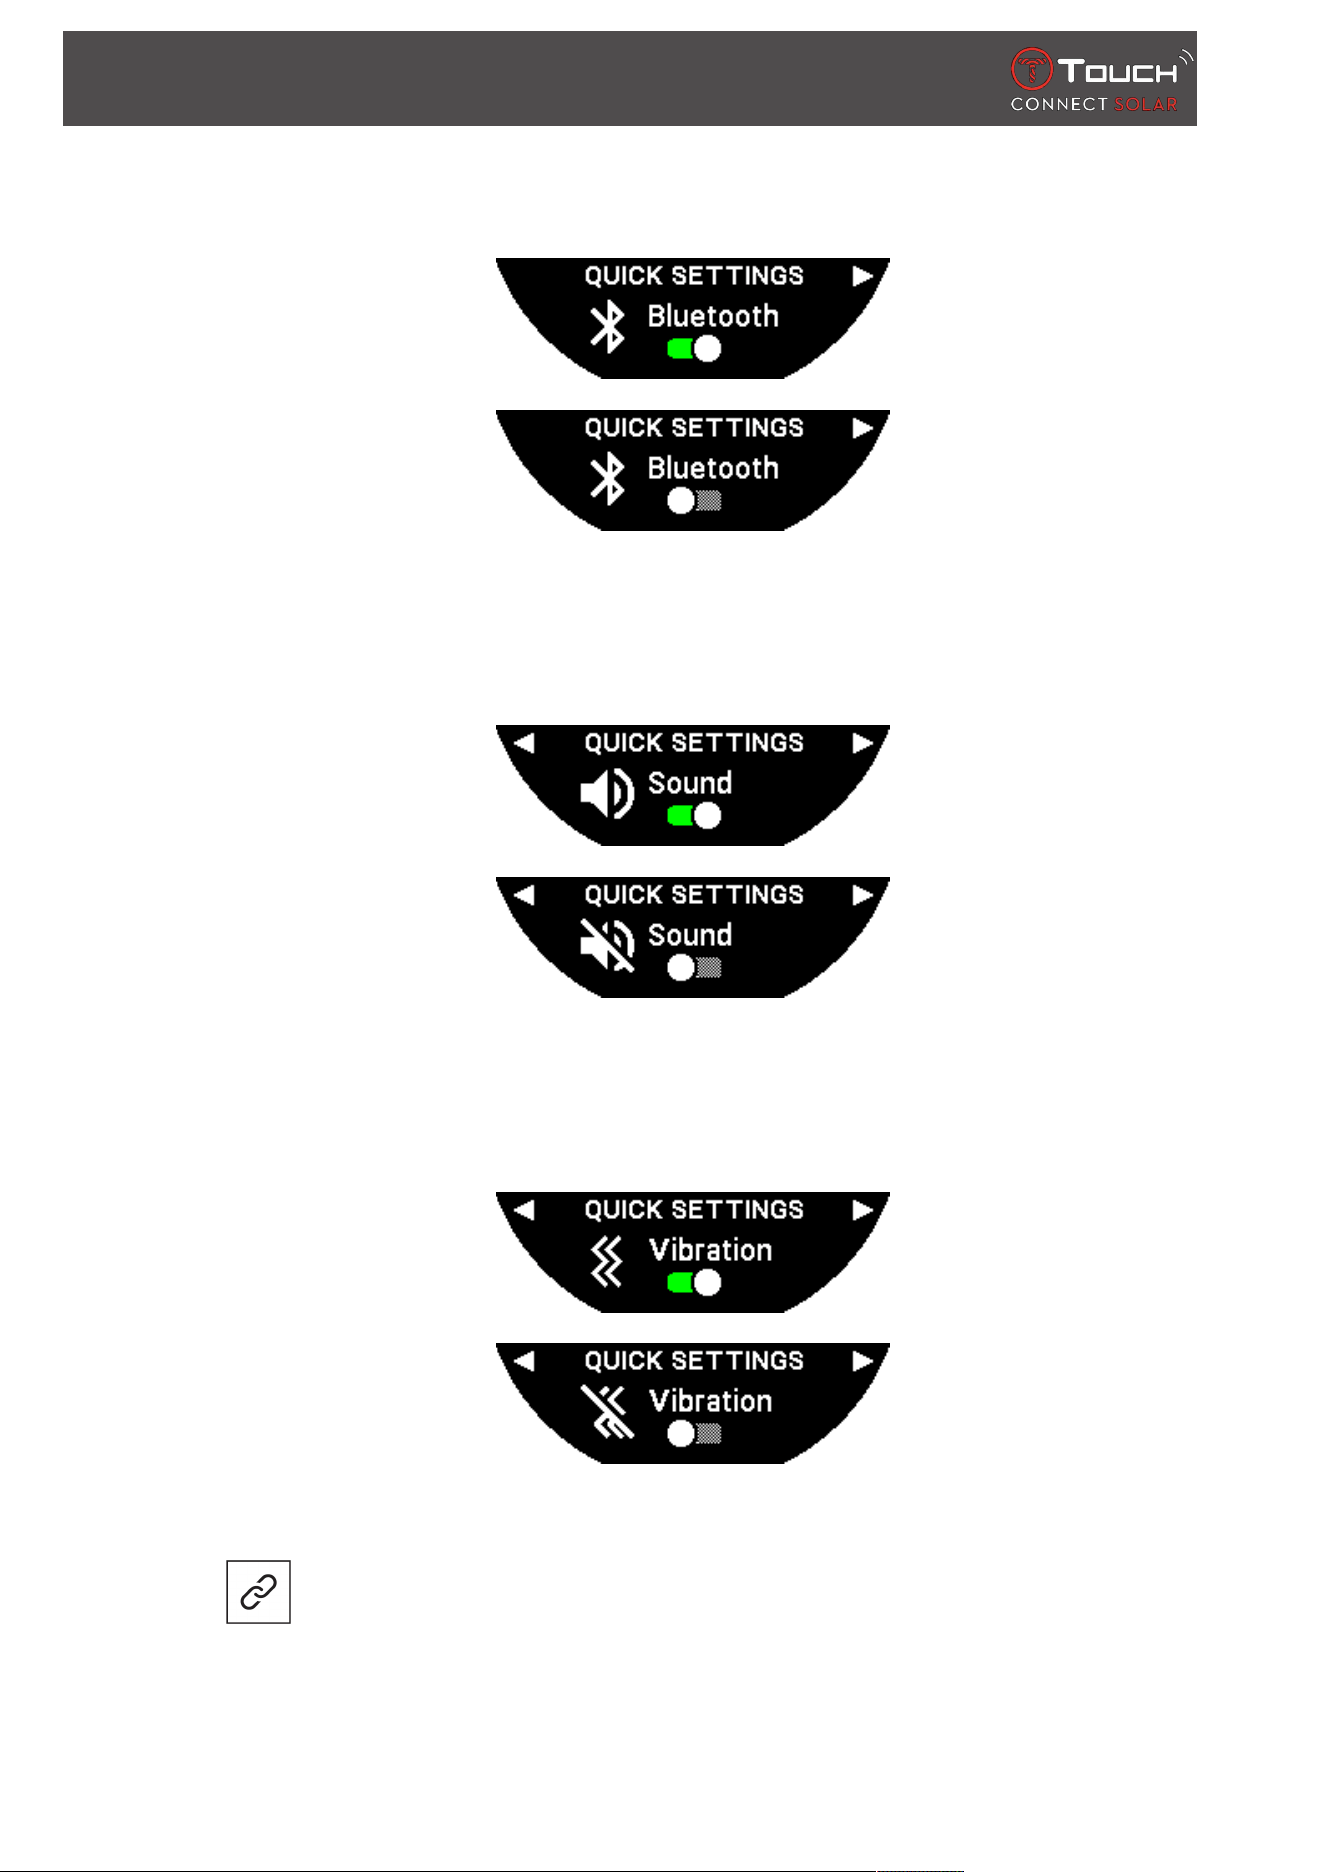
6.1 QUICK SETTINGS
Use quick settings to check some of the watch’s settings quickly.
1. Press the crown to activate or deactivate the following quick settings:
Sound VibrationBluetooth Battery level Solar energy
T-TOUCH
38 / 64 30.01.2023
6.1.1 "Bluetooth" (Quick setting of Bluetooth
®
)
Activation or deactivation of Bluetooth
®
.
Please note: The T-Touch Connect Solar is disconnected from the smartphone.
6.1.2 "Sound" (Quick setting of sound)
The watch’s sound alerts are activated or deactivated.
Please note: Alarm and timer sounds remain active regardless of this setting.
6.1.3 "Vibration" (Quick setting of vibration)
The watch’s vibration alerts are activated or deactivated.
Please note: Alarm and timer vibrations remain active regardless of this setting.
• : in paired mode
When the watch is paired with a smartphone, you can control the watch’s Bluetooth® technology
using additional quick settings.
T-TOUCH
30.01.2023 39 / 64
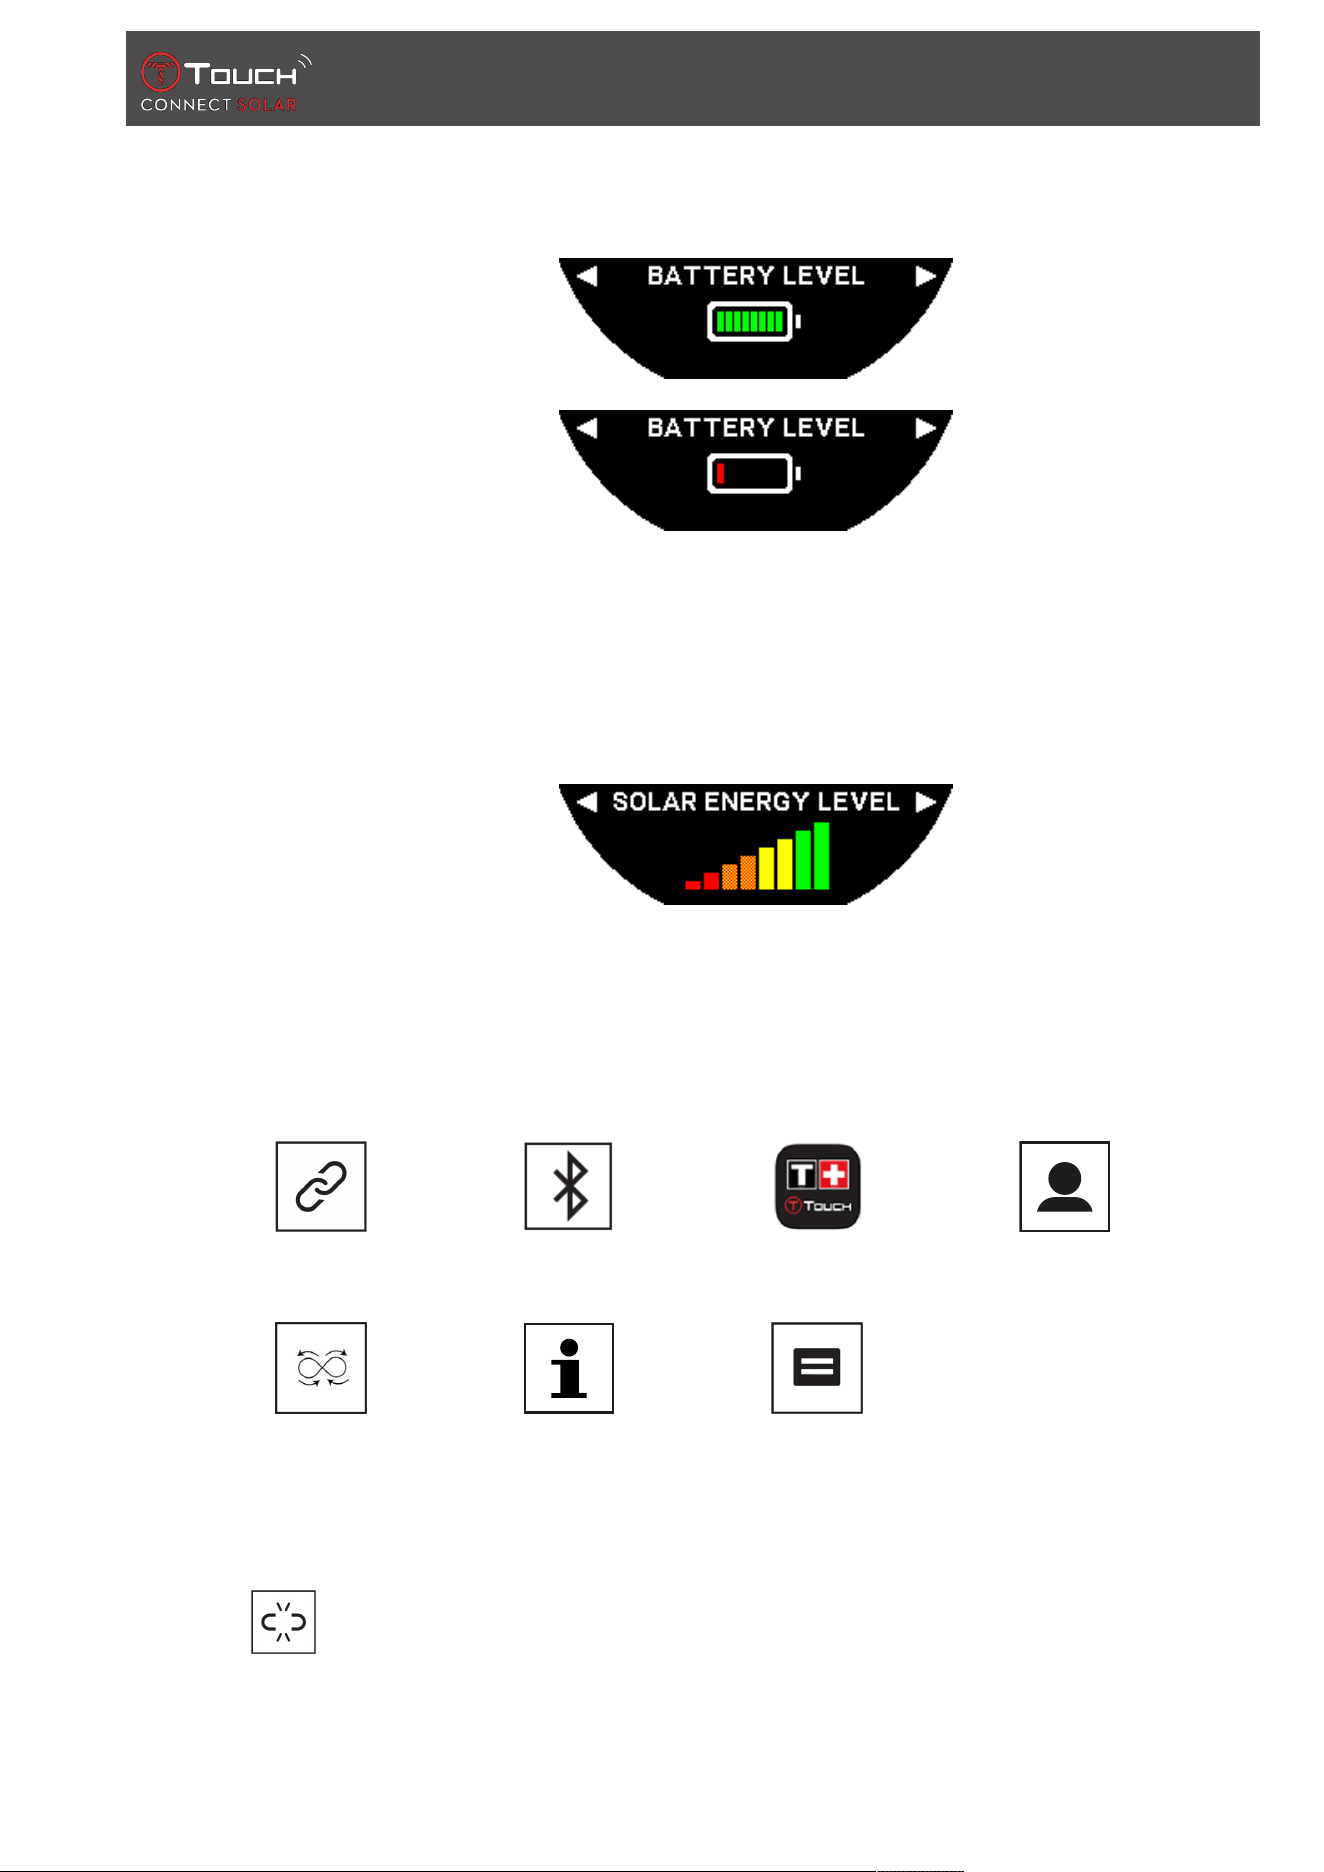
6.1.4 "BATTERY LEVEL"
Indicates the current battery level.
Note: The battery level is represented by coloured bars. When the watch is fully charged, the battery
level is represented by 8 green bars. When the battery is nearly drained, its level is represented by a
red bar.
6.1.5 "SOLAR ENERGY"
Indicates the current solar energy level received by the watch.
Please note: The energy level is represented by coloured bars. The full scale corresponds to exposure
to sunlight.
6.2 WATCH SETTINGS
Pair with phone
Sign in System User profile
Calibration About E-labelling
6.2.1 "Pair with phone"
: available only in unpaired mode
T-TOUCH
40 / 64 30.01.2023
When the watch is operating in unpaired mode, you have the option to pair it with your phone at any
time.
Please note that data stored in the watch will be deleted if you confirm this option.
Please note: It is necessary for the latest version of the Tissot T-Connect app to be installed on your
phone.
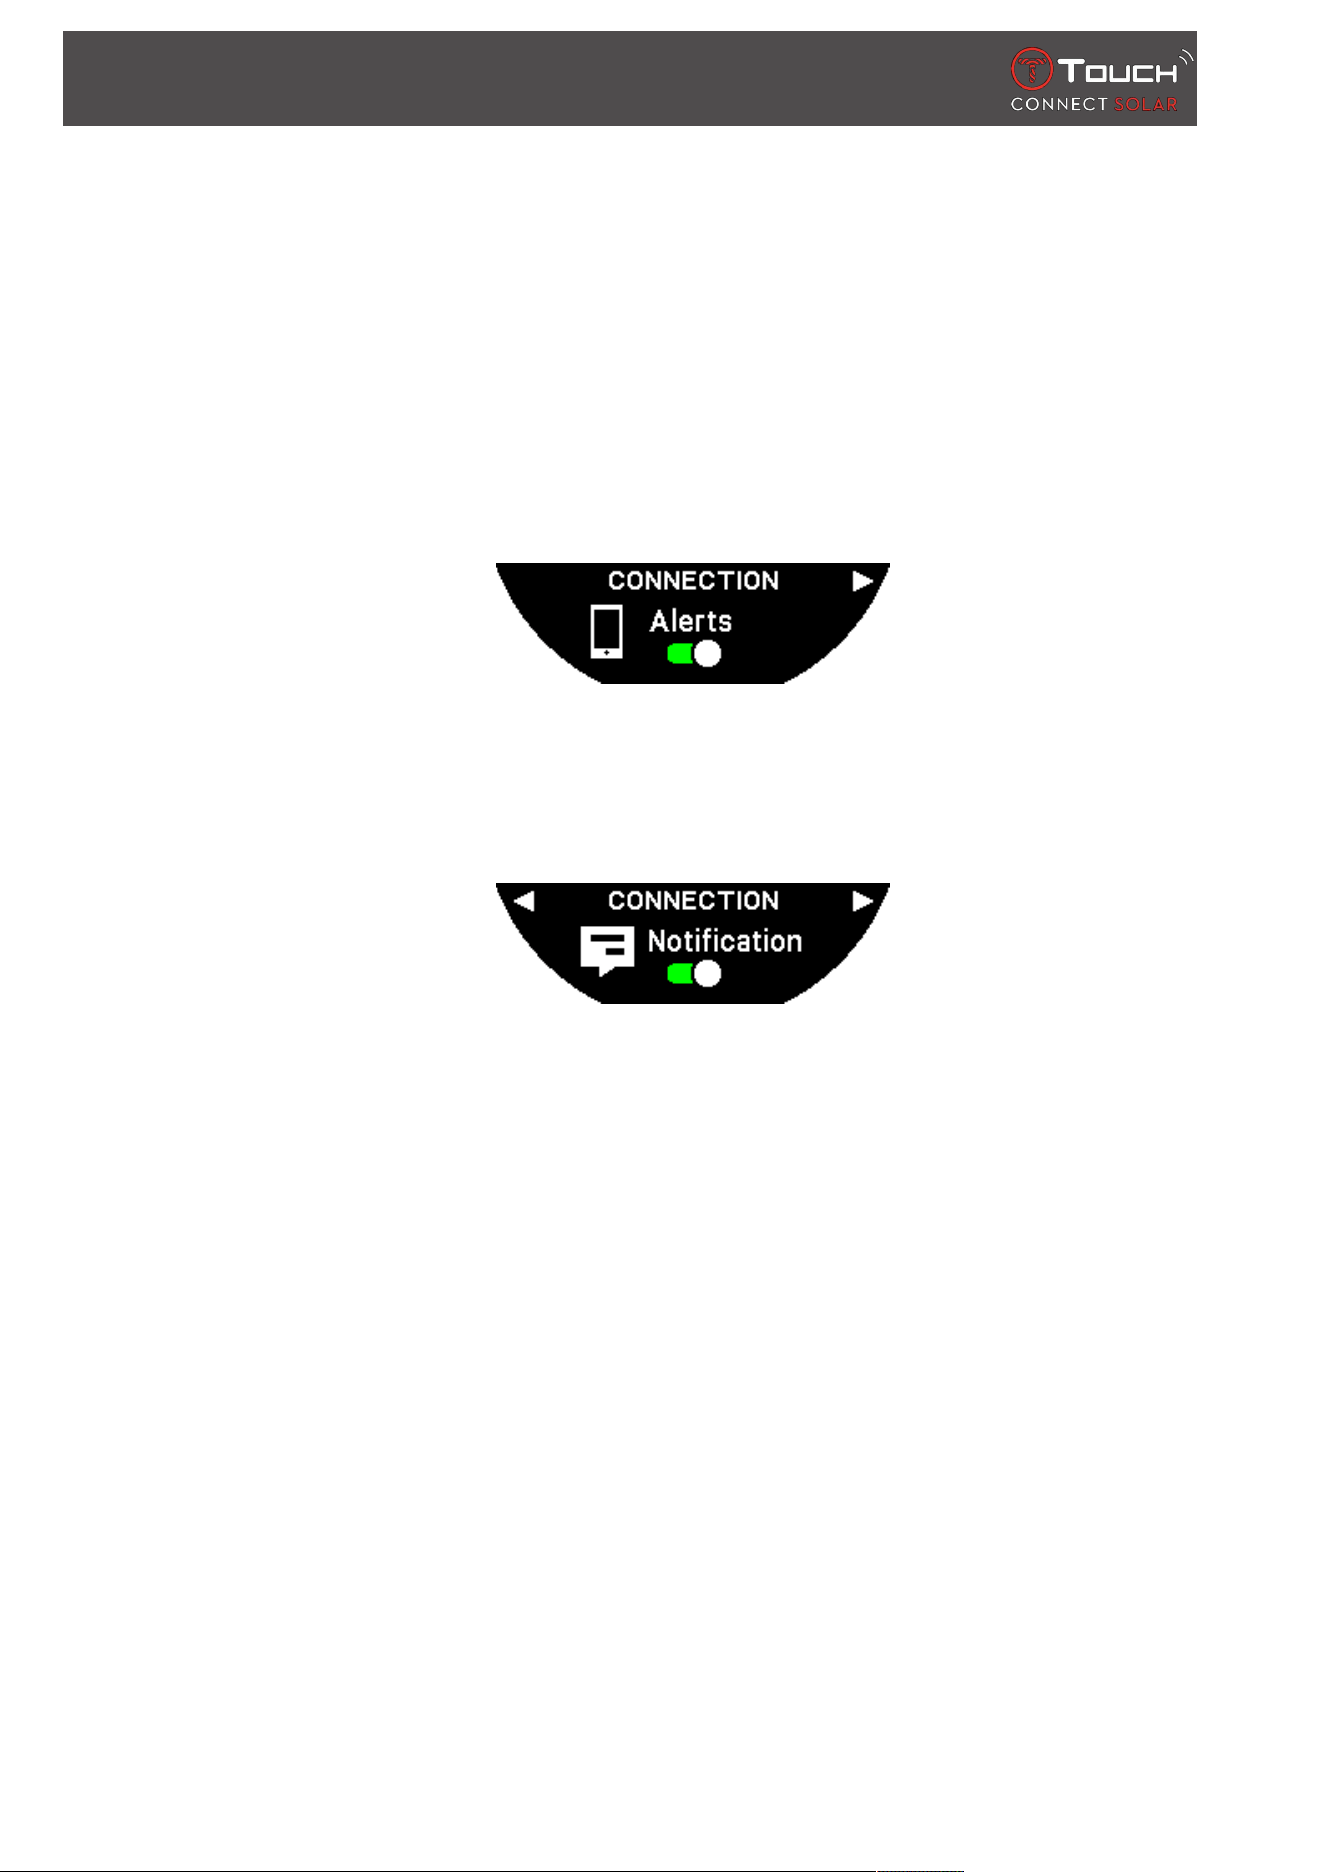
6.2.2 "CONNECTION" (Connection settings)
In this sub-menu, you can adjust the settings for connecting the watch to the phone.
"Alerts" (Connection alerts)
Activation or deactivation of communication alerts.
Please note: If this setting is active, the watch will notify you each time it connects to or disconnects
from the phone.
"Notification"
Activation or deactivation of receipt of notifications from the phone.
Please note: If this setting is active, the watch will receive notifications from the phone.
"Unpair from phone" (Disconnect the watch from the phone)
This action disconnects the watch from your phone and does not allow synchronisation of your data in
the Tissot T-Connect app.
6.2.3 System
In the "System" sub-menu, you can adjust the watch’s system options.
"Language"
In the "Language" sub-menu, you can set your watch’s language. Please refer to the
"[compatibility}58]" chapter to find out which languages your watch supports.
"Time (date and time)"
In the "Time" (Date and time) sub-menu, you can adjust all the watch’s date and time settings, such as
the date and time display format, and the first day of the week.
T-TOUCH
30.01.2023 41 / 64
"Code"
In the "Password" sub-menu, you can manage the watch’s password. When the password is activated,
the watch automatically locks itself when disconnected from the phone or if you press simultaneously
on the "START" and "BACK" push-pieces.
"Sounds"
In the "Sounds" sub-menu, you can set the acoustic and vibration signals for notifications and for
browsing through the watch's menus.
Please note: Alarm and time sounds and vibrations are always active regardless of this parameter.
"Units"
In the "Units" sub-menu, you can adjust all the watch’s units.
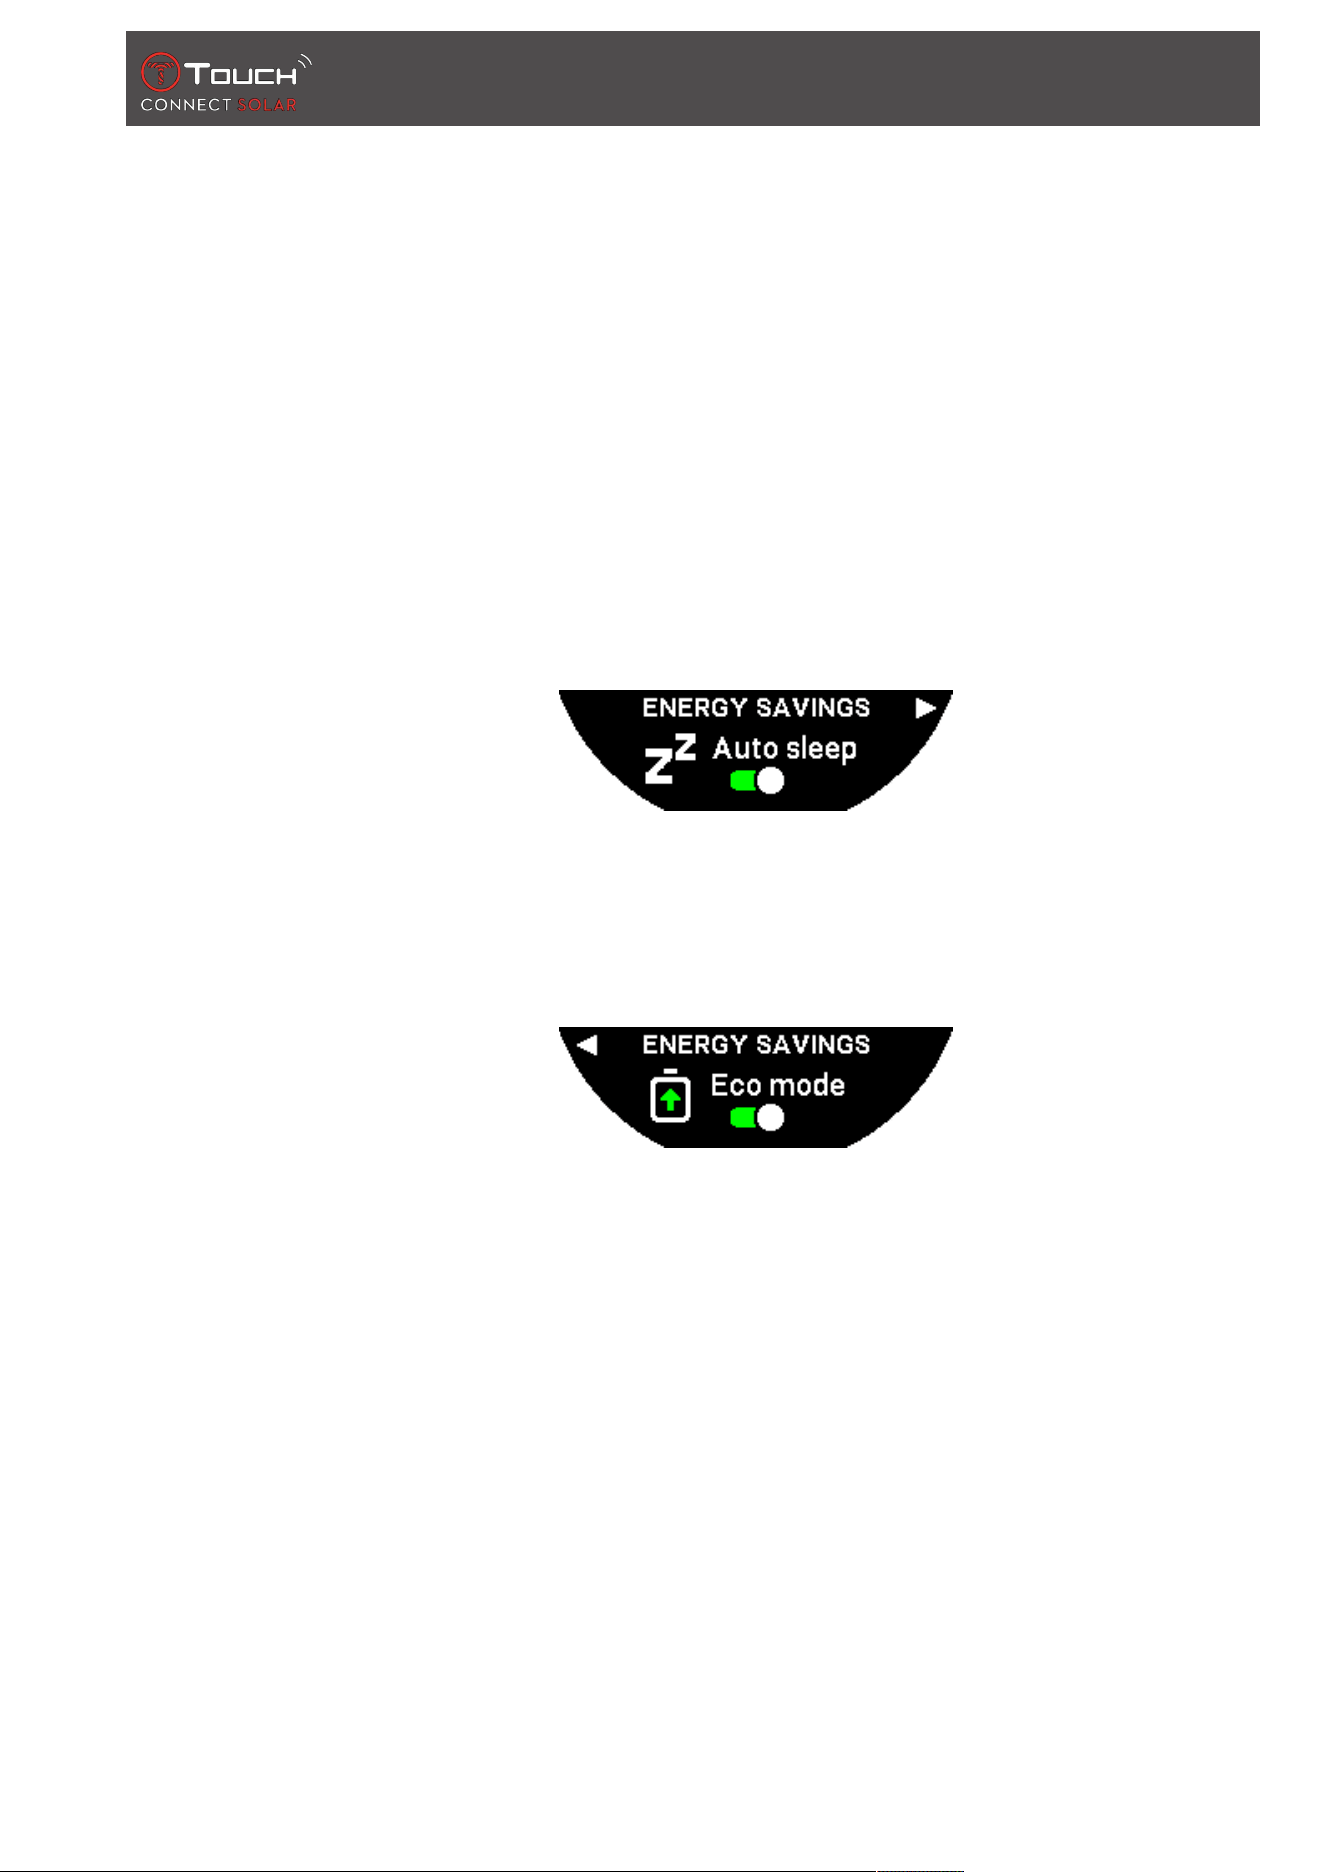
"Energy saving"
The "Energy saving" sub-menu enables you to manage your watch's consumption.
Activation and deactivation of "Auto sleep" mode
Please note: When this mode is activated, the watch automatically enters sleep mode when it has not
been worn for at least 2 hours. When the watch is in sleep mode, the hands are stopped and the
screen, backlighting and Bluetooth® are turned off to save energy.
You can enter this mode manually by selecting "Enter sleep mode."
Activation and deactivation of "Eco mode"
This mode increases battery life by reducing the watch’s performance. For example, the connection
with your phone is slower and vibration and backlighting are deactivated.
Below you will find the complete list of functions which are downgraded to extend battery life:
• The vibration is deactivated
• The buzzer is deactivated, except for alarms and the timer
• Automatic backlighting is deactivated, though manual backlighting is still available
• The altimeter refreshes its altitude every 5 seconds
• The Chrono displays "IN PROGRESS" instead of the current time
T-TOUCH
42 / 64 30.01.2023
"Restore to factory settings"
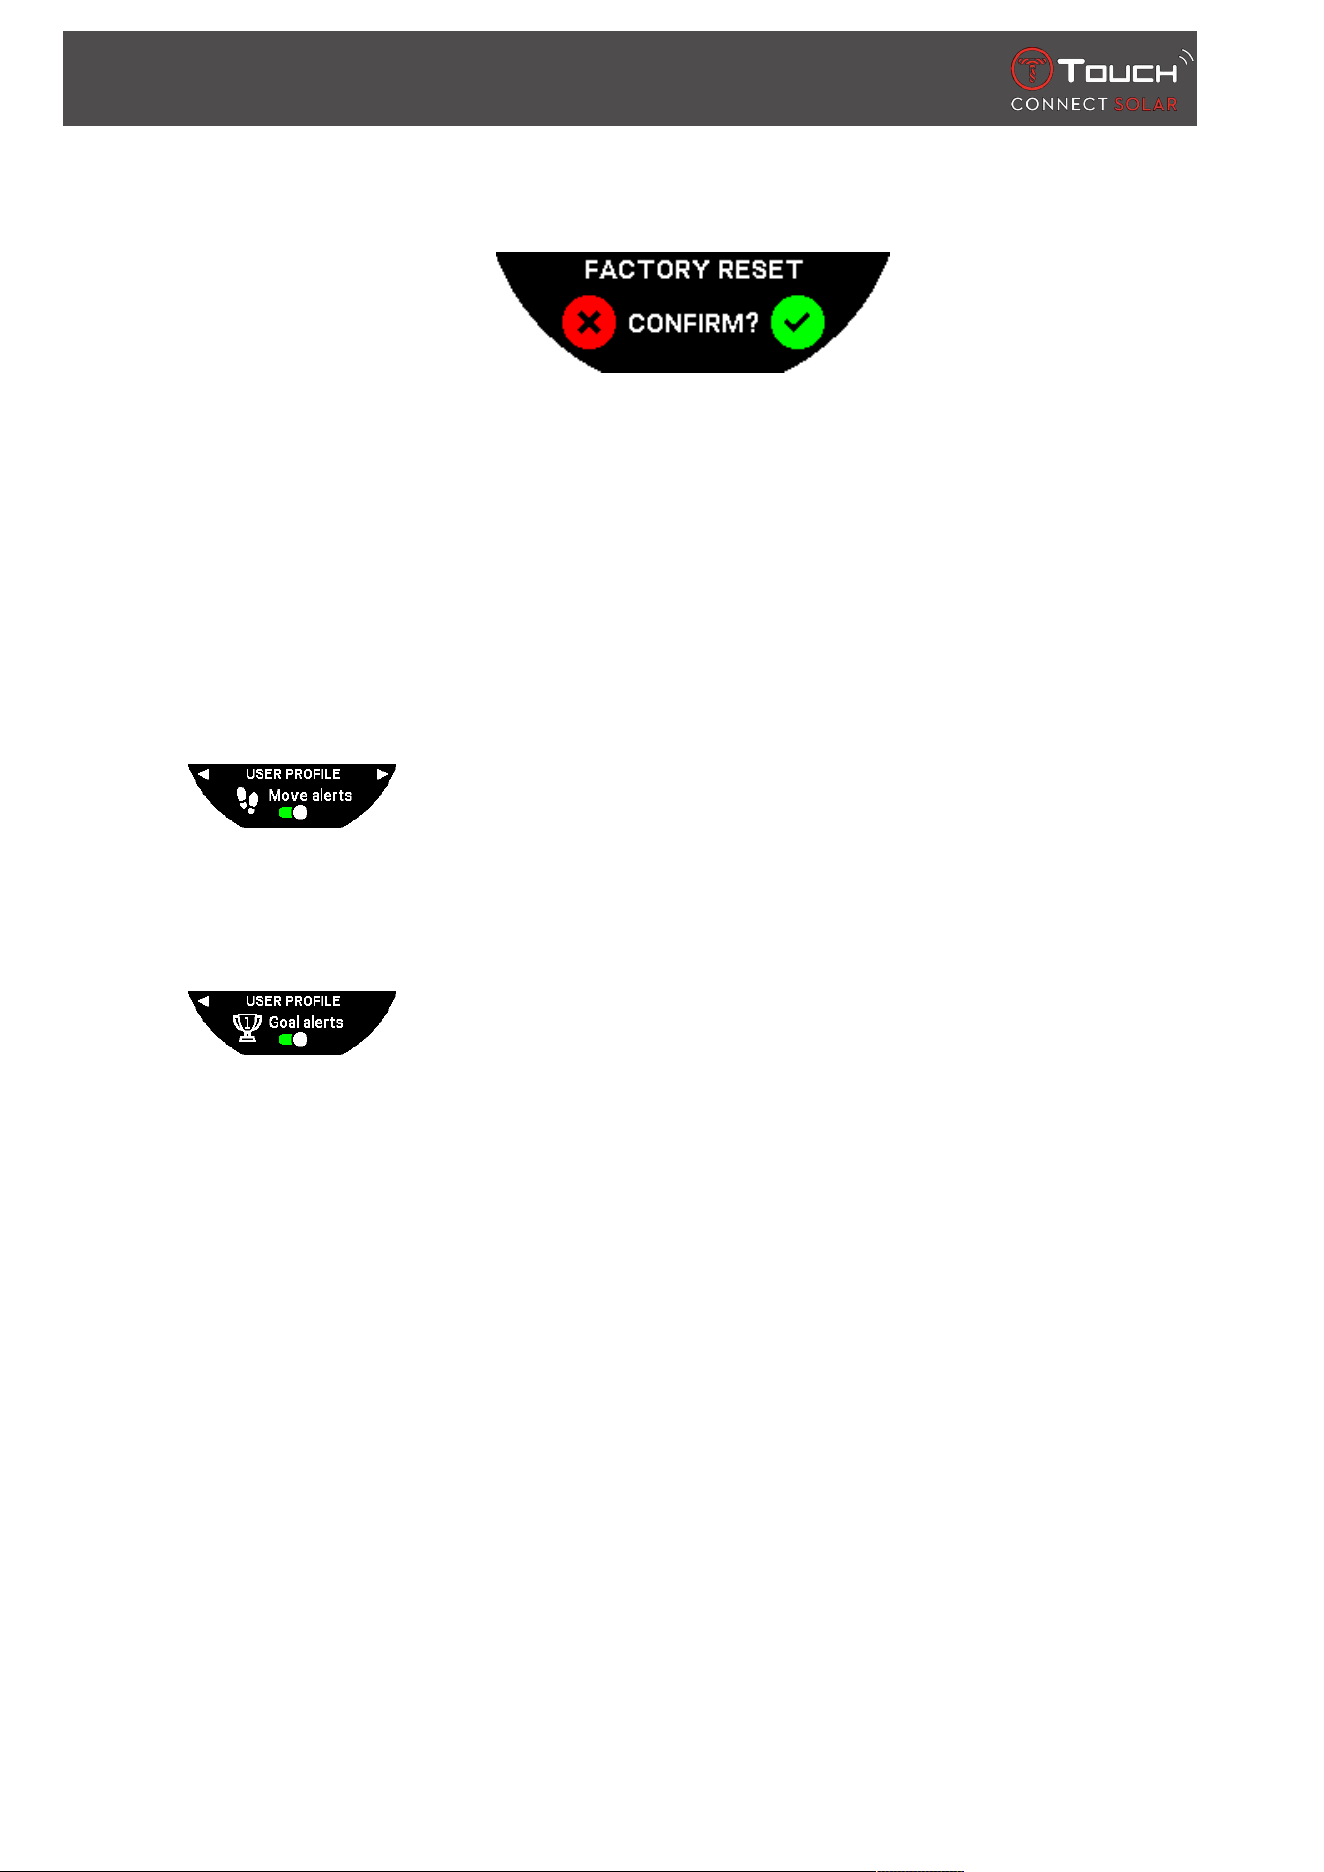
You can restore the watch to its factory settings from this sub-menu.
Please note: If you opt to restore the factory settings, all data not yet synchronised with the Tissot
T‑Connect mobile app will be lost. The connection with your phone will be deleted and you will have
to remove your watch from your phone’s connection settings if you wish to initiate the connection
procedure again.
6.2.4 User profile
In the "User profile" sub-menu, you can change all your user profile details as well as the alert
reception settings.
"Move alerts"
Activation and deactivation of reception of alerts when you are not moving
enough.
Please note: If you have not been moving enough for a period of time, the watch issues an alert
prompting you to move.
"Goal alerts"
Switch alerts on/off notifying you when you reach the goal you have set for a
daily number of steps.
6.2.5 Calibration
In the "Calibration" sub-menu, you can calibrate and adjust all the watch’s sensors and motors.
"Compass"
To maximise compass accuracy, you can adjust the correct magnetic declination value (for place and
date), either automatically or manually. You can also calibrate the compass as explained in the
"NAVIGATION/Compass" chapter.
"Barometer"
To obtain the most accurate barometer readings, you have the option to adjust the hemisphere and
climatic zone based on your geographical location.
"Altimeter"
To obtain the most accurate altimeter readings, you can adjust the hemisphere and climatic zone
based on your geographical location.

T-TOUCH
30.01.2023 43 / 64
"Motors"
When the watch hands are no longer showing the correct time, you can calibrate the motors
automatically from this sub-menu. This synchronisation takes place automatically every night.
6.2.6 About
In the "About" sub-menu, you can obtain full details about the watch.
6.2.7 E-labelling
In the "About" menu, you will find all the information on e-labelling

T-TOUCH
44 / 64 30.01.2023
PAGE LEFT INTENTIONALLY BLANK
TIMING (Timing and Alarm)
30.01.2023 45 / 64
7 TIMING (TIMING AND ALARM)
To access the "TIMING" (Timing and Alarm) functions:
1. Unlock the watch with a long press on START.
2. Press the "TIMING" touch zone.
ð Pressing and turning will give you access to the following functions:
Chrono Timer Alarm
ð Please note: You can go back at any time by using the BACK push-piece.
7.1 CHRONO (Timing)
In "CHRONO" mode, various types of timing are available in addition to basic timing, such as lap
timing and intermediate timing.
Activation of timing functions:
1. Give the "START" push-piece a short press to start the timer
2. Give the "BACK" push-piece a short press to enter an intermediate time (e.g. lap time or arrival
of first runner)
3. Give the "START" push-piece a short press to stop the timer (e.g. end of last lap or arrival of last
runner)
4. Give the "START" push-piece a short press to reset the timer to zero
ð To choose between Lap Timing and Intermediate Timing
TIMING (Timing and Alarm)
46 / 64 30.01.2023
5. Select "Set mode" by pressing and turning . You will now have access to "Set mode", enabling
you to choose between timing types, and "LOGBOOK", for the most recent times recorded.
Lap time Split Log
7.1.1 LAP (Lap timing)
The Lap Timing function is a timer for measuring lap time for a single runner, vehicle, etc. Maximum
measurement limit: 99 days 23 hours 59 mins 59 secs.
7.1.2 SPLIT (Intermediate timing)
The Intermediate Timing function is a timer for measuring the total duration of a race for up to
99runners or vehicles participating in the same timed event. For example: measuring the arrival time
of several runners in a 100-metre race.
7.1.3 LOGBOOK
Regardless of the type of pairing, the "LOGBOOK" function gives you access to the last timing taken, as
well as some statistics specific to the type of timing. To access these details, press and turn .
Please note: The stored data is deleted when you start a new timing from zero.
• Reading stored lap time data:
: in unpaired mode, all times measured by the lap timing function are stored and can be
displayed on the watch in the "LOGBOOK" function, together with statistics of the total race
duration and the fastest, slowest and average lap times.
: in paired mode, you will also find the most recent times recorded on the T-Touch Connect
Solar app. Under the History heading, you will also have access to the most recent timings taken.
• Reading stored intermediate time data:
: in unpaired mode, all timings measured by the intermediate timing function are stored
and can be displayed on the watch in "LOGBOOK" function.
: in paired mode and with the timer reset to zero, you can see the latest timings recorded
on the T-Touch Connect Solar app. Under the History heading, you will also have access to the
most recent timings taken.
7.2 TIMER
The "TIMER" function enables you to start a countdown of up to 23 hours 59 mins 59 secs.
TIMING (Timing and Alarm)
30.01.2023 47 / 64
1. To adjust the countdown duration, press and turn
2. Give the "START" push-piece a short press to confirm
ð An acoustic signal will sound at the end of the countdown
3. Stop the audible signal by pressing the "X" symbol on the left of the MIP screen, or press BACK
4. Restart the timer by pressing the "reload" symbol on the right of the MIP screen, or press
• : in paired mode, the countdown settings can be adjusted and countdown initiated from the
T-Touch Connect Solar app.
7.3 ALARM
The T-Touch Connect Solar watch has an Alarm function. An alarm can recur at various intervals. You
can programme 30 different alarms.
Set
Change, remove
7.3.1 Setting an alarm
• : in unpaired mode, the setting is made from the watch only:
1. Press
ð "ADD ALARM"
2. Press
3. Use to enter the alarm time, then confirm
4. Use to specify the recurrence:
ONCE: the alarm will sound once only
WEEKDAY: the alarm will sound every weekday (Monday to Friday)
EVERY DAY: the alarm will sound every day (Monday to Sunday)
PERSONALIZED: the alarm will sound on the days of the week selected by the user, by pressing and
turning to select the required day(s)
• : in paired mode, alarms can also be set and adjusted directly from the T-Touch Connect
Solar app.
TIMING (Timing and Alarm)
48 / 64 30.01.2023
When the alarm sounds you can either turn it off or set it to snooze, in which case the alarm will be
repeated 5 minutes later. Please note: a maximum of 3 snoozes is possible.
1. To stop the alarm: press "X" or press BACK
2. To snooze the alarm: press "ZZ" or press START
7.3.2 Change, activate or deactivate an alarm
• : in unpaired mode, the setting is made from the watch only:
1. Press
2. Use to select the alarm to be changed
3. Using gives you three options:
ð "Enable"/"Disable"?: To activate or deactivate the alarm
ð "Modify?": To change the alarm
ð "Delete?": To delete one alarm or all of them
• : in paired mode, alarms can also be changed directly from the T-Touch Connect Solar app.
NAVIGATION
30.01.2023 49 / 64
8 NAVIGATION
To access the "NAVIGATION" functions:
1. Unlock the watch with a long press on START
2. Press the "NAVIGATION" touch zone
ð Press to access the compass function with the chosen display mode.
By default, the compass will indicate magnetic north. Other display modes are available, such as
indication of geographic north or azimuthal direction.
1. Pressing a second time while turning it will give you access to the following functions:
Set mode Set azimuth Calibrate Glossary
ð Please note: You can go back at any time by using the BACK push-piece.
8.1 Set mode
Three types of indication are available: "Magn. North" (magnetic north), "True north" (geographic
north) and "Azimuth" (azimuthal direction).
1. Select the desired indication by pressing and turning .
ð Note: In "Azimuth" mode, the T-Touch Connect Solar indicates the azimuthal direction (course)
you need to follow.
NAVIGATION
50 / 64 30.01.2023
8.2 Azimuth
"Set azimuth"
The azimuth is the horizontal angle between the direction of an object (course) and geographic north.
The azimuth is measured from the north in degrees, from 0° to 359°, and can be adjusted by pressing
and turning . When using the compass in azimuth mode, red arrows on the MIP screen show you the
direction in which to turn the watch so that the second hand points in the programmed azimuthal
direction (course).
In azimuth mode, the T-Touch Connect Solar emits an acoustic signal and displays a visual signal
("Go") when the watch’s 6 o’clock‑12 o’clock axis is aligned with the azimuthal direction set. The
direction of the minute hand represents the azimuth direction in relation to geographic north, while
the direction of the hour hand represents geographic north.
8.3 Calibrate
Various factors affect compass function’s precision, and therefore it may be necessary to recalibrate
the compass.
1. For accurate calibration, ensure that you are outdoors and well away from any metallic or
magnetic body.
2. You now have 60 seconds in which to move your wrist fairly rapidly in a figure‑of‑eight
until you hear a little beep or see "Calibrated" displayed on the MIP screen, indicating that
calibration is complete.
3. If "Calibration is unsuccessful" appears on the MIP screen, the calibration operation has failed
and you need to restart it.
ð Note: For accurate calibration, the watch should not be kept horizontal during the
figure‑of‑eight movements, and it is not necessary to execute a perfect figure‑of‑eight, the
most important thing being for the watch to move within its environment.
NAVIGATION
30.01.2023 51 / 64
8.4 Glossary
In Compass mode the watch indicates magnetic north. Other display modes are available, such as
indication of geographic north or azimuthal direction.
On a geographical map of the world, the vertical lines (meridians) converge towards the Geographic
North Pole(gN), thus indicating its direction. The needle on a standard compass, which is often red,
points towards the North Magnetic Pole (mN). The angle (α) between these two directions, gN and
mN, is called the magnetic declination. The value of the magnetic declination thus depends on where
you are on the globe.
In addition, the North Magnetic Pole is constantly shifting. The magnetic declination value thus also
depends on the date. When the correct (for location and date) magnetic declination value is set, either
automatically or manually (see setting procedure under the "T-Touch" heading), the T-Touch Connect
Solar’s minute hand points towards geographic north (gN). When magnetic declination is reset to zero,
the watch points to magnetic north (mN).
Magnetic declination values and dates are shown on topographical maps or can be looked up in
dedicated software packages available online.
For the whole world: www.ngdc.noaa.gov/geomag/calculators/magcalc.shtml
Accuracy: ± 8°
Resolution: 1°

NAVIGATION
52 / 64 30.01.2023
Note 1:
For the most accurate indication of North, hold the watch as nearly horizontal as possible.
Note 2:
The compass function, like any other compass, should not be used near any metallic or magnetic body,
and should preferably be used outdoors. If in doubt, you can recalibrate the compass.
GENERAL INFORMATION
30.01.2023 53 / 64
9 GENERAL INFORMATION
Basic operations
Compatibility
Version and new
features
Reset password
Reset password
GENERAL INFORMATION
54 / 64 30.01.2023
9.1 Basic operations
: Touch zones
: MIP screen
: Short press (less than ½ a second)
: Long press (more than ½ a second)
: Rotation (applies only to the crown)
GENERAL INFORMATION
30.01.2023 55 / 64
START push-piece:
Short press: start or stop the timer / countdown
Long press: lock/ unlock the watch
BACK push-piece:
Short press: cancel a setting/ reject an incoming call/ stop an alarm/
go back to the previous screen or exit a mode
Short press: reset the timer/ countdown
Long press: go back to the main menu
Crown :
Short press: confirm/ enter a sub-menu/ snooze an alarm/ stop the
alarm sounding during an incoming call
Long press: activate screen backlighting
Rotation: navigate / scroll through functions and menus / change a
value
Note:
All touch actions can be performed by using the push-pieces and crown instead.
GENERAL INFORMATION
56 / 64 30.01.2023
To activate the functions on your T-Touch Connect Solar a gentle press on the push-buttons or touch
on the glass is all that is required. Excessive force can damage the watch.
One or more alarms active
Countdown in progress
Timer running
Navigation in progress
Activity in progress
Bluetooth® activated
Watch disconnected
Battery low
Battery charging
Battery charged
Watch locked
Watch locked in secure mode
(password)
Screen available on left
Watch in Eco mode
Unread notifications
Screen available on right
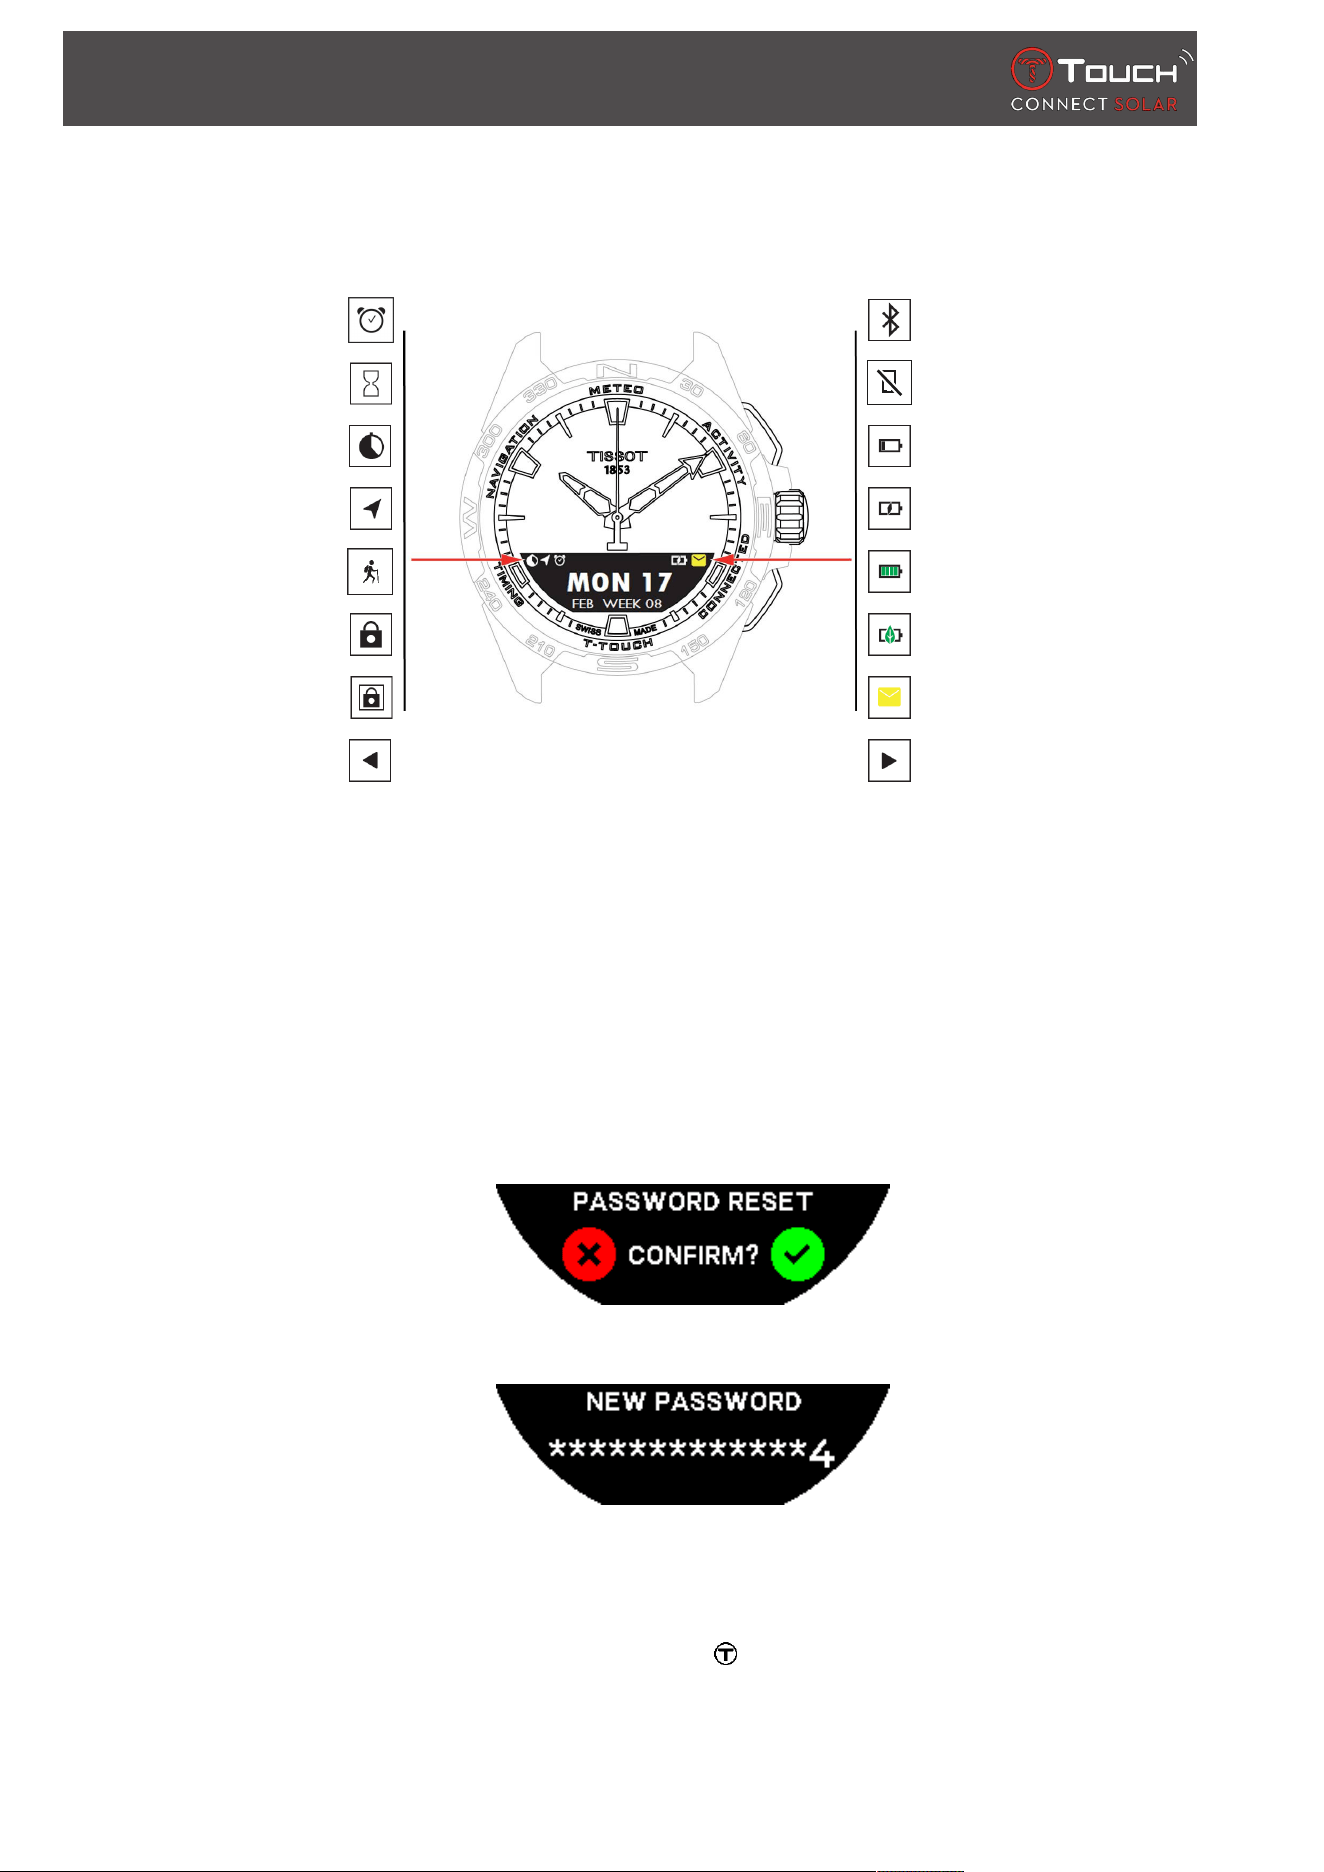
9.2 Reset the password with a smartphone
If you have forgotten the password and the watch is locked, it can be reset using the T-Touch Connect
Solar app asper the procedure below:
ü The watch is paired with and connected to a smartphone.
1. Open the"PARAMETERS" tab using the app.
2. Press the "My watch" menu.
3. Then under "CONFIGURATION", press "Watch password".
4. Press the "RESET PASSWORD" button.
5. On the T-Touch Connect Solar MIP screen, confirm the reset action.
6. Use the touch zones to create your new password.
ð Each zone corresponds to a character: 0, 2, 4, C, 6, 8 and X.
ð NB: minimum 6 digits, maximum 14.
7. When you have entered the code, confirm with .
GENERAL INFORMATION
30.01.2023 57 / 64
ð You can go back to the previous screen at any point by using the BACK push-piece.
8. Repeat and confirm the new password by pressing .
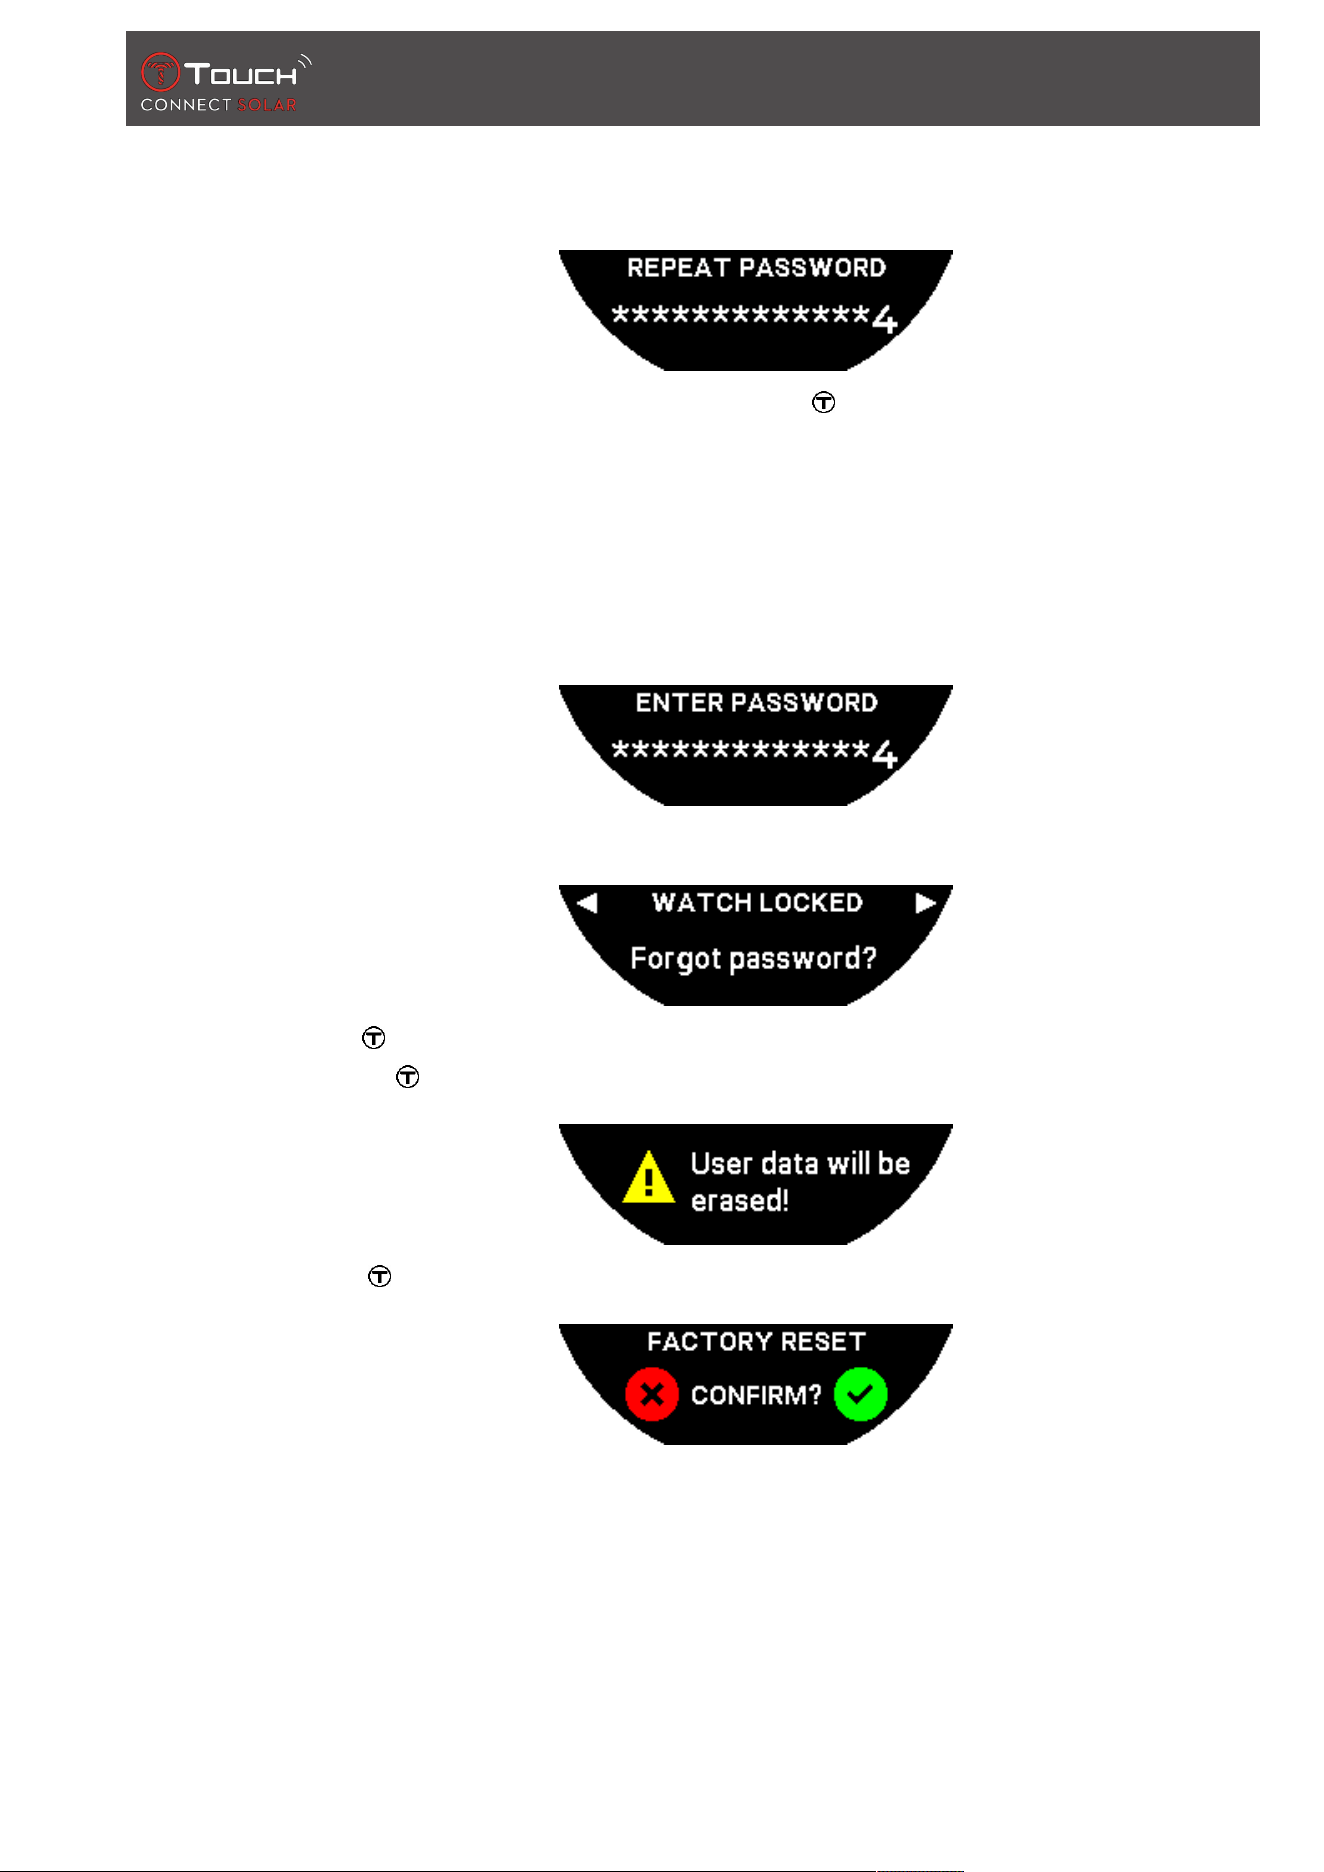
9.3 Resetting the password from the watch
If you have forgotten the password and the watch is locked, it can be reset using the T-Touch Connect
Solar app asper the procedure below:
ü The watch is locked by a password.
1. Press and hold the STARTpush-piece;
ð The T-Touch Connect Solar's MIP screen displays the screen above.
2. Turn to scroll through the "Forgot password?" menu.
3. Confirm to perform the resetting procedure.
4. Press .
5. Confirm to restore the watch to factory settings.
ð The watch will be reset and will restart. It will no longer be recognised in the smartphone's app.
6. Open the"PARAMETERS" tab using the app.
7. Press the "My watch" menu.
8. Then under "CONFIGURATION", press the "REMOVE WATCH" button to delete the watch's
settings from the smartphone.
GENERAL INFORMATION
58 / 64 30.01.2023
ð For iOS, remove the watch from the phone's list of Bluetooth® peripherals.
9. Confirm the pop-ups to finish deleting the settings from the app.
After the watch's settings have been removed from the smartphone T-Touch Connect Solar app, the
pairing procedure between the watch and app needs to be repeated, to enable them to communicate
with each other again, see [Using the T-Touch Connect Solar paired with a smartphone}9].
9.4 Compatibility
The T-Touch Connect Solar is equipped with a Bluetooth® function, and requires the use of a
smartphone meeting the following requirements:
Android requirements Operating system 8.0 or later.
This system version has been available since 21 August 2017. Most devices
manufactured after this date will meet this requirement.
Apple iOS requirements iOS 13 or later.
Compatible with iPhone.
Huawei requirements HarmonyOS 2.0 or later.
Available for some Huawei smartphones from June 2021.
Tissot ensures that its products are compatible with Android mobile devices, the best known and most
widely-used worldwide. Some devices, however, are not compatible with the T-Touch Connect Solar:
• Xiaomi Mi 8 lite international version;
• Blackberry Key2 LE;
• Samsung A21S;
• Sony XZ3;
• Caterpillar S60.
The T-Touch Connect Solar app is supported only in the following countries and languages:
Supported countries Supported character sets
(notifications)
App languages Watch languages
Albania Afrikaans German German
Germany Albanian English English
Andorra German Chinese (simplified) Chinese (simplified)
Australia English Chinese (traditional) Korean
Austria Basque Korean Spanish
Belarus Breton Danish French
Bosnia and Herzegovina Catalan* Spanish Italian
Belgium Chinese (simplified) Finnish Japanese
Bulgaria Korean French Russian
Canada Corsican Italian
Chile Danish* Japanese
China Scots Dutch
Cyprus Spanish Norwegian
Colombia Estonian* Polish

GENERAL INFORMATION
30.01.2023 59 / 64
Korea Faroese Portuguese
Croatia Finnish* Romanian
Denmark French Swedish
United Arab Emirates Scottish Gaelic
Spain Galician
Estonia Welsh*
USA Hungarian*
Finnish Indonesian
France Irish
Gibraltar Irish Gaelic* (traditional spelling)
Greece Icelandic
Greenland Italian
Hong Kong Japanese
Hungary Kurdish
Faroe Islands Leonese
Ireland Lithuanian
Iceland Luxembourgish
Israel Malay
Italy Manx
Japan Dutch*
Jordan Norwegian
Kosovo Occitan
Latvia Polish
Liechtenstein Portuguese
Lithuania Rhaeto-Romanic
Luxembourg Southern Sami
Macao Slovak
North Macedonia Swedish
Malta Swahili
Mexico Tagalog
Moldova Czech
Monaco Walloon
Montenegro
Norway
New Zealand
Netherlands
Poland
Portugal
Czech Republic
Romania

GENERAL INFORMATION
60 / 64 30.01.2023
United Kingdom
San Marino
Serbia
Singapore
Slovakia
Slovenia
Sweden
Switzerland
Taiwan
Turkey
Ukraine
Vatican City
*Please note that some characters may be missing.
9.5 Versions and new features
Version Availability Modifications
6.2 January 2023 BRING ME BACK
The watch guides the user back to their start point, following the waypoints along
the recorded track (in reverse order). The user can choose between two modes for
the "BRING ME BACK" function: Linear or Waypoints.
MULTI-REGION
The watch is now available in Korean.
IMPROVEMENTS
Watch password question removed.
If GNSS data quality is insufficient or unavailable, the watch informs the user it is no
longer saving waypoints.
If there are any missing GNSS data points for any reason, the distance during the
corresponding time interval is calculated based on the step counter.
The hands can be moved out of the display by briefly pressing on the T0 push-
button when the watch is locked.
IMPROVEMENTS AND BUG FIXES
6.1 November 2022 IMPROVEMENTS AND BUG FIXES
GENERAL INFORMATION
30.01.2023 61 / 64
6.0 July 2022 ACTIVITY - GPS LOCATION
You can now register outdoor activities with GPS tracking. Execute the new function
from your watch, and find the route taken in the app.
ACTIVITY - BRING ME BACK
During an activity, the watch guides the user back to the start point, via GPS and the
compass.
ALTIMETER
The watch automatically calibrates the altitude twice per day.
PASSWORD
Addition of watch password resetting procedure either from the app or the watch.
IMPROVEMENTS AND BUG FIXES
5.2 February 2022 IMPROVEMENTS AND BUG FIXES
5.0 November 2021 OUTDOOR TRACKER
Addition of the differential altitude meter: displays the cumulative altitude gains and
losses and average vertical ascent and descent speeds.
NBA
The results of your favourite team's match are shared in real time on your watch.
MULTI-REGION
New translation of the watch into Japanese.
4.1 August 2021 OUTDOOR TRACKER
The user can save their tracking data when carrying out an outdoor activity with the
watch: The activity time, number of steps, number of calories, and current altitude
CYCLING APP NOTIFICATIONS
The third-party cycling app notifications are displayed with a specific icon

GENERAL INFORMATION
62 / 64 30.01.2023
4.0 June 2021 USER INTERFACE IMPROVEMENT
Based on our customers’ feedback:
- Dashboard redesigned with new widgets and merged with the "My watch" page
- After an update, the improvements to the new watch or application version are
shown
- Alarm and time zones modification simplified
- The watch battery level and watch custom time are displayed in the app
NBA WIDGET
- The calendar for your favourite team, with the option of adding a match to your
smartphone calendar
- All standings for the current season (by conference, by division) and the Playoffs
- Team scores and statistics
- At any time, you can decide to follow another team
- The next game and last game are also displayed on your watch
MULTI-REGION
New application translation (Danish, Dutch, Finnish, Norwegian, Polish, Portuguese
and Swedish)
IMPROVEMENTS AND BUG FIXES
Improvements and bug fixes for an enhanced user experience
3.1 Mar. 2021 MULTI-LANGUAGE: The watch is available in English, French, German, Italian,
Spanish or Chinese.
MULTI-REGION: For Chinese residents, the user data are stored in China.
NOTIFICATIONS: The user can scroll through their lines of notifications by turning
the crown.
WATCH: There is a bigger connection range between the watch and phone.
BAROMETER: In addition to the hands, the weather trend is displayed by an
appropriate icon.
2.0 Dec. 2020 TIMER: manage a list of countdowns in the app, and start directly from the app
FIND MY PHONE: a new phone locating function, running on the watch
FIND MY WATCH: a new watch locating function, running on the phone
ENERGY: a detailed display of battery level and solar charge level in the watch's
"QUICK SETTINGS"
NOTIFICATIONS: A new function enabling you to clear all notifications
PAIRING: Simplified pairing procedure: the mobile app detects the closest watch to
establish the link.
SOUND & VIBRATION: Separate sound and vibration setting added for notifications
CONNECTION: improved reconnection after the phone has been out of range for
several hours.
1.1 Sept. 2020 Product basic version

Documents
30.01.2023 63 / 64
10 DOCUMENTS
Documents about this
2 T-Touch Connect Solar - MDE v2.0.0_Master_LEG
2 T-Touch Connect_EU_DoC
2 T-Touch Wireless Charger_EU_DoC

Tissot SA
Customer Service
Chemin des Tourelles 17
CH-2400 Le Locle
Switzerland
Tel.: +41 32 933 31 33
www.tissotwatches.com