
Loading ...
Loading ...
Loading ...
GE Consumer & Industrial
General Electric Company
Louisville, Kentucky 40225
ge.com
© 2005 General Electric Company
Pub. No. 31-30591-1
Dwg. No. 206C1559P135
ND 06J-1977 (9/06)
SPECIFICATIONS SUBJECT TO CHANGE WITHOUT NOTICE
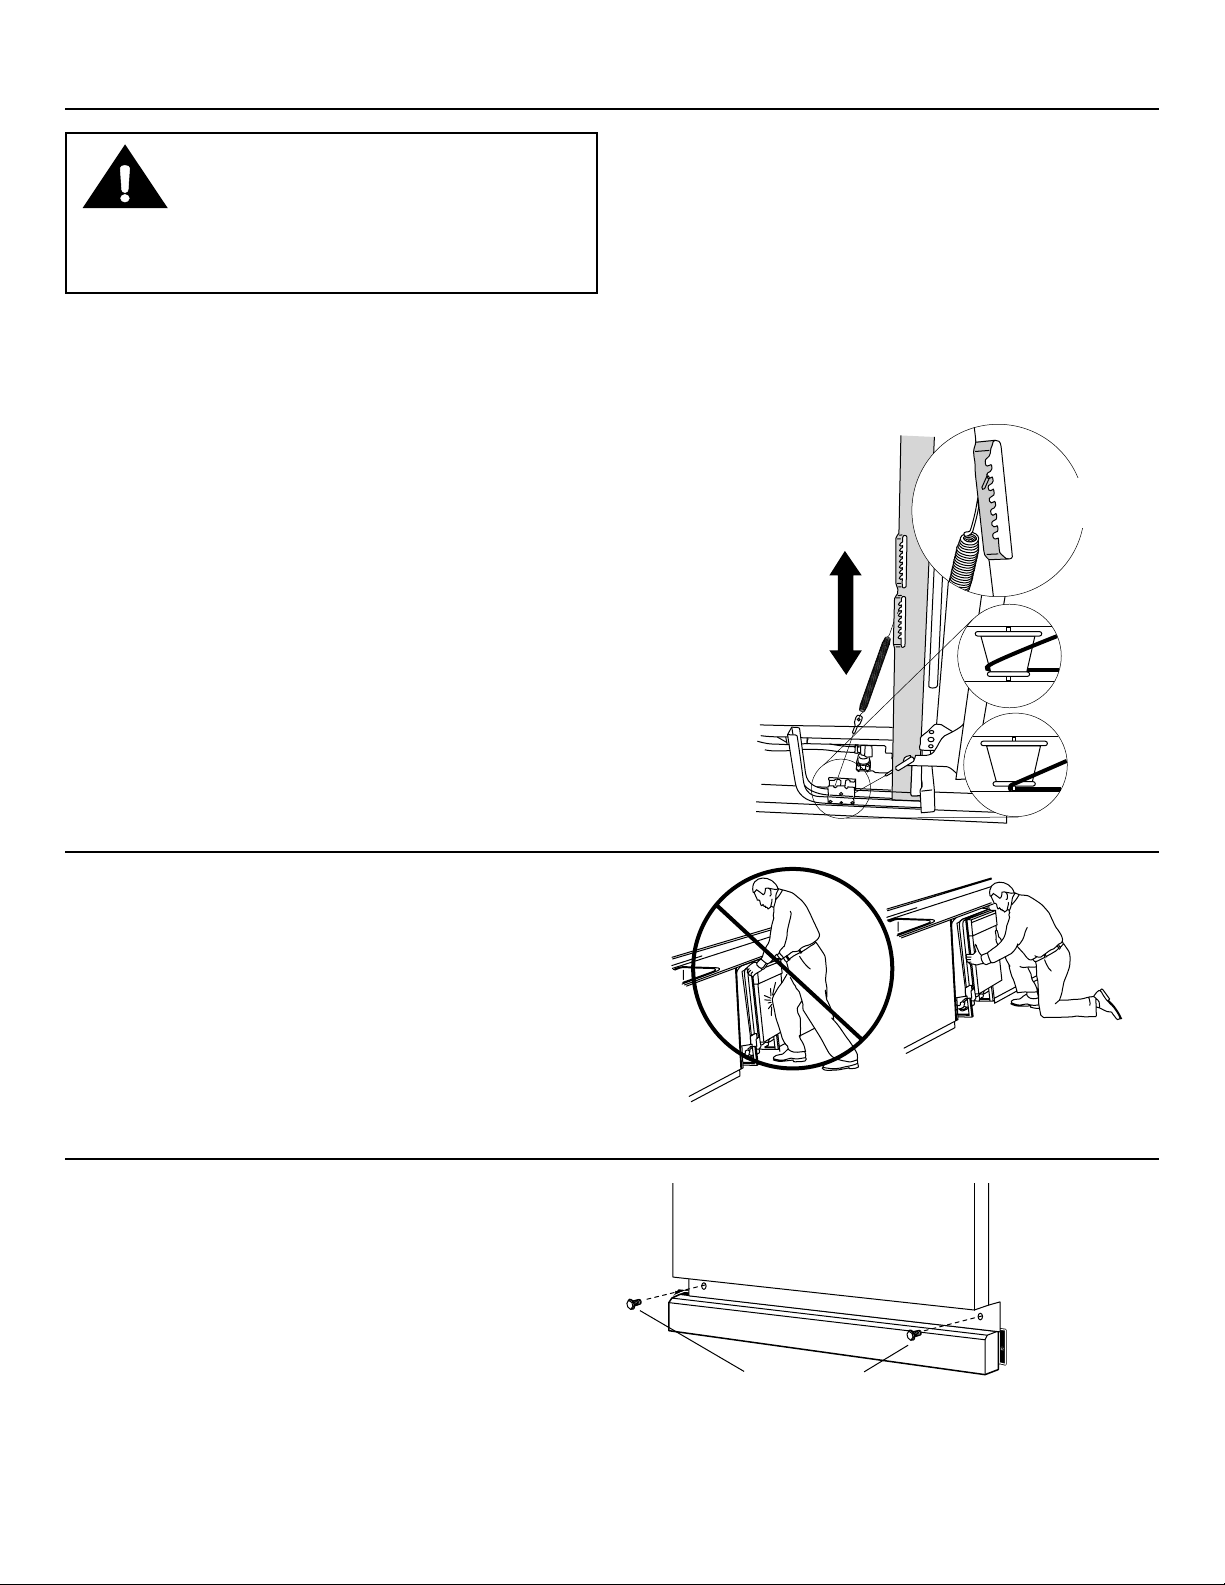
• Increase spring tension if the door dropped by moving the
springs to a higher notch on the dishwasher frame. Refer to
the figure below.
• Decrease tension if the door rose by moving the springs to
a lower notch on the dishwasher frame. Refer to the figure
below.
• Both springs should be adjusted to the same tension setting.
• Recheck door balance and repeat the above procedure if
necessary.
Tip: If door does not open easily or falls too quickly, check
spring cable routing. The cable is held in place by “shoulders”
on the pulley. Check to be
sure cable has not slipped
over the pulley shoulders
and onto
the axle.
• Check door for proper balance. Door is properly balanced if it
gently drops from a 1/2 open position and does not rise from
the full open position.
• If a balance adjustment is required, remove the two
countertop bracket screws or side mount bracket screws if
the counter is granite or similar material. Pull the dishwasher
part way out from the cabinet to expose the door springs.
The front of the dishwasher should extend about 12" from the
face of the cabinet.
• Custom panels weighing more than 3.5 pounds require
heavier door springs than those provided with the
dishwasher. Purchase two WD03X10012 springs and replace
the factory supplied springs with the purchased springs.
Order the springs at GE.COM or call 1-800-626-2002. Refer
to the illustration at right when replacing the springs. Pay
particular attention to the routing of the cables over the
pulleys. Cable routing is important for proper door operation.
Check door balance with the new springs installed as
described above.
• Close and latch the dishwasher door.
STEP 5: POSITION DISHWASHER
• Grasp the sides of the front panel and slide the dishwasher
back into the opening a few inches at a time. Do not push
against the front panel with a knee or the palm of your hand
as damage to the front panel may result.
• As you proceed, pull the drain hose through the opening
under the sink to prevent damage to the drain hose.
• Drive the mounting screws through the countertop brackets
or side mount brackets (if used) into the countertop or
adjacent cabinets to secure the dishwasher.
WARNING:
• All dishwashers can tip when removed from enclosure.
• Injury to persons could result.
• Use caution when opening door.
STEP 4: CHECK AND ADJUST DOOR BALANCE
STEP 6: REPLACE TOEKICK PANEL
• Place the toekick panel against the legs of the dishwasher
and align mounting holes.
• Make sure toekick is against the floor for quiet dishwasher
operation.
• Insert and tighten mounting screws.
• Restore dishwasher power.
05A-1183C
Attachment
Screws
Toekick
Increase
Spring
Tension
Decrease
Spring
Tension
Correct
Incorrect
Insert Hook
Over Bracket
05A-1182N
Do Not Push Against Front Door
Panel With Knee. Damage to The
Door Panel May Occur.
05A-1183T