Loading ...
Part 3 – Assembling the Mount
0502-20121101
2
3
1
Swivel adjustment can be made by simply turning your
projector in the desired direction.
Tilt adjustments can be made by loosening the screws on
both sides of the mount base, moving the projector to the
desired angle, and then re-tightening the screws.
Height adjustments can be made by removing the screws
from the extension pipe, moving the projector to the desired
height, and replacing the screws.
OPERATION AND ADJUSTMENT
Screw the mount body into the ceiling plate as shown (see
Fig. 7). Tighten the set screw at the top of the mount body
using the S3 Allen key (J) from the hardware kit.
1
Place the mount base with
your projector attached onto
the mount hook (see Fig. 10).
Tighten the screws on the
sides of the mount base to
hold it in place.
Part 3 – Assembling the Mount (continued)
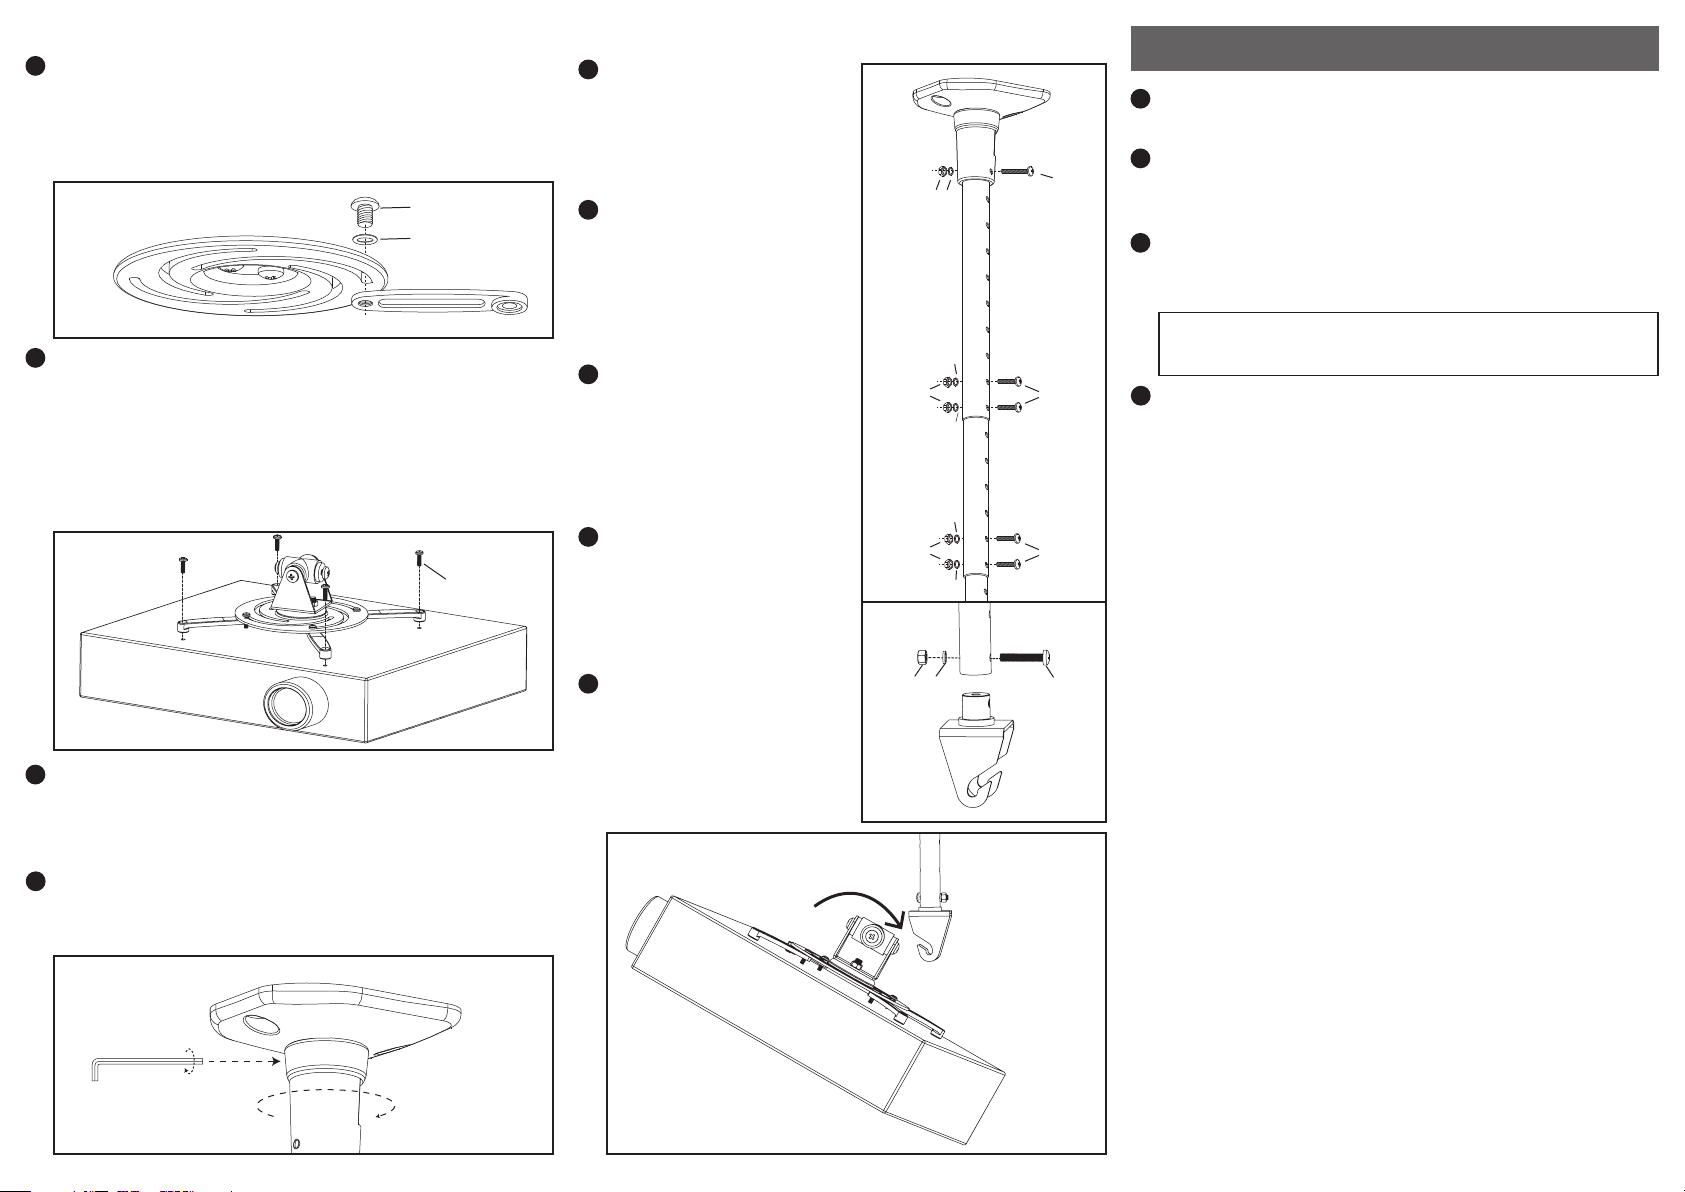
Attach the wider end of the
extension pipe to the mount
body using the M6 x 56 screw
(N) along with an M6 spring
washer (O) and M6 nut (P)
(see Fig. 8) .
Adjust the top and middle
portions of the extension pipe
and secure them using both
M6 x 45 screws (M) from the
hardware kit along with M6
spring washers (O) and M6
nuts (P) (see Fig. 8).
Adjust the middle and bottom
portions of the extension pipe
and secure them using both
M6 x 40 screws (L) from the
hardware kit along with M6
spring washers (O) and M6
nuts (P) (see Fig. 8).
Attach the mount hook to the
bottom of the extension pipe
using the M6 x 35 screw (K)
along with an M6 spring
washer (O) and M6 nut (P)
(see Fig. 9).
2
3
4
5
6
Periodically clean your mount with a dry cloth. Inspect all
screws and hardware at regular intervals to ensure that no
connections have become loose over time. Re-tighten as
needed.
4
1
Attach the mount arms to the mount base as shown using the
M5 x 14 screws (C) and M5 washers (D) from the kit (see Fig. 5).
Attach one mount arm into each slot in the mount base.
Leave the screws loose enough so that the arms can be
moved when attaching the projector.
3
Tighten the M5 x 14 screws (C) used to attach the arms to the
mount base in step 1.
2
Attach your projector to the mount arms as shown (see Fig. 6)
using the appropriate screw from the hardware kit (E, F, G, or
H). If you are using M4 screws (E or F), you will also need to use
the M4 washers (I).
NOTE: If you cannot find a screw from the provided hardware
kit that fits, consult the manufacturer of your display for the
proper size.
Fig. 5
IMPORTANT! For safety, all bolts provided in the hardware
kit must be used at all times.
Part 2 – Attaching the Projector to the Mount
Fig. 6
Fig. 9
Fig. 7
Fig. 10
N
P
O
L
O
P
O
M
O
P
O
Fig. 8
P O
K
E, F, G or H
C
D