1 .Before installation, please check the camera's normal function, and make sure you are using a high speed Micro SD card (speed Class 10 or above.),and format the card in the camera menu before recording.
2. Mount the camera over the original rearview mirror and use the included rubber rings to fix it, make sure the camera is in place and fasten.
3. Adjust the mirror angle according to your driving position, make sure the mirror is right in place and the view is clear.
4. Adjust the lens angle of the camera, make sure you get best coverage over the hood and the road ahead, so you can record what happens.
5. Connect the power to the camera and the cigarette lighter, hide the rest of the cable in the gap of the Interior trim board.
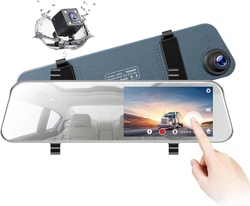
6. The rear camera should be installed above the number plate, screw pad upward, connect the red power cable to the reverse lamp wire positive lead.
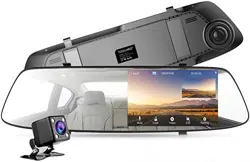
7. Route the camera cable to the front of the car, and connect the rear camera to the main device. There are 2 pictures for reference.
8.Start the engine and have a test run.
Setting Menu and Featured Functions
1. Return to Main Interface
2. Memory Card Status
3. Video Resolution
4. Recording Time
5. Power Status
6. Rearview Camera
7. Mute Audio Recording.
8. Manual Lock
9. Start/Stop Recording
10. Picture in Picture Mode Switch
11. Setting Menu
Video Recording Menu:
Resolution: Adjust recording video resolution, 1080P/ 720P/VGA available
Loop Recording: This function allows you to set video file length to 1/2/3minutes, Select a value to activate loop recording, so when storage fills up, it will automatically loop back to the earliest file and record over it.
Enhanced Night Vision: turn on to optimize video quality with wider light range and image details.
Exposure: Adjust exposure value to adjust the brightness of the video.
Date Stamp:Enable/Disable the date and time marks in video files.
Gravity Sensing:G-sensor will detect significant or sudde shock and movement then automatically locks current recording from loop recording, Low/medium/High sensitivity available.
Parking Monitor: It’s used to protect your car after parking, with this function on, after you stop the car and the camera turns off, it stays standby, when camera detects shacking, it will automatically turn on and take a short video, then shut down automatically.
Auto Power Off: Set the time for the camera to automatically power to save energy, after the camera is idle for set time, it will power off.
Language : English/French/ Spanish/ German/ Italian/ Russia/Japanese available.
Frequency: Set light frequency to 50Hz or 60Hz, and press OK.
Format: Format the Micro SD card.
Screen Saver: Set the time to automatically turn off the LCD display after no operation.
Off Screen Clock: Turn ON/OFF time display after screen saver is activated.
Date/Time: Change the time and date by using the UP and DOWN button, then press OK to confirm.
Default Setting: Reset all settings back to factory default.
Version: Check firmware version.
Photo Mode Interface and Setting Menu
1. Return to Main Interface
2. Memory Card Status
3. Photo Resolution
4. Remaining Storage
5. Power Status
6. Rearview Camera Switch
7. Take Photo
8. Setting Menu
Resolution:Set the photo resolution, Up to 3 Mega Pixels available.
Quality:Defines the quality of image you capture, Fine / Normal / Economy available.