Loading ...
Loading ...
Loading ...
Rear Suspension Adjustments
146 Adjustments
Rear Suspension Adjustments
On-Road Use
only
The rear suspension can be adjusted for the rider’s
weight and riding conditions by changing the
rebound and compression damping.
Off-Road Use
only
The rear suspension can be adjusted for the rider’s
weight and riding conditions by changing the
spring pre-load and the rebound and compression
damping.
The rear suspension assembly includes a damper
unit that contains high pressure nitrogen gas. Do
not attempt to disassemble, service, or dispose of
the damper; see your dealer. The instructions
found in this owner’s manual are limited to
adjustments of the shock assembly only.
Puncture or exposure to flame may also result in an
explosion, causing serious injury.
Service or disposal should only be done by your
dealer or a qualified mechanic, equipped with the
proper tools, safety equipment and an official
Honda Service Manual.
Off-Road Use
only
If your motorcycle is new, put enough part-throttle
break-in time (about 1 hour) on it to ensure that the
suspension has worked in.
Pre-load should be adjusted when the engine is
cold because it is necessary to remove the muffler.
An optional pin spanner is available for turning the
shock spring lock nut and adjusting nut to adjust
spring pre-load.
1. Place your motorcycle on an optional
workstand or equivalent support with the rear
wheel off the ground.
2. Remove the subframe (page 52).
3. Check that the spring pre-load is adjusted to
the standard length. Adjust as necessary by
loosening the shock spring lock nut (1) and
turning the adjusting nut (2).
Each complete turn of the adjusting nut
changes the spring length by 0.06 in (1.5 mm).
After adjustment, hold the adjusting nut and
tighten the shock spring lock nut to the
specified torque:
32 lbf·ft (44 N·m, 4.5 kgf·m)
Refer to the following pages for the installation
procedure of the removed parts:
• air cleaner housing and air cleaner connecting
tube: page 58 (Cylinder Head Installation)
• subframe: page 55
To increase spring pre-load
Loosen the shock spring lock nut with the optional
pin spanners (3) and turn the adjusting nut to
shorten the spring length (4). Do not shorten to less
than:
8.88 in (225.5 mm)
To decrease spring pre-load
Loosen the shock spring lock nut with the optional
pin spanners (3) and turn the adjusting nut to
increase the spring length (4). Do not increase to
more than:
9.41 in (239.0 mm)
Each turn of the adjusting nut changes spring
length and spring pre-load. One turn equals: spring
length/spring pre-load:
Standard: 0.06 in (1.5 mm)/18 lbf (78 N)
Pin spanners should be used for turning the shock
spring lock nut and adjusting nut. See page 190 for
optional pin spanners.
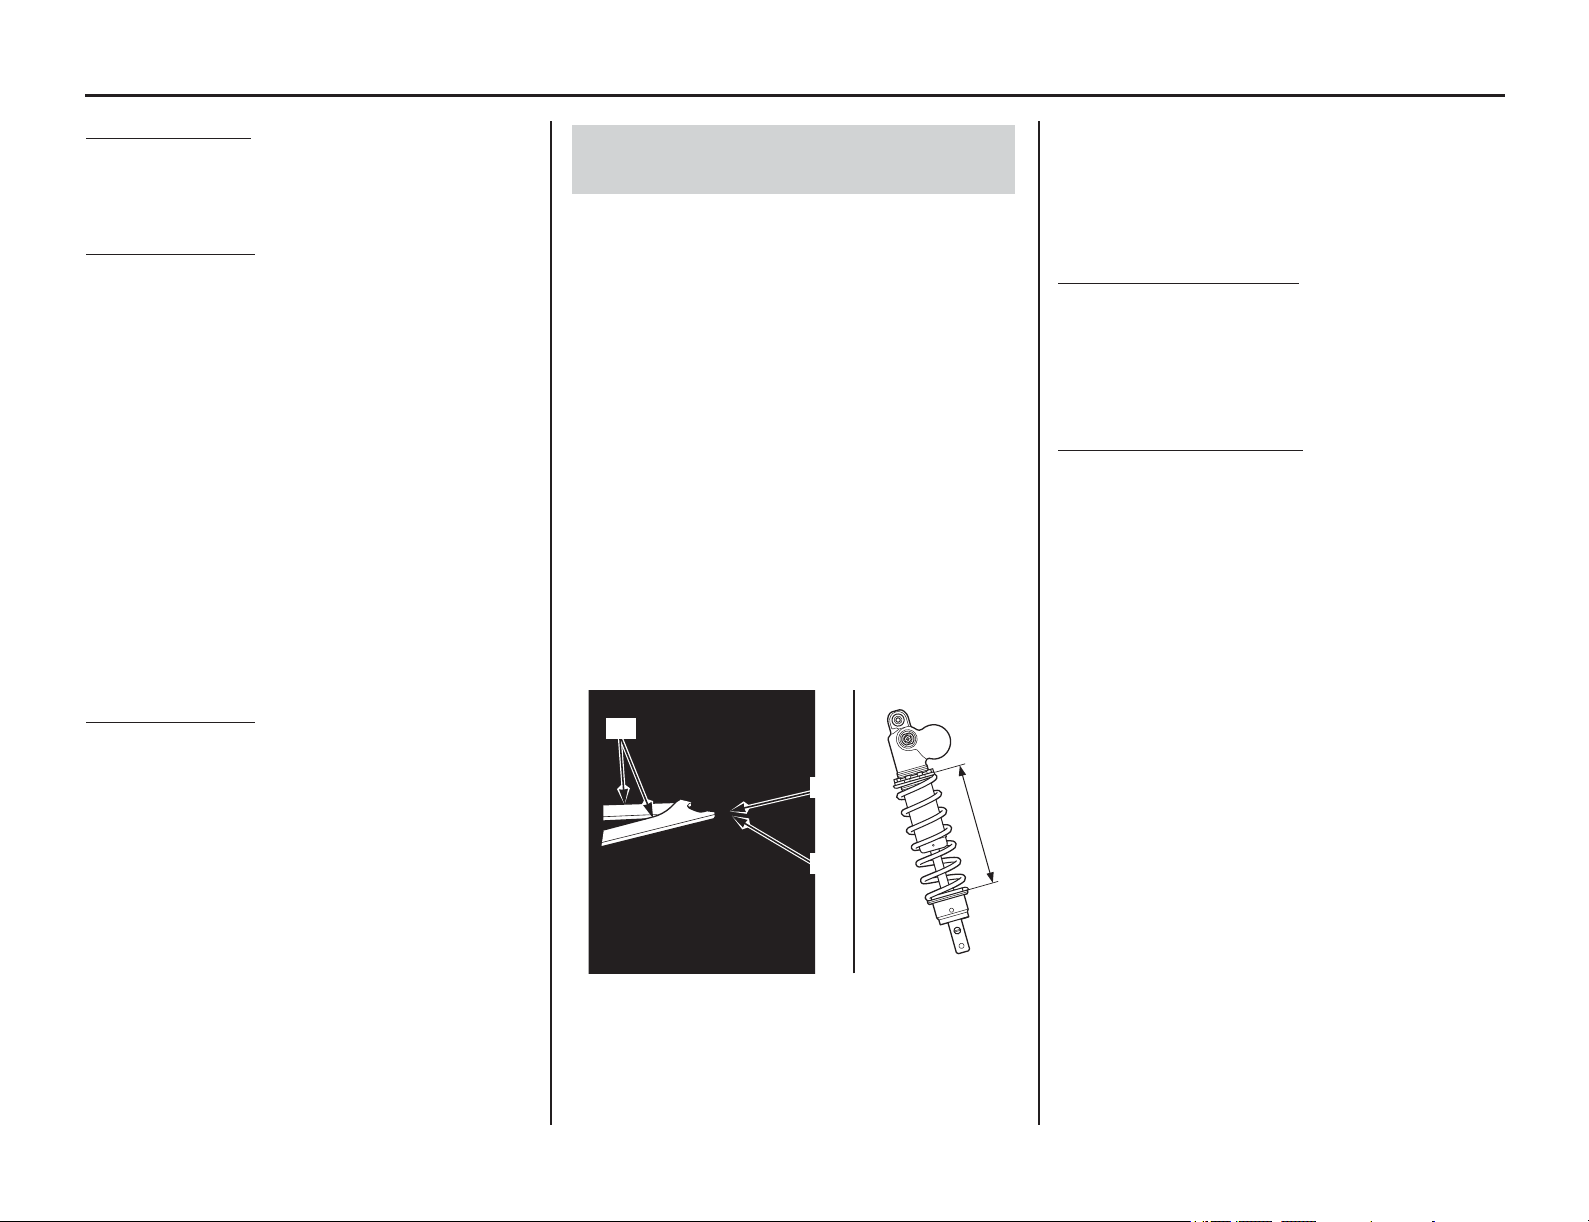
Spring pre-load length
Rear Suspension Spring Pre-Load
(Off-Road Use Only)
(1) shock spring lock nut (3) pin spanners
(2) adjusting nut (4) spring length
(2)
(4)
(1)
(3)
Standard: 9.13 in (232.0 mm)
Max. : 9.41 in (239.0 mm)
Min. : 8.88 in (225.5 mm)
Loading ...
Loading ...
Loading ...