Loading ...
Loading ...
Loading ...
Please read ALL instructions before installing. Two people are
recommended to install this product. If a new electrical outlet
is required, have the outlet installed by a qualified electrician
before installing unit. See#5 in Preliminary Instructions
following.
Preliminary instructions
Do the following before starting to install unit. See illustrations
below.
with this air conditioner are made to install in a wooden
Check dimensions of your unit to determine model type:
1. Check window opening size - the mounting parts furnished
sill double-hung window. The standard parts are for
window dimensions listed above. Open sash to a minimum
of 19"(483mm). (FIG. 1)
2. Check condition of window - all wood parts of window
must be in good shape and able to firmly hold the needed
screws.If not, make repairs before installing unit.
3. Check your storm windows - if your storm window
frame does not allow the clearance required, correct by
adding a piece of wood as shown in FIG.2, or by removing
storm window while room air conditioner is being installed.
(continued)
Unit Height:
Unit Width:
Min. Window Opening:
Min. Window Width:
Max. Window Width:
17.5/8"
23
1
/
2
"
18
1
/
2
"
26
1
/
2
"
40
1
/
2
"
FIG. 1
FIG. 2
SASH
19" MIN
1/2" MIN
STORM WINDOW FRAME OR
OTHER OBSTRUCTION
SASH
1/2" MIN
19" MIN
STORM WINDOW FRAME OR
OTHER OBSTRUCTION
1 1/2" MIN
BOARD THICKNESS AS
REQUIRED, ALONG
ENTIRE STOOL, FASTEN
WITH TWO NAILS OR
SCREWS.
SEAL-BOTTOM RAIL TO UNIT
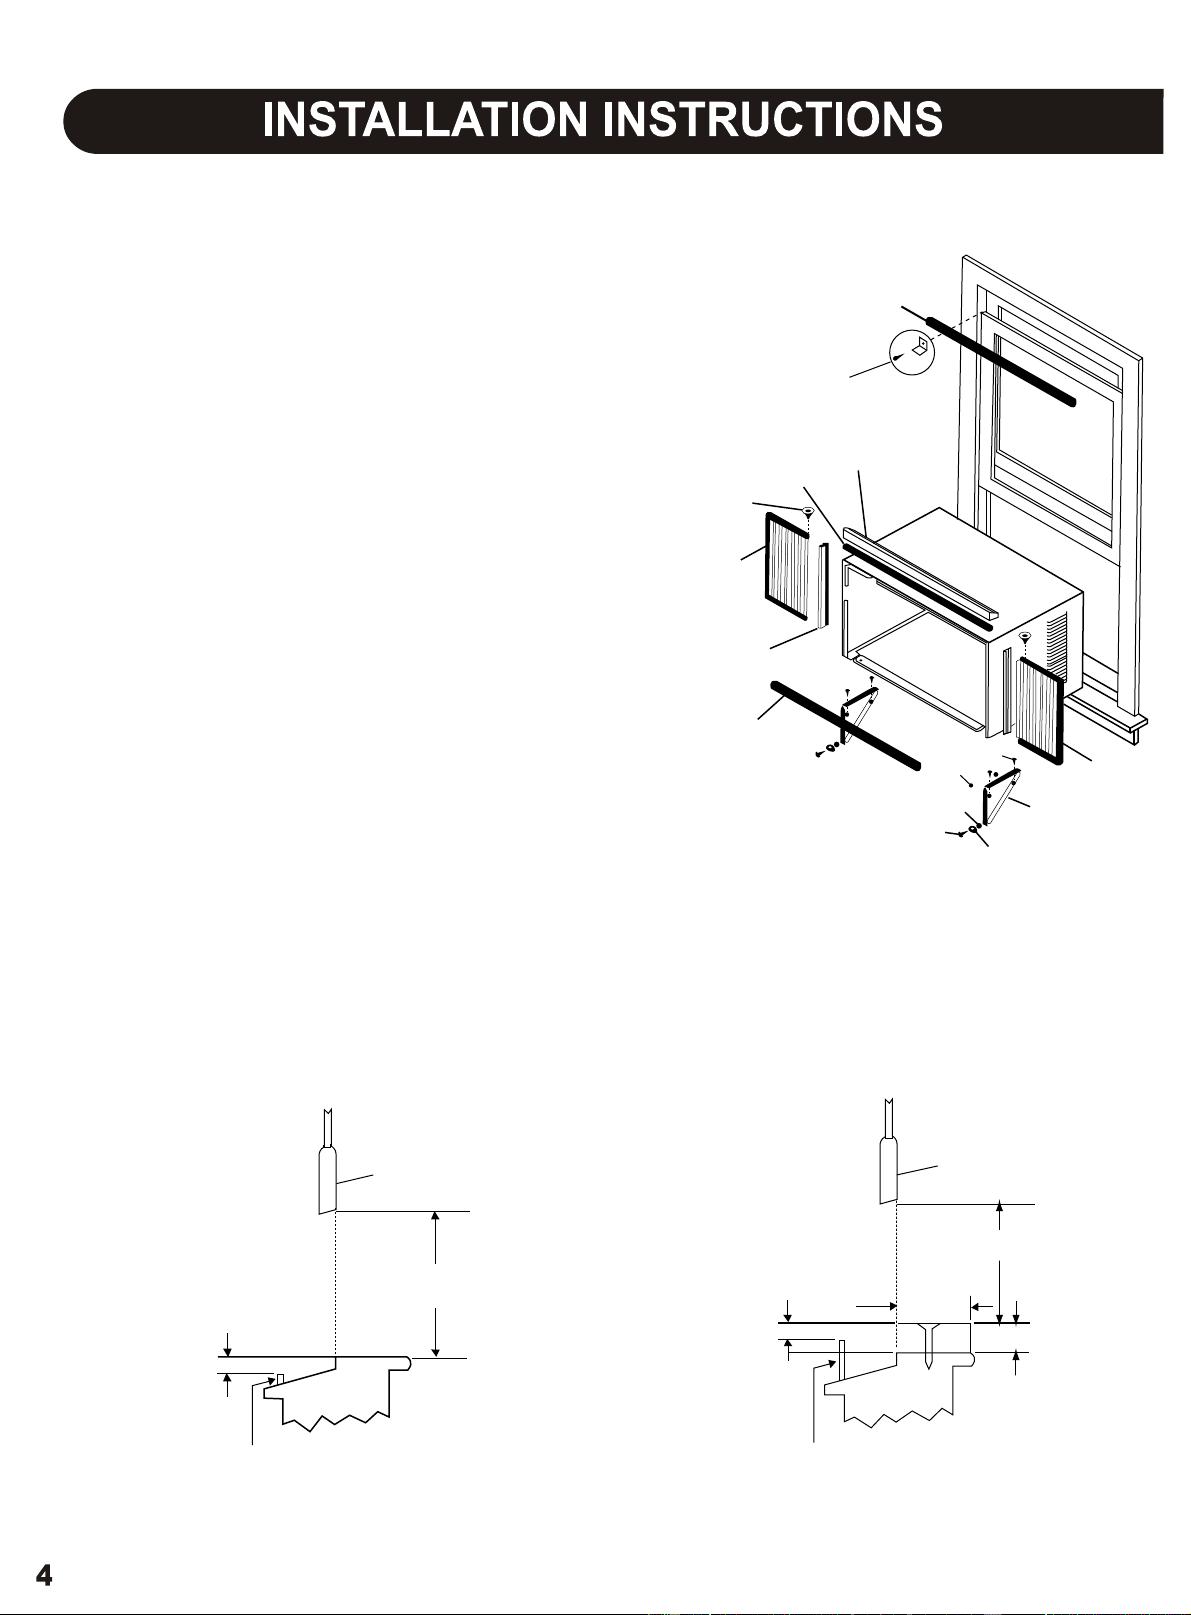
SIDE RETAINER
FRAME
ASSEMBLY
(LEFT)
WASHER HEAD
LOCKING SCREW
FOAM GASKET
TOP ANGLE
FRAME
ASSEMBLY
(LEFT)
SAFETY LOCK AND
3/4" LONG HEX HEAD
SCREW
1/2" LONG
SCREWS AND
LOCKNUTS
LOCKNUT
3/4" LONG
FLAT HEAD
BOLT
WINDOW SUPPORT
BRACKET
WINDOW SASH SEAL
SILLANGLE
BRACKET
Loading ...
Loading ...
Loading ...