Loading ...
Loading ...
Loading ...
Page 9
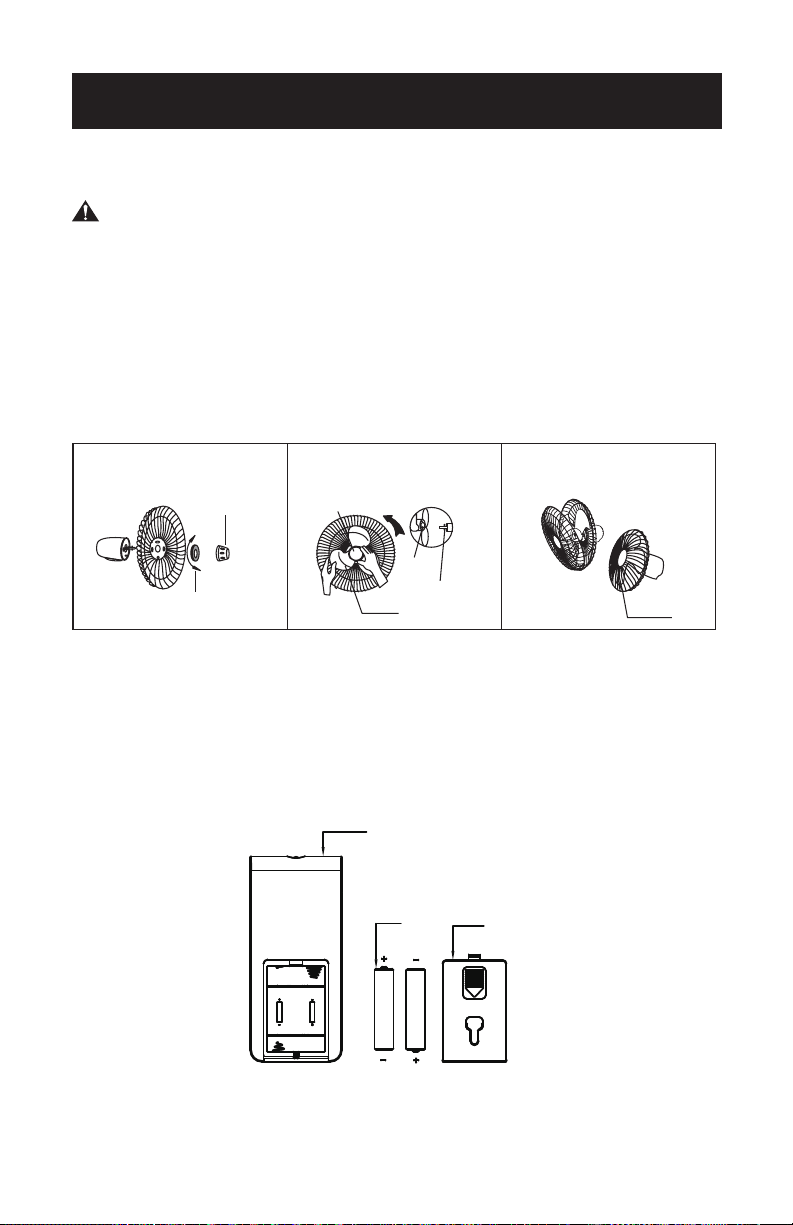
GRILL & FAN BLADE ASSEMBLY
WARNING: Never attempt to run the fan without the grill in place and properly
secured. Failure to have the grill in place can result in serious injury.
1. Unscrew the spinner clockwise and the plastic nut counterclockwise to remove
both of them. Fix the rear grill so it sits perfectly flush to the motor then tighten the
plastic nut clockwise. (see Fig. 5)
2. Insert the blade into shaft, and make sure the rotor shaft pin is fitted into groove of
the blade. Turn the spinner counterclockwise to tighten the blade. (see Fig. 6)
3. Fasten the front grill and the rear grill to each other by using the grill clips.
(see Fig. 7)
Spinner
Tight
Loose
Plastic Nut
Spinner
Tight
Blade
Retaining
Pin
Slot
Clip
Fig. 5 Fig. 6 Fig. 7
SET UP & USE
REMOTE CONTROL BATTERY INSTALLATION
1. Press down on the battery compartment cover and slide it out.
2. Insert 2 “AAA” batteries (not included) making sure that the positive terminals are
facing the proper way.
3. Replace the cover.
NOTE: Use size “AAA” alkaline batteries. Do not use rechargeable batteries.
Remote Control
Battery
Battery Cover
Fig. 10
Loading ...
Loading ...
Loading ...