Loading ...
Loading ...
Loading ...
Rails en
23
1. Remove the accessories from the cooking
compartment.
2. Mix 0.4 litres of water (not distilled water) with a drop
of washing-up liquid and pour into the middle of the
cooking compartment floor.
3. Touch the # touch button.
4. Touch the 0 touch button.
5. Use the ( or ) button to select "EasyClean š".
6. Use the & button to navigate to the next line.
7. Touch the # touch button.
The appliance starts EasyClean. The remaining time
appears on the display.
End
As soon as the cleaning aid has run through, a signal
sounds and the appliance ends the operation
automatically.
As soon as you open the appliance door, the interior
lighting is switched on so that you can rinse the cooking
compartment more easily. The remaining water in the
cooking compartment must be removed promptly. Do
not leave the remaining water in the cooking
compartment for a long time (e.g. overnight). The
appliance must not be operated when the cooking
compartment is still wet or damp.
Subsequent cleaning
1. Open the appliance door and remove the remaining
water with an absorbent sponge cloth.
2. Clean the smooth surfaces in the cooking
compartment with a dish cloth or a soft brush.
Stubborn residues can be removed using a stainless
steel scouring pad.
3. Remove limescale with a cloth soaked in vinegar.
Then wipe with clean water and rub dry with a soft
cloth (including under the door seal).
4. Use the # touch button to switch off the appliance.
5. Depending on the appliance type, open or lower the
appliance door to the stop position (approx. 30°)
and leave it open for approx. one hour to allow the
enamel surfaces in the cooking compartment to dry
thoroughly.
Removing heavy deposits of dirt
You have several options for removing particularly
stubborn deposits of dirt.
■ Leave the soapy water to work for some time before
starting the cleaning aid.
■ Rub soapy water onto the dirt on the smooth
surfaces before starting the cleaning aid.
■ Repeat the cleaning aid after the cooking
compartment has cooled down.
pRails
Ra i l s
With good care and cleaning, your appliance will retain
its appearance and remain fully functional for a long
time to come. This will tell you how to remove the
shelves and clean them.
Changing the shelf position for the
telescopic rail
Bars and telescopic rails can be positioned in any
order. For example, you can fit the telescopic rail to the
shelf position which you use the most frequently.
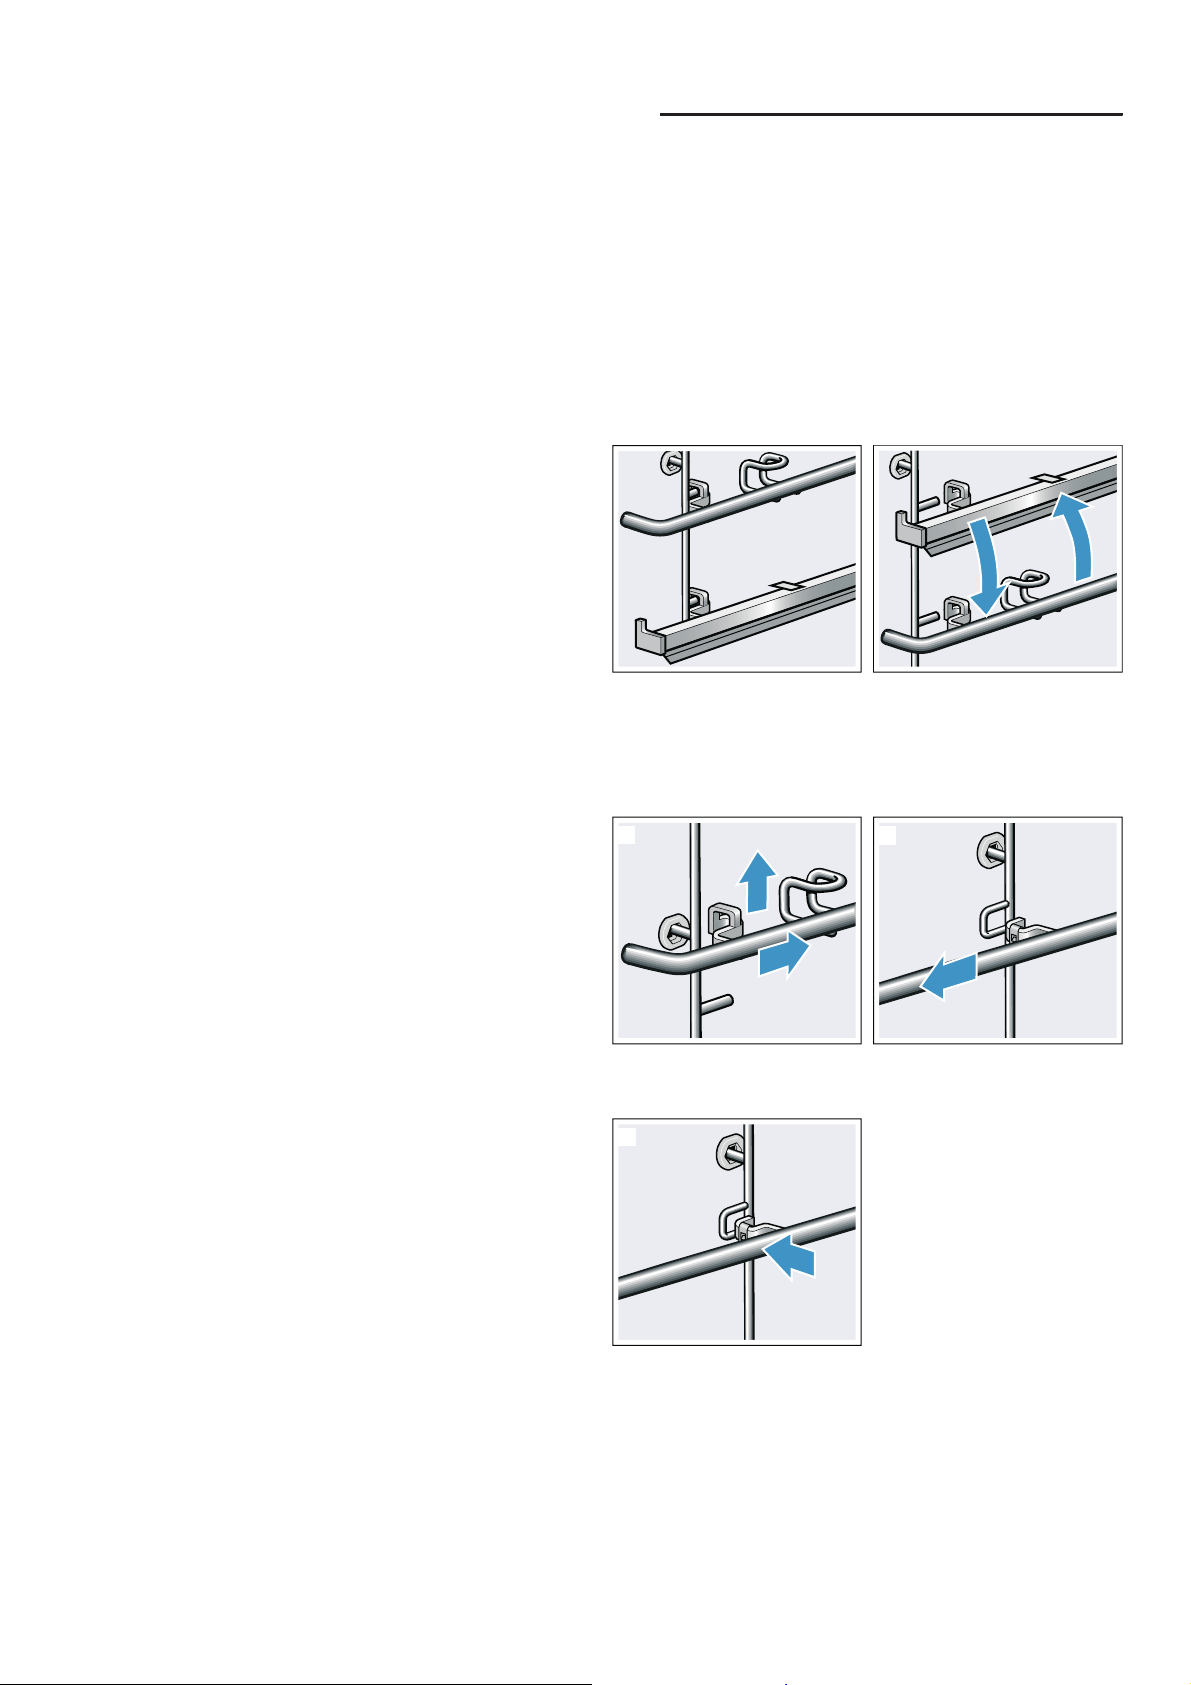
Removing the bar
Telescopic rails are removed and fitted like bars.
1. Push the bar towards the back ‚ until it can be
pulled out upwards ƒ (Fig. !).
2. Unhook the bar at the back and remove it (Fig. ").
Fitting the bar
1. Fit the bar at the back (Fig. !).
2
1
D
E
1
Loading ...
Loading ...
Loading ...