Loading ...
Loading ...
Loading ...
8
GB
• Light the burner.
• Turn the control until it engages in the minimum
position.
•Table of burner and nozzle specifications Ensure
the flame is stable and will not be extinguished by
air draughts.
To adjust the minimum flame:
Follow the procedure described in the gas conversion
instruction.
DO NOT MODIFY THIS APPLIANCE IN ANY WAY,
OTHER THAN AS DESCRIBED IN THESE
Post Installation Checks
Perform post installation checks and ensure proper
and safe operation before leaving. Test all burners
Leak Check
• Ensure all gas control knobs are in the Off
position.
• Ensure the gas supply is switched on.
• Spray a solution of soapy water onto all gas joints
as well as the full length of any flexible hoses.
UNDER NO CIRCUMSTANCES USE A NAKED
FLAME IN CHECKING FOR LEAKS.
If bubbles appear anywhere, turn the gas supply off,
check all connections and retest. If satisfactory
operation cannot be achieved, contact place of
purchase or their appointed agent for service.
Flame check
Turn each burner on, and ensure that the flame is
blue with minimal yellow tipping. If there is
significant yellow tipping, flame lift off or excessive
noise, check pressure and adjust at the regulator if
necessary.
If satisfactory operation cannot be achieved, contact
place of purchase or their appointed agent for
service.
Igniter operation
Check that the igniter for each burner successfully
ignites the gas.
If an igniter fails to work, first remove the plug from
the electrical power outlet, and then check that all
the electrical connections are in place.
If satisfactory operation cannot be achieved, contact
place of purchase or their appointed agent for
service.
Low flame setting
Check the low flame setting for each hob burner to
ensure that the minimum flame will not be
extinguished by air draughts.
individually and in combination.
INSTRUCTIONS.
For other minor adjustments or if the appliance does not
perform correctly: contact Arisit Pty Ltd 1300 762 219
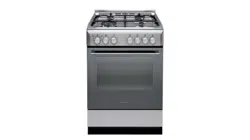
Anti-tilt Wall Bracket
To install the Anti-Tilt Wall Bracket:To install the Anti-Tilt Wall Bracket:To install the Anti-Tilt Wall Bracket:
! In order to prevent accidental
tipping of the appliance, for
example by a child climbing onto
the oven door, the supplied "anti-
tilt bracket" MUST be installed!
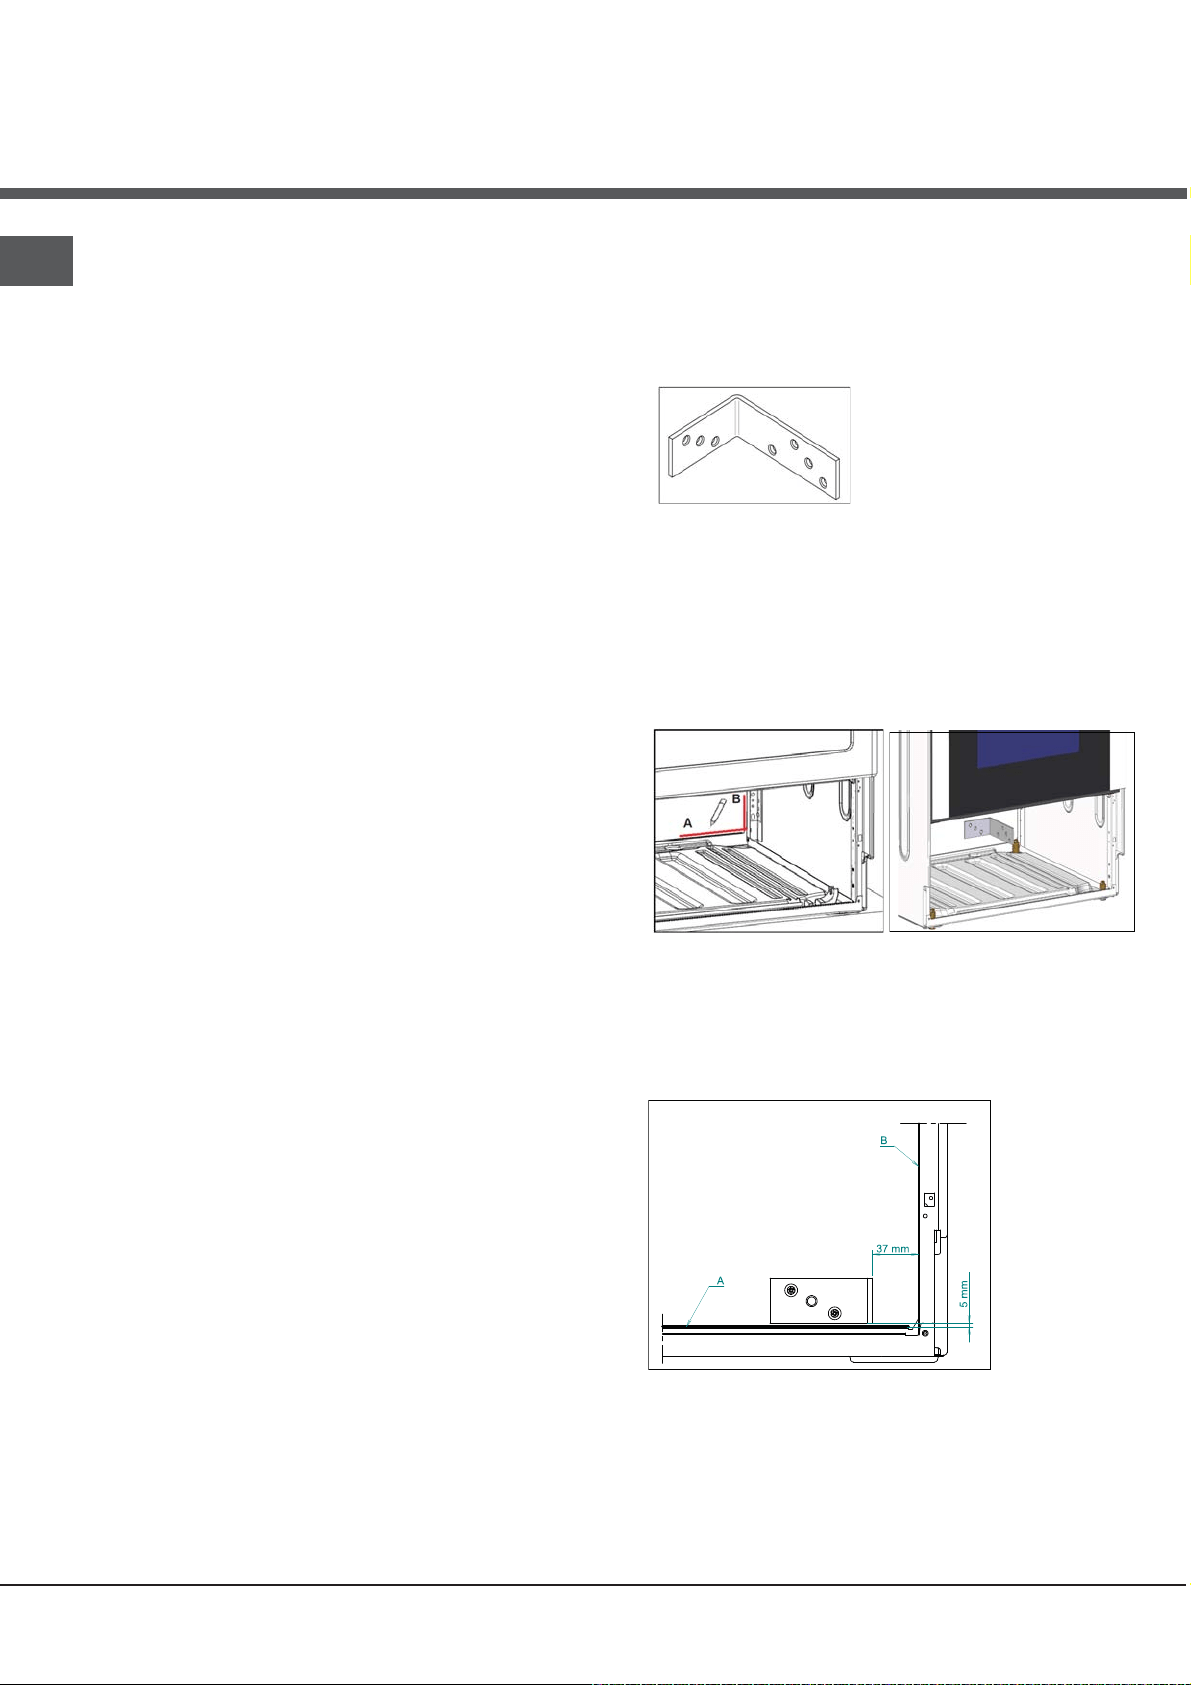
1. Fit the cooker between the cabinets and adjust the
height of the appliance (if necessary) by means of
adjustable feet.
2. Take out the lower compartment.
3. On the wall behind the cooker draw a line along
the horizontal edge A and then along the vertical edge
B so that the lines cross (see figures below).
4. Pull the cooker out of the space between cabinets
and attach the Anti-tilt Bracket with (its shorter arm
to the wall) in the position shown in the picture below:
37 mm left and 5 mm up from the crossing of the lines
A and B, inserting two bolts of 6mm diameter in the
holes: x and y.
x
y
5. Place the cooker back between the cabinets so that
the Anti-Tilt Wall Bracket fits inside the appliance.
6. Reinsert the lower compartment.
! The Anti-Tilt Wall Bracket may be installed both on the
left and on the right handside of the cooker.
! The Anti-Tilt Wall Bracket may be installed both on the
left and on the right handside of the cooker.
! The Anti-Tilt Wall Bracket may be installed both on the
left and on the right handside of the cooker.
Loading ...
Loading ...
Loading ...