Loading ...
Loading ...
Loading ...
16
GB
• Use dry utensil holders. Wet pot holders can
build up steam. Do not use towels or other large
pieces of cloth to pick up cooking utensils, as
these may touch the heating element and catch
fire.
• Do not allow pot handles to overhang other
burners that are in use, as this will cause
scorching of the handle, and potential handling
burns.
• Always make sure that pan handles are turned
towards the centre of the hob in order to avoid
accidental burns.
Maintenance Warnings
• DO NOT MODIFY THIS APPLIANCE.
• When you have removed the packing, check that
the appliance is not damaged. If you have any
doubts, do not use the appliance and contact
your nearest Ariston Service Centre.
• There are no user serviceable parts within this
appliance. For any service, contact the place of
purchase or the nominated service agent. Do not
attempt repairs yourself.
• Do not touch hot surfaces. Allow hob to cool
before wiping spillage.
• Do not attempt to replace the power supply cable
yourself. If the cable is damaged or needs
replacing, contact a technical assistance centre
that has been authorised by the manufacturer.
• Always disconnect the appliance from the mains
supply (either by unplugging it or by shutting off
the switch) before cleaning it or carrying out any
maintenance work.
• Before disposing of the appliance, make it
unusable by unplugging it and cutting off the
power supply cable. It is also advisable to
remove any potentially hazardous parts,
especially with regard to children who may use
the old appliance as a toy.
• Periodically check the condition of the gas
connection pipe and have it replaced by a
qualified technician as soon as it shows any
signs of wear or damage.
Gas And Electrical Safety
• If you are using small domestic appliances near
the hob, ensure that their power supply cables do
not come into contact with the hot parts of the
surface.
• DO NOT SPRAY AEROSOLS IN THE VICINITY OF
THIS APPLIANCE WHILE IT IS IN OPERATION.
MATERIALS IN THE APPLIANCE STORAGE
• Gas appliances require a regular air supply to
maintain efficient operation. Always ensure that
the kitchen is adequately ventilated whilst the
appliance is in use.
Respecting and conserving the
environment
• You can help to reduce the peak load of the electricity
supply network companies by using the oven in the hours
between late afternoon and the early hours of the morning.
• Always keep the oven door closed when using the TOP
OVEN, GRILL and GRATIN modes: This will achieve
improved results while saving energy (approximately 10%).
• Check the door seals regularly and wipe them clean to
ensure they are free of debris so that they adhere properly
to the door, thus avoiding heat dispersion.
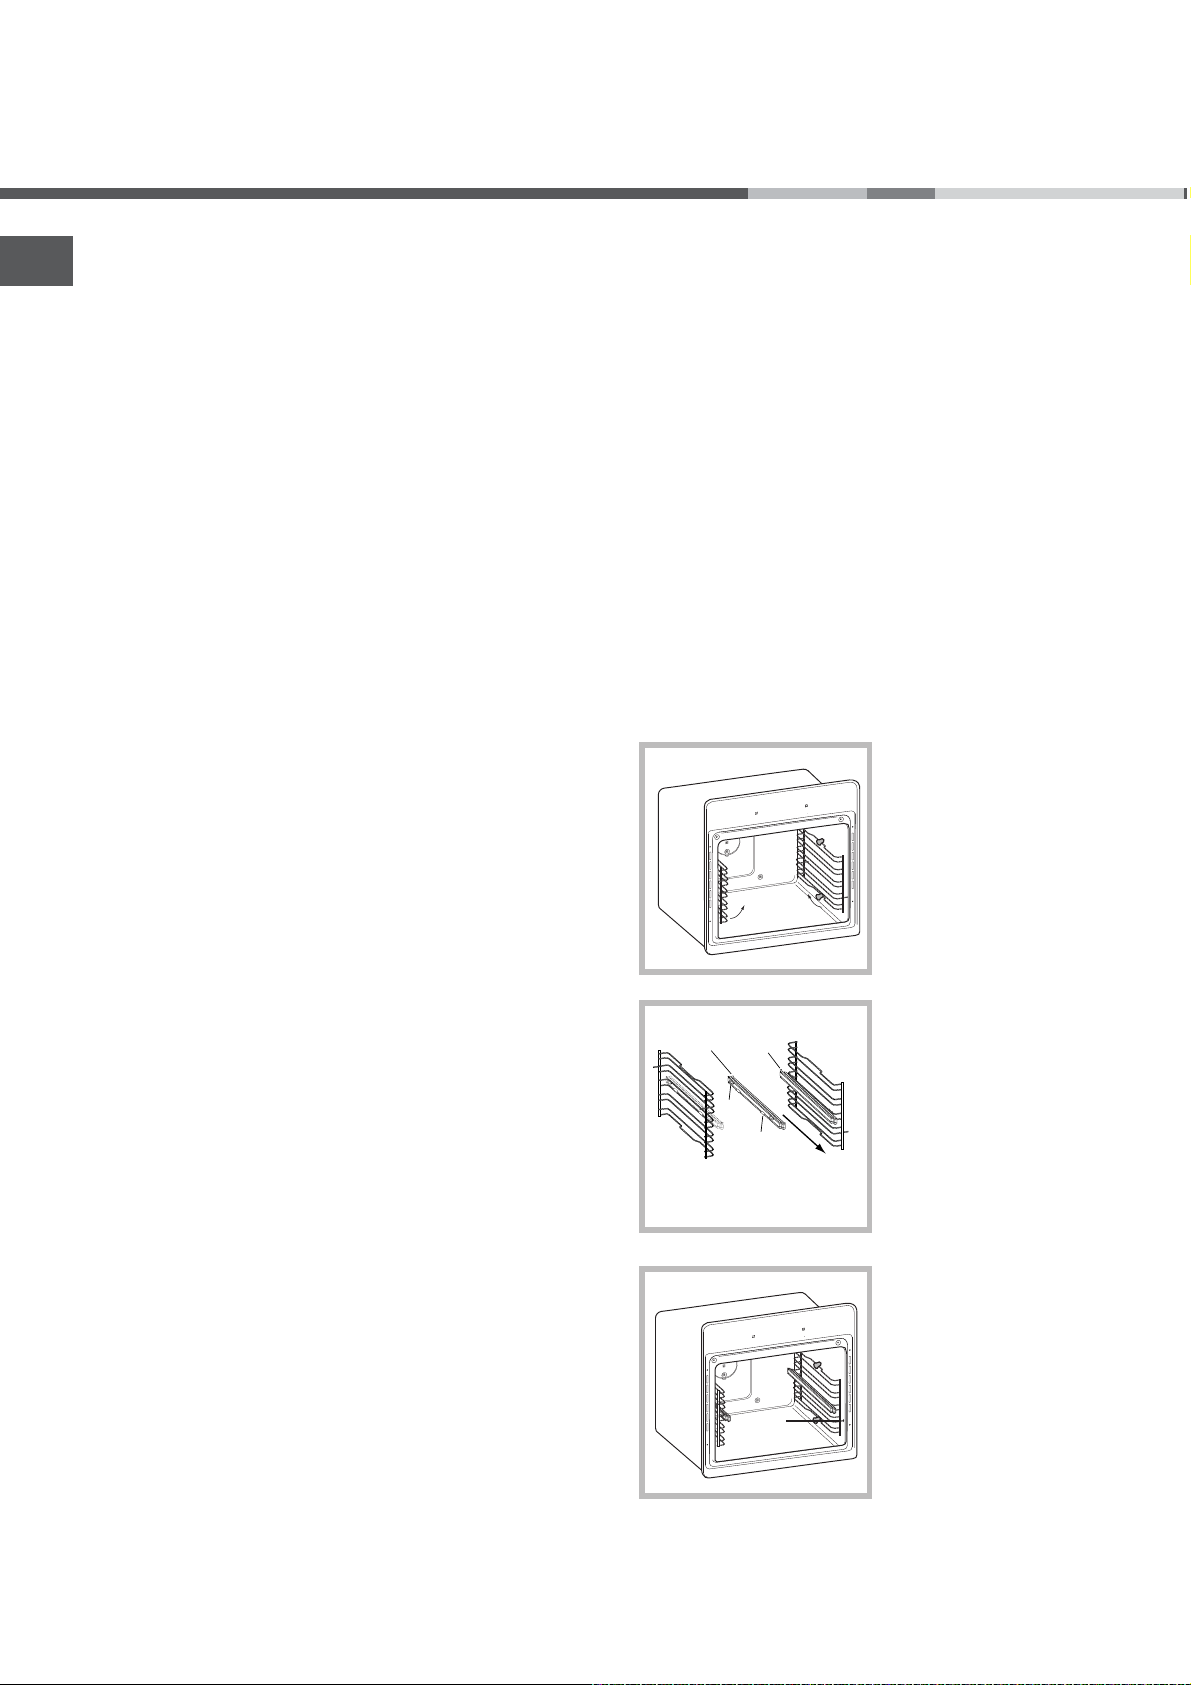
Assembling the sliding rack kit
To assemble the sliding racks:
1. Remove the two
frames, lifting them
away from the spacers
A (
see figure
).
2. Choose which shelf
to use with the sliding
rack. Paying attention to
the direction in which
the sliding rack is to be
extracted, position joint
B and then joint C on
the frame.
3. Secure the two frames
with the guide rails using
the holes provided on
the oven walls (
see
diagram
). The holes for
the left frame are
situated at the top, while
the holes for the right
frame are at the bottom.
4. Finally, fit the frames on the spacers A.
!
Do not place the sliding racks in position 5.
B
C
Left
guide rail
Right guide
rail
Direct
i
on
of
e
x
tracti
on
D
A
DRAWER OR NEAR THIS APPLIANCE.
• DO NOT USE OR STORE FLAMMABLE
Not suitable for operation with aftermarket lids or covers
•
fitted.
Loading ...
Loading ...
Loading ...