WARNING: To reduce the risk of fire. electric shock, or injury to persons, read the IMPORTANT SAFETY INSTRUCTIONS before operating this appliance.
CAUTION: Please always wait 3 minutes when turning unit off then on again, and when changing from cool to fan and back to cool. This prevents compressor from overheating & possible circuit breaker tripping.
To begin operating the air conditioner, follow these steps:
Set the thermostat to the highest number (coldest or cooler setting).
Set the selector control to the highest COOL setting.
Adjust the louver for comfortable air flow(see Air Directional Louvers).
Once the root has cooled, adjust the thermostat to the setting you find most comfortable.
Make sure that the air flow inside and outside are not obstructed by anything.
AIR DIRECTIONAL LOUVERS
The louvers will allow you to direct the air flow Up or Down(on some models) and Left or Right throughout the room as needed. Pivot horizontal louvers until the desired Up/Down direction is obtained. Move the Lever(s) from side to side until the desired Left/Right direction is obtained.
FRESH AIR VENT CONTROL
The Fresh Air Vent allows the air conditioner to:
Recirculate inside air - Vent Closed (See Fig. A)
Draw fresh air into the room- Vent Open (see Fig. B)
Exchange air from the room and draws fresh air into the room - Vent and Exhaust Open. (see Fig. C)
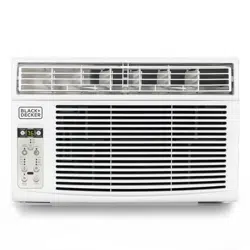
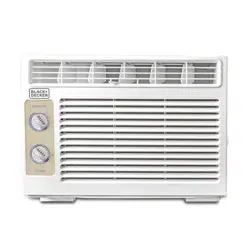
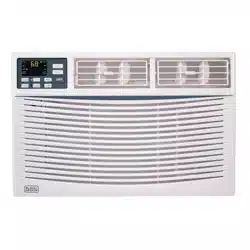
PARTS & FEATURES
BATTERY INSTRUCTIONS
NOTE: CR2032 Battery Not Included
Step 1: Insert a coin vertically in the groove on the battery cover, clockwise rotation of 45 degrees, make sure that the groove is aligned with the “unlock” sign as shown below and remove the battery cover.
Step 2: Install battery inside the remote controller, the positive (+) side up.
Step 3: Install the battery cover, make sure the battery cover groove is aligned with the “unlock” sign.
Insert a coin vertically in the groove and press it gently, then counter clockwise rotation of 45 degrees, make sure the groove is aligned with the “lock” sign as shown below.
WARNING:
Battery must be disposed of properly. Do not short circuit or dispose of in the fire.
Keep batteries out of the reach of children.
Caution for ingestion.
Non-rechargeable batteries are not to be recharged.
Exhausted batteries are to be removed from the product.
WARNING:
Danger of explosion if battery is incorrectly replaced.
Observe correct polarity (+ and -) when replacing batteries.
Do not store or carry batteries so that metal objects can contact exposed battery terminals.
When replacing battery, replace it with same or equivalent type CR2032.
WARNING: DO NOT INGEST BATTERY; CHEMICAL BURN HAZARD
This product contains a coin/button cell battery. If the coin/button cell battery is swallowed, it can cause severe internal burns in just 2 hours and can lead to death.
Keep new and used batteries away from children. If the battery compartment does not close securely, stop using the product and keep it away from children.
If you think batteries might have been swallowed or placed inside any part of the body seek immediate medical attention.
If the coin cell battery contents come into contact with the skin, immediately wash area with mild soap and water. If coin cell battery liquid gets into the eye, rinse water over the open eye for 15 minutes or until irritation ceases. If medical attention is needed, the battery electrolyte is composed of an organic solvent and lithium salts.
Do not incinerate or dispose of appliance together with household waste material!
An appliance that has reached the end of its life must be collected separately and returned to an environmentally compatible recycling facility.
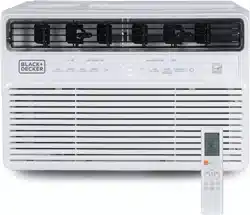
REMOTE CONTROL
POWER BUTTON
Operation starts when this button is pressed and stops when the button is pressed again.
NOTE: If the unit has ENERGY SAVER function, it will initiate automatically the Energy Saver function under Cool, Dry, and Auto (only Auto-Cooling and Auto-Fan) modes.
MODE BUTTON
Press this button to select the desired operation mode.
TEMP DOWN BUTTON
Push this button to decrease the indoor temperature setting.
TEMP UP BUTTON
Push this button to increase the temperature setting.
TIMER BUTTON
Push this button to activate the auto Start or auto Stop program.
SPEED BUTTON
Used to select the desired fan speed.
ONE TOUCH BUTTON
By pushing this button, the system will automatically shift to COOL operation with auto fan speed. Its setting is 80˚F/26˚C.
Any timer programs will be canceled.
SLEEP BUTTON
Press this button to activate the Sleep mode. This function is available on COOL,
HEAT or AUTO mode only and maintain the most comfortable temperature for you and save energy. For the detail, see sleep operation.
ENERGY SAVER BUTTON
Press this button to activate the Energy Saving mode. Press button again to stop the function.
LOCATION OF THE REMOTE CONTROLLER:
Use the remote controller within a distance of 16 feet from the appliance, pointing it towards the receiver. Reception is confirmed by a beep.
CAUTION:
The air conditioner will not operate if curtains, doors or other materials block the signals from the remote controller to the unit.
Prevent any liquid from falling into the remote controller. Do not expose the remote controller to direct sunlight or heat.
If the infrared signal receiver on the indoor unit is exposed to direct sunlight, the air conditioner may not function properly. Use curtains to prevent the sunlight from falling on the receiver.
If other electrical appliances react to the remote controller, either move these appliances or consult your local dealer.
OPERATING INSTRUCTIONS
The unit can be controlled by the unit control alone or with the remote.
NOTE: The outline of the operation panel is based on typical model, the function is the same with your air conditioner while there may be some slight differences in appearance.
TO TURN UNIT ON OR OFF:
Press ON/OFF button to turn unit on or off.
NOTE: The unit will initiate automatically the Energy Saver function under Cool, Dry and Auto modes.
TO CHANGE TEMPERATURE SETTING:
Press UP/DOWN button to change temperature setting.
NOTE: Press or hold either UP or DOWN button until the desired temperature is shown on the display.
This temperature will be automatically maintained anywhere between 62˚F(17˚C) and 86˚F(30˚C). If you want the display to read the actual room temperature, see To Operate on Fan Only section.
SLEEP FEATURE:
Press Sleep button to initiate the sleep mode. In this mode the selected temperature will increase by 2˚F/1(or 2) ˚C minutes after the mode is selected.
The temperature will then increase cooling) by another 2˚F/1(or2) ˚C after an additional 30 minutes. This new temperature will be maintained for 6 or 7 hours before it returns to the originally selected temperature. This ends the
Sleep mode and the unit will continue to operate as originally programmed.
The Sleep mode program can be canceled at any time during operation by pressing the Sleep button again.
TO ADJUST FAN SPEEDS:
Press Fan button to select the Fan
Speed in four steps-Auto, Low, Med or
High. Each time the button is pressed, the fan speed mode is shifted.
CHECK FILTER FEATURE:
Press Check filter button to initiate this feature. This feature is a reminder to clean the Air Filter for more efficient operation. The LED(light) will illuminate after 250 hours of operation. To reset after leaning the filter, press the Check
Filter button and the light will go off.
ENERGY SAVER FEATURE:
Press Energy saver button to initiate this function. This function is available on COOL, DRY, AUTO (only AUTOCOOLING and AUTO-FAN) modes. The fan will continue to run for 3 minutes after the compressor shuts off. The fan then cycles on for 2 minutes at 10 minute intervals until the room temperature is above the set temperature, at which time the compressor turns back on and Cooling Starts.
TO SELECT THE OPERATING MODE:
To choose operating mode, press Mode button. Each time you press the button, a mode is selected in a sequence that goes from Auto, Cool, Dry and Fan. The indicator light beside will be illuminated and remained on once the mode is selected.
The unit will initiate automatically the
Energy Saver function under Cool, Dry, Auto (only Auto-Cooling and Auto-Fan) modes.
TO OPERATE ON COOL MODE:
Choose Cool Mode to set the cooling function. Use the Up and Down buttons to choose the desired temperature.
When Cool Mode is selected, the fan speed can be adjusted by pressing the fan button.
TO OPERATE ON AUTO FEATURE:
When you set the air conditioner in AUTO mode, it will automatically select cooling, heating (cooling only models without), or fan only operation depending on what temperature you have selected and the room temperature.
The air conditioner will control room temperature automatically round the temperature point set by you.
In this mode, the fan speed cannot be adjusted, it starts automatically at a speed according to the room temperature.
TO OPERATE ON FAN ONLY:
Use this function only when cooling is not desired, such as for room air circulation or to exhaust stale air. (Remember to open the vent during this function, but keep it closed during cooling for maximum cooling efficiency.) You can choose any fan speed you prefer.
During this function, the display will show the actual room temperature, not the set temperature as in the cooling mode.
In Fan only mode, the temperature is not adjusted.
TO OPERATE ON DRY MODE:
In this mode, the air conditioner will generally operate in the form of a dehumidifier. Since the conditioned space is a closed or sealed area; some degree of cooling will continue. On Dry mode, the fan speed is controlled at Low automatically.
TIMER: AUTO START/STOP FEATURE:
Press Timer button, the TIMER ON or TIMER OFF indicator light illuminates.
It indicates the Auto Start or Auto Stop program is initiated. For some units, keep pressing the Timer button will cancel the timer settings.
Press or hold the UP or DOWN button to change the Auto time by 0.5-hour increments, up to 10 hours, then at 1 hour increments up to 24 hours. The control will count down the time remaining until start.
The selected time will register in 5 seconds, and the system will automatically revert back to display the previous temperature setting or room temperature when the unit is on (when the unit is off, there is no display.)
Turning the unit ON or OFF at any time or adjusting the timer setting to will cancel the Auto Start/Stop timed program.
DISPLAYS: Shows the set temperature in “OC” or “OF” and the Auto-timer settings. While on Fan only mode, it shows the room temperature. If the room temperature is too high or low, it will display “ HI” or “ LO”
ERROR CODES:
AS - Room temperature sensor error
ES - Evaporator temperature sensor error or •
HS -Electric heating sensor error (on some models);
CS -Condenser temperature sensor error (on some models);
OS -Outside temperature sensor error(on some models);
E7 -Unit malfunction(on some models).
NOTE: When error occurs, unplug the unit and plug it back in. If error repeats, call for service.
NOTE: If the unit breaks off unexpectedly due to the power failure, it will restart with the previous function setting automatically when the power resumes.
ADDITIONAL THINGS YOU SHOULD KNOW
Now that you have mastered the operating procedure, here are more features in your control that you should become familiar with:
The Cool circuit has an automatic 3 minutes time delayed start if the unit is turned off and on quickly. This prevents overheating of the compressor and possible circuit breaker tripping. The fan will continue to run during this time.
The control is capable of displaying temperature in degrees Fahrenheit or degrees Celsius. To convert from one to the other, press and hold the Up and Down buttons at the same time for 3 seconds.
CLEANING & CARE
DANGER
Be sure to unplug the unit before cleaning or servicing.
Do not use gasoline, thinner or other chemicals to clean the unit.
Do not wash the unit directly under a tap or using a hose. It may cause electrical danger.
If the power cord is damaged, it should be repaired by an authorized technician.
AIR FILTER CLEANING
CAUTION: Clean your air conditioner occasionally to keep it looking new.Be sure to unplug the unit before cleaning to prevent shock or fire hazards.
The air filter should be checked at least once a month to see if cleaning is necessary. Trapped particles in the filter can build up and cause an accumulation of frost on the cooling coils.
Grasp the top of the filter and gently pull up and out.
Wash the filter using dishwashing liquid and warm water. Rinse filter thoroughly. Gently shake excess water from the filter. Be sure the filter is thoroughly dry before replacing. Instead of washing, you may vacuumthe filter clean.
NOTE: Never use hot water over 40 °C(104°F) to clean the air filter. Never attempt to operate the unit without the air filter.
CABINET CLEANING
Be sure to unplug the air conditioner to prevent shock or fire hazard.
The cabinet and front may be dusted with an oil-free cloth or washed with a cloth dampened in a solution of warm water and mild liquid dishwashing detergent. Rinse thoroughly and wipe dry.
Never use harsh cleaners, wax or polish on the cabinet front.
Be sure to wring excess water from the cloth before wiping around the controls. Excess water in or around the controls may cause damage to the air conditioner.
Plug in air conditioner.
WINTER STORAGE
If you plan to store the air conditioner during the winter, remove it carefully from the window according to the installation instructions. Cover it with plastic or return it to the original carton.
TROUBLESHOOTING
BEFORE YOU CALL FOR SERVICE
IF THE AIR CONDITIONER FAILS TO OPERATE:
A) Check to make sure that the air conditioner is plugged in securely. If it is not, remove the plug from the outlet, wait 10 seconds and plug it in again securely.
B) Check for a blown circuit fuse or a tripped main circuit breaker. If these seem to be operating properly, test the outlet with another appliance.
WARNING
IF NONE OF THE ABOVE SOLVES THE PROBLEM, CONTACT A QUALIFIED TECHNICIAN. DO NOT TRY TO ADJUST OR REPAIR THE AIR CONDITIONER YOURSELF. Any person who is involved with working on or breaking into a refrigerant circuit should hold a currently valid certificate from an industry accredited assessment authority, which authorizes their competence to handle refrigerants safely in accordance with an industry-recognized assessment specification.
WARNING Do not use means to accelerate the defrosting process or to clean other than those recommended by the manufacturer.
WARNING Servicing shall only be performed as recommended by the equipment manufacturer. Maintenance and repair requiring the assistance of other skilled personnel shall be carried out under the supervision of the person competent in the use of the flammable refrigerants.
CUSTOMER SERVICE
IMPORTANT DO NOT RETURN THIS PRODUCT TO THE STORE
If you have a problem with this product, please contact the BLACK+DECKER Customer Satisfaction Center at DATED PROOF OF PURCHASE, MODEL # AND SERIAL # REQUIRED FOR WARRANTY SERVICE
Cauton: Risk of fire/ flammable materials (Required for R32/R290 units only)
IMPORTANT NOTE: Read this manual carefully before installing or operatng your new air conditoning unit. Make sure to save this manual for future reference.
TROUBLESHOOTING
TROUBLE
ANALYSIS
Air conditioner does not start
• Wall plug disconnected. Push plug firmly into wall outlet.
• House fuse blown or circuit breaker tripped. Replace fuse with time delay type or reset circuit breaker.
• Plug Current Device Tripped. Press the RESET button.
• Power is OFF. Turn power ON.
Air from unit does not feel cold enough
• Room temperature below 62°F(17°C). Cooling may not occur until room temperature rises above 62°F(170C).
• Temperature sensing behind air filter element touching cold coil. Keep it from the cold coil.
• Set to a Lower temperature.
• Compressor stopped when changing modes. Wait for 3 minutes after set to the COOL mode.
Air conditioner cooling, but room is too warm-ice forming on cooling coil behind decorative front.
• Outdoor temperature below 64°F(18°C). To defrost the coil, set FAN ONLY mode.
• Air filter may be dirty. Clean filter. Refer to Care and Cleaning section. To defrost, set to FAN ONLY mode.
• Thermostat set too cold for night-time cooling. To defrost the coil, set to FAN ONLY mode. Then, set temperature to a Higher setting.
Air conditioner cooling but room is too warm - No ice forming on cooling coil behind decorative front.
• Dirty air filter-air restricted. Clean air filter. Refer to Care and Cleaning section.
• Temperature is set too low. Set the temperature to a higher setting. 1 is the MIN setting and 7 is the coldest MAX setting.
• Air directional louvers positioned improperly. Position louvers for better air distribution.
• Front of units is blocked by drapes, blinds, furniture, etc. -restricts air distribution.
• Clear blockage in front of unit.
• An open doors, windows,or register may allow cold air to escape. Close any doors, windows, or registers.
• The room may be too warm. Allow additional time to remove “Stored heat” from walls, ceiling, floor and furniture.
Air conditioner turns on and off rapidly
• Dirty air filter-air restricted, Clean air filter.
• Outside temperature extremely hot Set FAN speed to a Higher setting to bring air past cooling coils more frequently.
Noise when unit is cooling
• Air movement sound. This is normal . If too loud, set to a slower FAN setting.
• Window vibration - poor installation. Refer to installation instructions or check with installer.
Water dripping INSIDE when unit is cooling.
• Improper installation. Tilt air conditioner slightly to the outside to allow water drainage. Refer to installation instructions - check with installer.
Water dripping OUTSIDE when unit is cooling.
• Unit removing large quantity of moisture from humid room. This is normal during excessively humid days.
Room too cold
• Temperature is set too high. Set the temperature to a lower setting. 1 is the MIN setting and 7 is the coldest MAX setting.