
Telescopic Rack
Installation and Use Manual
Manuel d’installation et d’utilisation
Manual de instalación y uso
Models:
HEZ1070, HEZ1077
English 1
Telescopic Rack
This rack allows for easier access when inserting or removing food. Do not clean in
the self-clean oven.
Inserting Telescopic Rack into Oven:
CAUTION:
To avoid burns, place oven racks in desired positions before turning
oven on. Always use oven mitts when the oven is warm. If a rack
must be moved while the oven is hot, do not let oven mitts contact
hot heating elements.
To avoid possible injury or damage to the appliance, ensure rack is
installed exactly per installation instructions and not backwards or
upside down.
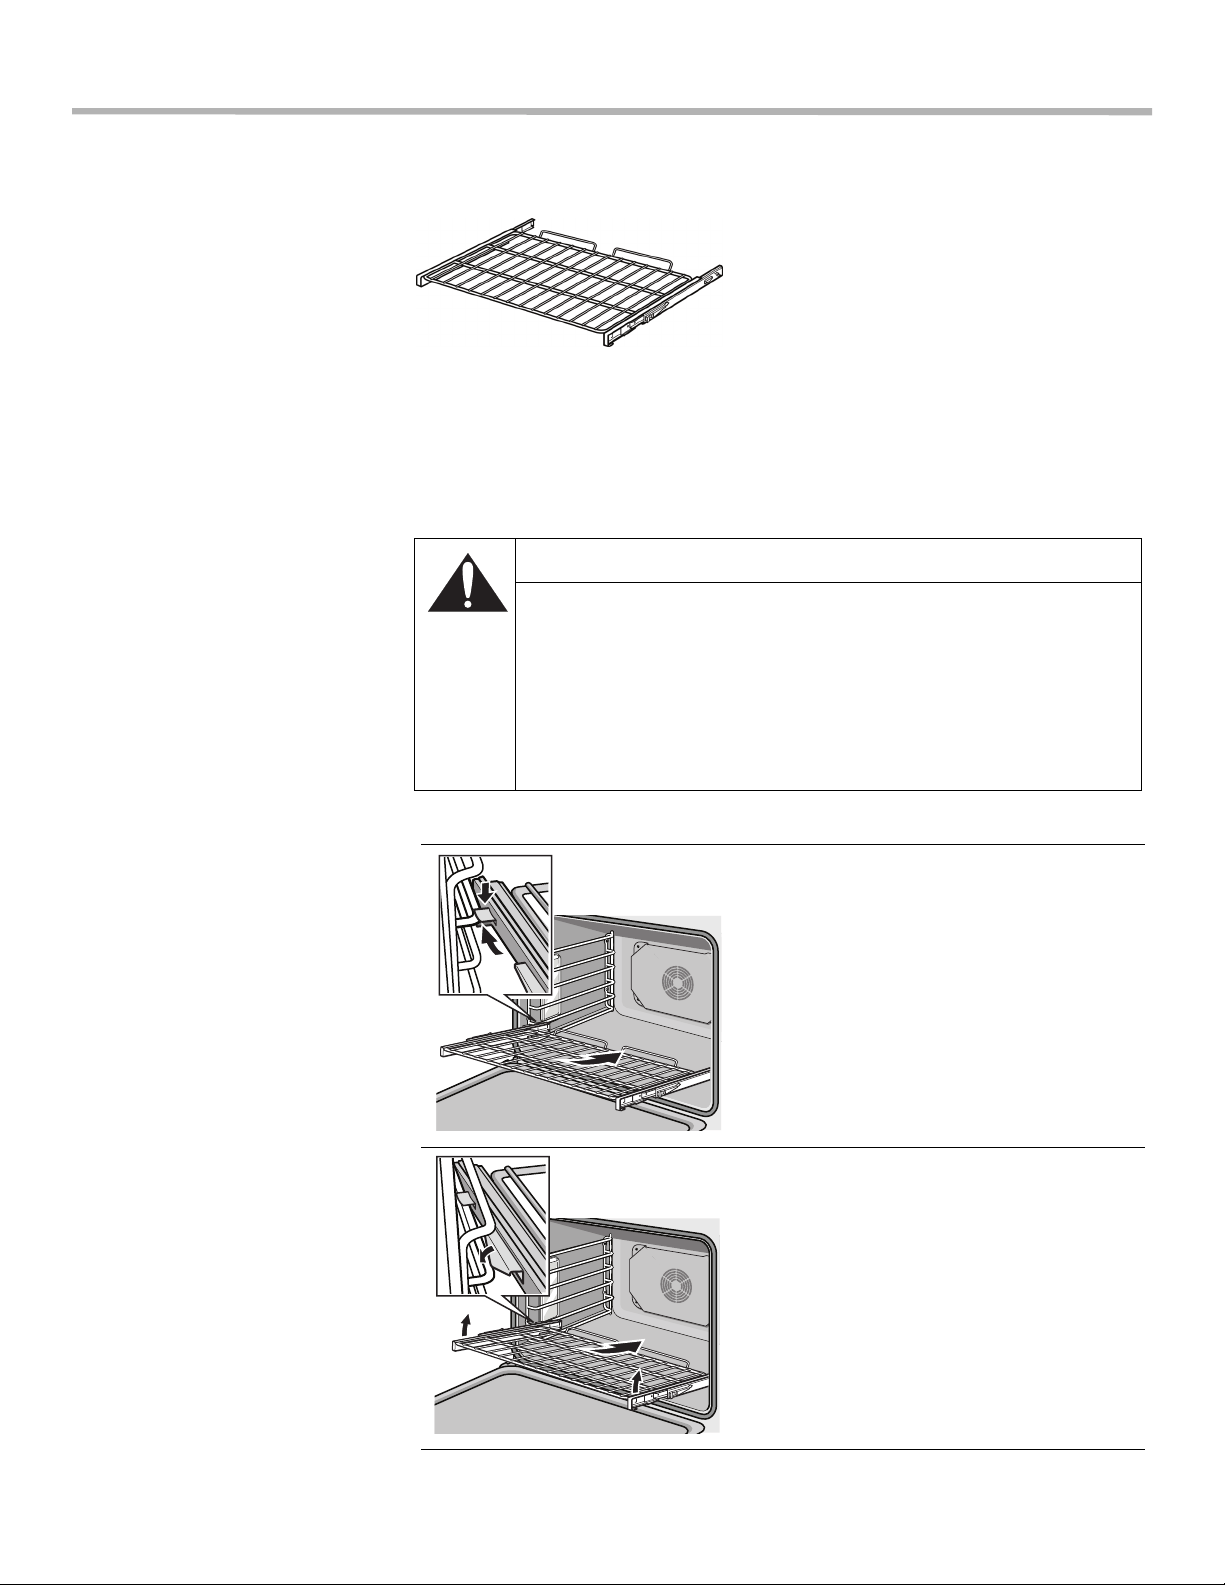
1. Hold the rack on a slight angle.
2. Engage the rear hooks in the
accessory brackets.
3. Hold the rack straight.
4. Push the rack in until it is even with the
front hooks.

English 2
Cleaning and Maintenance
Wash with hot soapy water. Rinse thoroughly and dry, or gently rub with cleansing
powder or soap-filled pads as directed. Avoid getting cleansing powder in the
telescopic slides. Relubrication may become necessary. Use only high-temperature
food-grade lubricants to re-lubricate slides.
DO NOT clean the rack in the self-cleaning oven.
5. Lift the rack up.
6. Push the rack in completely.
7. Engage the rack’s front hooks in the
accessory brackets.
This is very important to ensure that
the rack is installed correctly (see the
enlarged picture).
Questions?
1-800-944-2904
www.boschappliances.com
We look forward to hearing from you!
Français 1
Grille télescopique
Cette grille facilite l'accès au four, ainsi que l'introduction et le retrait de plats. Ne
pas nettoyer dans le four autonettoyant.
Mise en place de la grille télescopique dans le four :
ATTENTION :
Pour éviter les brûlures, placer les grilles dans la position désirée
avant de mettre le four en marche. Toujours utiliser des gants
isolants lorsque le four est chaud. Si une grille doit être déplacée
pendant que le four est chaud, ne pas laisser les gants isolants
entrer en contact avec les éléments chauffants.
Pour éviter des dommages à l'appareil ou des blessures, s'assurer
que la grille soit bien installée selon les instructions d'installation - ne
pas installer à l'envers ou de façon inversée.
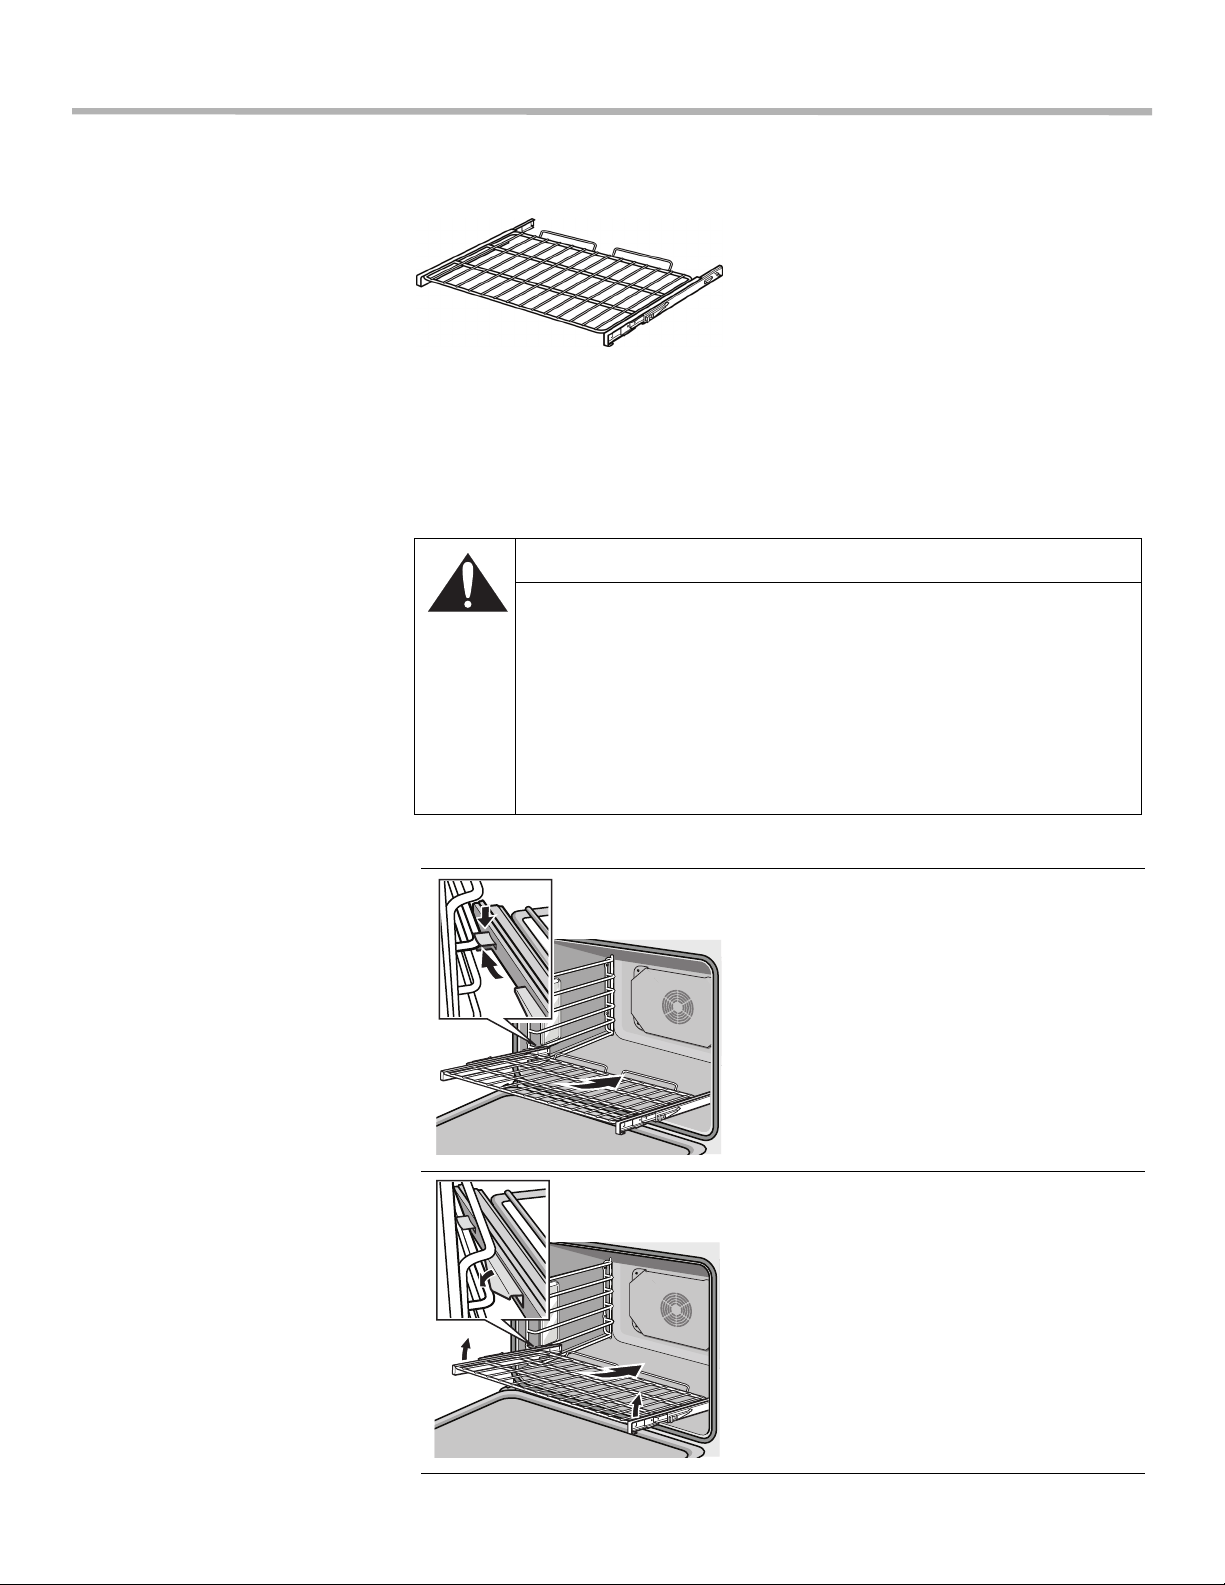
1. Tenir la grille en l'inclinant légèrement.
2. Insérer les crochets arrière dans les
supports d'accessoires.
3. Tenir la grille en position horizontale.
4. Introduire la grille jusqu'à ce qu'elle
soit alignée avec les crochets avant.

Français 2
Nettoyage et entretien
Laver avec de l'eau savonneuse chaude. Rincer à fond et sécher ou frotter
doucement avec de la poudre à récurer ou des tampons savonneux en suivant les
instructions. Éviter de mettre de la poudre à récurer dans les glissières
télescopiques. Une nouvelle lubrification pourrait s'avérer nécessaire. Utiliser
uniquement des lubrifiants haute température de qualité alimentaire pour lubrifier
les glissières.
NE PAS nettoyer la grille dans le four autonettoyant.
5. Soulever la grille.
6. Pousser la grille jusqu'au fond.
7. Introduire les crochets avant de la
grille dans les supports d'accessoires.
Ceci est très important pour assurer la
bonne installation de la grille (voir
l'image agrandie).
Questions ?
1-800-944-2904
www.boschappliances.com
Nous attendons de vos nouvelles !
Español 1
Rejilla telescópica
Esta rejilla facilita el acceso al introducir o retirar alimentos. No la limpie en el horno
autolimpiante.
Introducir la rejilla telescópica en el horno:
PRECAUCIÓN:
Para evitar quemaduras, debe colocar las rejillas del horno en las
posiciones deseadas antes de encender el horno. Siempre use
guantes para horno cuando el horno esté tibio. Si necesita mover la
rejilla mientras el horno está caliente, no debe dejar que los guantes
para horno entren en contacto con los elementos de calentamiento
que estén calientes.
Para evitar posibles lesiones o daño a la unidad, asegúrese que la
repisa está instalada exactamente como se indica en las
instrucciones y no de espaldas o al revés.
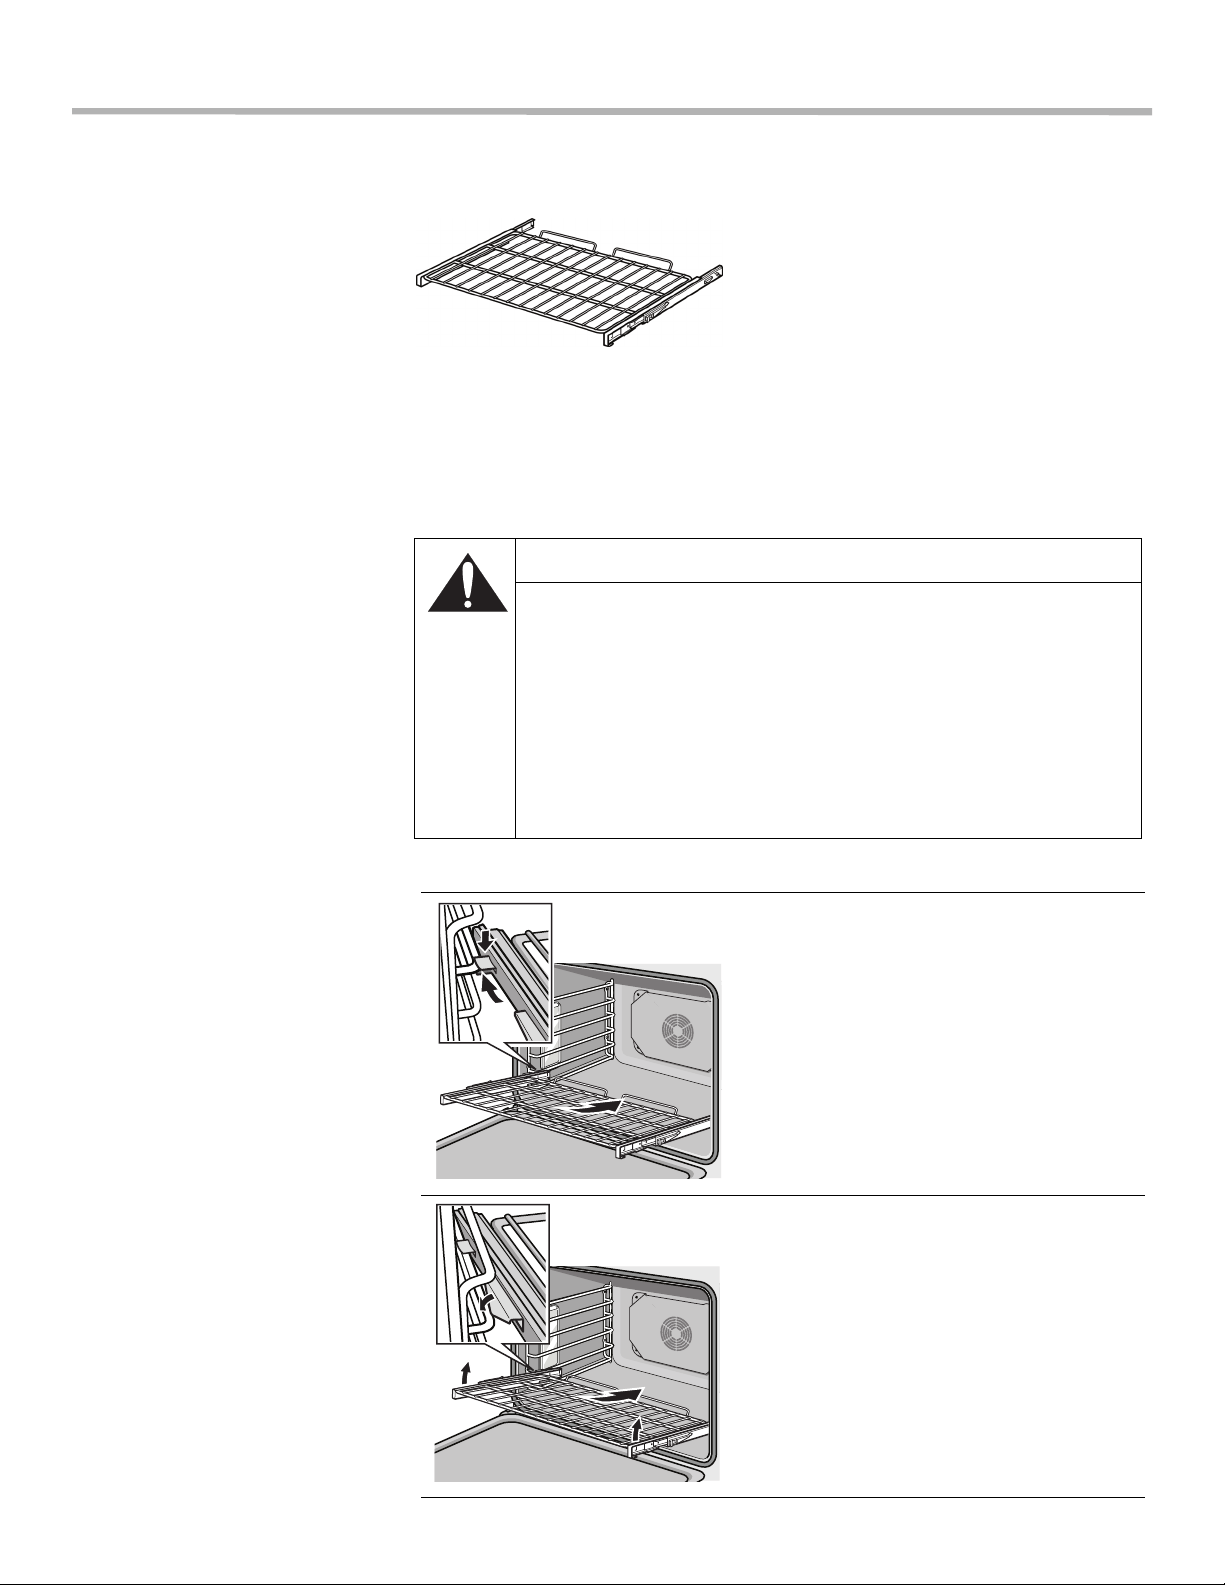
1. Sostenga la rejilla ligeramente en
ángulo.
2. Enganche los ganchos traseros en los
soportes del accesorio.
3. Sostenga la rejilla derecha.
4. Empuje la rejilla hacia adentro hasta
que esté a nivel con los ganchos
delanteros.

Español 2
Limpieza y mantenimiento
Lavar con agua jabonosa caliente. Enjuagar bien y secar, o frotar suavemente con
una esponjilla con polvo o jabón de limpieza según las indicaciones. Evitar poner
polvo de limpieza en las guías telescópicas. Es posible que sea necesario volver a
lubricarlas. Sólo usar lubricantes aptos para alimentos, para uso a altas
temperaturas.
NO limpiar la rejilla en el horno autolimpiante.
5. Levante la rejilla.
6. Empuje la rejilla hacia adentro por
completo.
7. Enganche los ganchos delanteros de
la rejilla en los soportes del accesorio.
Esto es muy importante para asegurar
que la rejilla esté instalada
correctamente (ver imagen ampliada).
¿Preguntas?
1-800-944-2904
www.boschappliances.com
¡Esparamos oir de usted!

5551 McFadden Avenue, Huntington Beach, CA 92649 • 800-944-2904 • www.boschappliances.com
9000270777 • 5V0BE8 • Rev. C • 07/07 © BSH Home Appliances Corporation, 2007 • All rights reserved
Litho in USA