Loading ...
Loading ...
Loading ...
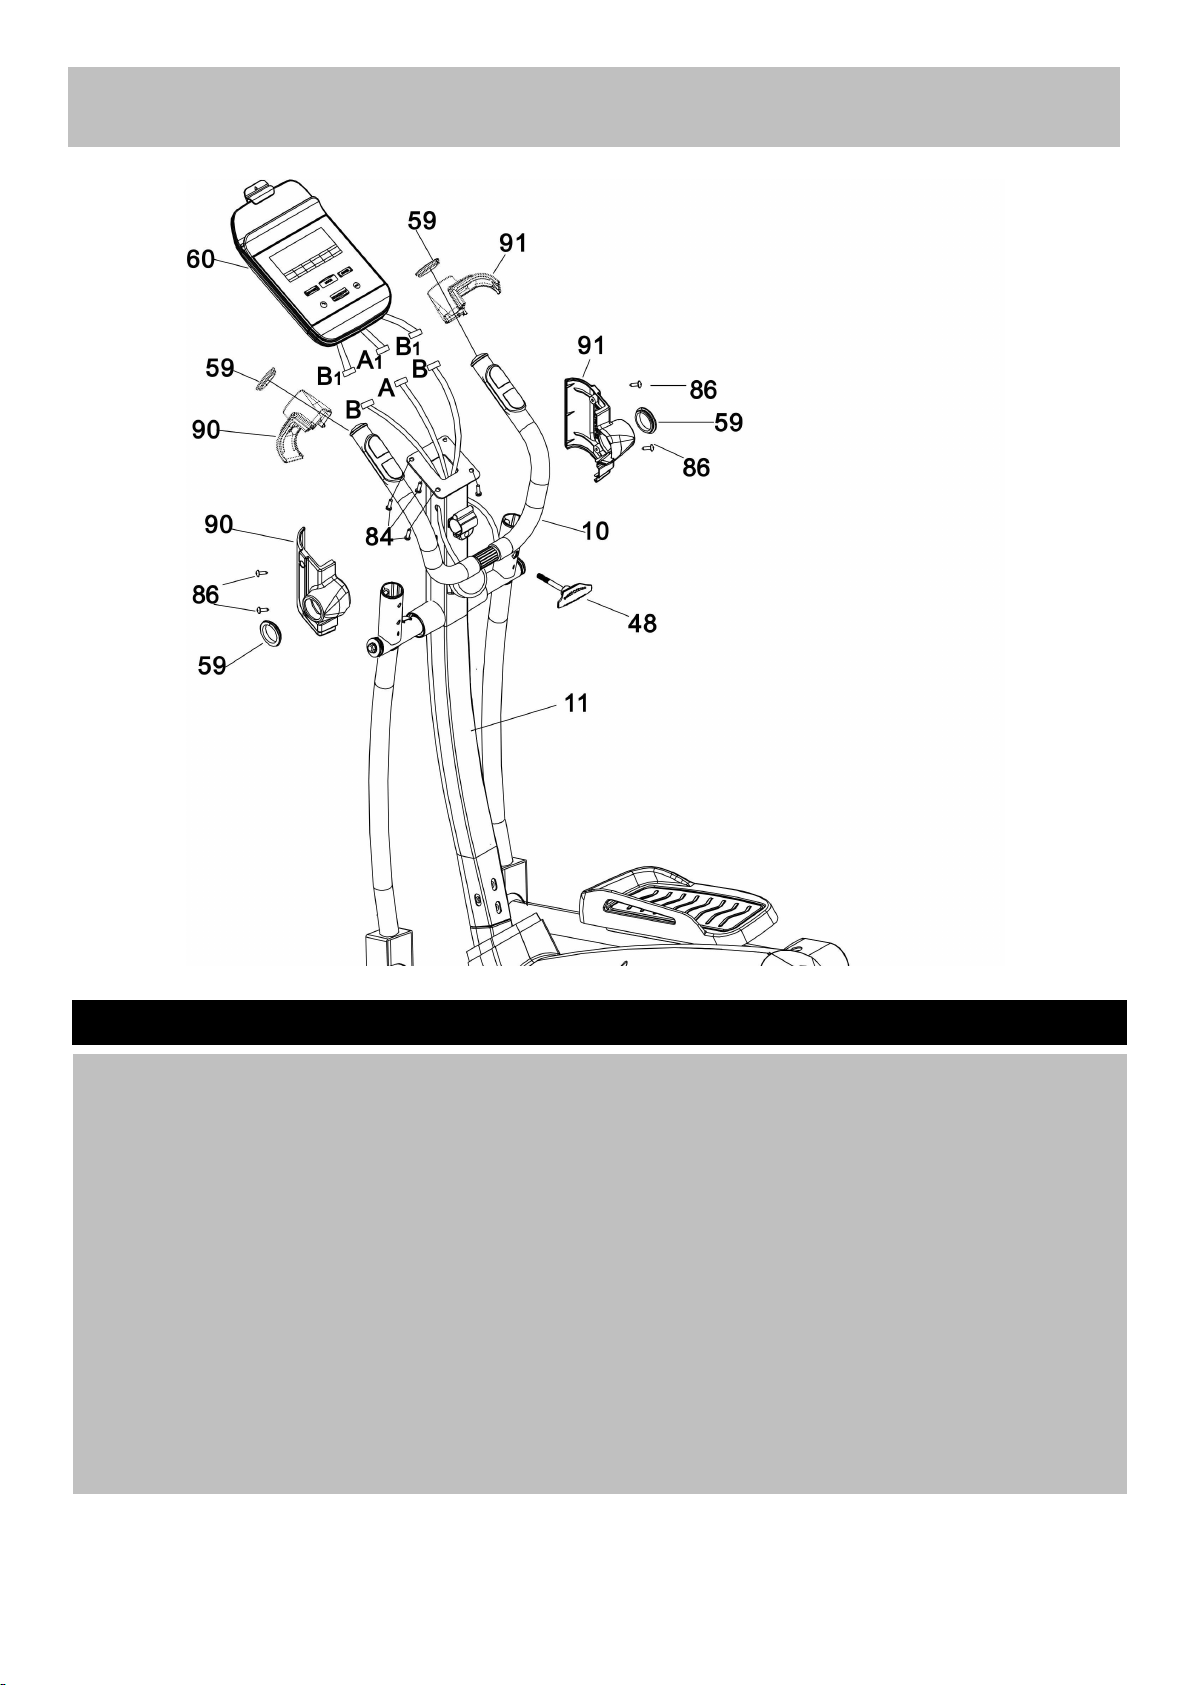
Step 5
a. Attach the Handle (10) to the bracket on the Front Post (11), and secure with M8 Lock knob (48).
Note: To adjust the position of the handle, turn the M8 lock knob (48) anti clockwise to loosen the
handle (10) as shown in the diagram, and adjust the handle (10) to your required position, then
secure the M8 lock knob (48).
b. Pass the two signal cables (B) on the Fixed Handle (10) into the holes on both sides of the Front
Post (11) and out of the top hole on the Front Post (11).
c. Connect the signal cables A1 and B1 on the Console (60) with the signal cables A and B from the
Front Post (11), respectively.
d. Attach the Console (60) to the Front Post (11) using 4 x M5x8MM Dome Head Philips Bolt (84).
a) Note: Part (84) is pre-assembled.
e. Slide the Left Handle Cover (90) from Right Handle Cover (91) to the left and right ends of the
Handle (10) respectively, fix using 4 x ST4.2x15mm Philips Screw (86) and put two Joint Rings (59)
on the left and right side of the Handle (10) respectively, and then push them together from both
sides. Please note that the 4 × ST4.2 × 15mm Philips Screw (86) are pre-assembled.
Assembly Instructions
10
Loading ...
Loading ...
Loading ...