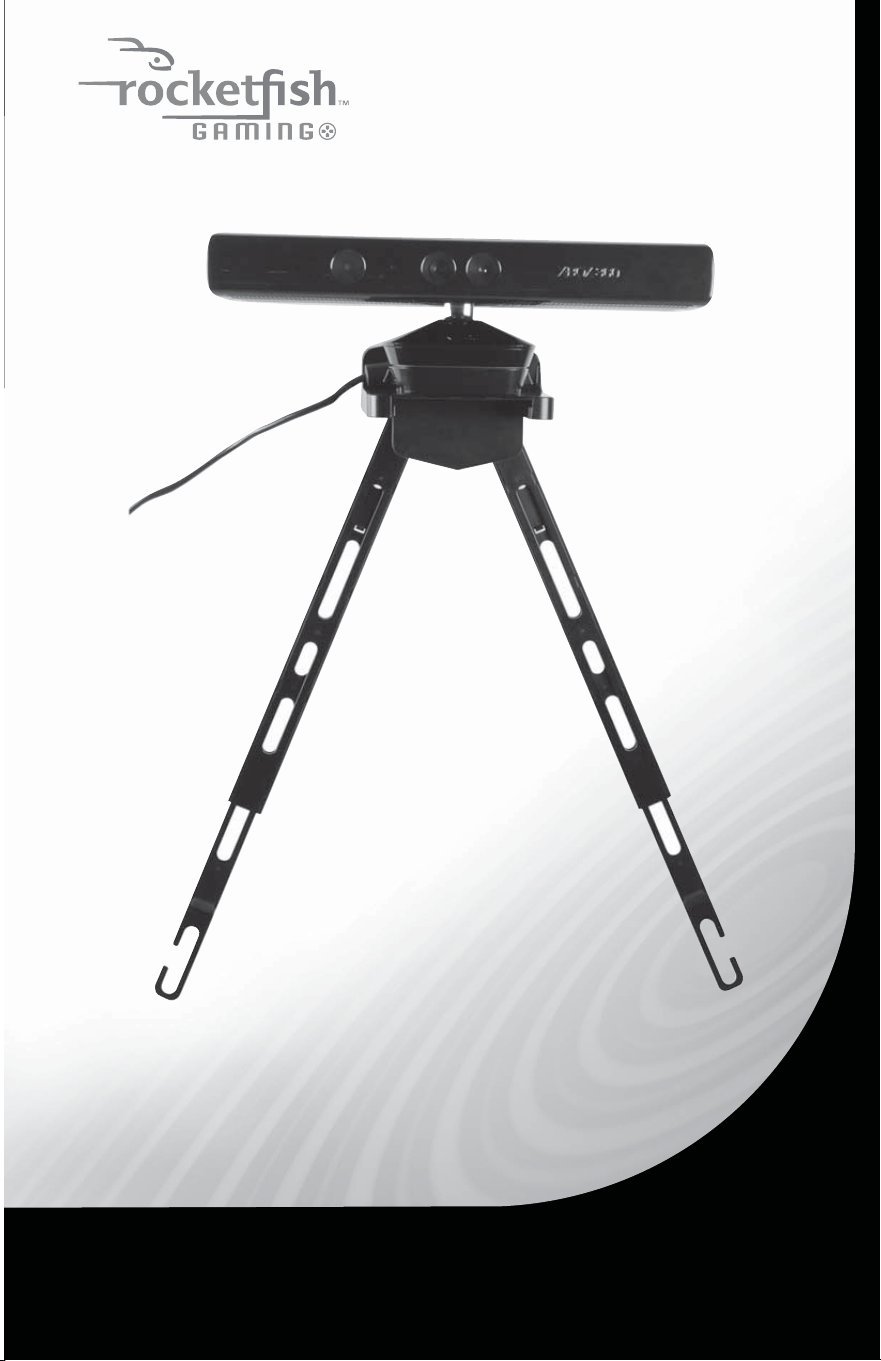
QUICK SETUP GUIDE
RF-GXBX1201
TV & Wall Mount Kit
for use with Kinect™
Fits most 26" to 52" at-panel TVs
Mounting your Kinect™ to a wall
Note: Use this option if your TV is wall-mounted and you want your Kinect™ in close
proximity. See your Kinect™ manual for information on recommended placement of
your Kinect™.
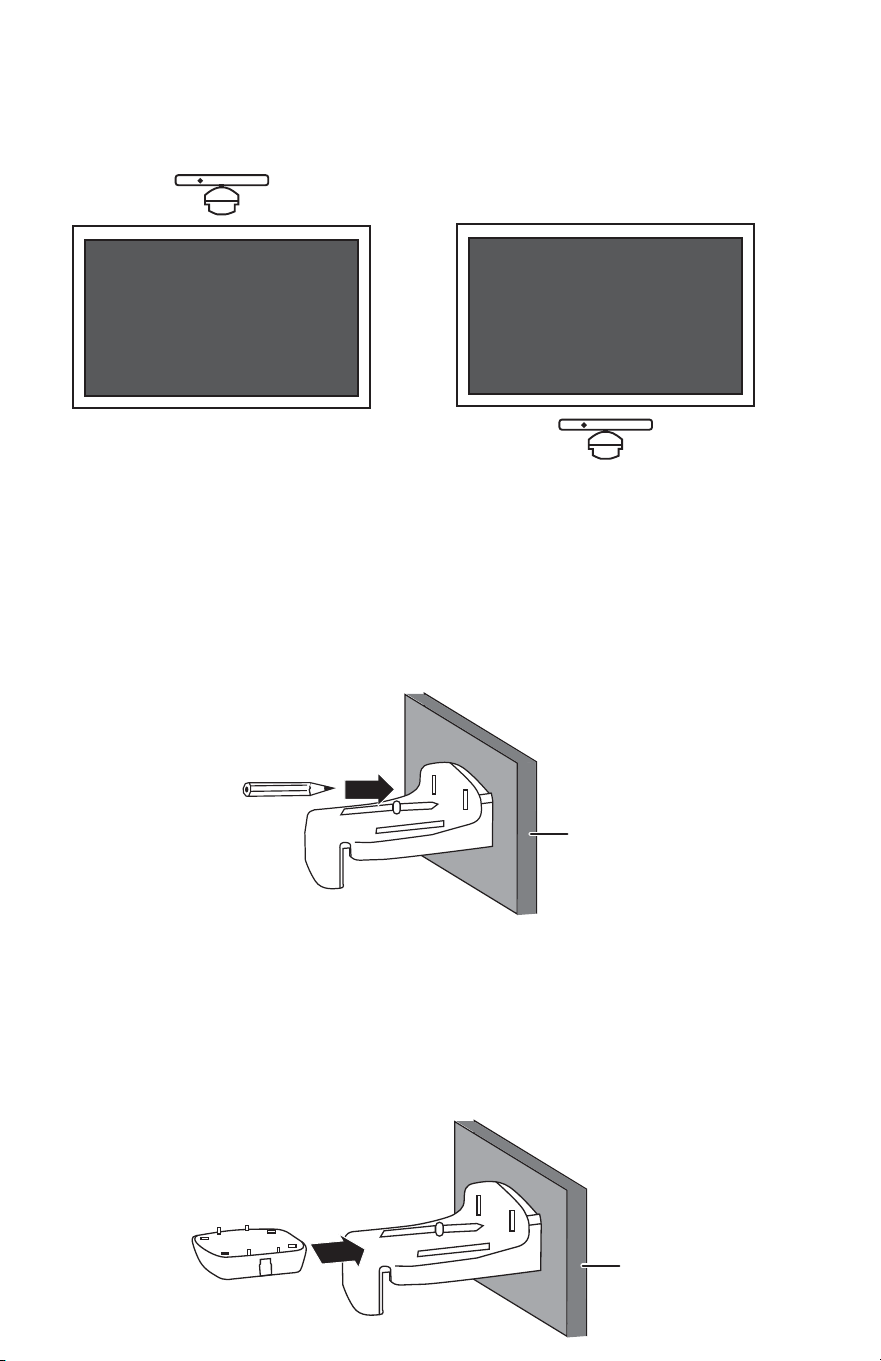
1 Find a place on your wall (either above or below your TV) to attach the wall mount.
You may attach to a wall stud to mount the bracket or use the included wall
anchors.
Note: If you attach to a stud, only one screwhole will t in the stud. If the second
screwhole is drilled through drywall, you will need to insert a wall anchor into that
hole for added strength.
2 Place the wall mount against the wall. Place a small level on the at part of the
mount. Once the mount is level, mark the screw holes with a pencil.
3 Use the 10 mm drill bit size to pre-drill holes for the screw(s) and/or wall anchor(s).
4 Drill the screw(s) and/or wall anchor(s) into the pre-drilled holes leaving
approximately ¼ of each screw out of the wall.
5 Hang the Kinect™ plate on the screws, then tighten the screws.
Note: To prevent damage to the wall mount, do not over-tighten the screws.
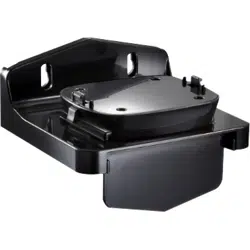
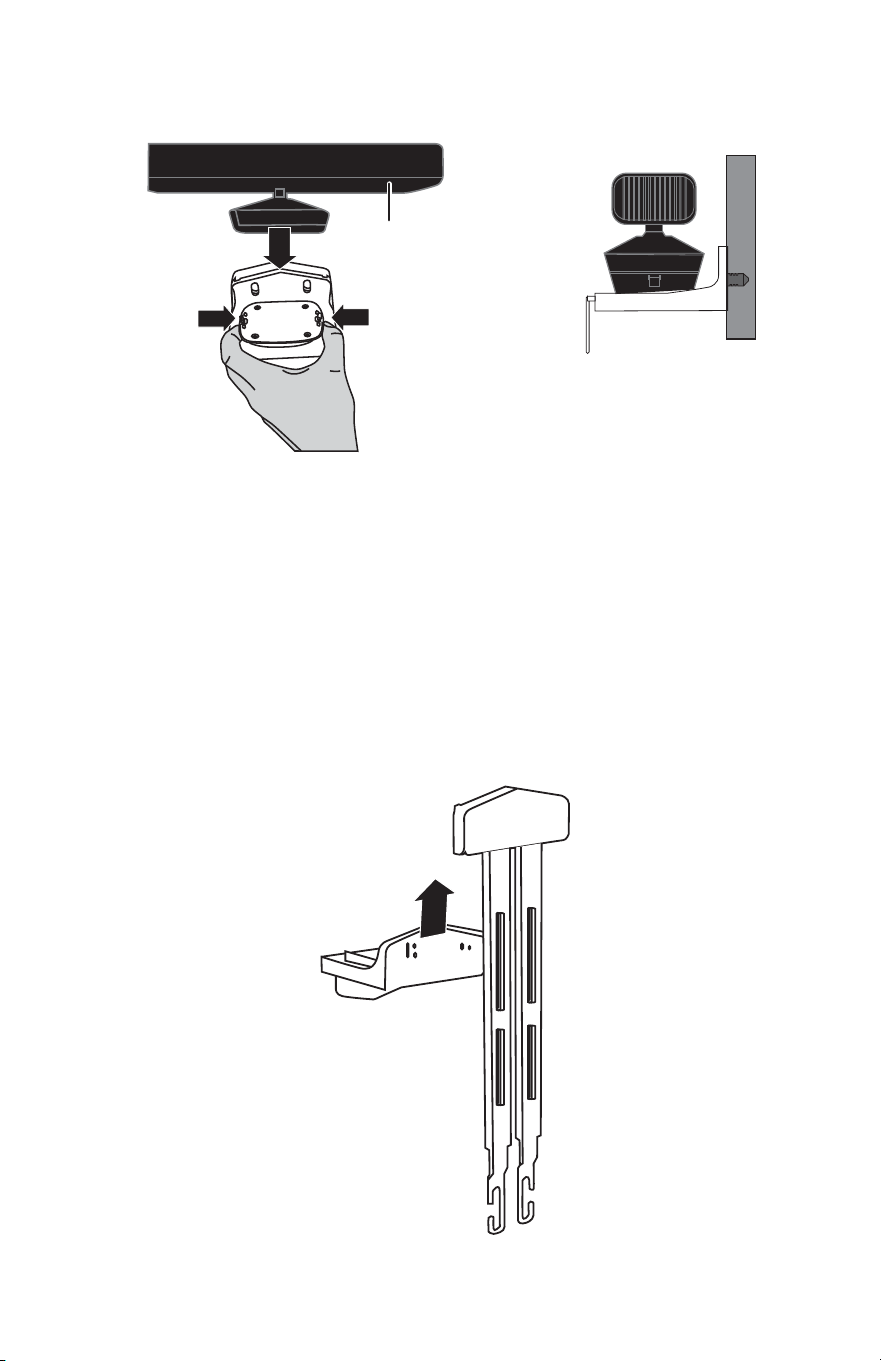
6 Slide the mounting plate onto the Kinect™ plate.
7 Press the mounting plate tabs in, then place the Kinect™ on top of the mounting
plate and release the tabs. The mounting plate will lock onto the Kinect™.
Mounting your Kinect™ to your TV
Note: Use this option if your TV sits on an open TV stand or entertainment center. See
your Kinect™ manual for recommended placement of your Kinect™.
1 To determine the screw size you will need, nd the mounting holes that exist on the
back of your TV and gently hand-thread the screws supplied until you nd the right
t. Otherwise, the mounting screw size can usually be found in your TV manual.
2 Then loosely thread screws through the two lowest, outer mouting holes. You will
tighten these later.
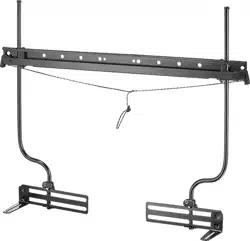
3 Slide the Kinect™ plate through the slot on the front of the retractable mounting
bracket.
CAUTION:
• This product is not intended for small children. The product may contain small
pieces that should be kept away from small children because they may pose a
choking hazard.
• Do not disassemble any of the components. Refer all servicing to qualied
personnel only.
• Do not place or store the product in a humid area and do not expose it to water
or rain.
• Use the product only as instructed. Read all instructions before operating the
product.
• Failure to follow these directions may void the warranty.
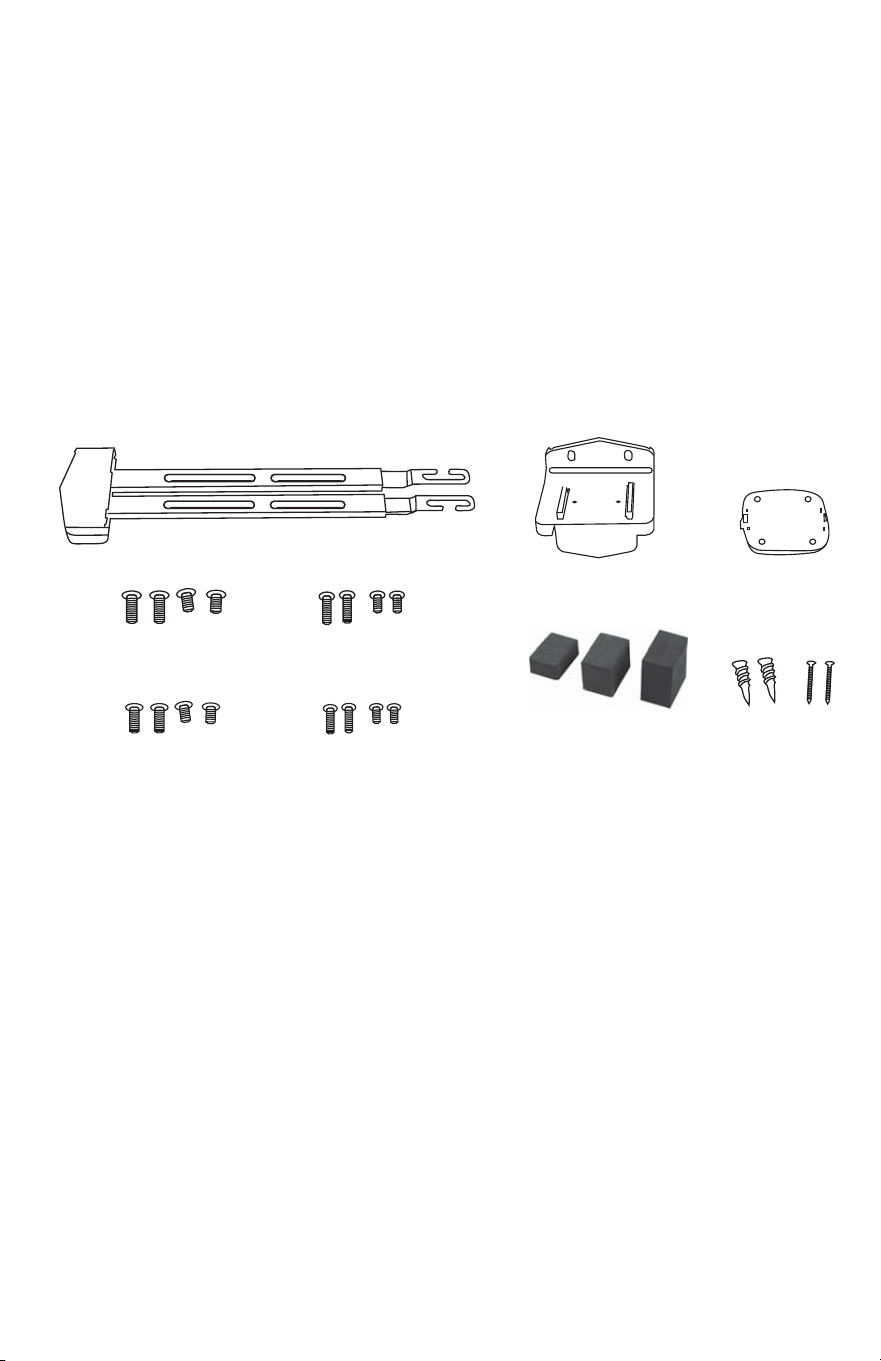
Package contents:
Kinect™ plate
Mounting bracket
Mounting plate
Protective pads (3)
Wall anchors
and
35 mm screws (2)
Required tools:
• Drill (for wall mounting)
• 10 mm drill bit (for wall mounting)
• Phillips screwdriver (for wall mounting and TV mounting)
• A small level
Kinect™
Wall
Wall
Screw M8 20 mm (2)
Screw M8 12 mm (2)
Screw M6 20 mm (2)
Screw M6 12 mm (2)
Screw M5 20 mm (2)
Screw M5 12 mm (2)
Screw M4 20 mm (2)
Screw M4 12 mm (2)
Kinect hardware not included
QUICK SETUP GUIDE
RF-GXBX1201
TV & Wall Mount Kit
for use with Kinect™
Fits most 26" to 52" at-panel TVs
Mounting your Kinect™ to a wall
Note: Use this option if your TV is wall-mounted and you want your Kinect™ in close
proximity. See your Kinect™ manual for information on recommended placement of
your Kinect™.
1 Find a place on your wall (either above or below your TV) to attach the wall mount.
You may attach to a wall stud to mount the bracket or use the included wall
anchors.
Note: If you attach to a stud, only one screwhole will t in the stud. If the second
screwhole is drilled through drywall, you will need to insert a wall anchor into that
hole for added strength.
2 Place the wall mount against the wall. Place a small level on the at part of the
mount. Once the mount is level, mark the screw holes with a pencil.
3 Use the 10 mm drill bit size to pre-drill holes for the screw(s) and/or wall anchor(s).
4 Drill the screw(s) and/or wall anchor(s) into the pre-drilled holes leaving
approximately ¼ of each screw out of the wall.
5 Hang the Kinect™ plate on the screws, then tighten the screws.
Note: To prevent damage to the wall mount, do not over-tighten the screws.
6 Slide the mounting plate onto the Kinect™ plate.
7 Press the mounting plate tabs in, then place the Kinect™ on top of the mounting
plate and release the tabs. The mounting plate will lock onto the Kinect™.
Mounting your Kinect™ to your TV
Note: Use this option if your TV sits on an open TV stand or entertainment center. See
your Kinect™ manual for recommended placement of your Kinect™.
1 To determine the screw size you will need, nd the mounting holes that exist on the
back of your TV and gently hand-thread the screws supplied until you nd the right
t. Otherwise, the mounting screw size can usually be found in your TV manual.
2 Then loosely thread screws through the two lowest, outer mouting holes. You will
tighten these later.
3 Slide the Kinect™ plate through the slot on the front of the retractable mounting
bracket.
CAUTION:
• This product is not intended for small children. The product may contain small
pieces that should be kept away from small children because they may pose a
choking hazard.
• Do not disassemble any of the components. Refer all servicing to qualied
personnel only.
• Do not place or store the product in a humid area and do not expose it to water
or rain.
• Use the product only as instructed. Read all instructions before operating the
product.
• Failure to follow these directions may void the warranty.
Package contents:
Kinect™ plate
Mounting bracket
Mounting plate
Protective pads (3)
Wall anchors
and
35 mm screws (2)
Required tools:
• Drill (for wall mounting)
• 10 mm drill bit (for wall mounting)
• Phillips screwdriver (for wall mounting and TV mounting)
• A small level
Kinect™
Wall
Wall
Screw M8 20 mm (2)
Screw M8 12 mm (2)
Screw M6 20 mm (2)
Screw M6 12 mm (2)
Screw M5 20 mm (2)
Screw M5 12 mm (2)
Screw M4 20 mm (2)
Screw M4 12 mm (2)
Kinect hardware not included
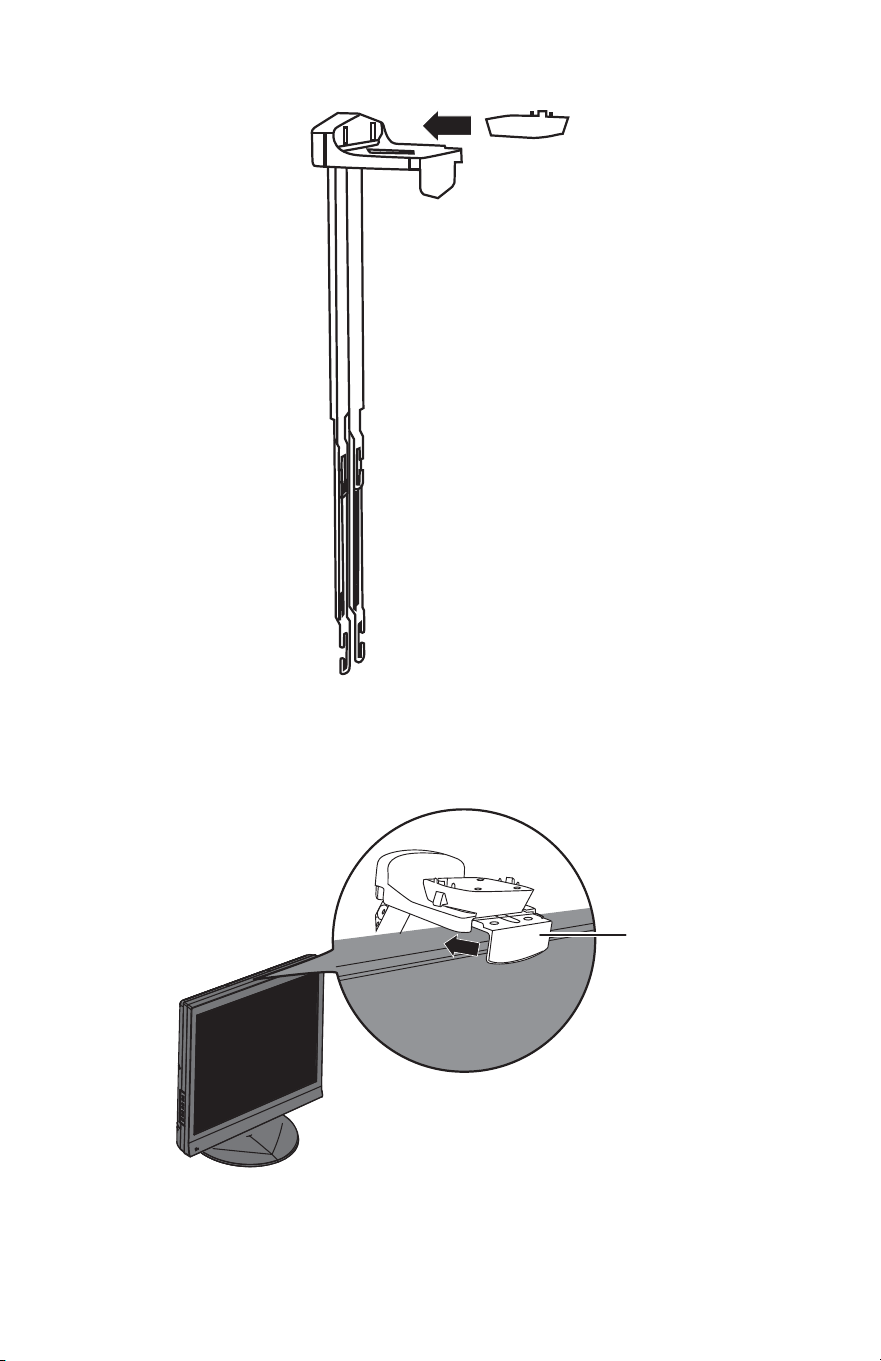
4 Slide the mounting plate on to the Kinect™ plate at the top of the retractable
mounting bracket.
5 Position the Kinect™ plate on the top center of the TV and slide the lip of the
plate until it’s ush against the front of the TV.
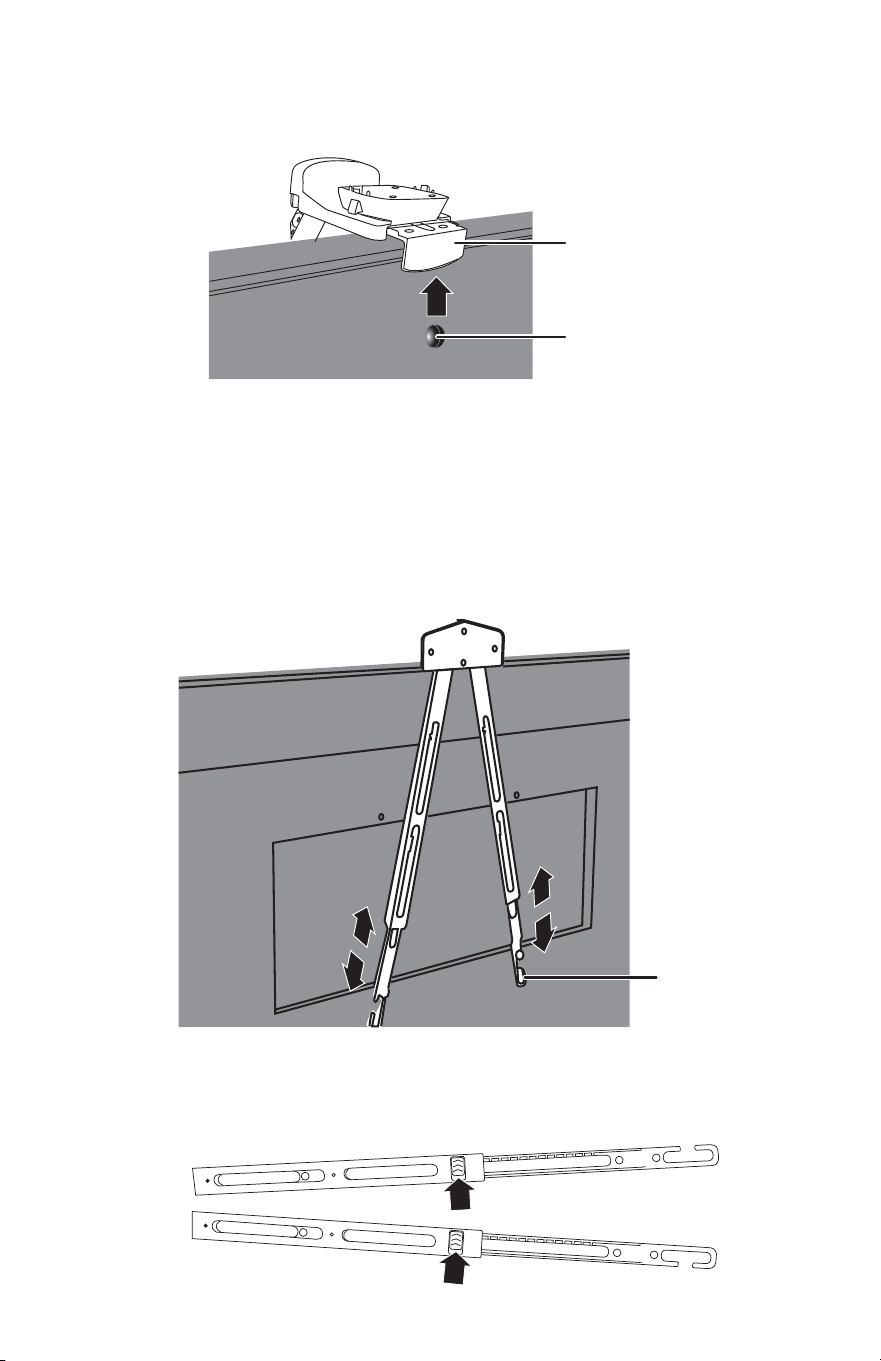
6 Place one of the supplied protective pads on the backside of the mounting bracket
lip to determine proper t. Pad size will depend on the thickness of your TV. Select
the pad that best ts your TV and keeps the mounting bracket level. Remove the
adhesive backing to apply.
7 Slide the locks on the retractable mounting bracket to the unlocked position.
8 Adjust the length of the retractable mounting bracket so that the hooks at the
bottom of the mounting bracket line up with the mounting screw holes closest to
the bottom of the TV, as shown. Make sure the retractable mounting bracket sits
ush on the top of the TV.
9 Slide the locks on the retractable mounting bracket to the locked position.
10 Slip the mounting hooks around the screws you placed on the back of the TV in
Step 1. Tighten the screws with a screwdriver.
Note: To prevent damage to the TV and retractable mounting bracket, do not
over-tighten the screws or use a powered drill.
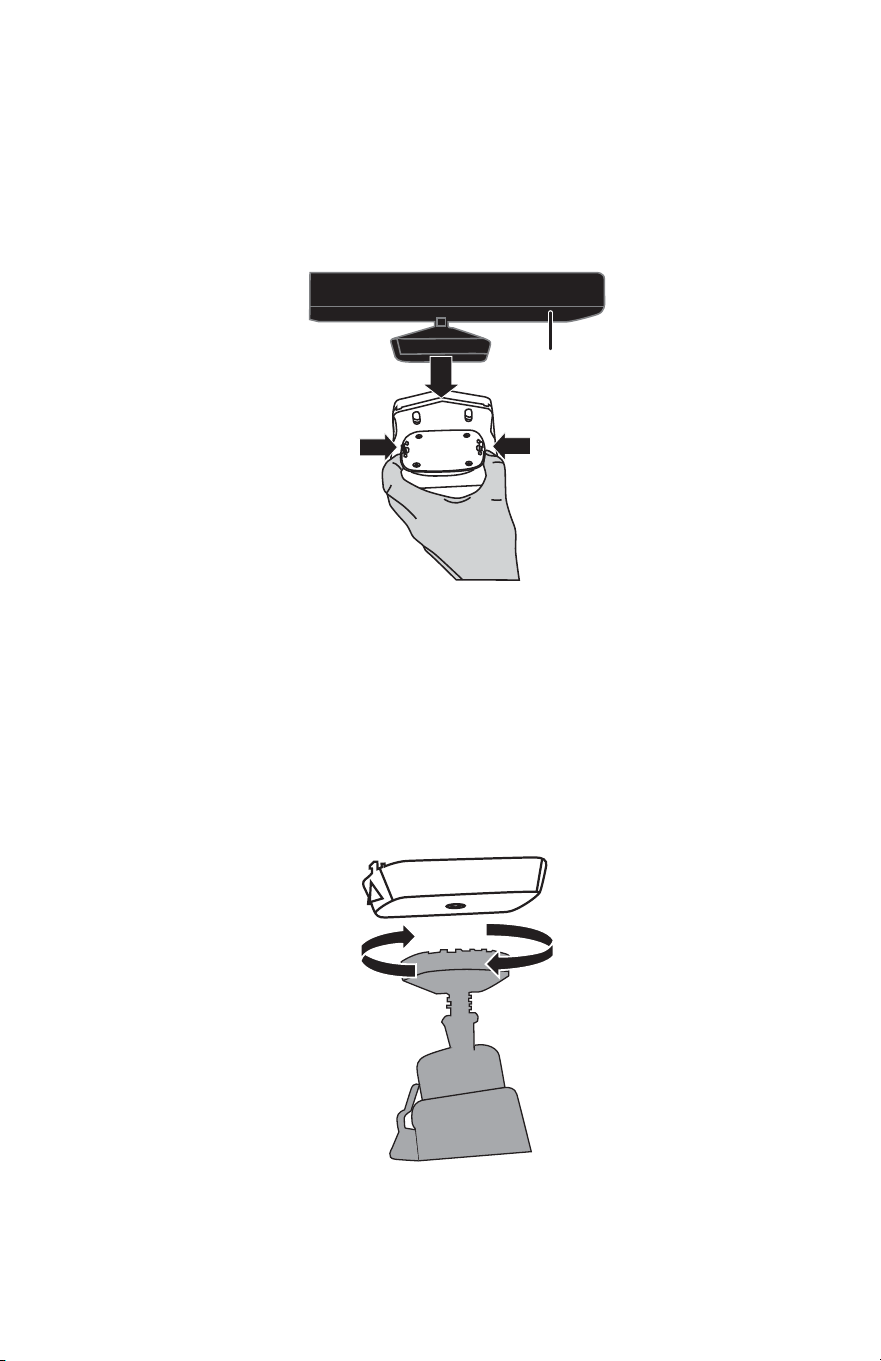
11 Press the mounting plate tabs in, then place the Kinect™ on top of the mounting
plate and release the tabs. The mounting plate will lock onto the Kinect™.
Note: Do not connect the Kinect™ until the mounting plate is securely attached to
the TV.
Connecting your Kinect™ to a tripod
Notes:
• Use this option if wall or TV mounting are not viable solutions, or if you need to
move your Kinect™ around. See your Kinect™ manual for information on
recommended placement of your Kinect™.
• Tripod is not included.
1 Screw the mounting plate onto the top of a tripod.
Kinect™
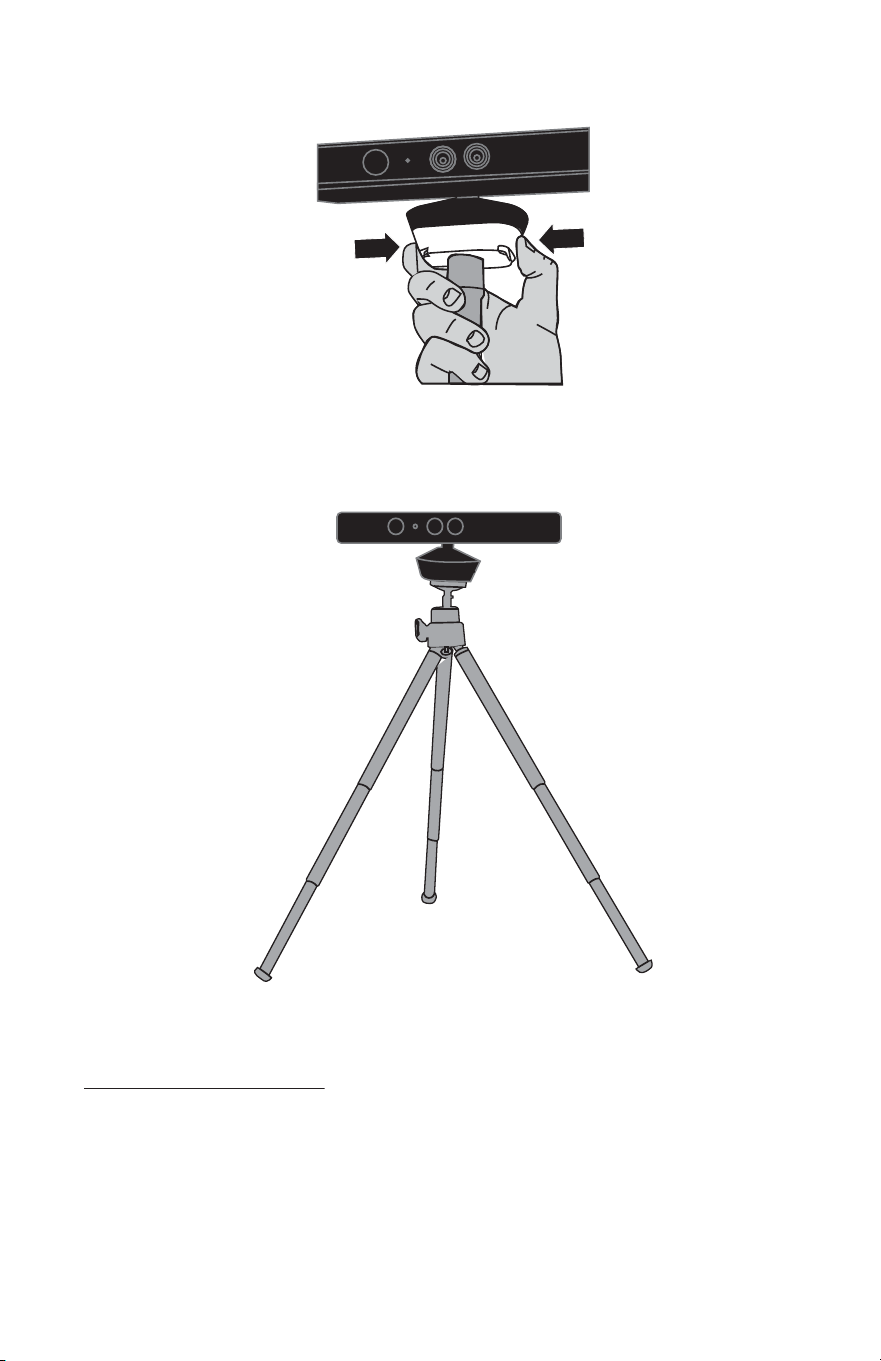
2 Press the mounting plate tabs in, then place the Kinect™ on top of the mounting
plate and release the tabs. The mounting plate will lock onto the Kinect™.
3 Adjust the tripod height and place it in a location best-suited for playing.
Note: See your Kinect™ manual for information on where the best position for your
Kinect™.
90-day warranty
Visit www.rocketshproducts.com for details
Distributed by Best Buy Purchasing, LLC
7601 Penn Avenue South, Richeld, MN 55423-3645 USA
© 2011 BBY Solutions, Inc., All Rights Reserved. ROCKETFISH is a trademark of BBY Solutions, Inc. All other products and brand
names are trademarks of their respective owners.
ENGLISH 11-0089
Lip
Lip
Protective pad
Hook
4 Slide the mounting plate on to the Kinect™ plate at the top of the retractable
mounting bracket.
5 Position the Kinect™ plate on the top center of the TV and slide the lip of the
plate until it’s ush against the front of the TV.
6 Place one of the supplied protective pads on the backside of the mounting bracket
lip to determine proper t. Pad size will depend on the thickness of your TV. Select
the pad that best ts your TV and keeps the mounting bracket level. Remove the
adhesive backing to apply.
7 Slide the locks on the retractable mounting bracket to the unlocked position.
8 Adjust the length of the retractable mounting bracket so that the hooks at the
bottom of the mounting bracket line up with the mounting screw holes closest to
the bottom of the TV, as shown. Make sure the retractable mounting bracket sits
ush on the top of the TV.
9 Slide the locks on the retractable mounting bracket to the locked position.
10 Slip the mounting hooks around the screws you placed on the back of the TV in
Step 1. Tighten the screws with a screwdriver.
Note: To prevent damage to the TV and retractable mounting bracket, do not
over-tighten the screws or use a powered drill.
11 Press the mounting plate tabs in, then place the Kinect™ on top of the mounting
plate and release the tabs. The mounting plate will lock onto the Kinect™.
Note: Do not connect the Kinect™ until the mounting plate is securely attached to
the TV.
Connecting your Kinect™ to a tripod
Notes:
• Use this option if wall or TV mounting are not viable solutions, or if you need to
move your Kinect™ around. See your Kinect™ manual for information on
recommended placement of your Kinect™.
• Tripod is not included.
1 Screw the mounting plate onto the top of a tripod.
Kinect™
2 Press the mounting plate tabs in, then place the Kinect™ on top of the mounting
plate and release the tabs. The mounting plate will lock onto the Kinect™.
3 Adjust the tripod height and place it in a location best-suited for playing.
Note: See your Kinect™ manual for information on where the best position for your
Kinect™.
90-day warranty
Visit www.rocketshproducts.com for details
Distributed by Best Buy Purchasing, LLC
7601 Penn Avenue South, Richeld, MN 55423-3645 USA
© 2011 BBY Solutions, Inc., All Rights Reserved. ROCKETFISH is a trademark of BBY Solutions, Inc. All other products and brand
names are trademarks of their respective owners.
ENGLISH 11-0089
Lip
Lip
Protective pad
Hook