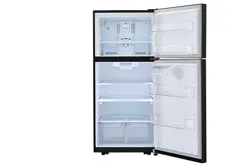
Use this page to become more familiar with the parts and features of your refrigerator. Page references are included for your convenience.
NOTE: This guide covers several models. The refrigerator you have purchased may have some or all of the items listed below. The locations of the features shown below may not match your model.
USING YOUR REFRIGERATOR
ENSURING PROPER AIR CIRCULATION
In order to obtain stable temperature, the air must flow between the freezer and refrigerator sections. As shown in the illustration below, the cold air enters through the bottom part and circulates upward. This air returns below the freezer floor and the rest of the air enters the refrigerator section through the top vent.
Do not block any of these vents with packages of food. This can interrupt the flow of air and cause temperature and moisture problems.
IMPORTANT: Because air circulates between both sections, any odors formed in one section will transfer to the other. You must thoroughly clean both sections to eliminate odors. To prevent odor transfer and drying out of food, make sure you wrap or cover foods tightly (See the “Food Storage Guide” section for details).
NOTE: If you close the fresh food compartment door applying more force than necessary, freezer door may get open and close again, due internal air flow of refrigerator.
ADJUSTING THE CONTROLS
Your refrigerator has two controls that allow you to regulate the temperature the freezer and refrigerator compartments.
Refrigerator Control (On Some Models)
Initially set the Refrigerator Control on the middle setting (number 3). To do so, press the TEMPERATURE ADJUST button until it reaches the middle position (the third LED turns ON). Leave the refrigerator on this setting for 24 hours to reach the correct temperature. After 24 hours, adjust the compartment temperature as you desire. ALWAYS wait 24 hours before you adjust the temperature. If you want to set the refrigerator compartment temperature to a warmer temperature than the current, continue pressing the TEMPERATURE ADJUST button until it reaches the desired temperature.
Demo Mode (For Store Use Only)
Demo Mode disables all cooling in the refrigerator and freezer sections to conserve energy while on display in a retail store. When activated, OFF will display on the control panel.
To deactivate:
Press the TEMPERATURE ADJUST button until your desired temperature setting is reached. The OFF light will turn off once the Demo Mode is deactivated.
Freezer Control
The freezer control should come from factory on the middle setting (number 3). Wait 24 hours before adjusting the freezer compartment temperature. Roll the knob to set the freezer temperature as you desire. ALWAYS wait 24 hours after any adjustment to reach the desired temperature.
NOTE: Setting at higher number of the freezer compartment, the temperature of freezer compartment becomes colder.
ADJUSTING CONTROL SETTINGS
Give the refrigerator time to cool down completely before adding food. It is best to wait 24 hours before adding food to the refrigerator. The mid-settings indicated in the previous section should be correct for normal household refrigerator usage. The controls are set correctly when milk or juice is cold to your liking and ice cream is firm.
The refrigerator control functions as the thermostat for the entire appliance. The higher the number setting, the longer the compressor will run to keep the temperature colder. The freezer control adjusts the cold air flow from the freezer to the refrigerator. Setting the freezer control to a lower temperature keeps more cold air in the freezer compartment to make it colder.
If you need to adjust the temperature in the refrigerator or freezer, begin by adjusting the refrigerator first. Wait 24 hours after the refrigerator adjustment to check the freezer temperature. If it is too warm or too cold, then adjust the freezer control as well.
Use the settings listed in the table below as a guide.
CONDITION/REASON:
RECOMMENDED ADJUSTMENT:
REFRIGERATOR section is too warm
Opening the door often
Adding a large amount of food
Room temperature is very warm
Adjust the REFRIGERATOR setting to the next highest number and wait 24 hours, then check.
FREEZER section is too warm/ ice is made too slowly
Opening the door often
Adding a large amount of food
Room temperature is very low (not cycling often enough)
Using ice frequently
Air vents blocked by objects
Adjust the FREEZER setting to the next highest number and wait 24 hours, then check.
Remove any objects blocking air flow.
REFRIGERATOR section is too cold
Controls not set correctly for your conditions
Adjust the REFRIGERATOR setting to the next lowest number and wait 24 hours, then check.
FREEZER section is too cold
Controls not set correctly for your conditions
Adjust the FREEZER setting to the next lowest number and wait 24 hours, then check.
Packaging Recommendations:
Use sealed plastic containers.
Use plastic containers with a smooth surface.
Package with aluminum foil of high resistance.
Wrap with paper layered with plastic.
Use water proof plastic.
Use recommended plastic bags to store frozen foods.
Follow these or container instructions in order to reach the best freezing.
Do not use:
Bread Wrapping
Plastic container not safe for storing.
Containers without lids or seals.
Waxed paper or waxed plastic.
Thin wrapping paper or not water proof.
Freezing
IMPORTANT: Do not keep bottles in the freezer compartment, they may explode after freezing and cause damage.
For the maximum use of your freezer do not store excess food. Do not introduce a large amount of unfrozen foods that cannot be frozen within 24 hours (no more than 2–3 pounds or ,91 kg - 1,36 kg of food per square inch of space in the freezer). Sufficient space must be left in order for the air to circulate properly around the packages. Leave enough space in order to close your refrigerator with out difficulty.
Storage times can vary depending on the type and quality of the food, the way its packages, or packaging container used, (in comparison to air and humidity), and the temperature it being stored in. Ice crystals formed inside your package are normal it indicates the air and humidity inside your package have condensed.
NOTE: Let warm foods cool off at room temperature for approximately 30 min, then wrap accordingly with the methods mention above and freeze. By letting your warm foods cool off before you introduce them to your freezer it will save you energy.
WARNING - SUFFOCATING DANGER
Adequate ventilation is required when using dry ice. Dry ice is Carbon Dioxide (CO2). When it evaporates i produces oxygen, causing dizziness, slight headaches, unconsciousness or death. Do not inhale these vapors and properly ventilate the room while in use of dry ice.
REFRIGERATOR SHELVES
The glass shelves in your refrigerator are adjustable to meet your individual storage needs.
Adjusting the shelves to fit different heights of items will make finding the exact item you want easier. Doing so will also reduce the amount of time the refrigerator door is open which will save energy.
IMPORTANT: Do not clean glass shelves with warm water while they are cold. Shelves may break if exposed to sudden temperature changes or impact.
NOTE: Glass shelves are heavy. Use special care when removing them. Glass shelves are heavy. Use special care when removing them.
Adjusting Shelves
Remove shelves from the shipping position and replace shelves in the position you want.
To remove a shelf—Tilt up the back of the shelf in the direction of 1 and lift it in the direction of 2 . Pull the shelf out.
PANTRY DRAWER (on some models)
To remove the Pantry Drawer:
Grasp the drawer handle and pull it forward to the drawer stop. Lift up and pull out.
To replace the Pantry Drawer:
Slide the drawer back all the way past the drawer stop.
Ice Tray (On some models)
Pour potable water to the level indicated in the picture. Do not overfill with water or ice cubes will be difficult to remove
For quick freeze, adjust the freezer dial to 3.
Twist the ice tray to remove the ice cubes
Do not bend the ice tray. Doing so may result in damage to the tray.
To remove ice cubes easily pour water on the back of the tray or soak it in water before removing ice cubes.
HUMIDITY CONTROLLED CRISPERS
The crispers provide fresher tasting fruit and vegetables by letting you easily control humidity inside the drawer.
You can control the amount of humidity in the moisturesealed crispers by adjusting the control to any setting between VEGETABLES and FRUIT.
VEGETABLES keeps moist air in the crisper for bes storage of fresh, leafy vegetables.
FRUIT lets moist air out of the crisper for best storage of fruit.
To remove and install the crisper drawers:
Pull the crisper drawer out to the drawer stop.
Lift the front of the crisper up, then pull it straight out.
To install, slightly tilt up the front, insert the drawer into the frame and push it back into place, past the drawer stop.
To remove the crisper glass:
Remove the crisper drawers (as described above).
Reach in under the glass and lift up.
Gently push the glass up and out.
To remove the crisper cover:
Remove both crisper drawers.
Remove the crisper glass.
While holding the support and crisper cover, pull upand out.
DOOR BINS
The door bins are removable for easy cleaning and adjustment.
To remove the bin, simply lift the bin up and pull straight out.
To replace the bin, slide it in above the desired supportand push down until it snaps into place.
NOTE: Some bins may vary in appearance and will only fit in one location.
DAIRY BIN
To remove the Dairy Bin, simply lift up and pull out.
To replace the Dairy Bin, slide it in above the desired support slots and push down until it stops.
WATER DISPENSER (On some models)
To dispense cold water, push on the dispenser switch with a glass.
Some dripping may occur after dispensing. Hold your cup beneath the dispenser for a few seconds after dispensing to catch all of the drops.
WARNING: Do not put your fingers up the ice chute opening. Doing so can result in severe injury.
CAUTION: Do not dispense ice into fine china or crystal glasses. China or crystal can break.
AUTOMATIC ICEMAKER (on some models)
The icemaker will produce approximately 100-130 cubes in a 24-hour period, depending on freezer compartment temperature, room temperature, number of door openings and other operating conditions.
It takes about 12 to 24 hours for a newly installed refrigerator to begin making ice. Wait 72 hours for full ice production to occur.
Ice making stops when the bin fills to the level of the feeler arm.
To turn off the automatic icemaker, set the icemaker switch to OFF (O). To turn on the automatic icemaker,set the switch to ON (I).
The water pressure must be between 20 and 120 psi on models without a water filter and between 40 and 120 psi on models with a water filter to produce the normal amount and size of ice cubes.
CAUTION:
Throw away the first few batches of ice (about 24 cubes). This is also necessary if the refrigerator has not been used for a long time.
Never store beverage cans or other items in the ice bin for the purpose of rapid cooling. Doing so may damage the icemaker or the containers may burst.
Never use thin crystal glass or crockery to collect ice. Such containers may chip or break resulting in glass fragments in the ice.
WARNING - Personal Injury Hazard! DO NOT place fingers or hands on the automatic ice making mechanism while the refrigerator is plugged in.
WHEN YOU SHOULD SET THE ICEMAKER POWER SWITCH TO OFF (O)
When the water supply will be shut off for several hours.
When the ice bin is removed for more than one or two minutes.
When the refrigerator will not be used for several days.
NOTE: The ice bin should be emptied when the icemaker ON/OFF switch is turned to the OFF position.
NORMAL SOUNDS YOU MAY HEAR
The icemaker water valve will buzz as the icemaker fills with water. If the power switch is in the ON (I) position, it will buzz even if it has not yet been hooked up to water. To stop the buzzing, move the power switch to OFF (O). NOTE: Keeping the power switch in the ON (I) position before the water line is connected can damage the icemaker.
You will hear the sound of cubes dropping into the bin and water running in the pipes as the icemaker refills.
PREPARING FOR VACATION
Set the icemaker power switch to OFF (O) and shut offthe water supply to the refrigerator.
NOTE: The ice bin should be emptied anytime the icemaker ON/OFF switch is turned to the OFF (O) position.
If the ambient temperature will drop below freezing, have a qualified technician drain the water supply system to prevent serious property damage due to flooding caused by ruptured water lines or connections.
WATER FILTER
WATER FILTER (On some models)
It is recommended that you replace the water filter.
Approximately every 6 months.
When the Filter Exchange indicator turns on.
When the water dispenser output decreases.
When the ice cubes are smaller than normal.
REMOVE THE OLD WATER FILTER.
NOTE: Replacing the water filter causes a small amount of water (around 1 oz. or 25 cc) to drain. Wrap a cloth around the front end of the water filter cover to collect any water. Hold the water filter upright, once it is removed, to leaking prevent any remaining water from spilling out of the water filter.
Make sure to turn off the household water supply.
Turn the filter counterclockwise and then pull down and out. Make sure to rotate the filter down completely before pulling it out of the manifold hole.
NOTE: The substitute cap must be retained for the future. If the filter is removed and not replaced, it is necessary to reinstall the substitute cap to prevent water leaks from the filter housing.
REPLACE WITH A NEW WATER FILTER
1. Remove the red cap from the filter.
2. Insert the filter into the filter receptacle on the left side of the refrigerator compartment.
3. Push the water filter up into the filter receptacle and rotate it clockwise to lock it into place. Once installed correctly, you should not be able to rotate the filter clockwise any more.
AFTER INSTALLING THE WATER FILTER:
Replace the shelf to the initial position.
Turn on household water supply.
Dispense 2.5 gallons (9.46 liters) of water to purge the system, depressing and releasing the dispenser pad in cycles of 30 seconds ON and 60 seconds OFF. Open the refrigerator door and check the shelf area for water leaks.
REFRIGERATOR CARE AND CLEANING
WARNING - EXPLOSION HAZARD! Do not use flammable cleaners. Not following these instructions can cause death, explosion or fire.
The refrigerator, as well as the freezer, do their own de-freezing. This process does not prevent the build up of contaminants, therefore it is suggested that you clean both parts once a month; clean spilled liquids immediately.
REFRIGERATOR CLEANING
Unplug your refrigerator.
Pull out all of the removable parts (such as the vegetable and dairy doors).
Use a clean sponge (or a soft rag) and use it with lukewarm water mixed with detergent. Do not use abrasive or concentrated cleaners.
Hand wash it, and dry it thoroughly.
Plug the refrigerator back in.
OUTSIDE
For products with a stainless steel exterior, use a clean sponge or soft cloth and a mild detergent in warm water. Do not use abrasive or harsh cleaners. Dry thoroughly with a soft cloth.
NOTE: Avoid the usage of chemical products that contain phosphates or bleach.
INSIDE (Allow freezer to slightly warm up a small degree to prevent cloth from sticking)
In order to eliminate bad odors, clean the inside of the refrigerator with a mixture of baking powder and lukewarm water (one teaspoon of baking powder per cup of water). Ensure that the powder dissolves thoroughly, in order to prevent any sort of damage.
DOOR LINING AND GASKETS
Use only a mild detergent (such as dish soap).
PLASTIC PARTS (Covers and Panels)
Do not use abrasive, paper or rough products. These could damage the product.
BACK COVER
WARNING - ELECTRICAL SHOCK HAZARD! Before you begin, either unplug the refrigerator or turn off power at the circuit breaker or fuse box.
NOTE: Back Cover should only be removed by a qualified technician.
In order to get an efficient performance of your refrigerator, clean the back cover of it at least twice a year.
REPLACING REFRIGERATOR LIGHTS
The refrigerator and freezer compartment lights are LED interior lighting, and service should be performed by a qualified technician.
WARNING - ELECTRIC SHOCK HAZARD! Before replacing the LED module, either unplug the refrigerator or turn off power at the circuit breaker or fuse box.
POWER INTERRUPTIONS
In case of a black out, call your electric company and ask how long it will last.
In case of a 24 hour or less black out, do not open the refrigerator; this will keep the food fresh.
In case of a longer black out, do one of the following options:
Pull out all of the frozen food and keep them in an ice chest.
Put 2 lbs (907 g) of frozen ice (make sure you use gloves) for each square foot (28 L) inside the freezer. This task will preserve the food from 2 to 4 days.
In case you do not possess neither ice chest or dry ice, consume your food as soon as possible.
REMEMBER: In a power failure, a full freezer stays cold longer than a partially filled one. A freezer full of meat stays cold longer than a freezer full of baked goods. If you see that food contains ice crystals, it may be safely refrozen, although the quality and flavor may be affected. If the condition of the food is poor or if you feel it unsafe, dispose of it.
WHEN GOING ON VACATION
If you decide to leave your refrigerator on when going away, consider these steps:
Consume all of the perishable items and freeze the rest.
Empty the ice bin.
If you decide to leave your refrigerator off:
Remove all of the food.
Unplug your refrigerator.
Clean and dry it well.
Make sure the doors stay open (use blocks or tape) in order to prevent bad odors and fungi from happening.
WHEN MOVING
If you decide to take your refrigerator with you when moving, consider the following:
Remove all of the food from it, and place the frozen food in an ice chest with dry ice.
Unplug your refrigerator.
Empty the water from its tray.
Clean and dry it with a rag.
Pull out all of the removable parts, and wrap them with adhesive tape.
Depending on the model of the refrigerator, lift the top part of the refrigerator so it can roll with ease, or screw the levelers so it won ́t scratch the floor. Consult to the section “Closing and Aligning Doors”.
Keep the doors closed with the cable glued to the refrigerator cabinet with an adhesive tape.
When your refrigerator arrives to your home, put everything back into place and read the section “Refrigerator Installation” in order to obtain installation preparation. In case your refrigerator has a factory ice maker, remember you have to reconnect the water supply.
ABOUT THE AUTOMATIC ICE MAKER
NOTE: The automatic Ice maker is only included in some models. Check your specifications of your refrigerator.
WARNING - PERSONAL INJURY HAZARD! Avoid contact with any moving parts of the ejector mechanism or with the heater that releases the ice cubes. DO NOT place your fingers in the automatic ice maker when the refrigerator is plugged in.
OPERATING INSTRUCTIONS
After turning on your refrigerator, the ice will start to be made between 12 and 24 hours.
Identify your ice maker type. Type 1
The ice maker produces 8 cubes per cycle (between 64 and 128 cubes in a 24 hour period), depending on the temperature of the freezer, the times in which the door opens, and other using conditions (amount of food in the freezer, etc).
If the refrigerator is used before the connection of water to the ice maker was performed, you must turn its dial to O (off).
When the water connections are performed, turn its dial to I (on).
The ice maker will fill up (and start making ice) between 12 and 24 hours after the refrigerator is turned on.
Throw away the first batch of ice. Make sure that nothing interferes with the sensor.
When the ice reaches the sensor, the ice maker will stop to make ice immediately.
It’s normal that some ice gets stuck. If the ice is not used frequently, the older cubes of ice will be opaque in color, smaller, and with a strange flavor.
NOTE: Never store beverage cans or other items in the ice bin for the purpose of rapid cooling. Doing so may damage the ice maker or the container may burst.
YOU MUST TURN THE SWITCH TO O (OFF)
When the water supply is interrupted for many hours.
When the ice container is left out of its place for more than one or two minutes.
When the refrigerator will not be in use for various days.
NORMAL SOUNDS
The valve will emit a buzzing sound when the ice maker is full of water. If the switch is placed in the on position the buzz will still be heard even when the water pipe has not been connected. To avoid this sound, move switch to O (off) position.
NOTE: The ice maker can get damaged if the switch is kept in the ON position before the water pipe has been connected.
While the ice maker is filling up with water and producing ice, you will hear the sound of the ice falling and water flowing through the pipes.
You will hear the sound of cubes dropping into the bin and water running in the pipes as the icemaker refills.
PREPARING FOR VACATIONS
Move the ice maker switch to the O (off) position and cut the flow of water going into the refrigerator.
If room temperature is at freezing point, have a specialized technician drain the flow of water from the inner pipes (certain models) to avoid broken pipe related damage.
NOTE: To avoid water spilling, the unit should be leveled and placed on even floor. Do not remove the ice bin from the ice maker for a long period, doing so may cause ice spilling.
TROUBLESHOOTING GUIDE
UNDERSTANDING SOUNDS YOU MAY HEAR
Your new refrigerator may make sounds that your old one did not make. Most of the new sounds are normal. Hard surfaces, like the floor, walls and cabinets, can make the sounds seem louder than they actually are. The following describes the kinds of sounds you may hear and what may be causing them..
Clicking:
The defrost control will click when the automatic defrost cycle begins and ends. The thermostat control (or refrigerator control, depending on the model) will also click when cycling on and off.
Rattling:
Rattling noises may come from the flow of refrigerant, the water line, or items stored on top of the refrigerator.
Whooshing:
• Evaporator fan motor circulating the air through the refrigerator and freezer compartments.
• Air being forced over the condenser by the condenser fan.
• Ice compartment fan in the freezer on the left side of the refrigerator when the doors are open.
Gurgling:
As each cycle ends, you may hear a gurgling sound caused by the refrigerant flowing through the cooling system.
Popping:
Contraction and expansion of the inside walls.
Sizzling:
Water dripping on the defrost heater during a defrost cycle.
Vibrating Noise:
If the side or back of the refrigerator is touching a cabinet or wall, some of the normal vibrations may make an audible sound. To eliminate the noise, make sure that the sides and back cannot vibrate against any wall or cabinet.
Dripping:
Water running into the drain pan during the defrost cycle. Pulsating or High-Pitched Sound:
Your refrigerator is designed to run more efficiently to keep your food items at the desired temperature.
The high efficiency compressor may cause your new refrigerator to run longer than your old one, but is still more energy efficient than previous models. While the refrigerator is running, it is normal to hear a pulsating or high-pitched sound.
Problem
Possible Causes
Solutions
Refrigerator and Freezer section are not cooling.
The power supply cord is unplugged.
Firmly plug the cord into a live outlet with proper voltage (see Electrical & Grounding Requirements).
A fuse in your home may be blown or the circuit breaker tripped. Or the appliance is connected to a GFCI (Ground Fault Circuit Interrupter) outlet, and the outlet's circuit breaker has tripped.
Check the main electrical box and replace the fuse or reset the circuit breaker. Do not increase fuse capacity. If the problem is a circuit overload, have it corrected by a qualified electrician.
Reset the circuit breaker on the GFCI. If the problem persists, contact an electrician.
The refrigerator control is set to OFF.
Refer to the Setting the Controls section.
Refrigerator is in the defrost cycle.
Wait about 30 minutes for defrost cycle to end.
The OFF light is illuminated.
The refrigerator is in DEMO mode. The Demo Mode disables the cooling system and only the lamps and display will work normally. To disable Demo Mode, press the Temperature Adjust button until you set the desire temperature level. When demo mode is deactivated, the OFF light will turn off.
Lights do not work.
The power supply cord is unplugged.
Firmly plug the cord into a live outlet with proper voltage (refer to Electrical & Grounding Requirements).
An LED light has malfunctioned.
Before proceeding to replace LED, unplug the refrigerator or turn off power at the circuit breaker or fuse box.
NOTE: The refrigerator and freezer compartment lamps are LED interior lighting, and service should only be performed by a qualified technician.
Vibration or rattling noise.
The refrigerator is not resting solidly on the floor.
Floor is weak or uneven or leveling legs need adjusting. See the Installation section for leveling instructions.
Cooling system runs too much.
The refrigerator that was replaced was an older model.
Modern refrigerators require more operating time but use less energy due to more efficient technology.
The room temperature is warmer than normal.
The compressor will run longer under warm conditions. At normal room temperatures (70°F) expect your compressor to run about 40% to 80% of the time. Under warmer conditions, expect it to run even more often. The refrigerator should not be operated in surrounding temperatures above 110°F.
The door is opened often or a large amount of food has just been added.
Adding food and opening the door warms the refrigerator, requiring the compressor to run longer in order to cool the refrigerator back down. In order to conserve energy, try to get everything you need out of the refrigerator at once, keep food organized so it is easy to find, and close the door as soon as the food is removed. (Refer to the Food Storage Guide.)
The refrigerator was recently plugged in and the refrigerator control was set correctly.
The refrigerator will take up to 24 hours to cool completely
The refrigerator control is not set correctly for the surrounding conditions.
See the Adjusting Control Settings section.
Cooling system runs too much.
The doors are not closed completely.
Firmly push the doors shut. If they will not shut all the way, see "Doors will not close completely" in the Troubleshooting section.
The back cover is dirty.
This prevents air transfer and makes the motorwork harder. Clean the back cover. Refer tothe Care and Cleaning section.
Doors will not close completely.
The refrigerator is not level.
See the Leveling and Door Alignment section.
Food packages are blocking the door open.
Rearrange food containers to clear door and door shelves.
The ice bin, crisper cover, pans, shelves, door bins or baskets are out of position.
Push bins all the way in and put crisper cover, pans, shelves and baskets into their correct positions. See the Using Your Refrigerator section for more information.
The gaskets are sticking.
Clean gaskets and the surfaces that they touch. Rub a thin coat of appliance polish or kitchen wax on the gaskets after cleaning.
The refrigerator wobbles or seems unstable.
Level the refrigerator. Refer to the Leveling and Door Alignment for more information.
The doors were removed during product installation and not properly replaced.
Remove and replace the doors according to the Removing and Replacing Refrigerator Handles and Doors section, or call a qualified technician.
Frost or ice crystals on frozen food.
The door is not closing properly.
See "Doors will not close completely" in the Troubleshooting section.
The door is opened often.
When the door is opened, warm, humid air is allowed in the freezer, resulting in frost.
Ice has bad taste
or odor.
The icemaker was recently installed.
Discard the first few batches of ice to avoid discolored or bad tasting ice.
The ice has been stored for too long.
Throw away old ice and make a new supply.
The food has not been wrapped tightly in either compartment.
Rewrap foods since odors may migrate to the ice if food is not wrapped properly.
The water supply contains minerals such as sulfur.
A water filter may need to be installed to eliminate taste and odor problems.
The interior of the refrigerator needs cleaning.
See Care and Cleaning section for more information.
The ice storage bin needs cleaning.
Empty and wash bin. Discard old cubes.
There is water in the defrost drain pan.
The refrigerator is defrosting.
The water will evaporate. It is normal for water to drip into the defrost pan.
It is more humid than normal.
Expect that the water in the defrost pan will take longer to evaporate. This is normal when it is hot or humid.
The refrigerator seems to make too much noise.
The sounds may be normal for your refrigerator.
Refer to the Understanding Sounds You May Hear section for more information.
The icemaker is not producing ice or not enough ice.
New installation.
Wait 12 to 24 hours after icemaker installation for ice production to begin. Wait 72 hours for full ice production.
The refrigerator is not connected to a water supply or the supply shutoff valve is not turned on.
Connect refrigerator to the water supply and turn water shutoff valve fully open.
Reverse osmosis water filtration system is connected to your cold water supply.
Reverse osmosis filtration systems can reduce the water pressure below the minimum amount and result in icemaker issues. (Refer to Water Pressure section.)
Kink in the water source line.
A kink in the line can reduce water flow. Straighten the water source line.
Ice demand has exceeded storage capacity.
The icemaker will produce approximately 95 cubes in a 24 hour period.
NOTE: An extra ice bucket is provided in the freezer section for additional storage capacity.
The icemaker is not turned on.
Locate the icemaker ON/OFF switch and confirm it is in the ON (I) position.
There is something on the ice-detecting sensor.
Foreign substances or frost on the icedetecting sensor can interrupt ice production.
Make sure the sensor area is clean at all times for proper operation.
The temperature setting for the freezer is too warm.
The recommended temperature for the freezer compartment for normal ice production is 0°F. If the freezer temperature is warmer, ice production will be affected.
The doors are opened often.
If the doors of the unit are opened often, ambient air will warm the refrigerator which will prevent the unit from maintaining the set temperature. Lowering the refrigerator temperature can help, as well as not opening the doors as frequently.
The doors are not closing properly.
If the doors are not properly closed, ice production will be affected. See "Doors will not close completely" in the Troubleshooting section for more information.
Refrigerator or Freezer section is too cold.
Controls are not set correctly for conditions.
If the temperature is too cold, raise the temperature setting one increment at a time (refer to the Setting the Controls section). When changing control settings, wait 24 hours before making additional adjustments.
Temperature is too warm or there is interior moisture buildup.
The air vents are blocked. Cold air circulates from the freezer to the fresh food section and back again through air vents in the wall dividing the two sections.
Locate air vents by using your hand to senseairflow and move all packages that blockvents and restrict airflow. (See air flowdiagram below.)
The doors are opened often.
Opening the door warms the refrigerator, requiring the compressor to run longer in order to cool the refrigerator back down. In order to conserve energy, try to get everything you need out of the refrigerator at once, keep food organized so it is easy to find, and close the door as soon as the food is removed.
The control is not set correctly for the surrounding conditions.
If the temperature is too warm, change the setting one increment at a time. Refer to the Setting the Controls section. Wait 24 hours for temperatures to stabilize or even out.
A large amount of food has just been added to the refrigerator or freezer
Adding food warms the refrigerator. It can take a few hours for the refrigerator to return to normal temperature.
The food is not packaged correctly
Wrap food tightly and wipe off damp containers prior to storing in the refrigerator to avoid moisture accumulation. If necessary, repackage food according to the guidelines in the Food Storage Guide section.
The doors are not closing completely.
See “Doors will not close completely” in the Troubleshooting section.
The weather is humid.
In humid weather, air carries moisture into the refrigerator when the doors are opened. Increased humidity in the freezer or refrigerator compartments can lead to frost or condensation.
An automatic defrost cycle was completed.
It is normal for droplets to form on the interior back wall after the refrigerator automatically defrosts.
The doors are difficult to open.
The gaskets are dirty or sticky.
Clean the gaskets and the surfaces that they touch. Rub a thin coat of appliance polish or kitchen wax on the gaskets after cleaning.
The door is reopened within a short time after having been opened.
When you open the door, warmer air entersthe refrigerator. As the warm air cools, it cancreate a vacuum. If the door is hard to open,wait one minute to allow the air pressure toequalize, then see if it opens more easily
Frozen food in refrigerator compartment.
The temperature control in the refrigerator compartment is set too cold
Press the Temperature Adjust button to set the refrigerator compartment to a warmer temperature.
Refrigerator is installed in a cold location.
When room temperature is below 41°F (5°C), food can freeze. The refrigerator should not be operated in temperatures below 55°F (13°C).
Food with a high water content was placed too close to the cold air discharge vent.
Place food with a high water content toward the front of the refrigerator.
Additionally, the document applies to other LG Electronics models: LTCS20220*, LTCS24223*, LTCS20120*, LTWS24223*, LTNS20220*, LTCS20020*, LTCS20030*, LTCS20040*, GT66BP*, GT58BP*, GT57BP*K