Loading ...
Loading ...
Loading ...
9
Cancelling the setting
Press the
0 Clock button. Press the - button until zero is
shown on the display. Switch off the function selector.
Setting the cooking time if the clock is hidden
Press the
0 Clock button twice and make your settings as
described in point 4.
If the oven is to switch on and off
automatically
Please remember that easily spoiled foods must not be allowed
to remain in the cooking compartment for too long.
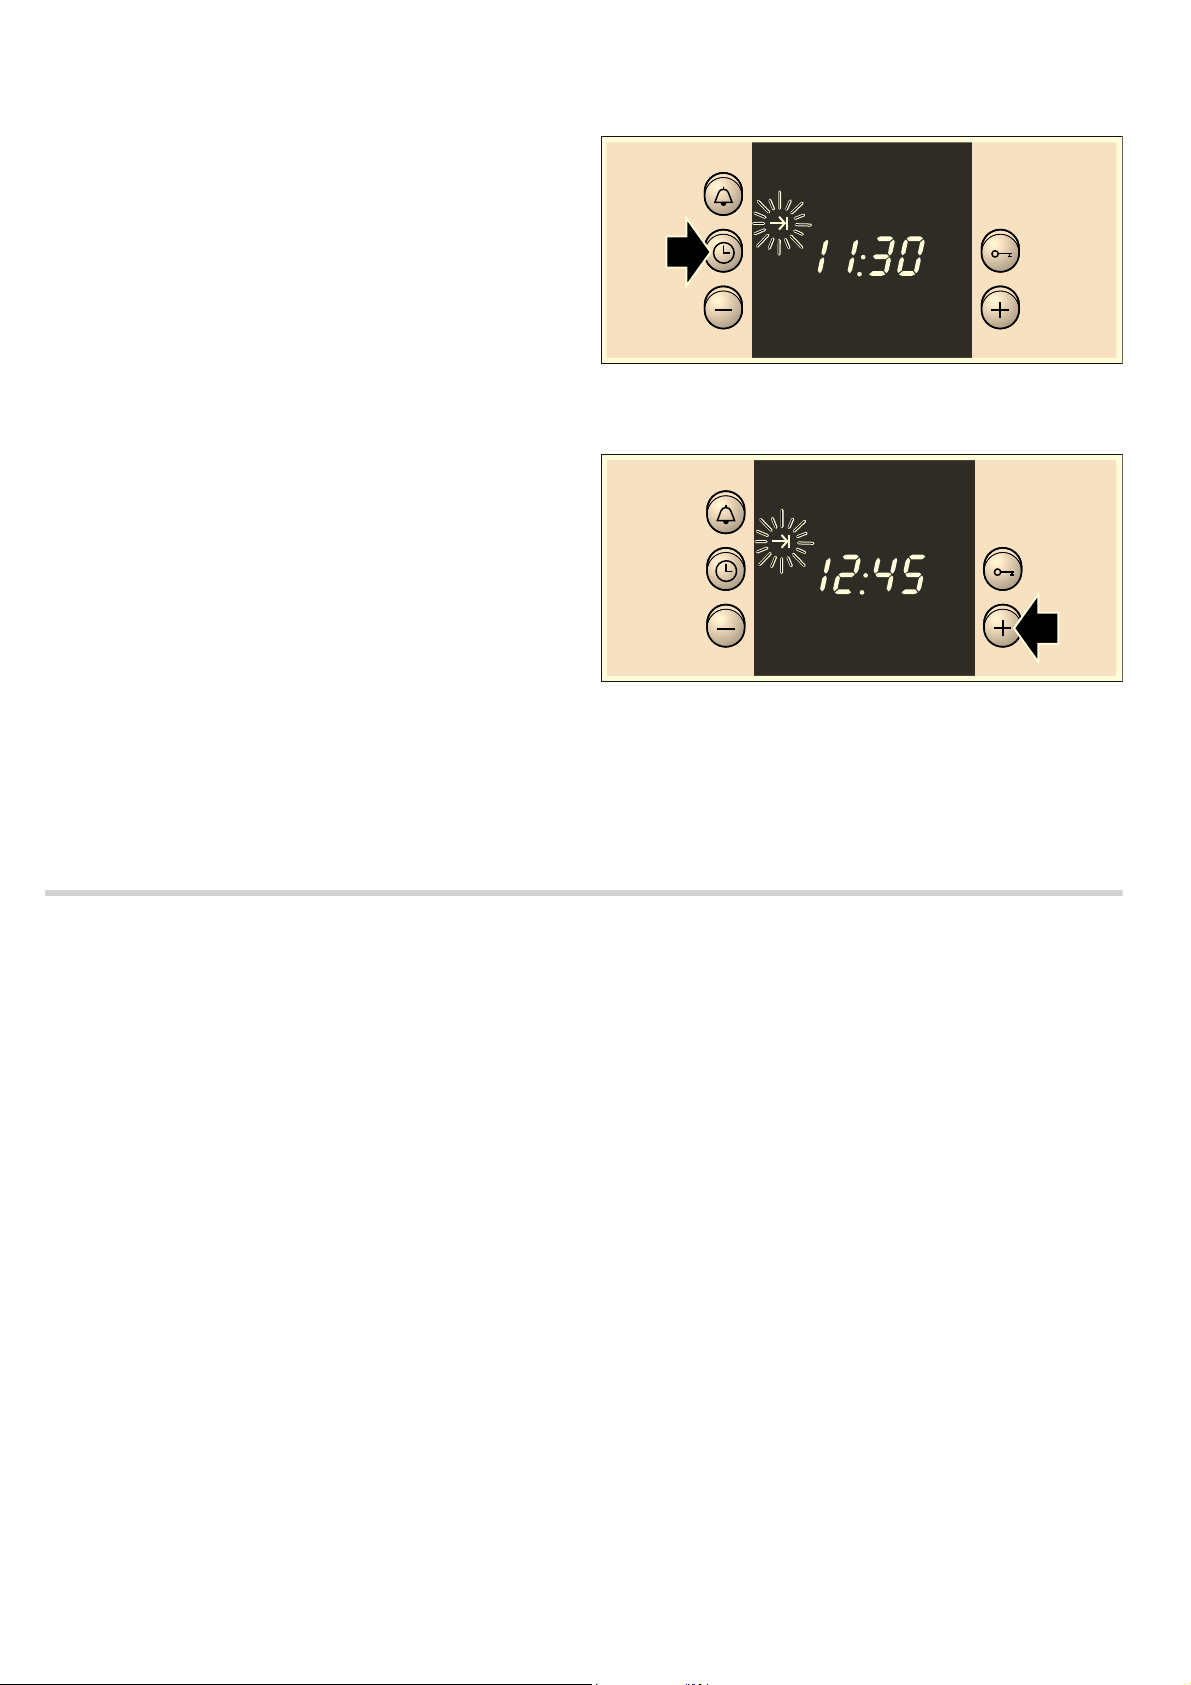
Example in the picture: 3D hot air
:, 200 °C. It is 10:45. The
meal takes 45 minutes to cook and should be ready at 12:45 .
1. The function selector is used to set the type of heating.
2. The temperature selector is used to set the temperature or
grill setting.
3. Press the 0 Clock button.
4. Use the @ or A button to set the cooking time.
5. Press the 0 Clock button repeatedly until the y End symbol
flashes.
You can see in the display when the meal will be ready.
6. Use the @ button to set a later end time.
The setting is adopted after a few seconds.
The end time is shown in the display until the oven starts.
The cooking time has elapsed
A signal sounds. The oven switches off. Press the
0 button
twice and switch off the function selector.
Note: You can make changes as long as the symbol is
flashing. When the symbol lights up, the setting has been
adopted.
Setting the clock
When the appliance is connected for the first time or after a
power cut, the
0 symbol and three zeros flash in the display.
Set the clock. The function selector must be switched off.
Setting procedure
1. Press the 0 Clock button.
12.00 appears in the display and the
0 symbol flashes.
2. Use the + or - button to change the clock.
After a few seconds, the time is saved. The
0 symbol goes
out.
Changing from summer to winter time, for example
Press the
0 Clock button twice and change the time using the
+ or - button.
PLQ VHF
K
PLQ
PLQ VHF
K
PLQ
Loading ...
Loading ...
Loading ...