Loading ...
Loading ...
Loading ...
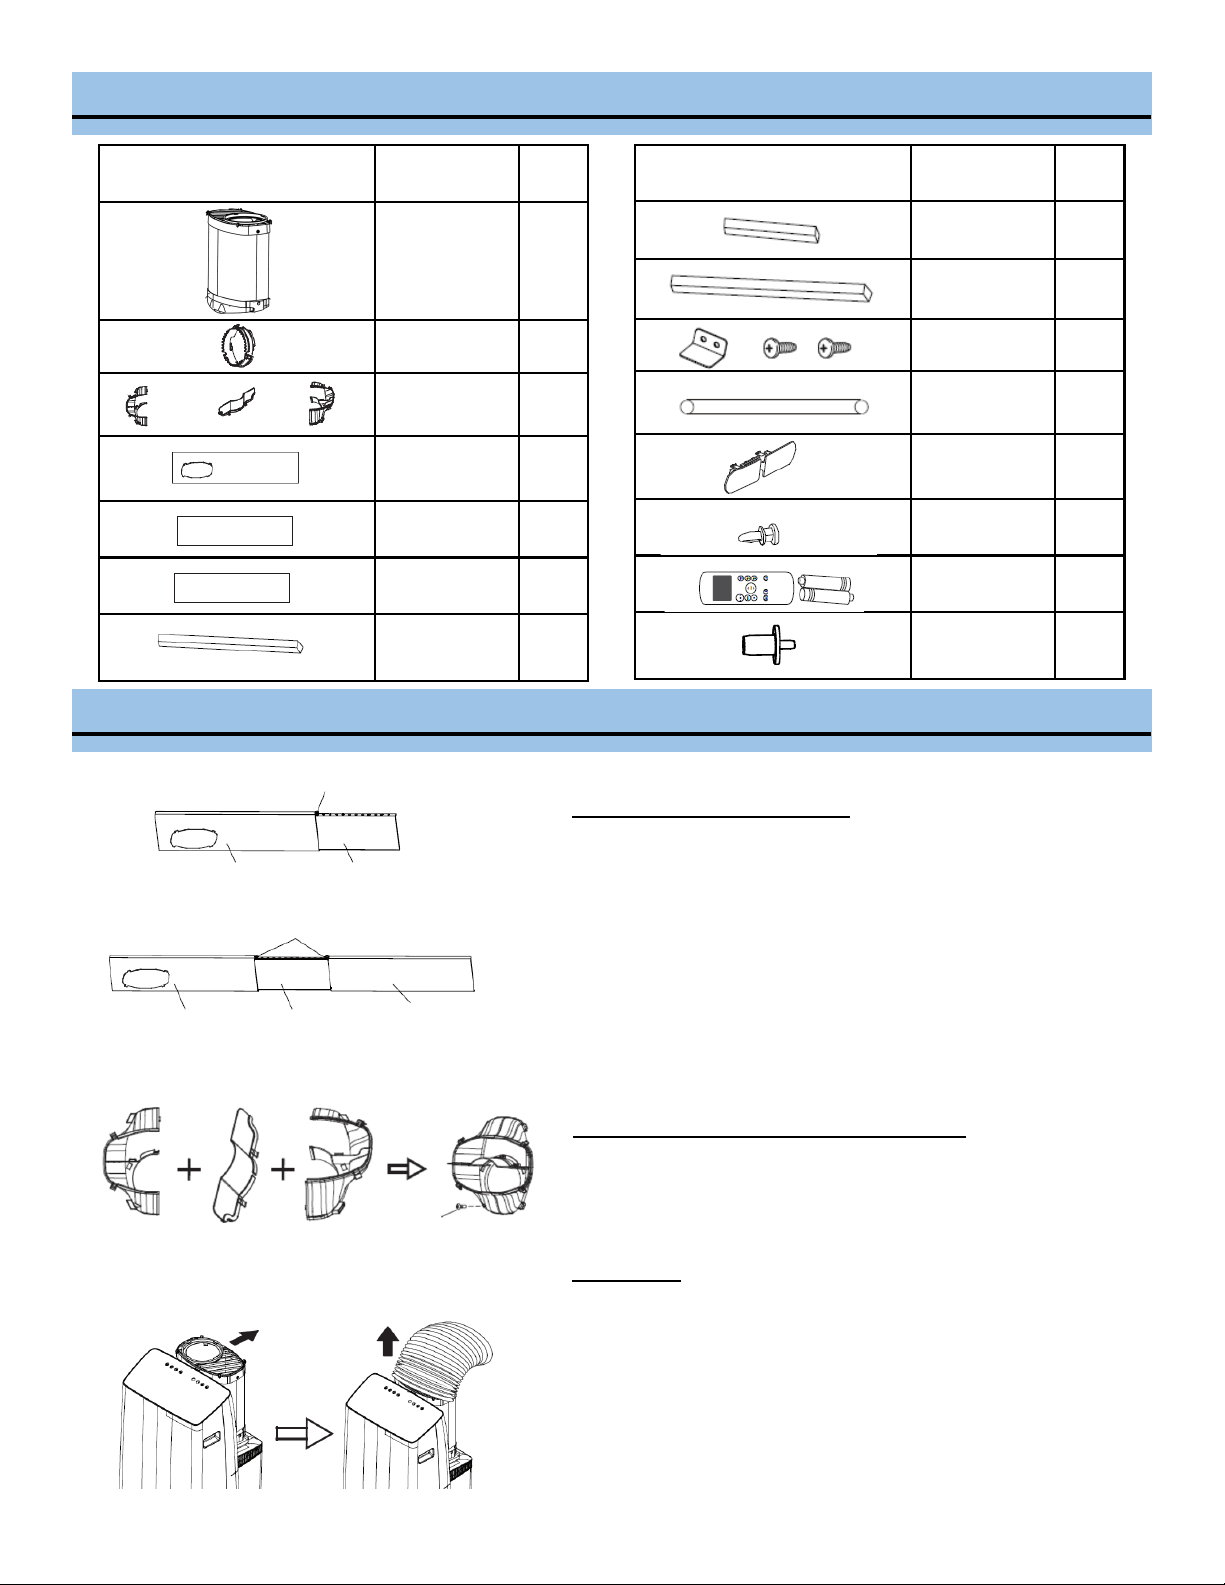
ACCESSORIES
Image Accessory Qty
Foam Seal B
(Adhesive)
2 pieces
Foam Seal C
(Non-Adhesive)
2 pieces
Security Bracket 1 set
Drain Hose 1 piece
Power Cord
Buckle
1 piece
Bolt 1 piece
Remote Control 1 set
Drain Hose
Adaptor
1 piece
WINDOW KIT INSTALLATION
Bolt
Window slider A
Screw
A
B C
Window slider B
Window slider B
Bolts
Window slider A Window slider C
Image Accessory
Descripon
Qty
Hose-in-hose
(Air intake hose &
exhaust hose)
1 set
Air outlet adapter 1 piece
Exhaust Connector
Module A B C*
1 piece
each
Window Slider A 1 piece
Window Slider B 1 piece
Window Slider C 1 piece
Foam Seal A
(Adhesive)
2 pieces
Adjustable Window Slider Opon
1. Measure the window opening where the window kit will be in-
stalled.
2. Assemble as many sliders as necessary to t the window. If the
window opening is less than the minimum length of a single slider,
use the slider that has the hole in it and cut it to the correct length.
Make sure not to cut the end that has the hole as this is necessary
to aach the exhaust hose adapter.
3. Use the window slider bolts to secure the window sliders at the
correct length.
Hoses Connector Modules (For Sliding Window)
Assemble the exhaust adapter module for sliding windows using the
exhaust connector screw as shown. The window slider is eccentric so
the exhaust adapter must be installed away from the wall.
Hose-in-hose
1. Rotate the exhaust hose gently backwards.
2. Pull out the exhaust hose away from the wall.
NOTE: To ensure proper funconing, DO NOT overextend or bend the
hose. Make sure that there is no obstacle around the air outlet of the
exhaust hose (in the range of 500mm) in order for the exhaust system
to work properly. All illustraons in this manual are for explanaon
purposes only. Your air condioner may be slightly dierent. The ac-
tual shape shall prevail.
A B C
Page 8
Loading ...
Loading ...
Loading ...