Loading ...
Loading ...
Loading ...
4
BEFORE OPERATION
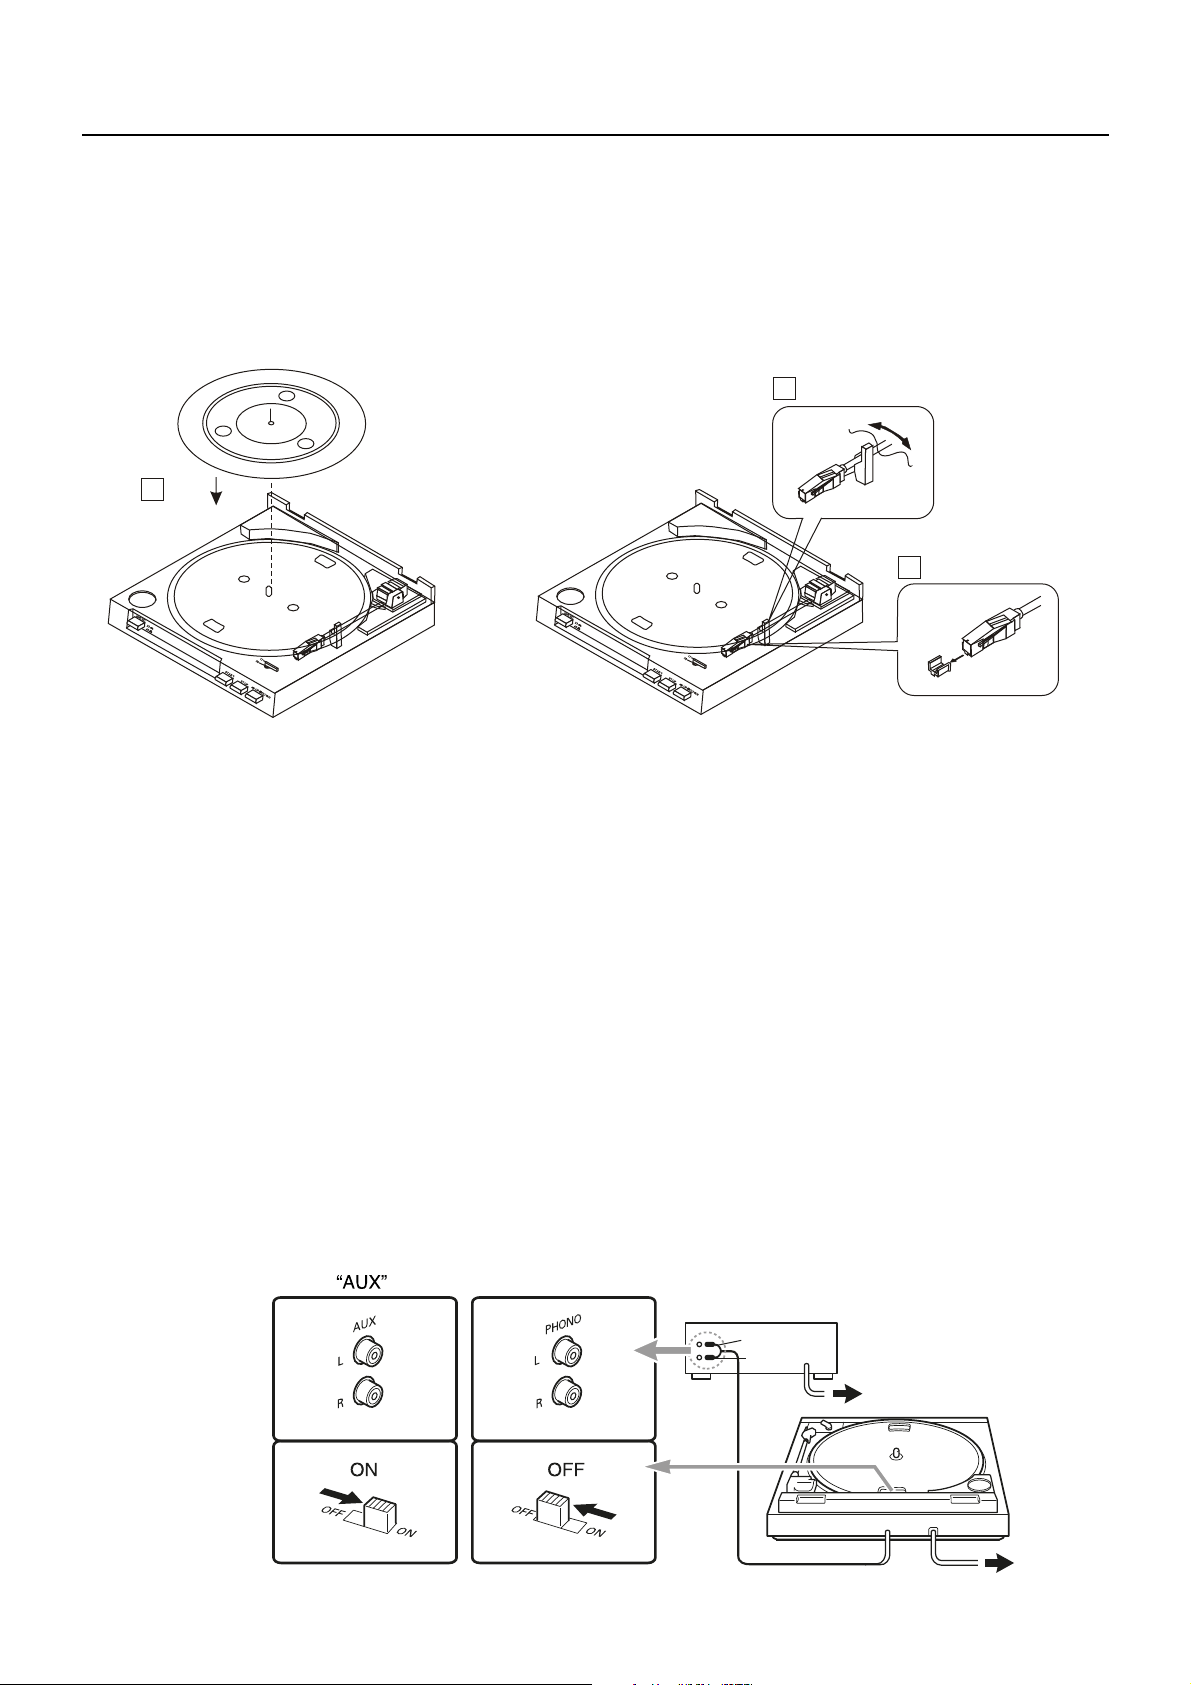
Please install the accessories on to the main turntable unit as follows:
1. Place the rubber slip mat on top of the platter.
2. Remove the twist tie securing the tonearm assambly.
3. Remove the clear plastic stylus guard.
Connections:
1
2
3
PHONO
Input
Jacks
Pre-amp
Selector
Switch
Amplier
White
Red
AC
AC
Figure 1 Inputs and pre-amp selector switch
Before making or changing any connections, please switch o the mains power switch and disconnect
from the AC power outlet.
1. Connect the red plug to your ampliers AUX or Phono ‘R’ jack.
2. Connect the white plug to your ampliers AUX or Phono ‘L’ jack.
3. Connect the power cord to your household mains power outlet.
For increased exibility of use, this turntable has an internal stereo phon pre-amplier. The Pre-amp
Selector Switch is located under the turntable platter, in the rear-centre (Fig. 1). If the system amplier
you are using has a PHONO input, set the Pre-amp Selector Switch to the “OFF” position. If your amplier
does not have a PHONO input, set the Pre-amp Selector Switch to the “ON” position and connect the
turntable’s output cables to the AUX or other high-level input on the amplier.
Loading ...
Loading ...