English
1
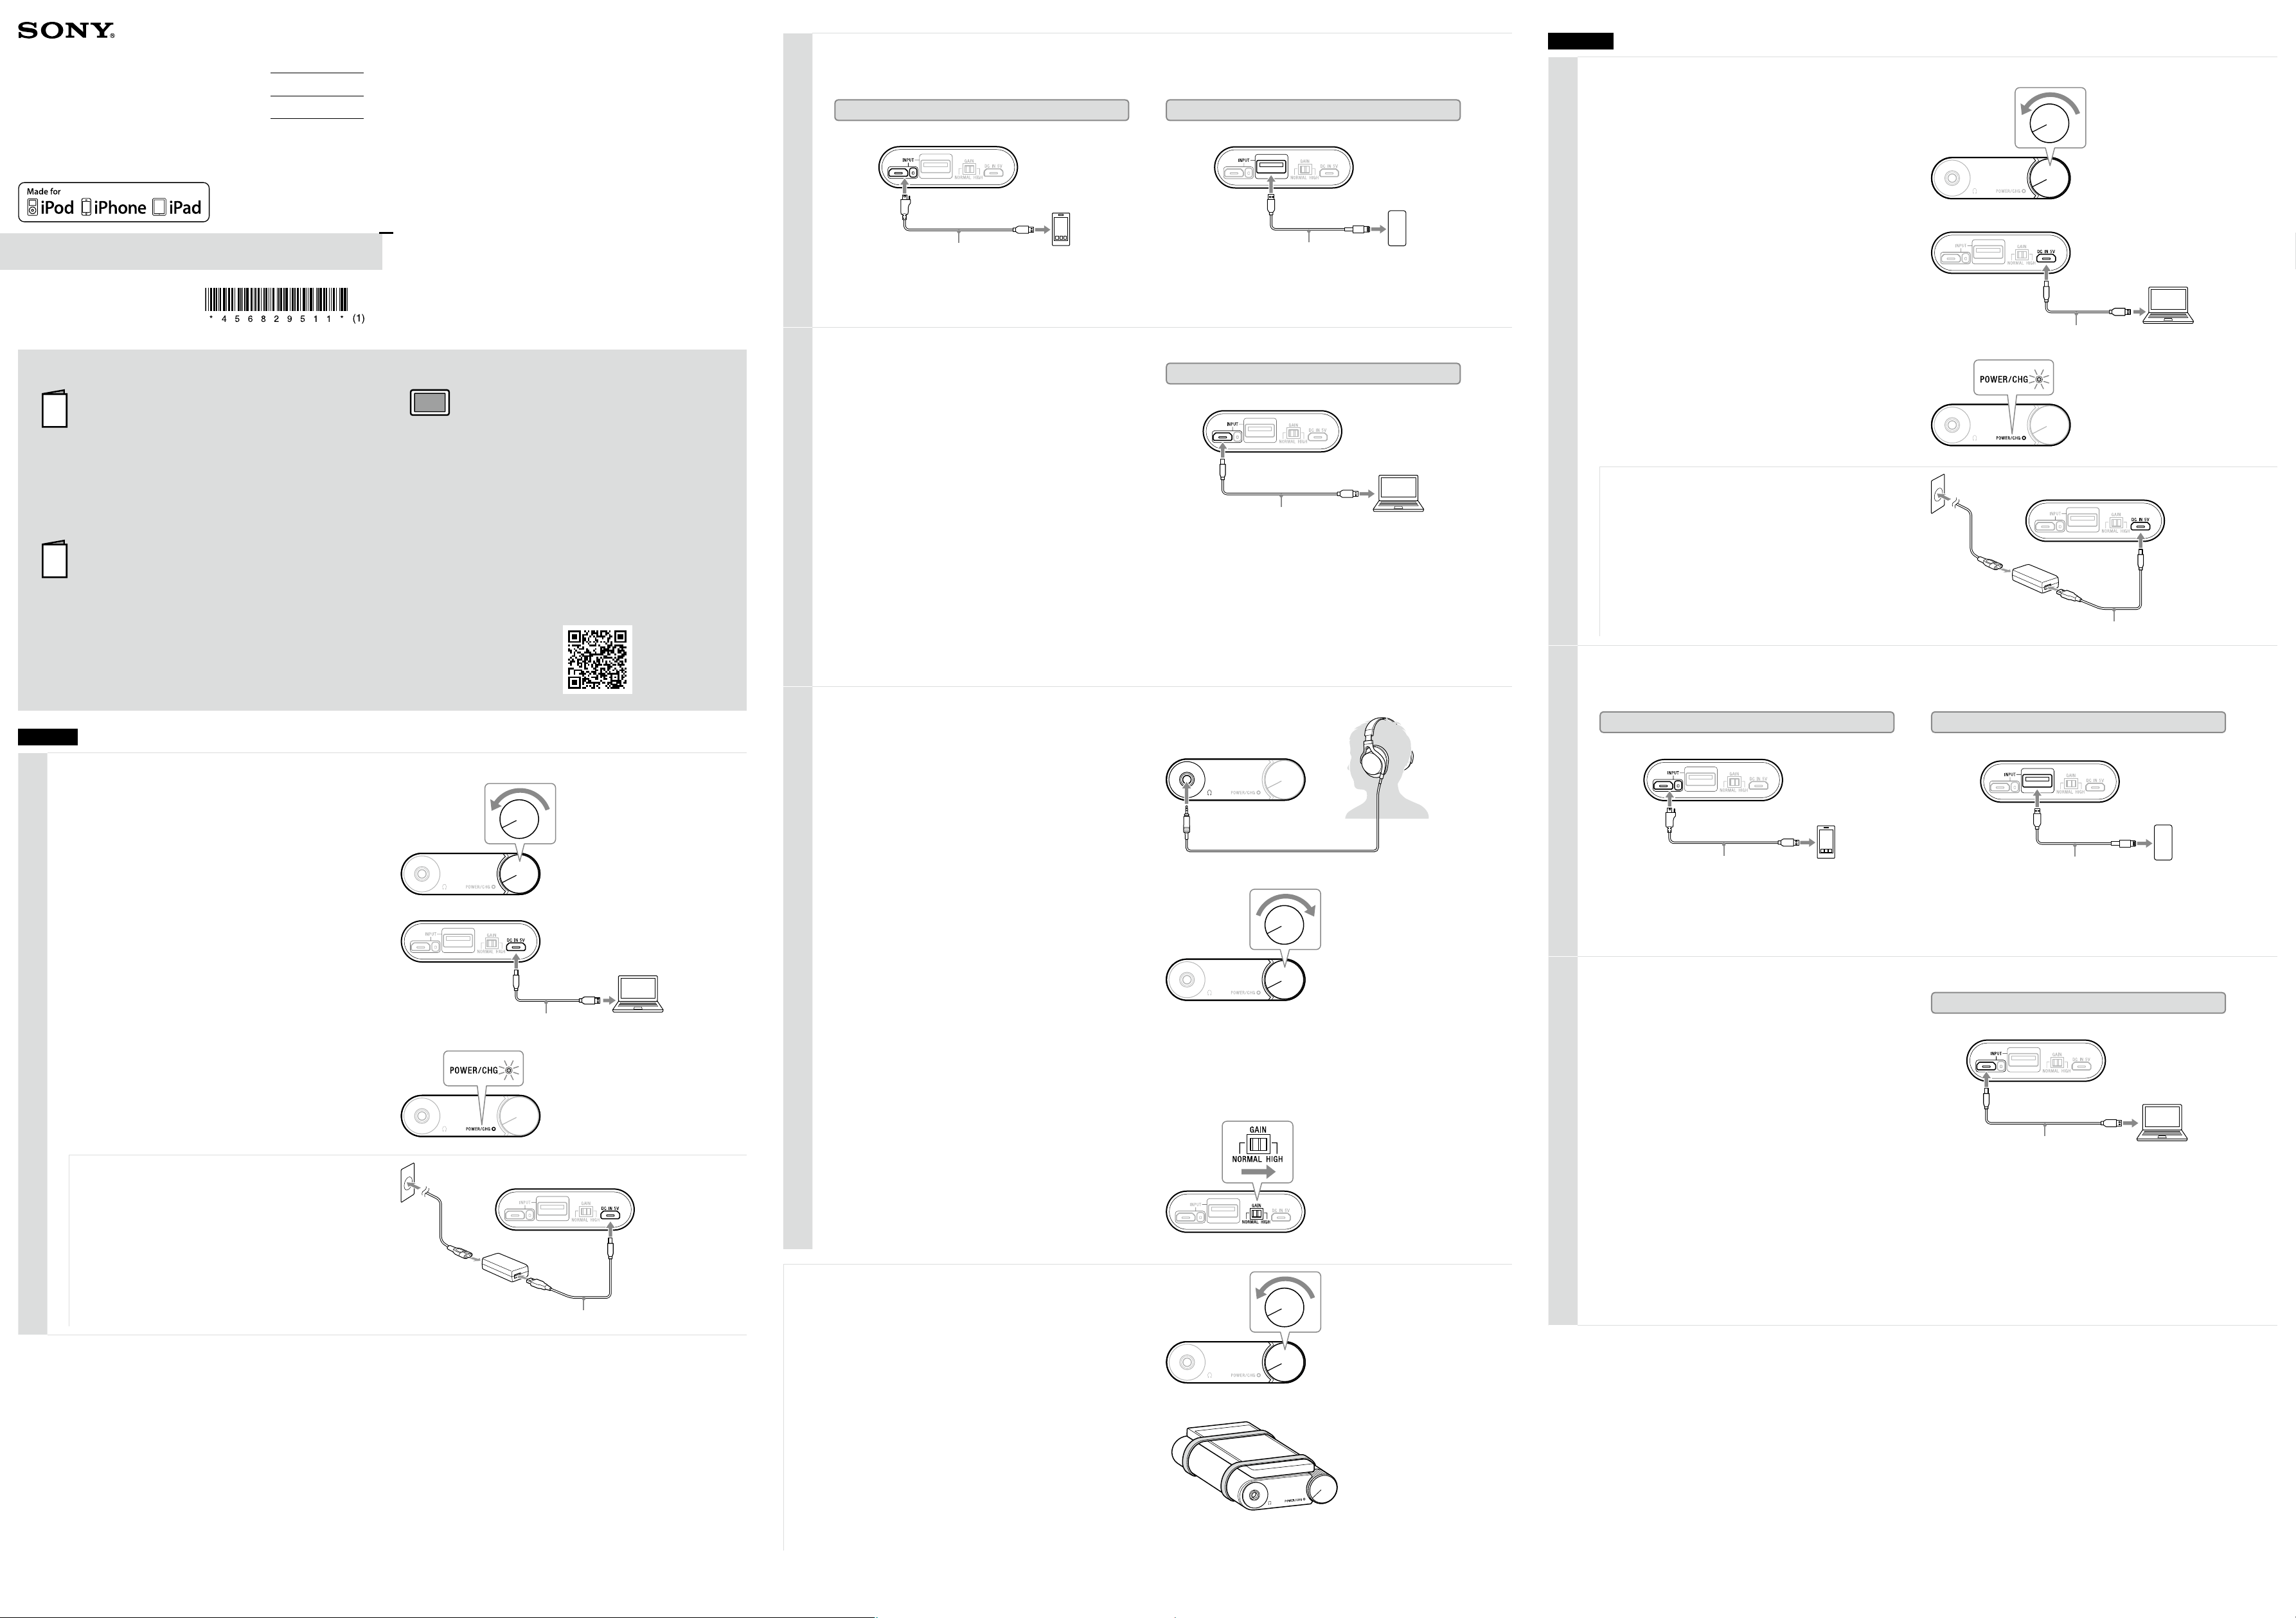
Charging the unit
Rotate the power/volume knob counterclockwise until it clicks
to turn off the unit.
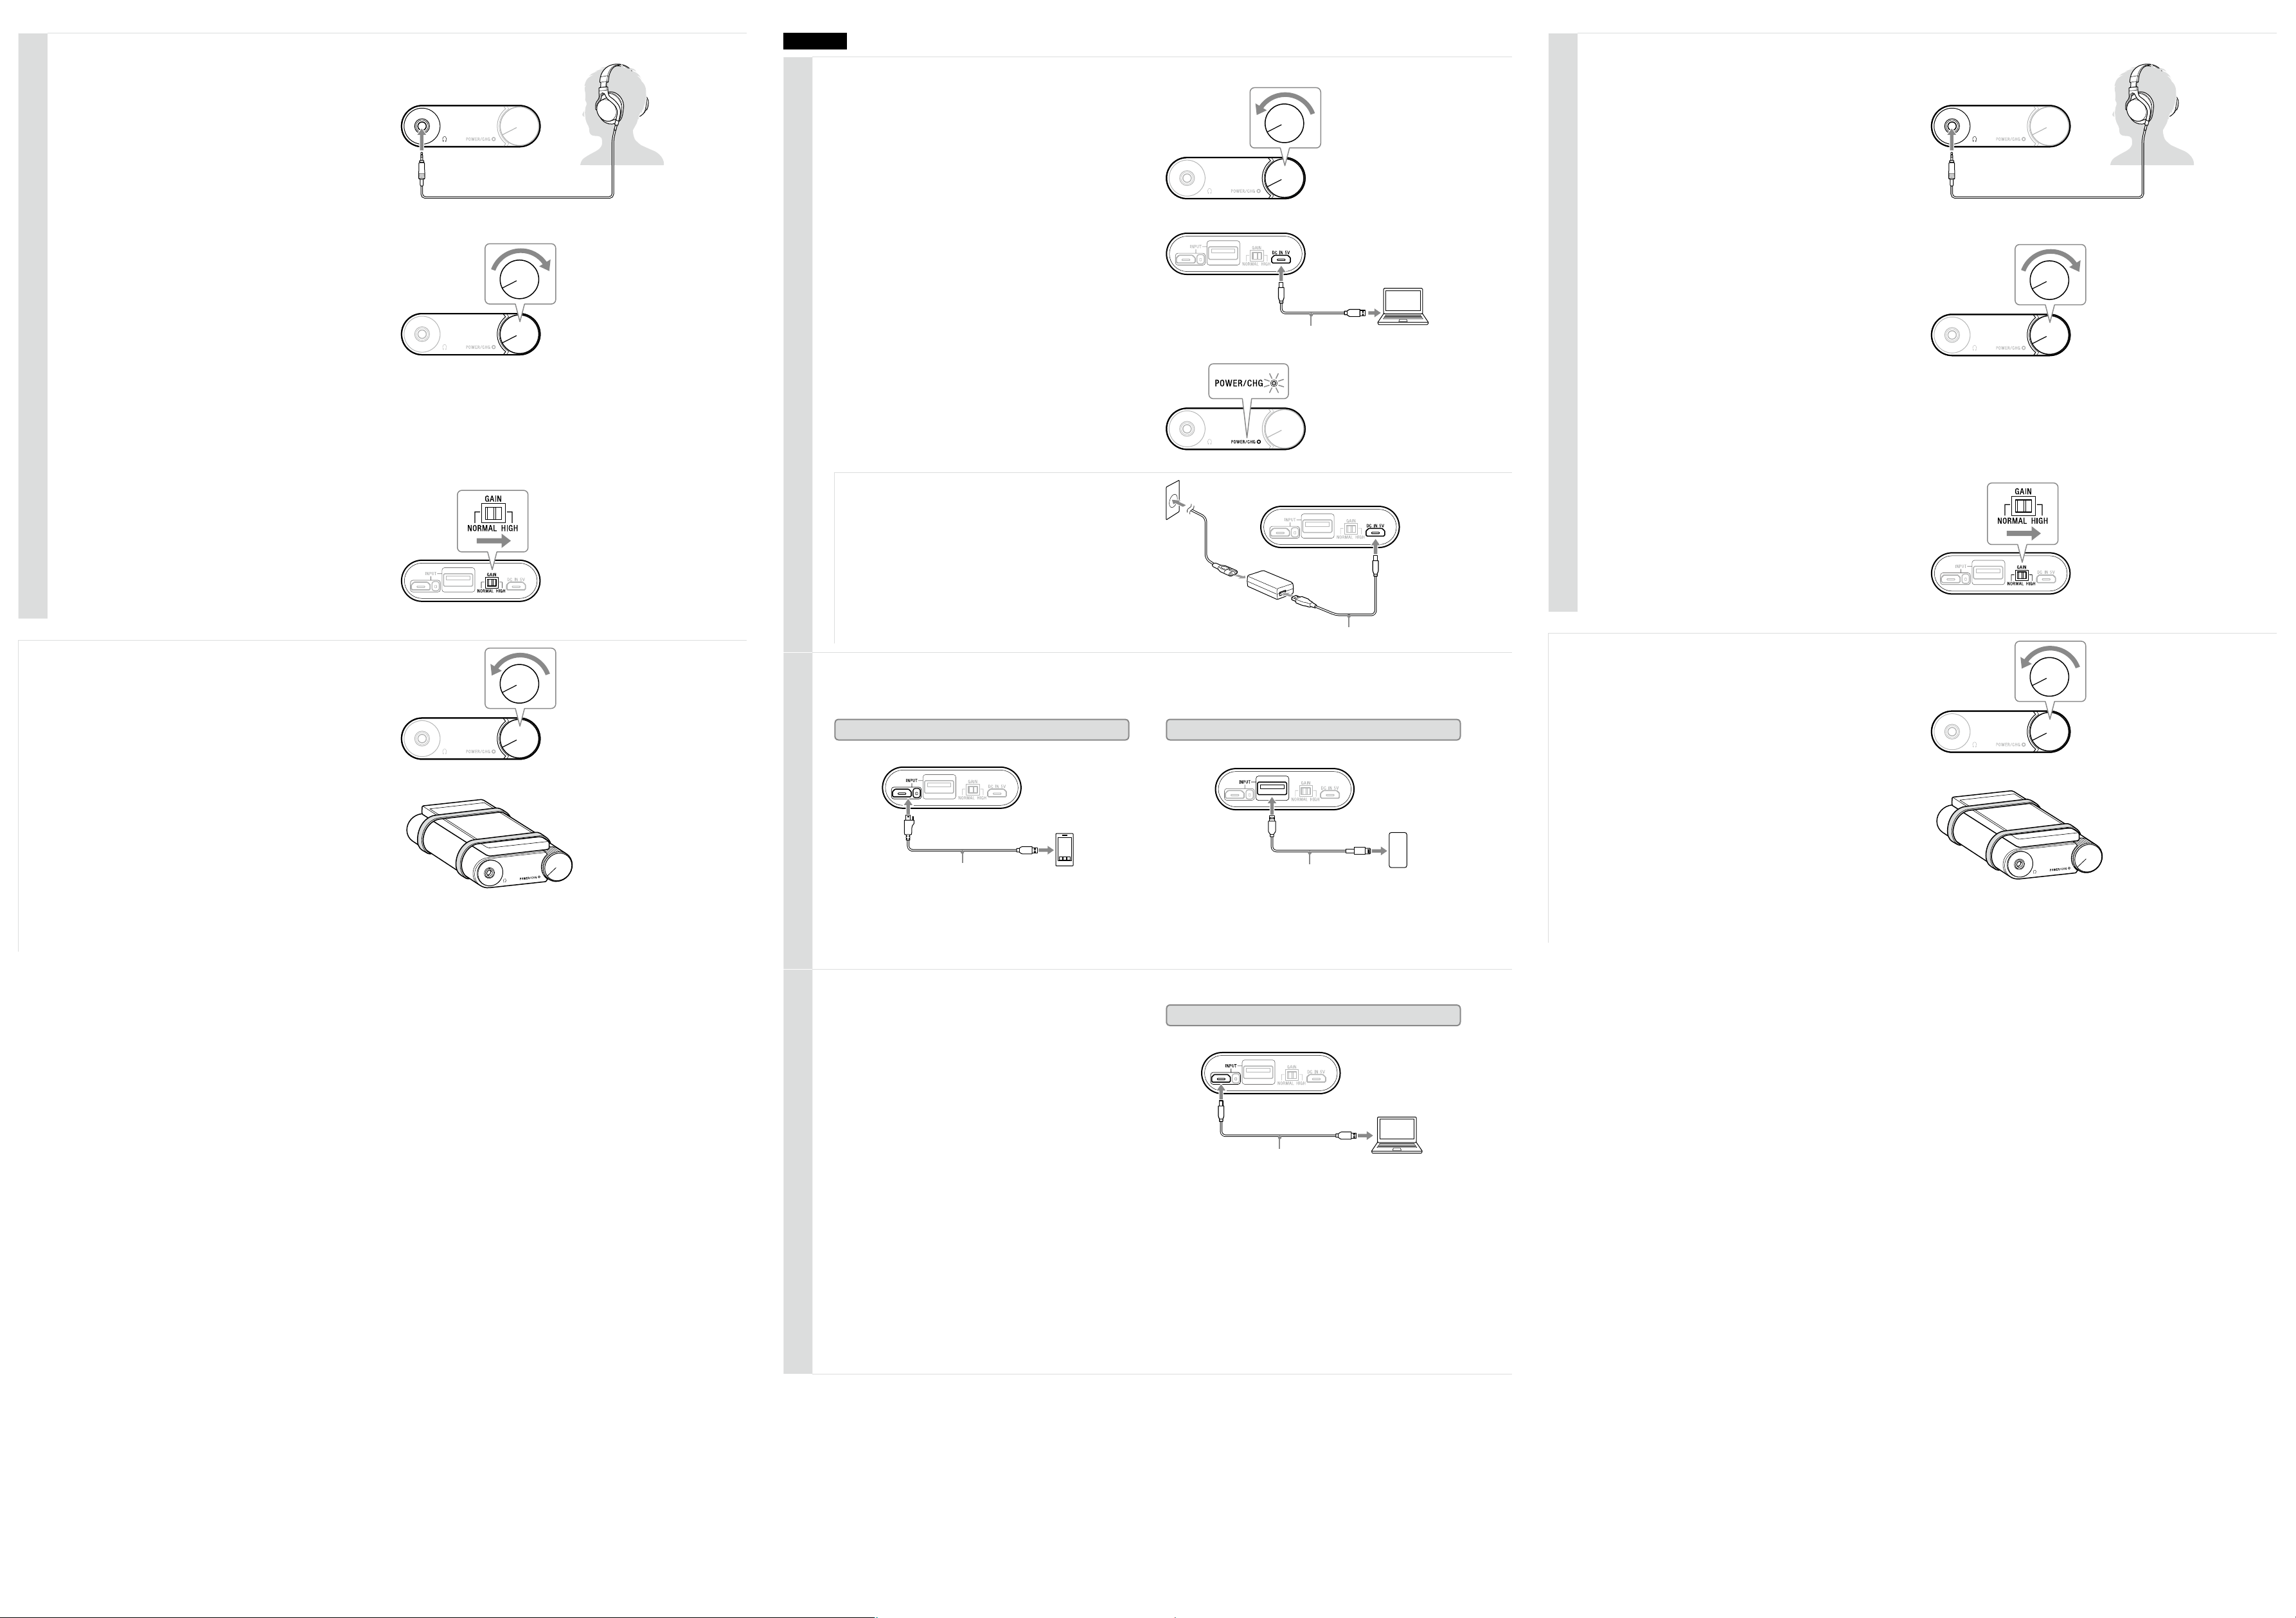
Front of the unit
Connect your booted computer to the DC IN 5V port of the
unit using the micro-USB cable (supplied).
POWER/CHG (charge) indicator lights up in red.
Charging is completed in about 3.5 hours, or in about 2 hours when
connected to an AC outlet using the recommended USB AC adaptor
AC-UD10 (sold separately). The indicator turns off when the battery is
completely charged.
If the battery is not charging properly, the POWER/CHG (charge)
indicator flashes in red.
Rear of the unit
Computer
Micro-USB cable
(supplied)
Front of the unit
To charge the battery from an AC outlet
Use the USB AC adaptor AC-UD10 (sold separately). For details, refer
to the operating instructions supplied with the USB AC adaptor.
Hint
The unit and the WALKMAN® connected to the unit can be charged at
the same time. Use the USB AC adaptor AC-UD10 (sold separately)
and connect the WALKMAN® to the unit using the digital cable for
WALKMAN® (supplied).
For details concerning connection, refer to step 2.
AC-UD10
Micro-USB cable (supplied)
Rear of the unit
2
Connecting the audio device to the unit
Connecting the digital output supported WALKMAN®/Xperia or iPhone/iPad/iPod
For details concerning computer connection, refer to “Preparing and connecting computer.”
Digital output supported WALKMAN®/Xperia
WALKMAN®: Digital cable for WALKMAN®
(supplied)
Xperia: Digital cable for Xperia (supplied)
Rear of the unit
WALKMAN®
Xperia
iPhone/iPad/iPod
USB cable supplied with
iPhone/iPad/iPod
Rear of the unit
iPhone
iPad
iPod
Note
When multiple devices are connected to the unit simultaneously, the computer/WALKMAN®/Xperia connection INPUT port has priority.
Preparing and connecting computer
Download and install the driver software for Windows
computers, “Sony USB Device Driver”, and a player “Hi-Res
Audio Player” to play the High-Resolution Audio format data
on your computer.
(For Mac, there is no need to install a driver.)
Visit the following website, and download the driver software.
http://www.sony.com/support/
For details on installing, refer to the website.
Computer
Rear of the unit
Micro-USB cable
(supplied: shared with
charging cable)
Computer
Connect the computer to the unit.
The unit needs to be connected to your Windows computer at a certain
point while installing the driver software.
In this case, connect the Windows computer to the computer/
WALKMAN®/Xperia connection INPUT port of the unit using the
micro-USB cable (supplied).
Set the sound device settings of your computer.
For Windows 8/8.1
Press and hold the [Windows] and [X] keys to display the menu, select [Control Panel], [Hardware and Sound], [Sound], [Playback] tab, select [Sony Headphone
Amplifier(PHA-1A)] for the playback device, then click [Set default].
For Windows 7/Windows Vista
Click the [Start] menu, select [Control Panel], [Hardware and Sound], [Sound], [Playback] tab, select [Sony Headphone Amplifier(PHA-1A)] for the playback device,
then click [Set default].
For Macintosh
Click the [Apple] menu, select [System Preferences], [Sound], [Output] tab, then select [Sony Headphone Amplifier(PHA-1A)] for [Select a device for sound output].
3
Listening to music with the headphones
Connect the headphones to the unit.
To connect the headphones with a standard
3-pole stereo mini plug
Rotate the power/volume knob clockwise to turn on the unit.
Rotate it more to adjust the volume.
POWER/CHG (charge) indicator lights up in green.
Front of the unit
Play back the connected audio device.
When playing High-Resolution Audio format data on your computer with the unit, use “Hi-Res Audio Player.”
For details on installing “Hi-Res Audio Player,” visit the following site at
http://www.sony.com/support/
Adjust the volume.
Adjust the volume by the power/volume knob. Depending on the headphones, the volume may remain low, even if you turn the knob to the maximum setting.
•When the volume is low: turn off the unit, set the GAIN select switch
to HIGH, then turn on the unit. In normal use, the setting should be
NORMAL.
Rear of the unit
After using the unit
Rotate the power/volume knob counterclockwise until it clicks to turn off the unit.
Front of the unit
How to use the silicone belts
You can fasten a connected device to the unit using the silicone belts (supplied).
Place the protection sheet (supplied) between the unit and the connected device to
avoid scratching.
Mount the connected device on the unit.
Bind the unit and the connected device using the silicone belt with its
wider part placed under the bottom of the unit.
For details on how to use the silicon belt and the protection sheet, refer to the
Help Guide.
Français
1
Mise en charge de l’appareil
Tournez le bouton d’alimentation/de volume dans le sens
contraire des aiguilles d’une montre jusqu’au déclic pour
éteindre l’appareil.
Avant de l’appareil
Raccordez votre ordinateur démarré au port DC IN 5V de
l’appareil en utilisant le câble micro-USB (fourni).
Le témoin POWER/CHG (charge) s’allume en rouge.
La charge complète prend environ 3,5heures ou environ 2heures lors
du raccordement à une priseCA à l’aide de l’adaptateur CA USB
AC-UD10 (vendu séparément) recommandé. Le témoin s’éteint lorsque
la charge de la batterie est terminée.
Si la batterie n’est pas chargée correctement, le témoin POWER/CHG
(charge) clignotera en rouge.
Arrière de l’appareil
Ordinateur
Câble micro-USB
(fourni)
Avant de l’appareil
Pour charger la batterie à partir d’une priseCA
Utilisez l’adaptateur CA USB AC-UD10 (vendu séparément). Pour plus
de détails, reportez-vous au mode d’emploi fourni avec
l’adaptateurCA USB.
Conseil
L’appareil et le WALKMAN® raccordé à l’appareil peuvent être chargés
en même temps. Utilisez l’adaptateur CA USB AC-UD10 (vendu
séparément) et raccordez le WALKMAN® à l’appareil en utilisant le
câble numérique pour WALKMAN® (fourni).
Pour plus de détails sur le raccordement, reportez-vous à l’étape 2.
AC-UD10
Câble micro-USB (fourni)
Arrière de l’appareil
2
Raccordement du périphérique audio à l’appareil
Raccordement d’un WALKMAN®/Xperia avec prise en charge de sortie numérique ou iPhone/iPad/iPod
Pour plus de détails sur le raccordement de l’ordinateur, reportez-vous à « Préparation et raccordement de l’ordinateur ».
WALKMAN®/Xperia avec prise en charge de sortie numérique
WALKMAN®: Câble numérique pour
WALKMAN® (fourni)
Xperia: Câble numérique pour Xperia
(fourni)
Arrière de l’appareil
WALKMAN®
Xperia
iPhone/iPad/iPod
Câble USB fourni avec le
iPhone/iPad/iPod
Arrière de l’appareil
iPhone
iPad
iPod
Remarque
Lorsque plusieurs périphériques sont raccordés simultanément à l’appareil, le port INPUT de raccordement pour ordinateur/WALKMAN®/Xperia a priorité.
Préparation et raccordement de l’ordinateur
Téléchargez et installez le pilote logiciel pour les ordinateurs
Windows, « Sony USB Device Driver », ainsi qu’un lecteur
« Hi-Res Audio Player » pour la lecture de données au format
audio haute résolution sur votre ordinateur.
(Pour les Mac, il n’est pas nécessaire d’installer un pilote.)
Visitez le site Web suivant et téléchargez le pilote logiciel.
http://www.sony.com/support/
Pour plus de détails sur l’installation, reportez-vous au site Web.
Ordinateur
Arrière de l’appareil
Câble micro-USB
(fourni: partagé avec
le câble de charge)
Ordinateur
Raccordez l’ordinateur à l’appareil.
L’appareil doit être raccordé à votre ordinateur Windows à un certain
moment pendant l’installation du pilote logiciel.
Dans ce cas, raccordez l’ordinateur Windows au port INPUT de
raccordement pour ordinateur/WALKMAN®/Xperia de l’appareil à l’aide
du câble micro-USB (fourni).
Réglez les paramètres de périphérique audio de votre ordinateur.
Pour Windows8/8.1
Maintenez enfoncées les touches [Windows] et [X] pour afficher le menu, sélectionnez [Panneau de configuration], [Matériel et audio], [Son], l’onglet [Lecture],
sélectionnez [Sony Headphone Amplifier(PHA-1A)] comme périphérique de lecture, puis cliquez sur [Par défaut].
Pour Windows7/Windows Vista
Cliquez sur le menu [Démarrer], sélectionnez [Panneau de configuration], [Matériel et audio], [Son], l’onglet [Lecture], sélectionnez [Sony Headphone Amplifier
(PHA-1A)] comme périphérique de lecture, puis cliquez sur [Par défaut].
Pour Macintosh
Cliquez sur le menu [Apple], sélectionnez [Préférences Système], [Son], l’onglet [Sortie], puis sélectionnez [Sony Headphone Amplifier(PHA-1A)] dans [Sélectionnez
un périphérique de sortie audio].
©2015 Sony Corporation
Printed in Malaysia
Manuals supplied/Manuels fournis/Manuales suministrados
The 3 following manuals are included./Les 3manuels suivants sont compris./Se incluyen los 3 manuales que aparecen a continuación.
Startup Guide (this document)
Provides you with instructions on how to connect the unit with
devices and basic operations.
Manuel de démarrage (le présent document)
Le guide présente les instructions de connexion de l’appareil avec
des périphériques et son fonctionnement de base.
Guía de inicio (este documento)
Brinda información sobre cómo conectar la unidad con dispositivos
y otras operaciones básicas.
Reference Guide (exhibit document)
Provides you with precautions and product specifications.
Manuel de référence (document en annexe)
Le guide indique les précautions à respecter et décrit les
spécifications du produit.
Guía de referencia (documento anexo)
Le proporciona precauciones y especificaciones del producto.
Help Guide (Operating Instructions)
Read the Help Guide on your computer or smartphone, when you
want to know how to use the unit in greater detail. The Help Guide
also contains a troubleshooting guide which provides you with
remedies for the problems you might encounter.
Manuel d’aide (Manuel d’instructions)
Lisez le Manuel d’aide sur votre ordinateur ou téléphone intelligent
lorsque vous souhaitez davantage de renseignements concernant
l’utilisation de l’appareil. Le Manuel d’aide dispose également d’un
guide de dépannage vous offrant des solutions aux problèmes
éventuels rencontrés.
Guía de ayuda (Manual de instrucciones)
Lea la Guía de ayuda en su equipo o smartphone cuando desee
saber cómo usar la unidad más detalladamente. La Guía de ayuda
también contiene una guía de resolución de problemas que le
proporciona recursos para los problemas que puede encontrar.
URL:
http://rd1.sony.net/help/mdr/pha-1a/h_uc/
Two-dimensional code:
Code bidimensionnel:
Código bidimensional:
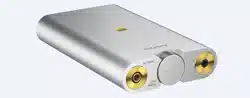
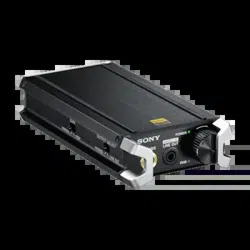
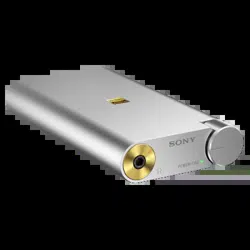
Portable Headphone Amplifier
Amplificateur portatif pour
casque d’écoute
Amplificador portátil de
auriculares
Startup Guide
Manuel de démarrage
Guía de inicio
PHA-1A
4-568-295-11(1)
3
Écoute de la musique avec le casque d’écoute
Raccordez le casque d’écoute à l’appareil.
Pour raccorder un casque d’écoute avec une mini-fiche
stéréo à 3pôles normale
Avant de l’appareil
Tournez le bouton d’alimentation/de volume dans le sens des
aiguilles d’une montre pour allumer l’appareil.
Tournez-le davantage pour régler le volume.
Le témoin POWER/CHG (charge) s’allume en vert.
Avant de l’appareil
Reproduisez la musique avec le périphérique audio raccordé.
Lors de la lecture de données au format audio haute résolution sur votre ordinateur avec l’appareil, utilisez «Hi-Res Audio Player».
Pour plus de détails sur l’installation de «Hi-Res Audio Player», visitez le site Web suivant
http://www.sony.com/support/
Réglez le volume.
Réglez le volume à l’aide du bouton d’alimentation/de volume. Selon le casque d’écoute utilisé, le volume peut demeurer faible même si vous tournez le bouton à
la valeur maximale.
•Lorsque le volume est faible: Éteignez l’appareil, réglez le sélecteur
GAIN à HIGH, puis allumez l’appareil. Lors d’une utilisation normale,
le sélecteur devrait être réglé à NORMAL.
Arrière de l’appareil
Après l’utilisation de l’appareil
Tournez le bouton d’alimentation/de volume dans le sens contraire des aiguilles
d’une montre jusqu’au déclic pour éteindre l’appareil.
Avant de l’appareil
Comment utiliser les courroies de silicone
Vous pouvez fixer un périphérique raccordé à l’appareil en utilisant les courroies
de silicone (fournies).
Placez la feuille de protection (fournie) entre l’appareil et le périphérique
raccordé afin d’éviter les égratignures.
Installez le périphérique raccordé sur l’appareil.
Reliez l’appareil et le périphérique raccordé à l’aide de la
courroie de silicone, en plaçant sa partie la plus large sous
l’appareil.
Pour plus de détails sur l’utilisation de la courroie en silicone et la feuille de
protection, reportez-vous au Manuel d’aide.
Español
1
Carga de la unidad
Gire la perilla de encendido/volumen en el sentido contrario
de las agujas del reloj para apagar la unidad.
Parte frontal de la unidad
Luego de iniciar su computadora, conéctela al puerto DC IN 5V
de la unidad utilizando el cable micro USB (suministrado).
El indicador de POWER/CHG (carga) se enciende en rojo.
La carga se completa en aproximadamente 3,5 horas; o cuando se
conecta a una salida de ca con el adaptador ca USB AC-UD10
recomendado (se vende por separado) se completa en
aproximadamente 2 horas. El indicador se apaga cuando la batería está
completamente cargada.
Si la batería no se carga de manera adecuada, el indicador de POWER/
CHG (carga) parpadeará en rojo.
Parte posterior
de la unidad
Equipo
Cable micro USB
(suministrado)
Parte frontal de la unidad
Para cargar la batería desde una salida de ca
Utilice el adaptador ca USB AC-UD10 (se vende por separado). Para
obtener más información, consulte el manual de instrucciones
suministrado con el adaptador ca USB.
Indicación
La unidad y el WALKMAN® conectados a la unidad se pueden cargar
al mismo tiempo. Utilice el adaptador ca USB AC-UD10 (se vende por
separado) y conecte el WALKMAN® a la unidad utilizando el cable
digital de WALKMAN® (suministrado).
Para obtener más información sobre la conexión, consulte el paso 2.
AC-UD10
Cable micro USB (suministrado)
Parte posterior de la unidad
2
Conexión del dispositivo de audio a la unidad
Conexión de la salida digital compatible con WALKMAN®/Xperia o iPhone/iPad/iPod
Para obtener información sobre la conexión de la computadora, consulte “Preparación y conexión de la computadora”.
Salida digital compatible con WALKMAN®/Xperia
WALKMAN®: cable digital para WALKMAN®
(suministrado)
Xperia: cable digital para Xperia
(suministrado)
Parte posterior de la unidad
WALKMAN®
Xperia
iPhone/iPad/iPod
Cable USB suministrado por
iPhone/iPad/iPod
Parte posterior de la unidad
iPhone
iPad
iPod
Nota
Cuando hay varios dispositivos conectados a la unidad al mismo tiempo, la computadora/WALKMAN®/el puerto INPUT de conexión de Xperia tiene prioridad.
Preparación y conexión de la computadora
Descargue e instale el software del controlador para las
computadoras con sistema operativo Windows, “Sony USB
Device Driver”, y un “Hi-Res Audio Player” para reproducir los
datos de formato de audio de alta definición en su
computadora.
(Para Mac, no es necesario instalar un controlador).
Visite el siguiente sitio web y descargue el software del controlador.
http://www.sony.com/support/
Para obtener más información sobre la instalación, consulte el sitio
web.
Computadora
Parte posterior de la unidad
cable micro USB
(suministrado: compartido
con la carga del cable)
Computadora
Conecte la computadora a la unidad.
La unidad debe estar conectada a una computadora con sistema
operativo Windows en un momento dado durante la instalación del
software del controlador.
En este caso, conecte la computadora con sistema operativo Windows
a la computadora/WALKMAN®/puerto INPUT de conexión de Xperia de
la unidad utilizando el cable micro USB (suministrado).
Ajuste la configuración del dispositivo de sonido de su computadora.
Para Windows 8/8.1
Presione y mantenga presionadas las teclas [Windows] y [X] para visualizar el menú, seleccione la pestaña [Panel de control], [Hardware y sonido], [Sonido],
[Reproducción], seleccione [Sony Headphone Amplifier(PHA-1A)] para el dispositivo de reproducción, luego haga clic [Predeterminar].
Para Windows 7/Windows Vista
Haga clic en el menú de [Inicio], seleccione las pestañas [Panel de control], [Hardware y sonido], [Sonido], [Reproducción], seleccione [Sony Headphone
Amplifier(PHA-1A)] para el dispositivo de reproducción y luego haga clic en [Predeterminar].
Para Macintosh
Haga clic en el menú de [Apple], seleccione las pestañas [Preferencias del Sistema], [Sonido], [Salida] y luego seleccione [Sony Headphone Amplifier(PHA-1A)] para
[Seleccione un dispositivo para la salida de sonido].
3
Escuchar música con los auriculares
Conecte los auriculares a la unidad.
Para conectar los auriculares con un mini enchufe
estéreo de 3 polos estándar
Parte frontal de la unidad
Gire la perilla de encendido/volumen en el sentido de las
agujas del reloj para encender la unidad.
Gírelo más para ajustar el volumen.
El indicador POWER/CHG (carga) se ilumina de color verde.
Parte frontal de la unidad
Reproduzca el dispositivo de audio conectado.
Cuando reproduce datos con formato de audio de alta definición en su equipo con la unidad, utilice “Hi-Res Audio Player”.
Para obtener información sobre la instalación de “Hi-Res Audio Player”, visite el siguiente sitio en
http://www.sony.com/support/
Ajuste el volumen.
Ajuste el volumen con la perilla de encendido/volumen. Según los auriculares, puede que el volumen permanezca bajo, incluso si aumenta la perilla al máximo.
•Cuando el volumen es bajo: apague la unidad, configure el
interruptor de selección GAIN en HIGH y luego encienda la unidad.
Durante el uso normal, debe ajustarse en NORMAL.
Parte posterior de la unidad
Después de usar la unidad
Gire la perilla de encendido/volumen en el sentido contrario de las agujas del
reloj para apagar la unidad.
Parte frontal de la unidad
Cómo utilizar los cinturones de silicona
Usted puede ajustar un dispositivo conectado a la unidad mediante los
cinturones de silicona (suministrados).
Coloque la lámina protectora (suministrada) entre la unidad y el dispositivo
conectado para evitar que se rayen.
Monte el dispositivo conectado en la unidad.
Enlace la unidad y el dispositivo conectado mediante el cinturón
de silicona con su parte más ancha colocada debajo de la parte
inferior de la unidad.
Para obtener más detalles sobre cómo utilizar el cinturón de silicona y la lámina
protectora, consulte la Guía de ayuda.