
Loading ...
Loading ...
Loading ...
6
Model TC70090
OPERATING
STARTING:
Make sure the wheel frame is raised before you start
the tiller. To raise the frame, pull out the lock pin (Step
A); rotate the wheel frame upward, so that it snaps
beneath the lock button on the back of the motor
housing (Step B); release the lock pin. The wheel
frame will be locked in place by the lock button.
(See Fig. 3)
Secure the extension cord into
the cord retainer. The loop of
the extension cord must be long
enough for the cord retainer to
freely slide from one side to the
other. Plug the extension cord
into the power cord plug on the
tiller. (See Fig. 4)
Move the tiller/cultivator to the work area prior to
starting the motor.
WARNING: Do not start tiller with any person or
object directly in its path.
Hold the tiller/cultivator firmly while starting. The tines
will pull the tiller/cultivator forward during operation.
Lower the tines slowly into the ground being tilled.
To Start
To start the tiller/cultivator,
press and hold the safety lock
button (A) on the safety switch
while pulling the trigger lever
(B) up and against the handle.
The motor will start and the
tines will begin to rotate.
(See Fig. 5)
To stop the tiller/cultivator,
simply release the lever.
Before use, remove any visible stones or other
foreign bodies from the area.
CAUTION: Before moving the tiller/cultivator from one
area to another switch off the motor and wait for the
tines to come to a complete stop. Be careful not to let
the tines touch the ground while moving the tiller/
cultivator. The tines as well as the unit itself may be
damaged even if the motor is switched off.
Use the tiller/cultivator for breaking sod, preparing seed
beds, and for cultivating gardens and flower beds. The
tiller/cultivator can also dig small holes for planting
saplings or potted plants.
For breaking sod or deep tilling, allow the tines to pull the
tiller/cultivator forward to the end of your arm’s reach,
then firmly pull it back toward yourself. You will achieve
the best results by repeatedly allowing it to move forward
and pulling it back.
By pulling the tiller/cultivator back towards yourself, the
tines will dig deeper and more aggressively.
To prevent tripping, take extra precautions when
moving backwards and when pulling the tiller/cultivator
back toward yourself.
If the tiller/cultivator digs deep enough to stay in one spot,
gently rock it side to side until it starts moving forward
again.
Never pass the tiller/cultivator over the extension cord.
Make sure the cord is always in a safe position behind
you.
When working on inclines always stand diagonally to the
incline to retain a firm, safe footing. Do not work on
extremely steep slopes.
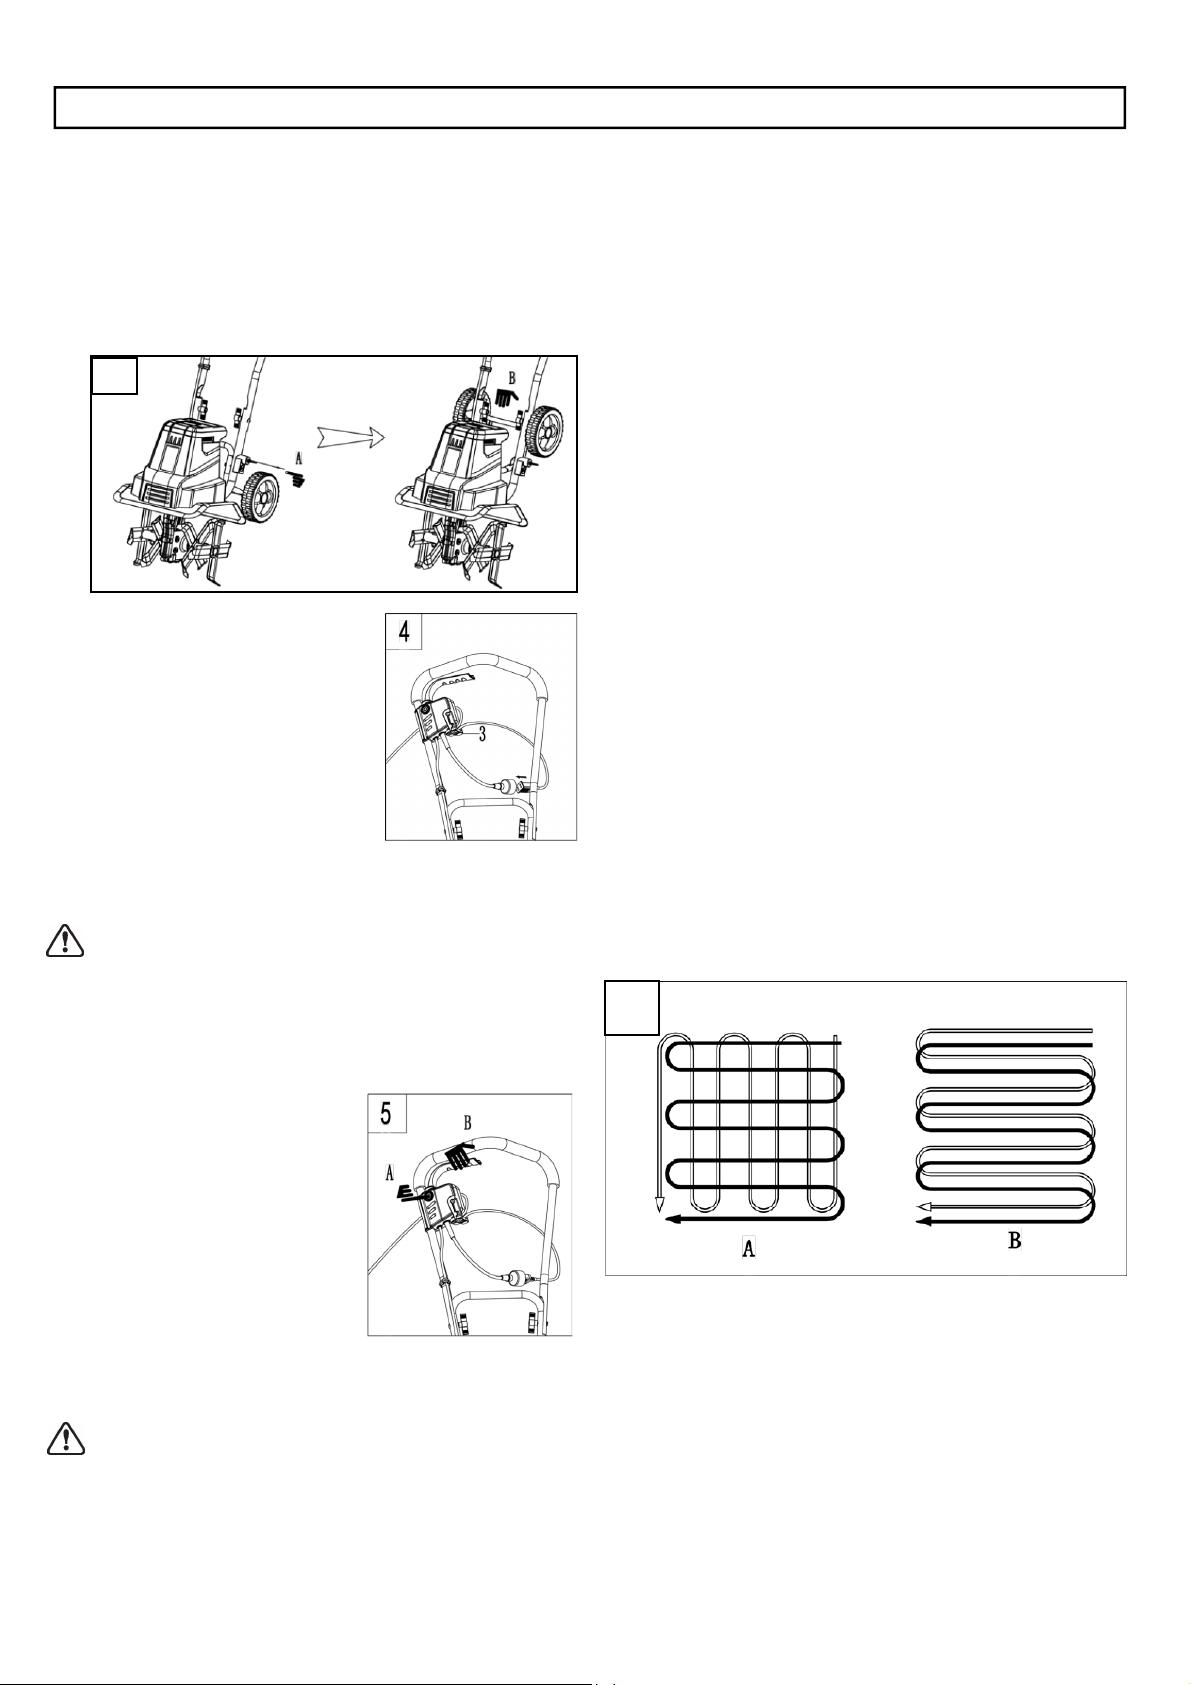
For preparing seed beds, we recommend using one of
these tilling patterns: (See Fig. 6)
Tilling Pattern A– Make two passes over area to be
tilled, the second at a right angle to the first.
Tilling Pattern B– Make two passes over area to be
tilled, the second overlapping the first.
Clearing foreign objects:
During operation a stone or root could become lodged in
the tines, or tall grass or weeds may become wrapped
around the tine shaft. To clear the tines or tine shaft
release the trigger lever, wait for the tines to come to a
complete stop and unplug the tiller/cultivator. Dislodge or
remove the foreign matter from the tines or tine shaft. To
simplify removal of tall grass or weeds from the tine shaft,
remove one or both sets of the tines. See Tine Removal
and Installation.
3
6
Loading ...
Loading ...
Loading ...