
WINE CHILLER
ENGLISH/FRANÇAIS
Write the model and serial
numbers here:
Model # _________________
Serial # _________________
Find these numbers on a label on
the ceiling inside the beverage
center and wine chiller.
29-6226 11-18 M
SAFETY INFORMATION .........2
CARE AND CLEANING ...........7
INSTALLATION INSTRUCTIONS 4
TROUBLESHOOTING TIPS ...... 9
WARRANTY ......................11
CONSUMER SUPPORT ..........12
PXR03FLMFSC
OWNER’S MANUAL &
INSTALLATION
INSTRUCTIONS
GE is a trademark of the General Electric Company. Manufactured under trademark license.
OPERATING INSTRUCTIONS . . . .5

THANK YOU FOR MAKING GE APPLIANCES A PART OF YOUR HOME.
Whether you grew up with GE Appliances, or this is your first, we’re happy to have you
in the family.
We take pride in the craftsmanship, innovation and design that goes into every GE Appliances
product, and we think you will too. Among other things, registration of your appliance ensures that
we can deliver important product information and warranty details when you need them.
Register your GE appliance now online. Helpful websites and phone numbers are available in
the Consumer Support section of this Owner’s Manual. You may also mail in the pre-printed
registration card included in the packing material.
2
IMPORTANT SAFETY INFORMATION.
READ ALL INSTRUCTIONS BEFORE USING.
WARNING!
Use this appliance only for its intended purpose as described in this Owner’s Manual.
SAFETY PRECAUTIONS
When using electrical appliances, basic safety precautions should be followed, including
the following:
This wine chiller must be properly installed and
located in accordance with these instructions
before it is used.
Do not allow children to climb, stand or hang
on the shelves in the wine chiller. They could
damage the wine chiller and seriously injure
themselves.
Do not store or use gasoline or other flammable
vapors and liquids in the vicinity of this or any
other appliance.
Keep fingers out of the “pinch point” areas;
clearances between the doors and between
the doors and cabinet are necessarily small.
Be careful closing doors when children are
in the area.
Unplug the wine chiller before cleaning and
making repairs.
NOTE: We strongly recommend that any
servicing be performed by a qualified individual.
Do not store or install this appliance outdoors.
PROPER DISPOSAL OF THE WINE CHILLER
Child entrapment and suffocation are not
problems of the past. Junked or abandoned
refrigeration products are still dangerous…
even if they will sit for “just a few days.”
If you are getting rid of your old appliance, please
follow the instructions below to help prevent
accidents.
Before You Throw Away Your Old
Refrigeration Product:
Take off the doors.
Leave the shelves in place so that children
may not easily climb inside.
CFC Disposal
Your old refrigerator has a cooling system that
used CFCs (chlorofluorocarbons). CFCs are believed
to harm stratospheric ozone.
If you are throwing away your old refrigerator,
make sure the CFC refrigerant is removed for
proper disposal by a qualified servicer. If you
intentionally release this CFC refrigerant, you
can be subject to fines and imprisonment under
provisions of environmental legislation.
DANGER! RISK OF CHILD ENTRAPMENT
Consumer Support Troubleshooting Tips
Operating
Instructions
Safety Instructions
Installation
Instructions
Care and Cleaning
WARNING
EXPLOSION HAZARD Flammable Refrigerant
This appliance contains isobutane refrigerant, R600a, a
natural gas with high environmental compatibility.
However, it is also combustible. Adhere to the
warnings below to reduce
the risk of injury or property
damage.
When handling, installing and operating the appliance,
care
should be taken to avoid damage to the
refrigerant tubing.
Service shall only be performed by authorized service
personnel. Use only manufacturer-authorized service
parts.
Dispose of appliance in accordance with Federal and
local regulations. Flammable refrigerant and
insulation material used require special disposal
procedures. Contact your local authorities for the
environmentally safe disposal of your appliance.
Keep ventilation openings in the appliance
enclosures or in the built-in structure clear of
obstruction.
Do not use mechanical devices or other means to
accelerate the defrosting process.
Do not damage refrigerant circuit.
Do not use electrical appliances inside the food
storage compartment of the appliance.

3
HOW TO CONNECT ELECTRICITY
Do not, under any circumstances, cut or remove the third (ground) prong from the power cord.
For personal safety, this appliance must be properly grounded.
The power cord of this appliance is equipped with
a 3-prong (grounding) plug which mates with
a standard 3-prong (grounding) wall outlet to
minimize the possibility of electric shock hazard
from this appliance.
Have the wall outlet and circuit checked by a
qualified electrician to make sure the outlet is
properly grounded.
If you have only a standard 2-prong wall outlet,
it is your personal responsibility and obligation to
have it replaced with a properly grounded
3-prong wall outlet.
The wine chiller should always be plugged into its
own individual electrical outlet which has
a voltage rating that matches the rating plate.
This provides the best performance and also
prevents overloading house wiring circuits which
could cause a fire hazard from overheated wires.
Never unplug your wine chiller by pulling on
the power cord. Always grip plug firmly and
pull straight out from the outlet.
Repair or replace immediately all power cords
that have become frayed or otherwise damaged.
Do not use a cord that shows cracks or abrasion
damage along its length or at either end.
When moving the wine chiller away from the wall,
be careful not to roll over or damage the power
cord.
USE OF ADAPTER PLUGS
READ AND FOLLOW THIS SAFETY INFORMATION CAREFULLY.
SAVE THESE INSTRUCTIONS
Consumer SupportTroubleshooting Tips
Operating
Instructions
Safety Instructions
Installation
Instructions
Care and Cleaning
Adapter plugs are not permitted in Canada.
USE OF EXTENSION CORDS
Because of potential safety hazards under certain conditions, we strongly recommend against
the use of an extension cord.
However, if you must use an extension cord, it is absolutely necessary that it be CSA certified, 3-wire
grounding type appliance extension cord having a grounding type plug and outlet and that the electrical
rating of the cord be 15 amperes (minimum) and 120 volts.

Installing the wine chiller.
Removing the Packaging
Before using the wine chiller, be sure all packing materials and tape have been
removed, including any protective film covering the control and any film protecting
the cabinet.
If you are discarding an old refrigeration product, remove the doors to reduce the
danger of children being trapped inside.
The wine chiller must be freestanding.
Allow the following clearances for ease
of installation, proper air circulation and
electrical connections:
Each side 2" (51 mm)
Top 2" (51 mm)
Back 3" (51 mm)
Before connecting the appliance to the
power source, let it stand upright for
approximately 2 hours. This will reduce
the possibility of a malfunction in the
cooling system from handling during
transporation.
Do not install the wine chiller where the
temperature will go below 55°F (13°C) or
above 90°F (32°C).
Install it on a level floor.
Do not install the wine chiller where it
will be subject to direct sunlight, heat or
moisture.
Do not store or install this appliance
outdoors.
The following models must be installed
on the floor: GWS04, GCS04.
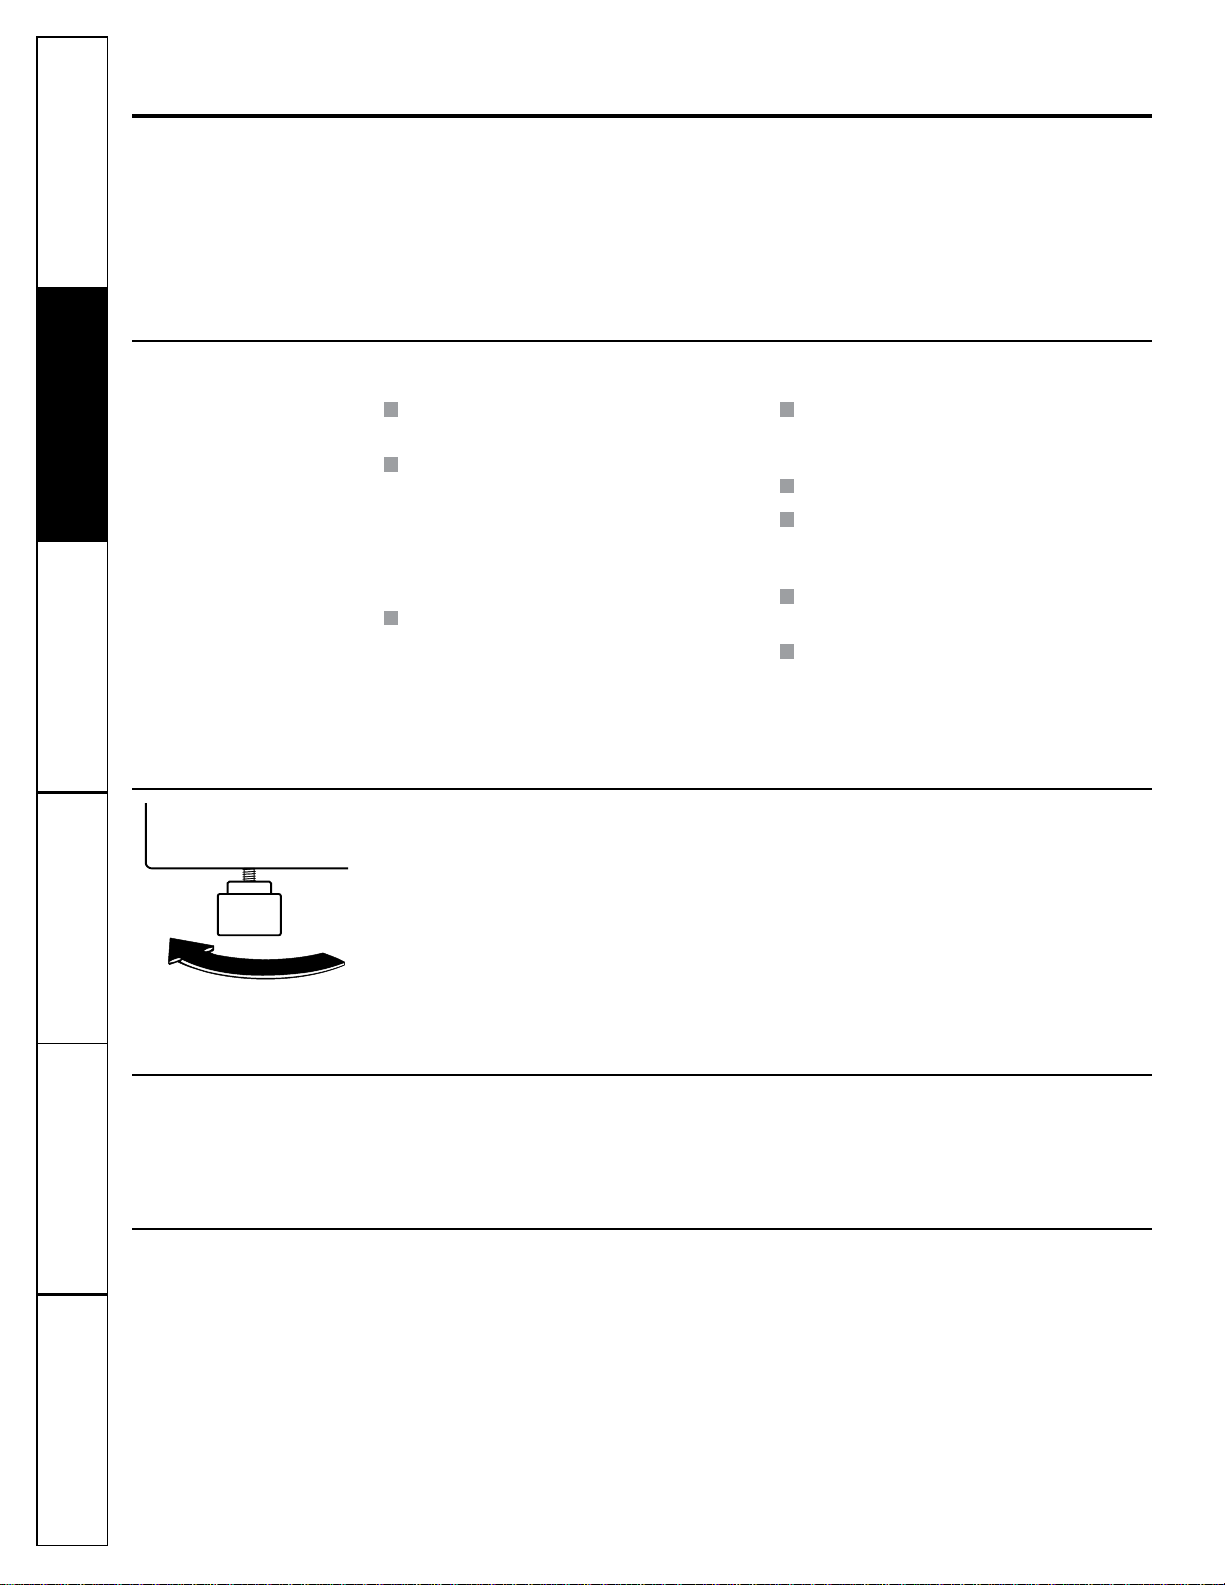
Installation Guidelines
To raise the wine chiller
Adjustable legs at the front corners of the
wine chiller should be set so the wine chiller
is firmly positioned on the floor, with a 1/8"
(3 mm) tilt to the back to help the door
closure.
To adjust the leveling legs, turn the
legs clockwise to raise the wine chiller,
counterclockwise to lower it.
Leveling Legs
Consumer Support Troubleshooting Tips
Operating
Instructions
Safety Instructions
Installation
Instructions
Care and Cleaning
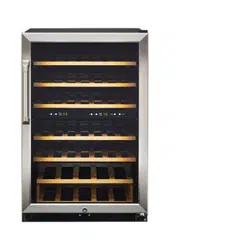
Interior Light (available on some Models)
You can turn the light ON or OFF by pushing the light switch located on the right side of
the control panel housing. If the interior light is left on, the temperature will be higher.
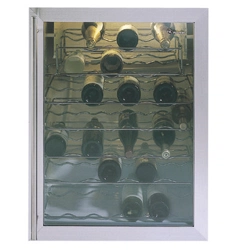
Loading the Wine
As with any refrigeration product, there is a slight temperature variance at different
locations within each compartment. The lower shelves provide a slightly cooler
temperature than the upper shelves.
4

About the controls and settings.
Consumer SupportTroubleshooting Tips
Operating
Instructions
Safety Instructions
Installation
Instructions
Care and Cleaning
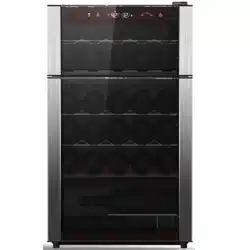
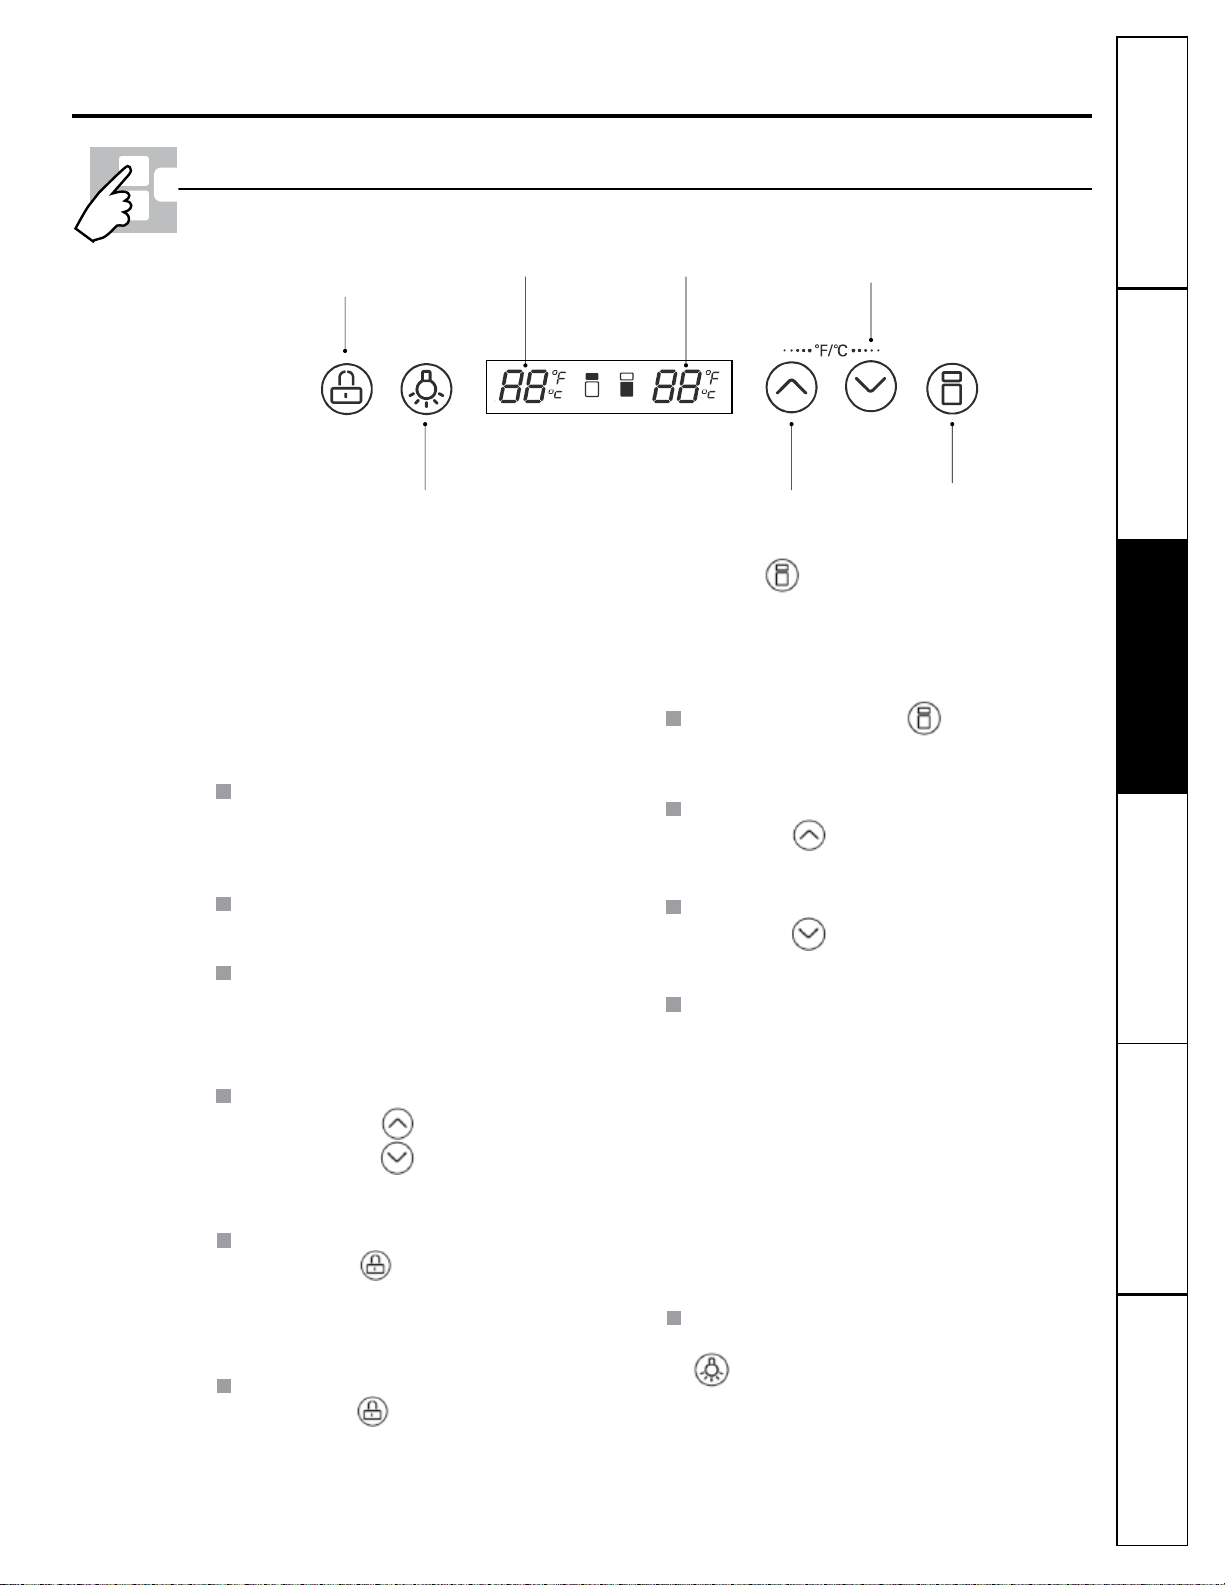
Setting the Temperature Control
Display Panel
5
Temperature-drop key
Lock/unlock key
Lighting mode key Temperature-rise key
Temperature-area
option key
Upper chamber
display area
Lower chamber
display area
When the Wine Chiller is Plugged In
After plugging in the wine chiller and making your
temperature selection, allow the wine chiller to
reach the set temperature before loading your wine.
This may take up to 12 hours to completely stabilize.
After loading the wine, you may notice a rise in
the temperature. Allow adequate time for the
temperature to return back to the set temperature.
This may take up to 12 hours to completely stabilize.
When first powering on, the display screen
gives a full display for 3 seconds and the
start-up sound rings; then the machine enters
into operation in the locked state. See below
for unlocking instructions.
If there is no key operation for 30 seconds, the
display screen will turn off. The display screen
will turn on again, if you touch any key.
When powering on, the temperature of the upper
chamber will be adjusted according to the factory
pre-set. By pressing the Option key
, the
temperature area will be switched between upper
chamber and lower chamber. Once a chamber is
selected, the display will flash and at this time the
temperature of the chamber can be set up. After
locking, temperature display stops flashing.
By selecting the key to switch the
temperature areas (upper or lower chamber),
the temperature display of upper or lower
chamber flashes.
By pressing the Temperature-rise key ,
the temperature will increase 1°C (or °F). After
locking, the cooler will operate according to the
setting temperature;
By pressing the Temperature-drop key ,
the temperature will decrease 1°C (or °F). After
locking, the cooler will operate according to the
setting temperature
The wine cooler‘s temperature can be set
between 7~18°C (44~65°F).
Press the Temperature-rise key and
the Temperature-drop key
at the same
time for 3 seconds to switch between Celsius
temperature and Fahrenheit temperature; the
screen will display the Fahrenheit temperature
or Celsius temperature under the current mode.
Switching of the Fahrenheit temperature and Celsius temperature
Lock/Unlock Key Button
By pressing the Lock/Unlock key for
3 seconds, the buzzer rings and the locked
mode is activated; the temperature display
areas (digit display areas) of upper chamber
and lower chamber turn off.
By pressing the Lock/Unlock key for
3 seconds in the locked mode, the buzzer rings
and the locked mode is de-activated; After
unlocking, the temperature display area of
selected chamber turns on.
When in the locked mode, if you touch any
key besides the Light key
, the display
screen will keep flashing for 2.5 seconds and
the buzzer will ring, alerting you to unlock the
control.
NOTE: WHEN USING ANY COMPARTMENT FOR BOTH WINE AND BEER STORAGE WE RECOMMEND
THAT YOU PLACE RED WINE BOTTLES ON TOP SHELF AND BEER ON BOTTOM SHELF.
About the controls and settings.
Consumer Support Troubleshooting Tips
Operating
Instructions
Safety Instructions
Installation
Instructions
Care and Cleaning
6
Interior Light
After the power is on for 3 seconds, the lighting
turns on by default for 30 seconds. If the
lighting key is not operated within 30 seconds,
the lighting will automatically turn off.
Press the Lighting mode key to turn on
or turn off the light.
Important:
In order to extend the compressor life, please restart wine cooler after waiting 3 minutes.
Memory Function:
The cooler has a power off memory function. When power comes on again, the wine cooler will
operate according to the setting mode before the power went off.
Fault Indication:
If the codes in the following table are displayed on the display area, it means the cooler has the
faults indicated.
Fault code Fault Description
Upper chamber display E1 The fault of temperature sensor of upper chamber
Lower chamber display E1 The fault of temperature sensor of lower chamber
Upper chamber display E4 The fault of defrosting sensor of upper chamber
Lower chamber display E4 The fault of defrosting sensor of lower chamber
Upper chamber display E6 Communication fault
Call for service if any of the above error messages show.
You should touch the temperature control panel softly as the panel is touch screen control. Please
protect the touch control panel carefully to avoid scratching,keep far away from strong magnetic
fields and high humidity, or it can cause wine cooler to not work properly.
If the power fails, open the door as
infrequently as possible to maintain
the temperature. A gradual rise in
temperature should not have any
adverse effect on the wine.
If it is extremely hot, you may want to
unload the wine from the wine chiller and
move the wine to a cooler location until
power is restored.
When power is restored, the controls
automatically are set to the Factory
Setting 50°F (10°C). If needed, reset the
controls to the desired setting.
Consumer SupportTroubleshooting Tips
Operating
Instructions
Safety Instructions
Installation
Instructions
Care and Cleaning
Care and cleaning.
IMPORTANT: Unplug the wine chiller
before cleaning.
Keep the outside clean. The cabinet can
be washed with mild soap and water. Rinse
thoroughly with clear water.
Never use abrasive scouring powders.
Use a glass cleaner or mild soap and water
and a soft cloth to clean the glass door. Do
not use any abrasive powders.
Wipe the control panel with a damp cloth.
Dry thoroughly. Do not use cleaning sprays,
large amounts of soap and water, abrasives
or sharp objects on the panel―they can
damage it. Some paper towels can also
scratch the control panel.
Do not wipe the wine chiller with a soiled
dishcloth or towel. These may leave a residue
that can erode the paint. Do not use scouring
pads, powdered cleaners, bleach or cleaners
containing bleach because these products
can scratch and weaken the paint finish.
Stainless steel. Regularly clean and polish
the stainless steel areas (on some models)
with a commercially available stainless
steel cleaner such as Gleem-it
®
to preserve
and protect the fine finish. Gleem-it
®
is
available at leading hardware stores. It is
also available through our website,
GEAppliances.ca, or call 1.888.261.3055.
Order part number WX10X15.
Do not use appliance wax or polish on the
stainless steel.
Protect the paint finish. The finish on
the outside of the wine chiller is a
high-quality, baked-on paint finish.
With proper care, it will stay new-looking
and rust-free for years. Apply a coat of
kitchen/appliance wax when the wine
chiller is new, and then at least twice
a year.
Cleaning the Outside
IMPORTANT: Unplug the wine chiller
before cleaning.
To clean the inner liner and racks, use
a warm water and baking soda solution―
about one tablespoon (15 mL) of baking
soda to a quart (1 liter) of water. This both
cleans and neutralizes odors.
Rinse and wipe dry.
The vinyl door gasket may be cleaned
with mild soap and water or a baking soda
solution. Rinse well.
Do not use detergents, scouring powders,
spray cleaners or other harsh chemicals
to clean the interior.
Cleaning the Inside
Defrost whenever frost on the inside
surfaces of the storage area becomes 1/8"
(3 mm) thick.
Never use a heater of any kind, scraper
or sharp instrument to remove frost as it
may damage the wine chiller.
To defrost, unplug the wine chiller. Remove
the contents and wipe inside surfaces and
racks with a clean towel. If frost does not
come off easily, allow the frost to melt
somewhat and wipe off.
After defrosting, make sure inside surfaces
are dry; then return the contents to the
wine chiller and set the temperature control
to the desired setting.
Defrosting
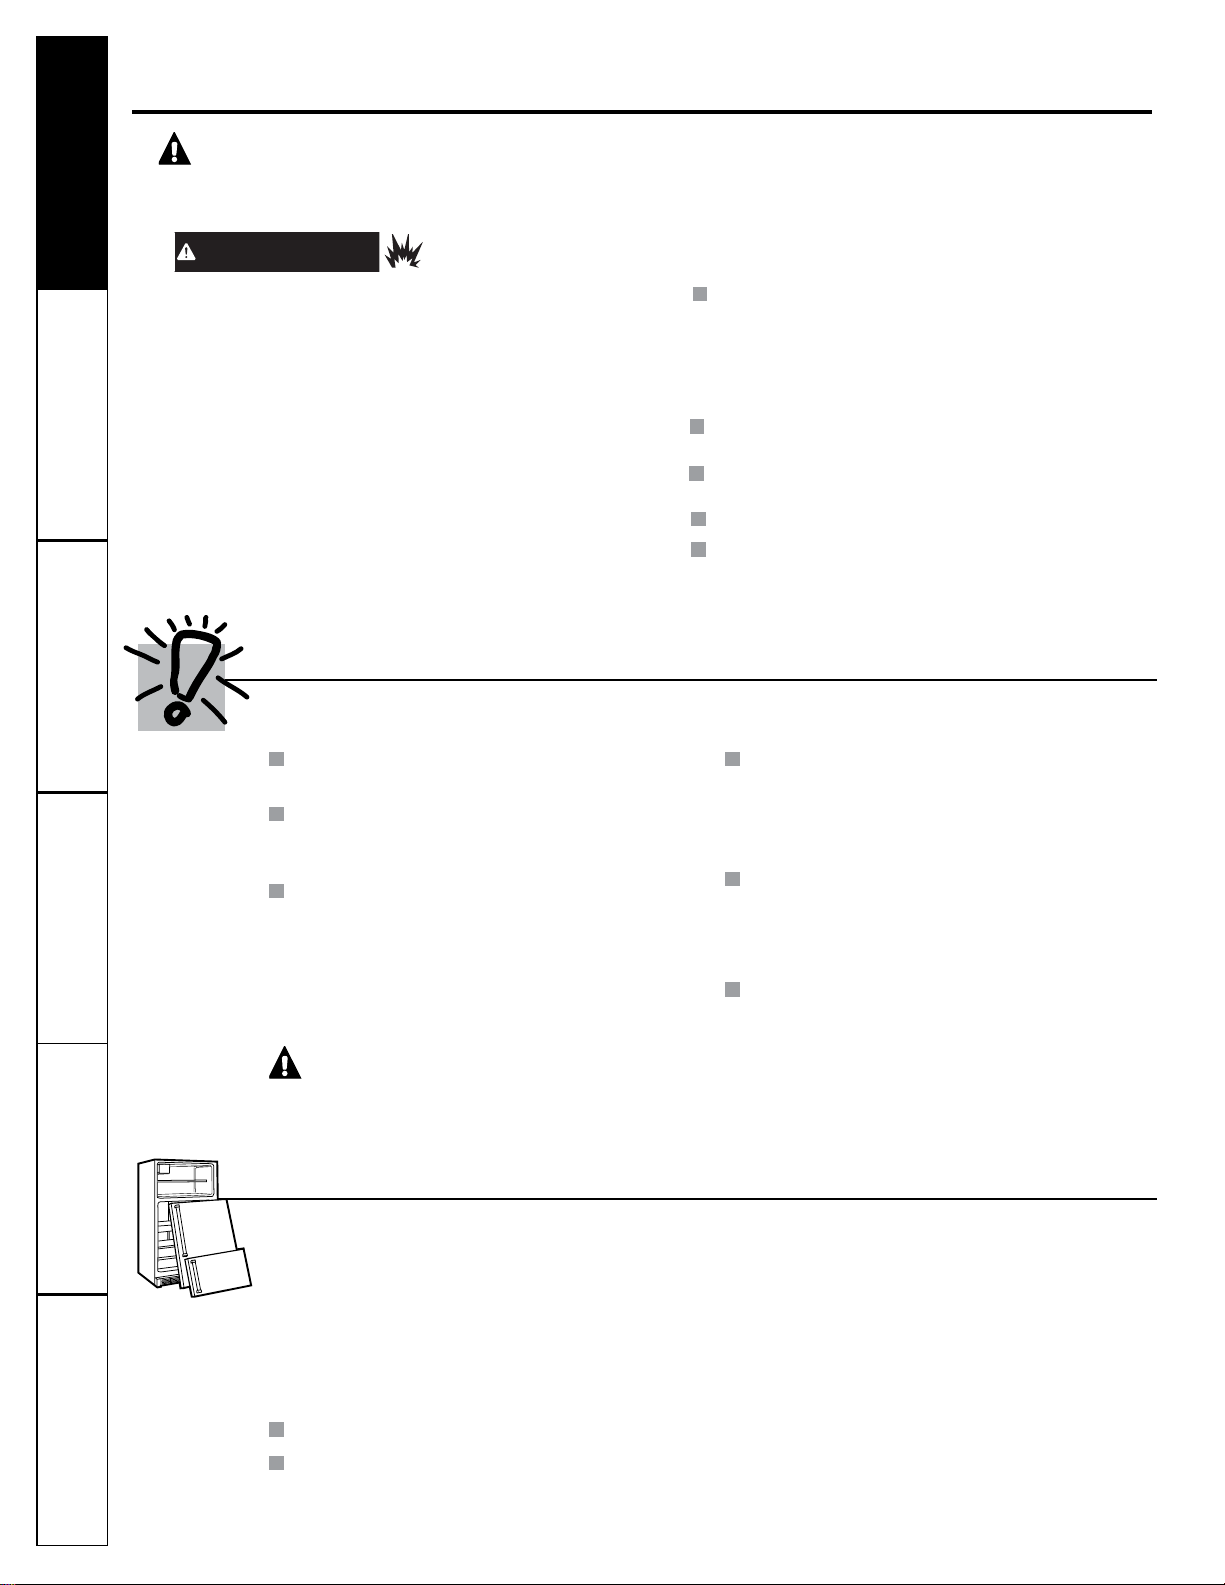
In the Event of a Power Failure
7
Unload the wine, then secure the racks and
door by taping them in place to prevent
damage.
Turn the adjustable leveling legs up to the
base to avoid damage.
Be sure the wine chiller stays in an upright
position during the move.
Preparing to Move
LED Refrigerator Lights
An authorized technician will need to
replace the LED light
Vacation Time
Short vacations: Leave the Wine/
Beverage Cooler operating during
vacations of less than three weeks.
Long vacations: If the appliance will
not be used for several months, remove
all items and unplug the power cord.
Clean and dry the interior thoroughly.
To prevent odor and mold growth, leave
the door open slightly: blocking it open if
necessary.
Energy Saving Tips
The Wine/Beverage Cooler should be
located in the coolest area of the room,
away from heat producing appliances,
and out of the direct sunlight.
Try not to open the door too often,
especially when the weather is wet or
hot. Once you open the door, mind to
close it as soon as possible.
This appliance is intended to be used
exclusively for the storage wine.
Every now and then check if the
appliance is sufficiently ventilated
(adequate air circulation behind the
appliance).
For wine storage appliances, please
arrange the temperature following the
instruction: SPARKLE: 41-45°F (5-7°C),
WHITE: 46-54°F (8-12°C), RED: 55-65°F
(13-18°C).
Care and cleaning.
Consumer Support Troubleshooting Tips Safety Instructions
Installation
Instructions
Care and Cleaning
Operating
Instructions
8
Troubleshooting Tips
Save time and money! Review the charts on the following
pages first and you may not need to call for service.
Before you call for service…
Problem Possible Causes What To Do
Wine chiller does not Wine chiller is unplugged. • Push the plug completely into the outlet.
operate and the display
The circuit breaker is tripped/ • Replace fuse or reset the breaker.
is blank
the fuse is blown.
Vibration or rattling Wine chiller is on an • See the Leveling Legs section.
(slight vibration uneven surface.
is normal)
The Wine/Beverage The rattling noise may come
Cooler seems to make from the flow of the refrigerant,
too much noise. which is normal.
As each cycle ends, you may hear
gurgling sounds caused by the
flow of refrigerant in your Wine/
Beverage Cooler.
Contraction and expansion of the
inside walls may cause popping
and crackling noises.
The Wine/Beverage Cooler is
not level.
Motor operates for Normal when wine chiller • Wait 12 hours for the wine chiller to completely
long periods or cycles is first plugged in. cool down.
Often occurs when large • This is normal.
amounts of wine are placed
in wine chiller.
Door left open. • Door is not self-closing. Always make sure that the
door is closed after opening.
• Check to see if a bottle is holding door open.
Hot weather or frequent • This is normal.
door openings.
Temperature control set • See About the control and settings.
at the coldest setting.
Wine chiller is too close • See the Installation Guidelines section for the
to the wall. correct clearances.
Wine chiller too warm Normal when wine chiller • Wait 12 hours for the wine chiller to completely
is first plugged in. cool down.
Often occurs when large • This is normal.
amounts of wine are placed
in wine chiller.
Temperature control • See About the control and settings.
not set cold enough.
Warm weather or frequent • Set the temperature control one step colder.
door openings. See About the control and settings.
Wine chiller is too close • See the Installation Guidelines section for the
to the wall. correct clearances.
Consumer Support
Operating
Instructions
Safety Instructions
Installation
Instructions
Care and Cleaning
Troubleshooting Tips
9
Problem Possible Causes What To Do
Wine chiller too warm Door left open. • Door is not self-closing. Always make sure that the
door is closed after opening.
• Check to see if a bottle is holding door open.
If the temperature setting is • When the power came back on, the wine chiller
not showing what you last returned to the default setting, which is 50°F (10°C).
selected, a power outage Reset the control to the desired setting.
may have occurred.
Wine chiller has odor Interior needs cleaning. • See Care and cleaning.
Moisture forms on Not unusual during periods • Wipe surface dry.
outside of wine chiller of high humidity.
Moisture collects inside Too frequent or too long
(in humid weather, door openings.
Wine bottles touching • Reposition bottles.
the back wall.
Frost forms on interior This is normal. • See the Defrosting section.
surfaces of wine chiller
Door left open. • Excessive frost may form if the door is left open.
See the Defrosting section.
• Door is not self-closing. Always make sure that the
door is closed after opening.
• Check to see if a bottle is holding door open.
Wine chiller too cold Temperature control • See About the control and settings.
is set too cold.
If the temperature setting is • When the power came back on, the wine chiller
not showing what you last returned to the default setting, which is 50°F (10°C).
selected, a power outage Reset the control to the desired setting.
may have occurred.
The room temperature where • For proper operation, the room temperature should
the wine chiller is located is be equal to or greater than the set temperature of the
too cold. wine chiller.
Temperature in the This is normal. • After you set the temperature, the display will go
display is not the back to showing the actual temperature.
temperature that
was just set.
Condensation on front Wine chiller is located in a • Wipe off the condensation with a clean, dry cloth.
of door high humidity environment.
• Locate the wine chiller in a lower humidity
environment.
Water on floor behind Door left open. • Door is not self-closing. Always make sure that the
wine chiller door is closed after opening.
• Check to see if a bottle is holding door open.
The door will not The Wine/Beverage Cooler is
close properly not level.
The door was reversed and not
properly installed.
The gasket is dirty.
The shelves are out of position.
Consumer Support Troubleshooting Tips
Operating
Instructions
Safety Instructions
Installation
Instructions
Care and Cleaning
Before you call for service…
air carries moisture
into wine chiller when
door is opened)
10

11
OWNERSHIP REGISTRATION
P.O. BOX 1780
MISSISSAUGA, ONTARIO
L4Y 4G1
(FOR CANADIAN CONSUMERS ONLY -
POUR RÉSIDENTS CANADIENS SEULEMENT)
Please place in envelope and mail to:
Veuillez mettre dans une enveloppe et envoyez à :

12
CUT ALONG THIS LINE AND RETURN CARD – THANKS
DÉCOUPEZ ICI ET ENVOYEZ LA FICHE – MERCI
For Canadian
Customers
Pour les
consommateurs
canadiens
OWNERSHIP REGISTRATION CERTIFICATE – FICHE D’INSCRIPTION DU PROPRIÉTAIRE
Please register your product to enable us to contact you in
the remote event a safety notice is issued for this product
and to allow for efficient communication under the terms of
our warranty, should the need arise.
REGISTER ON-LINE:
www.geappliances.ca
ENREGISTREMENT SUR INTERNET À :
www.electromenagersge.ca
MAIL TO:
P.O. BOX 1780, MISSISSAUGA
POSTEZ À
:
ONTARIO, L4Y 4G1
MR. / M.
MRS. / MME
MISS/MLLE
MS.
FIRST NAME / PRÉNOM
LAST NAME / NOM
STREET NO / N
O
RUE STREET NAME / RUE
APT.NO/APP./RR#
CITY / VILLE
PROVINCE
AREA CODE/
IND. RÉG.
TELEPHONE/TÉLÉPHONE E-MAIL/COURRIEL
DID YOU PURCHASE A SERVICE CONTRACT FOR THIS APPLIANCE?
AVEZ-VOUS ACHETÉ UN CONTRAT DE SERVICE POUR CET APPAREIL ?
YES/OUI
NO/NON
IF YES/SI OUI
: EXPIRATION
Y/A M
D/J
NAME OF SELLING DEALER / NOM DU MARCHAND
INSTALLATION DATE / DATE D’INSTALLATION
Y/A M D/J
CORRESPONDENCE
ENGLISH
CORRESPONDANCE
FRANÇAIS
I do not wish to receive any promotional offers regarding this product.
Je ne désire pas recevoir d’offres promotionnelles concernant ce produit
.
MODEL / MODÈLE
SERIAL / SÉRIE
Veuillez enregistrer votre produit afin de nous permettre de
communiquer avec vous si jamais un avis de sécurité concernant
ce produit était émis et de communiquer facilement avec vous en
vertu de votre garantie, si le besoin s’en fait sentir.
POSTAL CODE/CODE POSTAL
WARRANTY
Staple your receipt here. Proof of the original purchase
date is needed to obtain service under the warranty.
GE Appliances Warranty
For US Customers, DOOZDUUDQW\VHUYLFHSURYLGHGE\RXU)DFWRU\6HUYLFH&HQWHUVRUDQDXWKRUL]HG&XVWRPHU&DUH
®
technician. To schedule service, on-line, 24 hours a day, visit us at GEAppliances.com, or call 800.GE.CARES
3OHDVHKDYHVHULDOQXPEHUDQGPRGHOQXPEHUDYDLODEOHZKHQFDOOLQJIRUVHUYLFH
In Canada, call 800.561.3344.
Ŷ Service trips to your home to teach you how to
use the
product.
Ŷ Improper installation, delivery or maintenance.
Ŷ Failure of the product if it is abused, misused, or
used for other than the intended purpose or used
commercially.
Ŷ Loss of food due to spoilage.
Ŷ Replacement of house fuses or resetting of circuit
breakers.
Ŷ Damage caused after delivery.
Ŷ Replacement of the water filter cartridge, if
included, due to water pressure that is outside
the specified operating range or due to excessive
sediment in the water supply.
Ŷ Replacement of the light bulbs, if included, or
water filter cartridge, if included, other than as
noted above.
Ŷ Damage to the product caused by accident, fire,
floods or acts of God.
Ŷ Incidental or consequential damage caused by
possible defects with this appliance.
Ŷ Product not accessible to provide required service.
Ŷ Damage to finish, such as surface rust, tarnish, or
small blemishes not reported within 48 hours of
delivery.
Ŷ Products which are not defective, broken, or which
are working as described in the owner’s manual.
What is Not Covered:
For US Customers: This warranty is extended to the original purchaser and any succeeding owner for
SURGXFWVSXUFKDVHGIRUKRPHXVHZLWKLQWKH86$,IWKHSURGXFWLVORFDWHGLQDQDUHDZKHUHVHUYLFHE\D
*($XWKRUL]HG6HUYLFHULVQRWDYDLODEOH\RXPD\EHUHVSRQVLEOHIRUDWULSFKDUJHRU\RXPD\EHUHTXLUHG
WREULQJWKHSURGXFWWRDQ$XWKRUL]HG*(6HUYLFHORFDWLRQIRUVHUYLFH,Q$ODVNDWKHZDUUDQW\H[FOXGHVWKH
cost of shipping or service calls to your home.
Some states do not allow the exclusion or limitation of incidental or consequential damages. This warranty
gives you specific legal rights, and you may also have other rights which vary from state to state. To
know what your legal rights are, consult your local or state consumer affairs office or your state’s Attorney
General.
Warrantor US: GE Appliances, a Haier company
EXCLUSION OF IMPLIED WARRANTIES—Your sole and exclusive remedy is product repair
as provided in this Limited Warranty. Any implied warranties, including the implied warranties
of merchantability or fitness for a particular purpose, are limited to one year or the shortest
period allowed by law.
For the Period of: GE Appliances Will Replace
One Year
)URPWKHGDWHRIWKH
original purchase
Any part of the refrigerator which fails due to a defect in materials or workmanship.
'XULQJWKHlimited one-year warranty, GE Appliances will also provide, free of
charge, all labor and related service to replace the defective part.
For Customers in Canada: This warranty is extended to the original purchaser and any succeeding owner for
products purchased in Canada for home use within Canada. In-home warrantty service will be provided in areas
where it is available and deemed reasonable by MC Commercial Inc. to provide. If the product is located in an
area where service by an Authorized Servicer is not available, you may be responsible for a trip charge or you may
be requireed to bring the product to an Authorized Service location for service.
Warrantor Canada: MC Commercial Inc., Burlington, Ontario, L7R 5B6
Servicing your refrigerator may require the use of the onboard data port for diagnostics. This gives a GE Appliances
)DFWRU\6HUYLFHWHFKQLFLDQWKHDELOLW\WRTXLFNO\GLDJQRVHDQ\LVVXHVZLWK\RXUDSSOLDQFHDQGKHOSVLPSURYHLWV
products by providing information on your appliance. If you do not want your appliance data to be sent to GE
Appliances, please advise your technician NOT to submit the data at the time of service.

GE Appliances Website
Have a question or need assistance with your appliance? Try the GE Appliances Website 24 hours a day, any day
of the year! You can also shop for more great GE Appliances products and take advantage of all our on-line support
VHUYLFHVGHVLJQHGIRU\RXUFRQYHQLHQFH,QWKH86GEAppliances.com In Canada: GEAppliances.ca
Register Your Appliance
Register your new appliance on-line at your convenience! Timely product registration will allow for enhanced
communication and prompt service under the terms of your warranty, should the need arise. You may also mail in
the pre-printed registration card included in the packing material.
,QWKH86GEAppliances.com/register
In Canada: GEAppliances.ca/en/support/register-your-appliance
Schedule Service
Expert GE Appliances repair service is only one step away from your door. Get on-line and schedule your service at
\RXUFRQYHQLHQFHDQ\GD\RIWKH\HDU,QWKH86GEAppliances.com/ge/service-and-support/service.htm
RUFDOOGXULQJQRUPDOEXVLQHVVKRXUV
In Canada: GEAppliances.ca/en/support/service-request or call 800.561.3344
Extended Warranties
Purchase a GE Appliances extended warranty and learn about special discounts that are available while your
warranty is still in effect. You can purchase it on-line anytime. GE Appliances Services will still be there after your
warranty expires.
,QWKH86GEAppliances.com/ge/service-and-support/shop-for-extended-service-plans.htm
or call 800.626.2224 during normal business hours.
In Canada: GEAppliances.ca/en/support/purchase-extended-warranty or call 800.290.9029
Remote Connectivity
)RUDVVLVWDQFHZLWKZLUHOHVVQHWZRUNFRQQHFWLYLW\IRUPRGHOVZLWKUHPRWHHQDEOH
visit our website at GEAppliances.com/ge/connected-appliances/RUFDOOLQWKH86RQO\
Parts and Accessories
Individuals qualified to service their own appliances can have parts or accessories sent directly to their homes
9,6$0DVWHU&DUGDQG'LVFRYHUFDUGVDUHDFFHSWHG2UGHURQOLQHWRGD\KRXUVHYHU\GD\
,QWKH86GEApplianceparts.comRUE\SKRQHDWGXULQJQRUPDOEXVLQHVVKRXUV
Instructions contained in this manual cover procedures to be performed by any user. Other servicing
generally should be referred to qualified service personnel. Caution must be exercised, since improper
servicing may cause unsafe operation.
Customers in Canada should consult their nearest GE Appliances Service Center. Visit our website at
GEAppliances.ca/en/products/parts-filters-accessories or call 800.661.1616 during normal business hours.
Contact Us
If you are not satisfied with the service you receive from GE Appliances, contact us on our Website with all the
details including your phone number, or write to:
,QWKH86*HQHUDO0DQDJHU&XVWRPHU5HODWLRQV_*($SSOLDQFHV$SSOLDQFH3DUN_/RXLVYLOOH.<
GEAppliances.com/ge/service-and-support/contact.htm
,Q&DQDGD'LUHFWRU&RQVXPHU5HO
DWLRQV0C Commercial Inc_6XLWH)DFWRU\/DQH_0RQFWRQ1%(&0
GEAppliances.ca/en/contact-us
CONSUMER SUPPORT
Consumer Support

29-6226 11-18 GEA
BOISSONS ET VIN
CONSIGNES DE SÉCURITÉ .....2
INSTRUCTIONS
D’INSTALLATION . . . . . . . . 4
ENTRETIEN ET NETTOYAGE ....5
CONSEILS DE DÉPANNAGE ....9
GARANTIE ........................11
SOUTIEN
AU CONSOMMATEUR ...... 12
PXR03FLMFSC
MANUEL D’UTILISATION
ET INSTRUCTIONS
D’INSTALLATION
Inscrivez les numéros de modèle
et de série ci-après :
N° de modèle : ____________
N° de série : ______________
Vous trouverez ces numéros
sur l’étiquette à l’intérieur du
refroidisseur à boissons et vin.
GE est une marque déposée de General Electric Company. Fabriqué sous licence de marque.

NOUS VOUS REMERCIONS D’ACCUEILLIR CET
ÉLECTROMÉNAGER GE CHEZ VOUS.
Que vous ayez grandi avec des électroménagers GE ou qu’il s’agisse de votre première
acquisition, nous sommes heureux de vous accueillir dans notre famille.
Nous sommes fiers du savoir-faire, de l’innovation et de l’esthétique qui composent chaque
électroménager GE, et nous pensons que vous le serez aussi. Dans cette optique, nous vous
rappelons que l’enregistrement de votre électroménager vous assure la communication de
renseignements importants sur le produit et la garantie lorsque vous en avez besoin.
Enregistrez votre électroménager GE en ligne dès maintenant. Des sites Web et des numéros
de téléphone utiles figurent dans la section Soutien au consommateur de ce manuel d’utilisation.
Vous pouvez aussi poster la fiche de garantie préimprimée incluse dans l’emballage.
2
CONSIGNES DE SÉCURITÉ IMPORTANTES.
LISEZ TOUTES LES INSTRUCTIONS AVANT D’UTILISER VOTRE APPAREIL.
AVERTISSEMENT!
Cet appareil doit être utilisé uniquement aux fins prévues et décrites dans ce manuel.
MESURES DE SÉCURITÉ
Lors de l'utilisation d'appareils électriques, suivez les mesures de sécurité de base :
Ce refroidisseur à vin doit être installé conformément
à ces instructions avant d'être utilisé.
Ne laissez pas les enfants grimper, s'asseoir, se tenir
debout ni se pendre aux clayettes de cet appareil. Ils
pourraient l'endommager et gravement se blesser.
Vous ne devez ni entreposer, ni utiliser de l'essence
ou d'autres vapeurs ou liquides inflammables à
proximité de cet appareil ou de tout autre appareil
électroménager.
Éloignez vos doigts des zones où vous pouvez
facilement vous faire pincer : les espaces entre
les portes, et entre les portes et les armoires, sont
toujours étroits. Soyez prudent lorsque vous fermez
les portes de l'appareil en présence d'enfants.
Débranchez l'appareil avant de le nettoyer et de le
réparer.
REMARQUE : Nous vous recommandons vivement de
confier les réparations à un technicien qualifié.
N'installez pas et ne laissez pas cet appareil à
l'extérieur.
MISE AU REBUT APPROPRIÉE DE L'APPAREIL
Les enfants pris au piège ou morts d'asphyxie sont
un problème courant. Les appareils de réfrigération
abandonnés ou mis au rebut sont toujours dangereux...
même si ce n'est que pour « quelques jours ». Si vous
vous débarrassez de votre vieil appareil, veuillez suivre
les instructions ci-dessous pour éviter tout accident.
Avant de mettre au rebut votre vieil appareil
de réfrigération :
Démontez les portes.
Laissez les clayettes en place afin d'empêcher les
enfants de grimper facilement à l'intérieur.
Élimination des CFC
Votre ancien réfrigérateur dispose d'un système de
réfrigération qui utilise des CFC (chlorofluorocarbures).
Les CFC sont considérés comme nocifs pour l'ozone
stratosphérique.
Si vous mettez votre ancien réfrigérateur au rebut,
assurez-vous qu'un technicien qualifié retire le
frigorigène à base de CFC pour que ce dernier soit
correctement éliminé. Si vous jetez intentionnellement
ce frigorigène à base de CFC, vous pouvez être soumis à
des amendes et à une peine d'emprisonnement en vertu
de la loi sur l'environnement.
DANGER! RISQUE D'ENFERMEMENT POUR
LES ENFANTS
Service à la clientèle Dépannage Utilisation SécuritéInstallation
Entretien et
nettoyage
RISQUE D’EXPLOSION Fluide frigorigène inflammable
Cet électroménager contient le réfrigérant isobutane,
R600a, un gaz
naturel à compatibilité élevée avec
l’environnement. Il s’agit cependant d’un combustible.
Observez les consignes de sécurité ci-dessous afin de
réduire le risque de blessure ou de dommage à la
propriété.
Lors de la manipulation, de l’installation et de l’utilisation de cet
appareil, prenez soin de ne pas endommager les tubes de
circulation du fluide frigorigène.
L’entretien ou la réparation doivent être effectués par un
personnel de service autorisé. Utilisez seulement des pièces
de rechange autorisées par le fabricant.
Mettez le appareil au rebut conformément aux
réglementations fédérales et locales. Le fluide frigorigène
inflammable et le matériel isolant utilisés nécessitent des
procédures de mise au rebut spéciales. Communiquez avec
les autorités locales compétentes pour l
a mise au
rebut de
votre appareil sans danger pour l’environnement.
N'obstruez pas les
évents dans l'enciente préview pour
l'appareil
pour accélérer le processus de dégivrage.
N'endommagez pas le circuit du fluide frigorigène.
N'utilisez pas d'appareils électriques dans le compartiment
réfrigérateur de cet appareil.
AVERTISSEMENT
N'utilisez pas d'appareils ou autres moyens mécaniques
3
RACCORDEMENT ÉLECTRIQUE
Ne coupez ou ne retirez en aucun cas la troisième broche (mise à la terre) de la fiche du cordon
d’alimentation. Pour votre sécurité, cet appareil doit être correctement mis à la terre.
Pour diminuer les risques de choc électrique, le cordon
d’alimentation de cet appareil est muni d’une fiche à
3 broches (mise à la terre) qui correspond à une prise
murale à 3 alvéoles (prise mise à la terre).
Faites vérifier la prise murale et le circuit par un
électricien qualifié pour vous assurer que la prise est
correctement mise à la terre.
Si la prise de courant est une prise murale standard
à 2 alvéoles, c'est à l'utilisateur qu'incombent la
responsabilité et l'obligation de la faire remplacer par
une prise à 3 alvéoles correctement mise à la terre.
Le refroidisseur à vin doit toujours être le seul appareil
branché sur une prise de courant dont la tension
nominale correspond à celle indiquée sur la plaque
signalétique.
Cela assure de meilleures performances et évite toute
surcharge, et donc surchauffe, des circuits du domicile
qui pourrait être à l'origine d'un incendie.
Ne débranchez jamais votre refroidisseur à vin en tirant
sur son cordon d'alimentation. Saisissez fermement la
fiche et sortez-la de la prise en tirant bien droit.
Réparez ou remplacez immédiatement tous les cordons
électriques effilochés ou endommagés. N'utilisez pas de
cordon qui présente des signes d'usure ou de fissure.
Lorsque vous éloignez l'appareil du mur, faites attention
à ne pas le faire rouler sur le cordon d'alimentation et à
ne pas endommager ce dernier.
FICHES D'ADAPTATION
LISEZ ATTENTIVEMENT ET RESPECTEZ CES CONSIGNES DE SÉCURITÉ.
CONSERVEZ CES INSTRUCTIONS
Service à la clientèle
Dépannage
Utilisation
Sécurité
Installation
Entretien et
nettoyage
L'utilisation de fiches d'adaptation est interdite au Canada.
UTILISATION DE CORDONS PROLONGATEURS
En raison de risques de sécurité dans certaines situations, nous vous déconseillons fortement l'utilisation
d'un cordon prolongateur.
Cependant, si vous devez utiliser un cordon prolongateur, celui-ci doit absolument être homologué par CSA, de type
trifilaire avec mise à la terre, avec fiche et prise mises à la terre, pour une alimentation nominale de 15 ampères
(minimum) et de 120 volts.
4
Installation du refroidisseur à vin
Déballage
Avant d'utiliser le refroidisseur à vin, vérifiez que tout le matériel d'emballage et le ruban ont
été enlevés, y compris toute pellicule protectrice recouvrant le tableau de commande ou
protégeant l'appareil.
Si vous mettez au rebut un réfrigérateur ou un appareil semblable, démontez d'abord ses
portes pour éviter que les enfants ne s'emprisonnent à l'intérieur.
Le refroidisseur à vin doit être installé de
façon autonome.
Prévoyez les dégagements suivants pour
faciliter l'installation, la circulation d'air et les
raccordements électriques :
Sur chaque côté 2 po (51 mm)
Dessus 2 po (51 mm)
Arrière 3 po (76 mm)
Avant de brancher l'appareil, laissez-le à
la verticale pendant environ 2 heures. Cela
réduira les risques de dysfonctionnement
du système de refroidissement liés à la
manipulation de l'appareil pendant son
transport.
N'installez pas l'appareil là où la température
est inférieure à 55 °F (13 °C) ou supérieure à
90 °F (32 °C).
Installez-le sur un plancher de niveau.
N'installez pas le refroidisseur à vin là où il
sera exposé aux rayons du soleil, à la chaleur
ou à l'humidité.
N'installez pas et ne laissez pas cet appareil à
l'extérieur.
Les modèles suivants doivent être installés sur
le plancher : GWS04, GCS04.
Instructions d'installation
Relèvement de l'appareil
Les pieds de mise à niveau situés sur les coins
avant du refroidisseur à vin doivent être réglés
de manière à ce que l'appareil soit fermement
positionné sur le planché, incliné de 1/8 po
(3 mm) vers l'arrière pour faciliter la fermeture
de la porte.
Pour régler les pieds de mise à niveau,
tournez-les vers la gauche pour lever le
refroidisseur à vin et vers la droite pour
l'abaisser.
Pieds de mise à niveau
Service à la clientèle Dépannage Utilisation SécuritéInstallation
Entretien et
nettoyage
Lampe intérieure (certains modèles)
Vous pouvez ALLUMER ou ÉTEINDRE l'éclairage en utilisant le commutateur situé sur le tableau de
commande. Si la lampe reste allumée, la température dans l'appareil sera plus élevée.
Disposition des bouteilles de vin
Comme pour tout appareil de réfrigération, la température peut légèrement varier à l'intérieur de
l'appareil. Les clayettes inférieures procurent une température légèrement plus basse que celle des
clayettes supérieures.
5
Commandes et réglages
Service à la clientèle
Dépannage
Utilisation
Sécurité
Installation
Entretien et
nettoyage
Réglage de la température
Lorsque le refroidisseur à vin est branché
Après l'avoir branché et après avoir sélectionné la
température, attendez que le refroidisseur à vin
atteigne la température réglée avant d'y mettre
votre vin. 12 heures peuvent être nécessaires jusqu'à
l'obtention d'une température stable.
Après avoir mis les bouteilles dans l'appareil, vous
pourrez remarquer une hausse de température. Attendez
suffisamment longtemps pour que la température
revienne au niveau programmé. 12 heures peuvent être
nécessaires jusqu'à l'obtention d'une température stable.
Lors du démarrage initial, l'écran s'affiche entièrement
pendant 3 secondes et le son de démarrage se
fait entendre, puis l'appareil entre en fonction dans
l'état verrouillé. Pour obtenir les instructions de
déverrouillage, consultez les instructions ci-dessous.
Si aucune touche n'est utilisée pendant 30 secondes,
l'affichage s'éteint. Si l'on utilise une touche, l'écran
s'allume de nouveau.
Au lancement, la température de la chambre
supérieure est ajustée conformément à la valeur
préétablie en usine. En appuyant sur la touche
d'options
, la zone de température passe de la
chambre supérieure à la chambre inférieure. Une fois
qu'une chambre a été sélectionnée, l'affichage clignote
et il est alors possible de procéder au réglage de la
température de la chambre. Après le verrouillage,
l'affichage de la température cesse de clignoter.
Si l'on sélectionne la touche pour changer
les zones de température (chambre supérieure
ou inférieure), l'affichage de la température de la
chambre supérieure ou inférieure clignote.
Si l'on appuie sur la touche d'augmentation de la
température
, la température augmentera de
1 °C (ou 1,8 °F). Après le verrouillage, le refroidisseur
fonctionnera conformément à la température réglée.
Si l'on appuie sur la touche de diminution de la
température
, la température diminuera de 1 °C
(ou 1,8 °F). Après le verrouillage, le refroidisseur
fonctionnera conformément à la température réglée.
Le refroidisseur à vin peut être réglé à une
température variant de 7~18 °C (44~65 °F).
Tableau de commande avec affichage
Touche de diminution
de la température
Touche de
verrouillage/
déverrouillage
Touche du mode d'éclairage Touche d'augmentation
de la température
Touche d'option de
la zone de température
Zone d'affichage
de la chambre supérieure
Zone d'affichage
de la chambre inférieure
Appuyez simultanément sur la touche d'augmentation
de la température
et sur la touche de diminution
de la température
pendant 3 secondes pour
passer de l'affichage en Celsius à celui en Fahrenheit;
la température en Fahrenheit ou en Celsius s'affichera
dans le mode en cours.
Changement de l'affichage de la température, Fahrenheit à Celsius, et vice-versa
Touche de verrouillage/déverrouillage
Si l'on appuie sur la touche de verrouillage/
déverrouillage
pendant 3 secondes,
l'avertisseur se fait entendre et le mode verrouillé
est activé; les zones d'affichage de la température
(zones avec des chiffres) des chambres supérieure et
inférieure s'éteignent.
Si l'on appuie sur la touche de verrouillage/
déverrouillage
pendant 3 secondes dans le
mode verrouillé, l'avertisseur se fait entendre et le
mode verrouillé est désactivé; après le déverrouillage,
la zone d'affichage de la température de la chambre
sélectionnée s'allume.
Lorsque l'appareil est en mode verrouillé, si vous
appuyez sur une touche, sauf sur celle de l'éclairage
, l'affichage clignotera pendant 2,5 secondes et
l'avertisseur se fera entendre, vous avisant ainsi de
verrouiller la commande.
REMARQUE : LORSQUE VOUS UTILISEZ L'UN OU L'AUTRE DES DEUX COMPARTIMENTS POUR ENTREPOSER DU
VIN ET DE LA BIÈRE, NOUS VOUS CONSEILLONS DE PLACER LES BOUTEILLES DE VIN ROUGE SUR LA CLAYETTE
SUPÉRIEURE ET LA BIÈRE SUR LA CLAYETTE INFÉRIEURE.
6
Commandes et réglages
Service à la clientèle Dépannage Utilisation SécuritéInstallation
Entretien et
nettoyage
Important :
Afin de prolonger la durée de vie du compresseur, veuillez redémarrer le refroidisseur à vin après avoir attendu
3 minutes.
Fonction de mémorisation :
Le refroidisseur possède une fonction de mémorisation à l'extinction. Lorsqu'il est à nouveau mis sous tension,
le refroidisseur à vin fonctionne conformément au mode de réglage antérieur à la mise hors tension.
Indication d'une défaillance :
Si les codes du tableau suivant s'affichent, cela indique que la défaillance indiquée est survenue sur le
refroidisseur.
Contactez un service de dépannage si l'un des messages d'erreur précédents s'affiche.
Touchez le tableau de commande de température avec précaution, car il est tactile. Veillez à bien protéger le
tableau de commande tactile pour éviter toute rayure, tenez-le à l'écart de tout champ magnétique fort et d'un
taux élevé d'humidité, ou il pourrait présenter des dysfonctionnements.
Lampe intérieure
Lorsque la puissance est activée pendant
3 secondes, la lampe s'allume par défaut pendant
30 secondes. Si la touche d'éclairage demeure
inactive dans les 30 secondes suivantes, la lampe
s'éteint automatiquement.
Appuyez sur la touche du mode d'éclairage
pour allumer ou éteindre la lampe.
Code de défaillance Description des défaillances
La chambre supérieure affiche E1 Il s'agit d'une défaillance du capteur de température
de la chambre supérieure
La chambre inférieure affiche E1 Il s'agit d'une défaillance du capteur de température
de la chambre inférieure
La chambre supérieure affiche E4 Il s'agit d'une défaillance du capteur de dégivrage
de la chambre supérieure
La chambre inférieure affiche E4 Il s'agit d'une défaillance du capteur de dégivrage
de la chambre inférieure
La chambre supérieure affiche E6 Défaillance de communication

7
Entretien et nettoyage
Service à la clientèle
Dépannage
Utilisation
Sécurité
Installation
Entretien et
nettoyage
IMPORTANT : Débranchez l'appareil avant de le
nettoyer.
L'extérieur doit rester propre. La caisse peut
être lavée à l'aide d'eau et de savon doux. Rincez
bien avec de l'eau limpide. N'utilisez jamais de
poudre à récurer abrasive.
Utilisez un nettoyant pour verre ou de l'eau
légèrement savonneuse ainsi qu'un chiffon doux
pour nettoyer la porte en verre. N'utilisez pas de
poudres abrasives.
Essuyez le tableau de commande avec un
chiffon humide. Séchez bien. N'utilisez pas de
produit de nettoyage à pulvériser, de grandes
quantités d'eau savonneuse, de produit abrasif
ni d'objet acéré sur le tableau de commande –
ils peuvent l'endommager. Certains essuie-tout
peuvent également le rayer.
N'essuyez pas l'appareil avec une serviette ou un
torchon sale. Ceux-ci peuvent laisser un résidu qui
pourrait endommager la peinture. N'utilisez pas de
tampon à récurer, de poudre nettoyante, d'agent
de blanchiment (ou de produit qui en contient) car
ils peuvent rayer ou fragiliser la peinture.
Acier inoxydable. Nettoyez et polissez
périodiquement les parties en acier
inoxydable (certains modèles) avec un
produit pour acier inoxydable comme
Gleem-it
MD
pour préserver et protéger le
fini. Gleem-it
MD
est vendu dans les grandes
quincailleries. Vous pouvez aussi l'obtenir par
notre site Web : www.electromenagersge.ca,
ou en composant le 1-888-261-3055. Pièce
numéro WX10X15 (à fournir lors de la
commande).
N'utilisez pas de cire ni de produit à polir pour
électroménagers sur l'acier inoxydable.
Protection du fini extérieur. L'extérieur du
refroidisseur à vin est recouvert d'une peinture
cuite au four de haute qualité. S'il est bien
entretenu, le revêtement garde son aspect
neuf et ne rouille pas pendant de nombreuses
années. Appliquez une couche de cire pour
électroménagers de cuisine lorsque le
refroidisseur à vin est encore neuf, puis répétez
l'application au moins deux fois par année.
Nettoyage de la surface extérieure
IMPORTANT : Débranchez l'appareil avant de le
nettoyer.
Pour nettoyer le revêtement intérieur et les
clayettes, utilisez une solution d'eau chaude et
de bicarbonate de soude – environ une cuillère
à soupe (15 mL) de bicarbonate de soude pour
1 litre d'eau. Cela sert à nettoyer et à neutraliser
les odeurs. Rincez et essuyez.
Le joint de porte en vinyle peut aussi être
nettoyé avec une solution d'eau tiède et de
bicarbonate de soude. Rincez bien.
N'utilisez pas de détergents, de poudres à
récurer, de nettoyants à pulvériser ou d'autres
produits agressifs pour nettoyer l'intérieur de
l'appareil.
Nettoyage de l'intérieur
Dégivrez l'appareil lorsque le givre sur les surfaces
intérieures est de 1/8 po (3 mm) d'épaisseur.
N'utilisez pas d'appareil de chauffage, de grattoir
ni d'instruments acérés pour enlever le givre, cela
pourrait endommager le refroidisseur.
Pour dégivrer le refroidisseur à vin,
débranchez-le. Videz-le et essuyez les surfaces
intérieures, ainsi que les clayettes avec un
torchon propre.
Si le givre ne s'enlève pas facilement, attendez
qu'il fonde partiellement avant de l'essuyer.
Une fois le dégivrage terminé et les surfaces
intérieures bien sèches, remettez les bouteilles
dans l'appareil et réglez la température au
niveau désiré.
Dégivrage
En cas de coupure de courant, ouvrez le moins
possible la porte pour maintenir la température
à l'intérieur. Une augmentation graduelle de la
température ne devrait pas être néfaste pour le
vin.
S'il fait très chaud, le vin retiré du refroidisseur
devrait être mis dans un endroit plus frais
jusqu'au retour du courant.
Une fois l'alimentation rétablie, les commandes
sont automatiquement remises au réglage
de l'usine de 50 °F (10 °C). Si besoin est,
reprogrammez les commandes au réglage désiré.
En cas de coupure de courant

8
Videz l'appareil, puis fixez les clayettes et la
porte en place, avec du ruban adhésif, pour
éviter les dommages.
Tournez les pieds de mise à niveau jusqu'à ce
qu'ils soient en contact avec la base pour éviter
tous dommages.
Assurez-vous que le refroidisseur demeure à la
verticale pendant le déplacement.
Avant un déménagement
Lampes à DEL de l'appareil
Un réparateur agréé devra remplacer la lampe
à DEL.
Vacances
Courtes vacances : Laissez le refroidisseur
à vin/boissons fonctionner pendant vos
vacances, lorsque celles-ci durent moins de
trois semaines.
Longues vacances : Si vous ne prévoyez
pas d'utiliser l'appareil pendant plusieurs
mois, videz-le et débranchez le cordon
d'alimentation. Nettoyez et séchez-en
bien l'intérieur. Pour éviter toute odeur ou
formation de moisissure, laissez la porte
entrouverte : bloquez-la au besoin.
Conseils pour l'économie d'énergie
Le refroidisseur à vin/boissons doit être placé
dans la zone la plus froide de la pièce, loin
des appareils qui produisent de la chaleur et
des rayons directs du soleil.
Essayez de ne pas ouvrir la porte trop
souvent, surtout quand le temps est humide
ou chaud. Lorsque vous ouvrez la porte,
essayez de la fermer dès que possible.
Cet appareil est exclusivement conçu pour
l'entreposage de vin.
De temps en temps, vérifiez que l'appareil est
suffisamment ventilé (l'air doit pouvoir bien
circuler derrière).
Pour les appareils destinés à l'entreposage
de vin, veuillez régler la température
conformément aux instructions suivantes :
SPARKL (pétillant) : 41 à 45 °F (5 à 7 °C);
WHITE (blanc) : 46 à 54 °F (8 à 12 °C); RED
(rouge) : 55 à 65 °F (13 à 18 °C).
Service à la clientèle Dépannage SécuritéInstallation
Entretien et nettoyage
Entretien et
nettoyage
Utilisation
9
Service à la clientèle
Utilisation
Sécurité
Installation
Conseils de dépannage
Économisez du temps et de l’argent! Reportez-vous au tableau
suivant pour éviter tout appel de service qui ne serait pas nécessaire.
Avant de contacter un service de dépannage…
Problème Causes possibles Solutions
Le refroidisseur à vin Le refroidisseur à vin est débranché. • Insérez complètement la fiche dans la prise.
ne fonctionne pas et
Le disjoncteur s'est déclenché/ • Remplacez le fusible ou réenclenchez le disjoncteur.
l'affichage est vierge
le fusible a sauté.
Vibration ou cliquetis Le refroidisseur à vin est sur • Reportez-vous à la section Pieds de mise à niveau.
(une légère vibration une surface inégale.
est normale)
Le refroidisseur à vin/ Le cliquetis peut provenir du
boissons semble faire flux de frigorigène, ce qui
trop de bruit est normal.
À la fin de chaque cycle, vous
pouvez entendre des
glougloutements causés par le
flux de frigorigène à l'intérieur
de votre refroidisseur à vin/
boissons.
L'expansion et la contraction des
parois intérieures peut causer des
bruits de craquement ou de
crépitement.
Le refroidisseur à vin/boissons
n'est pas de niveau.
Le moteur fonctionne Ceci est normal lorsque le refroidisseur • Attendez 12 heures que l'appareil refroidisse complètement.
pendant des périodes de à vin est branché pour la première fois.
temps ou cycles prolongés
Ceci est fréquent lorsqu'une grande • Ceci est normal.
quantité de bouteilles est placée
dans le refroidisseur à vin.
La porte est restée ouverte. • La porte ne se ferme pas automatiquement. Assurez-vous
toujours que la porte est bien fermée après l'avoir ouverte.
• Vérifiez qu'une bouteille ne bloque pas la fermeture de la porte.
Temps très chaud ou ouvertures • Ceci est normal.
fréquentes de la porte.
Commande de température • Consultez la section Commandes et réglages.
au réglage le plus froid.
Le refroidisseur à vin est trop • Consultez la section Installation pour vérifier les dégagements
près du mur. appropriés.
Le refroidisseur à vin Ceci est normal lorsqu'il est • Attendez 12 heures pour que l'appareil refroidisse complètement.
est trop chaud branché pour la première fois.
Ceci est fréquent lorsqu'une grande • Ceci est normal.
quantité de bouteilles est placée
dans le refroidisseur à vin.
La température réglée n'est pas • Consultez la section Commandes et réglages.
assez basse.
Temps chaud ou ouvertures • Ajustez la commande de la température à un réglage plus froid.
fréquentes de la porte. Consultez la section Commandes et réglages.
Le refroidisseur à vin est trop • Consultez la section Installation pour vérifier les dégagements
près du mur. appropriés.
Entretien et
nettoyage
Dépannage
Problème Causes possibles Solutions
Le refroidisseur à vin est La porte est restée ouverte. • Laportenesefermepasautomatiquement.Assurez-vous
trop chaud toujours que la porte est bien fermée après l'avoir ouverte.
•Vérifiezqu'unebouteillenebloquepaslafermeturedelaporte.
Si le réglage de température est • Quandlecourantaétérétabli,leréglagedel'appareils'estremis
différent du dernier que vous avez à la valeur par défaut, soit 50 °F (10 °C).
sélectionné, il y a peut-être eu une Réglez la commande à la position voulue.
panne de courant.
Le refroidisseur à vin sent L'intérieur doit être nettoyé. • ConsultezlasectionEntretien et nettoyage.
mauvais
L'extérieur de l'appareil Ceci n'est pas rare en cas •Essuyezlasurfaceduréfrigérateur.
est humide d'humidité élevée dans l'air.
De l'humidité s'accumule Ouvertures de porte trop
à l'intérieur (l'humidité fréquentes ou trop longues.
contenue dans l'air peut
Les bouteilles touchent la • Redisposezlesbouteilles.
paroi arrière.
Du givre se forme à Ceci est normal. • ConsultezlasectionDégivrage.
l'intérieur du refroidisseur
La porte est restée ouverte. • Silaporteresteouverte,ilpeutyavoiruneproductionexcessive
à vin
de givre. Consultez la section Dégivrage.
•Laportenesefermepasautomatiquement.Assurez-vous
toujours que la porte est bien fermée après l'avoir ouverte.
•Vérifiezqu'unebouteillenebloquepaslafermeturedelaporte.
L'appareil est trop froid La température réglée est trop •ConsultezlasectionCommandes et réglages.
basse.
Si le réglage de température est •Quandlecourantaétérétabli,leréglagedel'appareils'estremis
différent du dernier que vous avez à la valeur par défaut, soit 50 °F (10 °C).
sélectionné, il y a peut-être eu une Réglez la commande à la position voulue.
panne de courant.
La température ambiante de la pièce •Pourunbonfonctionnementdel'appareil,latempérature
où se trouve le refroidisseur à vin ambiante doit être la même ou plus élevée que celle que vous
est trop froide. avez programmée.
La température affichée Ceci est normal. • Unefoisquevousavezprogrammélatempérature,l'affichage
n'est pas celle que vous redonne la température réelle de l'appareil.
venez de régler
De la condensation s'est L'appareil est situé dans un endroit • Essuyezlacondensationavecunchiffonpropreetsec.
formée sur le devant de où l'air est très humide.
• Placezlerefroidisseuràvindansunenvironnementmoins
la porte
humide.
Le plancher est mouillé La porte est restée ouverte. • Laportenesefermepasautomatiquement.Assurez-vous
derrière l'appareil toujours que la porte est bien fermée après l'avoir ouverte.
• Vérifiezqu'unebouteillenebloquepaslafermeturedelaporte.
La porte ne se ferme pas Le refroidisseur à vin/boissons
correctement n'est pas de niveau.
La porte a été inversée et mal installée.
Le joint est sale.
Les clayettes sont mal positionnées.
Service à la clientèle Dépannage Utilisation SécuritéInstallation
Entretien et
nettoyage
Avant de contacter un service de dépannage…
pénétrer à l'intérieur de
l'appareil lorsque les
portes sont ouvertes)
10

11
11
OWNERSHIP REGISTRATION
P.O. BOX 1780
MISSISSAUGA, ONTARIO
L4Y 4G1
(FOR CANADIAN CONSUMERS ONLY -
POUR RÉSIDENTS CANADIENS SEULEMENT)
Please place in envelope and mail to:
Veuillez mettre dans une enveloppe et envoyez à :
12
CUT ALONG THIS LINE AND RETURN CARD – THANKS
DÉCOUPEZ ICI ET ENVOYEZ LA FICHE – MERCI
For Canadian
Customers
Pour les
consommateurs
canadiens
OWNERSHIP REGISTRATION CERTIFICATE – FICHE D’INSCRIPTION DU PROPRIÉTAIRE
Please register your product to enable us to contact you in
the remote event a safety notice is issued for this product
and to allow for efficient communication under the terms of
our warranty, should the need arise.
REGISTER ON-LINE:
www.geappliances.ca
ENREGISTREMENT SUR INTERNET À :
www.electromenagersge.ca
MAIL TO:
P.O. BOX 1780, MISSISSAUGA
POSTEZ À
:
ONTARIO, L4Y 4G1
MR. / M.
MRS. / MME
MISS/MLLE
MS.
FIRST NAME / PRÉNOM
LAST NAME / NOM
STREET NO / N
O
RUE STREET NAME / RUE
APT.NO/APP./RR#
CITY / VILLE
PROVINCE
AREA CODE/
IND. RÉG.
TELEPHONE/TÉLÉPHONE E-MAIL/COURRIEL
DID YOU PURCHASE A SERVICE CONTRACT FOR THIS APPLIANCE?
AVEZ-VOUS ACHETÉ UN CONTRAT DE SERVICE POUR CET APPAREIL ?
YES/OUI
NO/NON
IF YES/SI OUI
: EXPIRATION
Y/A M
D/J
NAME OF SELLING DEALER / NOM DU MARCHAND
INSTALLATION DATE / DATE D’INSTALLATION
Y/A M D/J
CORRESPONDENCE
ENGLISH
CORRESPONDANCE
FRANÇAIS
I do not wish to receive any promotional offers regarding this product.
Je ne désire pas recevoir d’offres promotionnelles concernant ce produit
.
MODEL / MODÈLE
SERIAL / SÉRIE
Veuillez enregistrer votre produit afin de nous permettre de
communiquer avec vous si jamais un avis de sécurité concernant
ce produit était émis et de communiquer facilement avec vous en
vertu de votre garantie, si le besoin s’en fait sentir.
POSTAL CODE/CODE POSTAL
Agrafezvotrefactureici.Unepreuvedeladated’achat
d’origineestrequisepourobtenirdesservicessousgarantie.
electromenagersge.ca
Toutes les réparations sous garantie sont effectuées par nos Centres de réparation ou par nos réparateurs agréés Customer Care
®
.
Pourplanifieruneréparationenligne,visitezlehttp://www.electromenagersge.ca/fr/soutien/demande-de-service ou appelez
au1-800-561-3344.Veuillezavoirlesnumérosdesérieetdemodèledevotreappareilàportéedemainlorsquevousappelez
pour obtenir un service.
Laréparationdevotreappareilpeutnécessiterl'utilisationd'unaccèsembarquéauxdonnéespourdéterminerlediagnostic.Cela
permetàuntechnicienderéparationd'ÉlectroménagersGEdediagnostiquerrapidementtoutproblèmeavecvotreappareil,et
aideÉlectroménagersGEàaméliorersesproduitsenluifournissantdel'informationsurvotreappareil.Sivousnevoulezpasque
lesdonnéesdevotreappareilsoienttransmisesàÉlectroménagersGE,veuillezaviserletechniciendenepastransmettrede
donnéesàÉlectroménagersGEaumomentdelaréparation.
Pendant une
période de
MC Commercial Inc. remplacera
Un an
À compter de la date
d’achatd’origine
Toute pièce du électroménager tombée en panne à la suite d'un vice de matériau ou de fabrication.
Au cours de cette garantie limitée d'un an, MC Commercial Inc. fournira également, sans frais
,
toute la main-d’œuvrepourleremplacementdelapiècedéfectueuseàdomicile.
Ce que MC Commercial Inc. ne couvre pas (pour les consommateurs du Canada) :
■ Toute visite à votre domicile pour vous expliquer le
fonctionnementdel’appareil.
■ L'installation,lalivraisonoul'entretieninappropriésde
l'appareil.
■ Toutedéfectuositéduproduitlorsqu’ilaétéutiliséde
façon abusive ou inadéquate, ou employé à toute autre fin
que celle pour laquelle il a été conçu, ou utilisé à des fins
commerciales.
■ Leremplacementdesfusiblesouleréenclenchementdes
disjoncteurs.
■ Toutproduitauqueliln’estpaspossibled'accéderpour
effectuer les réparations nécessaires.
■ Toutdommageauproduitattribuableàunaccident,àun
incendie, à une inondation ou à une catastrophe naturelle.
■ Toutdommageaccessoireouindirect,causépardes
défaillances possibles de l'appareil.
■ Lenettoyageoul'entretiendudispositifdecoupure
antirefoulement dans la conduite de vidange.
■ Toutdommagecauséaprèslalivraison,incluantles
dommagescausésparlachuted'objetssurlaporte.
GARANTIE
Garantie d'Électroménagers GE
EXCLUSIONS DES GARANTIES IMPLICITES
Votre seul et unique recours est de faire réparer le produit dans le cadre de cette garantie limitée. Toute garantie implicite,
incluantlagarantiedequalitémarchandeoud’aptitudeduproduitàunusageparticulier,estlimitéeàunanouàlapériodela
plus courte autorisée par la loi.
Garanties prolongées :Procurez-vousunegarantieprolongéeÉlectroménagersGEetinformez-vousausujetdesrabais
spéciaux offerts tout au long de la durée de votre garantie. Contactez votre revendeur pour plus de détails.
Garant : MC Commercial Inc.
Cettegarantieestofferteàl’acheteurinitial,ainsiqu’àtoutpropriétairesubséquentd’unproduitachetéenvued’uneutilisation
domestiqueauCanada.SileproduitsesituedansunezoneoùaucunréparateuragrééparMCCommercialInc.n'estdisponible,
vous devrez peut-être assumer les frais de déplacement de celui-ci ou apporter le produit à un atelier de réparation agréé par
MCCommercialInc..
LE GARANT NE PEUT ÊTRE TENU RESPONSABLE DES DOMMAGES INDIRECTS.

Service à la clientèle
SERVICE À LA CLIENTÈLE
Site Web des électroménagers GE
Vousavezdesquestionsoubesoind'assistanceconcernantvotreappareil?ConsultezlesiteWebd'ÉlectroménagersGE,
accessible24heuressur24,touslesjoursdel'année!Vouspouvezégalementacheterd'autresexcellentsproduits
d'ÉlectroménagersGEetbénéficierdetousnosservicesdesoutienenligneconçuspourvotrecommodité.AuCanada:
electromenagersge.ca/fr
Enregistrer votre appareil
Enregistrezvotrenouvelappareilenligneaumomentquivousconvientlemieux!L'enregistrementdevotreproduitdansles
délais prescrits permet une meilleure communication et un service rapide, selon les modalités de votre garantie, si besoin est.
Vous pouvez également envoyer par courrier la carte d'enregistrement préimprimée qui se trouve dans l'emballage de votre
appareil. Au Canada : http://www.electromenagersge.ca/fr/soutien/enregistrez-votre-electromenager.
Demande de service
Pourbénéficierduservicederéparationd'ÉlectroménagersGE,ilsuffitdenouscontacter.Vouspouvezdemanderuneréparation
enligneàtouteheuredujour,aumomentquivousconvientlemieux.AuCanada:electromenagersge.ca/fr/soutien/
demande-de-serviceoutéléphonezau1-800-561-3344durantlesheuresnormalesdebureau.
Pièces et accessoires
Lespersonnesayantlescompétencesrequisespourréparerelles-mêmesleursappareilspeuventrecevoirdirectementàla
maison les pièces et accessoires par l'entremise du distributeur de pièces de leur région. Vous pouvez également téléphoner
au1-800-661-1616durantlesheuresnormalesdebureau.
Les directives fournies dans le présent manuel comportent des procédures que n’importe quel utilisateur peut effectuer.
Les autres types de réparation doivent généralement être confiés à un technicien qualifié. Faites preuve de prudence :
une réparation ou un entretien mal effectué peut rendre l'utilisation de l'appareil dangereuse.
Pour nous joindre
Sivousn’êtespassatisfaitduserviceaprès-vented'ÉlectroménagersGE,communiquezavecnoussurnotresiteWeben
fournissant tous les détails et votre numéro de téléphone, ou écrivez à :
Directeur,Relationsaveclaclientèle|MCCommercialInc.|1FactoryLane,bureau310,MonctonNB,E1C9M3
Garanties prolongées
Communiquezavecvotredétaillantconcernantl'achatd'unegarantieprolongéed'ÉlectroménagersGEetrenseignez-voussurles
rabaisspéciauxquisontoffertspendantquevotregarantieesttoujoursenvigueur.