Loading ...
Loading ...
Loading ...
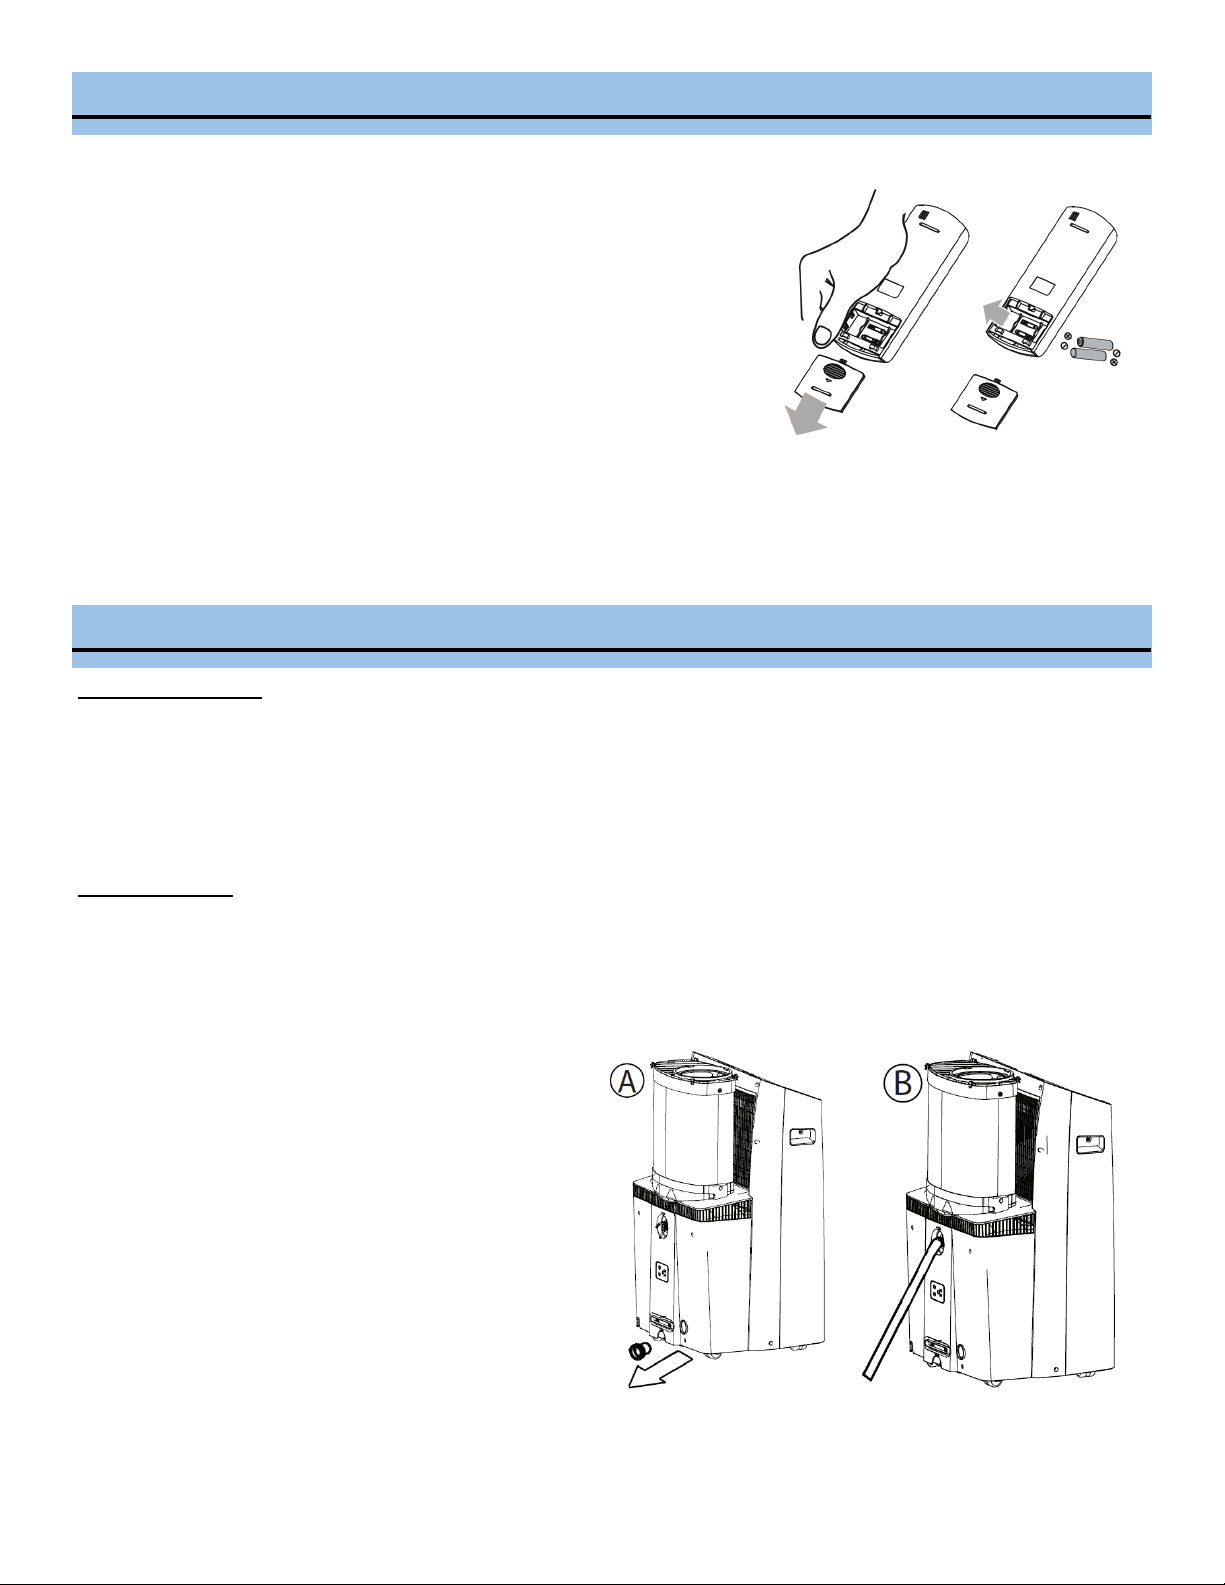
REPLACING THE REMOTE BATTERIES
This remote control comes with two AAA baeries. Place the baeries in the re-
mote control before use.
Slide the back cover from the remote downward to expose the baery com-
partment.
Insert the baeries, ensure to match the (+) and (-) symbols on the ends of
the baeries with the symbols inside the baery compartment.
Slide the baery cover back into place.
Notes:
• The air condioner will not respond if curtains, doors or other materials block
the signal from the remote control to the unit.
• Prevent any liquid from contact with the remote control. Do not expose the
remote control to direct sunlight or heat.
• If the infrared signal receiver on the indoor unit is exposed to direct sunlight, the air condioner may not funcon properly. Use
curtains to prevent the sunlight from falling on the receiver.
• Do not mix old and new baeries or baeries of dierent types.
• Do not leave the baeries in the remote control if it is not going to be used for more than two months.
REMOTE CONTROL
CARE AND MAINTENANCE
SAFETY PRECAUTIONS
• Always unplug the unit before cleaning or servicing.
• DO NOT use ammable liquids or chemicals to clean the unit.
• DO NOT wash the unit under running water. Doing so causes electrical danger.
• DO NOT operate the portable air condioner if the power supply was damaged during cleaning. A damaged power cord must
be replaced with a new cord. Contact Whynter Customer Support for more informaon.
WATER DRAINAGE
When the internal drain pan becomes full the appliance will beep 8 mes and the digital display will show error code P1. The air
condioning or dehumidifying acon will stop but the fan may connue to operate. Ensure that the appliance is turned o and
unplugged and that it is close to a oor drain before seng up any drain opon.
A. Drain Plug
Remove the drain plug and allow the water to completely
drain. Replace the boom drain plug, pressing rmly to ensure
a ght t and no leaks.
B. Connuous Drain
During dry mode, install connuous drain opon so that the
appliance will automacally drain collected water. Remove the
upper drain plug and aach the drain hose that was provided
with the appliance. Place the open end of the drain hose over
the receptacle that the appliance will drain into; this could be a
basement oor drain, a sink or similar. Ensure that there are no
kinks or bends in the drain hose and that it goes straight down
toward the oor. The connuous drain is acvated by gravity
only. If the hose is not posioned directly downwards, water
will not drain correctly.
Page 16
Loading ...
Loading ...
Loading ...