Loading ...
Loading ...
Loading ...
using your omelette maker ∙ 9 8 ∙ using your omelette maker
USING YOUR OMELETTE MAKERUSING YOUR OMELETTE MAKER
1 5
2 6
3 7
4
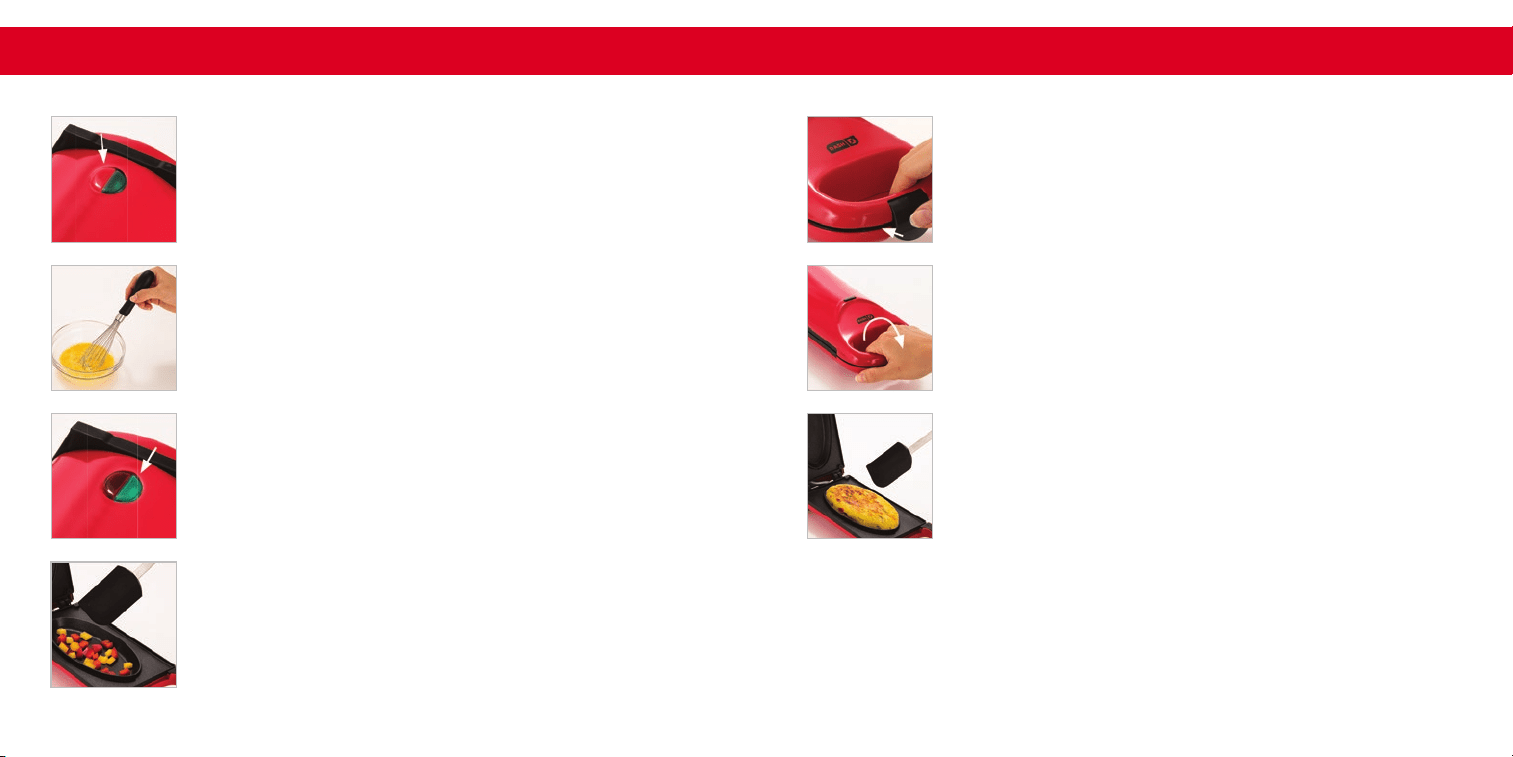
Whisk 2 eggs in a separate bowl. Alternatively you can use 4 egg
whites or 6-8 tablespoons of an egg substitute.
Halfway through cooking (approx. 1-2 minutes after pouring in the
eggs), ip the Omelette Maker over so that the bottom is facing up
and allow to cook for 1-2 more minutes.
Once the Cooking Surface reaches the optimal cooking
temperature, the Green Indicator Light will also turn on. Now,
you’re ready to get cooking!
Once food is cooked to your preference, carefully unlock the Latch and
lift the Cover. Remove the omelette from the Cooking Surface with a
heat resistant nylon or silicone cooking utensil. Do not use metal utensils
to remove or place food on the Cooking Surface as this will damage
the non-stick surface. When you have nished cooking, unplug your
Omelette Maker and allow to cool before moving or cleaning.
Carefully lift the Cover by the Handle and spray both Cooking
Surfaces with a little cooking spray. Place toppings on Cooking
Surface and gently stir with a heat-resistant nylon or silicone
cooking utensil until toppings are cooked through or warm.
Before rst use, remove all packaging material and thoroughly
clean the Omelette Maker. Place the appliance on a stable and dry
surface. Plug the cord into a power outlet. The Red Indicator Light
will illuminate, signaling that the Omelette Maker is heating up.
Pour the eggs onto the Cooking Surface, add cheese or other
toppings, and close the Cover.
Lock the Latch.
Loading ...
Loading ...
Loading ...