
TRENDnetUser’sGuide
CoverPage

©Copyright2016TRENDnet.AllRightsReserved.
TRENDnetUser’sGuide
Tableofcontents
2
TableofContents
TableofContents.............................................................................2
ProductOverview.............................................................................5
PackageContents..........................................................................................................5
Features.........................................................................................................................5
ProductHardwareFeatures...........................................................................................6
BasicSystemSetup...........................................................................7
SoftKeyboardInstruction..............................................................................................7
Keyboardstyles....................................................................................................7
SetupWizard.................................................................................................................8
StartRecording............................................................................................................12
InstantPlayback...........................................................................................................12
SystemManagement(local)...........................................................13
UsingtheShortMenu..................................................................................................13
ShortcutMenu...............................................................................15
Instantplayback.................................................................................................16
Audio..................................................................................................................16
PTZcontrol.........................................................................................................16
Digitalzoom.......................................................................................................17
Imagesettings....................................................................................................17
Liveviewstrategy..............................................................................................18
Information........................................................................................................18
Close..................................................................................................................18
UsingtheMainMenu.....................................................................18
LogintotheManagementPages.................................................................................19
RestoreDefaultPassword...........................................................................................19
Logout,startup,orshutdowntheNVR ................................................21
StartupyourNVR.........................................................................................................21
ShutdownyourNVR....................................................................................................21
RebootingyourNVR....................................................................................................21
LogoutfromNVRmanagement..................................................................................21
CameraSettingsMenu...................................................................22
CameraConnectionSettings.......................................................................................22
Camerainstallations..........................................................................................22
OnscreenDisplaySettings..........................................................................................25
DisplaySettings............................................................................................................26
Displaysettings............................................................................................................27
Basicpanandtilt...............................................................................................27
AdvancedPTZ....................................................................................................27
Presetpositions.................................................................................................27
Pattern...............................................................................................................28
Patrol.................................................................................................................28
MotionDetection........................................................................................................29
Motiondetectionsettings.................................................................................29
PrivacyMask................................................................................................................31
VideoTamper..............................................................................................................32
Videotampersettings.......................................................................................32
VideoLoss....................................................................................................................34
Videolosssettings.............................................................................................34
ConfigurationMenu.......................................................................36
SystemSettings...........................................................................................................36
General..............................................................................................................36
DSTsettings.......................................................................................................37
Moresettings.....................................................................................................37
Network.......................................................................................................................38
General..............................................................................................................38
DDNS..................................................................................................................39

©Copyright2016TRENDnet.AllRightsReserved.
TRENDnetUser’sGuide
Tableofcontents
3
NTP.....................................................................................................................39
Email..................................................................................................................40
UPnP..................................................................................................................41
Moresettings.....................................................................................................41
LiveView......................................................................................................................42
General..............................................................................................................42
View...................................................................................................................42
Channel‐ZeroEncoding......................................................................................43
Exceptions....................................................................................................................44
UserAccounts..............................................................................................................45
Add.....................................................................................................................45
Edit.....................................................................................................................45
Permission.........................................................................................................45
MaintenanceMenu........................................................................47
SystemMaintenance...................................................................................................47
NVRinformation................................................................................................47
Camerainformation...........................................................................................48
RecordingInformation.......................................................................................48
NetworkInformation.........................................................................................49
StorageInformation...........................................................................................49
LogInformation...........................................................................................................50
LogSearch..........................................................................................................50
LogExport..........................................................................................................51
Import/ExportConfigurationSettings.........................................................................52
FirmwareUpgrade.......................................................................................................52
LocalUpgrade....................................................................................................52
RemoteUpgrade................................................................................................52
FactoryDefault............................................................................................................53
NetworkMonitoring....................................................................................................53
Traffic.................................................................................................................53
NetworkTools....................................................................................................54
HardDriveMaintenance.............................................................................................55
S.M.A.R.TSettings..............................................................................................55
BadSectorDetection.........................................................................................55
HardDriveManagement................................................................56
Format/InitiatetheHardDrive..................................................................................56
AdvancedStorageQuotaSettings...............................................................................57
Scheduledrecording......................................................................57
Schedule......................................................................................................................57
VideoSettings..............................................................................................................59
SubStream........................................................................................................60
Advancedrecordingsetting.........................................................................................61
Holidayscheduling.......................................................................................................61
BackupVideoRecordings...............................................................62
Export..........................................................................................................................62
Videoplayback..............................................................................64
Playbackscreen...........................................................................................................65
Searchforvideorecordings...............................................................................66
Timeline............................................................................................................66
Playbackbuttons...............................................................................................66
Playbackoperations...........................................................................................67
Playbackmodes.................................................................................................68
AccessyourNVRwiththeWebBrowser........................................70
DefaultSettingsandFactoryReset....................................................................70
SystemRequirement...................................................................................................71
Logging‐intotheNVRfortheFirstTime(Windows)...................................................71
Logging‐intotheCamerafortheFirstTime(OSX).....................................................73
Basic.............................................................................................................................78
LiveView............................................................................................................78

©Copyright2016TRENDnet.AllRightsReserved.
TRENDnetUser’sGuide
Tableofcontents
4
Playback.............................................................................................................80
Log.....................................................................................................................82
SystemInformation...........................................................................................82
Logout................................................................................................................83
Advanced.....................................................................................................................84
System...............................................................................................................84
Network.............................................................................................................89
Video..................................................................................................................91
Events................................................................................................................96
StorageSettings...............................................................................................101
Appendix......................................................................................102
TurnonnetworkdiscoveryonWindows...................................................................102
Directvideoaccess‐RTSP.........................................................................................102
InstallyourNVRSystemonYourNetwork...............................................................102
CompatibleCameraList.............................................................................................103
Regulations..................................................................................104
Federal CommunicationCommissionInterference Statement......................................104
FCCRadiationExposureStatement.................................................................104
Europe–EUDeclarationofConformity....................................................................105
Safety...............................................................................................................105
EMC..................................................................................................................105
Directives.........................................................................................................105
RoHS..........................................................................................................................106

©Copyright2016TRENDnet.AllRightsReserved.
5
TRENDnetUser’sGuide
TV‐NVR216/TV‐NVR216D4
ProductOverview
TV‐NVR216
PackageContents
Thepackageincludes:
TV‐NVR216/TV‐NVR216D4NetworkVideoRecorder
4TBHardDrive(onlyforTV‐NVR216D4)
CD‐ROM(Utility&User’sGuide)
Powercord(1.8m/6ft.)
Networkcable(1.8m/6ft.)
HDMIcable(1.8m/6ft.)
Opticalmouse
QuickInstallatio
nGuide
Rackmounthardware
Ifanypackagecontentsaremissingordamaged,pleasecontacttheretailstore,
onlineretailer,orreseller/distributorfromwhichtheproductwaspurchased.
Features
TRENDnet’sstandalone 16‐channel HD PoE+ NVR,model TV‐NVR216
or TV‐NVR216D4, offers a comprehensive rack mountable camera
management solution. The NVR networks and powers up to sixteen
PoEcameras*.Installupto 12 terabytes of storage (hard drivessold
separately) to record over three weeks of continuous video from
sixteenHDPoEcameras**.TheTV‐NVR216 / TV‐NVR216D4 features
advancedvideoplaybackandcomeswithafreeiOS
®
/Android™app.
PoE+Ports
PlugandplayTRENDnetPoEnetworkcameras*tothesixteenPoE+
portswithatotalpowerbudgetof200W
Storage
Two3.5”SATAIIbayssupportupto12TBoftotalstorage(6TBper
bay)
NetworkUplinkPort
GigabitEthernetnetworkuplinkport
DisplayInterface
HDMIandVGAinterfaces
AudioPorts
Audioinandoutports
©Copyright2016TRENDnet.AllRightsReserved.
6
TRENDnetUser’sGuide
TV‐NVR216/TV‐NVR216D4
USB2.0port
LED
Pushbuttoncontrol
Menucontrols
USBPorts
OneUSBportfortheincludedmouseandoneforconfiguration
backup
MouseIncluded
Supportsmouseandkeyboard(keyboardsoldseparately)
RackMount
Rackmounthardwareincluded
*Seelistofcompatiblecameras
**Overoneweekofrecordingpercamerawith2x6TBofstorage(HDDssold
separately)and16x1080pcamerasat30fpswithmediumVBR
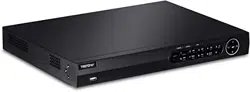
ProductHardwareFeatures
FrontView
USB: Connecttoopticalmouseand/orexternalUSBflashdrive
forfileimportorexport.
Pushbutton: Switchbetweencameras
Menu
controls:
Togglebetweenmenuselections

©Copyright2016TRENDnet.AllRightsReserved.
7
TRENDnetUser’sGuide
TV‐NVR216/TV‐NVR216D4
Ground
Power
button
Powerport
RearView
Power: Powersocketofcamera(48VDC,1.04A)
Note:Useonlytheadapterthatcamewithyourcamera
AudioIn: RCAconnectortoactivemicrophone(1.0Vp‐p,1kΩ)
AudioOut: RCAconnectortospeaker(1.0Vp‐p,1kΩ)
VGA: ConnecttoVGAmonitorwith1024x768resolutionor
higher.
HDMI: ConnecttomonitororHDTVwithHDMIinterface
USB: Connecttoopticalmouseand/orexternalUSBflashdrive
forfileimportorexport.
NetworkPort: Connecttoyourofficeorhomenetworkforremoteaccess
andviewing
PoE: Connect802.3af(15.4WMax.)cameras.
Grounding
Point:
Connecttogroundingwire.Thisisespeciallyimportant
whenyouinstallyourcameraoutdoor.
BasicSystemSetup
SoftKeyboardInstruction
Keyboardstyles
Therearethreekeyboardstylesavailable,Englishletter,numeric,andspecial
characters.ThedefaultkeyboardstyleisEnglishletterkeyboardinlowercaseletter
mode.Clickthekeyboardstylebuttonifyouwanttochangeitintoanotherstyle.
Specialcharacters
Clickon#++keytothelowerleftcornertoenablethespecialcharactermenu.Click
onthespecialcharacterofyourchoice.
PoEPorts
USB3.0
port
AudioPorts
VGAPort
HDMIPort
Network
p
ort
Capital
Special
Characters

©Copyright2016TRENDnet.AllRightsReserved.
8
TRENDnetUser’sGuide
TV‐NVR216/TV‐NVR216D4
SetupWizard
FirsttimestartingtheNVR,thedevicewillgothroughthebasicsettingsfirst,please
followtheonscreendisplaytocompletetheseinformation.
1. ClickthetextfieldtotherightofAdminPassword.Enterthedefault
administratorpasswordofadmin.ClickthetextfieldtotherightofNewAdmin
Passwor
dtoenteranewadministratorpassword.
2. SelectLanguageandclickApplytocontinue
3. SetupwizardwillshowupaftertheTV‐NVR216/TV‐NVR216D4ispoweredup.
ClickNexttostartthewizard.
Enterdefault
passwordadmin
andyournew
passwordhere.
Thenclickon
Next.

©Copyright2016TRENDnet.AllRightsReserved.
9
TRENDnetUser’sGuide
TV‐NVR216/TV‐NVR216D4
4. ClicktheselectionlisttotherightofTimeZone.
5. Selectyourtimezone.
5.TimeZone
6.DateFormat
7.Date
8 Time

©Copyright2016TRENDnet.AllRightsReserved.
10
TRENDnetUser’sGuide
TV‐NVR216/TV‐NVR216D4
6. Click the selection list to the right of Date Format and then select a date
format.
7. ClicktheselectionlisttotherightofSystemDate.
Selecttheyearbyclickingonleftorrightarrow.
Selectthemonthbyclickingonleftorrightarrow.
Selectthedaybyclickingonthedate.
8. ClicktheselectionlisttotherightofSystemTimeandthenenterthetimewith
24‐hourforma
tthenclickNext.
9. Displaycurrentnetworktype

©Copyright2016TRENDnet.AllRightsReserved.
11
TRENDnetUser’sGuide
TV‐NVR216/TV‐NVR216D4
10. Configuretheportrelatedsettingshere.
11. ClickOKtoexitthewizardifyouhaveabrandnewinstallation.Selectthehard
driveandthenclickInittoinitiateyourharddriveifyouarerunningthesetup
wizard in later time and want to clean up the video on the hard drive. Then
clickOK.
TV‐NVR216D4includesapre‐initialized4TBharddrive,youcanclickOK
heretocontinue.

©Copyright2016TRENDnet.AllRightsReserved.
12
TRENDnetUser’sGuide
TV‐NVR216/TV‐NVR216D4
12. Selecttypeofrecordingmethodyouwouldliketosetthecamerastobe.This
settingscanalsobeconfigurelaterunderrecordingsection.
13. ClickOKtocompletetheWizardinstallation.
StartRecording
Youcanstartrecordingimmediatelyjustwithafewclicks.InLiveView,rightclick
onthemouse.Ashortmenuwillcomeup.ChooseStartRecordingandthen
ContinuousRecord.
ClickYestostartcontinuousrecording.
InstantPlayback
Moveyourmousepointeroverthecameradisplayyouwanttoplaybackthevideo
andselectthedisplaybyclickonit.Theinstantplaybacktoolbarwillshowup.
Clickon
toplaybackthelast5minutesofrecording.(Formoreadvanced
videoplaybackfeatures,pleaseseetheVideoplaybackonpage64formore
details.)

©Copyright2016TRENDnet.AllRightsReserved.
13
TRENDnetUser’sGuide
TV‐NVR216/TV‐NVR216D4
SystemManagement(local)
Withthebasicsystemsetup,yoursystemisnowupandrunning.Now,youcanuse
yourmousepointerandmonitortoview,setup,andmanageyournetworkvideo
recorder.
UsingtheShortMenu
Rightclickyourmousewhileyouareviewingthelivevideo.Theshortmenuwillbe
poppedout.
ShortMenu
CommonMenu: ClicktogototheConfigurationsectiondirectly
Menu: Clicktoshowthemainmenu(seepage18forMain
Menuinstructions)
SingleScreen: Displayvideoliveviewoneatatime.ClickonSingle
Screenandthenchoosethecamerayouwant.(The
videoyouch
oosewillbereplacedwithothervideoif
theauto‐switchison,andtheauto‐switchisonby
default.)
Multi‐screen: Displayallfourvideoliveviewsatthesametime.By
default,thevideoliveviewissetintheMulti‐screen
mode.IfyouarenowinSingleScreenmode,clickon
Multi‐Screenandthenchoosefrom2x2,3x3,4x4,1+5,
1+7toswitchtomulti‐screenliveviewmode.

©Copyright2016TRENDnet.AllRightsReserved.
14
TRENDnetUser’sGuide
TV‐NVR216/TV‐NVR216D4
PreviousScreen: InSingleScreenmode,youcanmanuallyswitchthe
videotothepreviouschannel.
NextScreen: InSingleScreenmode,youcanmanuallyswitchthe
videotothenextchannel.
Stop/StartAuto‐
switch:
Start(default)orstopautomaticliveviewswitch.The
liveviewvideowillbechangedbycha
nnelsequence.
StartRecording: StartContinuousorMotionDetectionrecording.
Tosetupmotiondetectionarea,orstopcontinuousand
motion detection recordings, you need to navigate to
thedetailedsettingsthroughthemainmenu.
StopRecording: StopContinuousorMotionDetectionrecording.
AddCamera: ClickthistogodirectlytoIPCameraManagement
Playba
ck: ClickPlaybacktogofullplaybackmenu.
PTZControl: ClickthistoopenthePTZcontrolpanelforthe
supportedcameras

©Copyright2016TRENDnet.AllRightsReserved.
15
TRENDnetUser’sGuide
TV‐NVR216/TV‐NVR216D4
PictureMode: SelectamonitordisplaysettingfromStandard,Bright,
Gentle,andVividofyourchoice.ClickOKtoconfirm
yourchoice.
ShortcutMenu
Eachvideoinliveviewhasashortcutmenutoperformthefrequentadjustments
ofthevideo.Moveyourmousepointeroverthecameradisplayyouwanttobring
uptheShortcutMenu.Clickonthevideo.Theframeofthevideoshowsactive
(yellowframe).Andthenclickonthebut
tonoftheselectedjobs.
©Copyright2016TRENDnet.AllRightsReserved.
16
TRENDnetUser’sGuide
TV‐NVR216/TV‐NVR216D4
Instantplayback
Clickon
toplaybackthelast5minutesofrecording.
Audio
Clickon
toenabletheaudioonselectedchannel.Click tomutetheaudio.
PTZcontrol
Clickon
toproceedPTZoperations.
ThePTZmenuwillshowuponthescreen.
Basicpanandtilt
Clickthebuttonsyouwanttopanortiltthecamera.Adjustthedistanceofeach
stepofmovingbyslidingtheSpeed.Eachstepcanhavefartherdistancewhen
slidingtheSpeedtowardtheright,andviceversa.
AdvancedPTZ
Youcanfurthercontrolzoom
,focus,andaperturewithcompliantPTZcamera.Click
on+or–toadjustzoom,focusandaperture(iris).Click
button,thecamerawill
turningitaroundcontinuously.Clickthebuttonagaintostopmoving.
Specialfeatures
(Featureavailabilitydependsoncameramodels)
Menu.BringuptheadvancedPTZmenu.
Zoomoperation.
ZoomIn:Clickanddragareafromlefttorighttozoomin
thedefinedarea.
ZoomOut:Dragareafromrighttothelefttozoomout
thatarea.
Centeroperation.Pointandclickonthevideo.The
camerawillmovethecameraandmakethepointedspot
thecenterofthevideo.
Turnonorturnoffexternallighting
Turnonorturnoffexternalwipeonthecamera
©Copyright2016TRENDnet.AllRightsReserved.
17
TRENDnetUser’sGuide
TV‐NVR216/TV‐NVR216D4
PTZConfiguration
QuicklyaccessthePTZpresetsbyclickingtheOne‐touchbuttonandtoaccessthe
presetsettings,clickontheGeneralbutton.
Digitalzoom
Clickon
toenabledigitalzoom.Anavigatewindowwillshoweduponright
lowerscreencorner.Draganddropordoubleclicktodefinetheareayouwantto
zoomin.Thedefinedareaisshowedinredrectangular.Rightclicktoexitthezoom
mode.
Imagesettings
Clickon
toadjustthevideodisplaysettings.
Usethesliderorenteranumber(0‐255)toadjusttheimage
brightness.Default:128
Usethesliderorenteranumber(0‐255)toadjusttheimage
contrast.Default:128
Usethesliderorenteranumber(0‐255)toadjustthecolor
saturation.Thegreaternumbermeansthecolorwillbemore
saturated.Default:128

©Copyright2016TRENDnet.AllRightsReserved.
18
TRENDnetUser’sGuide
TV‐NVR216/TV‐NVR216D4
Liveviewstrategy
Clickon
tomanagetheliveviewstrategy.TheReal‐timestrategyallocateall
resourcestominimizethedelayofvideodelivery.Whenthenetworkiscongested,
thevideomaybeinterrupted.Fluencystrategymakeslargervideobuffertosave
andplayvideoback.Itmakesthecommunicationmorerobust,buttheliveview
playb
acktimingisdelayed.Balancedstrategysetupthegoodenoughvideobuffer
totakecareoftheplaybackfluencywhilemaintainthenetworkrobustness.
Information
Click on
to see current camera stream frame rate, bandwidth,
resolutionandcompressioninformation.
Close
Clickon
toclosetheshortcutmenu.
UsingtheMainMenu
Rightclickyourmousewhileyouareviewingthelivevideo.Theshortmenuwillbe
poppedout.MouseovertheMenuandclickthebuttontobringuptheMain
Menu.

©Copyright2016TRENDnet.AllRightsReserved.
19
TRENDnetUser’sGuide
TV‐NVR216/TV‐NVR216D4
LogintotheManagementPages
TheNVRwillaskyoutoenterthepasswordeverytimeyouwanttologintothe
managementpage.EnterthepasswordandthenclickonOKtobringupthemain
menu.
RestoreDefaultPassword
Forsecuritypurposes,ifyoufindyourselfinneedofrestoringtheTV‐IPNVR104to
factorydefaultsettingsyouwillneedtocontactsupport.
ClickResetPasswordandprovidetheSerialNumbertothesupportagentfora
temporaryaccesscode.
Thiscodeistimesensitive;pleaseensureyouresetthepasswordimmediately.
USA/Canadaphonesupport:
TollFreeEnglish:(855)373‐4741
• Monday–Friday:7:00AM–5:30PM,PST
Afterhours24/7:(866)845‐3673
GlobalSupport:
Findthesupportnumberforyourcountryat:www.trendnet.com/contact
OnlineSupport:
www.trendnet.com/support/helpdesk
Inthecalloremail,youneedtosupplytheserialinformation.ClickResetPassword
togettheinformation.Theserialnumberisacalculatednumberbasedonyour

©Copyright2016TRENDnet.AllRightsReserved.
20
TRENDnetUser’sGuide
TV‐NVR216/TV‐NVR216D4
NVRidentityandstartuptime.PleasedonotpoweroffyourNVRbeforeyou
completethepasswordresetprocess.Otherwise,thesecurecodeyougetfromthe
supportcentermaynotworktoresetthepasswordtofactorydefault.

©Copyright2016TRENDnet.AllRightsReserved.
21
TRENDnetUser’sGuide
TV‐NVR216/TV‐NVR216D4
Logout,startup,orshutdo wntheNVR
TheTV‐NVR216/TV‐NVR216D4isaclassAnetworkequipmentdesignedfor24/7
operation.Justplug‐inthepowersource,theTV‐NVR216/TV‐NVR216D4isupand
running.WhenyouwanttochangetheNVRsettings,managethecamerasproceed
systemmaintenanceorsoftwareupgrade,youneedtologin,logout
,restart,or
shutdownyourNVRgently.
Pullingoutthepowersourcemaycauseunexpectedharddrivedamageandsystem
malfunctionwhichisnotasuggestedwaytopowerdownyourNVR.
StartupyourNVR
Makesurethepowersupplyispluggedintoanelectricaloutlet.Itishighly
recommendedthatanuninterruptiblepowersupply(UPS)tobeusedin
conjunctionwiththeunit.
ShutdownyourNVR
Bringupthemainmenu.ClickonShutdownMenu icon.TheShutdownsub
menuisshowingup.
ClickShutdown
togracefullyendtherecordingsessionsandpreparethehard
driveforshuttingdown.ThenclicktheYestoconfirmthatyouwanttoshutdown
theNVR.
RebootingyourNVR
ClickReboot torebootyourNVRwithoutpowerdown.
LogoutfromNVRmanagement
WhenyouhavedonetheNVRsettingsandmanagements,you’llwanttolockyour
NVRbeforeyouleave.ClickLogout
toexittheNVRmanagement.
Note:Youcanalsosetautomatictimeout.Thedefaultsettingis5minuteswithout
managementinteraction.
©Copyright2016TRENDnet.AllRightsReserved.
22
TRENDnetUser’sGuide
TV‐NVR216/TV‐NVR216D4
CameraSettingsMenu
Settingandmanageyourcamerasbybringupthemainmenu.ClickonCamera
SettingsMenu
icon.
CameraConnectionSettings
Camerainstallations
The TV‐NVR216 / TV‐NVR216D4 is compatible with TRENDnet PoE cameras, the
compatible cameras can be found on TRENDnet website. There are three major
groupsofTRENDnetcompatiblecamerasinteractsdifferentlywiththeTV‐NVR216,
TRENDnet1,TRENDnet3,andONVIFcameras.TRENDnetcamerasmayfitintoone
or more came
ra groups. Please referencethe compatible camera list on page102
formoredetails.
IPCamera
CameraNo. The camera number is also called channel number. All
video recordings and camera settings are using this
sequentialnumberasthemajorindexnumber.
Status: Thiscolumnshowsthecameraco
nnectionstatus.
: The camera is online. You can click on the icon to
show the video and identify which camera you are
setting.
:ThecameraisnotconnectedtoNVR
IPCamera
Address:
ThisistheIPaddressdetectedbytheNVRorsetstatically
tothecamera.
Edit: Clickthisicontoeditthecameraconnectionsettings.The
defaultsettingsisplug‐and‐play.
CameraName: Thisisthecameraname.Thede
faultnameisthecamera
modelname.Youcansetituponyourcameradirectlyor
setitupinNVRforcompatiblecameras.
Protocol: This is the camera product group. You can choose from
TRENDnet 1, TRENDnet 3, ONVIF (generic), or ONVIF
installationwithotherbrandnamecameras.
ModelNumbe
r: This is the model number of the camera. The model
number will be showed up automatically for compatible
cameras.
ManagementPort: Different camera management protocols has different
management port number. Please see the compatible
cameralistformoredetail.
PoEPasswordSet: If you install plug‐and‐play TRENDnet 1 with its fa
ctory
default setting, the TV‐NVR216 / TV‐NVR216D4 will set
the camera away from the default and load the TV‐
NVR216 / TV‐NVR216D4 password as camera access
password. If your plug‐and‐play/TRENDnet 1 camera was
manually setup and coming back to plug‐and‐play
installation, yo
u can click the button to synchronize the

©Copyright2016TRENDnet.AllRightsReserved.
23
TRENDnetUser’sGuide
TV‐NVR216/TV‐NVR216D4
camera password to the same password of TV‐NVR216 /
TV‐NVR216D4.
When you click this button, all plug‐and‐play TRENDnet
1camerapasswordsaresynchronized.
Refresh: Clickrefresh torefresh thecamera list.Only thecameras
listed with valid camera index number (1 to 4) are
connectedto the NVR. Othercameras listedon th
e table
arecamerason thenetwork,butnotconnected.You can
double click on the listed camera, more detailed
information will be showed up. The information is
valuableformanualcamerasettings.
Back: Clickonthisbuttonorrightclickonthemousetogoback
toliveview.
NetReceiveIdle
Bandwidth:
TheTV‐NVR216/TV‐NVR216D4canprocesstotal25Mbps
videostreams.Thisreferencenumberindicateshow
muchmorenetworkcapacityisavailablenow.
Plug‐and‐Playinstallation
This is an effo
rt free installation. Just to make sure all your cameras are set to
factory default and connect the plug‐and‐play cameras to the PoE ports. One for
each port. The NVR will detect the camera and install it automatically. TV‐IP320PI
and TRENDnet 3 cameras are all plug‐an
d‐play cameras to TV‐NVR216 / TV‐
NVR216D4.
Ifyouchangedthechannelsettingsbefore,clicktheEditiconandthenselectPlug‐
and‐PlayonAddingMethodandthenclickOKtosavethesettings.

©Copyright2016TRENDnet.AllRightsReserved.
24
TRENDnetUser’sGuide
TV‐NVR216/TV‐NVR216D4
Manualinstallation
1. ClicktheEditiconandthenselectManualonAddingMethod.
2. EnterthecameraIPaddress.
3. Selecttheprotocol.(Seecompatiblecameralistformoredetails)
4. Managementport.(Seecompatiblecameralistformoredetails)
5. Choosethecameravideochannelnumberorleaveitwithdefaultchannel1.

©Copyright2016TRENDnet.AllRightsReserved.
25
TRENDnetUser’sGuide
TV‐NVR216/TV‐NVR216D4
6. Entercameraaccessusername.
7. Entercameraaccesspassword.
8. ClickOKtosavethesettings.
OnscreenDisplaySettings
Compatiblecameraonscreendisplaycanbechangeddirectlythroughcamera
accessorthroughNVR.
Note:Pleasereferencecompatiblecameralistformoredetails.
Camera: Clicktochoosethecamerayouwanttochangethe
settings.
CameraName: Thenameofthechosencamera.
DisplayName: Checkthisboxtodisplaycameraname.
DisplayDate: Checkthisboxtodisplaysystemtime.
DisplayWeek: Checkthisboxtodisplaytimeoftheweek.
TimeFormat: Select12or24‐hourtimefor
mat.
DateFormat: Selectthedateformat
DisplayMode: Choosehowthetextwillshowonthescreen.
Movetheyelloworredboxtopositionthetext.ClickApplytoapplythechange.
©Copyright2016TRENDnet.AllRightsReserved.
26
TRENDnetUser’sGuide
TV‐NVR216/TV‐NVR216D4
DisplaySettings
Adjustvideoimagequality,lightness,andcolorsettingshere.
Note:Pleasereferencecompatiblecameralistformoredetails.
Camera: Clicktochoosethecamerayouwanttochangethe
settings.
CameraName: Thenameofthechosencamera.
Brightness: Usethesliderorenteranumber(0‐255)toadjustthe
imagebrightness.Default:128
Contrast: Usethesliderorenteranumber(0‐255)toadjustthe
imageco
ntrast.Default:128
Saturation: Usethesliderorenteranumber(0‐255)toadjustthecolor
saturation.Thegreaternumbermeansthecolorwillbe
moresaturated.Default:128
HUE: Usethesliderorenteranumber(0‐255)toadjustthe
imageHUEsetting.Default:128
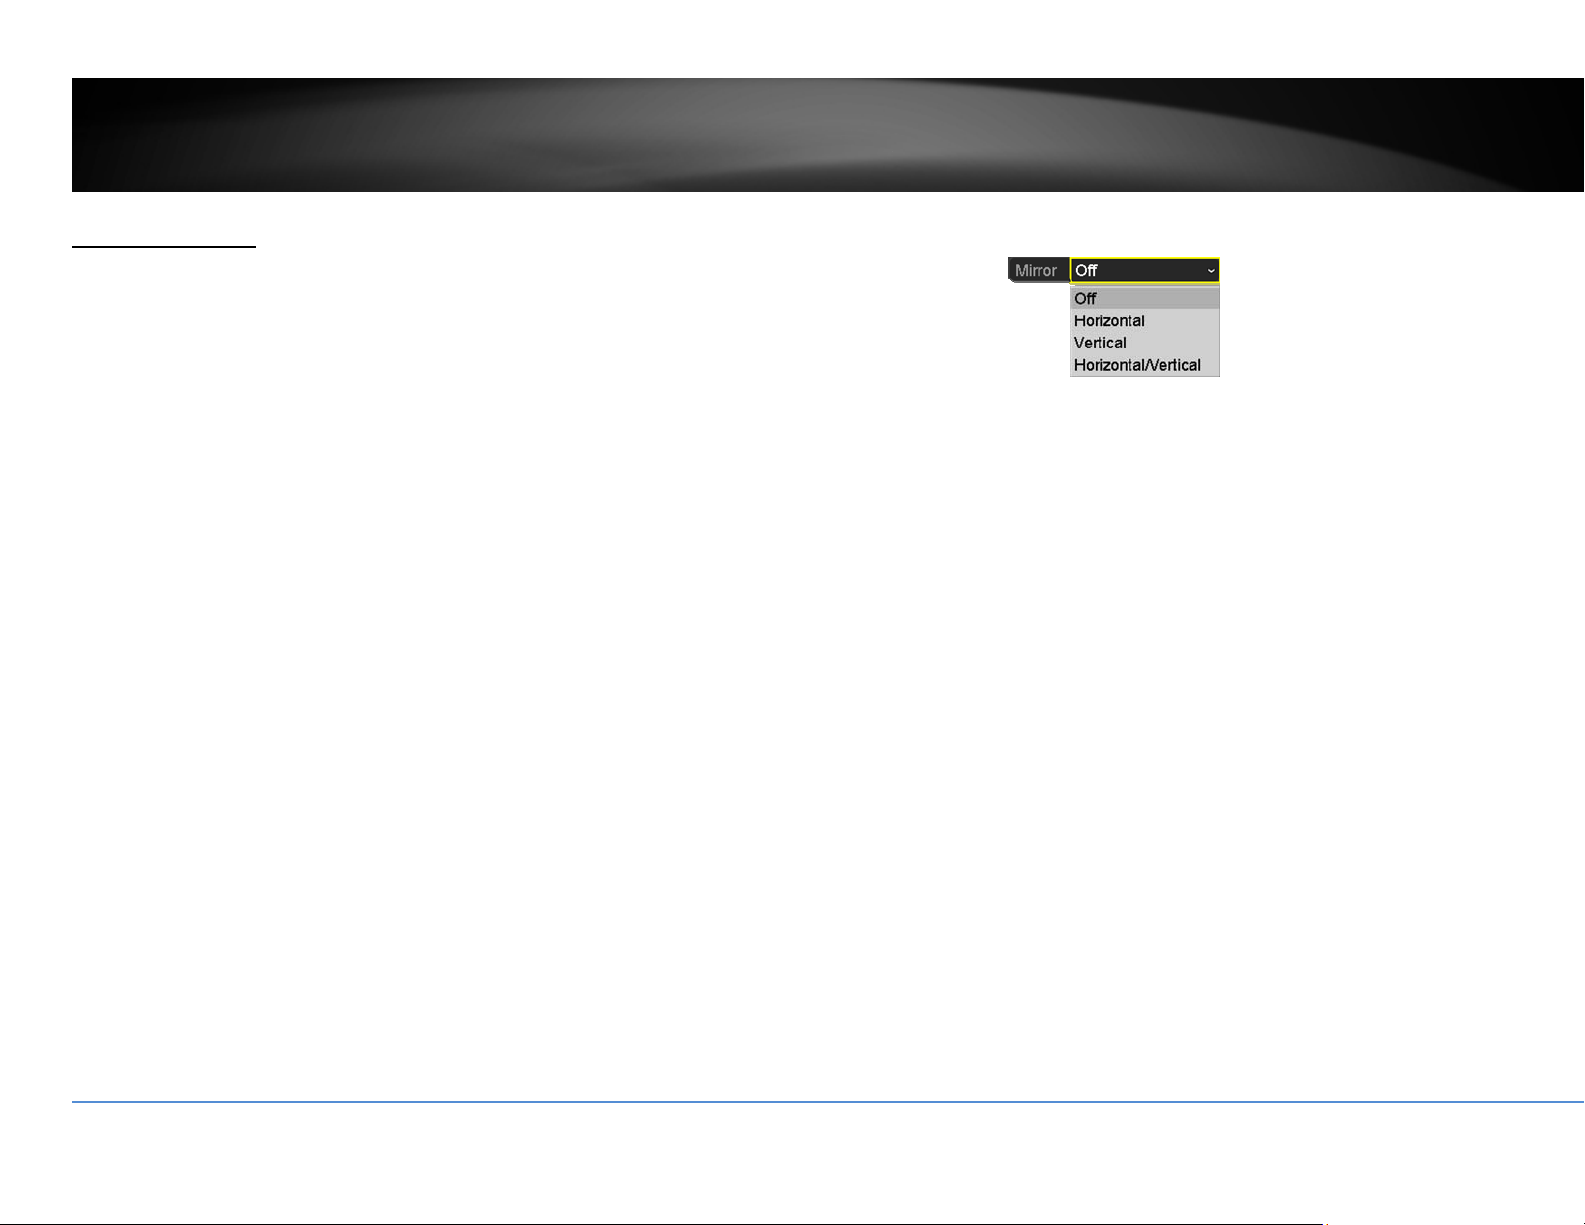
Mirror:
Choosehorizontal,verticalorbothtoadapttothe
physicalinstallation.
ClickApplytoapplythesettings.
©Copyright2016TRENDnet.AllRightsReserved.
27
TRENDnetUser’sGuide
TV‐NVR216/TV‐NVR216D4
Displaysettings
ControlPTZcamera’svideoshootingposition,patrolroute,zoom,focus,andiris.
Note:Pleasereferencecompatiblecameralistformoredetails.
Camera: Clicktochoosethecamerayouwanttochangethe
settings.
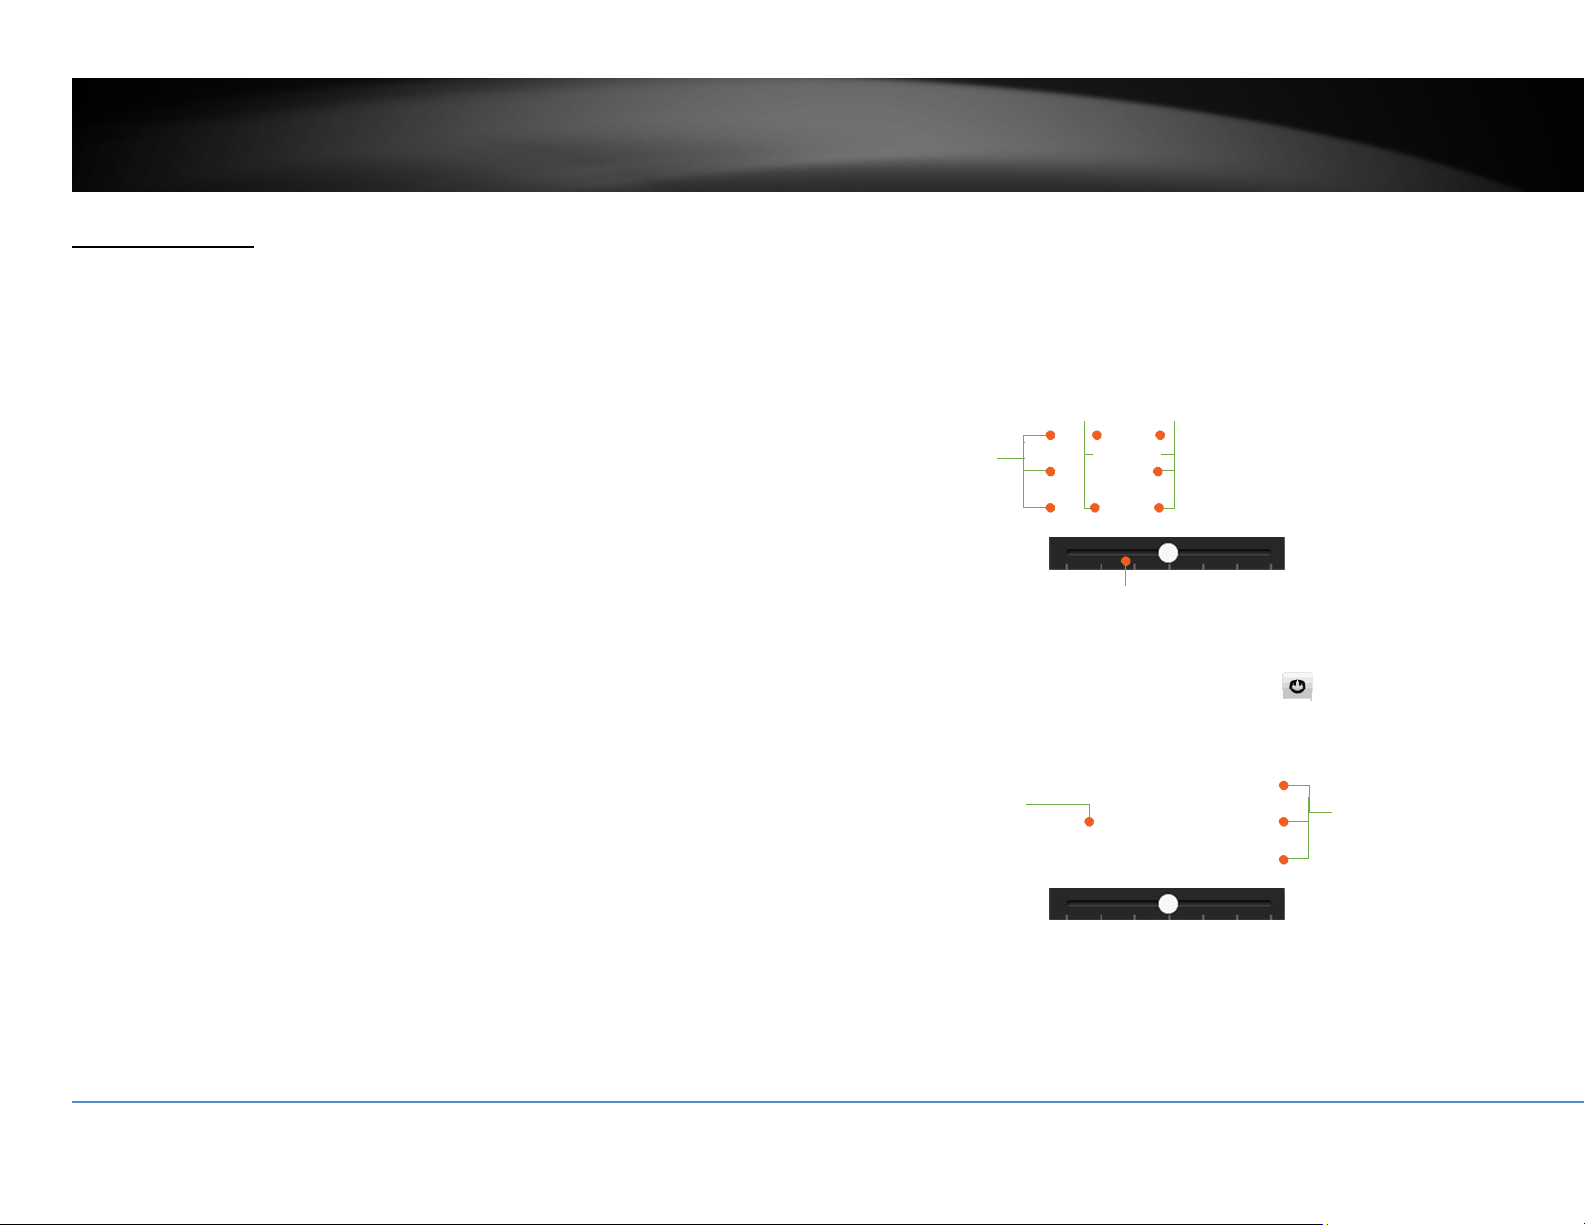
Basicpanandtilt
AllcompatiblePTZcamerascandothebasicpanandtilttoadjustthevideo
shootingposition.Clickthebuttonsyouwanttopanortiltthecamera.Adjustthe
distanceofeachstepofmovi
ngbyslidingtheSpeed.Eachstepcanhavefarther
distancewhenslidingtheSpeedtowardtheright,andviceversa.
AdvancedPTZ
Youcanfurthercontrolzoom,focus,andaperturewithcompliantPTZcamera.Click
on+or–toadjustzoom,focusandaperture(iris).Click
button,thecamerawill
turningaroundcontinuously.Clickthebuttonagaintostoppolicing.
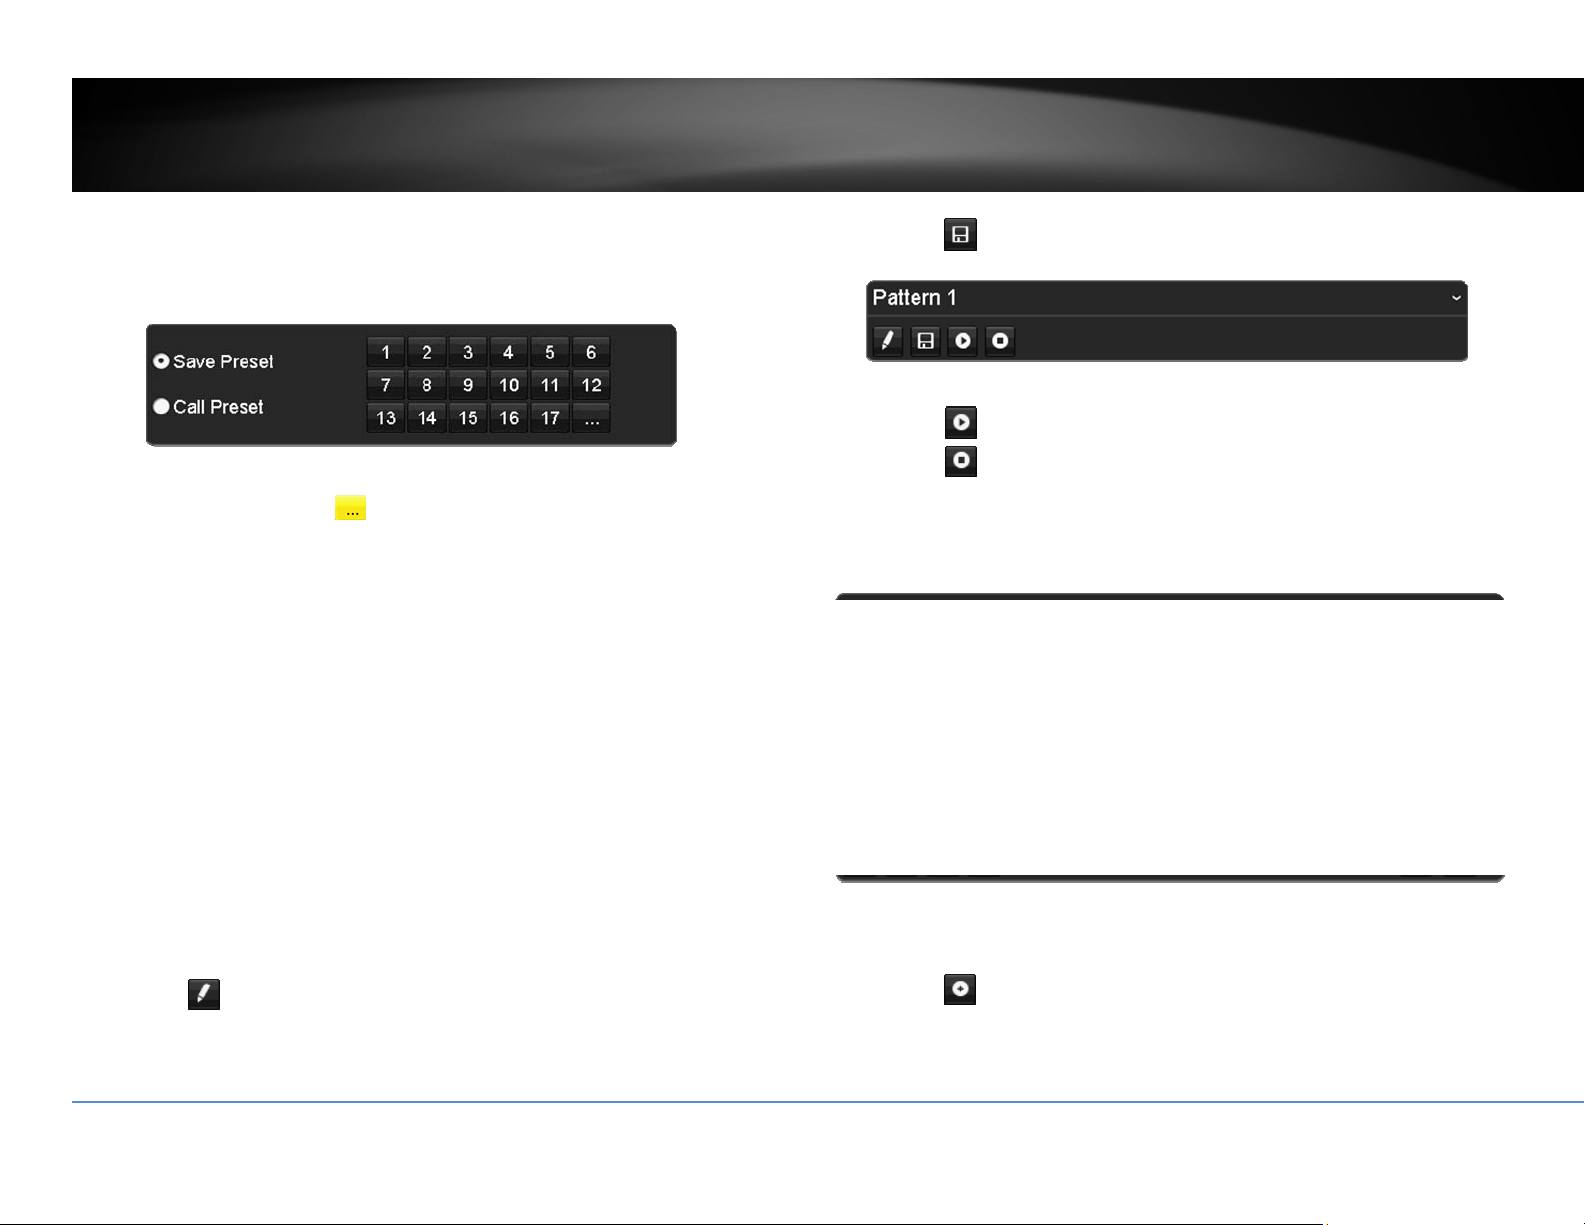
Presetpositions
Setandrecallthevideoviewsandsettingsforeasiernavigateandpatrol.
Tosetupapreset:
1. Moveyourcameratothepositionyouwantwitharrowkeys.
Left‐Up
Left
L
eft Down
Up
Down
Right‐Up
Right
Right
Down
Speed
Policin
g
Zoom
Focus
Aperture (Iris)
©Copyright2016TRENDnet.AllRightsReserved.
28
TRENDnetUser’sGuide
TV‐NVR216/TV‐NVR216D4
2. Adjustthezoom,focusandaperture.
3. SelectSavePreset.
4. Clickthenumberofpreset.
You can setup up to 255 presets depends on camera’s capability. To access preset
numbermore than17, clickon
.The presetselectionscreenwill pop up. Click
up/downarrowtoselectthepresetnumberyouwant.
Torecallapreset:
1. SelectCallPreset.
2. Clickthenumberofpreset.
Pattern
Setupthepattertoperformthenavigationautomatically.
Toeditthepattern:
1. Click
tostartrecordingthepattern.
2. Usepreset(SelectCallPresetandthenclickonnumber)orPTZbuttonsto
moveyourcamera.
3. Click
tostopandsaverecording.
Runningthepatternofbehaviors:
Click
tostartrunningthepattern.
Click
tostoprecording.
Patrol
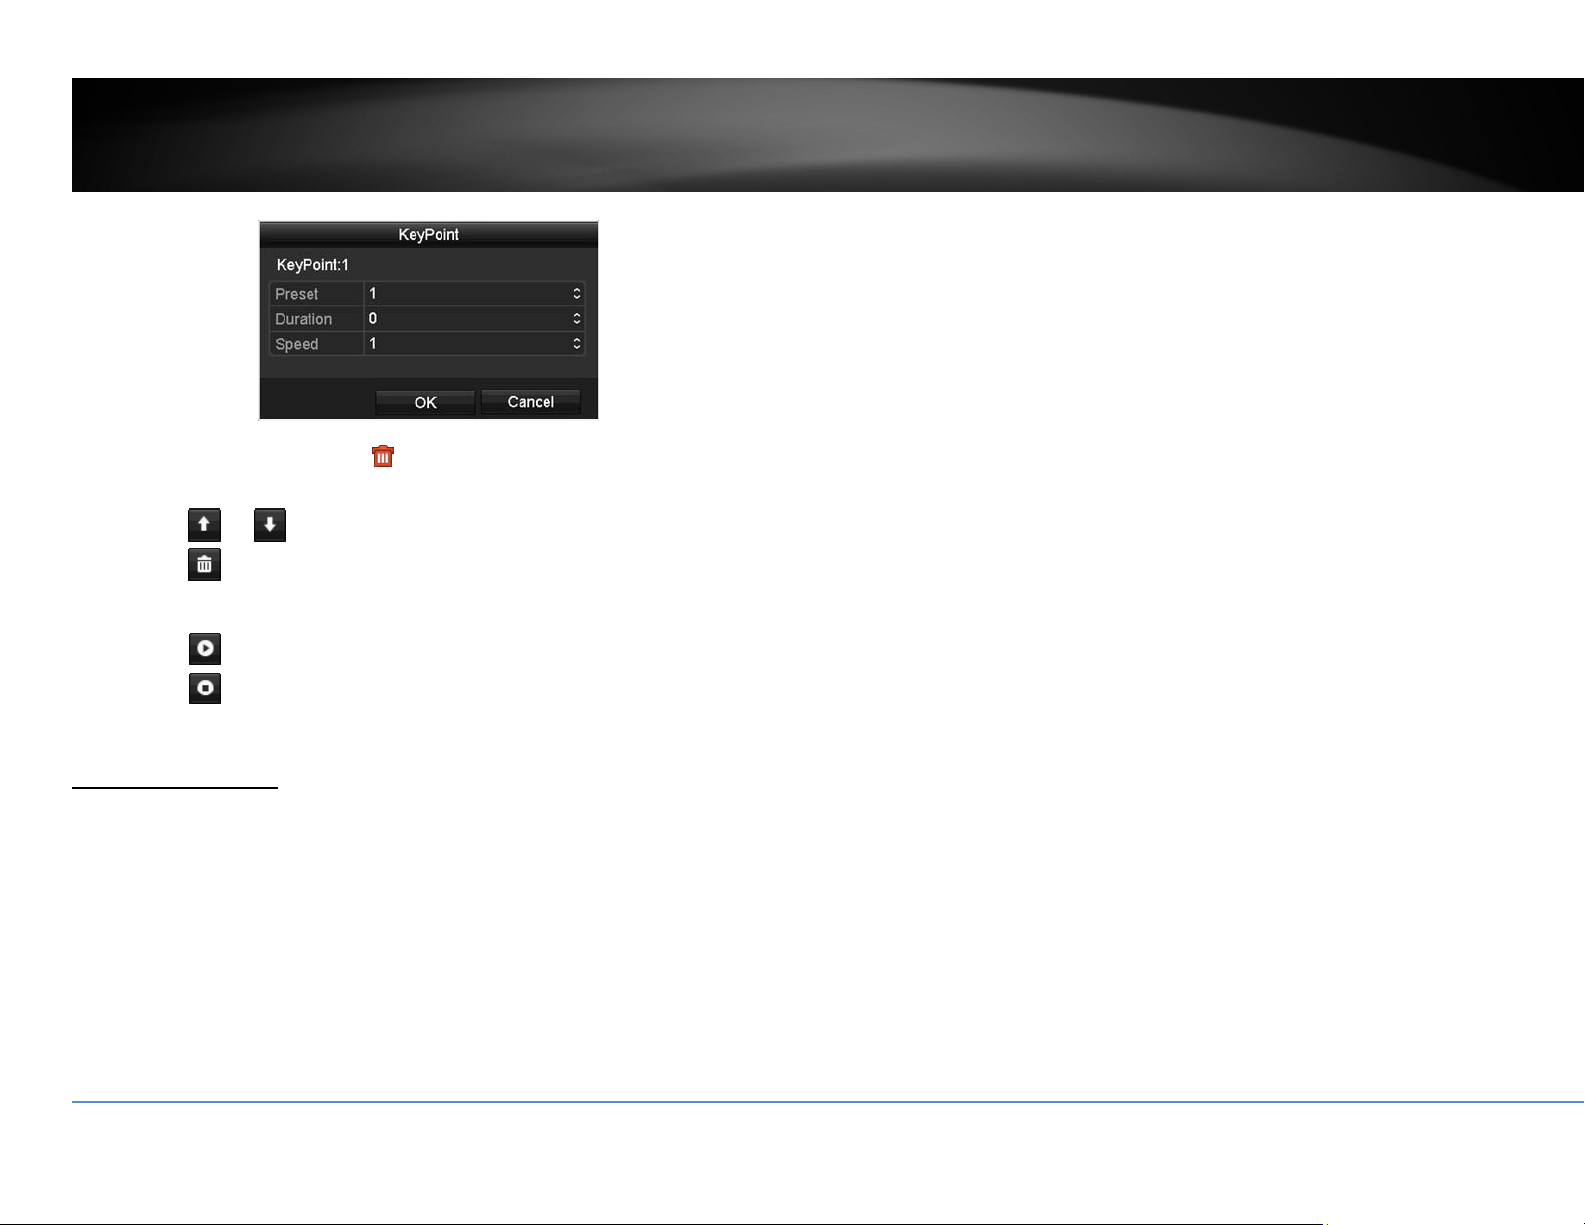
Setupdetailedpatrolroutewithkeypoints,speedtowardthekeypointandstopby
duration.
Toeditthepatrol
Note:pleasesetupallpresetpositionsbeforeyoueditthepatrolroute.
1. Click
toaddakeypoint.Selectthepresetnumber,durationyouwant
tostayon thiskey pointandthespeed youwantto gothiskeypointand
thenclickOK.
©Copyright2016TRENDnet.AllRightsReserved.
29
TRENDnetUser’sGuide
TV‐NVR216/TV‐NVR216D4
2. Toeraseakeypoint,click
onthekeypoint.Ifyouwantto editakey
point,justerasethekeypointandthenaddanewone.
3. Click
or tomovetheorderofthepatrolkeypoints.
4. Click
tocleanupallkeypoints.
Startorstopapatrol:
Click
tostartpatrol.
Click
tostoppatrol.
MotionDetection
Setuphowthemotiondetectioneventwillbetriggeredandwhatactionswillbe
triggered.
Note:Pleasereferencecompatiblecameralistformoredetails.
Camera: Clicktochoosethecamerayouwanttochangethesettings.
Enable Motion
Detection:
Check this box to enable motion detection. Click Apply to
applythechoice.
Settings: Setupthemotiondetectiondetail.
Sensitivity: Movetheslidertoadjustdetectionsensitivity.Slidingtothe
rightmeansthemotioneventiseasiertobetriggere
d.
DrawArea: Click and drag on the area you want to set up the motion
detectionorclickFullScreenforthewholeimagearea.The
redgridsrepresentthemotiondetectionarea.
ClickCleartoclearthemotiondetectionareas.
Motiondetectionsettings
ClickSet
tingstobringoutthedetailedsetupmenu.
Triggerchannel
Bydefault,amotiondetectiongeneratedbythecamerawillonlytriggertheevents
onthatchannel.Ifyouwanttotriggereventonotherchannels,selectthechannel
numberorselectAllforallchannels.
©Copyright2016TRENDnet.AllRightsReserved.
30
TRENDnetUser’sGuide
TV‐NVR216/TV‐NVR216D4
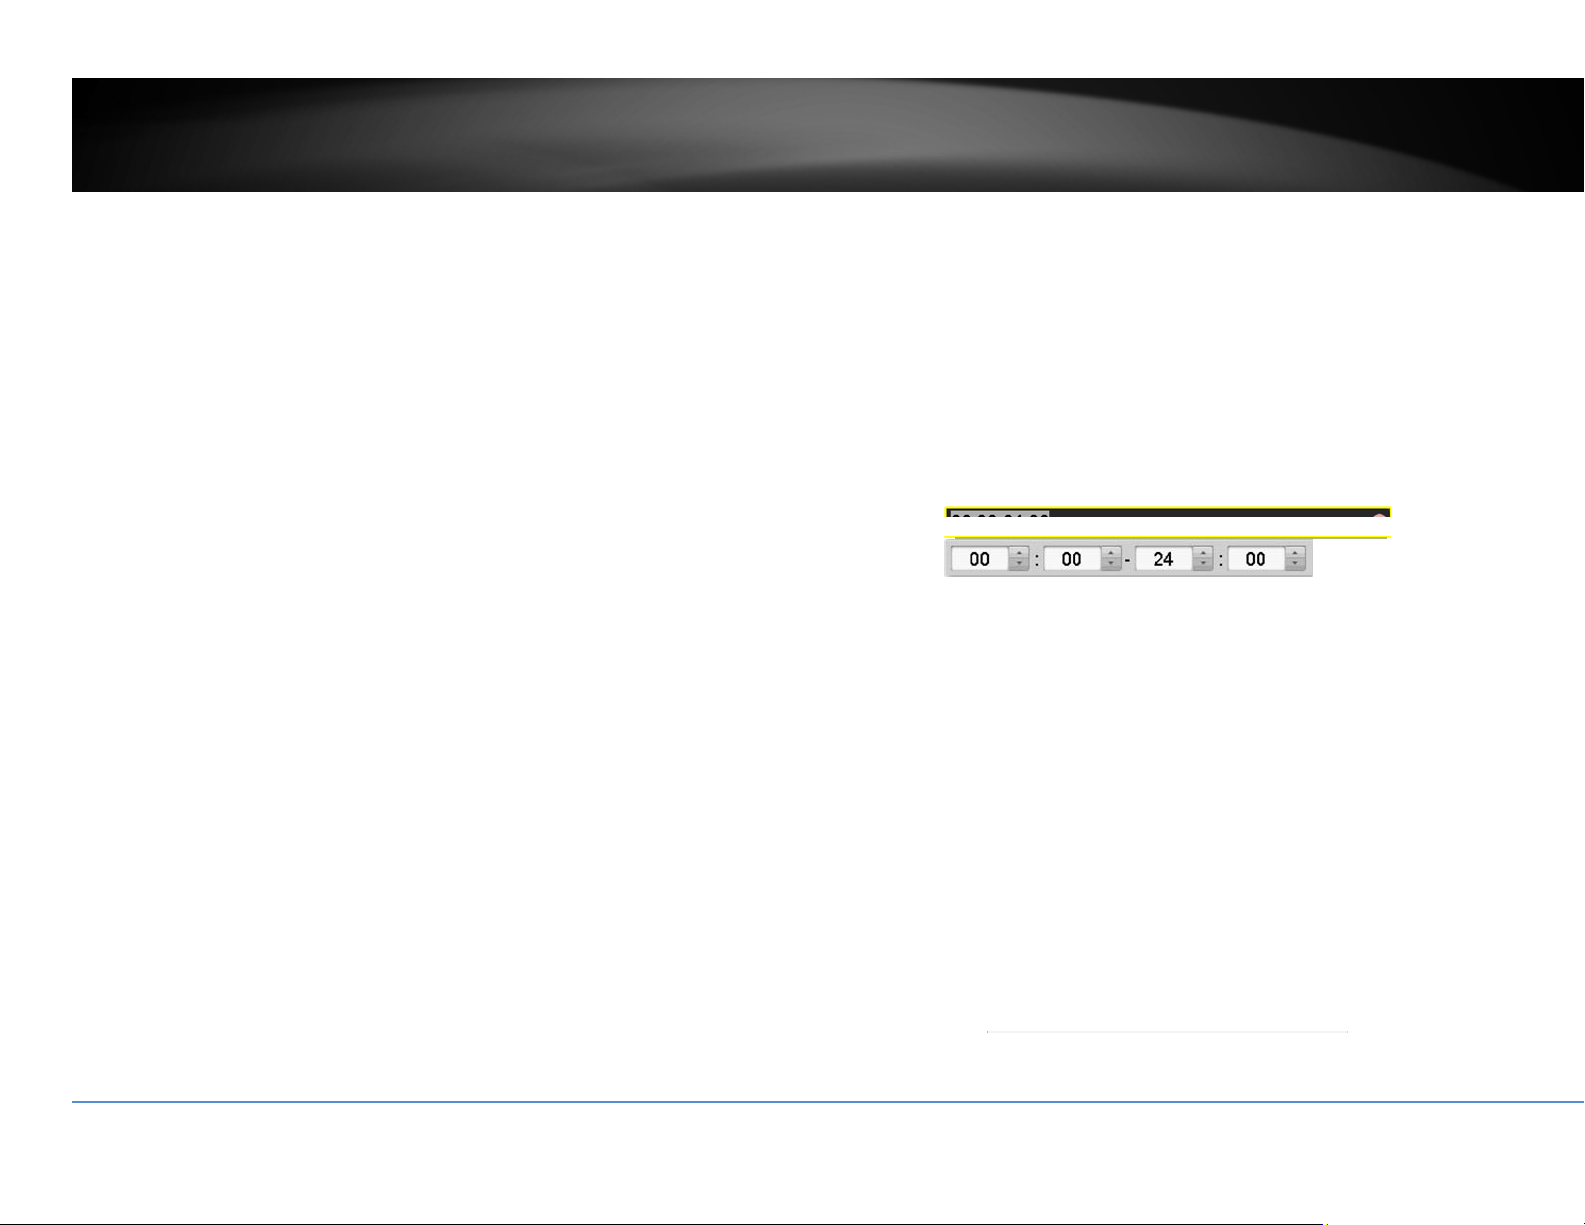
Armingschedule
1. SelectdayoftheweekyouwanttoeditontherowofWeek.
2. Entertheperiodoftimeyouwanttoactivelydetectthemotionevents.
Copyto:
Toquicklysetupthesamescheduleovertheweek,clickCopy.Clickanother
dayoftheweek(1:Monday,2:Tuesday,3:Wednesday,4:Thursday,5:Friday,
6:Saturdayand7:Sunday).ClickAlltoselectthewholeweek.ClickOKafter
youselectthedayoftheweekyo
uwanttocopyto.

©Copyright2016TRENDnet.AllRightsReserved.
31
TRENDnetUser’sGuide
TV‐NVR216/TV‐NVR216D4
Linkageaction
Whenmotioneventdetected,thecorrespondingactionswillbeexecuted.
FullScreen
Monitoring:
SwitchthevideoontheVGA/HDMImonitortothe
cameradetectedmotionevent.
AudibleWarning: Activatetheaudibleonboardbuzzer.
SendEmail: Sendemailtonotifythesystemmanager.
PrivacyMask
Createamaskingareatokeepyourprivacy.
Note:Pleasereferencecompatiblecameralistformoredetails.
Camera: Clicktochoosethecamerayouwanttochangethe
settings.
EnablePrivacyMask: Checkthisboxtoenableprivacymasking.
DrawArea: Clickanddragontheareayouwanttosetupthe
privacymask.
ClearAll: Clickthisbuttontoclearallthemaskingarea.
ClearZone1to4: Clickthisbutt
ontoclearspecificmaskingarea.
ClickApplytoapplythechanges

©Copyright2016TRENDnet.AllRightsReserved.
32
TRENDnetUser’sGuide
TV‐NVR216/TV‐NVR216D4
VideoTamper
Detectsifacamerahasbeentamperedwithandsurveillanceiscompromised.You
cansetupvideotampernotificationstoalertthesystemmanagertocheckthe
camera.
Note:Pleasereferencecompatiblecameralistformoredetails.
Camera: Clicktochoosethecamerayouwanttochangethe
settings.
EnableTamper‐
proof:
Checkthisboxtoenablevideotamper.
DrawArea: Clickanddragontheareayouwanttosetupthevideo
tamper.
Clear: Clickthisbuttontoclearthevideotamperarea.
Sensitivity: Movetheslidertoadjustdet
ectionsensitivity.Sliding
totherightmeansthemotioneventiseasiertobe
triggered.
ClickApplytoapplythechanges
Videotampersettings
ClickSettingstobringoutthedetailedsetupmenu.
ArmingSchedule
1. SelectdayoftheweekyouwanttoeditontherowofWeek.
2. Entertheperiodoftimeyouwanttoactivelydetectthemotionevents.

©Copyright2016TRENDnet.AllRightsReserved.
33
TRENDnetUser’sGuide
TV‐NVR216/TV‐NVR216D4
Copyto:
Toquicklysetupthesamescheduleovertheweek,clickCopy.Clickanother
dayoftheweek(1:Monday,2:Tuesday,3:Wednesday,4:Thursday,5:Friday,
6:Saturdayand7:Sunday).ClickAlltoselectthewholeweek.ClickOKafter
youselectthedayoftheweekyo
uwanttocopyto.
Linkageaction
Whenmotioneventdetected,thecorrespondingactionswillbeexecuted.
FullScreen
Monitoring:
SwitchthevideoontheVGA/HDMImonitorto
thecameradetectedmotionevent.
AudibleWarning: Activatetheaudibleonboardbuzzer.
SendEmail: Sendemailtonotifythesystemmanager.

©Copyright2016TRENDnet.AllRightsReserved.
34
TRENDnetUser’sGuide
TV‐NVR216/TV‐NVR216D4
VideoLoss
Detectsifacamerahaslostitsvideo.Youcansetupvideolossnotificationstoalert
thesystemmanagertocheckthecamera.
Camera: Clicktochoosethecamerayouwanttochangethe
settings.
ClickApplytoapplythechanges
Videolosssettings
ClickSettingstobringoutthedetailedsetupmenu.
ArmingSchedule
1. SelectdayoftheweekyouwanttoeditontherowofWeek.
2. Entertheperiodoftimeyouwanttoactivelydetectthemotionevents.

©Copyright2016TRENDnet.AllRightsReserved.
35
TRENDnetUser’sGuide
TV‐NVR216/TV‐NVR216D4
Copyto:
Toquicklysetupthesamescheduleovertheweek,clickCopy.Clickanother
dayoftheweek(1:Monday,2:Tuesday,3:Wednesday,4:Thursday,5:Friday,
6:Saturdayand7:Sunday).ClickAlltoselectthewholeweek.ClickOKafter
youselectthedayoftheweekyo
uwanttocopyto.
Linkageaction
Whenmotioneventdetected,thecorrespondingactionswillbeexecuted.
FullScreen
Monitoring:
SwitchthevideoontheVGA/HDMImonitorto
thecameradetectedmotionevent.
AudibleWarning: Activatetheaudibleonboardbuzzer.
SendEmail: Sendemailtonotifythesystemmanager.

©Copyright2016TRENDnet.AllRightsReserved.
36
TRENDnetUser’sGuide
TV‐NVR216/TV‐NVR216D4
ConfigurationMenu
SettingandmanageyourNVRsystembybringupthemainmenu.Clickon
ConfigurationMenu
icon.
SystemSettings
General
Setupthebasictime,displayresolution,andoperationsettingshere.
General
Language: TheTV‐NVR216/TV‐NVR216D4GUIissettingtoEnglish.
Resolution: The default monitor resolution is set to the lowest
option (1024 by 768) to maximize the monitor
compatibility. Choose a better resolution for your
monitortoseebetterqualityvideo.
TimeZone: ClicktheselectionlisttotherightofTimeZone.
DateFormat: Click the selection list to the right of Date Format and
thenselectadateformat.
SystemDate: ClicktheselectionlisttotherightofSystemDate.
SystemTime: Click the selection list to the right of Sy
stem Time and
thenenterthetimewith24‐hourformat.
Mouse Pointer
Speed:
Settingthemousecursormovingspeed.Adjustingtothe
rightforfasterspeed.
EnableWizard: Enableor disable setupwizard every timethe systemis
bootup.Default:Enabled.
EnablePassword: You need to login for system management. Ena
ble
password will ask entering password when login.
Uncheck this box will set the management free to
anyonephysicallyaccesstheNVR.Default:Enabled.
ClickApplytoapplythechanges.

©Copyright2016TRENDnet.AllRightsReserved.
37
TRENDnetUser’sGuide
TV‐NVR216/TV‐NVR216D4
DSTsettings
SetupDaylightSavingTime.
Daylightsavingtime
AutoDST
adjustment:
Thedaylightsavingtimeadjustmentissettingto
automaticadjustmentaccordingtothetimezonesetting
bydefault.Ifyouwanttosetthedaylightsettings
manually,uncheckthisboxtodisabletheautomaticDST
adjustment.
EnableDST: Manuallyenableordisabledaylightsavingtime
adjustme
nt.
From/To: Enterthedaylightsavingtimestartingandenddates.
TimeZone: ClicktheselectionlisttotherightofTimeZone.
DSTBias: Choosetheamountoftimeshiftingfordaylightsaving
adjustment.
ClickApplytoapplythechanges.
Moresettings
Moresettings
DeviceName: ThisisthenameoftheNVR.Default:TV‐NVR216
Autologout: SetupthetimeouttologoutNVRmanagementafter
managementinactiveforaperiodoftime.
MenuOutput
Mode:
ThevideooutputisactiveforbothHDMIandVGA
interfaces.
ClickApplytoapplythechan
ges.

©Copyright2016TRENDnet.AllRightsReserved.
38
TRENDnetUser’sGuide
TV‐NVR216/TV‐NVR216D4
Network
SetupNVRnetwork,DDNS,NTP,Email,andUPnPsettings.
General
SetupthenetworkinterfaceconnectingtotheInternet.
NetworkGeneralSettings
NICType: ChooseoneoftheEthernetduplexandspeedto
matchyournetwork.Default:10/100MAuto
detection.
EnableDHCP: CheckthisboxiftheIPaddressisassignedbyDHCP
server.
IPv4Address: TheIPv4dynamicorstaticaddress
IPv4SubnetMask: Networkrangeofthesubnet
IPv4Defa
ult
Gateway:
ThedefaultroutegoingfurtherfromTV‐IP320PIIPv4
subnet
IPv6Address1: IPv6self‐assignedaddressincludingthesubnetprefix
expressionintheendofthestring.
IPv6Address2: IPv6staticaddressincludingthesubnetprefixexpression
intheendofthestring.
IPv6Default
Gateway:
Thedefa
ultroutegoingfurtherfromIPv6subnet
MACAddress: TheMACaddressoftheNVRnetworkinterface.
MTU: Maximumtransmissionunit.Themaximumfieldsize
intheEthernetpacket.Default:1500
PreferredDNS: EnteryourfirstIPv4orIPv6DNSserveraddress
AlternateDNS: EnteryoursecondIPv4orIPv
6DNSserveraddress
ClickApplytoapplythechanges.

©Copyright2016TRENDnet.AllRightsReserved.
39
TRENDnetUser’sGuide
TV‐NVR216/TV‐NVR216D4
DDNS
DynamicDomainNameService,DDNS,allowsyoutofindyourNVRfromthe
Internetwithaneasytorememberdomainname.
DDNS
EnableDDNS: CheckthisboxtoenableDDNSService.
DDNSType: SelectaDDNSserviceprovider:dyn.comorno‐ip.com.
ServerAddress: EntertheDDNSserveraddress.
DeviceDomain
Name:
Enteryourregistereddomain/hostnameonselected
DDNSservice.
Status: TheDDNSconnectionstatus.
UserName: Entertheaccountname.
Password: Enterthepass
word.
Confirm: Enterthepasswordagain.
ClickApplytoapplythechanges.
NTP
NetworkTimeProtocolService.Theaccuracyofthesystemclockisimportantfor
schedulingandaccuratelogging.Youcanautomaticallycheckthetimeaccuracy
withanetworktimeserver(NTPserver).
NTPsettings
EnableNTP: CheckthisboxtoenableNTPService.
Interval: ThetimeintervalthattheTV‐NVR216/TV‐NVR216D4will
synchronizethetimewithNTPserver.Default:60minutes
NTPServer: Specifyatimeserver(NTPserver)tosynchronizewith.(e.g.
pool.ntp.org)
NTPPort: Theserverportnumber.De
fault:123.
ClickApplytoapplythechanges.

©Copyright2016TRENDnet.AllRightsReserved.
40
TRENDnetUser’sGuide
TV‐NVR216/TV‐NVR216D4
Email
Setupemailaccountsfornotifications.
Email
Enable Server
Authentication:
Check this box if your server requires a password in
order to send email. Most email servers require
authenticationwhensendinganemail.
Username: Entertheusernameofoutgoingemailaccount
Password: Enterthepassword
SMTPServer: SimpleMail Transportation ProtocolServer address, the
outgoi
ng email server address. It may has address the
same as your incoming email server, maybe not. Please
askyouremailserviceproviderfordetail.
SMTPPort: Serviceportnumberforoutgoingemail.*
Sender: Enterthenametobeappearedastheemailsender.
Sender’sAddress: Entersender’semailaddress.
SelectR
eceiver: Select the pull down menu to select the receiver you
wanttosetupthedetail.Youcansendto3accountsat
thesametime,butjustsetupseparately.
Receiver: Thereceiver’sname.
Receiver’s
Address:
Thereceiver’semailaddress.
*Note: Many ISPs does not allow service port 25 going through th
eir network.
PleaseconsultyouremailserviceproviderandISPfordetail.
ClickApplytoapplythechanges.
ClickTesttotestifalltheinformationareenteredcorrectly.

©Copyright2016TRENDnet.AllRightsReserved.
41
TRENDnetUser’sGuide
TV‐NVR216/TV‐NVR216D4
UPnP
UniversalPlug‐and‐Playisadevicediscoveryprotocolset.Itallowsyourcamerato
easilybefound,forexample,onaWindowsoperationsystem.
UPnP
EnableUPnP: CheckthisboxtoenableUPnPconnection.
MappingType: ChooseManualorAutoportmapping.
UPnPList
PortType: TheservicetypeontheUPnPport
Edit: Clicktheicontomanuallyedittheportmapping.
ExternalPort: Choosetheportnumberformapping.
MappingIP
Address:
0.0.0.
0istheTV‐NVR216/TV‐NVR216D4self‐address.
Port: Localportnumber.
Status: UPnPStatus.
ClickApplytoapplythechanges.
Moresettings
MoreSettings
ServerPort: TheserviceportnumberforNVRmanagement.The
defaultserviceportofTV‐NVR216/TV‐NVR216D4is
8000.
HTTPPort: Thedefaultwebaccessport.Youcanchangetheport
number.Thedefaultportnumberis80.
RTSPPort: TheReal‐TimeStreamingProtocolportforvi
deo
streaming.Youcanchangetheport.Thedefaultport
numberis554.

©Copyright2016TRENDnet.AllRightsReserved.
42
TRENDnetUser’sGuide
TV‐NVR216/TV‐NVR216D4
ClickApplytoapplythechanges.
LiveView
Changetheliveviewsettings.
General
Liveviewgeneralsettings
VideoOutput
Interface:
ThevideooutputinterfaceisVGAorHDMI
LiveViewMode: ChoosethedefaultLiveViewmodetobe1x1single
videoonthescreenor2x2fourvideoonthescreenat
thesametime.Default:2x2.
DwellTime: Setuphowlongea
chdisplaywillbeshoweduponthe
screen.There’snoeffecton2x2displaymode.On1x1
mode,eachvideowillbeshownonthescreenforDwell
Timeandthenchangetothenextvideo.Default:10
seconds.
EnableAudio
Output:
EnableordisableaudiooutputontheNV
R.Default:
disabled
EventOutput: Definewherethevideoisgoingoutwhenevent
triggered.TheTV‐NVR216/TV‐NVR216D4issettoboth
VGAandHDMI.
FullScreen
Monitoring
DwellingTime:
Wheneventtriggeredfullscreendisplay,wholongthe
videoisgoingtostayonthescreen.Defa
ult:10
seconds.
ClickApplytoapplythechanges.
View
Settingliveviewdisplayarrangementandsequence.
LiveViewLayoutandSequenceSettings
VideoOutput ThevideooutputinterfaceisVGAorHDMI

©Copyright2016TRENDnet.AllRightsReserved.
43
TRENDnetUser’sGuide
TV‐NVR216/TV‐NVR216D4
Interface:
CameraList: Installedcameraswillbelistedherebychannel.
LayoutPanel: Previewhowthelayoutthevideodisplay.
Toremoveacamerafromthedisplay,justclick
on
theselectedcell
toremovethechannel
number.
Toassignachanneltoadisplaycell,choosethecamera
fromthecameralist.
Note:Eachvideochannelcanbeassignedtoonedisplay
cell. Click on camera when it is not assigned
and
double click on the list if it is currently assigned
to
otherdisplaycell.
MissingVideo:Ifyouassignachanneltoadisplaycell
andthere'snovideostream,thecellisshowing
TRENDnet.ToremovetheTRENDNetmessage,just
removethechannelassignmentonthedisplaycell.
ControlPanel:
:Singlechanneldisplay
:Quadchanneldisplay
:Automaticchannelassignment
:Removeallchannelassignments
:Previouspage
:NextPage
:Currentpage/Totalpage
Note: In single channel display, you can set up the
displaysequencewiththepagenumbers.
ClickApplytoapplythechanges.
Channel‐ZeroEncoding
Settingcameratocertainframerateandbitrates.
List
Control
Panel

©Copyright2016TRENDnet.AllRightsReserved.
44
TRENDnetUser’sGuide
TV‐NVR216/TV‐NVR216D4
Exceptions
Setuptheactionwhenexceptionhappened.Selecttheexceptionyouwantto
monitorandthenchoosetheaudiblewarningoremailnotification.ClickApplyto
applythechangesandremembertosetupyouremailaccountifyouchoosethe
emailnotification.
ExceptionType
All: Anyofthefollowingexceptionswilltriggerthe
notification.
HDDFull: Bydefault,therecordingvideodoesnotoverwrite
whentheharddriveisfull.Youcansetupanaudio
warningorsendemailtosystemmanagertoremove
therecording.(YoucanalsosetuptheNVRfo
r
automaticoverwritetherecordingswhenthediskisfull.
Pleaseseepage61formoredetail.)
HDDError: Whentheharddrivereadingorwritingerror,theNVR
canmakeaudiblesoundorsendemailtosystem
managerfortheerror.Youcanusetheharddrive
maintenancetoolsonth
eNVRcheckingandmanaging
yourharddrive.Seepage55formoredetail.)
Network
Disconnected:
Theexceptionistriggeredwhennetworkportis
disconnected.
IPConflicted: TheNVRisconstantlymonitoringifthere’sanIPconflict
ishappening.Exceptionistriggeredwhenthere’sanIP
conflict.
IllegalLogin: Exceptionistri
ggeredwhenNVRdetecttheattempt
loginwithwrongcredential.
RecordException: Exceptionwillbetriggeredwhenanythinggoeswrong
duringvideorecordingprocess.
Alarmfeatureisnotsupportedonthismodel.
©Copyright2016TRENDnet.AllRightsReserved.
45
TRENDnetUser’sGuide
TV‐NVR216/TV‐NVR216D4
UserAccounts
Youcansetupupto16useraccountstoaccessthecamera’svideostreamwitha
webbrowserorrealtimevideostream(RTSP).Onlyoneadministratoraccount
(username:admin)canbesetuptoconfiguretheTV‐NVR216/TV‐NVR216D4and
cannotbedeleted.
Add
ClickAddbuttontoaddanaccount
Addaccount
User: Entertheusername.
Password: Enterthepassword.
Confirm: Enterthepasswordagain.
Level: Selecttheuser’slevelfromGuestorOperatorforthepreset
permissions.Bydefault,anoperatorcanviewthevideoand
operatethecamerapan,tilt,andzoom.Guestcanonlyviewthe
video.NV
Rsettingsareonlyallowedtobechangeswith
administratoraccount.
User’sMAC
Address:
Entertheuser’sMACaddresslimittheaccesstoaddonsecurity.
Leaveit00:00:00:00:00:00aswildcardaddressifyoudon’tlimit
theaccess.
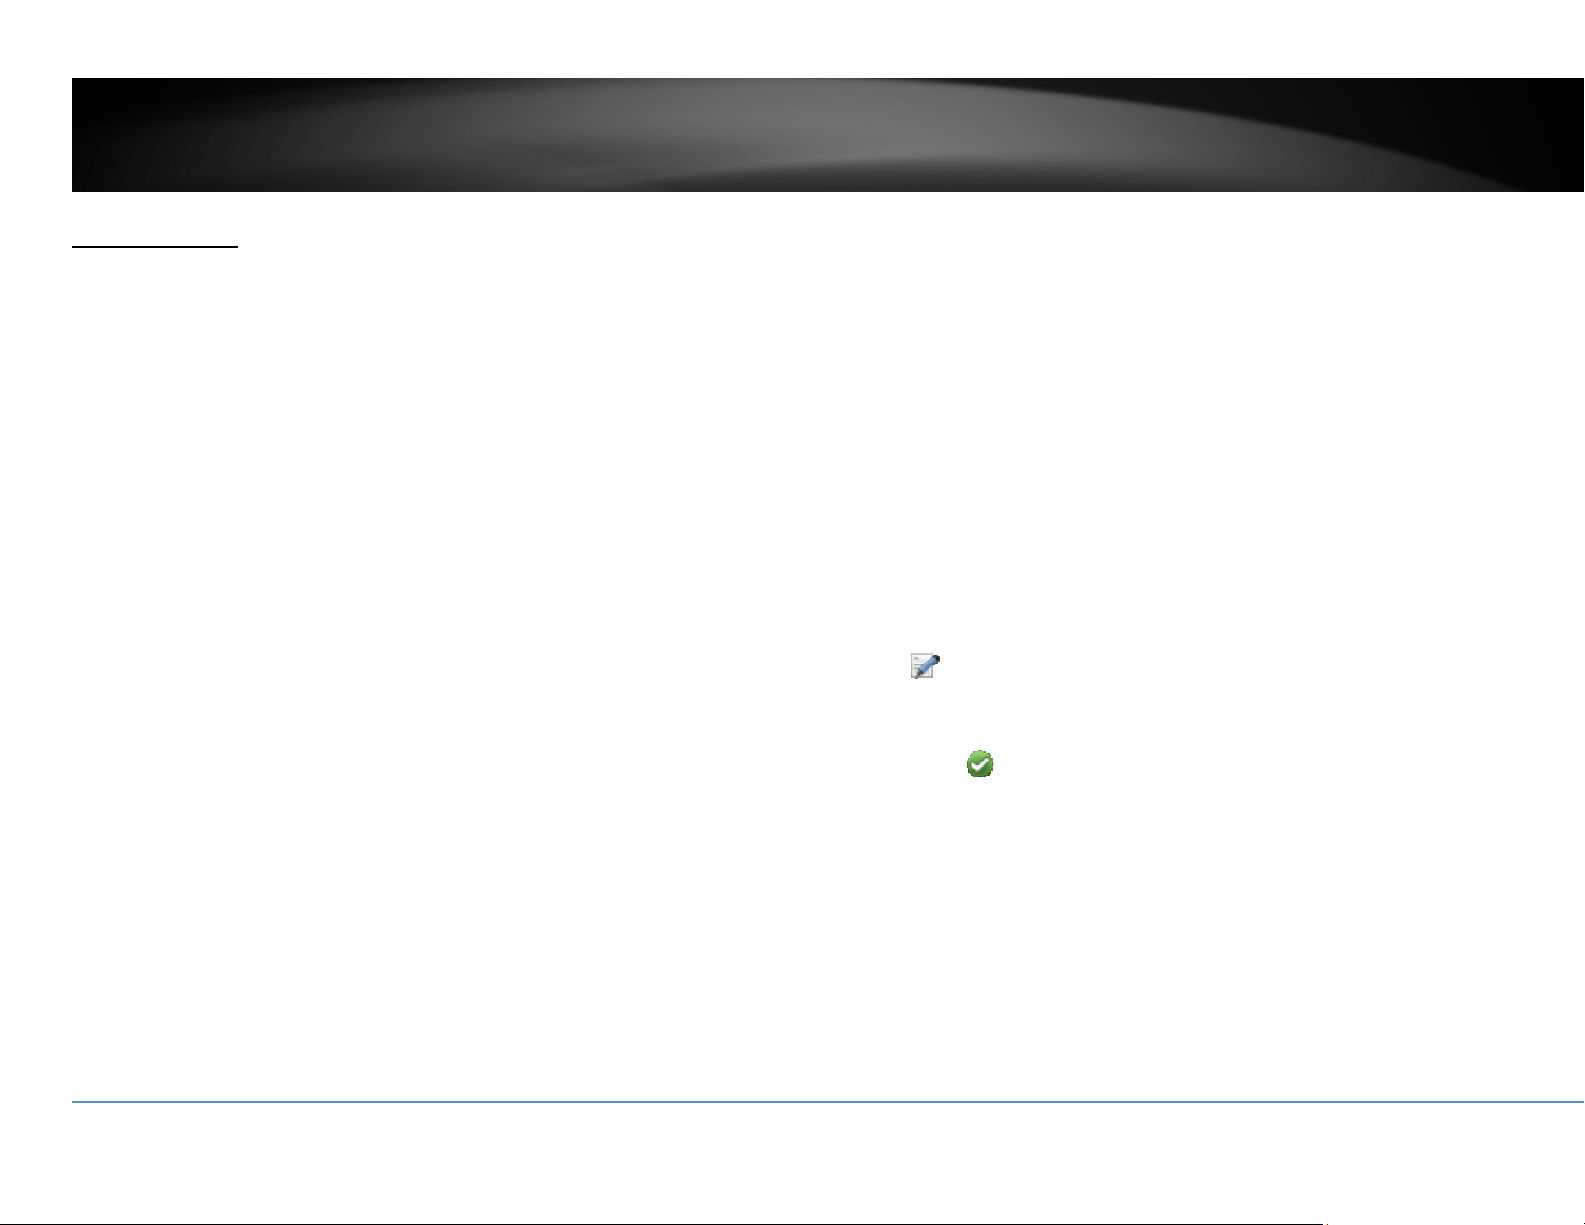
Edit
ClickEdit
onusertochangetheaccountsettings.
Permission
ClickPermission
onusertochangetheaccountpermissionsettings.

©Copyright2016TRENDnet.AllRightsReserved.
46
TRENDnetUser’sGuide
TV‐NVR216/TV‐NVR216D4
Permission:Localconfiguration
LocalLogSearch: SearchtheNVRlogwithlocallogin.
LocalParameters
Settings:
SettingNVRwithlocallogin.
LocalCamera
Management:
ManagecamerasonNVRwithlocallogin.
LocalAdvanced
Operation:
SettingNVRadvancedfeatureswithlocallogin.
LocalShutdown/
Reboot:
Accesstheshutdownmenuwithlocallogin.
Permission:Remoteconfiguration
RemoteLogSearch: SearchtheNVRlogwithweblogin.
RemoteParameters
Settings:
SettingNVRwithweblogin.
RemoteCamera
Management:
ManagecamerasonNVRwithweblogin.
RemoteAdvanced
Operation:
SettingNVRadvancedfeatureswithweblogin.
WebShutdown/
Reboot:
Accesstheshutdownmenuwithweblogin.

©Copyright2016TRENDnet.AllRightsReserved.
47
TRENDnetUser’sGuide
TV‐NVR216/TV‐NVR216D4
Permission:Cameraconfiguration
CameraPermission: Thecameramanagementpermissionlist:
RemoteLiveView:Viewingvideothroughthenetwork.
LocalManualOperation:Managecamerasettingswith
localNVRlogin.
RemoteManualOperation:Managecamerasettings
withweblogin.
LocalPlayback:Allowrecordingplaybackonconnected
monitor.
RemotePlayback:Allowrecordingplaybackvia
networka
ccess.
LocalPTZControl:AllowcameraPTZoperations
throughNVRwithlocalNVRlogin.
RemotePTZControl:AllowcameraPTZoperations
throughthenetwork.
LocalVideoExport:AllowexportingvideothroughUSB
port.
Channels: SelectD1~D4channelstoapplythepermissionto
selectedchannel(s).SelectIPCameraforallcha
nnels.
ClickApplytoapplythechanges.
MaintenanceMenu
ManageyourNVRsystembybringupthemainmenu.ClickonSystem
MaintenanceMenu
icon.
SystemMaintenance
SystemInformationisdisplayinghereforsystemmaintenance.
NVRinformation
NVRInformation
DeviceName: Humanreadabledevicenameforeasyidentification.
YoucanchangethisnameinSystemconfiguration.
Model: ThemodelnameoftheTV‐NVR216.
SerialNumber: Theuniqueidentificationnumberofthisdevice.
FirmwareVersion: Firmwareversion

©Copyright2016TRENDnet.AllRightsReserved.
48
TRENDnetUser’sGuide
TV‐NVR216/TV‐NVR216D4
Camerainformation
CameraInformation
CameraNo.: Thechannelnumbercameraassignedinto.
CameraName: Cameradevicename
Status: Showingthecameraisconnectedordisconnected.
MotionDetection: Showingthestatusandsetupofthecameramotion
detection.
Tamper‐proof: Showingthestatusandsetupofthecameravideo
tamperdetection.
VideoLoss: Showingth
estatusandsetupofthevideoloss
detection.
RecordingInformation
NVRRecordingStatusInformation
CameraNo.: Thechannelnumbercameraassignedinto.
RecordingStatus: Showingthestatusandsetupofthevideorecording.
FrameRate: Showingthecamerarecordingframerate.
Bitrate: Showingthecamerarecordingvideostreambitratein
thousandsbitspersecond.
Resolution: Showingthecamerarecordingvideoresolution.
Recor
dType: Showingthetypeofrecording.
Encoding
Parameters:
Showingtheencodingparameters.
Alarmisnotsupportedforthismodel.

©Copyright2016TRENDnet.AllRightsReserved.
49
TRENDnetUser’sGuide
TV‐NVR216/TV‐NVR216D4
NetworkInformation
NVRNetworkInterfaceInformation
NIC: NetworkInterfaceCard.LAN1istheassignednetwork
interfacewhichrepresenttothenon‐PoEnetworkport.
IPv4Address: TheIPv4addressonthisinterface
IPv4SubnetMask: Networkrangeofthesubnet
IPv4Default
Gateway:
ThedefaultgatewayofIPv4subnet
IPv6Address1: IPv6self‐assigneda
ddressincludingthesubnetprefix
expressionintheendofthestring.
IPv6Address2: IPv6staticaddressincludingthesubnetprefixexpression
intheendofthestring.
IPv6Default
Gateway:
ThedefaultroutegoingfurtherfromIPv6subnet
EnableDHCP: TheIPaddressisassignedbyDHCPserverornot.
StorageIn
formation
HDDStatusInformation
Label: IndexoftheHDD.TV‐NVR216/TV‐NVR216D4supports
2HardDrivebayswithupto6TBeach.
Status: Showingtheharddriveworkingcondition.
Capacity: Thetotalharddrivestoragecapacityafterformatting.
Freespace: Displayshowmuchspaceisavailablefreeforvideo
recordings.
Property: R/W:Allowre
adandwrite.
Type: Local:TheharddriveisinstalledontheNVR.
Group: TheHDDonNVRisassignedtothegroup1.

©Copyright2016TRENDnet.AllRightsReserved.
50
TRENDnetUser’sGuide
TV‐NVR216/TV‐NVR216D4
LogInformation
AllNVRactivitiesareregisteredonthelog.Findtheactivitybysearchingwithtime
rangeandlogtype.ClickSearchtostartthesearch.
LogSearch
LogSearch
StartTime: Thestartingtimeofalogsearch.
EndTime: Theendtimeofthetimerangeforthelogsearch.
MajorType: Filterthesearchbytypeoflogs:all,alarm,exceptions,
operation,andinformation.
MinorType: Filterthesearchbytypeoflogs.Selectthemajortype
andthench
oosetheminortype.
Alarm:Startmotiondetection,stopmotiondetection,
starttemper‐proof,stoptamper‐proof,andIP
CameraAlarm.
Exception:video loss, illegal login, HDD full,HDD error,
IP conflict, network disconnect, recording
exception, IP camera disconnection, IP camera
addressconflict,recordingbufferoverflow.
Operation:
poweron,ab
normalshutdown
Local operations: shutdown, reboot, login,
logout, configure parameters, upgrade, start
recording,stoprecording,PTZcontrol,lockfile,
unlockfile,initializeHDD,addIPcamera,delete
IP camera, set IP camera, playback by file,
playback by time, export configuration file,
import configuration file, export recordings,
restore admini
strator’s password, operate tag,
andHDDdetect.
Remote operations: reboot, login, logout,
configureparameters,upgrade,startrecording,
stoprecording,PTZcontrol,lockfile,unlockfile,
initializeHDD,addIPcamera,deleteIPcamera,
set IP camera, playback / download by file,
playback / download by time, export
configuration file, import co
nfiguration file,
export recordings, interrogate parameters,
interrogate working status, start‐two way
audio,stoptwo‐wayaudio,alarmarming,alarm
disarming,andoperatetag.
Information:localHDDinformation,HDDS.M.A.R.T.
startrecording,stoprecording,deleteexpiredrecording,
andsystemrunningstatus.
©Copyright2016TRENDnet.AllRightsReserved.
51
TRENDnetUser’sGuide
TV‐NVR216/TV‐NVR216D4
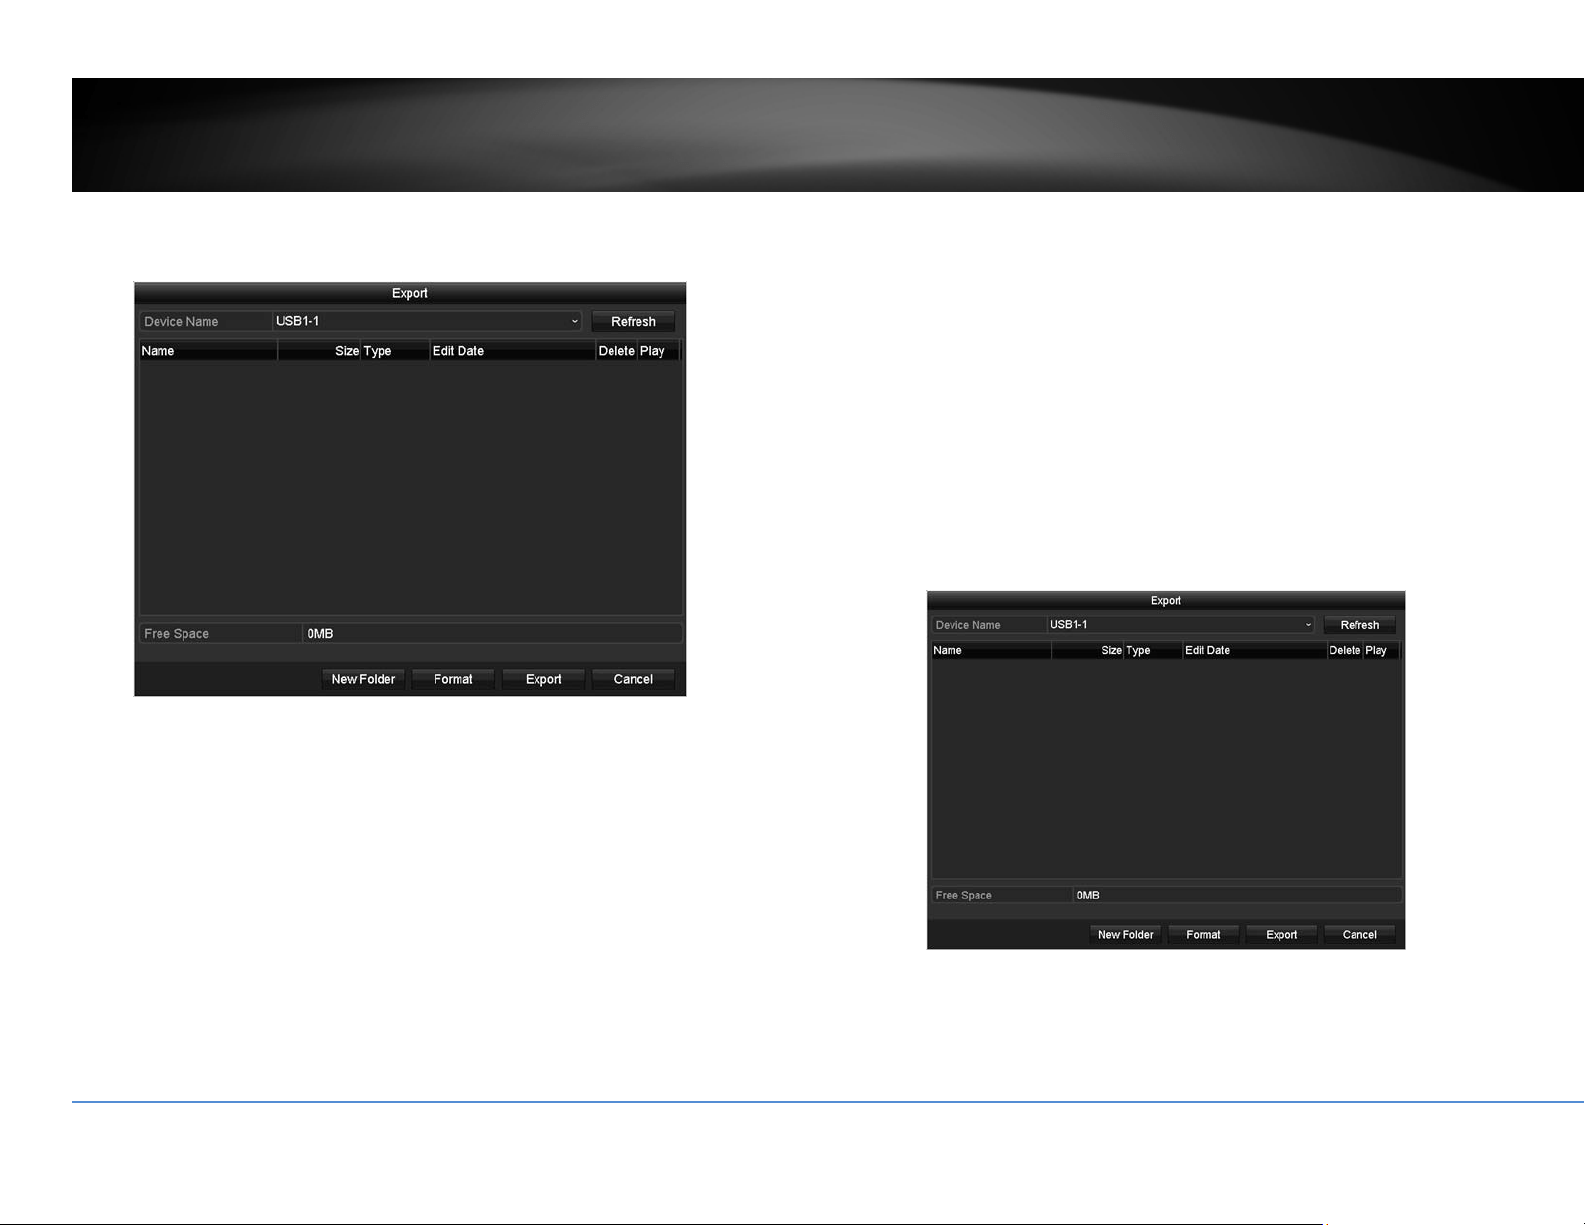
Export
ClickExportonthispagetoexportlogon thelist.
ClickExportagaintoexportthelogtotheUSBdriveofyourchoice.SelecttheUSB
driveontheDeviceNameandthenclickRefreshifyouwanttochangethedrive.
ClickNewFoldertocreateanewfolderoncurrentdirectory.ClickFormatto
formatthisUSBstorage.
LogExp
ort
ToexportalllogssavedonNVR,clicktheLogExporttab,selecttheharddrive,and
thenclickExport.
ClickExportagaintoexportthelogtotheUSBdriveofyourchoice.SelecttheUSB
driveontheDeviceNameandthenclickRefreshifyouwanttochangethedrive.
ClickNewFoldertocreateanewfolderoncurrentdirectory.ClickFormatto
formatthisUSBstorage.

©Copyright2016TRENDnet.AllRightsReserved.
52
TRENDnetUser’sGuide
TV‐NVR216/TV‐NVR216D4
Import/ExportConfigurationSettings
TosavecurrentorloadpreviousTV‐NVR216/TV‐NVR216D4settings,choosethe
Import/ExportpageandthenexportthefiletotheUSBdriveorimportthefile.
ClickExporttoexportthesettingstoafileontheUSBdriveofyourchoice.Select
theUSBdriveontheDeviceNameandthenclickRefreshifyouwanttochangethe
drive.ClickNewFoldertocreateanewfolderoncurrentdirectory.ClickFormatto
formatthisUSBstorage.
FirmwareUpgrade
LocalUpgrade
TRENDnetmayperiodicallyreleasefirmwareupgradesthatmightaddfeaturesor
fixproblemsassociatedwithyourTRENDnetmodelandversion.Tofindoutifthere
isafirmwareupgradeavailableforyourdevice,pleasecheckyourTRENDnetmodel
andversionusingthelink.
http://www.trendnet.com/downloads/
1. If a firmware upgrade is available, download the firmware to your
computer.
2. Unzipthefiletoafolderonyourcomputer.
3. Read the firmware upgrade instruction for specific version update
information.
4. LogintotheTV‐NVR216.
5. GettingtothisMaintenancepagetoupgradefirmware.
Extractthefir
mwarefilefromthedownloadedzipfileandthensaveittotheUSB
drive.PlugintheUSBdrivetooneoftheavailableUSBslotontheNVR.Choose
UpgradepageandthenclickonUpgrade.
RemoteUpgrade
YoucansetuptheupgradeoverthenetworkwithFTPprotocol.ToproceedFTP
upgrade,youneedtoprepareaFTPserveronthelocalnetworkwithusername:ftp
andpassword:ftp.Placethefirmwarefileontherootdirectorywhentheftp
accountisloggingintheFTPse
rver.
Navigatetotheremoteupgrade(FTP)page.EntertheFTPserveraddress,andthen
clickonUpgrade.

©Copyright2016TRENDnet.AllRightsReserved.
53
TRENDnetUser’sGuide
TV‐NVR216/TV‐NVR216D4
FactoryDefault
ToresetyourTV‐NVR216/TV‐NVR216D4tothefactorydefault,navigatetothis
DefaultpageandthenclickonOKtoresetallNVRsettingsbacktofactorydefault.
NetworkMonitoring
Traffic
Tomonitorthenetworktraffic,navigatetothetrafficchart.
Traffic
LAN1: Thenetworkinterface.
Sending: ThenetworktrafficgeneratedfromtheNVR.
Receiving: ThenetworktrafficreceivingbytheNVR.
LinkStatus: Thenetworklinkingstatus.
Type: Typeofnetwork,Ethernet.
MACAddress: MediaAccessAddressofthenetworkinterface.
MTU: MaximumTransmissionUnitinbytes.
NICType: Typeofthenetworkcard.Speedandduplexing.
©Copyright2016TRENDnet.AllRightsReserved.
54
TRENDnetUser’sGuide
TV‐NVR216/TV‐NVR216D4
NetworkTools
Usenetworktools(NetworkDetection)ontheNVRtotestthenetworkstatus.
Networkdelayandpacketlosstest
ThebasicPINGtesttool.EnterthetestingdestinationIPaddressandthenclickon
theTest.
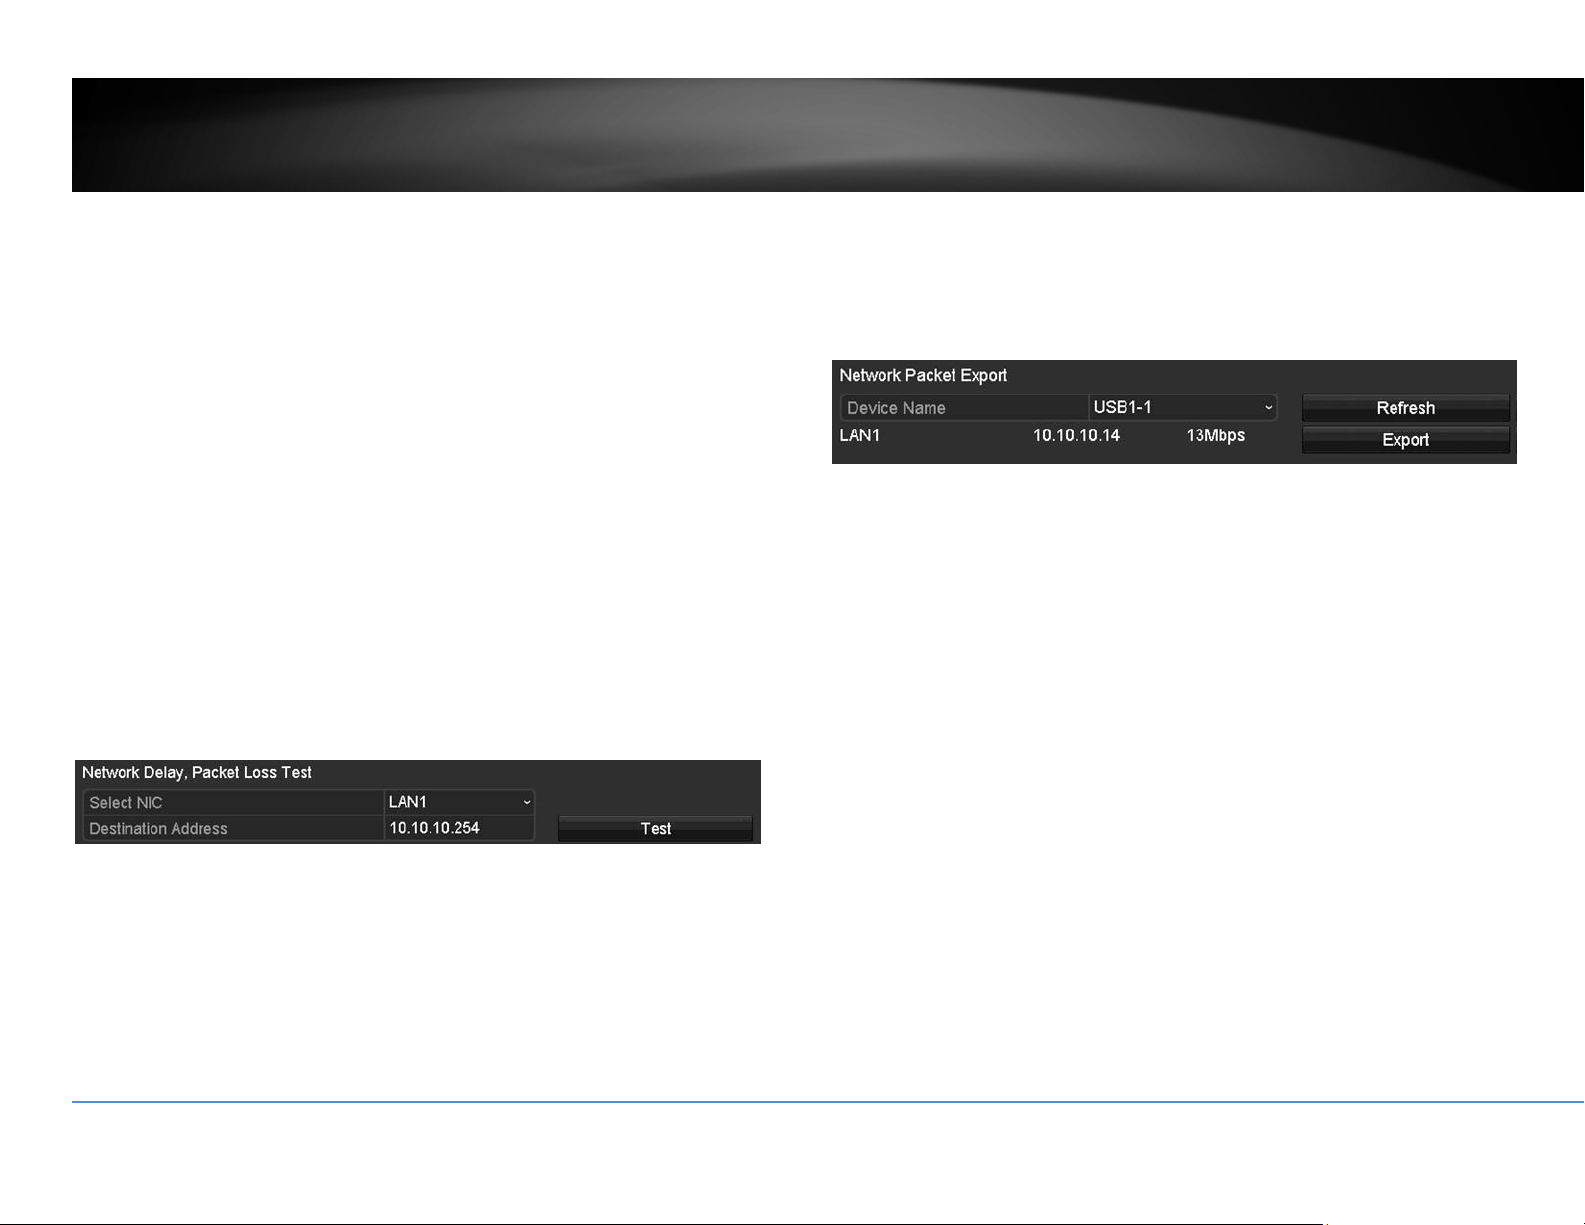
Networkpacketexport
CapturepacketsandsavetoexternalUSBstoragefornetworkanalysis.Plug‐inyour
USBnetworkdriveandthenclickExporttoexportthepacketcapturefiles.Click
RefreshtolistthedirectoryonyourUSBstorageagain.
NetworkStatistics
Toreviewthenetworkstatisticinformation,navigatetotheNetworkStatistics
page.ClickRefreshtoupdatetheinformation.
©Copyright2016TRENDnet.AllRightsReserved.
55
TRENDnetUser’sGuide
TV‐NVR216/TV‐NVR216D4
HardDriveMaintenance
S.M.A.R.TSettings
TheS.M.A.R.T.(Self‐Monitoring,AnalysisandReportingTechnology)isamonitoring
technologytodetectandreportonvariousperformanceandreliabilityfactorsto
helppredictandpreventdiskfailures.
S.M.A.R.T.Settings
Continuetouse: ChecktheContinuetousethisdiskwhenself‐
evaluationisfailedifyouwantittodoso.Click
Applyifyouchangethissetting.
HDD: TheDisknumber.TheTV‐NVR216/TV‐NVR216D4
hasoneHDD.
Capacity: Thetotalharddrivestoragecapacityafter
formatting.
Self‐testStatus: Showingtheself‐testingstatus.
Self‐testType: ChooseatypeofS.M.A.R.T.test:short,expanded,
andconveyancetests.
S.M.A.R.T.: Click tostartS.M.A.R.T.test.
Temperature: ThetemperatureoftheharddriveinCelsius.
Powerondays: Daystheharddriveison.
Self‐evaluation: Theresultofself‐evaluation.
All‐evaluation: Functionalevaluations.
S.M.A.R.T.
Information:
DetailedS.M.A.R.T.harddriveinformation.
BadSectorDetection
Detectifthere’sanybadsectoronthediskdrive.
©Copyright2016TRENDnet.AllRightsReserved.
56
TRENDnetUser’sGuide
TV‐NVR216/TV‐NVR216D4
BadSectorDetection
HDDNo.: TheDisknumber.TheTV‐NVR216/TV‐NVR216D4
hasoneHDD.
Capacity: Thetotalharddrivestoragecapacityafter
formatting.
Typeof
Detections:
Selectkeyareadetectionorfulldetection.
Detect: Clickthisbuttontostartbadsectordetection.
HDDCapacity: Thestoragecapacityoftheharddrive.
BlockCapacity: Theblockcapacity.
Status: Thestatusofbadsectordetection.
Errorcount: Thetotalerrorcountdetected.
ErrorInfo. Detailedsectordamageorshieldinformation.
Pause: Pausethebadsectordetectiononceitstart
running.
HardDriveManagement
Manageandallocateyourstoragespacebybringupthemainmenu.ClickonHDD
Menu
icon.
Format/InitiatetheHardDrive
SelecttheharddriveandthenclickonInittoformatandinitializetheharddrive.

©Copyright2016TRENDnet.AllRightsReserved.
57
TRENDnetUser’sGuide
TV‐NVR216/TV‐NVR216D4
AdvancedStorageQuotaSettings
Tosetupthediskquotaforeachchannelvideorecording,selectthecameraand
thenenterthemaximumrecordingcapacity.
Storagequotasettings
Mode: Quotasetting
Camera: Selecttheca merayouwanttosetupthestorage
quota.
UsedRecord
Capacity:
Thestoragespacespendinrecordingforthe
specificchannel.
HDDCapacity: Thestoragecapacityoftheharddrive.
Max.Record
Capacity:
Allocatetherecordingspacetoselectedvideo
channelingigabytes.
ClickCopytocopythesamequotasettingtootherchannel.
ClickApplytoapplythechanges.
Scheduledrecording
Setupthevideorecordingsettingsbybringupthemainmenu.ClickonScheduled
RecordingMenu
icon.
Schedule
Selectthevideochannel,typeofrecording,andthenclickanddragontheweekly
schedule.ClickEdittobringupthedetailedschedulesettingtableorclickCopyto
copythesamescheduletootherchannel.

©Copyright2016TRENDnet.AllRightsReserved.
58
TRENDnetUser’sGuide
TV‐NVR216/TV‐NVR216D4
1. Selectchannel.
2. Selectrecordingtype.ChoosefromContinuousorMotionrecording.Ifyou
wanttoclearoutsomescheduledrecordingtime,chooseNone.
3. Selectthetimeslotsyouwanttomakethescheduledrecording.Eachtime
slotrepresentsahalfhourinterval.Therownumberrepresentstheweek
ofthedaystartingfromMonday.
4. Ifyouwanttodefinethescheduleinfinerintervals,clickonEditbutton.
5. MakeyourselectionandthenclickApplytoapplythechanges.
Schedule: Selectthedayoftheweek
AllDay: Selectifyouwanttosetuptheall‐dayrecording.

©Copyright2016TRENDnet.AllRightsReserved.
59
TRENDnetUser’sGuide
TV‐NVR216/TV‐NVR216D4
Start/EndTime: Specifythestartingandendofrecordingtimein24‐hour
format.
Type: SelectContinuousorMotionDetectionrecording
Copyto:
Toquicklysetupthesamescheduleovertheweek,clickCopy.Clickanother
dayoftheweek(1:Monday,2:Tuesday,3:Wednesday,4:Thursday,5:Friday,
6:Satur
dayand7:Sunday).ClickAlltoselectthewholeweek.ClickOKafter
youselectthedayoftheweekyouwanttocopyto.
VideoSettings
Setupthevideoqualityforrecording(mainstream),thehighervideoquality
requirelargerstoragespaceandbetternetworkcondition.Pleasechoosethebest
profileofyourchoice.
Note:Settingsinthissectionarenotavailableallcameras.TheNVRwillpromptthe
messagetoremindyouthesettingisnotavailableonselectedcamera.
MainStream(Record)Settings
Camera: Selectthecamerayouwanttochangetherecording
videoquality.
Encoding
Parameters:
Thetypeofvideofromthecamera.

©Copyright2016TRENDnet.AllRightsReserved.
60
TRENDnetUser’sGuide
TV‐NVR216/TV‐NVR216D4
StreamType: Selectyouwanttostreamvideoonlyorvideoandaudio.
Resolution: Selectthevideoresolution.
Bitratetype: Thebitrateistherateofinformationgeneratedfromthe
video.Thehigherbitratemeansmoredataandmore
trafficandbettervideoquality.Constantbitrate
generatessameamountofinformationoverthesame
periodoftime.Variablebitera
tetakesonestepfurther
tocompresstheinformationwheneveritcan,therefore,
generatesthesameorloweramountofinformation
comparetotheconstantbitrate.
VideoQuality: Selectthevideocompressionalgorithm.
Framerate: Selecttheframeratetodecidehowmanypicturesyo
u
wanttotakeineachsecond.
Max.BitrateMode: SelectGeneraltosetthemaximumbitrateincertain
brackets.ChooseCustomizedtosetthemaximum
bitrateonyourown.
Max.Bitrate: ThemaximuminformationallowedtorecordontheNVR
inthousandsofbitspersecond.
Max.BitrateRan
ge
Recommended:
Recommendedbitratesetting.
Pre‐Record: Iftherecordingistriggeredbythemotionevent,this
valuespecifiestostartrecordingsomeperiodoftime
beforethemotioneventhappened.
Post‐Record: Iftherecordingistriggeredbythemotionevent,this
valuespecifiestorecordvideosomeperiodoftimeafter
themotionev
enthappened.
ExpiredTime: Locktherecordingvideoforsomeperiodoftime(in
days)topreventaccidentallybeenoverwriteordelete.
RecordAudio: Recordingaudioornot.
SubStream
ThesubstreamvideoismainlyforNVRliveview.Changeyourcameraoptionto
lowerresolutionifyourcam
erageneratestoomuchinformationtotheNVRforlive
view.
SubStream
Camera: Selectthecamerayouwanttochangetherecording
videoquality.
StreamType: Streamingtypeisvideoonly.
Resolution: Selectthevideoresolution.
Bitratetype: Thebitrateistherateofinformationgeneratedfromthe
video.Thehigherbitratemeansmoredataandmore
trafficandbettervideoquality.Co
nstantbitrate
generatessameamountofinformationoverthesame
periodoftime.Variablebiteratetakesonestepfurther
tocompresstheinformationwheneveritcan,therefore,
generatesthesameorloweramountofinformation
comparetotheconstantbitrate.
VideoQuality: Selectthevideocompressionalgorithm.
Framerate: Selectthefra
meratetodecidehowmanypicturesyou

©Copyright2016TRENDnet.AllRightsReserved.
61
TRENDnetUser’sGuide
TV‐NVR216/TV‐NVR216D4
wanttotakeineachsecond.
Max.BitrateMode: SelectGeneraltosetthemaximumbitrateincertain
brackets.ChooseCustomizedtosetthemaximum
bitrateonyourown.
Max.Bitrate: ThemaximuminformationallowedtorecordontheNVR
inthousandsofbitspersecond.
Max.BitrateRange
Recommended:
Recommendedbitratesetting.
Advancedrecordingsetting
SetupiftheNVRcanoverwritethepreviousvideorecordingornot.Ifyouchecked
thisoption,theNVRwilloverwriteoldrecordingswhenthediskisfull.Otherwise
theNVRwillsendDiskFullNotificationtoletadministratorknowsthatthediskis
fullandcannotproceedanyrecording.
Holidayscheduling
Recordingvideoinholidaysmayhasdifferentrequirements.Youcansetupto11
holidaysofayearsharingthesameholidayprofile.
Setuptheholidayschedulebyclickon
button.

©Copyright2016TRENDnet.AllRightsReserved.
62
TRENDnetUser’sGuide
TV‐NVR216/TV‐NVR216D4
EditHolidaySchedule
HolidayName: Changetheholidaynametomeaningfulnameinsteadof
indexnumbers.
Enable: Enableordisablethisholidayrule.
Mode: Selecttheholidayisforaday,aweekoramonth.
Daymode:Selectthestartandenddatestospecifythe
periodofholidays.Thissettingisgo
odforonetimeonly.
Itdoesnotrepeatperiodically.
Weekmode:Selectthestartandenddatesoftheweek
tospecifytheperiodofholidays.Thissettingisrepeating
everyyear.
Monthmode:Selectthestartandenddatestospecify
theperiodofholidays.Thisse
ttingisrepeatingevery
year.
StartDate: Selectthedaywhentheholidaystarts.
EndDate: Selectthedaywhentheholidayends.
ClickApplybuttontoapplythechangeandclicktheOKbuttontofinishtheediting.
BackupVideoRecordings
Quicklyandbackupandexportyourvideorecordingswiththefileexportingmenu.
BringupthemainmenuthenclickonExportMenu
icon.
Export
SelectthevideochannelandrangeoftimeandthenclickonSearchtosearchthe
videoyouwanttoexport.ClickQuickExportifyouwanttoexportallvideo
recordings.

©Copyright2016TRENDnet.AllRightsReserved.
63
TRENDnetUser’sGuide
TV‐NVR216/TV‐NVR216D4
Quickexport
ClickExportagaintoexportallthevideorecordingstotheUSBdriveofyourchoice.
SelecttheUSBdriveontheDeviceNameandthenclickRefreshifyouwantto
changethedrive.ClickNewFoldertocreateanewfolderoncurrentdirectory.Click
Formattofor
matthisUSBstorage.
Exportwithsearch
Selectthevideoclipsyouwanttoexportbycheckoruncheckthevideoclip.Then
clickExporttoexportthevideorecordings.
Click
topreviewthevideoclip.

©Copyright2016TRENDnet.AllRightsReserved.
64
TRENDnetUser’sGuide
TV‐NVR216/TV‐NVR216D4
Click tolockthevideoclip.Whenvideoislocked,thevideoclipisnotgoingto
beoverwriteaccidentally.Tounlockthevideoclip,click
.Thewarningmessage
willremindyouagainyouareunlockingthevideoclip.ClickYesifyouwantto
proceedunlock.
ClickExportagaintoexportthevideorecordingstotheUSBdriveofyourchoice.
SelecttheUSBdriveontheDeviceNameandthenclickRefreshifyouwantto
changethedrive.ClickNewFoldertocreateanewfolderoncurrentdirectory.Click
FormattoformatthisUSBst
orage.
Videoplayback
BringupthemainmenuthenclickonExportMenu icon.

©Copyright2016TRENDnet.AllRightsReserved.
65
TRENDnetUser’sGuide
TV‐NVR216/TV‐NVR216D4
Playbackscreen
Typeof
Playback
LiveView
Channel
Selection
Recording
search
Action
Buttons
Playback
Buttons
TimeLine
ScaleButtons
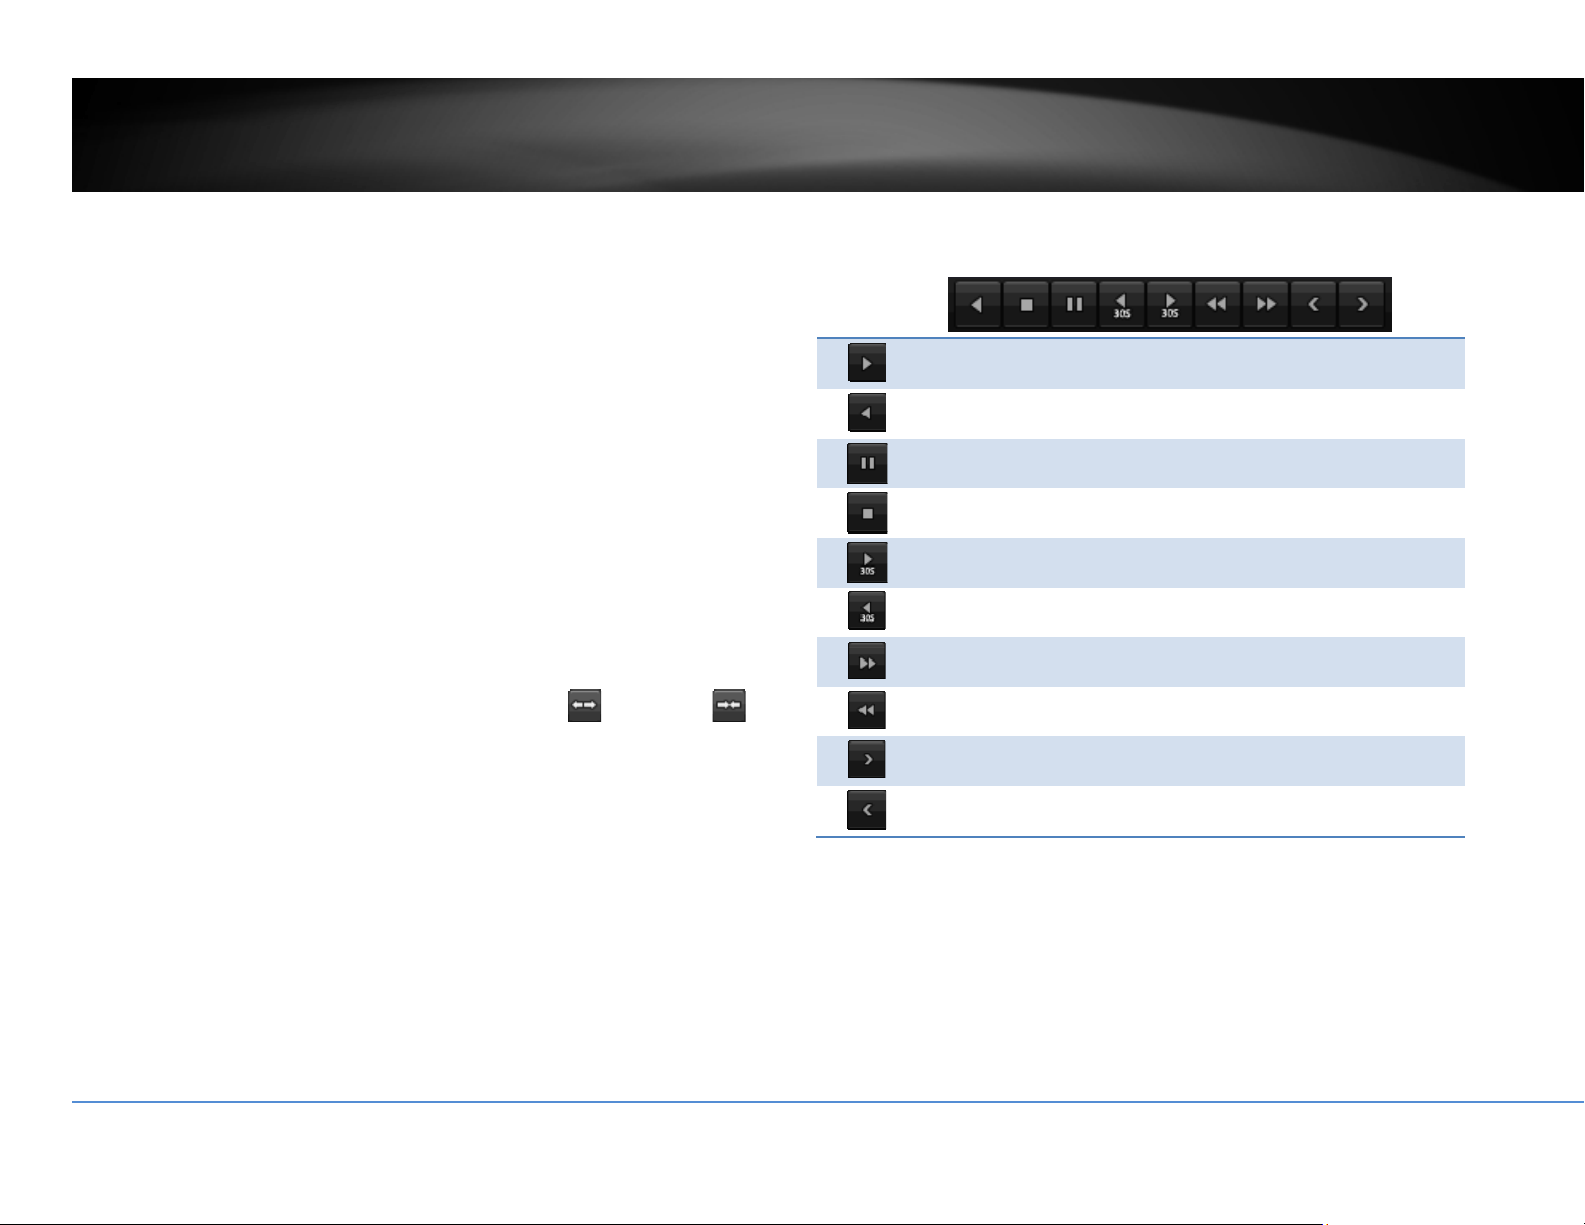
©Copyright2016TRENDnet.AllRightsReserved.
66
TRENDnetUser’sGuide
TV‐NVR216/TV‐NVR216D4
Searchforvideorecordings
CheckonthecamerayouwanttoseetheplaybackorcheckonCameratoselectall
channels.Then,choosethedatefortherecording.Iftherearevideorecordingin
selectedchannel,thedateonthecalendarwillshowblue.Doubleclickthedateto
startplay
back.
Timeline
Thereisaplaybackheadinthecenterofthetimelinerepresentedinayellow
verticalline.Tolookforaspecificvideorecording,movetheplayheadbyclicking
anddraggingit.Iftherecordingisshort,zoominbyclicking
button.Click
tozoomoutthetimescale.
Playbackbuttons
Useplaybackcontrolstoplaybackthevideorecording.
Clickthisbuttontoplaythevideobackward.
Clickthisbuttontoplaythevideo.
Clickthisbuttontopausevideoplayback.
Clickthisbuttontostopplayback.
Clickthisbuttontoskipforward30seconds.
Clickthisbuttontoskipbackward30seconds.
Clickthisbuttonincreaseplaybackspeed*.
Clickthisbuttondecreaseplaybackspeed*.
Clickthisbuttontojumptothenextday.
Clickthisbuttontojumptothepreviousday.
*Note:Thereare5stepsofplaybackspeedyoucanchoosefrom:1/4,1/2,1,2,and
4timesoforiginalspeed.
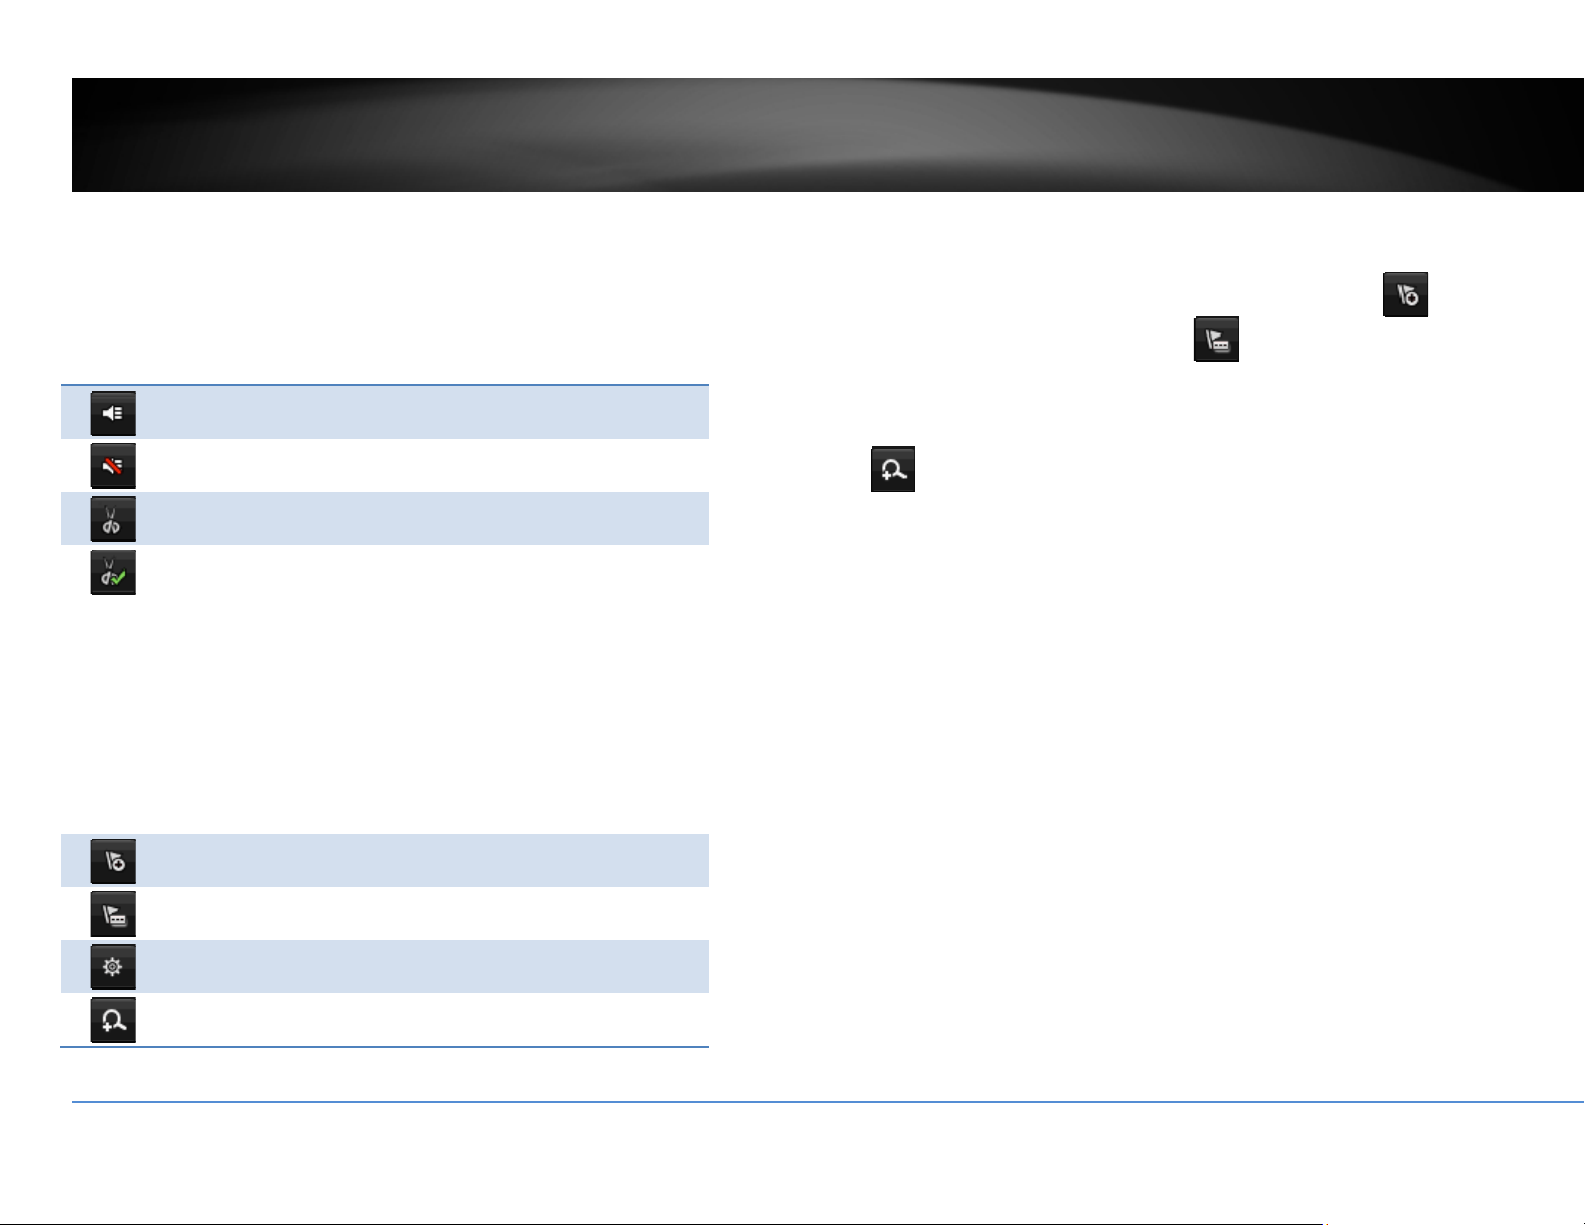
©Copyright2016TRENDnet.AllRightsReserved.
67
TRENDnetUser’sGuide
TV‐NVR216/TV‐NVR216D4
Playbackoperations
Moreplaybackoperationssuchasmutetheaudio,clipacustomizedvideo,addand
managetags,andzoomintheviewingareavailableontheactionbuttonssection.
Theaudioison.Clickthisbuttontomutetheaudio.
Theaudioismuted.Clickthisbuttontoenableaudio.
Clickthisbuttontostartvideoclipping.
Clickthisbuttontostopvideoclipping.Youcanmake
multiplevideoclips.Whenyoufinishallclippingandexit
theliveview,theNVRwillpromptandaskingyoutosave
thevideoclips.
Clickthisbuttontoaddatagwithdefaulttagname.
Clickthisbuttontoaddatagwithcustomizedtagname.
Clickthisbuttontomanagethetags
Clickthisbuttontozoomintheliveview.
Tagging
Taggingonvideorecordingshelpyoutomarkthecriticaltimeofvideorecording
andeasiertrackingandediting.Findthevideoiscriticalandclickon
tomake
thetagwithdefaulttagname“tag”.Clickon
tomakethetagwithcustomized
tagname.SearchthevideoonTaggedvideoplaybackmodeexplainedinfollowing
sections.
Zoom
Click
tozoomtheplayback.Anavigatewindowwillshoweduponrightlower
screencorner.Draganddropordoubleclicktodefinetheareayouwanttozoom
in.Thedefinedareaisshowedinredrectangular.Rightclicktoexitthezoommode.

©Copyright2016TRENDnet.AllRightsReserved.
68
TRENDnetUser’sGuide
TV‐NVR216/TV‐NVR216D4
Playbackmodes
Thevideoplaybacknotonlycanplaybackthevideorecordedontheharddrive
indexedbythetime.Youcanalsosearchthevideowithmotiondetectionevent,
tag,orplaybackthevideostoredontheUSBexternalharddrive.
Event
Tosearchvideowithmotiondetectionevent,clickandselecttheEventplayback
mode.
Selectthechannelyouwanttosearchthemotiondetection.Enterthestartand
stoptime.And,thenclickonSearch.
Themotionrecordingeventsareshowedonthelist.Click
toviewthevideo.
Usethescrollbartobrowsetherecordingsandadjustthepre‐playandpost‐play
between5secondsandthemaximumamountofasinglesectionofrecordingto
decidethelengthofplaybackbeforeandafterthemotionevent.
Tag
Ifyousetupthetagsandwanttosear
chvideowiththetags,clickandselectthe
Tagplaybackmode.
Selectthechannelyouwanttosearchthetags.Enterthestartandstoptime.Ifyou
wanttosearchforspecifictagname,enterthetagnameorleaveitblankforall
tags.And,thenclickonSearch.

©Copyright2016TRENDnet.AllRightsReserved.
69
TRENDnetUser’sGuide
TV‐NVR216/TV‐NVR216D4
Thetagssearchedareshowedonthelist.Click
toviewthevideo.
Usethescrollbartobrowsetherecordingsand
adjustthepre‐playandpost‐playbetween5
secondsandthemaximumamountofasingle
sectionofrecordingtodecide
thelengthofplaybackbefore
andafterthemotionevent.
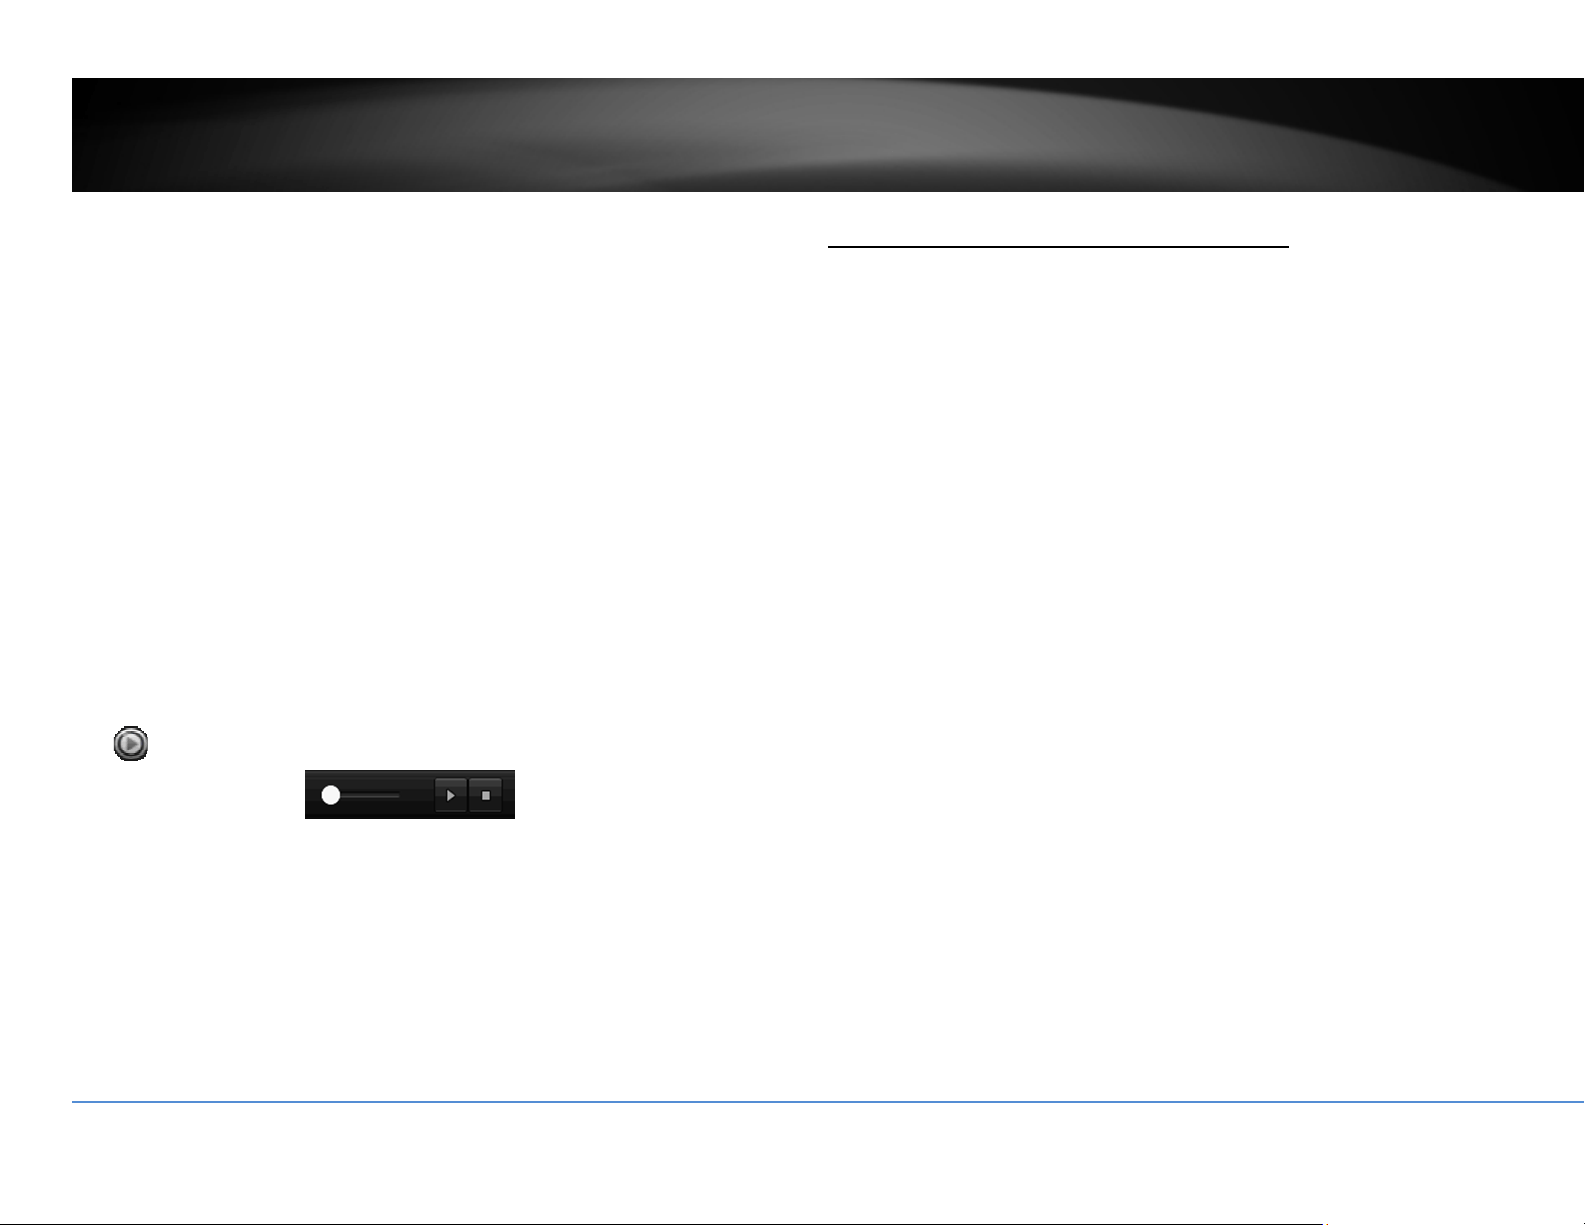
©Copyright2016TRENDnet.AllRightsReserved.
70
TRENDnetUser’sGuide
TV‐NVR216/TV‐NVR216D4
Externalfile
ToplaybackthevideofilessavedontheUSBdrive,clickandselecttheExternalFile
playbackmode.
SelecttheUSBdevicetobrowsethefiles.ClickRefreshtoupdatethelistwhen
necessary.
Click
toviewthevideoandusetheplaybackcontroltocontroltheplayback.
AccessyourNVRwiththeWebBrowser
DefaultSettingsandFactoryReset
TomanageyourTV‐NVR216/TV‐NVR216D4throughthewebbrowser,youhaveto
setupthenetworkconnectionfirst.Ifyoudidn’tsetupyourNVRattachingtoyour
home/business network, please enable NVR’s DHCP client. Click Apply and then
restart the NVR.If you have already install
ed yourcameras, you have tomanually
change their settings. (You don’t have to do anything for plug‐and‐Play models
connected directly on PoE ports.) Check the network status when necessary to
makesuretheNVRgetstheIPaddressfromyournetwork.
Here’sthelistofyo
urNVR’sfactorydefaultsettings:
SystemDefault
ManagementIP: 192.168.10.60
Administratorname: admin
Administratorpassword: admin
Note: If you are not having a brand new TV‐NVR216, you may not know what
password was setup on the NVR. In this case, you have to call our 24‐hour tech
supporttoge
ttemporaryaccesscodetoresettheNVR.

©Copyright2016TRENDnet.AllRightsReserved.
71
TRENDnetUser’sGuide
TV‐NVR216/TV‐NVR216D4
SystemRequirement
ToaccessyouNVRwiththebrowser,youneedaWindowsorOSXbasedcomputer
andup‐to‐datebrowser(InternetExplorer,Safari,orFirefox).Awebbrowserplug‐
inmustbeinstalledtosupportedcomputerandbrowsertowatchthevideo.
YouneedtosetuptheIPaddressinthesamenetworkofTV‐NV
R216(192.168.10.x
network or your home network). For example, setup your computer with
192.168.10.2staticIPaddress.
ForWindowssystem,pleasegotothenextparagraph.
ForOSXsystem,pleasegodirectlytopage74.
Logging‐intotheNVRfortheFirstTime(Windows)
1. OpenabrowserandtypeintheNVR’sIPaddress.(default192.168.10.60if
theNVRisnotconnectedtoanetwork)
2. Enter the user name, admin, and the password you setup through the
basic setup. If you didn’t setup your password, the change password
windowwillpopuponstep9toguid
eyouthroughthepasswordchanging.
Thedefaultpasswordisadmin.
3. The NVR management page will detect if you installed the camera video
streaming plug‐in or not. Click the link to download the plug‐in from TV‐
NVR216.
4. ClickonRuntoinstallthewebplug‐inforthecameras.
5. PermissionrequestmayshowupdependsontheInternetsecuritysettings
on your computer.Click More Info and then Run anyway to install the
plug‐in.

©Copyright2016TRENDnet.AllRightsReserved.
72
TRENDnetUser’sGuide
TV‐NVR216/TV‐NVR216D4
6. ClickNexttoinstalltheplug‐in.
7. ClickFinishtofinishtheinstallation.
8. Openthebrowserandloginagain.
9. (Go to step 11 if you already changed your password). The TV‐NVR216 / TV‐
NVR216D4 will ask you to change your password from default setting. Please
enterthenewpasswordtwiceandclickOK.Thepasswordmustbebetween8
and16characters.(Alphanumeric:a‐z,A‐Z,0‐9,!,@,#,$)
.
10. Entertheusernameadminandnewpasswordagaintostartsecuredsession.

©Copyright2016TRENDnet.AllRightsReserved.
73
TRENDnetUser’sGuide
TV‐NVR216/TV‐NVR216D4
11. TheLiveViewpagewillshowupandbeginstreamingvideo.
Note:Ifyouwerenotgothroughthebasicsetup,thecameraplug‐and‐playprocess
willbeginafteryousetupthepassword.WaitafewminutesandpressF5torefresh
thebrowserforthelivevideo.
Logging‐intotheCamerafortheFirstTime(OSX)
1. Open the web browser on your computer. In the address bar, enter the IP
address of the camera 192.168.10.60 (If you have a DHCP server on your
network,theIPaddresswillbeassigneddynamically.Forexample,ifyouhave
a home gateway on your network and you plug‐in th
e camera on the same
network,thenyoucanfindthecameraIPaddressonyourhomegateway),and
thenpressEnter.
2. Enterthe username, admin,and thedefaultpassword, admin,andthenclick
OK.

©Copyright2016TRENDnet.AllRightsReserved.
74
TRENDnetUser’sGuide
TV‐NVR216/TV‐NVR216D4
3. The camera management page will detect if you installed the camera video
streaming plug‐in or not. Click the link to download the plug‐in from the TV‐
NVR216.
Note: Internet connection is required to download the plug‐in. If you do not
have Internet access, you can find the plug‐in on th
e CD comes with the
packageunder/Macfolder.
4. Quityourbrowsercompletelybycommand‐Clickonthebrowsericonandthen
clickQuitbeforeinstallingtheplug‐in.
5. Go to the Finder and navigate to the Download folder. Command‐Click the
WebComponents.pkg and then click Open.(If you are install the plug‐infrom
theCD,justbrowse to /Mac folder anddoubleclicktheWebComponents.pkg
file.)

©Copyright2016TRENDnet.AllRightsReserved.
75
TRENDnetUser’sGuide
TV‐NVR216/TV‐NVR216D4
6. ClickOpentostartinstallation.
7. ClickContinuetoinstalltheplug‐in.
8. Selectadestinationtoinstalltheplug‐in.ThenclickContinue.
9. UsethedefaultlocationandclickInstall.

©Copyright2016TRENDnet.AllRightsReserved.
76
TRENDnetUser’sGuide
TV‐NVR216/TV‐NVR216D4
10. EnteryourpasswordandclickInstallSoftware
11. Installationwillprocessautomatically.
12. ClickClosetoexittheinstallation.
13. Open the browser and login again with the default IP 192.168.10.30 or theIP
thatwasdynamicallyassignedbyyourrouter.
14. Entertheuser name, admin,and the defaultpassword, admin,and thenclick
OK.

©Copyright2016TRENDnet.AllRightsReserved.
77
TRENDnetUser’sGuide
TV‐NVR216/TV‐NVR216D4
15. ClickTrust(You’llhavetodothisagainwhenyourcamerachangestoanewIP
address.)
16. TheTV‐NVR216/TV‐NVR216D4willaskyoutochangeyourpasswordfromthe
default setting. Please enter the new password twice and click OK. The
passwordmustbebetween8and16characters.(Alphanumeric:a‐z,A‐Z,0‐9,!,
@,#,$).
17. Entertheusernameadminandnewpasswordagaintostartsecuredsession.
18. TheLiveViewpageshowsupandthevideostartstostream.
Note:Ifyouwerenotgothroughthebasicsetup,thecameraplug‐and‐playprocess
willbeginafteryousetupthepassword.Waitafewminutesandpresscommand‐R
torefreshthebrowserforthelivevideo.

©Copyright2016TRENDnet.AllRightsReserved.
78
TRENDnetUser’sGuide
TV‐NVR216/TV‐NVR216D4
Basic
LiveView
Afteryoulog‐inintothecameramanagementpage,you’llseetheLiveViewpage.
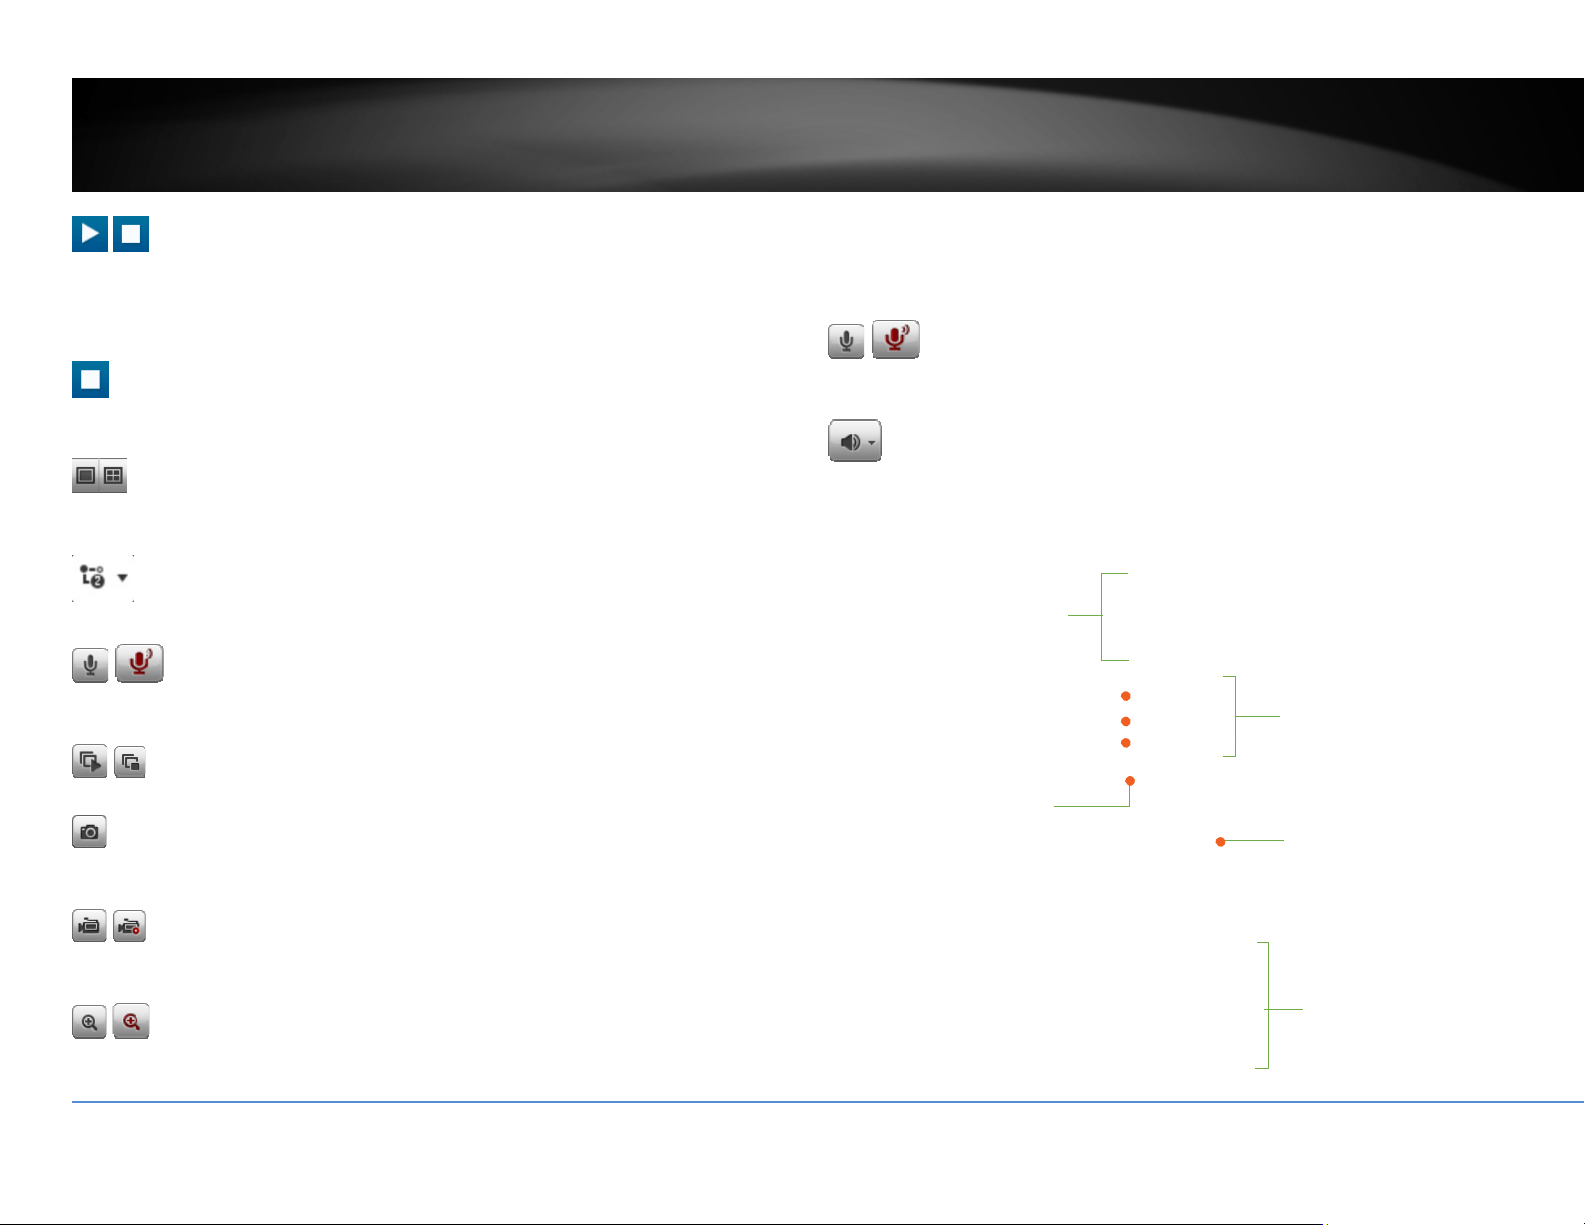
©Copyright2016TRENDnet.AllRightsReserved.
79
TRENDnetUser’sGuide
TV‐NVR216/TV‐NVR216D4
Start/StopStreaming
Clickthisbuttontostartorstopstreaming.Selectthedisplaycellbyclickonit,(The
yellowframewillwraparoundtheselecteddisplaycell.)thenclickontheiconof
thestreamyouwant.Ifthechannelhasbeenselectedbyothers,stopthat
streamingbeforeyouchange.
VideoStream
Clickthisbuttontochoosethevideostreambetweenmainstreamandsubstream.
1:mainstream;2:substream.
DisplayMode
Clickthisbuttontoselectthedisplaymodetodisplayasinglevideoonthescreen
ordisplayfourvideosonthescreenatthesametime.
StreamMode
Clickthisbuttontochangeviewingstreamfrommaintosubstreamorback.
Microphone
Selectthevideochannelandthenclickonthisbuttontostart/stoptalkingthrough
thecamera.
Start/StopAllStreams
Clickthisbuttontostartorstopallvideostreams.
Snapshot
Selectthevideoyouwanttotakeasnapshotandthenclickthisicontotakeavideo
snapshot.
Start/StopRecording
Selectthevideoyouwanttorecordandthenclickthisicontostartorstopvideo
recording.
Zoom
Selectsinglevideodisplayandthenclickoncetoenablezoom.Whenenabled,click
anddragtheareaonthepicturetozoomin.Rightclicktoresume100%zoom.Click
theiconagaintodisablezoom.Thezoomfunctionworksinfullscreenmodeas
well.
Microphone
Selectthevideochannelandthenclickonthisbuttontostart/stoptalkingthrough
thecamera.
Speaker
Selectthevideochannelandthenclickonthisbuttontostart/stoplisteningfrom
thecamera.Usetheslidebelowtoadjustthevolume.
Panandtilt
controls
Brightness
Contrast
Saturation
HUE
Speed
Zoom
Focus
Aperture(Iris)
Presets
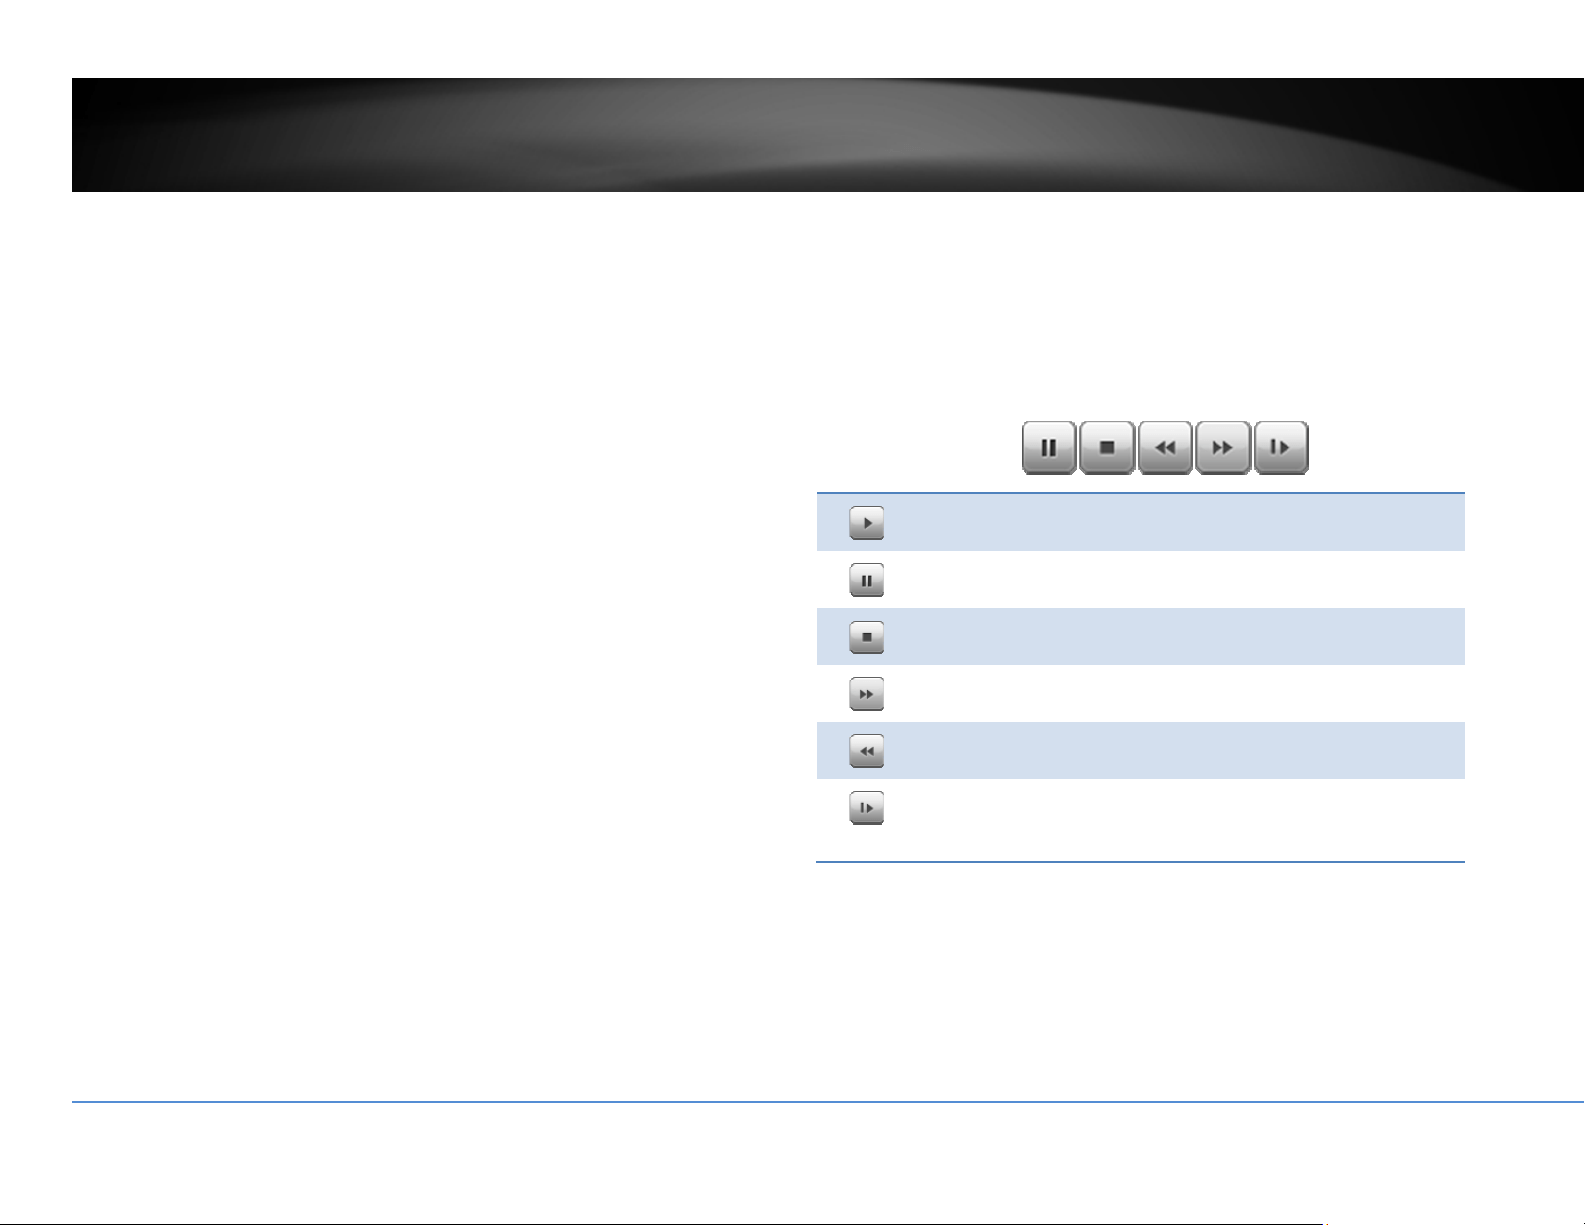
©Copyright2016TRENDnet.AllRightsReserved.
80
TRENDnetUser’sGuide
TV‐NVR216/TV‐NVR216D4
Playback
Youcanplaybackthevideorecordingoneatatimeatthispage.Youcanalso
downloadthevideoclipandsnapshotstoyourlocalcomputer.Selectthevideo
channelonthelefthandsideandthensearchforthevideo.
Searchforvideorecordings
Clickthedateselection,andthenchooseadateasthedaterangeofsearching.
ClickSearchtostartsearching.
TimeLine
Thereisaplaybackheadinthecenterofthetimelinerepresentedinayellow
verticalline.Tolookforaspecificvideorecording,movethetimelinebyclicking
anddraggingit.
Playvideo
Useplaybackcontrolstoplaybackthevideorecording.
Clickthisbuttontoplaythevideo.
Clickthisbuttontopausevideoplayback.
Clickthisbuttontostopplayback.
Clickthisbuttonincreaseplaybackspeed*.
Clickthisbuttondecreaseplaybackspeed*.
Clicktoplaybackvideoframebyframe.Clickagainfor
thenext
fr
ame
�
*Note:Thereare5stepsofplaybackspeedyoucanchoosefrom:1/4,1/2,1,2,and
4timesoforiginalspeed.

©Copyright2016TRENDnet.AllRightsReserved.
81
TRENDnetUser’sGuide
TV‐NVR216/TV‐NVR216D4
Sliceimagesfromvideoplayback
Youcantakesnapshotsfromplaybackvideoormakenewvideoclipsfromthe
videoyouareplayingback.
Clickthisbuttontostopvideoplaybackstreams.
Clickthisbuttontotakeasnapshotofcurrentplayback.
Clickthisbuttontostartclippingavideofromplayback.
Clickthisbuttonoranywhereonthetimelinetozoom
Clickthisbuttontodownloadthefiles.
Clickthisbuttontoenableordisabletheaudioplayback.
Clickthisbuttonforfullscreenplayback.
Downloadrecordedvideos
Tosavecompletevideosections,youcandownloadthefilesdirectly.
Clickselectedicontoopencamerarecordingdownloadpage
Checkthetimeoftherecording,selectthevideosyouwanttodownload,andthen
clickDownload.

©Copyright2016TRENDnet.AllRightsReserved.
82
TRENDnetUser’sGuide
TV‐NVR216/TV‐NVR216D4
Log
ThelogoftheTV‐NVR216issavingontheharddiskdrive.Youcansearchthe
relevantrecordsandsavetoyourlocalcomputer.
Searchforlogs
ClickthetypeoflogandthentheStartTimeandEndTime.ClickSearchtostart
searching.
ClickFirstPage,PrevPage,NextPage,andLastPagetoshowthelogs.ClickSave
Logtosavethelogstoyourcomputer.
SystemInformation
SystemInformationpageshowstheTV‐NVR216’sbasicinformation.ClickSystem
thenclickSystemInfotoshowthepage.
TheTV‐NVR216andTV‐NVR216D4willdisplayasTV‐NVR216undertheDevice
Namesection.TheTV‐NVR216D4includesa4TB.
BasicInformation
DeviceName: Humanreadabledevicenameforeasy
identification.
FirmwareVersion: Firmwareversion
MACAddress: TheMACaddressofEthernetInterface

©Copyright2016TRENDnet.AllRightsReserved.
83
TRENDnetUser’sGuide
TV‐NVR216/TV‐NVR216D4
SystemTime: Thesystemtimesetupinthecamera.Keepingthis
timecorrectisimportantforrecording,scheduled
controlandloggingaccurately.
NetworkInformation
IPAddress: IPaddressoftheTV‐NVR216
SubnetMask: NetworkrangeofIPaddress
DefaultGateway: ThedefaultroutegoingfromtheTV‐NVR216/TV‐
NVR216D4subnet.
PrimaryDNS: PrimaryDNSserveraddress
SecondaryDNS: SecondaryDNSserveraddress
Logout
LogoutpageallowsusertologouttheNVRwebconfigurationpagetotally.ClickOK
tologoutcompletelyorCanceltostayintheconfigurationpage.
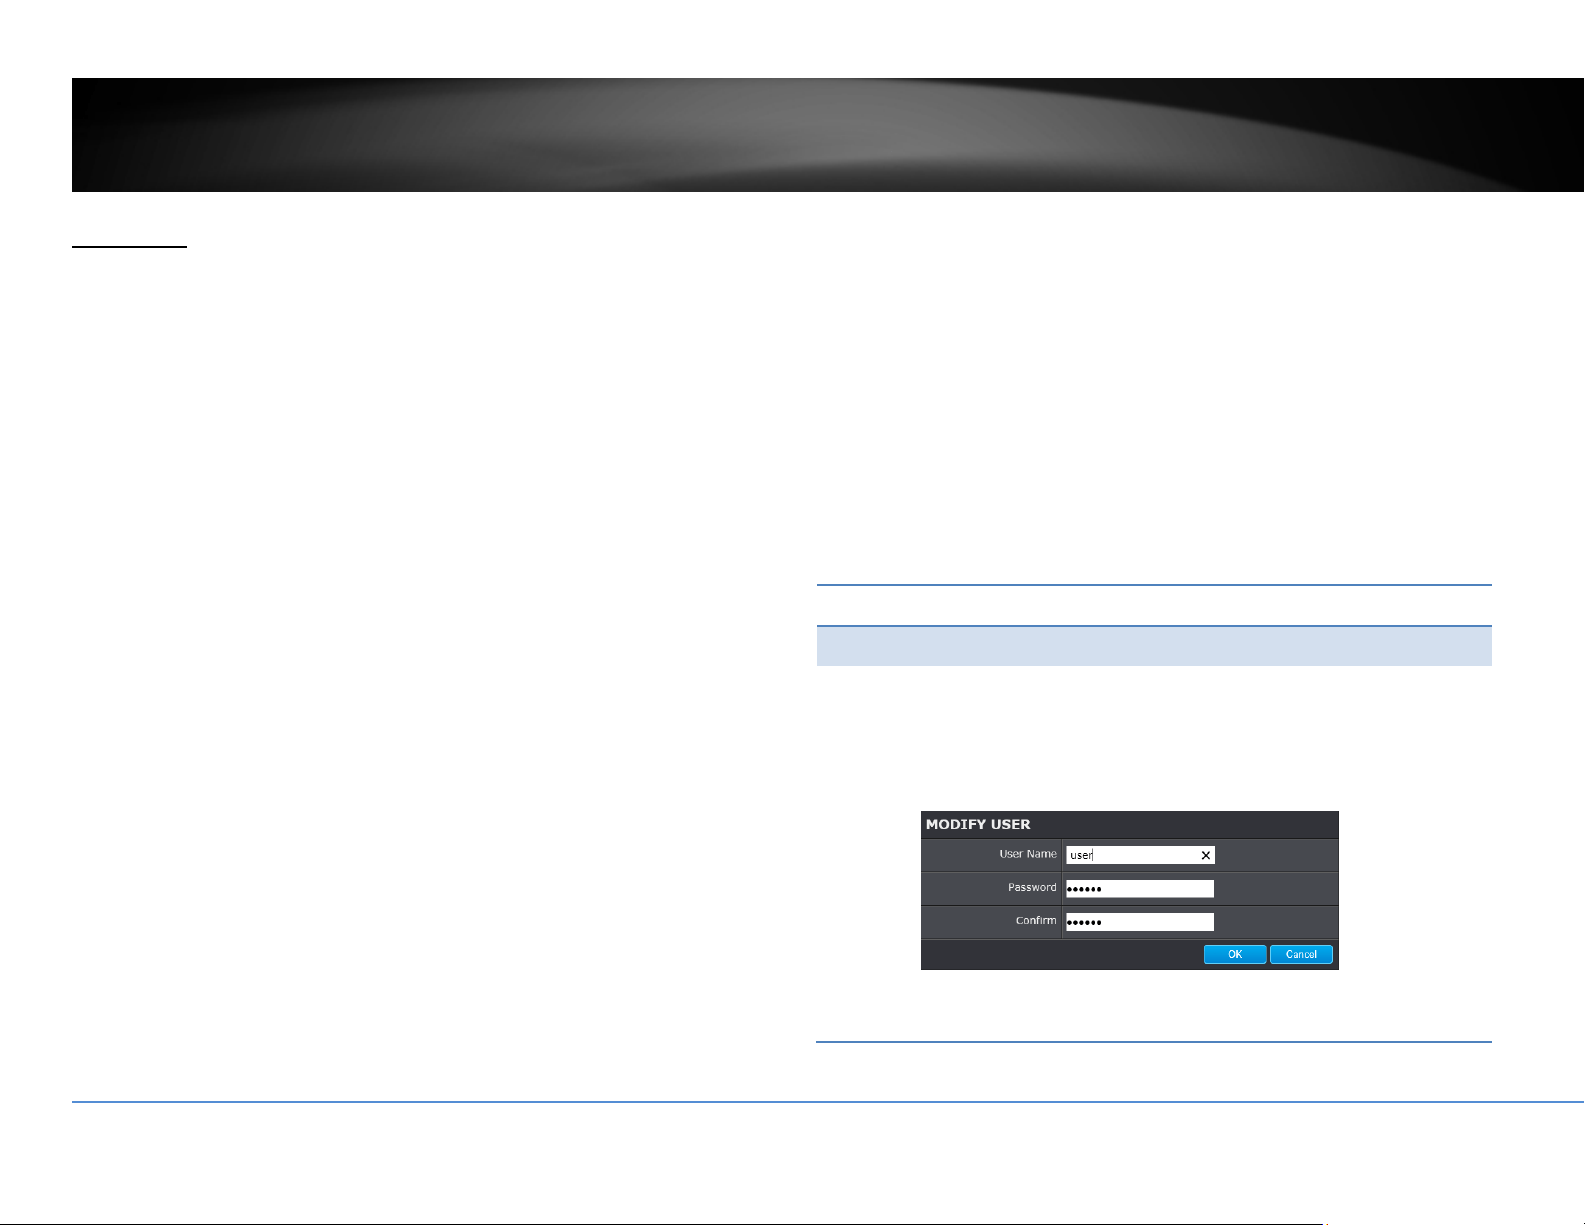
©Copyright2016TRENDnet.AllRightsReserved.
84
TRENDnetUser’sGuide
TV‐NVR216/TV‐NVR216D4
Advanced
System
DeviceSettings
Setupyoursystemnameforeasyidentification.Thisdevicenamewillalsobe
recognizedbyothernetworkcamerasoftwareasthenameofthiscamera.OSD,On
ScreenDisplay,cameranameisreferringtothissettingaswell.
EnterthecustomizeddevicenameandtheclickonSavetosavethesettings.
UserAccounts
Youcansetupupto16useraccountstoaccesstheNVR’svideostreamwithaweb
browserorrealtimevideostream(RTSP).Onlyoneadministratoraccountcanbe
setuptoconfiguretheNV
Randcannotbedeleted.
UserAccounts
Add: ClickAddbuttontoaddoneuseraccount
Modify: Tochangeauser’snameandpassword,highlighttheuserby
clickingonit.Then,clickModifybutton.Youcanchangethe
user’snameandpassword.Youcanalsochangethe
administrator’spasswordhere.But,theadministrator’sname
isfixed,youcannotchangethat.
ClickOKtosavethechanges.

©Copyright2016TRENDnet.AllRightsReserved.
85
TRENDnetUser’sGuide
TV‐NVR216/TV‐NVR216D4
TimeSettings
Theaccuracyofthesystemclockisimportantforschedulingandaccuratelogging.
Youcansynchronizethesystemtimewithyourcomputer,orautomaticallycheck
thetimeaccuracywithanetworktimeserver(NTPserver).
AutomaticUpdate
NTP
Server:
Specifyatimeserver(NTPserver)tosynchronizewith.
(e.g.pool.ntp.org)
Interval: ThetimeintervalthattheNVRwillsynchronizethetimewith
NTPserver.Default:1440minutes(24hours)
ClickSavetosavethechanges
ManualTimeSync
DeviceTime: Thesystemtimeofthiscamera.
SetTime: Clickthecalendariconandmanuallyselectthedate.
ChecktheSync.withcomputertimetocopythetime
fromyourcomputer.
ClickSavetosavethechanges

©Copyright2016TRENDnet.AllRightsReserved.
86
TRENDnetUser’sGuide
TV‐NVR216/TV‐NVR216D4
DaylightSavings
Setupdaylightsavings.
AutomaticUpdate
EnableDST: Checkthisboxifyourtimezonehasdaylightsavings.
StartTime: Enterthedatethatdaylightsavingsstarts
EndTime: Enterthedatethatdaylightsavingsends
DSTBias Enterhowmuchtimethedaylightsavingadjustedby
daylightsavings.
ClickSavetosavethechanges
LiveViewSettings
Setuptheliveviewvideoquality,filesizeandfilesavingdirectories.
LiveViewParameters
LiveView
Buffer:
Configurethebuffersizeforliveviewvideostream.
Withlowbuffersizesetting,youcangetreal‐timevideo
stream,butthevideomaybestopandgoifthenetwork
iscongested.Withhighbuffersetting,youcanhave
smoothvideostreaming,butthevideoisdelayedfrom
thetimehappening.Mediumsizecanhavemoderate
videostreamsmoothnessandtimedelay.

©Copyright2016TRENDnet.AllRightsReserved.
87
TRENDnetUser’sGuide
TV‐NVR216/TV‐NVR216D4
RecordFileSettings
Recordfilesize: Thissizeofliveviewvideorecording.Youcanchoose
256MB,512MB,or1GBafile.Smallerfilesizeisgood
formanyshortrecordings.
Saverecord
filesto:
Bydefault,fileswillbesavedunderthefolderwith
yourusername,underthesubdirectory
TRENDnet/RecordFiles.ClickBrowseandthenchoose
anewdestinationifyouwanttosavethefile
somewhereelse.
Save
downloaded
filesto:
Bydefault,fileswillbesavedunderthefolderwith
yourusername,underthesubdirectory
TRENDnet/DownloadFiles.ClickBrowseandthen
chooseanewdestinationifyouwanttosavethefile
somewhereelse.
PictureandClipSettings
Savesnapshots
in
liveviewto:
Bydefault,fileswillbesavedunderthefolderwith
yourusername,underthesubdirectory
TRENDnet/SnapshotFiles.ClickBrowseandthen
chooseanewdestinationifyouwanttosavethefile
somewhereelse.
Savesnapshots
whenplayback
to:
Bydefault,fileswillbesavedunderthefolderwith
yourusername,underthesubdirectory
TRENDnet/PlaybackPics.ClickBrowseandthen
chooseanewdestinationifyouwanttosavethefile
somewhereelse.
Saveclipsto: Bydefault,fileswillbesavedunderthefolderwith
yourusername,underthesubdirectory
TRENDnet/PlaybackFiles.ClickBrowseandthen
chooseanewdestinationifyouwanttosavethefile
somewhereelse.
ClickSavetosavethechanges
Maintenance
Youcanrestart,loadcamerasettingsandupgradethecamerafirmwareonthis
page.

©Copyright2016TRENDnet.AllRightsReserved.
88
TRENDnetUser’sGuide
TV‐NVR216/TV‐NVR216D4
Reboot
Reboot: Clickthisbuttontorebootthiscamera.
Reset
Reset: ResetallNVRsettings,excepttheIPnetworksettings
anduserinformation.
Default: Loadcompletefactorydefaulttothecamera.
ImportConfig.File
ConfigFile: Toloadpreviouslysavedsettings,clickBrowsetofind
theconfigurationfileandthenclickImport.
Status: Showsthestatusinloadingconfigurationfile.
ExportConfig.File
Export: ClickExporttodownloadconfigurationfile.Thefilewill
bedownloadedtotheDownloadfolderbydefault.
RemoteUpgrade
Firmware: ClickBrowsetofindthelatestfirmwareandthenclick
Upgrade.
Status: Showsthestatusinfirmwareupgrade.
TRENDnetmayperiodicallyreleasefirmwareupgradesthatmightaddfeaturesor
fixproblemsassociatedwithyourTRENDnetmodelandversion.Tofindoutifthere
isafirmwareupgradeavailableforyourdevice,pleasecheckyourTRENDnetmodel
andversionusingthelink.
http://www.trendnet.com/downloads/
1. If a firmware upgrade is available, do
wnload the firmware to your
computer.
2. Unzipthefiletoafolderonyourcomputer.
3. Read the firmware upgrade instruction for specific version update
information.
4. LogintotheTV‐NVR216.
5. GettingtothisMaintenancepagetoupgradefirmware.
CameraManagement
Youcanmodifycamerasettingshereonthi
spage.

©Copyright2016TRENDnet.AllRightsReserved.
89
TRENDnetUser’sGuide
TV‐NVR216/TV‐NVR216D4
Network
TCP/IP
SetupyourbasicIPv4andIPv6networksettingsonthispage.
NetworkInterface
Duplexand
Speed:
ChooseoneoftheEthernetduplexandspeedto
matchyournetwork.Default:auto.
MACAddress: Clickthisbuttontorebootthiscamera.
MTU: Maximumtransmissionunit.Themaximumfield
sizeintheEthernetpacket.
PrimaryDNS: EnteryourfirstIPv4orIPv6DNSserveraddress
SecondaryDNS: EnteryoursecondIPv4orIPv6DNSserveraddress
IPv4
DHCP: CheckthisboxiftheIPaddressisassignedbyDHCP
server.
IPv4Address: TheIPv4dynamicorstaticaddress
SubnetMask: Networkrangeofthesubnet
DefaultGateway: ThedefaultroutegoingfurtherfromTV‐IP320PI
IPv4subnet
IPv6
IPv6Address: IPv6self‐assignedaddressofTV‐NVR21 6
IPv6Default
Gateway:
ThedefaultroutegoingfurtherfromTV‐NVR216/TV‐
NVR216D4IPv6subnet

©Copyright2016TRENDnet.AllRightsReserved.
90
TRENDnetUser’sGuide
TV‐NVR216/TV‐NVR216D4
Port
YoucanchangetheserviceportnumbersofNVRandenable/disableRTSPorHTTP
services.
PortNumbers
HTTPPort: Thedefaultwebaccessport.Youcanchangethe
portnumber.However,youcannotdisabletheweb
service.Thedefaultportnumberis80.
RTSPPort: TheReal‐TimeStreamingProtocolportforvideo
streaming.Youcanchangetheportnumberor
disabletheservicebyuncheckthebox.Thedefault
portnumberis554.
ClickSavetosavethechanges
DDNS
DynamicDomainNameService,DDNS,allowsyoutofindyourcamerafromthe
Internetwithaneasytorememberdomainname.
DDNS
EnableDDNS: CheckthisboxtoenableDDNSService.
DDNSType: SelectaDDNSserviceprovider.
ServerAddress: EntertheDDNSserveraddress.
Domain: Enteryourregistereddomain/hostnameon
selectedDDNSservice.
UserName: Entertheaccountname.
Password: Enterthepassword.
Confirm: Enterthepasswordagain.
ClickSavetosavethechanges

©Copyright2016TRENDnet.AllRightsReserved.
91
TRENDnetUser’sGuide
TV‐NVR216/TV‐NVR216D4
VirtualHost
VirtualHostallowsyoutosetvirtualportsforeachcamera.
VirtualHost
EnableVirtual
Host:
CheckthisboxtoenableVirtualHost
Camera: Selectcameratoconfigure
VirtualHTTP
Port:
CreateavirtualHTTPportnumberforthecamera
VirtualRTSP
Port:
CreateavirtualRTSPportnumberforthecamera
VirtualHTTPS
Port:
CreateavirtualHTTPSportnumberforthecamera
VirtualServer
Port:
Createavirtualserverportnumberforthecamera
ClickSavetosavethechanges
Video
VideoFormat
Adjustthesettingsofvideostreams.
Channel:
Selectwhichvideostreamforvideoformat
changes.
StreamType:
Choosethemainstreamorsubstreamofthevideo
channeltochangeitsvideoformats.
VideoEncoding:
Choosethevideoencodingtype.H.264ismore
advancedselectionwhileMJPEGvideosis
compatibletomoreapplicationssuchasembedded
webvideo.
Resolution: Resolutionofthevideo stream.

©Copyright2016TRENDnet.AllRightsReserved.
92
TRENDnetUser’sGuide
TV‐NVR216/TV‐NVR216D4
BitrateType: Choosebetweenvariablebitrateandconstantbit
rateforvideocompression.Thedefaultisvariable
rate.
VideoQuality: Choosethevideoquality.Thedefaultismedium
quality.
FrameRate: Choosethecapturingframerate.Reducetheframe
ratetoreducethecapturefilesize.
Max.Bitrate: Choosethemaximumvideosamplingbitrate.
ClickSavetosavethechanges
OnScreenDisplaySettings
Displaythecameranameandthetimethevideo.Selectthevideochannelyouwant
tochangethesetting,thenchangethesettings.Movetheredboxtopositionthe
text.ClickonSavetosavethechanges.
Channel: Selectthevideochannelyouwanttoedit.
DisplayName: Checkthisboxtodisplaytheproduct namethat
wassetupinthedevicesettings.
DisplayDate: Checkthisboxtodisplaysystemtime.
DisplayWeek: Checkthis boxtodisplaytimeoftheweek.
TimeFormat: Select12or24‐hourtimeformat.
DateFormat: Selectthedateformat
DisplayMode: Choosehowthetextwillshowonthescreen.

©Copyright2016TRENDnet.AllRightsReserved.
93
TRENDnetUser’sGuide
TV‐NVR216/TV‐NVR216D4
TextOverlay
Displayextrainformationonthescreenovertheimage.Movetheredboxto
positionthetext.ClickonSavetosavethechanges.
Channel: Selectthevideochannelyouwanttoedit.
CheckBox: Checkthisboxtoenabletextoverlay.
TextField: Enterthetextyouwanttodisplay.Thelengthofthe
textisdecidedbylimitationofthecamera.
PrivacyMask
Createamaskingareatokeepyourprivacy.Youcancreateuptofourindependent
maskingareasbyclickinganddraggingonthescreen.
Channel: Selectthevideochannelyouwanttoedit.
EnablePrivacyMask: Checkthisboxtoenableprivacymasking.
StopDrawing: Clickthisbuttontostopdrawing.
ClearAll: Clickthisbuttontoclearallthemasking
areas.
ClickSavetosavethechanges

©Copyright2016TRENDnet.AllRightsReserved.
94
TRENDnetUser’sGuide
TV‐NVR216/TV‐NVR216D4
VideoRecording
Channel: Selectthevideochannelyouwanttoedit.
EnableRecord
Schedule:
CheckthisboxandthenclickSavetoenablevideo
recording.
Pre‐record: Recordingtimebeforetriggerevent.
Post‐record: Recordingtimeaftertriggerevent.
Overwrite: SelectYestoallowolderrecordingstobe
overwritten.
RecordAudio: Recordaudiowhenthecamerahasaudio
capability.
ExpireTime: Specifyhowmanydaysyo uwant tolockthe
recording.
ClickSavetosavethechanges
Edit: ClickEdittoedittherecordingschedule.TheEdit
Schedulewindowwillpopup.
1. Selectdayoftheweekyouwanttoedit.
2. SelectAllDayorCustomizedscheduleof
theday.
3. Setthetimeperiodandtheeventyou
wanttotriggerthevideorecording
continuous(alwaysrecording)ormotion
detection.
4. ClickSelectAllortheweekdayyouwant
tohavethesamescheduleondifferent
day.
5. Clickanotherdayoftheweekbyclicking
onitstabtosetthenextschedule.Click
OKwhenyouhavefinishedyoursettings.

©Copyright2016TRENDnet.AllRightsReserved.
95
TRENDnetUser’sGuide
TV‐NVR216/TV‐NVR216D4
HolidaySettings
Recordingvideoinholidaysmayhasdifferentrequirements.Youcansetupto11
holidaysofayearsharingthesameholidayprofile.
Setuptheholidayschedulebyclickon
button.
EditHolidaySchedule
HolidayName: Changetheholidaynametomeaningfulname
insteadofindexnumbers.
Enable: Enableordisablethisholidayrule.
Type: Selecttheholidayisforaday,aweekoramonth.
Daymode:Selectthestartandenddatestospecify
theperiodofholidays.Thissettingisgoodforone
timeonly.Itdoesnotrepeatperiodically.
Weekmode:Selectthestartandenddatesofthe
weektospecifytheperiodofholidays.Thissetting
isrepeatingeveryyear.
Monthmode:Selectthestartandenddatesto
specifytheperiodofholidays.Thissettingis
repeatingeveryyear.
StartDate: Selectthedaywhen theholidaystarts.
EndDate: Selectthedaywhentheholidayends.
ClickOKtosavethechanges

©Copyright2016TRENDnet.AllRightsReserved.
96
TRENDnetUser’sGuide
TV‐NVR216/TV‐NVR216D4
Events
MotionDetection
Setuphowthemotiondetectioneventwillbetriggeredandwhatactionswillbe
triggered.
Note:Thisfeatureiscameradependent.
Camera: Selectthecamerayouwanttoconfigure
Enable Checkthisboxtoenablemotiondetection.Click
Motion
Detection:
Savetosavethechoice.
DrawArea: ClickDrawAreabuttontostartdrawing.Clickand
dragontheareayouwanttosetupthemotion
detection.Thenumberofareasyoucansetup
dependsoncameramodels.ClickStopDrawingto
stopdrawingmotiondetectionareas.
Theredgridsrepresentthemotiondetectionarea,
bydefault,theentireareaisselected.ClickClearAll
toerasetheareatorestart.
Sensitivity: Movetheslidertoadjustdetectionsensitivity.
ClearAll: Clickthisbuttontoclearallthesetupareas.

©Copyright2016TRENDnet.AllRightsReserved.
97
TRENDnetUser’sGuide
TV‐NVR216/TV‐NVR216D4
ArmingSchedule
Edit: ClickEdittoedittherecordingschedule.The Edit
Schedulewindowwillpopup.
3. Selectdayoftheweekyouwanttoedit.
4. SelectAllDayorCustomizedscheduleofthe
day.
5. Setthetimeperiodandtheeventyouwant
totriggerthevideorecordingcontinuous
(alwaysrecording)ormotiondetection.
6. ClickSelectAllortheweekdayyouwantto
havethesamescheduleondifferentday.
7. Clickanotherdayoftheweekbyclickingon
itstabtosetthenextschedule.Click OK
whenyouhavefinishedyoursettings.
LinkageMethod
Alarmisnotsupportedforthismodel.
ClickSavetosavethechanges

©Copyright2016TRENDnet.AllRightsReserved.
98
TRENDnetUser’sGuide
TV‐NVR216/TV‐NVR216D4
VideoTampering
Setuphowthevideotamperingdetectioneventwillbetriggeredandwhatactions
willbetriggered.Whenvideoissuddenlyblockedorblacken,tampered,thevideo
tampernotificationswillalertthesystemmanagertocheckthecamera.
Note:Thisfeatureiscameradependent.
Camera: Selectthecamerayouwanttoedit.
Enable
Tamper
Detection:
Checkthisboxtoenabletamperdetection.ClickSave
tosavethesettings.
DrawArea: ClickDrawAreabuttontostartdrawing.Clickand
dragontheareayouwanttosetupthetamper
detection.ClickStopDrawingtostopdrawingmotion
detectionareas.Thegrayblockrepresentsthe
detectionarea.
Sensitivity: Movetheslidertoadjustdetectionsensitivity.
ClearAll: Clickthisbuttontoclearallthesetupareas.
ArmingSchedule
Edit: ClickEdittoedittherecordingschedule.The Edit
Schedulewindowwillpopup.
1. Selectdayoftheweekyouwanttoedit.
2. SelectAllDayorCustomizedscheduleofthe
day.
3. Setthetimeperiodandtheeventyouwant
totriggerthevideorecordingcontinuous
(alwaysrecording)ormotiondetection.

©Copyright2016TRENDnet.AllRightsReserved.
99
TRENDnetUser’sGuide
TV‐NVR216/TV‐NVR216D4
4. ClickSelectAllortheweekdayyouwantto
havethesamescheduleondifferentday.
5. Clickanotherdayoftheweekbyclickingon
itstabtosetthenextschedule.Click OK
whenyouhavefinishedyoursettings.
LinkageMethod
FullScreen
Monitoring:
SwitchthevideoontheVGA/HDMImonitortothe
cameradetectedmotionevent.
Audible
Warning:
Activatetheaudibleonboardbuzzer.
SendEmail: Sendemailtonotifythesystemmanage r.
ClickSavetosavethechanges
Exception
Providenotificationsforothersystemevents,setupyournotificationshere.
Notification
ExceptionType: First,choosetheexceptiontype,andthenchoose
thecorrespondingaction.
Audible
Warning:
Activatetheaudibleonboardbuzzer.
SendEmail: Checkthisboxtosendane‐mailnotificationwhen
motionisdetected.
ClickSavetosavethechanges

©Copyright2016TRENDnet.AllRightsReserved.
100
TRENDnetUser’sGuide
TV‐NVR216/TV‐NVR216D4
Email
Setupemailaccountsfornotifications.
Sender
Sender: Enterthenametobeappearedastheemailsender.
Sender’s
Address:
Entersender’semailaddress.
SMTPServer: SimpleMailTransportationProtocolServeraddress,
theoutgoingemailserveraddress.Itmaybehas
addressasyourincomingemailserver,maybenot.
Pleaseaskyouremailserviceproviderfordetail.
SMTPPort: Serviceportnumberforoutgoingemail.*
Authentication: Checkthisboxifyourserverrequiresapasswordin
ordertosendemail.Mostemailserversrequire
authenticationwhensendinganemail.
Username: Entertheusernameofoutgoingemailaccount
Password: Enterthepassword
Confirm: Enterthepasswordagaintoconfirmthatthe
passwordwasenteredcorrectly.
ClickSavetosavethechanges
Receiver
Receiver1: Thefirstreceiver’sname.
Receiver1’s
Address:
Thefirstreceiver’semailaddress.
Receiver2: Thesecondreceiver’sname.
Receiver2’s
Address:
Thesecondreceiver’semailaddress.
Receiver3: Thethirdreceiver’sname.
Receiver3’s
Address:
Thethirdreceiver’semailaddress.
ClickSavetosavethechanges
*Note: Many ISPs does not allow service port 25 going through their network.
Please consult your email service provider and ISP for detail. TV‐NVR216 / TV‐
NVR216D4doesnotsupportSSLorTLS.Pleaseselecttherightemailserviceforthe
notifications.

©Copyright2016TRENDnet.AllRightsReserved.
101
TRENDnetUser’sGuide
TV‐NVR216/TV‐NVR216D4
StorageSettings
StorageManagement
Tosetupandinitiatetheharddriveremotely,checktheharddiskdriveandthen
clickonFormat.
Format: SelectthestoragevolumeandthenclickFormattoformat
yourharddiskdrive.Thisactionwillformatthevolumefor
videorecording.Placeholderfiles(formattingfiles)will be
createdtomakesurediskallocationisappropriateandthe
filesearchingisoptimized.
Capacity: Thetotalcapacityoftheharddiskcanbeusedforvideo
recordingandlog.
FreeSpace: Thefreespaceleftforvideorecordingandlog.
Status: Thediskstatus.
Property: Thisnetworkstorageisreadonlyorcanbereadandwrite.
NetworkStorage
Network Storage must be setup before it can be managed. You can add up to 8
networkstoragesforyourNVR.Therecordingswillsubsequentlybestoredinthese
spaces.Savevideofromthefirststorageandthenthenextwhenthefirstoneisfull.
Clickontheentrytoch
angethesettingsandclickSavetosavethesettings.
Server
Address:
EntertheIPaddressofyournetworkstorage.
FilePath: Enterthesharedfolderasfilepathfornetworkstorage.
Youcancreateafolderunderthesharedfolderandmake
itanetworkvolumehere.Justcreatethefolderandenter
thecorrectpathnamehere.
Type: ChoosebetweenNASorIPSANforstorageType.
Delete: Clickthedeletextoremovethestoragesettings.

©Copyright2016TRENDnet.AllRightsReserved.
102
TRENDnetUser’sGuide
TV‐NVR216/TV‐NVR216D4
Appendix
TurnonnetworkdiscoveryonWindows
TheNVRisUPnPenableddevice.FindyourcameraiseasywithWindowsnetwork
discovery.Ifyournetworkdiscoveryisturnedoff,gotoControlPanel>>Network
andInternet>>NetworkandSharingCenter>>Advancedsharingsettingsand
thenselectTurnonnetworkdiscovery.ClickSavechangestosavethech
anges.If
youstillhavedifficultytofindyourcamerawithnetworkdiscovery,checkitoutifit
hastonetworkdiscoverysettingonothernetworkprofiles.
Directvideoaccess‐RTSP
ToaccessthevideodirectlythroughRTSP,justvisitthecameraIPaddressonport
554bydefault.
ToaccessthevideothroughNVR,youneedtoentertheIPaddress,portnumber
andleadingpath“/Streaming/Channels”thenspecifythechannelnumber.The
channelnumberis2digitsleadingwithzero.Forexample
:
rtsp://192.168.10.60:554/Streaming/Channels/01toviewthechannel1videoon
NVRwhichlocatedon192.168.10.60.
InstallyourNVRSystemonYourNetwork
ToenableremotenetworkaccesstotheNVR,youneedtoinstallyourNVRonto
yournetwork.MakesureyourNVRsystemisworkingonthesamenetwork
segmentyourrouterdefined.ReserveapoolofIPaddressesforNVRandall
cameras.YoucanthenaccessyourNVRandnetworkcame
raseverywhereoverthe
network.
TheotheroptiontosetuptheNVRandcamerasonyournetworkisusingDHCP.The
NVRDHCPclientisdefaultdisabled.YoucanenableDHCPclientmanually.
1. Goto GeneralNetworkSettingsto enabletheNVR getting itsIP address from
yourrouterDHCP.
2. Rebootyo
urNVR.
3. PluginthePoEcamerastothePoEports.
4. AllthecamerasaregettingtheassignedIPaddressfromyourrouter.
5. For plug‐and‐play cameras, such as TV‐IP314PI, installed directly on the PoE
port,theNVRproceedfollowingsettingsoncameratoaddonthesecurity.
The camera wi
ll be assigned with an IP assigned by your router and then
theaddressbecomesstaticIPonthecamera.Youcanwritedown theIP
address for remote access or advancedport forwardingsettings onyour
router. Please make the assigned IP rese
rved, so your router will not
accidentallyassignthesameaddresstootherofyournetworkdevices.
Ifthecamerahasitsdefaultsetting,thepasswordwillbesettothesame
passwordyousettotheNVR.

©Copyright2016TRENDnet.AllRightsReserved.
103
TRENDnetUser’sGuide
TV‐NVR216/TV‐NVR216D4
Youcanvisitthecamerawiththenewpresetpassword.(Formorecamera
passwordmanagement,pleaseseeCameraConnectionSettingsonpage
22formoredetails.)
CompatibleCameraList
MostofTRENDnetandONVIFcamerasarecompatiblewithNVR.Forthebest
performanceandinteroperability,thefollowingcameramodelsaresuggested:
Model Protocol Default
Port
Basic
PTZ
Adv.
PTZ
Audio
TV‐IP302PI ONVIF 80 NA NA NA
TV‐IP310PI TRENDnet3 8000 NA NA NA
TV‐IP311PI TRENDnet3 8000 NA NA NA
TV‐IP314PI TRENDnet3 8000 NA NA NA
TV‐IP315PI TRENDnet3 8000 NA NA NA
TV‐IP320PI TRENDnet3 8000 NA NA NA
TV‐IP320PI2K TRENDnet3 8000 NA NA NA
TV‐IP321PI TRENDnet3 8000 NA NA NA
TV‐IP322WI TRENDnet3 8000 NA NA NA
TV‐IP342PI ONVIF 80 NA NA Yes
TV‐IP343PI ONVIF 80 NA NA Yes
TV‐IP430PI* TRENDnet3 8000 Yes Yes Yes
TV‐IP450P* TRENDnet3 8000 Yes Yes Yes
TV‐IP450PI* TRENDnet3 8000 Yes Yes Yes
TV‐IP420P TRENDnet3 8000 NA NA Yes
TV‐IP344PI ONVIF
80 NA NA Yes
TV‐IP345PI ONVIF 80 Yes NA Yes
* TV‐IP430PI and TV‐IP450P cameras require 802.3at PoE+ power supply. TV‐
IP450PI camera require proprietary PoE power supply. Please supply the power
separatelyinsteadofdragging power fromthe TV‐NVR216. Dragging PoE power
supplyoverthebudget(35W)maycausethesystembreakdown.

©Copyright2016TRENDnet.AllRightsReserved.
104
TRENDnetUser’sGuide
TV‐NVR216/TV‐NVR216D4
Regulations
FederalCommuni cationCommissionInterferenceStatement
ThisequipmenthasbeentestedandfoundtocomplywiththelimitsforaClassB
digitaldevice,pursuanttoPart15oftheFCCRules.Theselimitsaredesignedto
providereasonableprotectionagainstharmfulinterferenceinaresidential
installation.Thisequipmentgeneratesusesandcanradiateradiofrequencyenergy
and,ifnotinstalledanduse
dinaccordancewiththeinstructions,maycause
harmfulinterferencetoradiocommunications.However,thereisnoguaranteethat
interferencewillnotoccurinaparticularinstallation.Ifthisequipmentdoescause
harmfulinterferencetoradioortelevisionreception,whichcanbedeterminedby
turningthee
quipmentoffandon,theuserisencouragedtotrytocorrectthe
interferencebyoneofthefollowingmeasures:
• Reorientorrelocatethereceivingantenna.
• Increasetheseparationbetweentheequipmentandreceiver.
• Connect the equipment into an outlet on a circuit different from that to
whichthere
ceiverisconnected.
• Consultthedealeroranexperiencedradio/TVtechnicianforhelp.
FCCCaution:Anychangesormodificationsnotexpresslyapprovedbytheparty
responsibleforcompliancecouldvoidtheuser’sauthoritytooperatethis
equipment.
ThisdevicecomplieswithPart15oftheFCCRules.Operationissubjecttothe
followingtwoconditions:(1
)Thisdevicemaynotcauseharmfulinterference,and
(2)thisdevicemustacceptanyinterferencereceived,includinginterferencethat
maycauseundesiredoperation.
IMPORTANTNOTE:
FCCRadiationExposureStatement
ThisequipmentcomplieswithFCCradiationexposurelimitssetforthforan
unc
ontrolledenvironment.Thisequipmentshouldbeinstalledandoperatedwith
minimumdistance20cmbetweentheradiator&yourbody.
Thistransmittermustnotbeco‐locatedoroperatinginconjunctionwithanyother
antennaortransmitter.
Theavailabilityofsomespecificchannelsand/oroperationalfrequencybandsare
countrydependentandarefi
rmwareprogrammedatthefactorytomatchthe
intendeddestination.Thefirmwaresettingisnotaccessiblebytheenduser.

©Copyright2016TRENDnet.AllRightsReserved.
TRENDnetUser’sGuide
TEW‐821DAP
105
Europe–EUDeclarationofConformity
TRENDnetherebydeclarethattheproductisincompliancewiththeessential
requirementsandotherrelevantprovisionsunderoursoleresponsibility.
Safety
EN60950‐1:2006+A11:2009:+A1:2010+A12:2011+A2:2013
EMC
EN55022:2010ClassB
EN50130‐4:2011
EN6100‐3‐2:2006+A1:2009+A2:2009
EN61000‐3‐3:20008
ThisproductisherewithconfirmedtocomplywiththeDire
ctives.
Directives
LVDDirective2006/95/EC
EMCDirective2004/108/EC
RoHSDirective2011/65/EU
WEEEDirective2012/19/EU
REACHRegulation(EC)No.1907/2006
Česky[Czech] TRENDnettímtoprohlašuje,žetentoTV‐NVR216/TV‐NVR216D4jeve
shoděsezákladnímipožadavkyadalšímipříslušnýmiustanoveními
směrnice2004/108/ES,2006/95/ESa2009/125/ES.
Dansk[Danish] UndertegnedeTRENDneterklærer herved,atfølgendeudstyrTV‐
NVR216/TV‐NVR216D4overholderdevæsentligekravogøvrige
relevantekravidirektiv20 04/108/EF,2006/95/EFog2009/125/EF.
Deutsch[German] Hiermiterklär tTRENDnet,dasssichdasGerätTV‐NVR216/TV‐
NVR216D4inÜbereinstimmungmitdengrundlegenden
AnforderungenunddenübrigeneinschlägigenBestimmungender
Richtlinie2004/108/EG,2006/95/EGund2009/125/EGbefindet.
Eesti[Estonian] KäesolevagakinnitabTRENDnetseadmeTV‐NVR216/TV‐NVR216D4
vastavustdirektiivi2004/108/EÜ,2006/95/EÜja2009/125/EÜ
põhinõuetelejanimetatuddirektiivisttulenevateleteistele
asjakohastelesätetele.
English Hereby,TRENDnet,declaresthatthisTV‐NVR216/TV‐NVR216D4isin
compliancewiththeessentialrequirementsandotherrelevant
provisionsof Directiv e2004/108/CE2006/95/CE,and2009/125/CE.
Español[Spanish] PormediodelapresenteTRENDnetdeclaraqueelTV‐NVR216/TV‐
NVR216D4cumpleconlosrequisitosesencialesycualesquieraotra s
disposicionesaplicablesoexigiblesdelaDirectiva2004/108/CE,
2006/95/CEy2009/125/CE.
Ελληνική[Greek] ΜΕΤΗΝΠΑΡΟΥΣΑTRENDnetΔΗΛΩΝΕΙΟΤΙTV‐NVR216/TV‐
NVR216D4ΣΥΜΜΟΡΦΩΝΕΤΑΙΠΡΟΣΤΙΣΟΥΣΙΩΔΕΙΣΑΠΑΙΤΗΣΕΙΣΚΑΙ
ΤΙΣΛΟΙΠΕΣΣΧΕΤΙΚΕΣΔΙΑΤΑΞΕΙΣΤΗΣΟΔΗΓΙΑΣ2004/108/EK ,
2006/95/EK,2009/12 5/ΕΚκαι.
Français[French] ParlaprésenteTR EN Dnetdéclarequel'appareilTV‐NVR216/TV‐
NVR216D4estconformeauxexigencesessentiellesetauxautres
dispositionspertinentesdeladirective2004/108/CE,2006/95/CEet
2009/125/CE.
Italiano[Italian] ConlapresenteTRENDnetdichiara chequestoTV‐NVR216/TV‐
NVR216D4èconformeairequisitiessenzialiedallealtredisposizioni
pertinentistabilitedalladirettiva2004/108/CE,2006/95/CEe
2009/125/CE.
Latviski[Latvian] AršoTRENDnetdeklarē,kaTV‐NVR216/TV‐NVR216D4
atbilstDirektīvas2004/108/EK,2006/95/EKun2009/125/EK
būtiskajāmprasībāmuncitiemartosaistītajiemnoteikumiem.
Lietuvių
[Lithuanian]
ŠiuoTREN Dnetdeklar uoja,kadšisTV‐NVR216/TV‐NVR216D4atitinka
esminiusreikalavimusirkit a s2004/108/EB,2006/95/EBir
2009/125/EBDirektyvosnuostatas.
Nederlands
[Dutch]
HierbijverklaartTRENDnetdathettoestelTV‐NVR216/TV‐NVR216D4
inovereenstemmingismetdeessentiëleeisenendeandererelevante
bepalingenvanrichtlijn2004/108/EG,2006/95/EGen2009/125/EG.

©Copyright2016TRENDnet.AllRightsReserved.
TRENDnetUser’sGuide
TEW‐821DAP
106
Malti[Maltese] Hawnhekk,TRENDnet,jiddikjara lidanTV‐NVR216/TV‐NVR216D4
jikkonformamal‐ħtiġijietessenzjaliumaprovvedimentioħrajn
relevantilihemmfid‐Dirrettiva2004/108/KE,2006/95/KEu
2009/125/KE.
Magyar
[Hungarian]
Alulírott,TRENDnetnyilatkozom,hogyaTV‐NVR216/TV‐NVR216D4
megfelelavonatkozóalapvetõkövetelményeknekésaz2 0 04/ 1 08/EK,
2006/95/EKésa2009/125/EKirányelvegyébelõírásainak.
Polski[Polish] NiniejszymTRENDnetoświadcza,żeTV‐NVR216/TV‐NVR216D4jest
zgodnyzzasadniczymiwymogamiorazpozostałymistosownymi
postanowieniamiDyrektywy2004 /108/WE,2006/95/WEi
2009/125/WE.
Português
[Portuguese]
TRENDnetdeclaraqueesteTV‐NVR216/TV‐NVR216D4estáconforme
comosrequisitosessenciaiseoutrasdisposiçõesda
Directiva2004/108/CE,2006/95/CEe2009/125/CE.
Slovensko
[Slovenian]
TRENDnetizjavlja,dajetaTV‐NVR216/TV‐NVR216D4vskladuz
bistvenimizah tevamiinostalimirelevantnimidolo čili
direktive2004/108/ES,2006/95/ESin2009/125/ES.
Slovensky[Slovak] TRENDnettýmtovyhlasuje,žeTV‐NVR216/TV‐NVR216D4
spĺňazákladnépožiadavkyavšetkypríslušnéustanoveniaSmernice
2004/108/ES,2006/95/ESa2009/125/ES.
Suomi[Finnish] TRENDnetvakuuttaatätenettäTV‐NVR216/TV‐NVR216D4tyyppinen
laiteondirektiivin2004/108/EY,2006/95/EYja2009/125/EY
oleellistenvaatimustenjasitäkoskeviendirektiivinmuidenehtojen
mukainen.
Svenska[Swedish] HärmedintygarTRENDnetattdennaTV‐NVR216/TV‐NVR216D4stårI
överensstämmelsemeddeväsentligaegenskapskravochövriga
relevantabestämmelsersomframgåravdirektiv2004/108/EG,
2006/95/EGoch2009/125/EG.
RoHS
ThisproductisRoHScompliant.

©Copyright2016TRENDnet.AllRightsReserved.
TRENDnetUser’sGuide
TEW‐821DAP
107
LimitedWarranty
TRENDnet warrants its products against defects in material and workmanship, under
normaluseandservice,forthefollowinglengthsoftimefromthedateofpurchase.
TV‐NVR216–2YearsWarranty
AC/DCPowerAdapter,CoolingFan,andPowerSupplycarry1yearwarranty.
HardDrivecarry1yearmanufacturerwarranty.
If a pro
duct does not operate as warranted during the applicable warranty period,
TRENDnet shall reserve the right, at its expense, to repair or replace the defective
product or part and deliver an equivalent product or part to the customer. The
repair/replacement unit’s warranty continues from the original date of purchase. All
produ
cts that are replaced become the property of TRENDnet. Replacement products
may be new or reconditioned. TRENDnet does not issue refunds or credit. Please
contactthepoint‐of‐purchasefortheirreturnpolicies.
TRENDnetshallnotberesponsibleforanysoftware,firmware,information,ormemory
data of customercontained in, stored on
, or integrated with any productsreturned to
TRENDnetpursuanttoanywarranty.
There are no user serviceable parts inside the product.Do not remove or attempt to
servicetheproductbyanyunauthorizedservicecenter.Thiswarrantyisvoidedif(i)the
product has been modified or repaired by an
y unauthorized service center, (ii) the
productwassubjecttoaccident,abuse,orimproperuse(iii)theproductwassubjectto
conditionsmoreseverethanthosespecifiedinthemanual.
Warranty service may be obtained by contacting TRENDnet within the applicable
warrantyperiodandprovidingacopyofthedated proofofthepu
rchase.Uponproper
submission ofrequired documentation aReturn MaterialAuthorization (RMA)number
willbeissued.AnRMAnumberisrequiredinordertoinitiatewarrantyservicesupport
for all TRENDnet products. Products that are sent to TRENDnet for RMA service must
havetheRMAnumbermarkedontheoutsi
deofreturnpackagesandsenttoTRENDnet
prepaid, insured and packaged appropriately for safe shipment. Customers shipping
fromoutsideoftheUSAandCanadaareresponsibleforreturnshippingfees.Customers
shippingfromoutsideoftheUSAareresponsibleforcustomcharges,includingbutnot
limitedto,dut
y,tax,andotherfees.
WARRANTIES EXCLUSIVE: IF THE TRENDNET PRODUCT DOES NOT OPERATE AS WARRANTED
ABOVE,THECUSTOMER’SSOLEREMEDYSHALLBE,ATTRENDNET’SOPTION,REPAIRORREPLACE.
THE FOREGOING WARRANTIES AND REMEDIES ARE EXCLUSIVE AND ARE IN LIEU OF ALL OTHER
WARRANTIES, EXPRESSED OR IMPLIED, EITHER IN FACT OR BY OPERATION OF LAW, STATUTORY
OR OT
HERWISE, INCLUDING WARRANTIES OF MERCHANTABILITY AND FITNESS FOR A
PARTICULARPURPOSE. TRENDNETNEITHER ASSUMESNORAUTHORIZES ANY OTHERPERSONTO
ASSUME FOR IT ANY OTHER LIABILITY IN CONNECTION WITH THE SALE, INSTALLATION
MAINTENANCEORUSEOFTRENDNET’SPRODUCTS.
TRENDNET SHALL NOT BE LIABLE UNDER THIS WARRANTY IF ITS TESTING AND EXAMINATION
DISCLOSE THAT THE ALLEGED DEFECT IN THE PRODUCT DOES NOT EXIST OR WAS CAUSED BY
CUSTOMER’SORANYTHIRDPERSON’SMISUSE,NEGLECT,IMPROPERINSTALLATIONORTESTING,
UNAUTHORIZED ATTEMPTSTO REPAIR OR MODIFY, OR ANY OTHERCAUSEBEYOND THE RANGE
OFTHEINTENDEDUSE,ORBYACCIDENT,FIRE,LIGHTNING,OROTHERHAZARD.
LIMITATION OF LIABILITY: TO THE FULL EXTENT ALLOWED BY LAW TRENDNET ALSO EXCLUDES
FOR ITSELF AND ITS SUPPLIERS ANY LIABILITY, WHETHER BASED IN CONTRACT OR TORT
(INCLUDING NEGLIGENCE), FOR INCIDENTAL, CONSEQUENTIAL, INDIRECT, SPECIAL, OR PUNITIVE
DAMAGES OF ANY KIND, OR FOR LOSS OF REVENUE OR PROFITS, LOSS OF BUSINESS, LOSS OF
INFORMATIONORDATE,OR OT
HERFINANCIALLOSSARISINGOUT OF OR INCONNECTIONWITH
THE SALE, INSTALLATION, MAINTENANCE, USE, PERFORMANCE, FAILURE, OR INTERRUPTION OF
THE POSSIBILITY OF SUCH DAMAGES, AND LIMITS ITS LIABILITY TO REPAIR, REPLACEMENT, OR
REFUNDOF THE PURCHASEPRICE PAID,AT TRENDNET’S OPTION. THIS DISCLAIMER OFLIABILITY
FOR DAMAGES WILL NOT BE AFFECTED IF ANY REMEDY PROVIDED HEREIN SHALL FAIL OF ITS
ESSENTIALPURPOSE.
Governing Law: This Limited Warranty shall be governed by the laws of the state of
California.
Some TRENDnet products include software code written by third party developers.
These codes are subject to the GNU General Public License ("GPL") or GNU Lesser
GeneralPublicLicense("LGPL").
Go to http://www.trendnet.com/gpl or http://www.trendnet.com Do
wnload section
and look for the desired TRENDnet product to access to the GPL Code or LGPL Code.
Thesecodesaredistributed WITHOUTWARRANTYandaresubject tothe copyrightsof
thedevelopers.TRENDnetdoesnotprovidetechnicalsupportforthesecodes.Pleasego
to http://www.gnu.org/licenses/gpl.txt or http://www.gnu.org/licenses/lgpl.txt for
specifictermsofeachlicense.
2016.08.10