
TRENDnetUser’sGuide
CoverPage

©Copyright2018TRENDnet.AllRightsReserved.
TRENDnetUser’sGuide
Tableofcontents
2
TableofContents
ProductOverview.............................................................................5
PackageContents..........................................................................................................5
Features.........................................................................................................................5
ProductHardwareFeatures...........................................................................................7
SetupWizard.................................................................................................................8
StartRecording............................................................................................................12
InstantPlayback...........................................................................................................12
SystemManagement(local)...........................................................13
UsingtheShortMenu..................................................................................................13
ShortcutMenu...............................................................................16
Instantplayback.................................................................................................16
Audio..................................................................................................................16
PTZcontrol.........................................................................................................16
Digitalzoom.......................................................................................................17
Imagesettings....................................................................................................18
Liveviewstrategy..............................................................................................18
Information........................................................................................................18
Close..................................................................................................................18
UsingtheMainMenu.....................................................................19
LogintotheManagementPages.................................................................................19
RestoreDefaultPassword...........................................................................................20
Logout,startup,orshutdowntheNVR................................................21
StartupyourNVR.........................................................................................................21
ShutdownyourNVR....................................................................................................21
RebootingyourNVR....................................................................................................21
LogoutfromNVRmanagement..................................................................................21
CameraSettingsMenu...................................................................22
CameraConnectionSettings.......................................................................................22
Camerainstallations..........................................................................................22
OnscreenDisplaySettings..........................................................................................25
DisplaySettings............................................................................................................26
Displaysettings............................................................................................................27
Basicpanandtilt...............................................................................................27
AdvancedPTZ....................................................................................................27
Presetpositions.................................................................................................27
Pattern...............................................................................................................28
Patrol.................................................................................................................28
MotionDetection........................................................................................................29
Motiondetectionsettings.................................................................................29
PrivacyMask................................................................................................................31
VideoTamper..............................................................................................................32
Videotampersettings.......................................................................................32
VideoLoss....................................................................................................................34
Videolosssettings.............................................................................................34
ConfigurationMenu.......................................................................36
SystemSettings...........................................................................................................36
General..............................................................................................................36
DSTsettings.......................................................................................................37
Moresettings.....................................................................................................37
Network.......................................................................................................................38
General..............................................................................................................38
DDNS..................................................................................................................39
NTP....................................................................................................................39
Email..................................................................................................................40
UPnP..................................................................................................................41
Moresettings.....................................................................................................41

©Copyright2018TRENDnet.AllRightsReserved.
TRENDnetUser’sGuide
Tableofcontents
3
LiveView......................................................................................................................42
General..............................................................................................................42
View...................................................................................................................42
Channel‐ZeroEncoding......................................................................................43
Exceptions....................................................................................................................44
UserAccounts..............................................................................................................45
Add.....................................................................................................................45
Edit.....................................................................................................................45
Permission.........................................................................................................45
MaintenanceMenu........................................................................47
SystemMaintenance...................................................................................................47
NVRinformation................................................................................................47
Camerainformation...........................................................................................48
RecordingInformation.......................................................................................48
NetworkInformation.........................................................................................49
StorageInformation...........................................................................................49
LogInformation...........................................................................................................50
LogSearch..........................................................................................................50
LogExport..........................................................................................................51
Import/ExportConfigurationSettings.........................................................................52
FirmwareUpgrade.......................................................................................................52
LocalUpgrade....................................................................................................52
RemoteUpgrade................................................................................................52
FactoryDefault............................................................................................................53
NetworkMonitoring....................................................................................................53
Traffic.................................................................................................................53
NetworkTools....................................................................................................54
HardDriveMaintenance..............................................................................................55
S.M.A.R.TSettings..............................................................................................55
BadSectorDetection.........................................................................................55
HardDriveManagement................................................................56
Format/InitiatetheHardDrive..................................................................................56
AdvancedStorageQuotaSettings...............................................................................57
Scheduledrecording......................................................................57
Schedule......................................................................................................................57
VideoSettings..............................................................................................................59
SubStream........................................................................................................60
Advancedrecordingsetting.........................................................................................61
Holidayscheduling.......................................................................................................61
BackupVideoRecordings...............................................................62
Export..........................................................................................................................62
Videoplayback..............................................................................64
Playbackscreen...........................................................................................................65
Searchforvideorecordings...............................................................................66
Timeline............................................................................................................66
Playbackbuttons...............................................................................................66
Playbackoperations...........................................................................................67
Playbackmodes.................................................................................................68
AccessyourNVRwiththeWebBrowser........................................70
DefaultSettingsandFactoryReset....................................................................70
SystemRequirement...................................................................................................71
Logging‐intotheNVRfortheFirstTime(Windows)...................................................71
Logging‐intotheNVRfortheFirstTime(OSX)..........................................................73
Basic.............................................................................................................................78
LiveView............................................................................................................78
Playback.............................................................................................................80
Log.....................................................................................................................82
SystemInformation...........................................................................................82
Logout................................................................................................................83
Advanced.....................................................................................................................84

©Copyright2018TRENDnet.AllRightsReserved.
TRENDnetUser’sGuide
Tableofcontents
4
System...............................................................................................................84
Network.............................................................................................................89
Video..................................................................................................................91
Events................................................................................................................96
StorageSettings...............................................................................................101
Appendix......................................................................................102
TurnonnetworkdiscoveryonWindows...................................................................102
Directvideoaccess‐RTSP.........................................................................................102
InstallyourNVRSystemonYourNetwork...............................................................102
CompatibleCameraList.............................................................................................103
Regulations..................................................................................104
FederalCommunicationCommissionInterferenceStatement......................................104
FCCRadiationExposureStatement.................................................................104
Europe–EUDeclarationofConformity....................................................................105
Safety...............................................................................................................105
EMC..................................................................................................................105
Directives.........................................................................................................105
RoHS..........................................................................................................................106
©Copyright2018TRENDnet.AllRightsReserved.
5
TRENDnetUser’sGuide
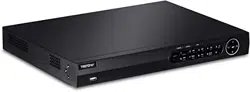
TV‐NVR408
ProductOverview
TV‐NVR408
PackageContents
Thepackageincludes:
NVR
Powercord(1.8m/6ft.)
Networkcable(1.8m/6ft.)
HDMIcable(1.8m/6ft.)
Opticalmouse
SATAdatacables/powercables
QuickInstallationGuide
Rackmountaccessories
Ifanypackagecontentsaremissingordamaged,pleasecontacttheretailstore,
onlineretailer,orreseller/distributorfromwhichtheproductwaspurchased.
Features
TRENDnet’s standalone 8‐channel H.265 PoE+ NVR, model TV‐
NVR408, offers a comprehensive rack mountable camera
managementsolution.TheNVRnetworksandpowersuptoeightPoE
cameras*.Installupto12TBofstorage(harddrivesnotincluded)to
recordoveronemonthofcontinuousvideofromeight1080pHDPoE
cameras**. The TV‐NVR408 features advanced video playback and
comeswithafreeiOS®/Android™app.
PoE+Ports
PlugandplayTRENDnetPoEnetworkcameras*totheeightPoE+
portswithatotalpowerbudgetof80W
Storage
Two3.5”SATAIIbayssupportupto12TBoftotalstorage(6TBper
bay,HDDsnotincluded)
NetworkUplinkPort
GigabitEthernetnetworkuplinkport
DisplayInterface
HDMIupto4KresolutionandVGAupto1080presolution
AudioPorts
Audioinandoutports

©Copyright2018TRENDnet.AllRightsReserved.
6
TRENDnetUser’sGuide
TV‐NVR408
USBPorts
OneUSBportfortheincludedmouseandoneforvideoexport
MouseIncluded
Supportsmouseandkeyboard(keyboardnotincluded)
Rackmount
Rackmounthardwareincluded
MobileApp
ViewlivevideoonamobiledevicewiththefreeiOS
®
and
Android™apps
RemoteAccess
AccesstheNVRovertheinternet
CameraSetup
Auto‐recognizesTRENDnetcameras*andworkswithONVIFPoE
networkcameras
LiveView
Multiplecameraviewingoptionswithauto‐scanfunction
ONVIF
ONVIFcertified
CameraManagement
Foreachcamera,manageon‐screendisplay(OSD),imagesettings,
PTZfunctionality,motiondetection,privacymasks,tamperdetection,
andvideoloss
VideoRecording
Max.resolutionforallcamerasconcurrently:FullHD1080p
videoat30fpsinH.265compression
Max.forasinglecamera:8MP4KUHDresolutioninH.265
compression
ScheduledRecording
Createweeklycontinuousandmotiondetectionrecordingschedules
foreachcamerawithvideooverwritewhenstorageisfull
AdvancedPlayback
Advancedarchivedvideoplaybackwithaquickreferencetimeline
andcalendar
VideoExport
Exportandarchiverecordedvideo
DynamicDNSSupport
Supportfordyn.comandNO‐IP.com
IPv6
IPv6support

©Copyright2018TRENDnet.AllRightsReserved.
7
TRENDnetUser’sGuide
TV‐NVR408
USB2.0port
Ground
LED
Pushbuttoncontrol
Menucontrols
Power
button
Powerport
ProductHardwareFeatures
FrontView
USB: Connecttoopticalmouseand/orexternalUSBflashdrive
forfileimportorexport.
Pushbutton: Switchbetweencameras
Menu
controls:
Togglebetweenmenuselections
RearView
Power: Powersocketofcamera(48VDC,1.04A)
Note:Useonlytheadapterthatcamewithyourcamera
AudioIn: RCAconnectortoactivemicrophone(1.0Vp‐p,1kΩ)
AudioOut: RCAconnectortospeaker(1.0Vp‐p,1kΩ)
VGA: ConnecttoVGAmonitorwith1024x768resolutionor
higher.
HDMI: ConnecttomonitororHDTVwithHDMIinterface
USB: Connecttoopticalmouseand/orexternalUSBflashdrive
forfileimportorexport.
NetworkPort: Connecttoyourofficeorhomenetworkforremoteaccess
andviewing
PoE: Connect802.3at(30WMax.)cameras.
Grounding
Point:
Connecttogroundingwire.Thisisespeciallyimportant
whenyouinstallyourcameraoutdoor.
PoEPorts
USB2.0
port
AudioPorts
VGAPort
HDMIPort
Network
p
ort

©Copyright2018TRENDnet.AllRightsReserved.
8
TRENDnetUser’sGuide
TV‐NVR408
SetupWizard
IfyouareaccessingtheDVRforthefirsttime,thedevicewillgothroughthesebasic
settings.Pleasefollowtheonscreendisplaytocompletetheseinformation.
1. IfyouareaccessingtheDVRthefirsttime,pleaseactivatethe device by
followingthepasswordsetup.
2. Oncethenewpasswordisset,thedevicewillbeactivated.
3. Createtheunlockpatternforquickaccesslater.
4. SelectLanguageandclickApplytocontinue

©Copyright2018TRENDnet.AllRightsReserved.
9
TRENDnetUser’sGuide
TV‐NVR408
5. Enterthepasswordagain
6. ClicktheselectionlisttotherightofTimeZone.
7. Selectyourtimezone.
5.TimeZone
6.DateFormat
7.Date
8.Time

©Copyright2018TRENDnet.AllRightsReserved.
10
TRENDnetUser’sGuide
TV‐NVR408
8. Click the selection list to the right of Date Formatandthenselectadate
format.
9. ClicktheselectionlisttotherightofSystemDate.
Selecttheyearbyclickingonleftorrightarrow.
Selectthemonthbyclickingonleftorrightarrow.
Selectthedaybyclickingonthedate.
10. ClicktheselectionlisttotherightofSystemTimeandthenenterthetimewith
24‐hourformatthenclickNext.
11. Displaycurrentnetworktype

©Copyright2018TRENDnet.AllRightsReserved.
11
TRENDnetUser’sGuide
TV‐NVR408
12. Configuretheportrelatedsettingshere.
13. ClickOKtoexitthewizardifyouhaveabrandnewinstallation.Selectthehard
driveandthenclickInittoinitiateyourharddriveifyouarerunningthesetup
wizard in later time and wantto clean up the video on the harddrive.Then
clickOK.

©Copyright2018TRENDnet.AllRightsReserved.
12
TRENDnetUser’sGuide
TV‐NVR408
14. Selecttypeofrecordingmethodyouwouldliketosetthecamerastobe.This
settingscanalsobeconfigurelaterunderrecordingsection.
15. ClickOKtocompletetheWizardinstallation.
StartRecording
Youcanstartrecordingimmediatelyjustwithafewclicks.InLiveView,rightclick
onthemouse.Ashortmenuwillcomeup.ChooseStartRecordingandthen
ContinuousRecord.
ClickYestostartcontinuousrecording.
InstantPlayback
Moveyourmousepointeroverthecameradisplayyouwanttoplaybackthevideo
andselectthedisplaybyclickonit.Theinstantplaybacktoolbarwillshowup.
Clickon
toplaybackthelast5minutesofrecording.(Formoreadvanced
videoplaybackfeatures,pleaseseetheVideoplaybackonpage64formore
details.)

©Copyright2018TRENDnet.AllRightsReserved.
13
TRENDnetUser’sGuide
TV‐NVR408
SystemManagement(local)
Withthebasicsystemsetup,yoursystemisnowupandrunning.Now,youcanuse
yourmousepointerandmonitortoview,setup,andmanageyournetworkvideo
recorder.
UsingtheShortMenu
Rightclickyourmousewhileyouareviewingthelivevideo.Theshortmenuwillbe
poppedout.
ShortMenu
CommonMenu: ClicktogototheConfigurationsectiondirectly
Menu: Clicktoshowthemainmenu(seepage19forMain
Menuinstructions)
SingleScreen: Displayvideoliveviewoneatatime.ClickonSingle
Screenandthenchoosethecamerayouwant.(The
videoyouchoosewillbereplacedwithothervideoif
theauto‐switchison,andtheauto‐switchisonby
default.)
Multi‐screen: Displayallfourvideoliveviewsatthesametime.By
default,thevideoliveviewissetintheMulti‐screen
mode.IfyouarenowinSingleScreenmode,clickon
Multi‐Screenandthenchoosefrom2x2,1+5,1+7or
3x3toswitchtomulti‐screenliveviewmode.

©Copyright2018TRENDnet.AllRightsReserved.
14
TRENDnetUser’sGuide
TV‐NVR408
PreviousScreen: InSingleScreenmode,youcanmanuallyswitchthe
videotothepreviouschannel.
NextScreen: InSingleScreenmode,youcanmanuallyswitchthe
videotothenextchannel.
Stop/StartAuto‐
switch:
Start(default)orstopautomaticliveviewswitch.The
liveviewvideowillbechangedbychannelsequence.
StartRecording: StartContinuousorMotionDetectionrecording.
Tosetupmotiondetectionarea,orstopcontinuousand
motion detection recordings, you need to navigate to
thedetailedsettingsthroughthemainmenu.
StopRecording: StopContinuousorMotionDetectionrecording.
AddCamera: ClickthistogodirectlytoIPCameraManagement
Playback: ClickPlaybacktogofullplaybackmenu.
PTZControl: ClickthistoopenthePTZcontrolpanelforthe
supportedcameras

©Copyright2018TRENDnet.AllRightsReserved.
15
TRENDnetUser’sGuide
TV‐NVR408
PictureMode: SelectamonitordisplaysettingfromStandard,Bright,
Gentle,andVividofyourchoice.ClickOKtoconfirm
yourchoice.
©Copyright2018TRENDnet.AllRightsReserved.
16
TRENDnetUser’sGuide
TV‐NVR408
ShortcutMenu
Eachvideoinliveviewhasashortcutmenutoperformthefrequentadjustments
ofthevideo.Moveyourmousepointeroverthecameradisplayyouwanttobring
uptheShortcutMenu.Clickonthevideo.Theframeofthevideoshowsactive
(yellowframe).Andthenclickonthebuttonoftheselectedjobs.
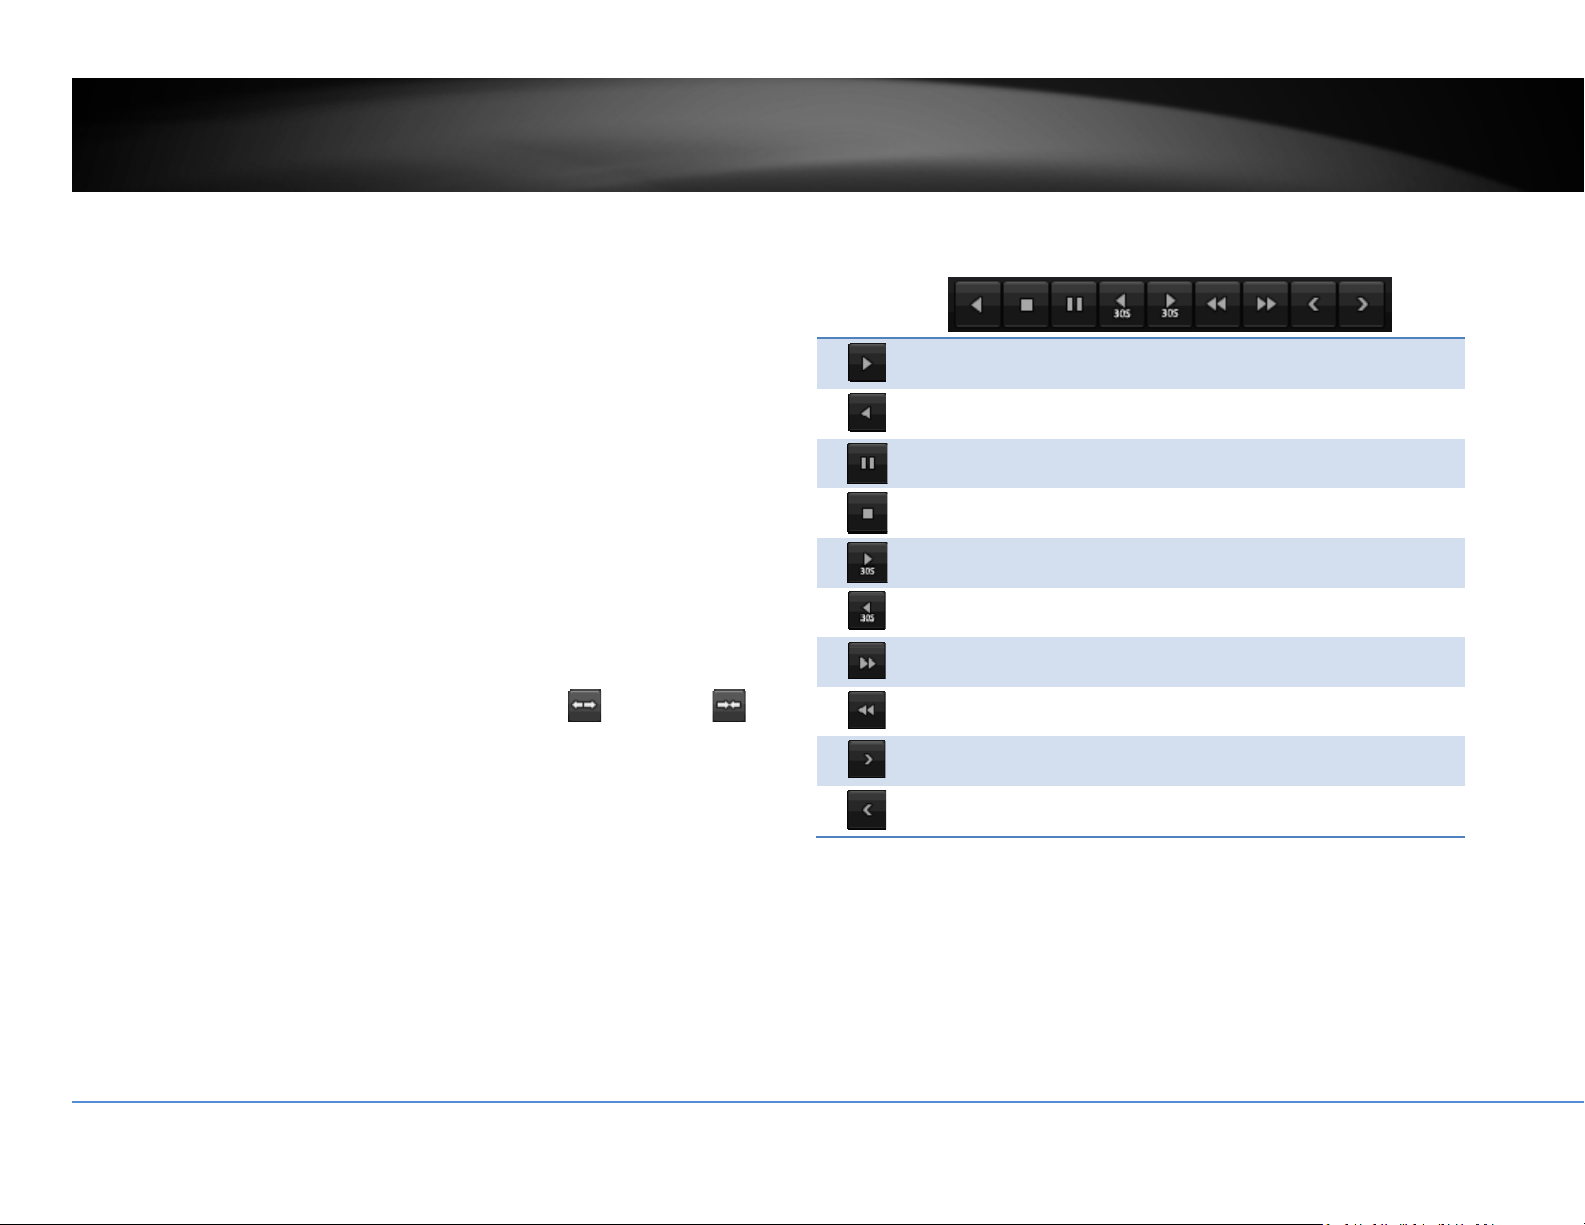
Instantplayback
Clickon
toplaybackthelast5minutesofrecording.
Audio
Clickon
toenabletheaudioonselectedchannel.Click tomutetheaudio.
PTZcontrol
Clickon
toproceedPTZoperations.
ThePTZmenuwillshowuponthescreen.
Basicpanandtilt
Clickthebuttonsyouwanttopanortiltthecamera.Adjustthedistanceofeach
stepofmovingbyslidingtheSpeed.Eachstepcanhavefartherdistancewhen
slidingtheSpeedtowardtheright,andviceversa.

©Copyright2018TRENDnet.AllRightsReserved.
17
TRENDnetUser’sGuide
TV‐NVR408
AdvancedPTZ
Youcanfurthercontrolzoom,focus,andaperturewithcompliantPTZcamera.Click
on+or–toadjustzoom,focusandaperture(iris).Click
button,thecamerawill
turningitaroundcontinuously.Clickthebuttonagaintostopmoving.
Specialfeatures
(Featureavailabilitydependsoncameramodels)
Menu.BringuptheadvancedPTZmenu.
Zoomoperation.
ZoomIn:Clickanddragareafromlefttorighttozoomin
thedefinedarea.
ZoomOut:Dragareafromrighttothelefttozoomout
thatarea.
Centeroperation.Pointandclickonthevideo.The
camerawillmovethecameraandmakethepointedspot
thecenterofthevideo.
Turnonorturnoffexternallighting
Turnonorturnoffexternalwipeonthecamera
PTZConfiguration
QuicklyaccessthePTZpresetsbyclickingtheOne‐touchbuttonandtoaccessthe
presetsettings,clickontheGeneralbutton.
Digitalzoom
Clickon
toenabledigitalzoom.Anavigatewindowwillshoweduponright
lowerscreencorner.Draganddropordoubleclicktodefinetheareayouwantto
zoomin.Thedefinedareaisshowedinredrectangular.Rightclicktoexitthezoom
mode.

©Copyright2018TRENDnet.AllRightsReserved.
18
TRENDnetUser’sGuide
TV‐NVR408
Imagesettings
Clickon
toadjustthevideodisplaysettings.
Usethesliderorenteranumber(0‐255)toadjusttheimage
brightness.Default:128
Usethesliderorenteranumber(0‐255)toadjusttheimage
contrast.Default:128
Usethesliderorenteranumber(0‐255)toadjustthecolor
saturation.Thegreaternumbermeansthecolorwillbemore
saturated.Default:128
Liveviewstrategy
Clickon
tomanagetheliveviewstrategy.TheReal‐timestrategyallocateall
resourcestominimizethedelayofvideodelivery.Whenthenetworkiscongested,
thevideomaybeinterrupted.Fluencystrategymakeslargervideobuffertosave
andplayvideoback.Itmakesthecommunicationmorerobust,buttheliveview
playbacktimingisdelayed.Balancedstrategysetupthegoodenoughvideobuffer
totakecareoftheplaybackfluencywhilemaintainthenetworkrobustness.
Information
Click on
toseecurrentcamerastreamframerate,bandwidth,
resolutionandcompressioninformation.
Close
Clickon
toclosetheshortcutmenu.

©Copyright2018TRENDnet.AllRightsReserved.
19
TRENDnetUser’sGuide
TV‐NVR408
UsingtheMainMenu
Rightclickyourmousewhileyouareviewingthelivevideo.Theshortmenuwillbe
poppedout.MouseovertheMenuandclickthebuttontobringuptheMain
Menu.
LogintotheManagementPages
TheNVRwillaskyoutoenterthepasswordeverytimeyouwanttologintothe
managementpage.EnterthepasswordandthenclickonOKtobringupthemain
menu.
©Copyright2018TRENDnet.AllRightsReserved.
20
TRENDnetUser’sGuide
TV‐NVR408
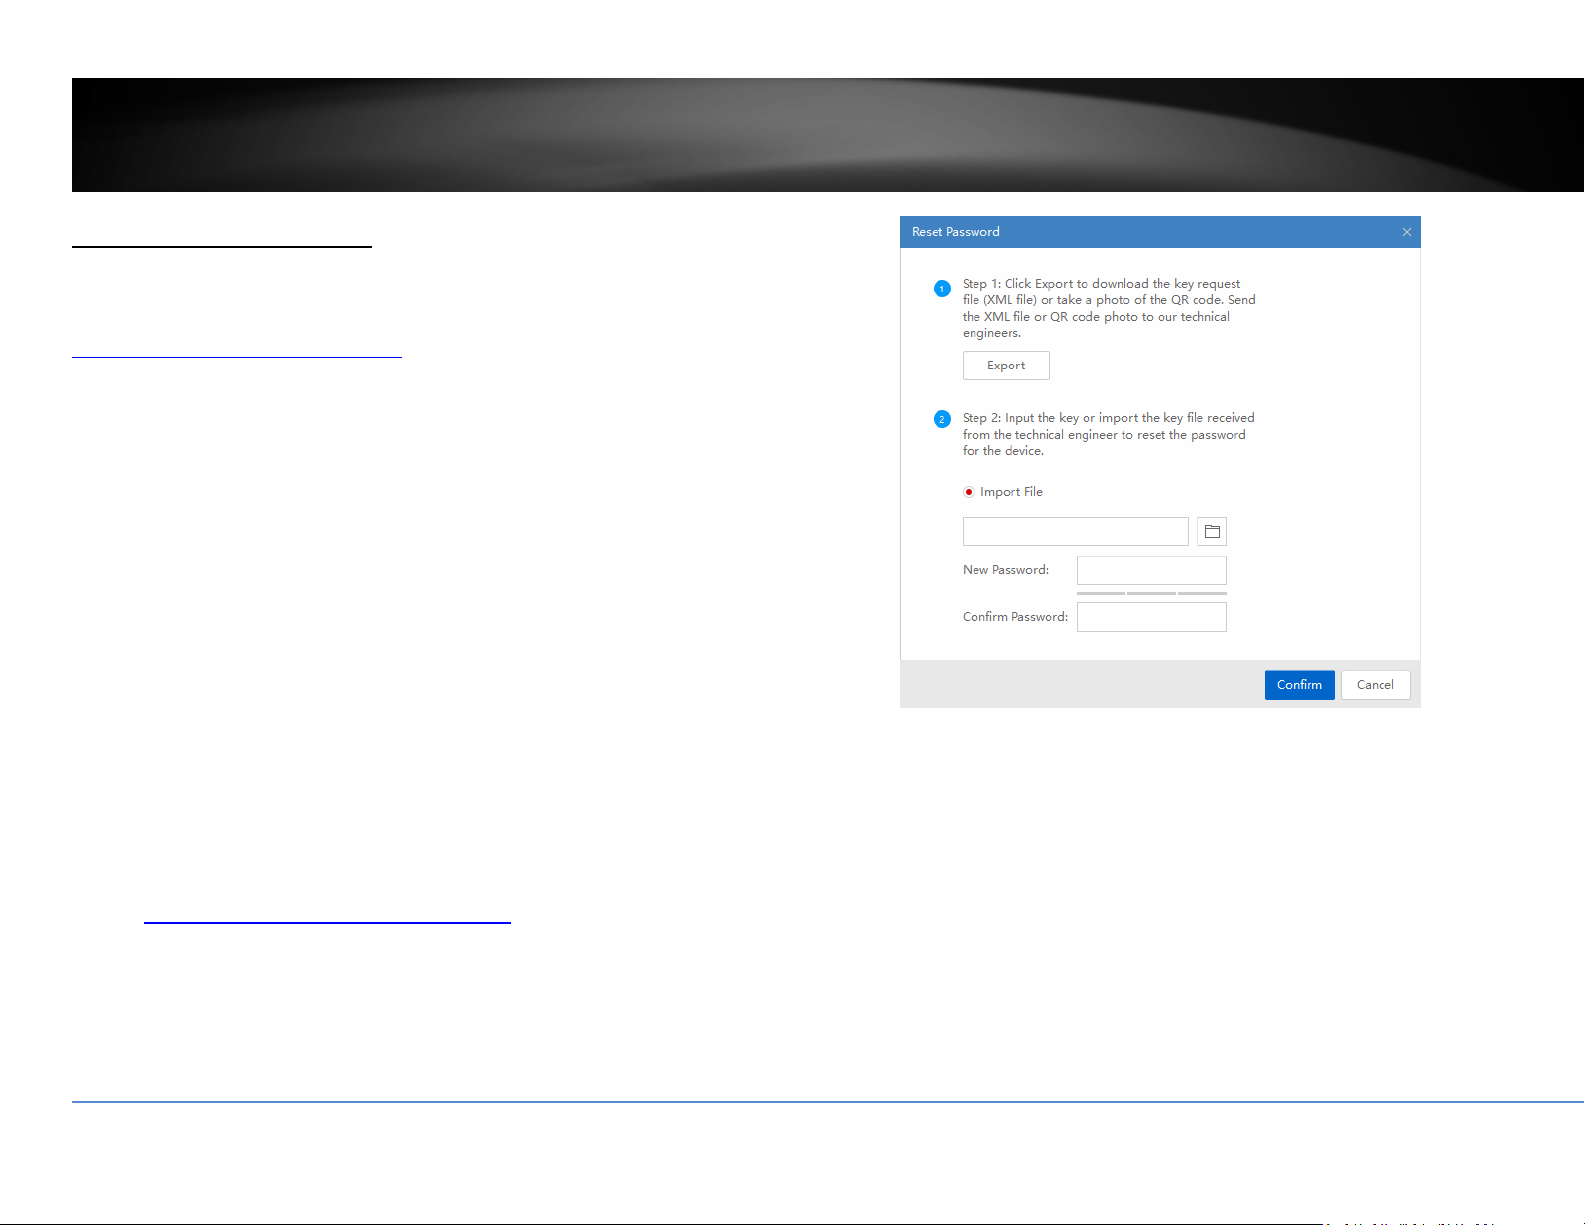
RestoreDefaultPassword
Youcanresetthedevicepasswordbygoingintothemanagementpagesandreset
theunittodefaultorusetheutility.Theutilitycanbedownloadedat
http://www.trendnet.com/camerautility
1. Runtheutilityandselectthedevicethatrequiresthepasswordresetand
clickonForgotPassword.
2. ClickExporttoexporttheXMLfilethencontactourhelpdesk.
http://www.trendnet.com/support/helpdesk

©Copyright2018TRENDnet.AllRightsReserved.
21
TRENDnetUser’sGuide
TV‐NVR408
Logout,startup,orshutdowntheNVR
TheNVRisaclassAnetworkequipmentdesignedfor24/7operation.Justplug‐in
thepowersource,theNVRisupandrunning.WhenyouwanttochangetheNVR
settings,managethecamerasproceedsystemmaintenanceorsoftwareupgrade,
youneedtologin,logout,restart,orshutdownyourNVRgently.
Pullingoutthepowersourcemaycauseunexpectedharddrivedamageandsystem
malfunctionwhichisnotasuggestedwaytopowerdownyourNVR.
StartupyourNVR
Makesurethepowersupplyispluggedintoanelectricaloutlet.Itishighly
recommendedthatanuninterruptiblepowersupply(UPS)tobeusedin
conjunctionwiththeunit.
ShutdownyourNVR
Bringupthemainmenu.ClickonShutdownMenu icon.TheShutdownsub
menuisshowingup.
ClickShutdown
togracefullyendtherecordingsessionsandpreparethehard
driveforshuttingdown.ThenclicktheYestoconfirmthatyouwanttoshutdown
theNVR.
RebootingyourNVR
ClickReboot torebootyourNVRwithoutpowerdown.
LogoutfromNVRmanagement
WhenyouhavedonetheNVRsettingsandmanagements,you’llwanttolockyour
NVRbeforeyouleave.ClickLogout
toexittheNVRmanagement.
Note:Youcanalsosetautomatictimeout.Thedefaultsettingis5minuteswithout
managementinteraction.
©Copyright2018TRENDnet.AllRightsReserved.
22
TRENDnetUser’sGuide
TV‐NVR408
CameraSettingsMenu
Settingandmanageyourcamerasbybringupthemainmenu.ClickonCamera
SettingsMenu
icon.
CameraConnectionSettings
Camerainstallations
TheNVRiscompatiblewithTRENDnetPoEcameras,thecompatiblecamerascanbe
foundonTRENDnetwebsite.TherearethreemajorgroupsofTRENDnetcompatible
cameras interactsdifferently with theNVR, TRENDnet1, TRENDnet 3, and ONVIF
cameras. TRENDnet cameras may fit into one or more camera groups. Please
referencethecompatiblecameralistonpage102formoredetails.
IPCamera
CameraNo. The camera number is also called channel number. All
video recordings and camera settings are using this
sequentialnumberasthemajorindexnumber.
Status: Thiscolumnshowsthecameraconnectionstatus.
: The camera is online. Youcanclickontheiconto
showthevideoandidentifywhichcamerayouare
setting.
:ThecameraisnotconnectedtoNVR
IPCamera
Address:
ThisistheIPaddressdetectedbytheNVRorsetstatically
tothecamera.
Edit: Clickthisicontoeditthecameraconnectionsettings.The
defaultsettingsisplug‐and‐play.
CameraName: Thisisthecameraname.Thedefaultnameisthecamera
modelname.Youcansetituponyourcameradirectlyor
setitupinNVRforcompatiblecameras.
Protocol: This is the camera product group. You can choose from
TRENDnet 1, TRENDnet 3, ONVIF (generic), or ONVIF
installationwithotherbrandnamecameras.
ModelNumber: This is the model number of the camera. The model
number will be showed up automatically for compatible
cameras.
ManagementPort: Different camera management protocols has different
management port number. Please see the compatible
cameralistformoredetail.
PoEPasswordSet: If you install plug‐and‐play TRENDnet 1 with its factory
default setting, the NVR will set the camera away from
thedefaultandloadtheNVRpasswordascameraaccess
password.Ifyourplug‐and‐play/TRENDnet1camerawas
manually setup and coming back to plug‐and‐play
installation, you can click the button to synchronize the
camerapasswordtothesamepasswordofNVR.
Whenyouclickthisbutton,allplug‐and‐playTRENDnet1

©Copyright2018TRENDnet.AllRightsReserved.
23
TRENDnetUser’sGuide
TV‐NVR408
camerapasswordsaresynchronized.
Refresh: Clickrefreshtorefreshthecameralist.Onlythecameras
listed with valid camera index number (1 to 4) are
connectedtotheNVR.Othercameraslistedonthetable
arecamerasonthenetwork,butnotconnected.Youcan
double click on the listed camera, more detailed
information will be showed up. The information is
valuableformanualcamerasettings.
Back: Clickonthisbuttonorrightclickonthemousetogoback
toliveview.
NetReceiveIdle
Bandwidth:
TheNVRcanprocesstotal25Mbpsvideostreams.This
referencenumberindicateshowmuchmorenetwork
capacityisavailablenow.
Plug‐and‐Playinstallation
This is an effort free installation. Just to make sure all yourcamerasaresetto
factory defaultand connect the plug‐and‐play cameras to thePoE ports. One for
eachport. The NVRwilldetectthe cameraandinstallit automatically.TV‐IP320PI
andTRENDnet3camerasareallplug‐and‐playcamerastoNVR.
Ifyouchangedthechannelsettingsbefore,clicktheEditiconandthenselectPlug‐
and‐PlayonAddingMethodandthenclickOKtosavethesettings.

©Copyright2018TRENDnet.AllRightsReserved.
24
TRENDnetUser’sGuide
TV‐NVR408
Manualinstallation
1. ClicktheEditiconandthenselectManualonAddingMethod.
2. EnterthecameraIPaddress.
3. Selecttheprotocol.(Seecompatiblecameralistformoredetails)
4. Managementport.(Seecompatiblecameralistformoredetails)
5. Choosethecameravideochannelnumberorleaveitwithdefaultchannel1.

©Copyright2018TRENDnet.AllRightsReserved.
25
TRENDnetUser’sGuide
TV‐NVR408
6. Entercameraaccessusername.
7. Entercameraaccesspassword.
8. ClickOKtosavethesettings.
OnscreenDisplaySettings
Compatiblecameraonscreendisplaycanbechangeddirectlythroughcamera
accessorthroughNVR.
Note:Pleasereferencecompatiblecameralistformoredetails.
Camera: Clicktochoosethecamerayouwanttochangethe
settings.
CameraName: Thenameofthechosencamera.
DisplayName: Checkthisboxtodisplaycameraname.
DisplayDate: Checkthisboxtodisplaysystemtime.
DisplayWeek: Checkthisboxtodisplaytimeoftheweek.
TimeFormat: Select12or24‐hourtimeformat.
DateFormat: Selectthedateformat
DisplayMode: Choosehowthetextwillshowonthescreen.
Movetheyelloworredboxtopositionthetext.ClickApplytoapplythechange.
©Copyright2018TRENDnet.AllRightsReserved.
26
TRENDnetUser’sGuide
TV‐NVR408
DisplaySettings
Adjustvideoimagequality,lightness,andcolorsettingshere.
Note:Pleasereferencecompatiblecameralistformoredetails.
Camera: Clicktochoosethecamerayouwanttochangethe
settings.
CameraName: Thenameofthechosencamera.
Brightness: Usethesliderorenteranumber(0‐255)toadjustthe
imagebrightness.Default:128
Contrast: Usethesliderorenteranumber(0‐255)toadjustthe
imagecontrast.Default:128
Saturation: Usethesliderorenteranumber(0‐255)toadjustthecolor
saturation.Thegreaternumbermeansthecolorwillbe
moresaturated.Default:128
HUE: Usethesliderorenteranumber(0‐255)toadjustthe
imageHUEsetting.Default:128
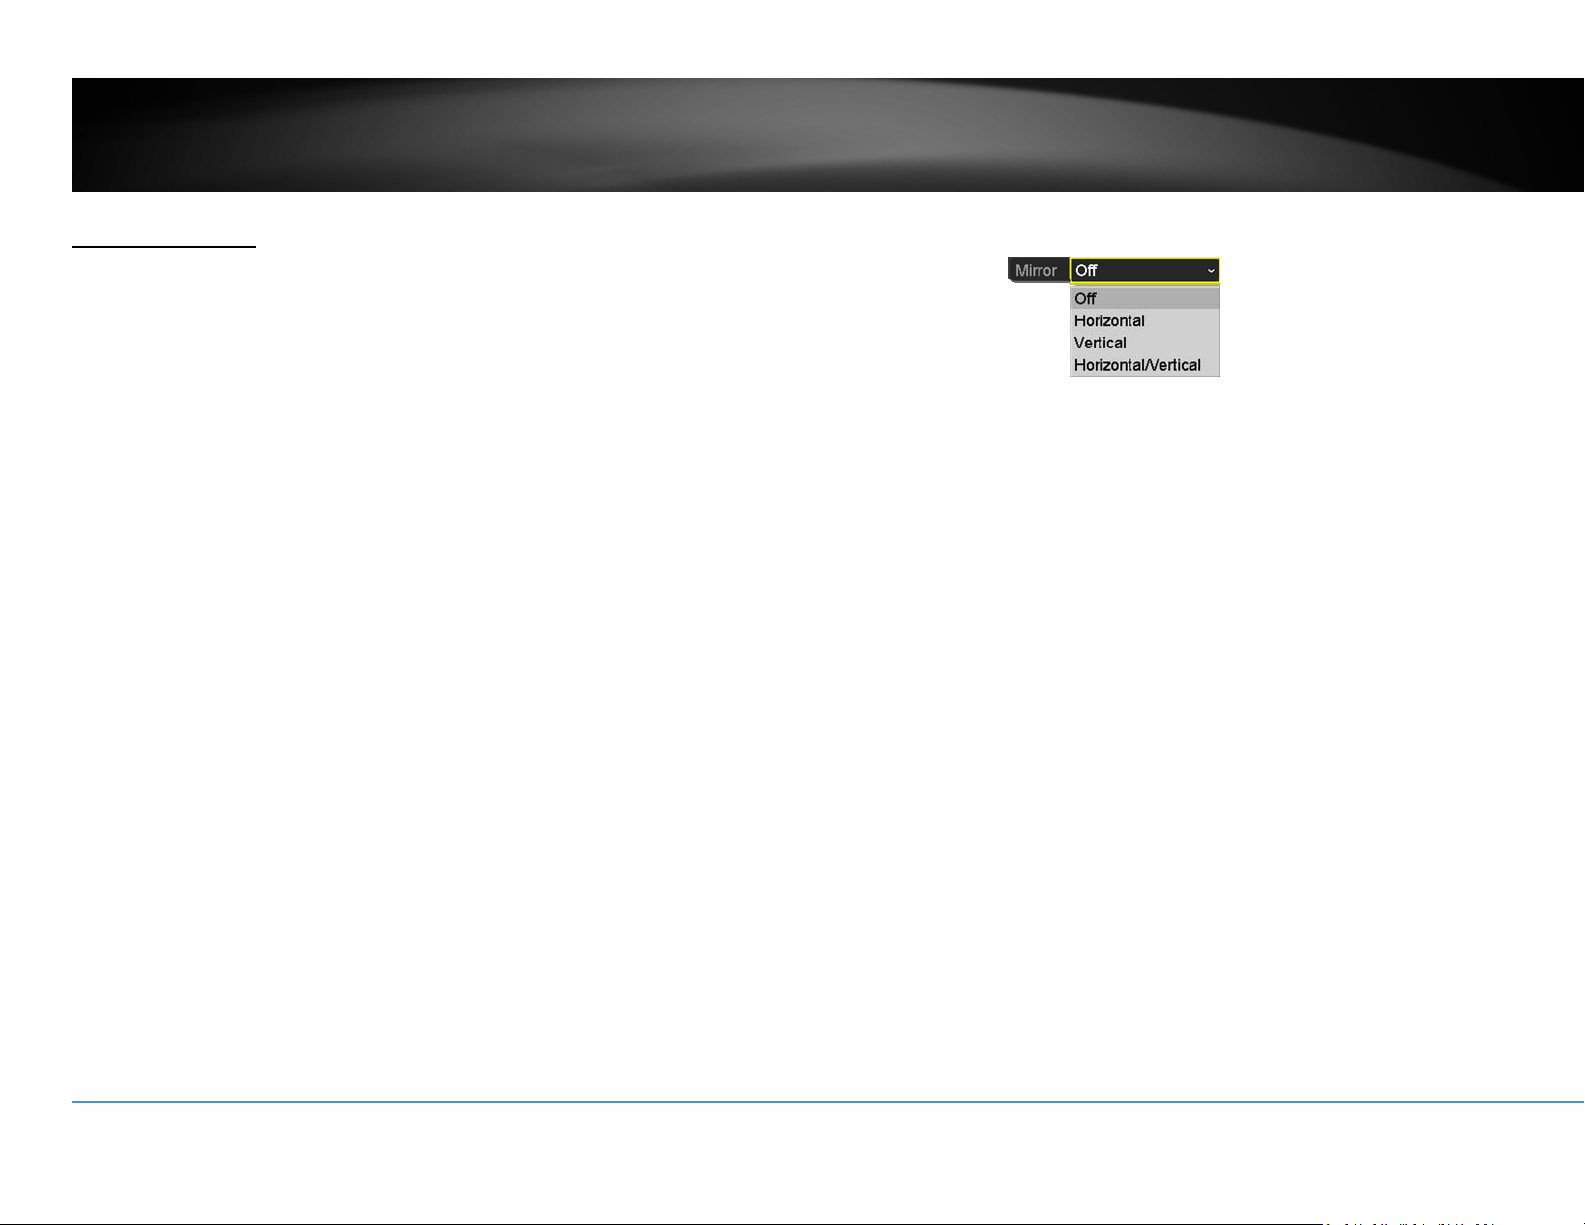
Mirror:
Choosehorizontal,verticalorbothtoadapttothe
physicalinstallation.
ClickApplytoapplythesettings.
©Copyright2018TRENDnet.AllRightsReserved.
27
TRENDnetUser’sGuide
TV‐NVR408
Displaysettings
ControlPTZcamera’svideoshootingposition,patrolroute,zoom,focus,andiris.
Note:Pleasereferencecompatiblecameralistformoredetails.
Camera: Clicktochoosethecamerayouwanttochangethe
settings.
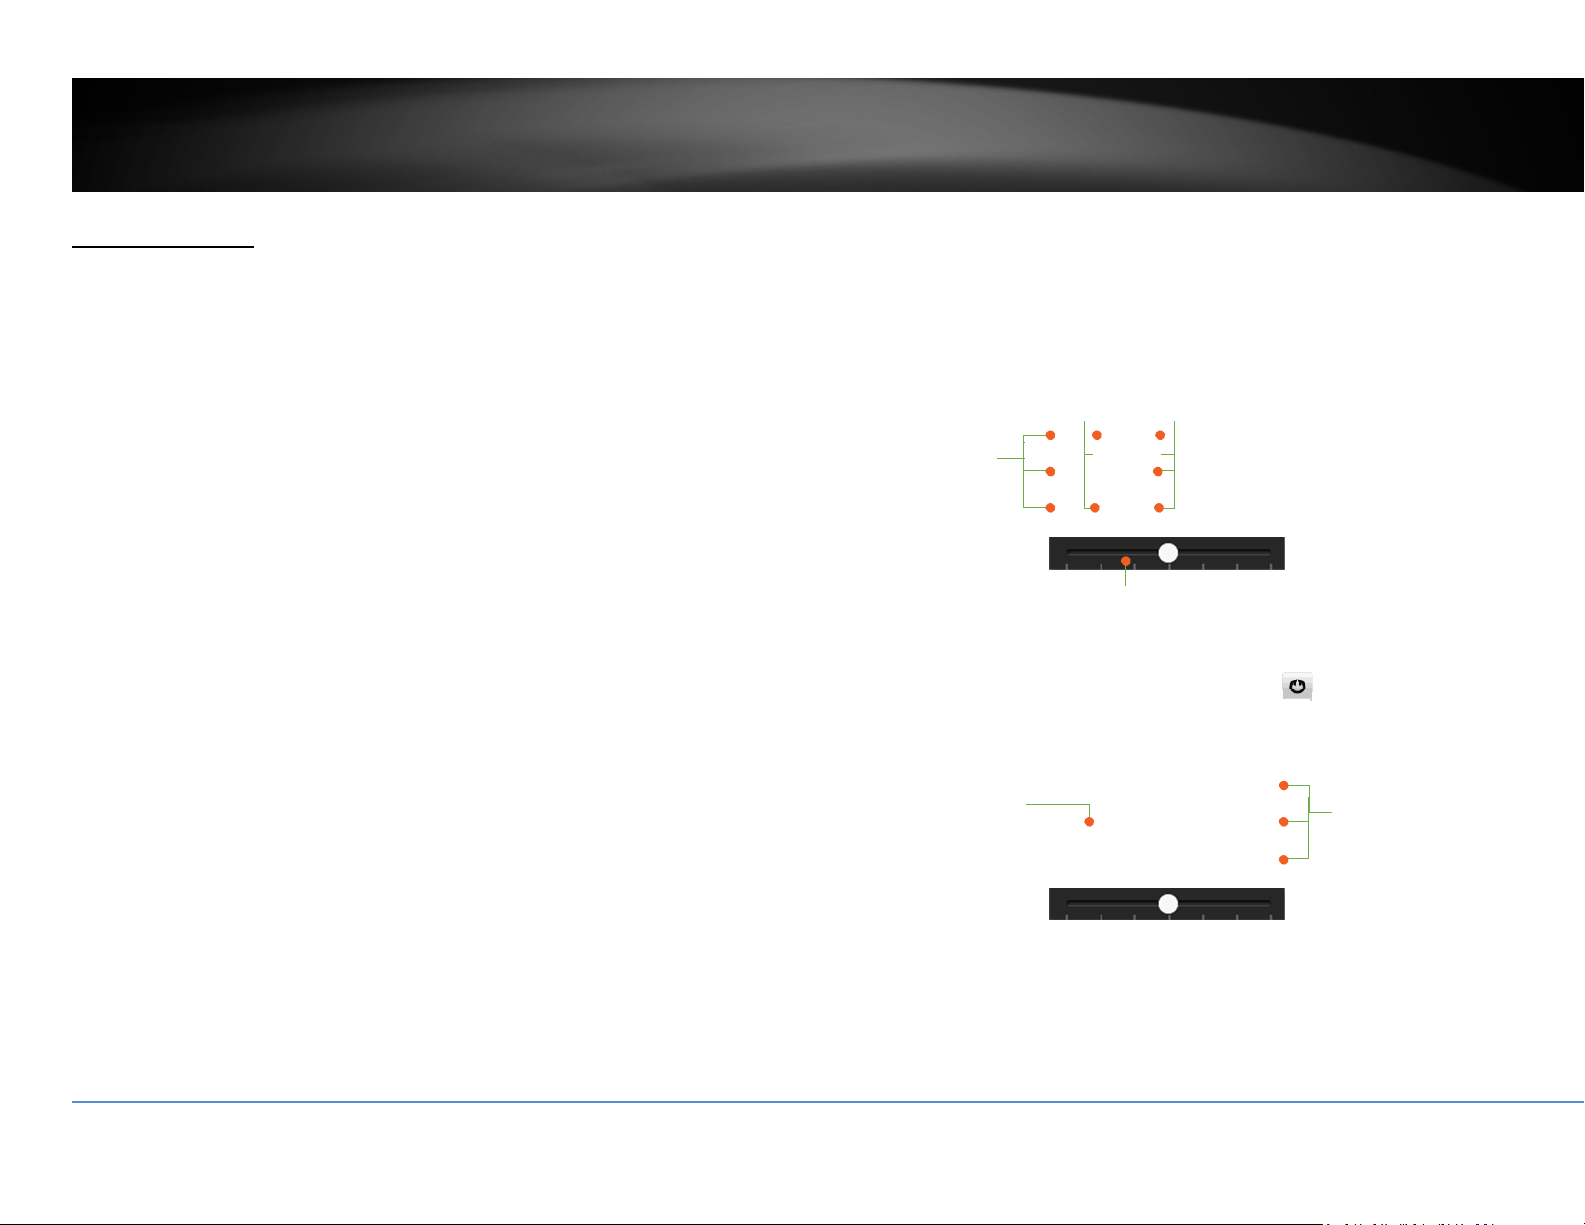
Basicpanandtilt
AllcompatiblePTZcamerascandothebasicpanandtilttoadjustthevideo
shootingposition.Clickthebuttonsyouwanttopanortiltthecamera.Adjustthe
distanceofeachstepofmovingbyslidingtheSpeed.Eachstepcanhavefarther
distancewhenslidingtheSpeedtowardtheright,andviceversa.
AdvancedPTZ
Youcanfurthercontrolzoom,focus,andaperturewithcompliantPTZcamera.Click
on+or–toadjustzoom,focusandaperture(iris).Click
button,thecamerawill
turningaroundcontinuously.Clickthebuttonagaintostoppolicing.
Presetpositions
Setandrecallthevideoviewsandsettingsforeasiernavigateandpatrol.
Tosetupapreset:
1. Moveyourcameratothepositionyouwantwitharrowkeys.
Left‐Up
Left
Left Down
Up
Down
Right‐Up
Right
Right
Down
Speed
Policin
g
Zoom
Focus
Aperture (Iris)
©Copyright2018TRENDnet.AllRightsReserved.
28
TRENDnetUser’sGuide
TV‐NVR408
2. Adjustthezoom,focusandaperture.
3. SelectSavePreset.
4. Clickthenumberofpreset.
Youcan setup upto255 presets depends on camera’scapability.Toaccesspreset
numbermorethan17,clickon
.Thepresetselectionscreenwillpopup.Click
up/downarrowtoselectthepresetnumberyouwant.
Torecallapreset:
1. SelectCallPreset.
2. Clickthenumberofpreset.
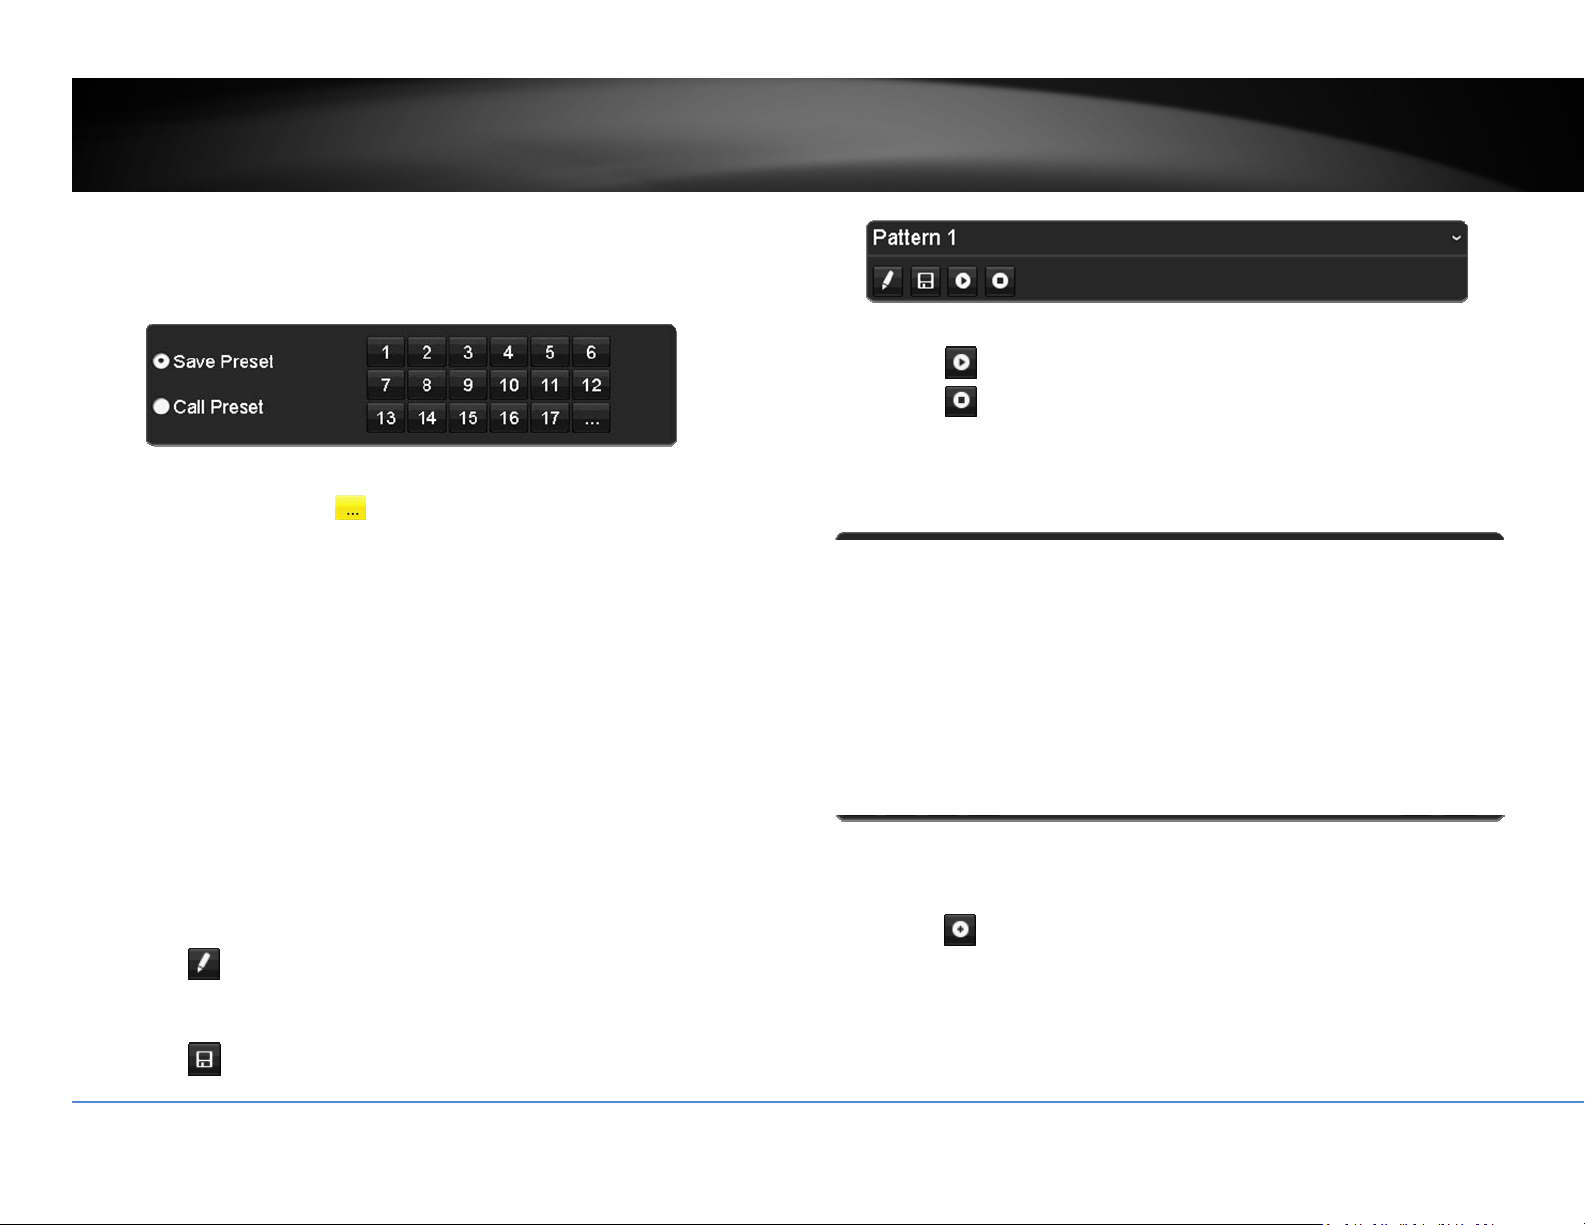
Pattern
Setupthepattertoperformthenavigationautomatically.
Toeditthepattern:
1. Click
tostartrecordingthepattern.
2. Usepreset(SelectCallPresetandthenclickonnumber)orPTZbuttonsto
moveyourcamera.
3. Click
tostopandsaverecording.
Runningthepatternofbehaviors:
Click
tostartrunningthepattern.
Click
tostoprecording.
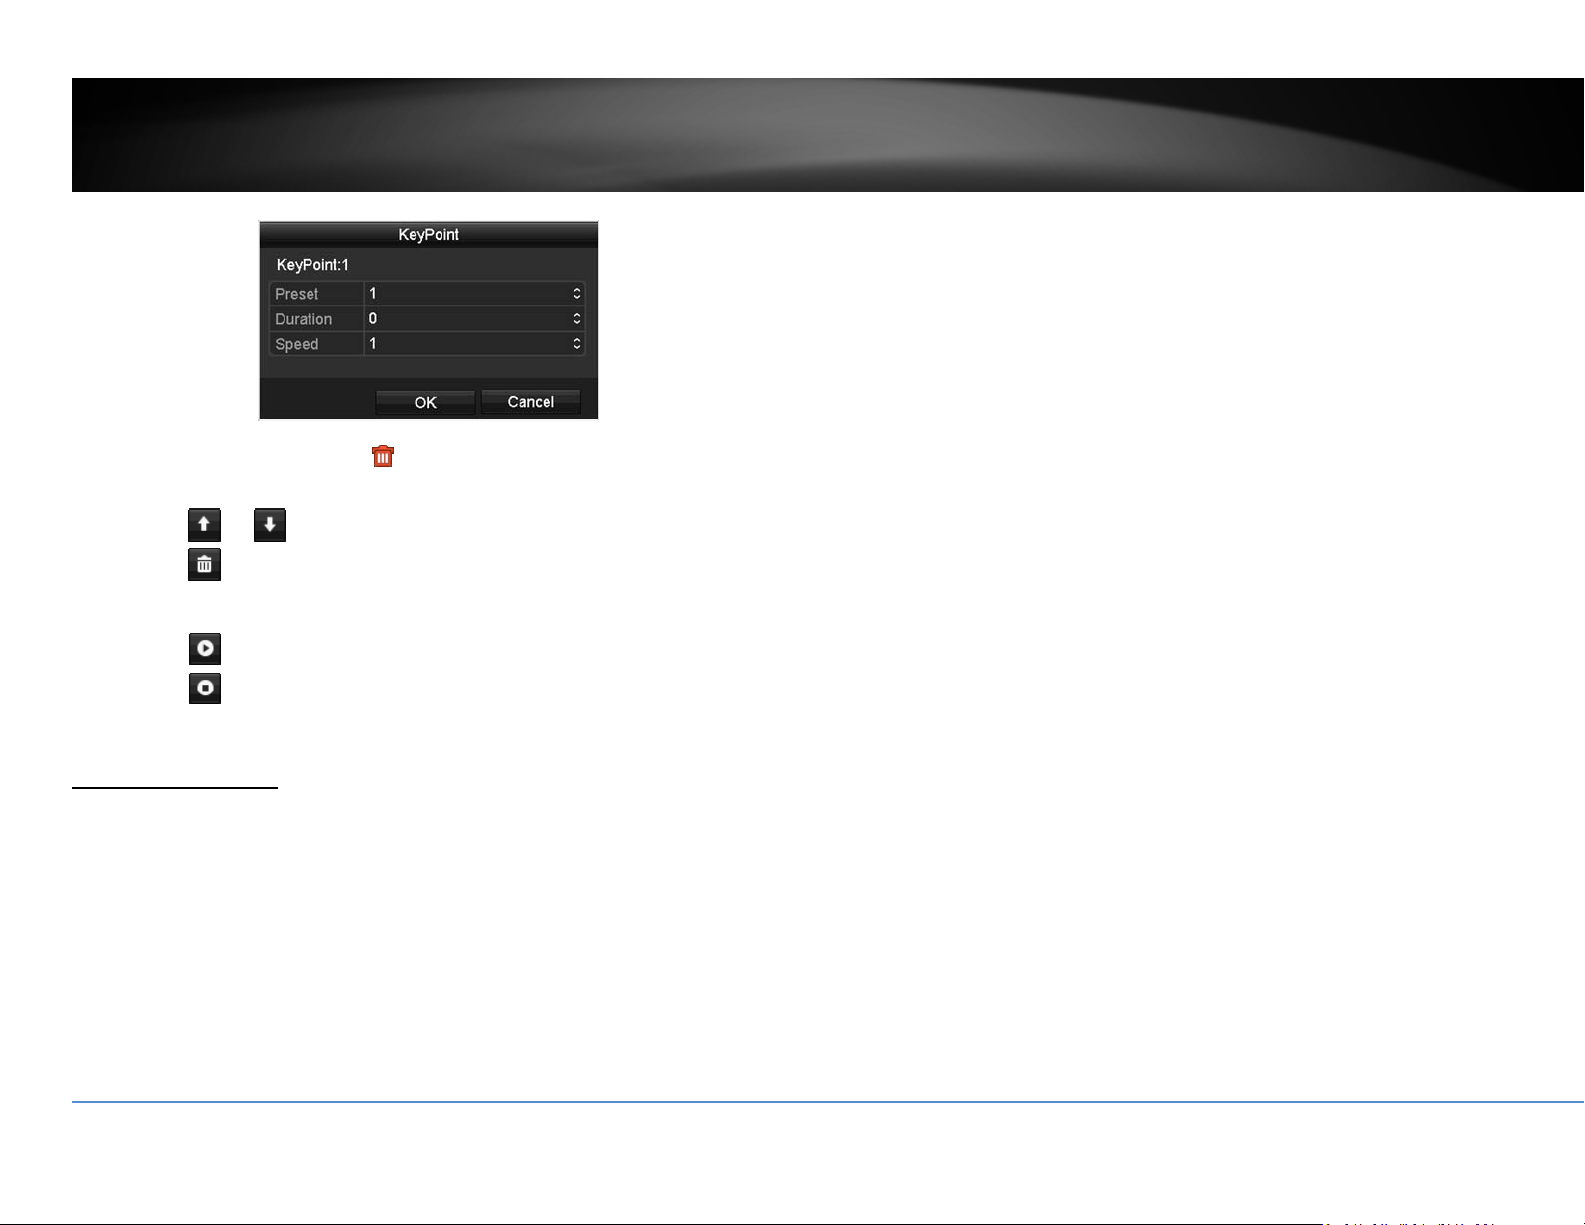
Patrol
Setupdetailedpatrolroutewithkeypoints,speedtowardthekeypointandstopby
duration.
Toeditthepatrol
Note:pleasesetupallpresetpositionsbeforeyoueditthepatrolroute.
1. Click
toaddakeypoint.Selectthepresetnumber,durationyouwant
tostayonthiskeypointandthespeedyouwanttogothiskeypointand
thenclickOK.
©Copyright2018TRENDnet.AllRightsReserved.
29
TRENDnetUser’sGuide
TV‐NVR408
2. Toeraseakeypoint,click
onthekeypoint.Ifyouwanttoeditakey
point,justerasethekeypointandthenaddanewone.
3. Click
or tomovetheorderofthepatrolkeypoints.
4. Click
tocleanupallkeypoints.
Startorstopapatrol:
Click
tostartpatrol.
Click
tostoppatrol.
MotionDetection
Setuphowthemotiondetectioneventwillbetriggeredandwhatactionswillbe
triggered.
Note:Pleasereferencecompatiblecameralistformoredetails.
Camera: Clicktochoosethecamerayouwanttochangethesettings.
Enable Motion
Detection:
Check this box to enable motion detection. Click Applyto
applythechoice.
Settings: Setupthemotiondetectiondetail.
Sensitivity: Movetheslidertoadjustdetectionsensitivity.Slidingtothe
rightmeansthemotioneventiseasiertobetriggered.
DrawArea: Click and drag on the area you want to set up the motion
detectionorclickFullScreenforthewholeimagearea.The
redgridsrepresentthemotiondetectionarea.
ClickCleartoclearthemotiondetectionareas.
Motiondetectionsettings
ClickSettingstobringoutthedetailedsetupmenu.
©Copyright2018TRENDnet.AllRightsReserved.
30
TRENDnetUser’sGuide
TV‐NVR408
Triggerchannel
Bydefault,amotiondetectiongeneratedbythecamerawillonlytriggertheevents
onthatchannel.Ifyouwanttotriggereventonotherchannels,selectthechannel
numberorselectAllforallchannels.
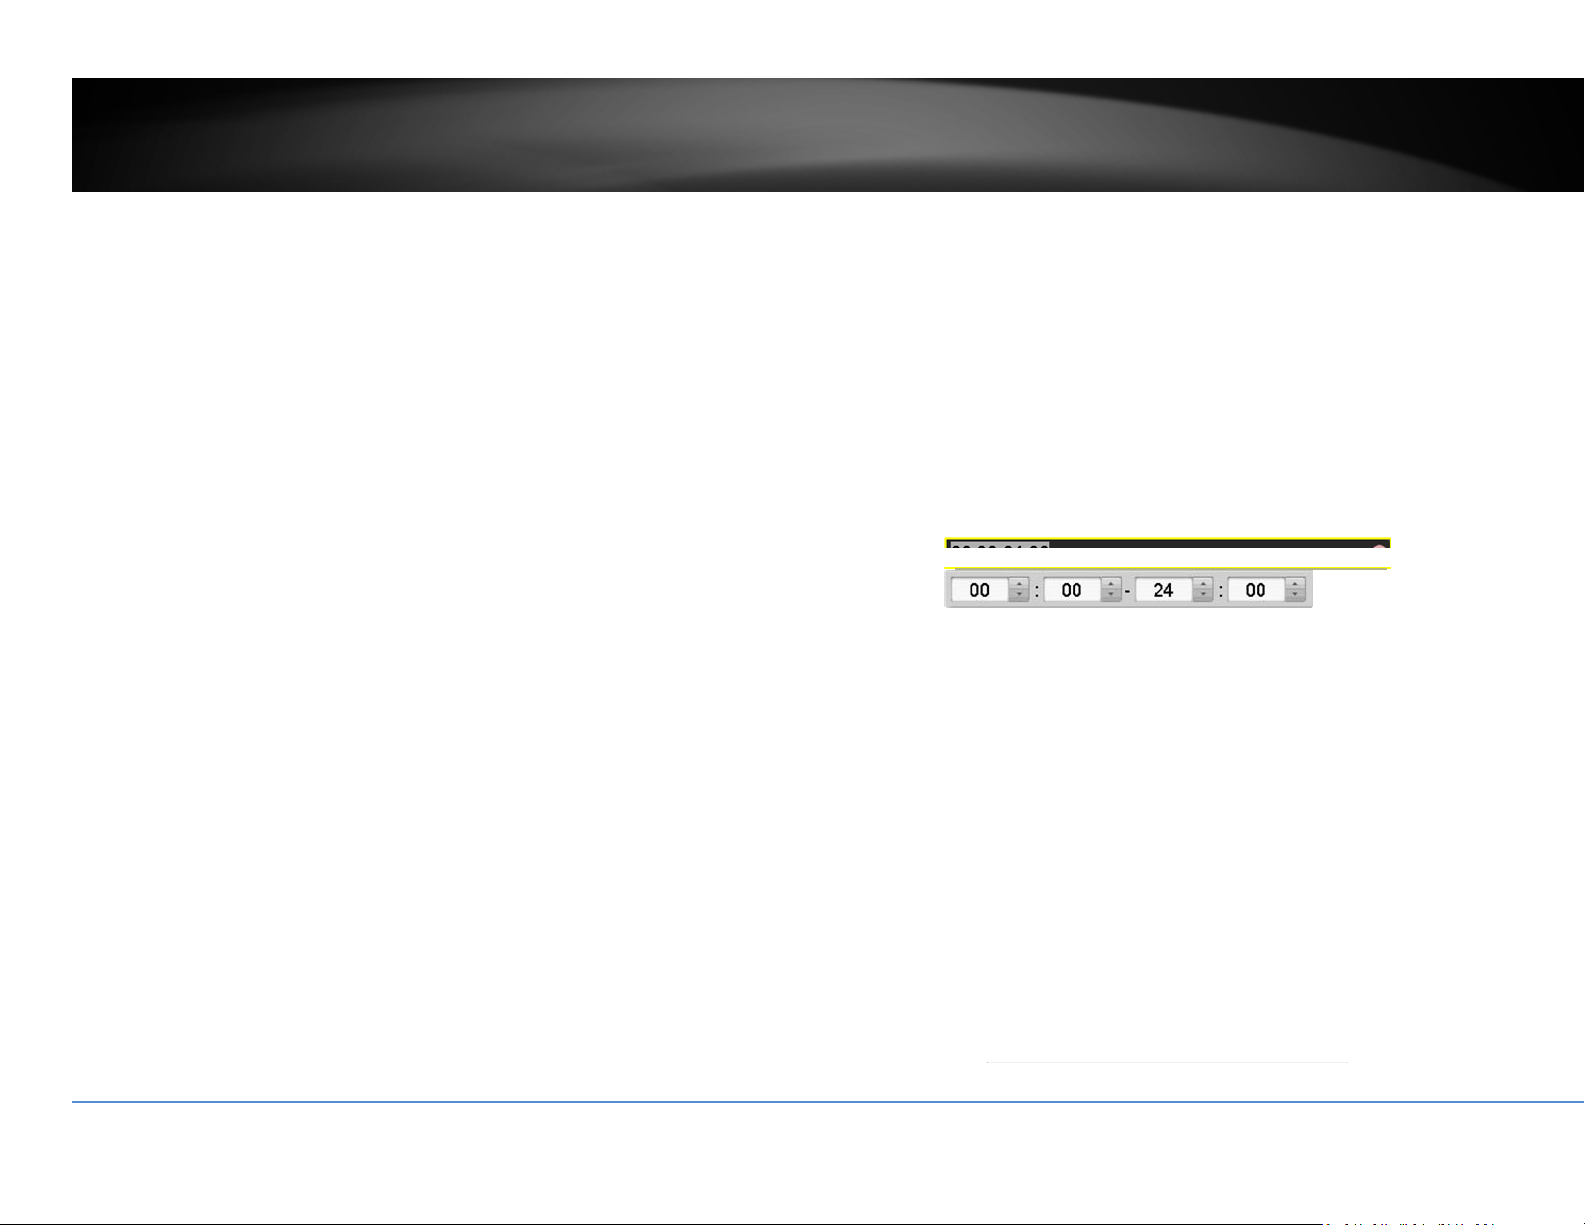
Armingschedule
1. SelectdayoftheweekyouwanttoeditontherowofWeek.
2. Entertheperiodoftimeyouwanttoactivelydetectthemotionevents.
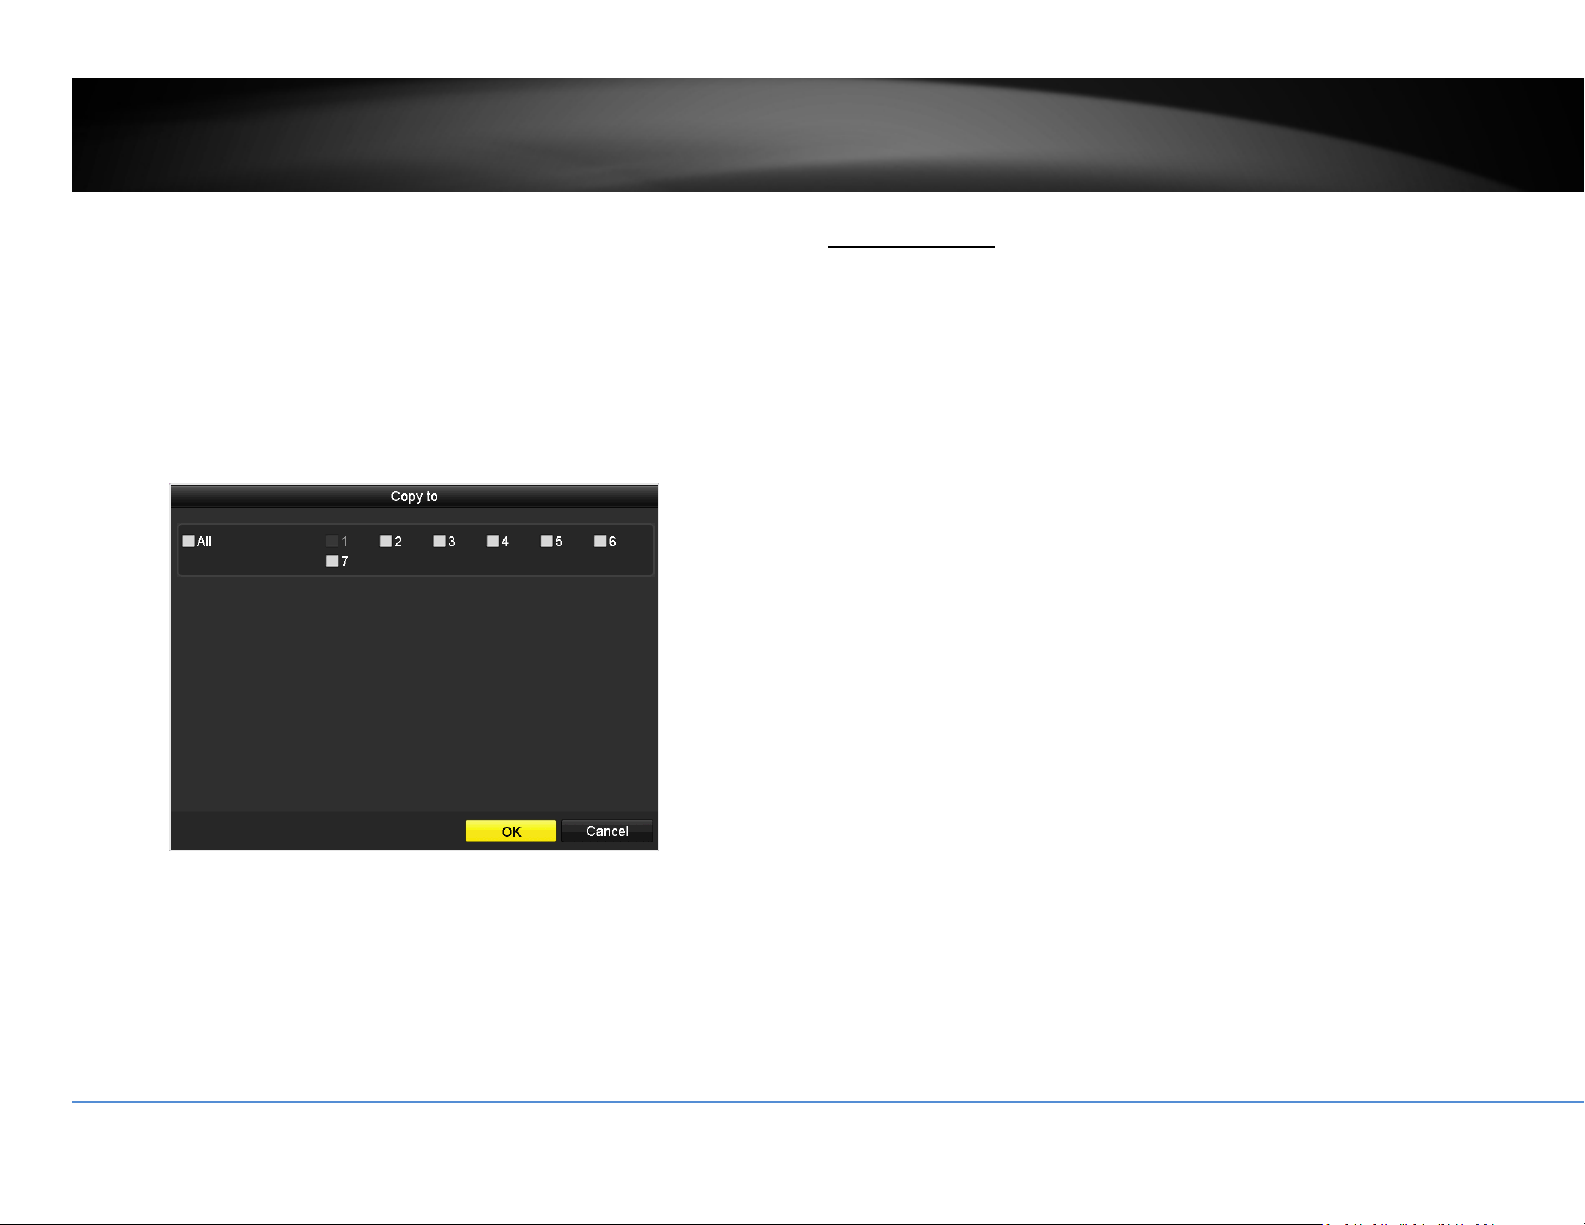
Copyto:
Toquicklysetupthesamescheduleovertheweek,clickCopy.Clickanother
dayoftheweek(1:Monday,2:Tuesday,3:Wednesday,4:Thursday,5:Friday,
6:Saturdayand7:Sunday).ClickAlltoselectthewholeweek.ClickOKafter
youselectthedayoftheweekyouwanttocopyto.

©Copyright2018TRENDnet.AllRightsReserved.
31
TRENDnetUser’sGuide
TV‐NVR408
Linkageaction
Whenmotioneventdetected,thecorrespondingactionswillbeexecuted.
FullScreen
Monitoring:
SwitchthevideoontheVGA/HDMImonitortothe
cameradetectedmotionevent.
AudibleWarning: Activatetheaudibleonboardbuzzer.
SendEmail: Sendemailtonotifythesystemmanager.
PrivacyMask
Createamaskingareatokeepyourprivacy.
Note:Pleasereferencecompatiblecameralistformoredetails.
Camera: Clicktochoosethecamerayouwanttochangethe
settings.
EnablePrivacyMask: Checkthisboxtoenableprivacymasking.
DrawArea: Clickanddragontheareayouwanttosetupthe
privacymask.
ClearAll: Clickthisbuttontoclearallthemaskingarea.
ClearZone1to4: Clickthisbuttontoclearspecificmaskingarea.
ClickApplytoapplythechanges

©Copyright2018TRENDnet.AllRightsReserved.
32
TRENDnetUser’sGuide
TV‐NVR408
VideoTamper
Detectsifacamerahasbeentamperedwithandsurveillanceiscompromised.You
cansetupvideotampernotificationstoalertthesystemmanagertocheckthe
camera.
Note:Pleasereferencecompatiblecameralistformoredetails.
Camera: Clicktochoosethecamerayouwanttochangethe
settings.
EnableTamper‐
proof:
Checkthisboxtoenablevideotamper.
DrawArea: Clickanddragontheareayouwanttosetupthevideo
tamper.
Clear: Clickthisbuttontoclearthevideotamperarea.
Sensitivity: Movetheslidertoadjustdetectionsensitivity.Sliding
totherightmeansthemotioneventiseasiertobe
triggered.
ClickApplytoapplythechanges
Videotampersettings
ClickSettingstobringoutthedetailedsetupmenu.
ArmingSchedule
1. SelectdayoftheweekyouwanttoeditontherowofWeek.
2. Entertheperiodoftimeyouwanttoactivelydetectthemotionevents.

©Copyright2018TRENDnet.AllRightsReserved.
33
TRENDnetUser’sGuide
TV‐NVR408
Copyto:
Toquicklysetupthesamescheduleovertheweek,clickCopy.Clickanother
dayoftheweek(1:Monday,2:Tuesday,3:Wednesday,4:Thursday,5:Friday,
6:Saturdayand7:Sunday).ClickAlltoselectthewholeweek.ClickOKafter
youselectthedayoftheweekyouwanttocopyto.
Linkageaction
Whenmotioneventdetected,thecorrespondingactionswillbeexecuted.
FullScreen
Monitoring:
SwitchthevideoontheVGA/HDMImonitorto
thecameradetectedmotionevent.
AudibleWarning: Activatetheaudibleonboardbuzzer.
SendEmail: Sendemailtonotifythesystemmanager.

©Copyright2018TRENDnet.AllRightsReserved.
34
TRENDnetUser’sGuide
TV‐NVR408
VideoLoss
Detectsifacamerahaslostitsvideo.Youcansetupvideolossnotificationstoalert
thesystemmanagertocheckthecamera.
Camera: Clicktochoosethecamerayouwanttochangethe
settings.
ClickApplytoapplythechanges
Videolosssettings
ClickSettingstobringoutthedetailedsetupmenu.
ArmingSchedule
1. SelectdayoftheweekyouwanttoeditontherowofWeek.
2. Entertheperiodoftimeyouwanttoactivelydetectthemotionevents.

©Copyright2018TRENDnet.AllRightsReserved.
35
TRENDnetUser’sGuide
TV‐NVR408
Copyto:
Toquicklysetupthesamescheduleovertheweek,clickCopy.Clickanother
dayoftheweek(1:Monday,2:Tuesday,3:Wednesday,4:Thursday,5:Friday,
6:Saturdayand7:Sunday).ClickAlltoselectthewholeweek.ClickOKafter
youselectthedayoftheweekyouwanttocopyto.
Linkageaction
Whenmotioneventdetected,thecorrespondingactionswillbeexecuted.
FullScreen
Monitoring:
SwitchthevideoontheVGA/HDMImonitorto
thecameradetectedmotionevent.
AudibleWarning: Activatetheaudibleonboardbuzzer.
SendEmail: Sendemailtonotifythesystemmanager.

©Copyright2018TRENDnet.AllRightsReserved.
36
TRENDnetUser’sGuide
TV‐NVR408
ConfigurationMenu
SettingandmanageyourNVRsystembybringupthemainmenu.Clickon
ConfigurationMenu
icon.
SystemSettings
General
Setupthebasictime,displayresolution,andoperationsettingshere.
General
Language: TheNVRGUIissettingtoEnglish.
Resolution: The default monitor resolution is set to the lowest
option (1024 by 768) to maximize the monitor
compatibility. Choose a better resolution for your
monitortoseebetterqualityvideo.
TimeZone: ClicktheselectionlisttotherightofTimeZone.
DateFormat: Click the selection list to the right of Date Formatand
thenselectadateformat.
SystemDate: ClicktheselectionlisttotherightofSystemDate.
SystemTime: Click the selection list to the right of System Time and
thenenterthetimewith24‐hourformat.
Mouse Pointer
Speed:
Settingthemousecursormovingspeed.Adjustingtothe
rightforfasterspeed.
EnableWizard: Enableordisablesetupwizardeverytimethesystemis
bootup.Default:Enabled.
EnablePassword: You need to login for system management. Enable
password will ask entering password when login.
Uncheckthisboxwillsetthemanagementfreeto
anyonephysicallyaccesstheNVR.Default:Enabled.
ClickApplytoapplythechanges.

©Copyright2018TRENDnet.AllRightsReserved.
37
TRENDnetUser’sGuide
TV‐NVR408
DSTsettings
SetupDaylightSavingTime.
Daylightsavingtime
AutoDST
adjustment:
Thedaylightsavingtimeadjustmentissettingto
automaticadjustmentaccordingtothetimezonesetting
bydefault.Ifyouwanttosetthedaylightsettings
manually,uncheckthisboxtodisabletheautomaticDST
adjustment.
EnableDST: Manuallyenableordisabledaylightsavingtime
adjustment.
From/To: Enterthedaylightsavingtimestartingandenddates.
TimeZone: ClicktheselectionlisttotherightofTimeZone.
DSTBias: Choosetheamountoftimeshiftingfordaylightsaving
adjustment.
ClickApplytoapplythechanges.
Moresettings
Moresettings
DeviceName: ThisisthenameoftheNVR.Default:NVR
Autologout: SetupthetimeouttologoutNVRmanagementafter
managementinactiveforaperiodoftime.
MenuOutput
Mode:
ThevideooutputisactiveforbothHDMIandVGA
interfaces.
ClickApplytoapplythechanges.

©Copyright2018TRENDnet.AllRightsReserved.
38
TRENDnetUser’sGuide
TV‐NVR408
Network
SetupNVRnetwork,DDNS,NTP,Email,andUPnPsettings.
General
SetupthenetworkinterfaceconnectingtotheInternet.
NetworkGeneralSettings
NICType: ChooseoneoftheEthernetduplexandspeedto
matchyournetwork.Default:10/100MAuto
detection.
EnableDHCP: CheckthisboxiftheIPaddressisassignedbyDHCP
server.
IPv4Address: TheIPv4dynamicorstaticaddress
IPv4SubnetMask: Networkrangeofthesubnet
IPv4Default
Gateway:
ThedefaultroutegoingfurtherfromTV‐IP320PIIPv4
subnet
IPv6Address1: IPv6self‐assignedaddressincludingthesubnetprefix
expressionintheendofthestring.
IPv6Address2: IPv6staticaddressincludingthesubnetprefixexpression
intheendofthestring.
IPv6Default
Gateway:
ThedefaultroutegoingfurtherfromIPv6subnet
MACAddress: TheMACaddressoftheNVRnetworkinterface.
MTU: Maximumtransmissionunit.Themaximumfieldsize
intheEthernetpacket.Default:1500
PreferredDNS: EnteryourfirstIPv4orIPv6DNSserveraddress
AlternateDNS: EnteryoursecondIPv4orIPv6DNSserveraddress
ClickApplytoapplythechanges.

©Copyright2018TRENDnet.AllRightsReserved.
39
TRENDnetUser’sGuide
TV‐NVR408
DDNS
DynamicDomainNameService,DDNS,allowsyoutofindyourNVRfromthe
Internetwithaneasytorememberdomainname.
DDNS
EnableDDNS: CheckthisboxtoenableDDNSService.
DDNSType: SelectaDDNSserviceprovider:dyn.comorno‐ip.com.
ServerAddress: EntertheDDNSserveraddress.
DeviceDomain
Name:
Enteryourregistereddomain/hostnameonselected
DDNSservice.
Status: TheDDNSconnectionstatus.
UserName: Entertheaccountname.
Password: Enterthepassword.
Confirm: Enterthepasswordagain.
ClickApplytoapplythechanges.
NTP
NetworkTimeProtocolService.Theaccuracyofthesystemclockisimportantfor
schedulingandaccuratelogging.Youcanautomaticallycheckthetimeaccuracy
withanetworktimeserver(NTPserver).
NTPsettings
EnableNTP: CheckthisboxtoenableNTPService.
Interval: ThetimeintervalthattheNVRwillsynchronizethetimewith
NTPserver.Default:60minutes
NTPServer: Specifyatimeserver(NTPserver)tosynchronizewith.(e.g.
pool.ntp.org)
NTPPort: Theserverportnumber.Default:123.
ClickApplytoapplythechanges.

©Copyright2018TRENDnet.AllRightsReserved.
40
TRENDnetUser’sGuide
TV‐NVR408
Email
Setupemailaccountsfornotifications.
Email
Enable Server
Authentication:
Check this box if your server requires a password in
order to send email. Most email servers require
authenticationwhensendinganemail.
Username: Entertheusernameofoutgoingemailaccount
Password: Enterthepassword
SMTPServer: SimpleMailTransportationProtocolServeraddress,the
outgoing email server address. It may has address the
sameas yourincomingemail server, maybenot.Please
askyouremailserviceproviderfordetail.
SMTPPort: Serviceportnumberforoutgoingemail.*
Sender: Enterthenametobeappearedastheemailsender.
Sender’sAddress: Entersender’semailaddress.
SelectReceiver: Selectthepulldownmenutoselectthereceiveryou
wanttosetupthedetail.Youcansendto3accountsat
thesametime,butjustsetupseparately.
Receiver: Thereceiver’sname.
Receiver’s
Address:
Thereceiver’semailaddress.
*Note: Many ISPs does not allow service port 25 going through their network.
PleaseconsultyouremailserviceproviderandISPfordetail.
ClickApplytoapplythechanges.
ClickTesttotestifalltheinformationareenteredcorrectly.

©Copyright2018TRENDnet.AllRightsReserved.
41
TRENDnetUser’sGuide
TV‐NVR408
UPnP
UniversalPlug‐and‐Playisadevicediscoveryprotocolset.Itallowsyourcamerato
easilybefound,forexample,onaWindowsoperationsystem.
UPnP
EnableUPnP: CheckthisboxtoenableUPnPconnection.
MappingType: ChooseManualorAutoportmapping.
UPnPList
PortType: TheservicetypeontheUPnPport
Edit: Clicktheicontomanuallyedittheportmapping.
ExternalPort: Choosetheportnumberformapping.
MappingIP 0.0.0.0istheNVRself‐address.
Port: Localportnumber.
Status: UPnPStatus.
Moresettings
MoreSettings
ServerPort: TheserviceportnumberforNVRmanagement.The
defaultserviceportofNVRis8000.
HTTPPort: Thedefaultwebaccessport.Youcanchangetheport
number.Thedefaultportnumberis80.
RTSPPort: TheReal‐TimeStreamingProtocolportforvideo
streaming.Youcanchangetheport.Thedefaultport
numberis554.
ClickApplytoapplythechanges.

©Copyright2018TRENDnet.AllRightsReserved.
42
TRENDnetUser’sGuide
TV‐NVR408
LiveView
Changetheliveviewsettings.
General
Liveviewgeneralsettings
VideoOutput
Interface:
ThevideooutputinterfaceisVGAorHDMI
LiveViewMode: ChoosethedefaultLiveViewmodetobe1x1single
videoonthescreenor2x2fourvideoonthescreenat
thesametime.Default:2x2.
DwellTime: Setuphowlongeachdisplaywillbeshoweduponthe
screen.There’snoeffecton2x2displaymode.On1x1
mode,eachvideowillbeshownonthescreenforDwell
Timeandthenchangetothenextvideo.Default:10
seconds.
EnableAudio
Output:
EnableordisableaudiooutputontheNVR.Default:
disabled
EventOutput: Definewherethevideoisgoingoutwhenevent
triggered.TheNVRissettobothVGAandHDMI.
FullScreen
Monitoring
DwellingTime:
Wheneventtriggeredfullscreendisplay,wholongthe
videoisgoingtostayonthescreen.Default:10
seconds.
ClickApplytoapplythechanges.
View
Settingliveviewdisplayarrangementandsequence.
LiveViewLayoutandSequenceSettings
VideoOutput
Interface:
ThevideooutputinterfaceisVGAorHDMI
CameraList: Installedcameraswillbelistedherebychannel.
LayoutPanel: Previewhowthelayoutthevideodisplay.
Camera
List
Control
Panel

©Copyright2018TRENDnet.AllRightsReserved.
43
TRENDnetUser’sGuide
TV‐NVR408
Toremoveacamerafromthedisplay,justclick on
theselectedcell
toremovethechannel
number.
Toassignachanneltoadisplaycell,choosethecamera
fromthecameralist.
Note:Eachvideochannelcanbeassignedtoonedisplay
cell.Clickoncamerawhenitisnotassigned
and
double click on the list if it is currently assigned
to
otherdisplaycell.
MissingVideo:Ifyouassignachanneltoadisplaycell
andthere'snovideostream,thecellisshowing
TRENDnet.ToremovetheTRENDNetmessage,just
removethechannelassignmentonthedisplaycell.
ControlPanel:
:Singlechanneldisplay
:Quadchanneldisplay
:Automaticchannelassignment
:Removeallchannelassignments
:Previouspage
:NextPage
:Currentpage/Totalpage
Note: In single channel display, you can set up the
displaysequencewiththepagenumbers.
ClickApplytoapplythechanges.
Channel‐ZeroEncoding
Settingcameratocertainframerateandbitrates.
©Copyright2018TRENDnet.AllRightsReserved.
44
TRENDnetUser’sGuide
TV‐NVR408
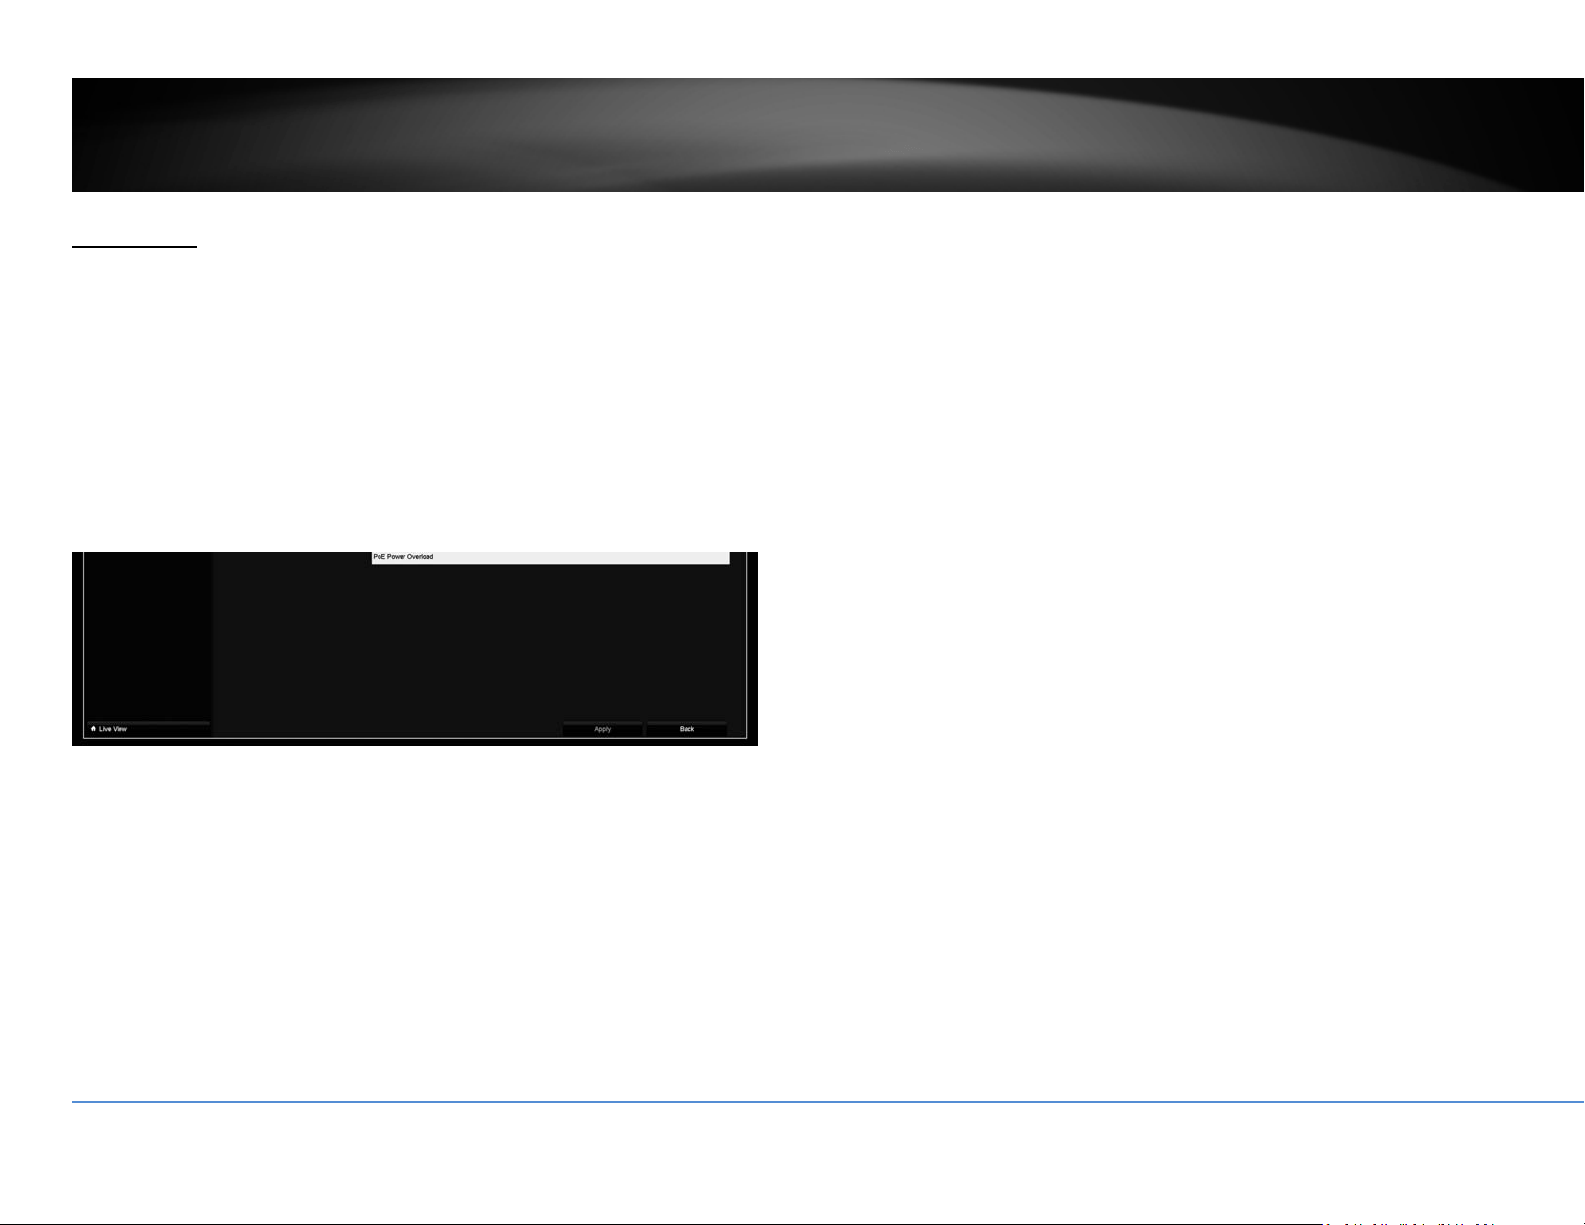
Exceptions
Setuptheactionwhenexceptionhappened.Selecttheexceptionyouwantto
monitorandthenchoosetheaudiblewarningoremailnotification.ClickApplyto
applythechangesandremembertosetupyouremailaccountifyouchoosethe
emailnotification.
ExceptionType
All: Anyofthefollowingexceptionswilltriggerthe
notification.
HDDFull: Bydefault,therecordingvideodoesnotoverwrite
whentheharddriveisfull.Youcansetupanaudio
warningorsendemailtosystemmanagertoremove
therecording.(YoucanalsosetuptheNVRfor
automaticoverwritetherecordingswhenthediskisfull.
Pleaseseepage61formoredetail.)
HDDError: Whentheharddrivereadingorwritingerror,theNVR
canmakeaudiblesoundorsendemailtosystem
managerfortheerror.Youcanusetheharddrive
maintenancetoolsontheNVRcheckingandmanaging
yourharddrive.Seepage55formoredetail.)
Network
Disconnected:
Theexceptionistriggeredwhennetworkportis
disconnected.
IPConflicted: TheNVRisconstantlymonitoringifthere’sanIPconflict
ishappening.Exceptionistriggeredwhenthere’sanIP
conflict.
IllegalLogin: ExceptionistriggeredwhenNVRdetecttheattempt
loginwithwrongcredential.
RecordException: Exceptionwillbetriggeredwhenanythinggoeswrong
duringvideorecordingprocess.
Alarmfeatureisnotsupportedonthismodel.
©Copyright2018TRENDnet.AllRightsReserved.
45
TRENDnetUser’sGuide
TV‐NVR408
UserAccounts
Youcansetupupto16useraccountstoaccessthecamera’svideostreamwitha
webbrowserorrealtimevideostream(RTSP).Onlyoneadministratoraccount
(username:admin)canbesetuptoconfiguretheNVRandcannotbedeleted.
Add
ClickAddbuttontoaddanaccount
Addaccount
User: Entertheusername.
Password: Enterthepassword.
Confirm: Enterthepasswordagain.
Level: Selecttheuser’slevelfromGuestorOperatorforthepreset
permissions.Bydefault,anoperatorcanviewthevideoand
operatethecamerapan,tilt,andzoom.Guestcanonlyviewthe
video.NVRsettingsareonlyallowedtobechangeswith
administratoraccount.
User’sMAC
Address:
Entertheuser’sMACaddresslimittheaccesstoaddonsecurity.
Leaveit00:00:00:00:00:00aswildcardaddressifyoudon’tlimit
theaccess.
Edit
ClickEdit
onusertochangetheaccountsettings.
Permission
ClickPermission
onusertochangetheaccountpermissionsettings.

©Copyright2018TRENDnet.AllRightsReserved.
46
TRENDnetUser’sGuide
TV‐NVR408
Permission:Localconfiguration
LocalLogSearch: SearchtheNVRlogwithlocallogin.
LocalParameters
Settings:
SettingNVRwithlocallogin.
LocalCamera
Management:
ManagecamerasonNVRwithlocallogin.
LocalAdvanced
Operation:
SettingNVRadvancedfeatureswithlocallogin.
LocalShutdown/
Reboot:
Accesstheshutdownmenuwithlocallogin.
Permission:Remoteconfiguration
RemoteLogSearch: SearchtheNVRlogwithweblogin.
RemoteParameters
Settings:
SettingNVRwithweblogin.
RemoteCamera
Management:
ManagecamerasonNVRwithweblogin.
RemoteAdvanced
Operation:
SettingNVRadvancedfeatureswithweblogin.
WebShutdown/
Reboot:
Accesstheshutdownmenuwithweblogin.

©Copyright2018TRENDnet.AllRightsReserved.
47
TRENDnetUser’sGuide
TV‐NVR408
Permission:Cameraconfiguration
CameraPermission: Thecameramanagementpermissionlist:
RemoteLiveView:Viewingvideothroughthenetwork.
LocalManualOperation:Managecamerasettingswith
localNVRlogin.
RemoteManualOperation:Managecamerasettings
withweblogin.
LocalPlayback:Allowrecordingplaybackonconnected
monitor.
RemotePlayback:Allowrecordingplaybackvia
networkaccess.
LocalPTZControl:AllowcameraPTZoperations
throughNVRwithlocalNVRlogin.
RemotePTZControl:AllowcameraPTZoperations
throughthenetwork.
LocalVideoExport:AllowexportingvideothroughUSB
port.
Channels: SelectD1~D4channelstoapplythepermissionto
selectedchannel(s).SelectIPCameraforallchannels.
ClickApplytoapplythechanges.
MaintenanceMenu
ManageyourNVRsystembybringupthemainmenu.ClickonSystem
MaintenanceMenu
icon.
SystemMaintenance
SystemInformationisdisplayinghereforsystemmaintenance.
NVRinformation
NVRInformation
DeviceName: Humanreadabledevicenameforeasyidentification.
YoucanchangethisnameinSystemconfiguration.
Model: ThemodelnameoftheNVR.
SerialNumber: Theuniqueidentificationnumberofthisdevice.
FirmwareVersion: Firmwareversion

©Copyright2018TRENDnet.AllRightsReserved.
48
TRENDnetUser’sGuide
TV‐NVR408
Camerainformation
CameraInformation
CameraNo.: Thechannelnumbercameraassignedinto.
CameraName: Cameradevicename
Status: Showingthecameraisconnectedordisconnected.
MotionDetection: Showingthestatusandsetupofthecameramotion
detection.
Tamper‐proof: Showingthestatusandsetupofthecameravideo
tamperdetection.
VideoLoss: Showingthestatusandsetupofthevideoloss
detection.
RecordingInformation
NVRRecordingStatusInformation
CameraNo.: Thechannelnumbercameraassignedinto.
RecordingStatus: Showingthestatusandsetupofthevideorecording.
FrameRate: Showingthecamerarecordingframerate.
Bitrate: Showingthecamerarecordingvideostreambitratein
thousandsbitspersecond.
Resolution: Showingthecamerarecordingvideoresolution.
RecordType: Showingthetypeofrecording.
Encoding
Parameters:
Showingtheencodingparameters.
Alarmisnotsupportedforthismodel.

©Copyright2018TRENDnet.AllRightsReserved.
49
TRENDnetUser’sGuide
TV‐NVR408
NetworkInformation
NVRNetworkInterfaceInformation
NIC: NetworkInterfaceCard.LAN1istheassignednetwork
interfacewhichrepresenttothenon‐PoEnetworkport.
IPv4Address: TheIPv4addressonthisinterface
IPv4SubnetMask: Networkrangeofthesubnet
IPv4Default
Gateway:
ThedefaultroutegoingfurtherfromTV‐IP320PIIPv4
subnet
IPv6Address1: IPv6self‐assignedaddressincludingthesubnetprefix
expressionintheendofthestring.
IPv6Address2: IPv6staticaddressincludingthesubnetprefixexpression
intheendofthestring.
IPv6Default
Gateway:
ThedefaultroutegoingfurtherfromIPv6subnet
EnableDHCP: TheIPaddressisassignedbyDHCPserverornot.
StorageInformation
HDDStatusInformation
Label: IndexoftheHDD.NVRsupports2HardDrivebayswith
upto6TBeach.
Status: Showingtheharddriveworkingcondition.
Capacity: Thetotalharddrivestoragecapacityafterformatting.
Freespace: Displayshowmuchspaceisavailablefreeforvideo
recordings.
Property: R/W:Allowreadandwrite.
Type: Local:TheharddriveisinstalledontheNVR.
Group: TheHDDonNVRisassignedtothegroup1.

©Copyright2018TRENDnet.AllRightsReserved.
50
TRENDnetUser’sGuide
TV‐NVR408
LogInformation
AllNVRactivitiesareregisteredonthelog.Findtheactivitybysearchingwithtime
rangeandlogtype.ClickSearchtostartthesearch.
LogSearch
LogSearch
StartTime: Thestartingtimeofalogsearch.
EndTime: Theendtimeofthetimerangeforthelogsearch.
MajorType: Filterthesearchbytypeoflogs:all,alarm,exceptions,
operation,andinformation.
MinorType: Filterthesearchbytypeoflogs.Selectthemajortype
andthenchoosetheminortype.
Alarm:Startmotiondetection,stopmotiondetection,
starttemper‐proof,stoptamper‐proof,andIP
CameraAlarm.
Exception:videoloss,illegallogin,HDDfull,HDDerror,
IPconflict,networkdisconnect,recording
exception,IPcameradisconnection,IPcamera
addressconflict,recordingbufferoverflow.
Operation:
poweron,abnormalshutdown
Localoperations:shutdown,reboot,login,
logout,configureparameters,upgrade,start
recording,stoprecording,PTZcontrol,lockfile,
unlockfile,initializeHDD,addIPcamera,delete
IPcamera,setIPcamera,playbackbyfile,
playbackbytime,exportconfigurationfile,
importconfigurationfile,exportrecordings,
restoreadministrator’spassword,operatetag,
andHDDdetect.
Remoteoperations:reboot,login,logout,
configureparameters,upgrade,startrecording,
stoprecording,PTZcontrol,lockfile,unlockfile,
initializeHDD,addIPcamera,deleteIPcamera,
setIPcamera,playback/downloadbyfile,
playback/downloadbytime,export
configurationfile,importconfigurationfile,
exportrecordings,interrogateparameters,
interrogateworkingstatus,start‐twoway
audio,stoptwo‐wayaudio,alarmarming,alarm
disarming,andoperatetag.
Information:localHDDinformation,HDDS.M.A.R.T.
startrecording,stoprecording,deleteexpiredrecording,
andsystemrunningstatus.
©Copyright2018TRENDnet.AllRightsReserved.
51
TRENDnetUser’sGuide
TV‐NVR408
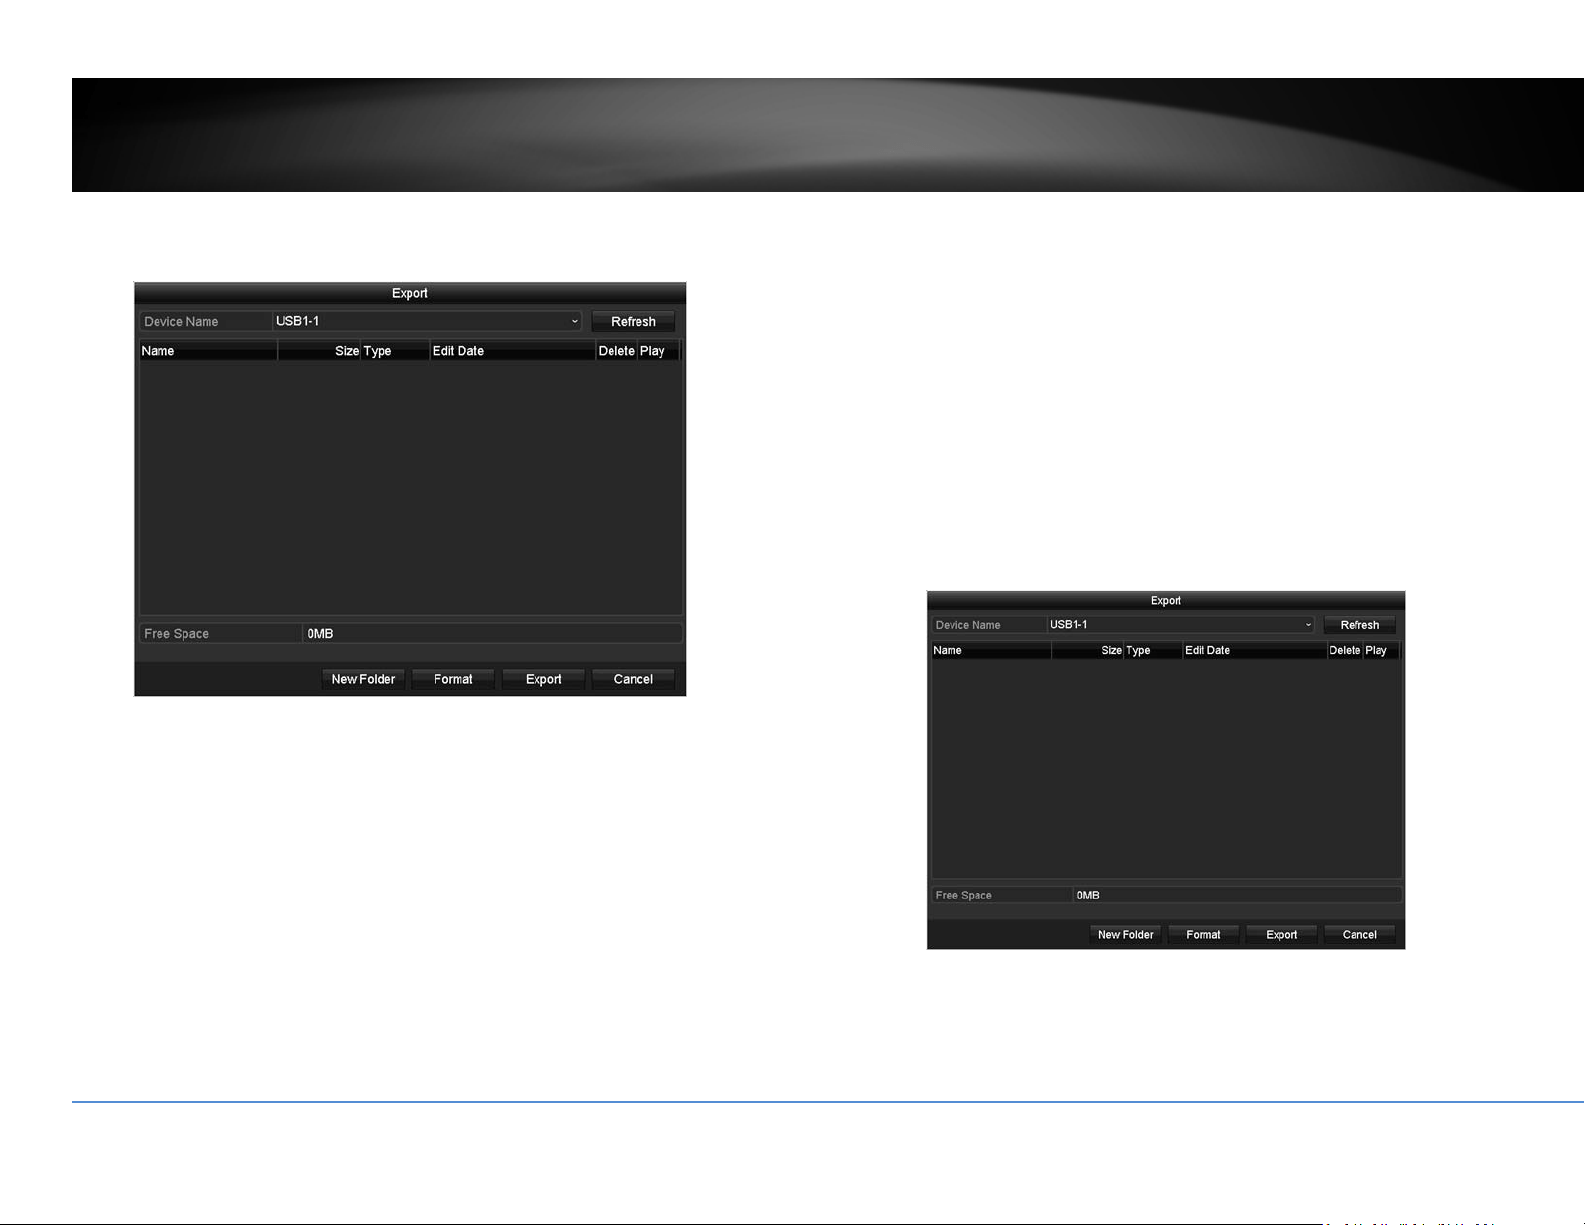
Export
ClickExportonthispagetoexportlogonthelist.
ClickExportagaintoexportthelogtotheUSBdriveofyourchoice.SelecttheUSB
driveontheDeviceNameandthenclickRefreshifyouwanttochangethedrive.
ClickNewFoldertocreateanewfolderoncurrentdirectory.ClickFormatto
formatthisUSBstorage.
LogExport
ToexportalllogssavedonNVR,clicktheLogExporttab,selecttheharddrive,and
thenclickExport.
ClickExportagaintoexportthelogtotheUSBdriveofyourchoice.SelecttheUSB
driveontheDeviceNameandthenclickRefreshifyouwanttochangethedrive.
ClickNewFoldertocreateanewfolderoncurrentdirectory.ClickFormatto
formatthisUSBstorage.

©Copyright2018TRENDnet.AllRightsReserved.
52
TRENDnetUser’sGuide
TV‐NVR408
Import/ExportConfigurationSettings
TosavecurrentorloadpreviousNVRsettings,choosetheImport/Exportpage
andthenexportthefiletotheUSBdriveorimportthefile.
ClickExporttoexportthesettingstoafileontheUSBdriveofyourchoice.Select
theUSBdriveontheDeviceNameandthenclickRefreshifyouwanttochangethe
drive.ClickNewFoldertocreateanewfolderoncurrentdirectory.ClickFormatto
formatthisUSBstorage.
FirmwareUpgrade
LocalUpgrade
TRENDnetmayperiodicallyreleasefirmwareupgradesthatmightaddfeaturesor
fixproblemsassociatedwithyourTRENDnetmodelandversion.Tofindoutifthere
isafirmwareupgradeavailableforyourdevice,pleasecheckyourTRENDnetmodel
andversionusingthelink.
http://www.trendnet.com/downloads/
1. If a firmware upgrade is available, download the firmware to your
computer.
2. Unzipthefiletoafolderonyourcomputer.
3. Read the firmware upgrade instruction for specific version update
information.
4. LogintotheNVR.
5. GettingtothisMaintenancepagetoupgradefirmware.
ExtractthefirmwarefilefromthedownloadedzipfileandthensaveittotheUSB
drive.PlugintheUSBdrivetooneoftheavailableUSBslotontheNVR.Choose
UpgradepageandthenclickonUpgrade.
RemoteUpgrade
YoucansetuptheupgradeoverthenetworkwithFTPprotocol.ToproceedFTP
upgrade,youneedtoprepareaFTPserveronthelocalnetworkwithusername:ftp
andpassword:ftp.Placethefirmwarefileontherootdirectorywhentheftp
accountisloggingintheFTPserver.
Navigatetotheremoteupgrade(FTP)page.EntertheFTPserveraddress,andthen
clickonUpgrade.

©Copyright2018TRENDnet.AllRightsReserved.
53
TRENDnetUser’sGuide
TV‐NVR408
FactoryDefault
ToresettheNVRtothefactorydefault,navigatetothisDefaultpageandthen
clickonOKtoresetallNVRsettingsbacktofactorydefault.
NetworkMonitoring
Traffic
Tomonitorthenetworktraffic,navigatetothetrafficchart.
Traffic
LAN1: Thenetworkinterface.
Sending: ThenetworktrafficgeneratedfromtheNVR.
Receiving: ThenetworktrafficreceivingbytheNVR.
LinkStatus: Thenetworklinkingstatus.
Type: Typeofnetwork,Ethernet.
MACAddress: MediaAccessAddressofthenetworkinterface.
MTU: MaximumTransmissionUnitinbytes.
NICType: Typeofthenetworkcard.Speedandduplexing.
©Copyright2018TRENDnet.AllRightsReserved.
54
TRENDnetUser’sGuide
TV‐NVR408
NetworkTools
Usenetworktools(NetworkDetection)ontheNVRtotestthenetworkstatus.
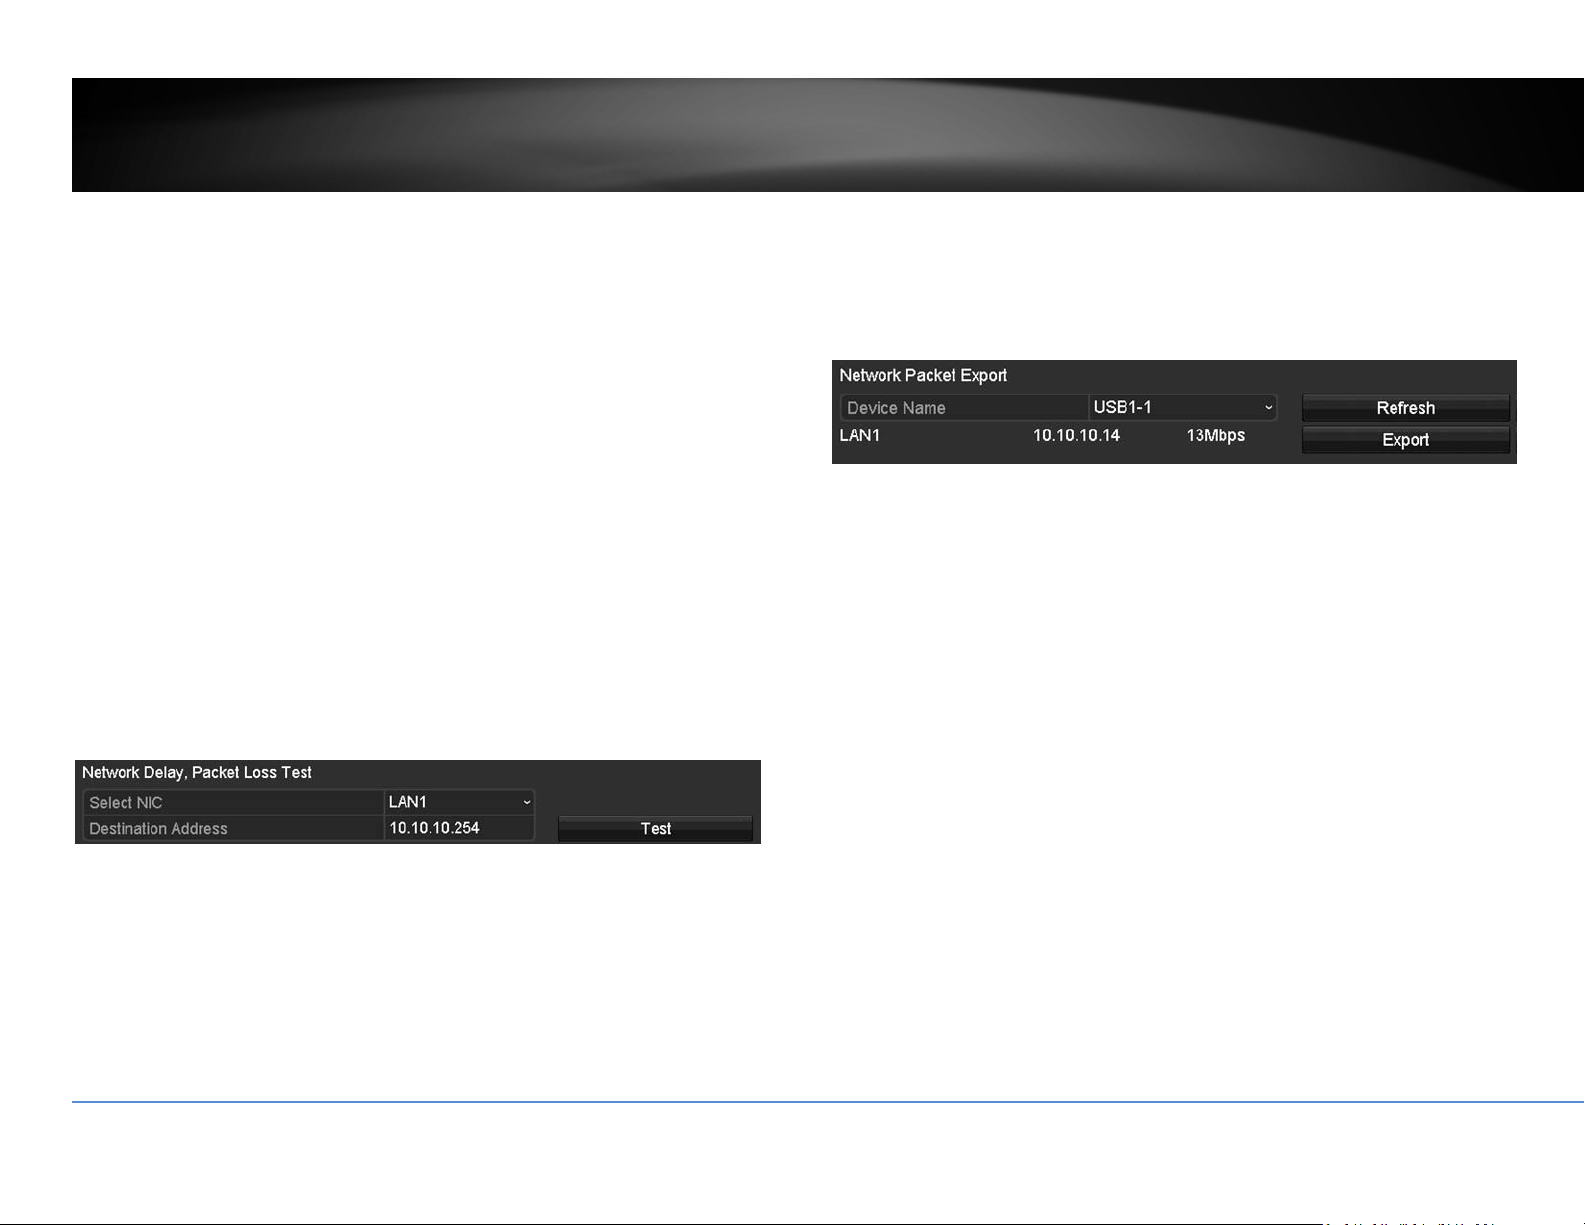
Networkdelayandpacketlosstest
ThebasicPINGtesttool.EnterthetestingdestinationIPaddressandthenclickon
theTest.
Networkpacketexport
CapturepacketsandsavetoexternalUSBstoragefornetworkanalysis.Plug‐inyour
USBnetworkdriveandthenclickExporttoexportthepacketcapturefiles.Click
RefreshtolistthedirectoryonyourUSBstorageagain.
NetworkStatistics
Toreviewthenetworkstatisticinformation,navigatetotheNetworkStatistics
page.ClickRefreshtoupdatetheinformation.
©Copyright2018TRENDnet.AllRightsReserved.
55
TRENDnetUser’sGuide
TV‐NVR408
HardDriveMaintenance
S.M.A.R.TSettings
TheS.M.A.R.T.(Self‐Monitoring,AnalysisandReportingTechnology)isamonitoring
technologytodetectandreportonvariousperformanceandreliabilityfactorsto
helppredictandpreventdiskfailures.
S.M.A.R.T.Settings
Continuetouse: ChecktheContinuetousethisdiskwhenself‐
evaluationisfailedifyouwantittodoso.Click
Applyifyouchangethissetting.
HDD: TheDisknumber.TheNVRhasoneHDD.
Capacity: Thetotalharddrivestoragecapacityafter
formatting.
Self‐testStatus: Showingtheself‐testingstatus.
Self‐testType: ChooseatypeofS.M.A.R.T.test:short,expanded,
andconveyancetests.
S.M.A.R.T.: Click tostartS.M.A.R.T.test.
Temperature: ThetemperatureoftheharddriveinCelsius.
Powerondays: Daystheharddriveison.
Self‐evaluation: Theresultofself‐evaluation.
All‐evaluation: Functionalevaluations.
S.M.A.R.T.
Information:
DetailedS.M.A.R.T.harddriveinformation.
BadSectorDetection
Detectifthere’sanybadsectoronthediskdrive.
©Copyright2018TRENDnet.AllRightsReserved.
56
TRENDnetUser’sGuide
TV‐NVR408
BadSectorDetection
HDDNo.: TheDisknumber.TheNVRhasoneHDD.
Capacity: Thetotalharddrivestoragecapacityafter
formatting.
Typeof
Detections:
Selectkeyareadetectionorfulldetection.
Detect: Clickthisbuttontostartbadsectordetection.
HDDCapacity: Thestoragecapacityoftheharddrive.
BlockCapacity: Theblockcapacity.
Status: Thestatusofbadsectordetection.
Errorcount: Thetotalerrorcountdetected.
ErrorInfo. Detailedsectordamageorshieldinformation.
Pause: Pausethebadsectordetectiononceitstart
running.
HardDriveManagement
Manageandallocateyourstoragespacebybringupthemainmenu.ClickonHDD
Menu
icon.
Format/InitiatetheHardDrive
SelecttheharddriveandthenclickonInittoformatandinitializetheharddrive.
©Copyright2018TRENDnet.AllRightsReserved.
57
TRENDnetUser’sGuide
TV‐NVR408
AdvancedStorageQuotaSettings
Tosetupthediskquotaforeachchannelvideorecording,selectthecameraand
thenenterthemaximumrecordingcapacity.
Storagequotasettings
Mode: Quotasetting
Camera: Selectthecamerayouwanttosetupthestorage
quota.
UsedRecord
Capacity:
Thestoragespacespendinrecordingforthe
specificchannel.
HDDCapacity: Thestoragecapacityoftheharddrive.
Max.Record
Capacity:
Allocatetherecordingspacetoselectedvideo
channelingigabytes.
ClickCopytocopythesamequotasettingtootherchannel.
ClickApplytoapplythechanges.
Scheduledrecording
Setupthevideorecordingsettingsbybringupthemainmenu.ClickonScheduled
RecordingMenu
icon.
Schedule
Selectthevideochannel,typeofrecording,andthenclickanddragontheweekly
schedule.ClickEdittobringupthedetailedschedulesettingtableorclickCopyto
copythesamescheduletootherchannel.

©Copyright2018TRENDnet.AllRightsReserved.
58
TRENDnetUser’sGuide
TV‐NVR408
1. Selectchannel.
2. Selectrecordingtype.ChoosefromContinuousorMotionrecording.Ifyou
wanttoclearoutsomescheduledrecordingtime,chooseNone.
3. Selectthetimeslotsyouwanttomakethescheduledrecording.Eachtime
slotrepresentsahalfhourinterval.Therownumberrepresentstheweek
ofthedaystartingfromMonday.
4. Ifyouwanttodefinethescheduleinfinerintervals,clickonEditbutton.
5. MakeyourselectionandthenclickApplytoapplythechanges.
Schedule: Selectthedayoftheweek
AllDay: Selectifyouwanttosetuptheall‐dayrecording.
©Copyright2018TRENDnet.AllRightsReserved.
59
TRENDnetUser’sGuide
TV‐NVR408
Start/EndTime: Specifythestartingandendofrecordingtimein24‐hour
format.
Type: SelectContinuousorMotionDetectionrecording
Copyto:
Toquicklysetupthesamescheduleovertheweek,clickCopy.Clickanother
dayoftheweek(1:Monday,2:Tuesday,3:Wednesday,4:Thursday,5:Friday,
6:Saturdayand7:Sunday).ClickAlltoselectthewholeweek.ClickOKafter
youselectthedayoftheweekyouwanttocopyto.
VideoSettings
Setupthevideoqualityforrecording(mainstream),thehighervideoquality
requirelargerstoragespaceandbetternetworkcondition.Pleasechoosethebest
profileofyourchoice.
Note:Settingsinthissectionarenotavailableallcameras.TheNVRwillpromptthe
messagetoremindyouthesettingisnotavailableonselectedcamera.
MainStream(Record)Settings
Camera: Selectthecamerayouwanttochangetherecording
videoquality.
Encoding
Parameters:
Thetypeofvideofromthecamera.

©Copyright2018TRENDnet.AllRightsReserved.
60
TRENDnetUser’sGuide
TV‐NVR408
StreamType: Selectyouwanttostreamvideoonlyorvideoandaudio.
Resolution: Selectthevideoresolution.
Bitratetype: Thebitrateistherateofinformationgeneratedfromthe
video.Thehigherbitratemeansmoredataandmore
trafficandbettervideoquality.Constantbitrate
generatessameamountofinformationoverthesame
periodoftime.Variablebiteratetakesonestepfurther
tocompresstheinformationwheneveritcan,therefore,
generatesthesameorloweramountofinformation
comparetotheconstantbitrate.
VideoQuality: Selectthevideocompressionalgorithm.
Framerate: Selecttheframeratetodecidehowmanypicturesyou
wanttotakeineachsecond.
Max.BitrateMode: SelectGeneraltosetthemaximumbitrateincertain
brackets.ChooseCustomizedtosetthemaximum
bitrateonyourown.
Max.Bitrate: ThemaximuminformationallowedtorecordontheNVR
inthousandsofbitspersecond.
Max.BitrateRange
Recommended:
Recommendedbitratesetting.
Pre‐Record: Iftherecordingistriggeredbythemotionevent,this
valuespecifiestostartrecordingsomeperiodoftime
beforethemotioneventhappened.
Post‐Record: Iftherecordingistriggeredbythemotionevent,this
valuespecifiestorecordvideosomeperiodoftimeafter
themotioneventhappened.
ExpiredTime: Locktherecordingvideoforsomeperiodoftime(in
days)topreventaccidentallybeenoverwriteordelete.
RecordAudio: Recordingaudioornot.
SubStream
ThesubstreamvideoismainlyforNVRliveview.Changeyourcameraoptionto
lowerresolutionifyourcamerageneratestoomuchinformationtotheNVRforlive
view.
SubStream
Camera: Selectthecamerayouwanttochangetherecording
videoquality.
StreamType: Streamingtypeisvideoonly.
Resolution: Selectthevideoresolution.
Bitratetype: Thebitrateistherateofinformationgeneratedfromthe
video.Thehigherbitratemeansmoredataandmore
trafficandbettervideoquality.Constantbitrate
generatessameamountofinformationoverthesame
periodoftime.Variablebiteratetakesonestepfurther
tocompresstheinformationwheneveritcan,therefore,
generatesthesameorloweramountofinformation
comparetotheconstantbitrate.
VideoQuality: Selectthevideocompressionalgorithm.
Framerate: Selecttheframeratetodecidehowmanypicturesyou

©Copyright2018TRENDnet.AllRightsReserved.
61
TRENDnetUser’sGuide
TV‐NVR408
wanttotakeineachsecond.
Max.BitrateMode: SelectGeneraltosetthemaximumbitrateincertain
brackets.ChooseCustomizedtosetthemaximum
bitrateonyourown.
Max.Bitrate: ThemaximuminformationallowedtorecordontheNVR
inthousandsofbitspersecond.
Max.BitrateRange
Recommended:
Recommendedbitratesetting.
Advancedrecordingsetting
SetupiftheNVRcanoverwritethepreviousvideorecordingornot.Ifyouchecked
thisoption,theNVRwilloverwriteoldrecordingswhenthediskisfull.Otherwise
theNVRwillsendDiskFullNotificationtoletadministratorknowsthatthediskis
fullandcannotproceedanyrecording.
Holidayscheduling
Recordingvideoinholidaysmayhasdifferentrequirements.Youcansetupto11
holidaysofayearsharingthesameholidayprofile.
Setuptheholidayschedulebyclickon
button.

©Copyright2018TRENDnet.AllRightsReserved.
62
TRENDnetUser’sGuide
TV‐NVR408
EditHolidaySchedule
HolidayName: Changetheholidaynametomeaningfulnameinsteadof
indexnumbers.
Enable: Enableordisablethisholidayrule.
Mode: Selecttheholidayisforaday,aweekoramonth.
Daymode:Selectthestartandenddatestospecifythe
periodofholidays.Thissettingisgoodforonetimeonly.
Itdoesnotrepeatperiodically.
Weekmode:Selectthestartandenddatesoftheweek
tospecifytheperiodofholidays.Thissettingisrepeating
everyyear.
Monthmode:Selectthestartandenddatestospecify
theperiodofholidays.Thissettingisrepeatingevery
year.
StartDate: Selectthedaywhentheholidaystarts.
EndDate: Selectthedaywhentheholidayends.
ClickApplybuttontoapplythechangeandclicktheOKbuttontofinishtheediting.
BackupVideoRecordings
Quicklyandbackupandexportyourvideorecordingswiththefileexportingmenu.
BringupthemainmenuthenclickonExportMenu
icon.
Export
SelectthevideochannelandrangeoftimeandthenclickonSearchtosearchthe
videoyouwanttoexport.ClickQuickExportifyouwanttoexportallvideo
recordings.

©Copyright2018TRENDnet.AllRightsReserved.
63
TRENDnetUser’sGuide
TV‐NVR408
Quickexport
ClickExportagaintoexportallthevideorecordingstotheUSBdriveofyourchoice.
SelecttheUSBdriveontheDeviceNameandthenclickRefreshifyouwantto
changethedrive.ClickNewFoldertocreateanewfolderoncurrentdirectory.Click
FormattoformatthisUSBstorage.
Exportwithsearch
Selectthevideoclipsyouwanttoexportbycheckoruncheckthevideoclip.Then
clickExporttoexportthevideorecordings.
Click
topreviewthevideoclip.

©Copyright2018TRENDnet.AllRightsReserved.
64
TRENDnetUser’sGuide
TV‐NVR408
Click tolockthevideoclip.Whenvideoislocked,thevideoclipisnotgoingto
beoverwriteaccidentally.Tounlockthevideoclip,click
.Thewarningmessage
willremindyouagainyouareunlockingthevideoclip.ClickYesifyouwantto
proceedunlock.
ClickExportagaintoexportthevideorecordingstotheUSBdriveofyourchoice.
SelecttheUSBdriveontheDeviceNameandthenclickRefreshifyouwantto
changethedrive.ClickNewFoldertocreateanewfolderoncurrentdirectory.Click
FormattoformatthisUSBstorage.
Videoplayback
BringupthemainmenuthenclickonExportMenu icon.

©Copyright2018TRENDnet.AllRightsReserved.
65
TRENDnetUser’sGuide
TV‐NVR408
Playbackscreen
Typeof
Playback
LiveView
Channel
Selection
Recording
search
Action
Buttons
Playback
Buttons
TimeLine
ScaleButtons
©Copyright2018TRENDnet.AllRightsReserved.
66
TRENDnetUser’sGuide
TV‐NVR408
Searchforvideorecordings
CheckonthecamerayouwanttoseetheplaybackorcheckonCameratoselectall
channels.Then,choosethedatefortherecording.Iftherearevideorecordingin
selectedchannel,thedateonthecalendarwillshowblue.Doubleclickthedateto
startplayback.
Timeline
Thereisaplaybackheadinthecenterofthetimelinerepresentedinayellow
verticalline.Tolookforaspecificvideorecording,movetheplayheadbyclicking
anddraggingit.Iftherecordingisshort,zoominbyclicking
button.Click
tozoomoutthetimescale.
Playbackbuttons
Useplaybackcontrolstoplaybackthevideorecording.
Clickthisbuttontoplaythevideobackward.
Clickthisbuttontoplaythevideo.
Clickthisbuttontopausevideoplayback.
Clickthisbuttontostopplayback.
Clickthisbuttontoskipforward30seconds.
Clickthisbuttontoskipbackward30seconds.
Clickthisbuttonincreaseplaybackspeed*.
Clickthisbuttondecreaseplaybackspeed*.
Clickthisbuttontojumptothenextday.
Clickthisbuttontojumptothepreviousday.
*Note:Thereare5stepsofplaybackspeedyoucanchoosefrom:1/4,1/2,1,2,and
4timesoforiginalspeed.
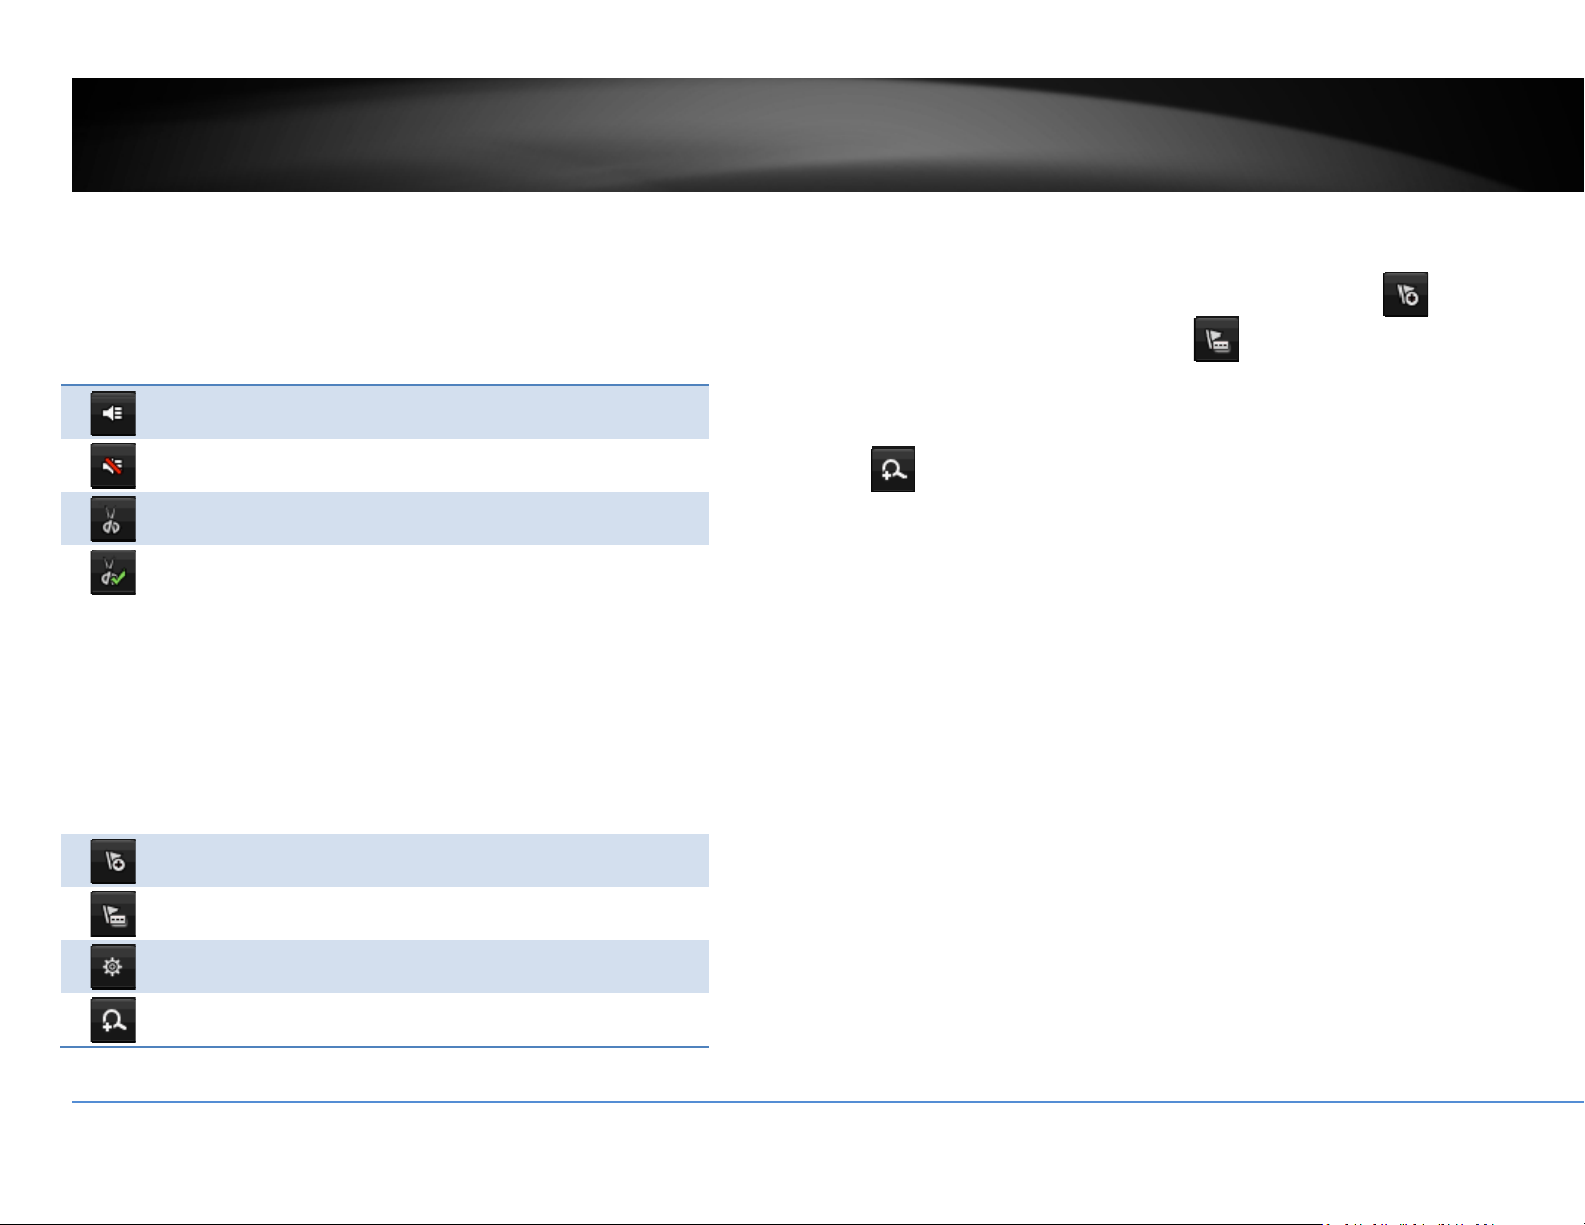
©Copyright2018TRENDnet.AllRightsReserved.
67
TRENDnetUser’sGuide
TV‐NVR408
Playbackoperations
Moreplaybackoperationssuchasmutetheaudio,clipacustomizedvideo,addand
managetags,andzoomintheviewingareavailableontheactionbuttonssection.
Theaudioison.Clickthisbuttontomutetheaudio.
Theaudioismuted.Clickthisbuttontoenableaudio.
Clickthisbuttontostartvideoclipping.
Clickthisbuttontostopvideoclipping.Youcanmake
multiplevideoclips.Whenyoufinishallclippingandexit
theliveview,theNVRwillpromptandaskingyoutosave
thevideoclips.
Clickthisbuttontoaddatagwithdefaulttagname.
Clickthisbuttontoaddatagwithcustomizedtagname.
Clickthisbuttontomanagethetags
Clickthisbuttontozoomintheliveview.
Tagging
Taggingonvideorecordingshelpyoutomarkthecriticaltimeofvideorecording
andeasiertrackingandediting.Findthevideoiscriticalandclickon
tomake
thetagwithdefaulttagname“tag”.Clickon
tomakethetagwithcustomized
tagname.SearchthevideoonTaggedvideoplaybackmodeexplainedinfollowing
sections.
Zoom
Click
tozoomtheplayback.Anavigatewindowwillshoweduponrightlower
screencorner.Draganddropordoubleclicktodefinetheareayouwanttozoom
in.Thedefinedareaisshowedinredrectangular.Rightclicktoexitthezoommode.

©Copyright2018TRENDnet.AllRightsReserved.
68
TRENDnetUser’sGuide
TV‐NVR408
Playbackmodes
Thevideoplaybacknotonlycanplaybackthevideorecordedontheharddrive
indexedbythetime.Youcanalsosearchthevideowithmotiondetectionevent,
tag,orplaybackthevideostoredontheUSBexternalharddrive.
Event
Tosearchvideowithmotiondetectionevent,clickandselecttheEventplayback
mode.
Selectthechannelyouwanttosearchthemotiondetection.Enterthestartand
stoptime.And,thenclickonSearch.
Themotionrecordingeventsareshowedonthelist.Click
toviewthevideo.
Usethescrollbartobrowsetherecordingsandadjustthepre‐playandpost‐play
between5secondsandthemaximumamountofasinglesectionofrecordingto
decidethelengthofplaybackbeforeandafterthemotionevent.
Tag
Ifyousetupthetagsandwanttosearchvideowiththetags,clickandselectthe
Tagplaybackmode.
Selectthechannelyouwanttosearchthetags.Enterthestartandstoptime.Ifyou
wanttosearchforspecifictagname,enterthetagnameorleaveitblankforall
tags.And,thenclickonSearch.

©Copyright2018TRENDnet.AllRightsReserved.
69
TRENDnetUser’sGuide
TV‐NVR408
Thetagssearchedareshowedonthelist.Click
toviewthevideo.
Usethescrollbartobrowsetherecordingsand
adjustthepre‐playandpost‐playbetween5
secondsandthemaximumamountofasingle
sectionofrecordingtodecide
thelengthofplaybackbefore
andafterthemotionevent.
©Copyright2018TRENDnet.AllRightsReserved.
70
TRENDnetUser’sGuide
TV‐NVR408
Externalfile
ToplaybackthevideofilessavedontheUSBdrive,clickandselecttheExternalFile
playbackmode.
SelecttheUSBdevicetobrowsethefiles.ClickRefreshtoupdatethelistwhen
necessary.
Click
toviewthevideoandusetheplaybackcontroltocontroltheplayback.
AccessyourNVRwiththeWebBrowser
DefaultSettingsandFactoryReset
TomanageyourNVRthroughthewebbrowser,youhavetosetupthe network
connectionfirst.Ifyoudidn’tsetupyourNVRattachingtoyour home/business
network,pleaseenableNVR’sDHCPclient.ClickApplyandthenrestarttheNVR.If
you have already installed your cameras, you have to manually change their
settings. (You don’t have to do anything for plug‐and‐Play models connected
directlyonPoEports.)Checkthenetworkstatuswhennecessarytomakesurethe
NVRgetstheIPaddressfromyournetwork.
Here’sthelistofyourNVR’sfactorydefaultsettings:
SystemDefault
ManagementIP: 192.168.10.60.
Administratorname: admin
Administratorpassword: admin
Note:If youare nothavinga brandnew NVR,youmay notknow whatpassword
wassetupontheNVR.Inthiscase,youhavetocallour24‐hourtechsupporttoget
temporaryaccesscodetoresettheNVR.

©Copyright2018TRENDnet.AllRightsReserved.
71
TRENDnetUser’sGuide
TV‐NVR408
SystemRequirement
ToaccessyouNVRwiththebrowser,youneedaWindowsorOSXbasedcomputer
andup‐to‐datebrowser(InternetExplorer,Safari,orFirefox).Awebbrowserplug‐
inmustbeinstalledtosupportedcomputerandbrowsertowatchthevideo.
You need to setup the IP address in the same network of NVR. (192.168.10.x
network or your home network). For example, setup your computerwith
192.168.10.2staticIPaddress.
ForWindowssystem,pleasegotothenextparagraph.
ForOSXsystem,pleasegodirectlytopage74.
Logging‐intotheNVRfortheFirstTime(Windows)
1. OpenInternetExplorerandtypeintheNVR’sIPaddress.(default
192.168.10.60iftheNVRisnotconnectedtoanetwork)
2. Enter the user name, admin, and the password you setup through the
basic setup. If you didn’t setup your password, the change password
windowwillpopuponstep9toguideyouthroughthepasswordchanging.
Thedefaultpasswordisadmin.
3. TheNVR management page will detect if you installed the cameravideo
streamingplug‐inornot.Clickthelinktodownloadtheplug‐infromNVR.
4. ClickonRuntoinstallthewebplug‐inforthecameras.
5. PermissionrequestmayshowupdependsontheInternetsecuritysettings
on your computer. Click More Info and then Run anyway to install the
plug‐in.

©Copyright2018TRENDnet.AllRightsReserved.
72
TRENDnetUser’sGuide
TV‐NVR408
6. ClickNexttoinstalltheplug‐in.
7. ClickFinishtofinishtheinstallation.
8. Openthebrowserandloginagain.
9. (Gotostep11ifyoualreadychangedyourpassword).TheNVRwillaskyouto
changeyourpasswordfromdefaultsetting.Pleaseenterthenewpassword
twice and click OK. The password must be between 8 and 16 characters.
(Alphanumeric:a‐z,A‐Z,0‐9,!,@,#,$).
10. Entertheusernameadminandnewpasswordagaintostartsecuredsession.

©Copyright2018TRENDnet.AllRightsReserved.
73
TRENDnetUser’sGuide
TV‐NVR408
11. TheLiveViewpagewillshowupandbeginstreamingvideo.
Note:Ifyouwerenotgothroughthebasicsetup,thecameraplug‐and‐playprocess
willbeginafteryousetupthepassword.WaitafewminutesandpressF5torefresh
thebrowserforthelivevideo.
Logging‐intotheNVRfortheFirstTime(OSX)
1. OpenSafarionyourcomputer.Intheaddressbar,entertheIPaddressofthe
NVR192.168.10.60.(IfyouhaveaDHCPserveronyournetwork,theIPaddress
willbeassigneddynamically.Forexample,ifyouhaveahomegatewayonyour
networkandyouplug‐intheNVRonthesamenetwork,thenyoucanfindthe
NVRIPaddressonyourhomegateway),andthenpressEnter.
2. Entertheusername,admin,andthedefaultpassword,admin,andthenclick
OK.

©Copyright2018TRENDnet.AllRightsReserved.
74
TRENDnetUser’sGuide
TV‐NVR408
3. The camera management page will detect if you installed the camera video
streamingplug‐inornot.Clickthelinktodownloadtheplug‐infromtheNVR.
Note: Internet connection is required to download the plug‐in. If you do not
have Internet access, you can find the plug‐in on the CD comes with the
packageunder/Macfolder.
4. Quityourbrowsercompletelybycommand‐Clickonthebrowsericonandthen
clickQuitbeforeinstallingtheplug‐in.
5. Go to the FinderandnavigatetotheDownloadfolder.Command‐Clickthe
WebComponents.pkgandthenclickOpen.(Ifyouareinstalltheplug‐infrom
theCD,justbrowseto/MacfolderanddoubleclicktheWebComponents.pkg
file.)

©Copyright2018TRENDnet.AllRightsReserved.
75
TRENDnetUser’sGuide
TV‐NVR408
6. ClickOpentostartinstallation.
7. ClickContinuetoinstalltheplug‐in.
8. Selectadestinationtoinstalltheplug‐in.ThenclickContinue.
9. UsethedefaultlocationandclickInstall.

©Copyright2018TRENDnet.AllRightsReserved.
76
TRENDnetUser’sGuide
TV‐NVR408
10. EnteryourpasswordandclickInstallSoftware
11. Installationwillprocessautomatically.
12. ClickClosetoexittheinstallation.
13. OpenthebrowserandloginagainwiththedefaultIP192.168.10.30ortheIP
thatwasdynamicallyassignedbyyourrouter.
14. Entertheusername,admin,andthedefaultpassword,admin,andthenclick
OK.

©Copyright2018TRENDnet.AllRightsReserved.
77
TRENDnetUser’sGuide
TV‐NVR408
15. ClickTrust(You’llhavetodothisagainwhenyourcamerachangestoanewIP
address.)
16. TheNVRwillaskyoutochangeyourpasswordfromthedefaultsetting.Please
enterthenewpasswordtwiceandclickOK.Thepasswordmustbebetween8
and16characters.(Alphanumeric:a‐z,A‐Z,0‐9,!,@,#,$).
17. Entertheusernameadminandnewpasswordagaintostartsecuredsession.
18. TheLiveViewpageshowsupandthevideostartstostream.
Note:Ifyouwerenotgothroughthebasicsetup,thecameraplug‐and‐playprocess
willbeginafteryousetupthepassword.Waitafewminutesandpresscommand‐R
torefreshthebrowserforthelivevideo.

©Copyright2018TRENDnet.AllRightsReserved.
78
TRENDnetUser’sGuide
TV‐NVR408
Basic
LiveView
Afteryoulog‐inintothecameramanagementpage,you’llseetheLiveViewpage.
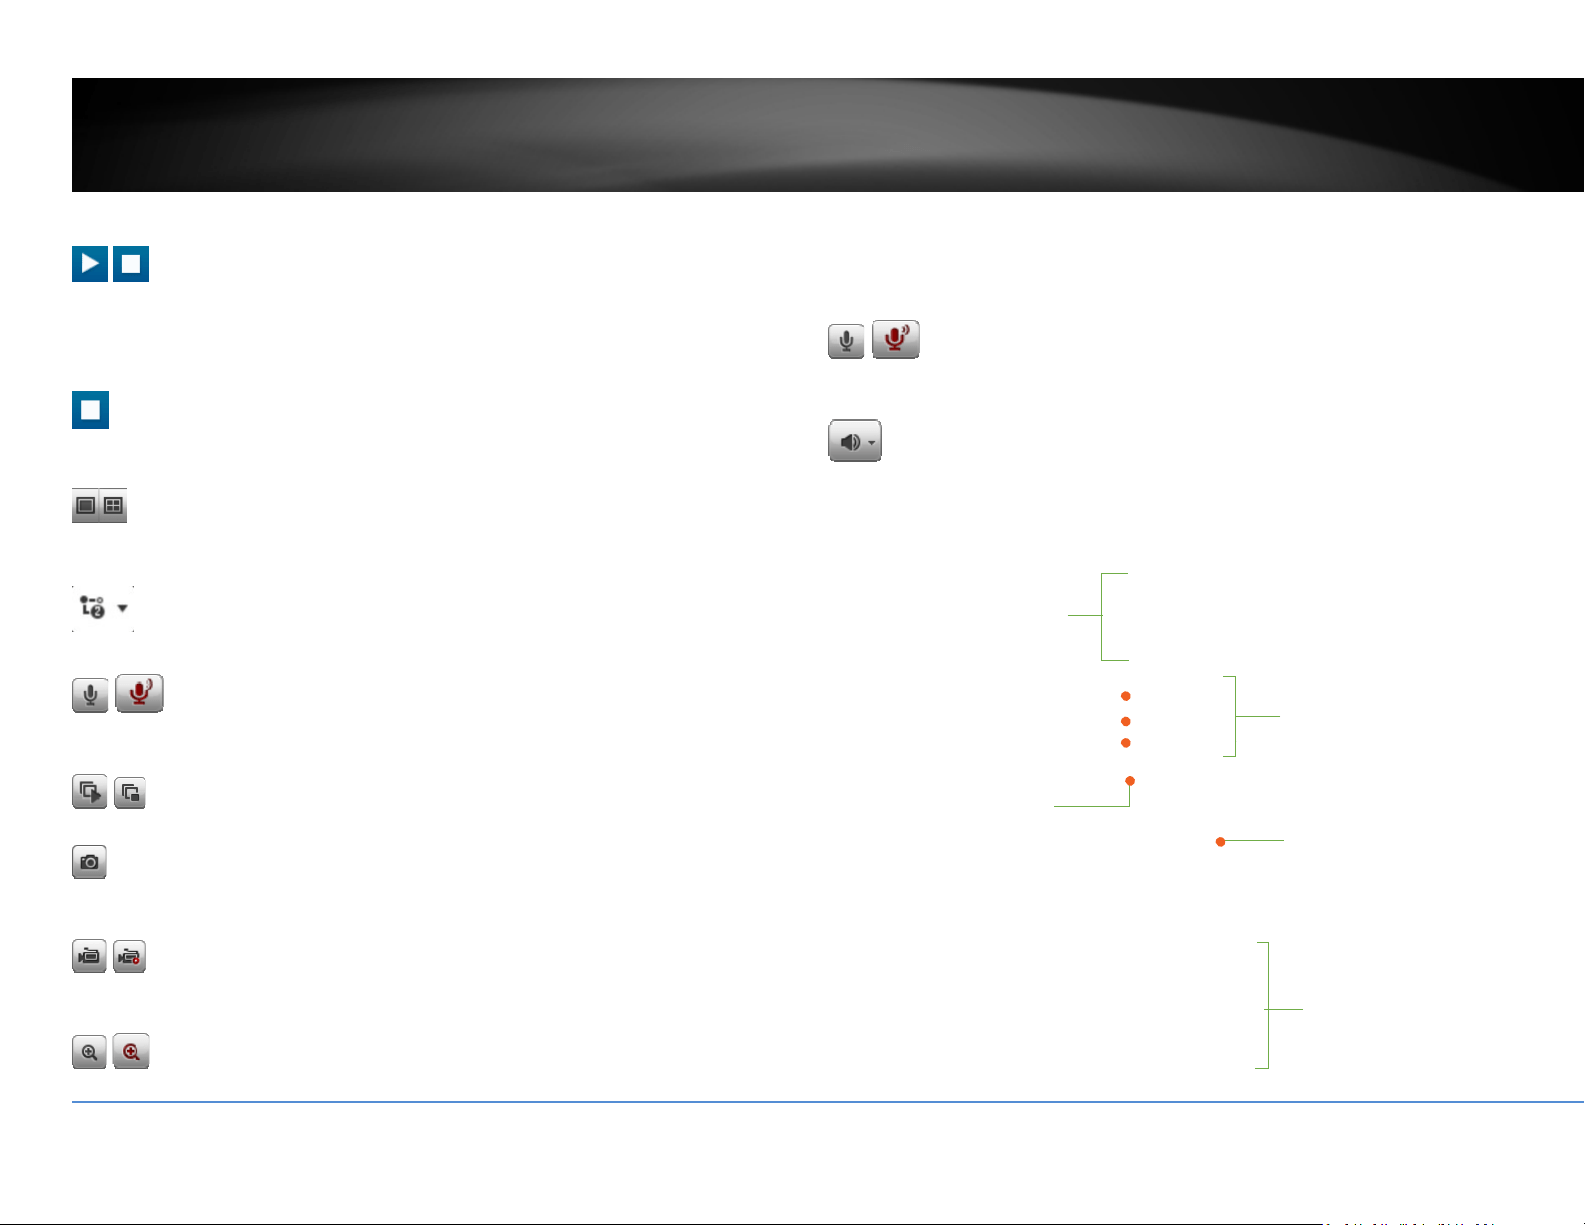
©Copyright2018TRENDnet.AllRightsReserved.
79
TRENDnetUser’sGuide
TV‐NVR408
Start/StopStreaming
Clickthisbuttontostartorstopstreaming.Selectthedisplaycellbyclickonit,(The
yellowframewillwraparoundtheselecteddisplaycell.)thenclickontheiconof
thestreamyouwant.Ifthechannelhasbeenselectedbyothers,stopthat
streamingbeforeyouchange.
VideoStream
Clickthisbuttontochoosethevideostreambetweenmainstreamandsubstream.
1:mainstream;2:substream.
DisplayMode
Clickthisbuttontoselectthedisplaymodetodisplayasinglevideoonthescreen
ordisplayfourvideosonthescreenatthesametime.
StreamMode
Clickthisbuttontochangeviewingstreamfrommaintosubstreamorback.
Microphone
Selectthevideochannelandthenclickonthisbuttontostart/stoptalkingthrough
thecamera.
Start/StopAllStreams
Clickthisbuttontostartorstopallvideostreams.
Snapshot
Selectthevideoyouwanttotakeasnapshotandthenclickthisicontotakeavideo
snapshot.
Start/StopRecording
Selectthevideoyouwanttorecordandthenclickthisicontostartorstopvideo
recording.
Zoom
Selectsinglevideodisplayandthenclickoncetoenablezoom.Whenenabled,click
anddragtheareaonthepicturetozoomin.Rightclicktoresume100%zoom.Click
theiconagaintodisablezoom.Thezoomfunctionworksinfullscreenmodeas
well.
Microphone
Selectthevideochannelandthenclickonthisbuttontostart/stoptalkingthrough
thecamera.
Speaker
Selectthevideochannelandthenclickonthisbuttontostart/stoplisteningfrom
thecamera.Usetheslidebelowtoadjustthevolume.
Panandtilt
controls
Brightness
Contrast
Saturation
HUE
Speed
Zoom
Focus
Aperture(Iris)
Presets
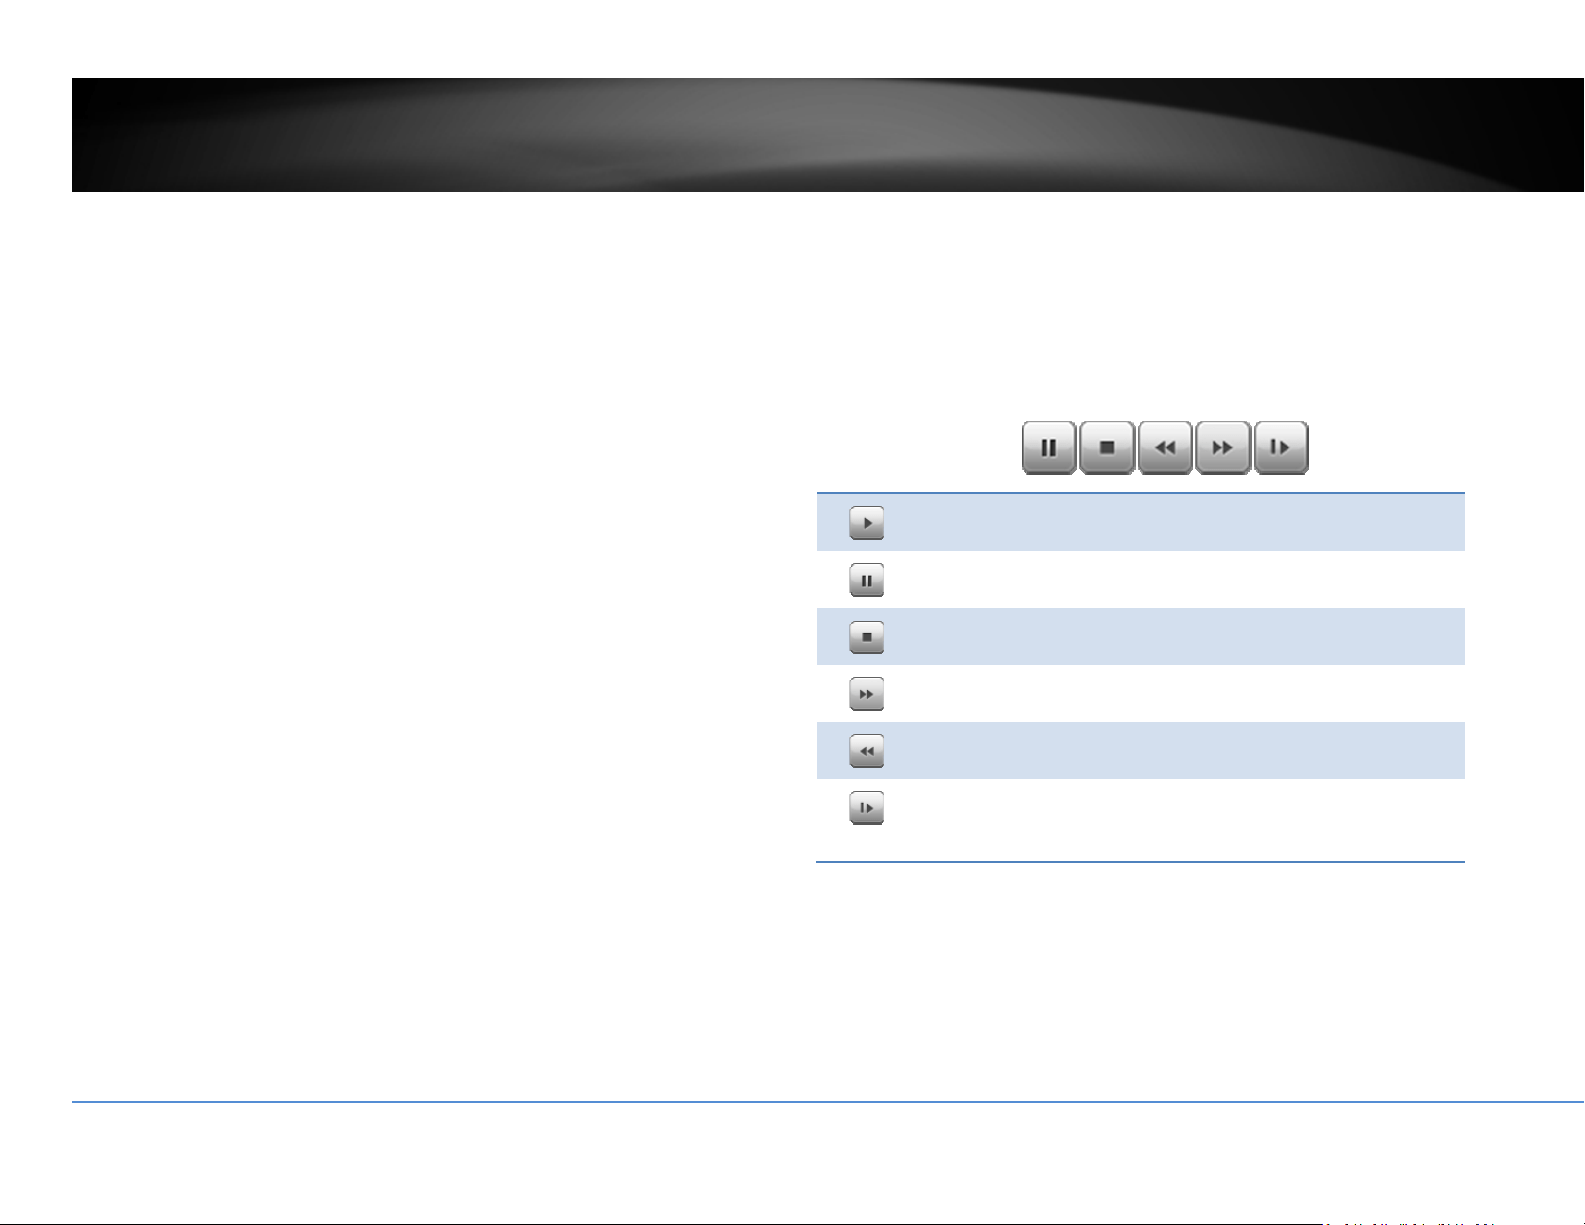
©Copyright2018TRENDnet.AllRightsReserved.
80
TRENDnetUser’sGuide
TV‐NVR408
Playback
Youcanplaybackthevideorecordingoneatatimeatthispage.Youcanalso
downloadthevideoclipandsnapshotstoyourlocalcomputer.Selectthevideo
channelonthelefthandsideandthensearchforthevideo.
Searchforvideorecordings
Clickthedateselection,andthenchooseadateasthedaterangeofsearching.
ClickSearchtostartsearching.
TimeLine
Thereisaplaybackheadinthecenterofthetimelinerepresentedinayellow
verticalline.Tolookforaspecificvideorecording,movethetimelinebyclicking
anddraggingit.
Playvideo
Useplaybackcontrolstoplaybackthevideorecording.
Clickthisbuttontoplaythevideo.
Clickthisbuttontopausevideoplayback.
Clickthisbuttontostopplayback.
Clickthisbuttonincreaseplaybackspeed*.
Clickthisbuttondecreaseplaybackspeed*.
Clicktoplaybackvideoframebyframe.Clickagainfor
thenext
fr
ame
�
*Note:Thereare5stepsofplaybackspeedyoucanchoosefrom:1/4,1/2,1,2,and
4timesoforiginalspeed.
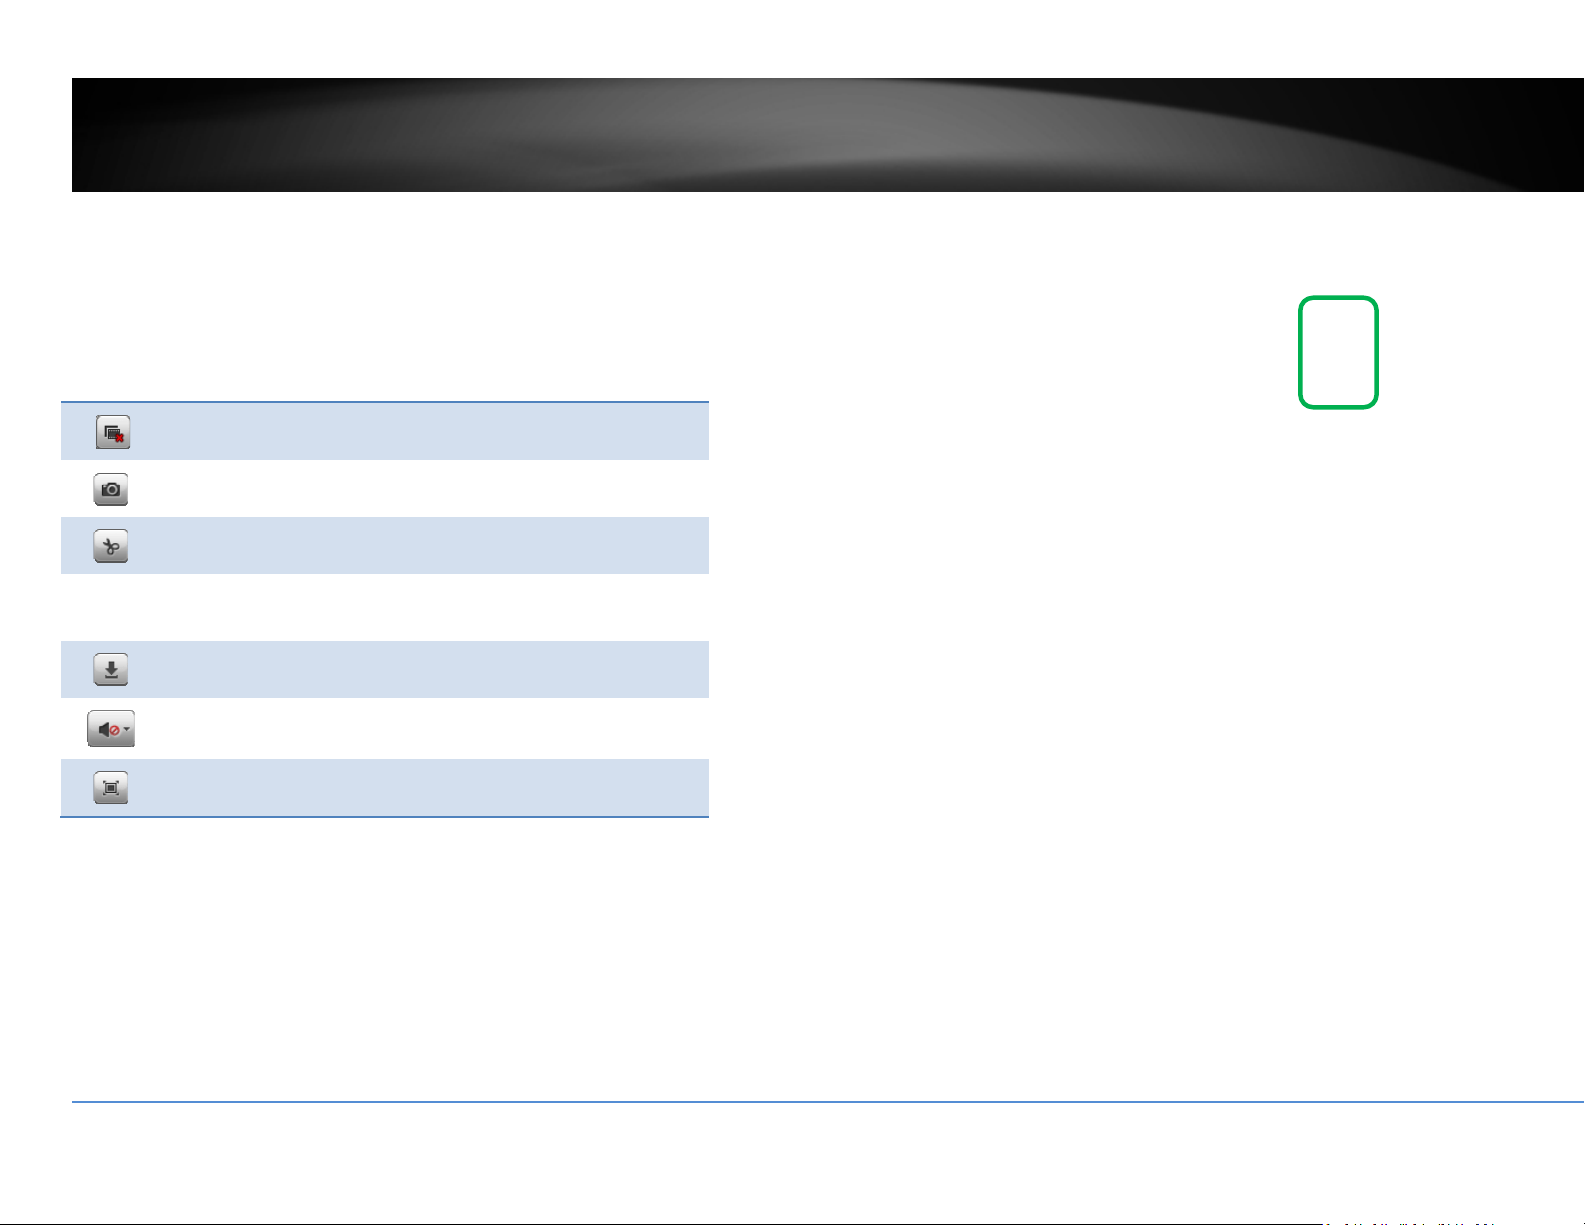
©Copyright2018TRENDnet.AllRightsReserved.
81
TRENDnetUser’sGuide
TV‐NVR408
Sliceimagesfromvideoplayback
Youcantakesnapshotsfromplaybackvideoormakenewvideoclipsfromthe
videoyouareplayingback.
Clickthisbuttontostopvideoplaybackstreams.
Clickthisbuttontotakeasnapshotofcurrentplayback.
Clickthisbuttontostartclippingavideofromplayback.
Clickthisbuttonoranywhereonthetimelinetozoom
Clickthisbuttontodownloadthefiles.
Clickthisbuttontoenableordisabletheaudioplayback.
Clickthisbuttonforfullscreenplayback.
Downloadrecordedvideos
Tosavecompletevideosections,youcandownloadthefilesdirectly.
Clickselectedicontoopencamerarecordingdownloadpage
Checkthetimeoftherecording,selectthevideosyouwanttodownload,andthen
clickDownload.

©Copyright2018TRENDnet.AllRightsReserved.
82
TRENDnetUser’sGuide
TV‐NVR408
Log
ThelogoftheNVRissavingontheharddiskdrive.Youcansearchtherelevant
recordsandsavetoyourlocalcomputer.
Searchforlogs
ClickthetypeoflogandthentheStartTimeandEndTime.ClickSearchtostart
searching.
ClickFirstPage,PrevPage,NextPage,andLastPagetoshowthelogs.ClickSave
Logtosavethelogstoyourcomputer.
SystemInformation
SystemInformationpageshowstheNVR’sbasicinformation.ClickSystemthen
clickSystemInfotoshowthepage.
BasicInformation
DeviceName: Humanreadabledevicenameforeasy
identification.
FirmwareVersion: Firmwareversion
MACAddress: TheMACaddressofEthernetInterface
SystemTime: Thesystemtimesetupinthecamera.Keepingthis
timecorrectisimportantforrecording,scheduled
controlandloggingaccurately.
©Copyright2018TRENDnet.AllRightsReserved.
83
TRENDnetUser’sGuide
TV‐NVR408
NetworkInformation
IPAddress: IPaddressoftheNVR
SubnetMask: NetworkrangeofIPaddress
DefaultGateway: ThedefaultroutegoingfromtheNVRsubnet.
PrimaryDNS: PrimaryDNSserveraddress
SecondaryDNS: SecondaryDNSserveraddress
Logout
LogoutpageallowsusertologouttheNVRwebconfigurationpagetotally.ClickOK
tologoutcompletelyorCanceltostayintheconfigurationpage.
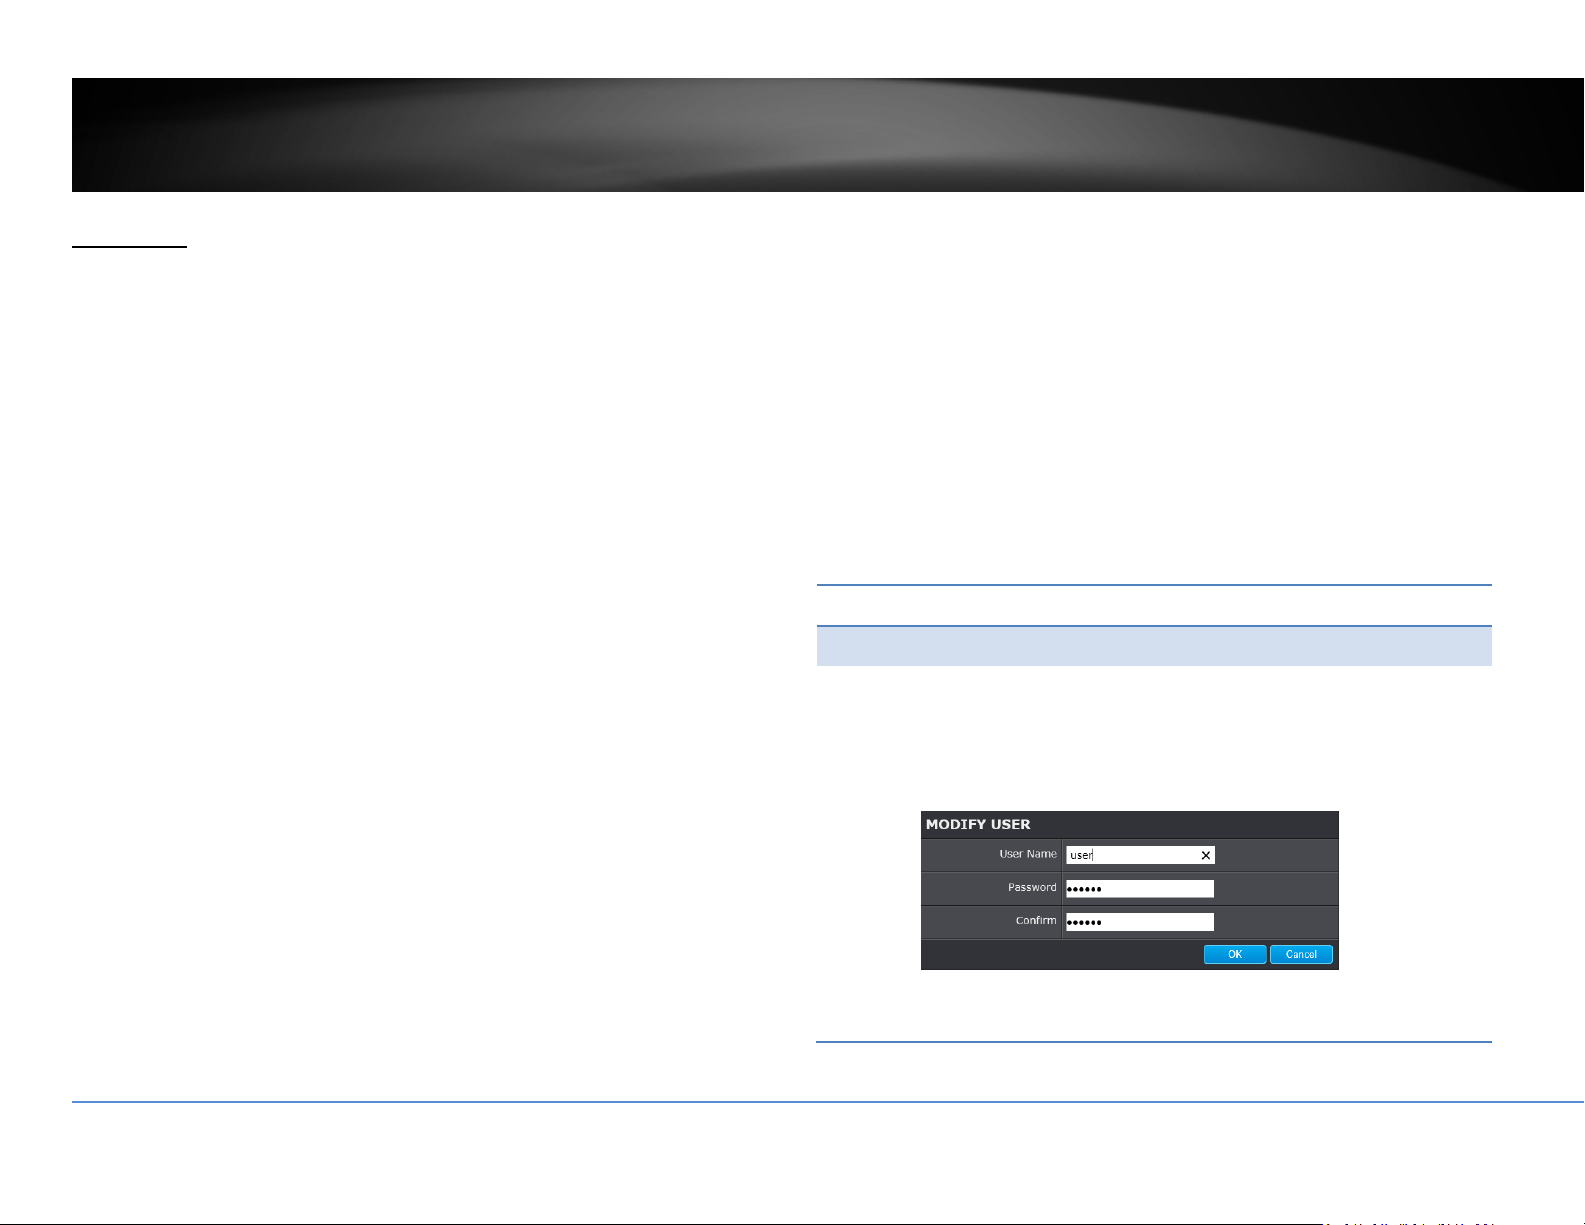
©Copyright2018TRENDnet.AllRightsReserved.
84
TRENDnetUser’sGuide
TV‐NVR408
Advanced
System
DeviceSettings
Setupyoursystemnameforeasyidentification.Thisdevicenamewillalsobe
recognizedbyothernetworkcamerasoftwareasthenameofthiscamera.OSD,On
ScreenDisplay,cameranameisreferringtothissettingaswell.
EnterthecustomizeddevicenameandtheclickonSavetosavethesettings.
UserAccounts
Youcansetupupto16useraccountstoaccesstheNVR’svideostreamwithaweb
browserorrealtimevideostream(RTSP).Onlyoneadministratoraccountcanbe
setuptoconfiguretheNVRandcannotbedeleted.
UserAccounts
Add: ClickAddbuttontoaddoneuseraccount
Modify: Tochangeauser’snameandpassword,highlighttheuserby
clickingonit.Then,clickModifybutton.Youcanchangethe
user’snameandpassword.Youcanalsochangethe
administrator’spasswordhere.But,theadministrator’sname
isfixed,youcannotchangethat.
ClickOKtosavethechanges.

©Copyright2018TRENDnet.AllRightsReserved.
85
TRENDnetUser’sGuide
TV‐NVR408
TimeSettings
Theaccuracyofthesystemclockisimportantforschedulingandaccuratelogging.
Youcansynchronizethesystemtimewithyourcomputer,orautomaticallycheck
thetimeaccuracywithanetworktimeserver(NTPserver).
AutomaticUpdate
NTP
Server:
Specifyatimeserver(NTPserver)tosynchronizewith.
(e.g.pool.ntp.org)
Interval: ThetimeintervalthattheNVRwillsynchronizethetimewith
NTPserver.Default:1440minutes(24hours)
ClickSavetosavethechanges
ManualTimeSync
DeviceTime: Thesystemtimeofthiscamera.
SetTime: Clickthecalendariconandmanuallyselectthedate.
ChecktheSync.withcomputertimetocopythetime
fromyourcomputer.
ClickSavetosavethechanges

©Copyright2018TRENDnet.AllRightsReserved.
86
TRENDnetUser’sGuide
TV‐NVR408
DaylightSavings
Setupdaylightsavings.
AutomaticUpdate
EnableDST: Checkthisboxifyourtimezonehasdaylightsavings.
StartTime: Enterthedatethatdaylightsavingsstarts
EndTime: Enterthedatethatdaylightsavingsends
DSTBias Enterhowmuchtimethedaylightsavingadjustedby
daylightsavings.
ClickSavetosavethechanges
LiveViewSettings
Setuptheliveviewvideoquality,filesizeandfilesavingdirectories.
LiveViewParameters
LiveView
Buffer:
Configurethebuffersizeforliveviewvideostream.
Withlowbuffersizesetting,youcangetreal‐timevideo
stream,butthevideomaybestopandgoifthenetwork
iscongested.Withhighbuffersetting,youcanhave
smoothvideostreaming,butthevideoisdelayedfrom
thetimehappening.Mediumsizecanhavemoderate
videostreamsmoothnessandtimedelay.

©Copyright2018TRENDnet.AllRightsReserved.
87
TRENDnetUser’sGuide
TV‐NVR408
RecordFileSettings
Recordfilesize: Thissizeofliveviewvideorecording.Youcanchoose
256MB,512MB,or1GBafile.Smallerfilesizeisgood
formanyshortrecordings.
Saverecord
filesto:
Bydefault,fileswillbesavedunderthefolderwith
yourusername,underthesubdirectory
TRENDnet/RecordFiles.ClickBrowseandthenchoose
anewdestinationifyouwanttosavethefile
somewhereelse.
Save
downloaded
filesto:
Bydefault,fileswillbesavedunderthefolderwith
yourusername,underthesubdirectory
TRENDnet/DownloadFiles.ClickBrowseandthen
chooseanewdestinationifyouwanttosavethefile
somewhereelse.
PictureandClipSettings
Savesnapshots
in
liveviewto:
Bydefault,fileswillbesavedunderthefolderwith
yourusername,underthesubdirectory
TRENDnet/SnapshotFiles.ClickBrowseandthen
chooseanewdestinationifyouwanttosavethefile
somewhereelse.
Savesnapshots
whenplayback
to:
Bydefault,fileswillbesavedunderthefolderwith
yourusername,underthesubdirectory
TRENDnet/PlaybackPics.ClickBrowseandthen
chooseanewdestinationifyouwanttosavethefile
somewhereelse.
Saveclipsto: Bydefault,fileswillbesavedunderthefolderwith
yourusername,underthesubdirectory
TRENDnet/PlaybackFiles.ClickBrowseandthen
chooseanewdestinationifyouwanttosavethefile
somewhereelse.
ClickSavetosavethechanges
Maintenance
Youcanrestart,loadcamerasettingsandupgradethecamerafirmwareonthis
page.

©Copyright2018TRENDnet.AllRightsReserved.
88
TRENDnetUser’sGuide
TV‐NVR408
Reboot
Reboot: Clickthisbuttontorebootthiscamera.
Reset
Reset: ResetallNVRsettings,excepttheIPnetworksettings
anduserinformation.
Default: Loadcompletefactorydefaulttothecamera.
ImportConfig.File
ConfigFile: Toloadpreviouslysavedsettings,clickBrowsetofind
theconfigurationfileandthenclickImport.
Status: Showsthestatusinloadingconfigurationfile.
ExportConfig.File
Export: ClickExporttodownloadconfigurationfile.Thefilewill
bedownloadedtotheDownloadfolderbydefault.
RemoteUpgrade
Firmware: ClickBrowsetofindthelatestfirmwareandthenclick
Upgrade.
Status: Showsthestatusinfirmwareupgrade.
TRENDnetmayperiodicallyreleasefirmwareupgradesthatmightaddfeaturesor
fixproblemsassociatedwithyourTRENDnetmodelandversion.Tofindoutifthere
isafirmwareupgradeavailableforyourdevice,pleasecheckyourTRENDnetmodel
andversionusingthelink.
http://www.trendnet.com/downloads/
1. If a firmware upgrade is available, download the firmware to your
computer.
2. Unzipthefiletoafolderonyourcomputer.
3. Read the firmware upgrade instruction for specific version update
information.
4. LogintotheNVR.
5. GettingtothisMaintenancepagetoupgradefirmware.
CameraManagement
Youcanmodifycamerasettingshereonthispage.

©Copyright2018TRENDnet.AllRightsReserved.
89
TRENDnetUser’sGuide
TV‐NVR408
Network
TCP/IP
SetupyourbasicIPv4andIPv6networksettingsonthispage.
NetworkInterface
Duplexand
Speed:
ChooseoneoftheEthernetduplexandspeedto
matchyournetwork.Default:auto.
MACAddress: Clickthisbuttontorebootthiscamera.
MTU: Maximumtransmissionunit.Themaximumfield
sizeintheEthernetpacket.
PrimaryDNS: EnteryourfirstIPv4orIPv6DNSserveraddress
SecondaryDNS: EnteryoursecondIPv4orIPv6DNSserveraddress
IPv4
DHCP: CheckthisboxiftheIPaddressisassignedbyDHCP
server.
IPv4Address: TheIPv4dynamicorstaticaddress
SubnetMask: Networkrangeofthesubnet
DefaultGateway: ThedefaultroutegoingfurtherfromTV‐IP320PI
IPv4subnet
IPv6
IPv6Address: IPv6self‐assignedaddressofNVR
IPv6Default
Gateway:
ThedefaultroutegoingfurtherfromNVRIPv6subnet

©Copyright2018TRENDnet.AllRightsReserved.
90
TRENDnetUser’sGuide
TV‐NVR408
Port
YoucanchangetheserviceportnumbersofNVRandenable/disableRTSPorHTTP
services.
PortNumbers
HTTPPort: Thedefaultwebaccessport.Youcanchangethe
portnumber.However,youcannotdisabletheweb
service.Thedefaultportnumberis80.
RTSPPort: TheReal‐TimeStreamingProtocolportforvideo
streaming.Youcanchangetheportnumberor
disabletheservicebyuncheckthebox.Thedefault
portnumberis554.
ClickSavetosavethechanges
DDNS
DynamicDomainNameService,DDNS,allowsyoutofindyourcamerafromthe
Internetwithaneasytorememberdomainname.
DDNS
EnableDDNS: CheckthisboxtoenableDDNSService.
DDNSType: SelectaDDNSserviceprovider.
ServerAddress: EntertheDDNSserveraddress.
Domain: Enteryourregistereddomain/hostnameon
selectedDDNSservice.
UserName: Entertheaccountname.
Password: Enterthepassword.
Confirm: Enterthepasswordagain.
ClickSavetosavethechanges
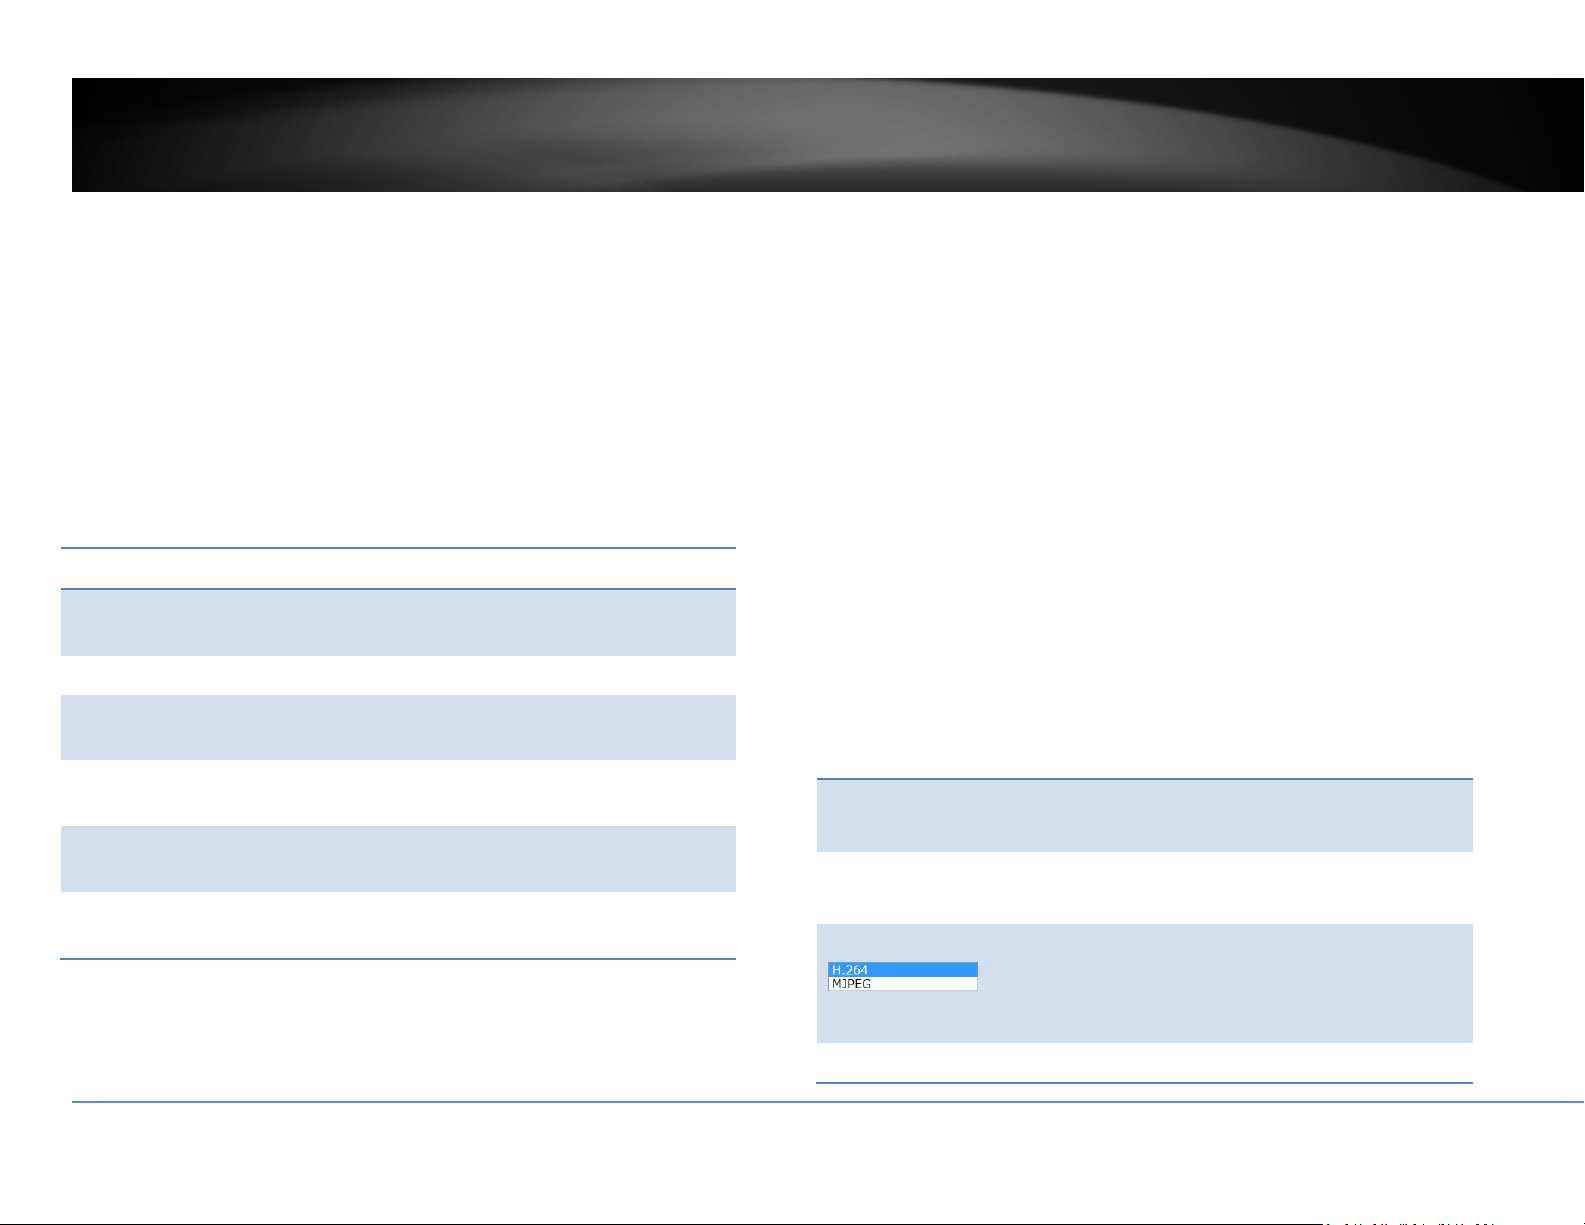
©Copyright2018TRENDnet.AllRightsReserved.
91
TRENDnetUser’sGuide
TV‐NVR408
VirtualHost
VirtualHostallowsyoutosetvirtualportsforeachcamera.
VirtualHost
EnableVirtual
Host:
CheckthisboxtoenableVirtualHost
Camera: Selectcameratoconfigure
VirtualHTTP
Port:
CreateavirtualHTTPportnumberforthecamera
VirtualRTSP
Port:
CreateavirtualRTSPportnumberforthecamera
VirtualHTTPS
Port:
CreateavirtualHTTPSportnumberforthecamera
VirtualServer
Port:
Createavirtualserverportnumberforthecamera
ClickSavetosavethechanges
Video
VideoFormat
Adjustthesettingsofvideostreams.
Channel:
Selectwhichvideostreamforvideoformat
changes.
StreamType:
Choosethemainstreamorsubstreamofthevideo
channeltochangeitsvideoformats.
VideoEncoding:
Choosethevideoencodingtype.H.264ismore
advancedselectionwhileMJPEGvideosis
compatibletomoreapplicationssuchasembedded
webvideo.
Resolution: Resolutionofthevideostream.

©Copyright2018TRENDnet.AllRightsReserved.
92
TRENDnetUser’sGuide
TV‐NVR408
BitrateType: Choosebetweenvariablebitrateandconstantbit
rateforvideocompression.Thedefaultisvariable
rate.
VideoQuality: Choosethevideoquality.Thedefaultismedium
quality.
FrameRate: Choosethecapturingframerate.Reducetheframe
ratetoreducethecapturefilesize.
Max.Bitrate: Choosethemaximumvideosamplingbitrate.
ClickSavetosavethechanges
OnScreenDisplaySettings
Displaythecameranameandthetimethevideo.Selectthevideochannelyouwant
tochangethesetting,thenchangethesettings.Movetheredboxtopositionthe
text.ClickonSavetosavethechanges.
Channel: Selectthevideochannelyouwanttoedit.
DisplayName: Checkthisboxtodisplaytheproductnamethat
wassetupinthedevicesettings.
DisplayDate: Checkthisboxtodisplaysystemtime.
DisplayWeek: Checkthisboxtodisplaytimeoftheweek.
TimeFormat: Select12or24‐hourtimeformat.
DateFormat: Selectthedateformat
DisplayMode: Choosehowthetextwillshowonthescreen.

©Copyright2018TRENDnet.AllRightsReserved.
93
TRENDnetUser’sGuide
TV‐NVR408
TextOverlay
Displayextrainformationonthescreenovertheimage.Movetheredboxto
positionthetext.ClickonSavetosavethechanges.
Channel: Selectthevideochannelyouwanttoedit.
CheckBox: Checkthisboxtoenabletextoverlay.
TextField: Enterthetextyouwanttodisplay.Thelengthofthe
textisdecidedbylimitationofthecamera.
PrivacyMask
Createamaskingareatokeepyourprivacy.Youcancreateuptofourindependent
maskingareasbyclickinganddraggingonthescreen.
Channel: Selectthevideochannelyouwanttoedit.
EnablePrivacyMask: Checkthisboxtoenableprivacymasking.
StopDrawing: Clickthisbuttontostopdrawing.
ClearAll: Clickthisbuttontoclearallthemasking
areas.
ClickSavetosavethechanges

©Copyright2018TRENDnet.AllRightsReserved.
94
TRENDnetUser’sGuide
TV‐NVR408
VideoRecording
Channel: Selectthevideochannelyouwanttoedit.
EnableRecord
Schedule:
CheckthisboxandthenclickSavetoenablevideo
recording.
Pre‐record: Recordingtimebeforetriggerevent.
Post‐record: Recordingtimeaftertriggerevent.
Overwrite: SelectYestoallowolderrecordingstobe
overwritten.
RecordAudio: Recordaudiowhenthecamerahasaudio
capability.
ExpireTime: Specifyhowmanydaysyouwanttolockthe
recording.
ClickSavetosavethechanges
Edit: ClickEdittoedittherecordingschedule.TheEdit
Schedulewindowwillpopup.
1. Selectdayoftheweekyouwanttoedit.
2. SelectAllDayorCustomizedscheduleof
theday.
3. Setthetimeperiodandtheeventyou
wanttotriggerthevideorecording
continuous(alwaysrecording)ormotion
detection.
4. ClickSelectAllortheweekdayyouwant
tohavethesamescheduleondifferent
day.
5. Clickanotherdayoftheweekbyclicking
onitstabtosetthenextschedule.Click
OKwhenyouhavefinishedyoursettings.
©Copyright2018TRENDnet.AllRightsReserved.
95
TRENDnetUser’sGuide
TV‐NVR408
HolidaySettings
Recordingvideoinholidaysmayhasdifferentrequirements.Youcansetupto11
holidaysofayearsharingthesameholidayprofile.
Setuptheholidayschedulebyclickon
button.
EditHolidaySchedule
HolidayName: Changetheholidaynametomeaningfulname
insteadofindexnumbers.
Enable: Enableordisablethisholidayrule.
Type: Selecttheholidayisforaday,aweekoramonth.
Daymode:Selectthestartandenddatestospecify
theperiodofholidays.Thissettingisgoodforone
timeonly.Itdoesnotrepeatperiodically.
Weekmode:Selectthestartandenddatesofthe
weektospecifytheperiodofholidays.Thissetting
isrepeatingeveryyear.
Monthmode:Selectthestartandenddatesto
specifytheperiodofholidays.Thissettingis
repeatingeveryyear.
StartDate: Selectthedaywhentheholidaystarts.
EndDate: Selectthedaywhentheholidayends.
ClickOKtosavethechanges

©Copyright2018TRENDnet.AllRightsReserved.
96
TRENDnetUser’sGuide
TV‐NVR408
Events
MotionDetection
Setuphowthemotiondetectioneventwillbetriggeredandwhatactionswillbe
triggered.
Note:Thisfeatureiscameradependent.
Camera: Selectthecamerayouwanttoconfigure
Enable Checkthisboxtoenablemotiondetection.Click
Motion
Detection:
Savetosavethechoice.
DrawArea: ClickDrawAreabuttontostartdrawing.Clickand
dragontheareayouwanttosetupthemotion
detection.Thenumberofareasyoucansetup
dependsoncameramodels.ClickStopDrawingto
stopdrawingmotiondetectionareas.
Theredgridsrepresentthemotiondetectionarea,
bydefault,theentireareaisselected.ClickClearAll
toerasetheareatorestart.
Sensitivity: Movetheslidertoadjustdetectionsensitivity.
ClearAll: Clickthisbuttontoclearallthesetupareas.

©Copyright2018TRENDnet.AllRightsReserved.
97
TRENDnetUser’sGuide
TV‐NVR408
ArmingSchedule
Edit: ClickEdittoedittherecordingschedule.TheEdit
Schedulewindowwillpopup.
3. Selectdayoftheweekyouwanttoedit.
4. SelectAllDayorCustomizedscheduleofthe
day.
5. Setthetimeperiodandtheeventyouwant
totriggerthevideorecordingcontinuous
(alwaysrecording)ormotiondetection.
6. ClickSelectAllortheweekdayyouwantto
havethesamescheduleondifferentday.
7. Clickanotherdayoftheweekbyclickingon
itstabtosetthenextschedule.ClickOK
whenyouhavefinishedyoursettings.
LinkageMethod
Alarmisnotsupportedforthismodel.
ClickSavetosavethechanges

©Copyright2018TRENDnet.AllRightsReserved.
98
TRENDnetUser’sGuide
TV‐NVR408
VideoTampering
Setuphowthevideotamperingdetectioneventwillbetriggeredandwhatactions
willbetriggered.Whenvideoissuddenlyblockedorblacken,tampered,thevideo
tampernotificationswillalertthesystemmanagertocheckthecamera.
Note:Thisfeatureiscameradependent.
Camera: Selectthecamerayouwanttoedit.
Enable
Tamper
Detection:
Checkthisboxtoenabletamperdetection.ClickSave
tosavethesettings.
DrawArea: ClickDrawAreabuttontostartdrawing.Clickand
dragontheareayouwanttosetupthetamper
detection.ClickStopDrawingtostopdrawingmotion
detectionareas.Thegrayblockrepresentsthe
detectionarea.
Sensitivity: Movetheslidertoadjustdetectionsensitivity.
ClearAll: Clickthisbuttontoclearallthesetupareas.
ArmingSchedule
Edit: ClickEdittoedittherecordingschedule.TheEdit
Schedulewindowwillpopup.
1. Selectdayoftheweekyouwanttoedit.
2. SelectAllDayorCustomizedscheduleofthe
day.
3. Setthetimeperiodandtheeventyouwant
totriggerthevideorecordingcontinuous
(alwaysrecording)ormotiondetection.

©Copyright2018TRENDnet.AllRightsReserved.
99
TRENDnetUser’sGuide
TV‐NVR408
4. ClickSelectAllortheweekdayyouwantto
havethesamescheduleondifferentday.
5. Clickanotherdayoftheweekbyclickingon
itstabtosetthenextschedule.ClickOK
whenyouhavefinishedyoursettings.
LinkageMethod
FullScreen
Monitoring:
SwitchthevideoontheVGA/HDMImonitortothe
cameradetectedmotionevent.
Audible
Warning:
Activatetheaudibleonboardbuzzer.
SendEmail: Sendemailtonotifythesystemmanager.
ClickSavetosavethechanges
Exception
Providenotificationsforothersystemevents,setupyournotificationshere.
Notification
ExceptionType: First,choosetheexceptiontype,andthenchoose
thecorrespondingaction.
Audible
Warning:
Activatetheaudibleonboardbuzzer.
SendEmail: Checkthisboxtosendane‐mailnotificationwhen
motionisdetected.

©Copyright2018TRENDnet.AllRightsReserved.
100
TRENDnetUser’sGuide
TV‐NVR408
ClickSavetosavethechanges
Email
Setupemailaccountsfornotifications.
Sender
Sender: Enterthenametobeappearedastheemailsender.
Sender’s
Address:
Entersender’semailaddress.
SMTPServer: SimpleMailTransportationProtocolServeraddress,
theoutgoingemailserveraddress.Itmaybehas
addressasyourincomingemailserver,maybenot.
Pleaseaskyouremailserviceproviderfordetail.
SMTPPort: Serviceportnumberforoutgoingemail.*
Authentication: Checkthisboxifyourserverrequiresapasswordin
ordertosendemail.Mostemailserversrequire
authenticationwhensendinganemail.
Username: Entertheusernameofoutgoingemailaccount
Password: Enterthepassword
Confirm: Enterthepasswordagaintoconfirmthatthe
passwordwasenteredcorrectly.
ClickSavetosavethechanges
Receiver
Receiver1: Thefirstreceiver’sname.
Receiver1’s
Address:
Thefirstreceiver’semailaddress.
Receiver2: Thesecondreceiver’sname.
Receiver2’s
Address:
Thesecondreceiver’semailaddress.
Receiver3: Thethirdreceiver’sname.
Receiver3’s
Address:
Thethirdreceiver’semailaddress.
ClickSavetosavethechanges
*Note: Many ISPs does not allow service port 25 going through their network.
PleaseconsultyouremailserviceproviderandISPfordetail.NVRdoesnotsupport
SSLorTLS.Pleaseselecttherightemailserviceforthenotifications.

©Copyright2018TRENDnet.AllRightsReserved.
101
TRENDnetUser’sGuide
TV‐NVR408
StorageSettings
StorageManagement
Tosetupandinitiatetheharddriveremotely,checktheharddiskdriveandthen
clickonFormat.
Format: SelectthestoragevolumeandthenclickFormattoformat
yourharddiskdrive.Thisactionwillformatthevolumefor
videorecording.Placeholderfiles(formattingfiles)willbe
createdtomakesurediskallocationisappropriateandthe
filesearchingisoptimized.
Capacity: Thetotalcapacityoftheharddiskcanbeusedforvideo
recordingandlog.
FreeSpace: Thefreespaceleftforvideorecordingandlog.
Status: Thediskstatus.
Property: Thisnetworkstorageisreadonlyorcanbereadandwrite.
NetworkStorage
Network Storage must be setup before it can be managed. You can add up to 8
networkstoragesforyourNVR.Therecordingswillsubsequentlybestoredinthese
spaces.Savevideofromthefirststorageandthenthenextwhenthefirstoneisfull.
ClickontheentrytochangethesettingsandclickSavetosavethesettings.
Server
Address:
EntertheIPaddressofyournetworkstorage.
FilePath: Enterthesharedfolderasfilepathfornetworkstorage.
Youcancreateafolderunderthesharedfolderandmake
itanetworkvolumehere.Justcreatethefolderandenter
thecorrectpathnamehere.
Type: ChoosebetweenNASorIPSANforstorageType.
Delete: Clickthedeletextoremovethestoragesettings.
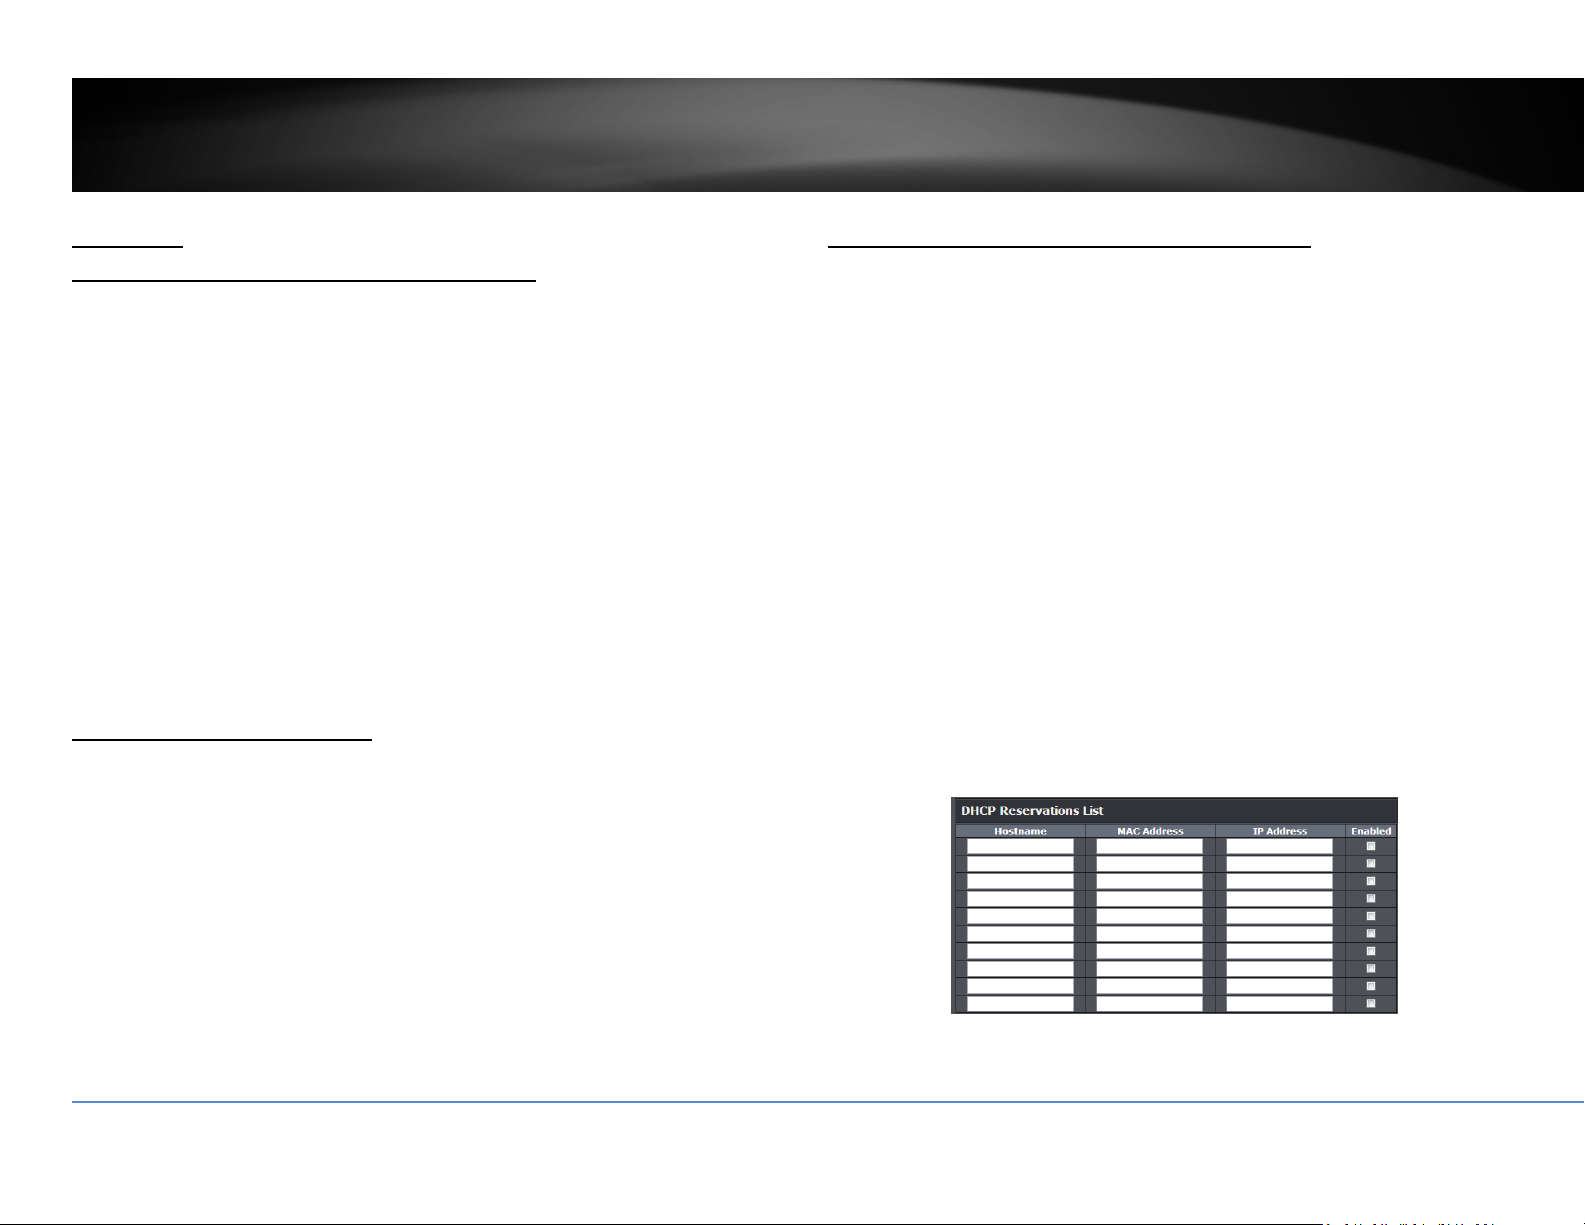
©Copyright2018TRENDnet.AllRightsReserved.
102
TRENDnetUser’sGuide
TV‐NVR408
Appendix
TurnonnetworkdiscoveryonWindows
TheNVRisUPnPenableddevice.FindyourcameraiseasywithWindowsnetwork
discovery.Ifyournetworkdiscoveryisturnedoff,gotoControlPanel>>Network
andInternet>>NetworkandSharingCenter>>Advancedsharingsettingsand
thenselectTurnonnetworkdiscovery.ClickSavechangestosavethechanges.If
youstillhavedifficultytofindyourcamerawithnetworkdiscovery,checkitoutifit
hastonetworkdiscoverysettingonothernetworkprofiles.
Directvideoaccess‐RTSP
ToaccessthevideodirectlythroughRTSP,justvisitthecameraIPaddressonport
554bydefault.
ToaccessthevideothroughNVR,youneedtoentertheIPaddress,portnumber
andleadingpath“/Streaming/Channels”thenspecifythechannelnumber.The
channelnumberis2digitsleadingwithzero.Forexample:
rtsp://192.168.10.60:554/Streaming/Channels/01toviewthechannel1videoon
NVRwhichlocatedon192.168.10.60.
InstallyourNVRSystemonYourNetwork
ToenableremotenetworkaccesstotheNVR,youneedtoinstallyourNVRonto
yournetwork.MakesureyourNVRsystemisworkingonthesamenetwork
segmentyourrouterdefined.ReserveapoolofIPaddressesforNVRandall
cameras.YoucanthenaccessyourNVRandnetworkcameraseverywhereoverthe
network.
TheotheroptiontosetuptheNVRandcamerasonyournetworkisusingDHCP.The
NVRDHCPclientisdefaultdisabled.YoucanenableDHCPclientmanually.
1. GotoGeneralNetworkSettingstoenabletheNVRgettingitsIPaddressfrom
yourrouterDHCP.
2. RebootyourNVR.
3. PluginthePoEcamerastothePoEports.
4. AllthecamerasaregettingtheassignedIPaddressfromyourrouter.
5. For plug‐and‐play cameras, such as TV‐IP320PI, installed directly on the PoE
port,theNVRproceedfollowingsettingsoncameratoaddonthesecurity.
Thecamera willbeassignedwithan IP assignedbyyourrouterandthen
theaddressbecomesstaticIPonthecamera.YoucanwritedowntheIP
addressforremoteaccessoradvancedportforwardingsettingsonyour
router. Please make the assigned IP reserved, so your router will not
accidentallyassignthesameaddresstootherofyournetworkdevices.
Ifthecamerahasitsdefaultsetting,thepasswordwillbesettothesame
passwordyousettotheNVR.

©Copyright2018TRENDnet.AllRightsReserved.
103
TRENDnetUser’sGuide
TV‐NVR408
Youcanvisitthecamerawiththenewpresetpassword.(Formorecamera
passwordmanagement,pleaseseeCameraConnectionSettingsonpage
22formoredetails.)
CompatibleCameraList
MostofTRENDnetandONVIFcamerasarecompatiblewithNVR.Forthebest
performanceandinteroperability,thefollowingcameramodelsaresuggested:
Model Protocol Default
Port
Basic
PTZ
Adv.
PTZ
Audio
TV‐IP302PI ONVIF 80 NA NA NA
TV‐IP310PI TRENDnet3 8000 NA NA NA
TV‐IP311PI TRENDnet3 8000 NA NA NA
TV‐IP314PI TRENDnet3 8000 NA NA NA
TV‐IP315PI TRENDnet3 8000 NA NA NA
TV‐IP320PI TRENDnet3 8000 NA NA NA
TV‐IP320PI2K TRENDnet3 8000 NA NA NA
TV‐IP321PI TRENDnet3 8000 NA NA NA
TV‐IP322WI TRENDnet3 8000 NA NA NA
TV‐IP342PI ONVIF 80 NA NA Yes
TV‐IP343PI ONVIF 80 NA NA Yes
TV‐IP430PI*TRENDnet3 8000 Yes Yes Yes
TV‐IP450P* TRENDnet3 8000 Yes Yes Yes
TV‐IP450PI*TRENDnet3 8000 Yes Yes Yes
TV‐IP420P TRENDnet3 8000 NA NA Yes
TV‐IP344PI ONVIF
80 NA NA Yes
TV‐IP345PI ONVIF 80 Yes NA Yes
* TV‐IP430PI and TV‐IP450P cameras require 802.3at PoE+ power supply. TV‐
IP450PIcamerarequireproprietaryPoEpowersupply.Pleasesupply the power
separatelyinsteadofdraggingpowerfromtheNVR.DraggingPoEpowersupply
overthebudget(35W)maycausethesystembreakdown.

©Copyright2018TRENDnet.AllRightsReserved.
104
TRENDnetUser’sGuide
TV‐NVR408
Regulations
FederalCommunicationCommissionInterferenceStatement
ThisequipmenthasbeentestedandfoundtocomplywiththelimitsforaClassB
digitaldevice,pursuanttoPart15oftheFCCRules.Theselimitsaredesignedto
providereasonableprotectionagainstharmfulinterferenceinaresidential
installation.Thisequipmentgeneratesusesandcanradiateradiofrequencyenergy
and,ifnotinstalledandusedinaccordancewiththeinstructions,maycause
harmfulinterferencetoradiocommunications.However,thereisnoguaranteethat
interferencewillnotoccurinaparticularinstallation.Ifthisequipmentdoescause
harmfulinterferencetoradioortelevisionreception,whichcanbedeterminedby
turningtheequipmentoffandon,theuserisencouragedtotrytocorrectthe
interferencebyoneofthefollowingmeasures:
• Reorientorrelocatethereceivingantenna.
• Increasetheseparationbetweentheequipmentandreceiver.
• Connect the equipment into an outlet ona circuit differentfrom that to
whichthereceiverisconnected.
• Consultthedealeroranexperiencedradio/TVtechnicianforhelp.
FCCCaution:Anychangesormodificationsnotexpresslyapprovedbytheparty
responsibleforcompliancecouldvoidtheuser’sauthoritytooperatethis
equipment.
ThisdevicecomplieswithPart15oftheFCCRules.Operationissubjecttothe
followingtwoconditions:(1)Thisdevicemaynotcauseharmfulinterference,and
(2)thisdevicemustacceptanyinterferencereceived,includinginterferencethat
maycauseundesiredoperation.
IMPORTANTNOTE:
FCCRadiationExposureStatement
ThisequipmentcomplieswithFCCradiationexposurelimitssetforthforan
uncontrolledenvironment.Thisequipmentshouldbeinstalledandoperatedwith
minimumdistance20cmbetweentheradiator&yourbody.
Thistransmittermustnotbeco‐locatedoroperatinginconjunctionwithanyother
antennaortransmitter.
Theavailabilityofsomespecificchannelsand/oroperationalfrequencybandsare
countrydependentandarefirmwareprogrammedatthefactorytomatchthe
intendeddestination.Thefirmwaresettingisnotaccessiblebytheenduser.
©Copyright2018TRENDnet.AllRightsReserved.
TRENDnetUser’sGuide
TEW‐821DAP
105
Europe–EUDeclarationofConformity
TRENDnetherebydeclarethattheproductisincompliancewiththeessential
requirementsandotherrelevantprovisionsunderoursoleresponsibility.
Safety
EN60950‐1:2006+A11:2009:+A1:2010+A12:2011+A2:2013
EMC
EN55022:2010ClassB
EN50130‐4:2011
EN6100‐3‐2:2006+A1:2009+A2:2009
EN61000‐3‐3:20008
ThisproductisherewithconfirmedtocomplywiththeDirectives.
Directives
LVDDirective2006/95/EC
EMCDirective2004/108/EC
RoHSDirective2011/65/EU
WEEEDirective2012/19/EU
REACHRegulation(EC)No.1907/2006
Česky[Czech] TRENDnettímtoprohlašuje,žetentoNVRjeveshoděsezákladními
požadavkyadalšímipříslušnýmiustanovenímisměrnice2004/108/ES,
2006/95/ESa2009/125/ES.
Dansk[Danish] UndertegnedeTRENDneterklærerherved,atfølgendeudstyrNVR
overholderdevæsentligekravogøvrigerelevantekravidirektiv
2004/108/EF,2006/95/EFog2009/125/EF.
Deutsch[German] HiermiterklärtTRENDnet,dasssichdasGerätNVRin
ÜbereinstimmungmitdengrundlegendenAnforderungenundden
übrigeneinschlägigenBestimmungenderRichtlinie2004/108/EG,
2006/95/EGund2009/125/EGbefindet.
Eesti[Estonian] KäesolevagakinnitabTRENDnetseadmeNVRvastavustdirektiivi
2004/108/EÜ,2006/95/EÜja2009/125/EÜpõhinõueteleja
nimetatuddirektiivisttulenevateleteisteleasjakohastelesätetele.
English Hereby,TRENDnet,declaresthatthisNVRisincompliancewiththe
essentialrequirementsandotherrelevantprovisionsofDirective
2004/108/CE2006/95/CE,and2009/125/CE.
Español[Spanish] PormediodelapresenteTRENDnetdeclaraqueelNVRcumpleconlos
requisitosesencialesycualesquieraotrasdisposicionesaplicableso
exigiblesdelaDirectiva2004/108/CE,2006/95/CEy2009/125/CE.
Ελληνική[Greek] ΜΕΤΗΝΠΑΡΟΥΣΑTRENDnetΔΗΛΩΝΕΙΟΤΙNVRΣΥΜΜΟΡΦΩΝΕΤΑΙ
ΠΡΟΣΤΙΣΟΥΣΙΩΔΕΙΣΑΠΑΙΤΗΣΕΙΣΚΑΙΤΙΣΛΟΙΠΕΣΣΧΕΤΙΚΕΣΔΙΑΤΑΞΕΙΣ
ΤΗΣΟΔΗΓΙΑΣ2004/108/EK,2006/95/EK,2009/125/ΕΚκαι.
Français[French] ParlaprésenteTRENDnetdéclarequel'appareilNVRestconformeaux
exigencesessentiellesetauxautresdispositionspertinentesdela
directive2004/108/CE,2006/95/CEet2009/125/CE.
Italiano[Italian] ConlapresenteTRENDnetdichiarachequestoNVRèconformeai
requisitiessenzialiedallealtredisposizionipertinentistabilitedalla
direttiva2004/108/CE,2006/95/CEe2009/125/CE.
Latviski[Latvian] AršoTRENDnetdeklarē,kaNVRatbilstDirektīvas2004/108/EK,
2006/95/EKun2009/125/EKbūtiskajāmprasībāmuncitiemarto
saistītajiemnoteikumiem.
Lietuvių
[Lithuanian]
ŠiuoTRENDnetdeklaruoja,kadšisNVRatitinkaesminiusreikalavimus
irkitas2004/108/EB,2006/95/EBir2009/125/EBDirektyvos
nuostatas.
Nederlands
[Dutch]
HierbijverklaartTRENDnetdathettoestelNVRinovereenstemmingis
metdeessentiëleeisenendeandererelevantebepalingenvan
richtlijn2004/108/EG,2006/95/EGen2009/125/EG.
Malti[Maltese] Hawnhekk,TRENDnet,jiddikjaralidanNVRjikkonformamal‐ħtiġijiet
essenzjaliumaprovvedimentioħrajnrelevantilihemmfid‐Dirrettiva
2004/108/KE,2006/95/KEu2009/125/KE.
Magyar Alulírott,TRENDnetnyilatkozom,hogyaNVRmegfelelavonatkozó

©Copyright2018TRENDnet.AllRightsReserved.
TRENDnetUser’sGuide
TEW‐821DAP
106
[Hungarian] alapvetõkövetelményeknekésaz2004/108/EK,2006/95/EKésa
2009/125/EKirányelvegyébelõírásainak.
Polski[Polish] NiniejszymTRENDnetoświadcza,żeNVRjestzgodnyzzasadniczymi
wymogamiorazpozostałymistosownymipostanowieniamiDyrektywy
2004/108/WE,2006/95/WEi2009/125/WE.
Português
[Portuguese]
TRENDnetdeclaraqueesteNVRestáconformecomosrequisitos
essenciaiseoutrasdisposiçõesdaDirectiva2004/108/CE,2006/95/CE
e2009/125/CE.
Slovensko
[Slovenian]
TRENDnetizjavlja,dajetaNVRvskladuzbistvenimizahtevamiin
ostalimirelevantnimidoločilidirektive2004/108/ES,2006/95/ESin
2009/125/ES.
Slovensky[Slovak] TRENDnettýmtovyhlasuje,žeNVRspĺňazákladnépožiadavkya
všetkypríslušnéustanoveniaSmernice2004/108/ES,2006/95/ESa
2009/125/ES.
Suomi[Finnish] TRENDnetvakuuttaatätenettäNVRtyyppinenlaiteon
direktiivin2004/108/EY,2006/95/EYja2009/125/EYoleellisten
vaatimustenjasitäkoskeviendirektiivinmuidenehtojenmukainen.
Svenska[Swedish] HärmedintygarTRENDnetattdennaNVRstårIöverensstämmelse
meddeväsentligaegenskapskravochövrigarelevantabestämmelser
somframgåravdirektiv2004/108/EG,2006/95/EGoch2009/125/EG.
RoHS
ThisproductisRoHScompliant.

©Copyright2018TRENDnet.AllRightsReserved.
TRENDnetUser’sGuide
TEW‐821DAP
107
LimitedWarranty
TRENDnet warrants its products against defects in material and workmanship, under
normaluseandservice,forthefollowinglengthsoftimefromthedateofpurchase.
NVR–2YearsWarranty
AC/DCPowerAdapter,CoolingFan,andPowerSupplycarry1yearwarranty.
If a product does not operate as warranted during the applicable warranty period,
TRENDnet shall reserve the right, at its expense, to repair or replace the defective
product or part and deliver an equivalent product or part to the customer. The
repair/replacement unit’s warranty continues from the original date of purchase. All
products thatare replaced become theproperty of TRENDnet.Replacement products
may be new or reconditioned. TRENDnet does not issue refunds orcredit.Please
contactthepoint‐of‐purchasefortheirreturnpolicies.
TRENDnetshallnotberesponsibleforanysoftware,firmware,information,ormemory
dataofcustomercontainedin,storedon,orintegratedwithanyproductsreturnedto
TRENDnetpursuanttoanywarranty.
Thereareno user serviceablepartsinside the product.Donot removeorattempt to
servicetheproductbyanyunauthorizedservicecenter.Thiswarrantyisvoidedif(i)the
product has been modified or repaired by any unauthorized servicecenter,(ii)the
productwassubjecttoaccident,abuse,orimproperuse(iii)theproductwassubjectto
conditionsmoreseverethanthosespecifiedinthemanual.
Warranty service may be obtained by contacting TRENDnet within the applicable
warrantyperiodandprovidingacopyofthedatedproofofthepurchase.Uponproper
submissionofrequireddocumentationaReturnMaterialAuthorization(RMA)number
willbeissued.AnRMAnumberisrequiredinordertoinitiatewarrantyservicesupport
forallTRENDnetproducts.ProductsthataresenttoTRENDnetforRMAservicemust
havetheRMAnumbermarkedontheoutsideofreturnpackagesandsenttoTRENDnet
prepaid, insured and packaged appropriately for safe shipment. Customers shipping
fromoutsideoftheUSAandCanadaareresponsibleforreturnshippingfees.Customers
shippingfromoutsideoftheUSAareresponsibleforcustomcharges,includingbutnot
limitedto,duty,tax,andotherfees.
WARRANTIES EXCLUSIVE:IFTHETRENDNETPRODUCTDOESNOTOPERATEAS
WARRANTED ABOVE, THE CUSTOMER’S SOLE REMEDY SHALL BE, AT TRENDNET’S
OPTION, REPAIR OR REPLACE. THE FOREGOING WARRANTIES AND REMEDIES ARE
EXCLUSIVE AND ARE IN LIEU OF ALL OTHER WARRANTIES, EXPRESSED ORIMPLIED,
EITHERINFACTORBYOPERATIONOF LAW, STATUTORY OR OTHERWISE, INCLUDING
WARRANTIES OF MERCHANTABILITY AND FITNESS FOR A PARTICULAR PURPOSE.
TRENDNETNEITHERASSUMESNORAUTHORIZESANYOTHERPERSONTOASSUMEFOR
ITANYOTHERLIABILITYINCONNECTIONWITHTHESALE,INSTALLATIONMAINTENANCE
ORUSEOFTRENDNET’SPRODUCTS.
TRENDNET SHALL NOT BE LIABLE UNDER THIS WARRANTY IF ITS TESTINGAND
EXAMINATIONDISCLOSETHATTHEALLEGEDDEFECTINTHEPRODUCTDOESNOTEXIST
ORWASCAUSEDBYCUSTOMER’SORANYTHIRDPERSON’SMISUSE,NEGLECT,
IMPROPER INSTALLATION OR TESTING,UNAUTHORIZEDATTEMPTSTOREPAIR OR
MODIFY, OR ANY OTHER CAUSE BEYOND THE RANGE OF THE INTENDED USE, OR BY
ACCIDENT,FIRE,LIGHTNING,OROTHERHAZARD.
LIMITATION OF LIABILITY: TO THE FULLEXTENTALLOWEDBYLAWTRENDNET ALSO
EXCLUDESFORITSELFANDITSSUPPLIERSANYLIABILITY,WHETHERBASED IN
CONTRACT OR TORT (INCLUDING NEGLIGENCE), FOR INCIDENTAL, CONSEQUENTIAL,
INDIRECT,SPECIAL,ORPUNITIVEDAMAGESOFANYKIND,ORFORLOSSOFREVENUEOR
PROFITS, LOSS OF BUSINESS, LOSSOF INFORMATIONOR DATE,OR OTHER
FINANCIAL
LOSS ARISING OUT OF OR IN CONNECTION WITH THE SALE, INSTALLATION,
MAINTENANCE,USE,PERFORMANCE,FAILURE,ORINTERRUPTIONOFTHEPOSSIBILITY
OFSUCHDAMAGES,ANDLIMITSITSLIABILITYTOREPAIR,REPLACEMENT,ORREFUND
OFTHEPURCHASEPRICEPAID,ATTRENDNET’SOPTION.THISDISCLAIMEROFLIABILITY
FORDAMAGESWILLNOTBEAFFECTEDIFANYREMEDYPROVIDEDHEREINSHALLFAIL
OFITSESSENTIALPURPOSE.
Governing Law: This Limited Warranty shall be governed by the laws of the state of
California.
Some TRENDnet products include software code written by third party developers.
ThesecodesaresubjecttotheGNUGeneralPublicLicense("GPL") or GNU Lesser
GeneralPublicLicense("LGPL").
Go to http://www.trendnet.com/gpl or http://www.trendnet.com Download section
andlookforthedesiredTRENDnetproducttoaccesstotheGPLCodeorLGPLCode.
ThesecodesaredistributedWITHOUTWARRANTYandaresubjecttothecopyrightsof
thedevelopers.TRENDnetdoesnotprovidetechnicalsupportforthesecodes.Pleasego
to http://www.gnu.org/licenses/gpl.txt or http://www.gnu.org/licenses/lgpl.txt for
specifictermsofeachlicense.
PWP05202009v21.23.181.01