Loading ...
Loading ...
Loading ...
.
ATTACH THE SUPPORT
4. Determine and make necessary cuts for the ductwork. The duct
opening is shown on the mounting template (L in FIGURE 7). Install
ductwork before mounting the support.
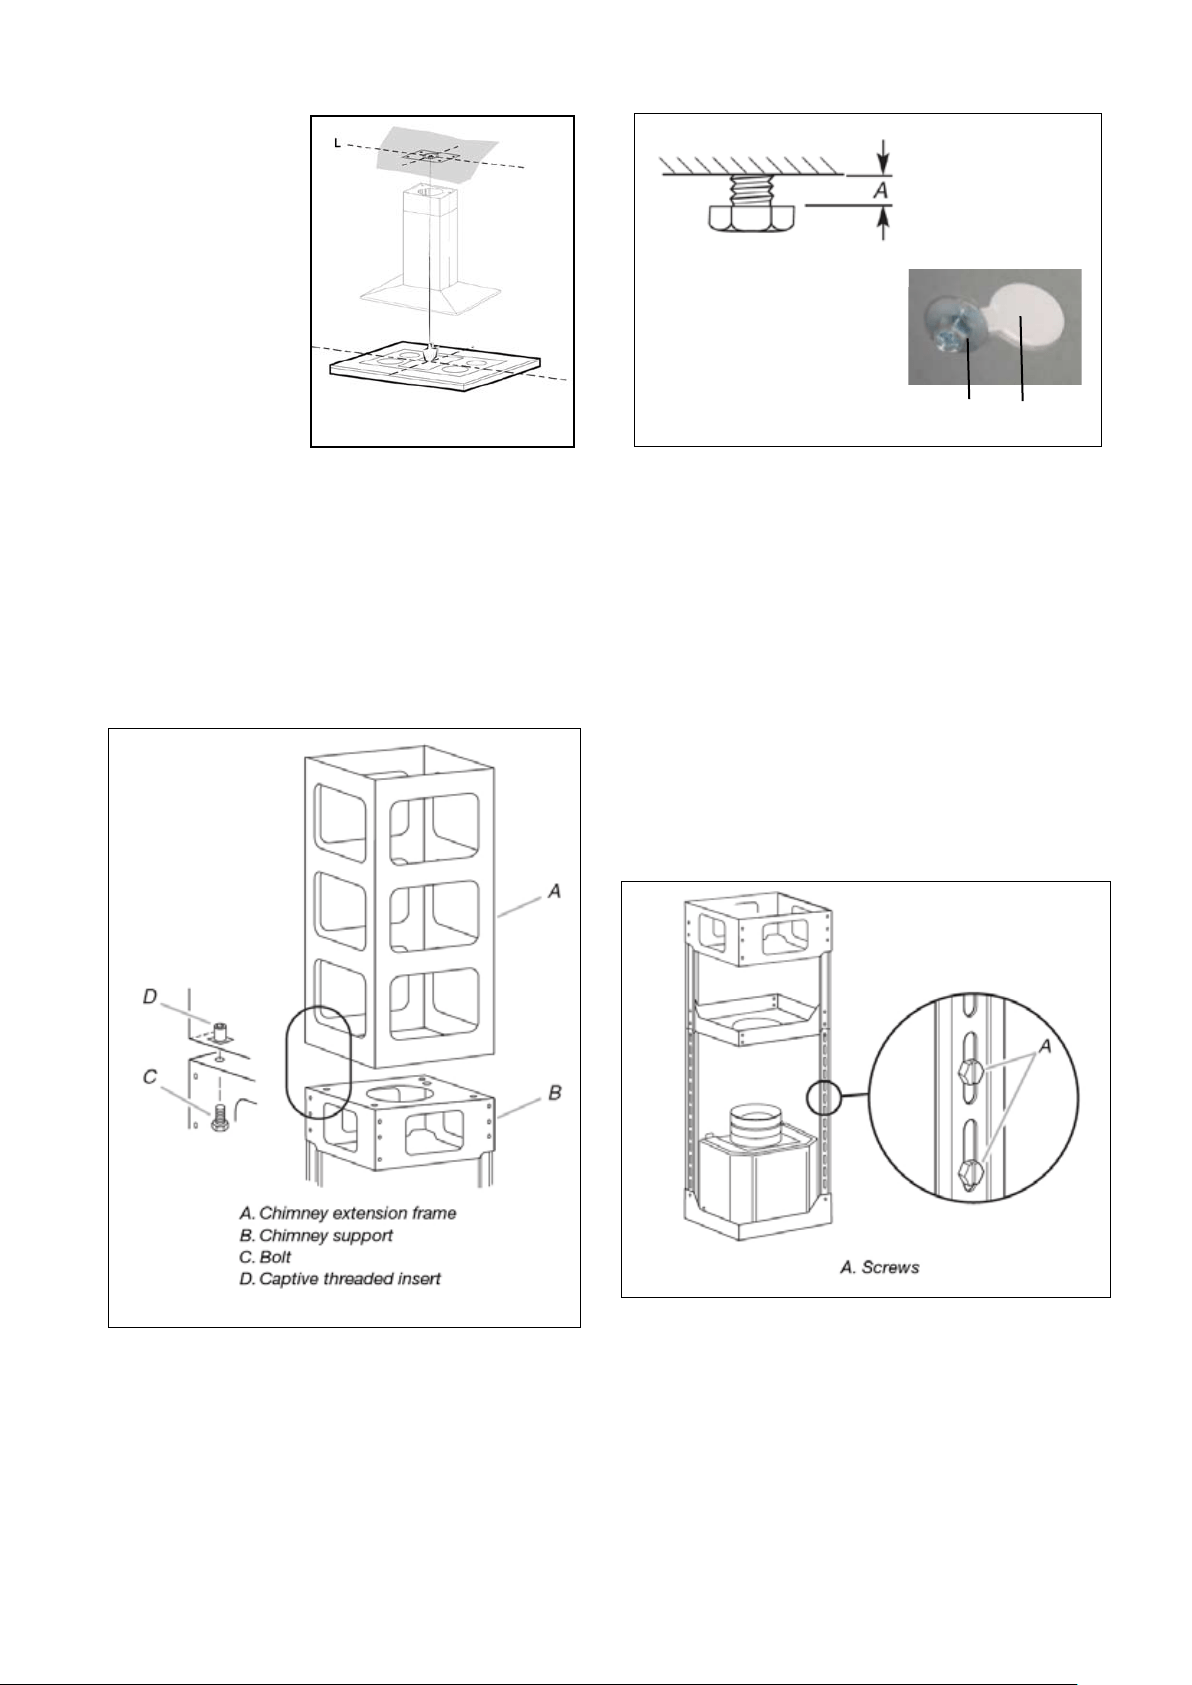
FIGURE 7
1. Put a thick, protective
covering over cooktop,
set-in range or countertop
to protect from damage
or dirt.
2. Determine and clearly
mark with a pencil on the
ceiling where the rangehood
will be installed.
3. A template (L in FIGURE
7) for mounting the support
is supplied in the carton
template to mark holes for
support on the ceiling.
8. Install in previously drilled pilot holes in the ceiling the 4 bolts,
washers and nuts OR the wood screws from the parts bag depending
on your ceiling type (PAGE 4).
(A IN FIGURE 9).
9. Remove wiring box cover located on the top section of the chimney
support.
10.
screws can be tightened after the chimney support is
attached to the ceiling.
11.
through the strain relief.
12. Position the chimney support so that the large end of the
keyhole slots are over the ceiling attachment bolts (B IN FIGURE 9).
Then push the chimney support so that the bolts are in the neck of
the slots. (C IN FIGURE 9) Tighten bolts securely.
IMPORTANT: The chimney support must be securely
attached to the ceiling.
13.
the length of the support by removing the four screws (indicated
in FIGURE 10)
support is determined, install and tighten the four screws.
6.
DO
NOT turn on the power until installation is complete! A knockout
7. For ducted installations, place the round DAMPER (N in FIGURE
1) into the exhaust opening of the rangehood and press down.
5. If using the High Ceiling Chimney Kit
(A in FIGURE 8). Position
(B in
FIGURE 8) so that the outside edges and the electrical holes line up.
the 4 bolts (C in FIGURE 8). Tighten bolts securely.
FIGURE 10
FIGURE 8
FIGURE 9
A. 1/4"
B
C
Loading ...
Loading ...
Loading ...