Loading ...
Loading ...
Loading ...
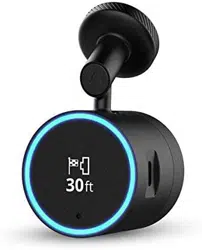
Getting Started
WARNING
See the Important Safety and Product Information guide in the
product box for product warnings and other important
information.
Mounting Considerations
Before you mount the device on your windshield, you should
carefully consider the mounting location. The adhesive is
extremely sticky, can be difficult to remove, and is not reusable.
One extra adhesive pad is included in the product packaging.
You should keep it in a safe place so that you can use it if you
decide to change the mounting location in the future.
• Choose a location that allows you to route the power cable
safely and out of sight.
WARNING
When installing the device in a vehicle, install the device and
power cable securely so they do not interfere with the vehicle
operating controls, such as the foot pedals, or the driver's
feet. Interference with the vehicle operating controls or feet
can result in a collision, which could result in injury or death.
The included long, lightweight power cable is designed to be
routed out of sight. To hide the cable, you can route it around
the windshield and tuck it into the gap between the
windshield and the trim.
• Do not mount the device in a location that obscures the
driver's view of the road.
• Choose a location that is within easy reach and provides
access to the device buttons.
• Choose a location that allows the device to clearly hear your
voice.
For example, you should avoid placing the device near a
speaker or air vent, which can introduce noise that interferes
with the microphones. Also, placing the device in a central
location, such as near the rear-view mirror, allows the device
to hear both the driver and the passenger.
• Choose a location that provides the dash cam with a clear
view of the road.
You should verify the vehicle's windshield wipers clear the
windshield area in front of the dash cam, and you should
avoid placing the dash cam behind a tinted area of the
windshield.
• Thoroughly clean the windshield before installing the mount.
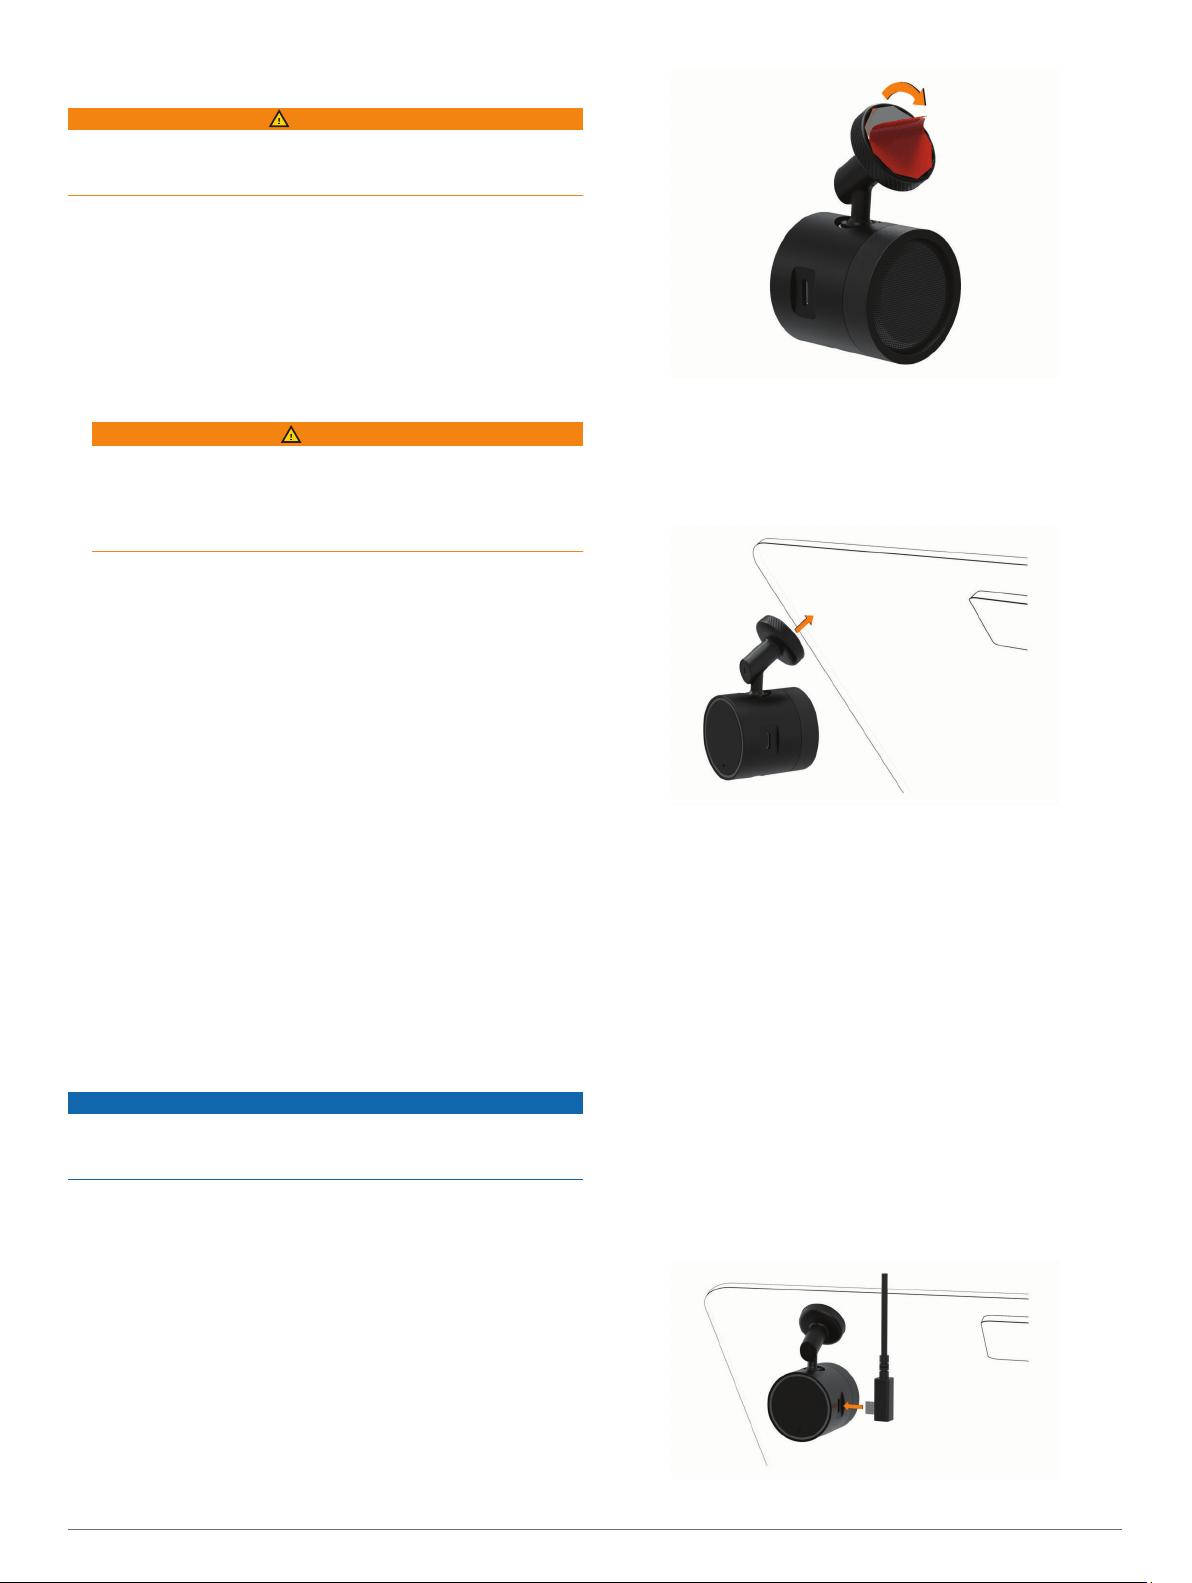
Installing the Adhesive Disc onto Your Windshield
NOTICE
The adhesive disc is difficult to remove after it is installed. You
must carefully consider the mounting location before you install
the mount (Mounting Considerations, page 1).
For the best results, you should install the adhesive disc onto
your windshield while the ambient temperature is from 21° to
38°C (from 70° to 100°F).
1
Clean the windshield using water or alcohol, and a lint-free
cloth.
The windshield must be free of dust, wax, oils, or coatings.
2
Remove the protective film from the mount adhesive.
3
Position the mount over the mounting location.
TIP: The adhesive is extremely sticky. Do not touch the
adhesive to the windshield until the mount is properly
positioned and aligned.
4
Press the mount firmly onto the windshield, and maintain
pressure for 30 seconds.
5
Pull the device and mount away from the windshield.
The metal adhesive disc remains attached to the windshield.
6
Using your finger, press firmly on the disc for 30 seconds.
This helps to ensure the disc adhesive has proper contact
with the windshield.
For the best results, especially in low temperature environments,
you should allow the adhesive on the metal disc to bond to the
windshield for 24 hours before installing the device onto the
mount. Failure to allow adequate bonding time may cause the
adhesive to detach from the windshield.
Installing and Powering the Garmin Speak Plus
Device
NOTE: For the best results, especially in low temperature
environments, you should allow the adhesive on the metal disc
to bond to the windshield for 24 hours before installing the
device onto the mount. Failure to allow adequate bonding time
may cause the adhesive to detach from the windshield.
1
Place the device and mount onto the metal disc.
2
Plug the power cable into the USB port on the device.
3
Route the power cable to your vehicle power outlet.
Getting Started 1
Loading ...
Loading ...
Loading ...