
USER GUIDE
NZ AU
DISHWASHER
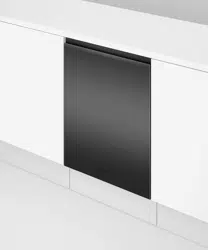
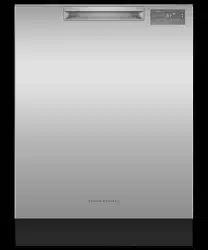
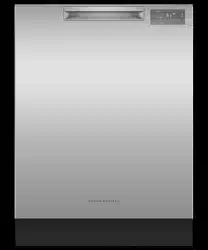
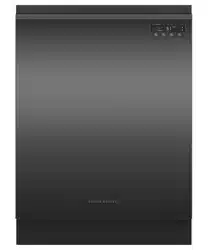
DW60FC and DW60UC models


This user guide is an accompaniment to your ‘Quick start guide’ which is included
with your dishwasher.
For operating instructions, see your ‘Quick start guide’. If you no longer have your
‘Quick start guide’, you can download it from our local website, listed on the back cover.
Refer to your ‘Quick start guide’ for information on:
●
Starting a wash
●
Wash programs and when to use them
●
Controls
●
Racking features


1
CONTENTS
IMPORTANT!
SAVE THESE INSTRUCTIONS
The models shown in this user guide may not be available in all markets and are subject
to change at any time. For current details about model and specification availability in
your country, please go to our website www.fisherpaykel.com or contact your local
Fisher & Paykel dealer.
Safety and warnings 2
Controls and starting a wash 4
Setting Delay Start 5
Setting wash modifiers (DW60FC6 and DW60UC6 models) 6
Setting a 1/2 load (DW60FC6 and DW60UC6 models) 8
User preference settings 9
Caring for your dinnerware 10
Loading advice 11
Water hardness and dishwashing 13
Wash programmes and detergent quantities 14
Adding detergent 15
Using rinse aid 16
After the wash 17
Care and cleaning 18
Fault codes 21
Troubleshooting 23
Warranty and service 27
Wash programme data 28
Standards test (DW60FC1 models only) 29
Standards test (DW60FC2 and DW60UC2 models only) 30
Standards test (DW60FC4/C6 and DW60UC6 models only) 31

2
IMPORTANT SAFETY INSTRUCTIONS
WARNING!
When using your dishwasher, follow basic precautions, including the following:
●
Read all instructions before using the dishwasher.
●
The information in this manual must be followed to minimise the risk of fire or
explosion or to prevent property damage, personal injury or loss of life.
●
Use the dishwasher only for its intended function as described in this user guide.
●
This appliance is intended to be used in household and similar applications such as:
– staff kitchen areas in shops, offices and other working environments;
– farm houses;
– by clients in hotels, motels and other residential type environments;
– bed and breakfast type environments.
●
Use only detergents or rinse aid recommended for use in a domestic dishwasher and
keep them out of reach of children.
●
Check that the detergent dispenser is empty after the completion of each
wash program.
●
When loading items to be washed, locate sharp items so that they are not likely to
damage the dishwasher and load sharp knives with the handle up to reduce the risk of
cut-type injuries.
●
Do not touch the filter plate (the metal disc in the dishwasher base) during or
immediately after use, as it may be hot from the heater plate underneath.
●
Do not tamper with the controls.
●
Do not abuse, sit in, stand on the door or dish rack of the dishwasher.
●
Do not lean on the adjustable racks or use them to support your body weight.
●
To reduce the risk of injury, do not allow children to play in or on the dishwasher.
●
Under certain conditions, hydrogen gas may be produced in a hot water heater system
that has not been used for two weeks or more. HYDROGEN GAS IS EXPLOSIVE. If the
hot water system has not been used for such a period, before using the dishwasher,
turn on all hot water taps and let the water flow from each for several minutes. This
will release any accumulated hydrogen gas. As the gas is flammable, do not smoke or
use an open flame during this time.
●
Remove the door to the washing compartment when removing an old dishwasher
from service or discarding it.
●
Some dishwasher detergents are strongly alkaline. They can be extremely dangerous
if swallowed. Avoid contact with the skin and eyes and keep children away from the
dishwasher when the door is open. Check that the detergent receptacle is empty after
completion of the wash cycle.
●
Certified residential dishwashers are not intended for licensed food establishments.
Your dishwasher has been carefully designed to operate safely during normal
dishwashing procedures. Please keep the following instructions in mind when you are
using your dishwasher.
SAFETY AND WARNINGS

3
SAFETY AND WARNINGS
IMPORTANT SAFETY INSTRUCTIONS
Maintenance
●
Disconnect the appliance from the power supply before any cleaning or maintenance.
●
When disconnecting the appliance pull the plug rather than the power supply cord or
junction of cord to avoid damage.
●
Do not repair or replace any part of the appliance or attempt any servicing unless
specifically recommended in this user guide.
●
We recommend that you contact Customer Care to arrange service. See your ‘Service
and warranty’ booklet for contact details.
●
Keep the floor around your appliance clean and dry to reduce the possibility
of slipping.
●
Keep the area around/underneath your appliance free from the accumulation of
combustible materials, such as lint, paper, rags and chemicals.
Operational
●
Open the door very carefully if the dishwasher is in operation. There is a risk of
being sprayed with hot water. Do not open the door fully until the spray arms have
stopped rotating.
●
Always press the
FISHER AND PAYKEL P8 DISHWASHER TOPCAP GRAPHICS
DW60CE
button to pause and wait a few seconds before opening the door.
●
The door should not be left in the open position as this could present a
tripping hazard.
●
The water inside the dishwasher is not suitable for drinking.
●
The dishwasher must be used with the filter plate, drain filter and spray arm(s) in
place. To identify what these parts are, see drawings in section ‘Care and Cleaning’
of this user guide.
●
Do not operate this dishwasher if it is damaged, malfunctioning, partially
disassembled or has missing or broken parts, including a damaged power supply
cord or plug.
●
Household appliances are not intended to be played with by children. Children of
less than 8 years old must be kept away from the appliance unless continuously
supervised. This appliance can be used by children aged from 8 years and above, and
persons with reduced physical, sensory or mental capabilities or lack of experience
and knowledge, if they have been given supervision or instruction concerning the use
of the appliance in a safe way and they understand the hazards involved.
●
Cleaning and user maintenance shall not be done by children without supervision.
●
Do not allow children to play inside, on or with this appliance or any
discarded appliance.
●
If a dishwasher cleaner is used, we would strongly recommend a wash program
with detergent should be run immediately afterward, to prevent any damage to
the dishwasher.
●
The dishwasher is designed for washing normal household utensils. Items that are
contaminated by petrol, paint, steel or iron debris, corrosive, acidic or alkaline
chemicals are not to be washed in the dishwasher.
●
If the dishwasher is not being used for long periods of time, turn the electricity and
water supply to the dishwasher off.

4
To start a wash programme
1 Press
FISHER AND PAYKEL P8 DISHWASHER TOPCAP GRAPHICS
DW60CE
to turn the dishwasher on.
2 Check that the wash programme displayed is the one you would like to use.
If not, press
C2, C4 Dishwasher
C6 Dishwasher
to scroll through the wash programmes
(see section ‘Changing the wash programme’ below).
3 Once the display shows the programme you would like to use, press
FISHER AND PAYKEL P8 DISHWASHER TOPCAP GRAPHICS
DW60CE
to start.
The display will show the approximate time remaining and the stage of the wash.
Note:
●
the default cycle when you first turn the dishwasher on is Normal
●
the dishwasher will remember the last programme used.
To pause and restart a wash programme
1 Press
FISHER AND PAYKEL P8 DISHWASHER TOPCAP GRAPHICS
DW60CE
to pause the programme. The programme status (eg Wash) will flash while
the dishwasher is paused.
2 Open the door very slowly.
IMPORTANT!
There is a risk of being sprayed with hot water. Do not fully open the door until the
spray arms have stopped rotating.
3 Load, remove, or rearrange any dishes if needed.
4 Press
FISHER AND PAYKEL P8 DISHWASHER TOPCAP GRAPHICS
DW60CE
to restart the programme.
If the dishwasher is not restarted within 7 minutes, it will then beep until the cycle
is restarted.
Changing the wash programme
Note: The dishwasher will remember the last programme used.
1 Press
FISHER AND PAYKEL P8 DISHWASHER TOPCAP GRAPHICS
DW60CE
to turn the dishwasher on.
2 Press Program to scroll to the desired wash programme.
●
The display will show the wash programme time.
3 Select a wash modifier (optional, DW60C6 models only)
●
Press
C2, C4 Dishwasher
C6 Dishwasher
to scroll between the wash modifier options. The selected wash modifier
indicator will be lit. (see ‘Selecting wash modifiers’).
4 Press
FISHER AND PAYKEL P8 DISHWASHER TOPCAP GRAPHICS
DW60CE
to start the wash programme.
At the end of the programme the dishwasher will beep. The display will show 0.
After 30 seconds the display will turn off.
CONTROLS AND STARTING A WASH
5
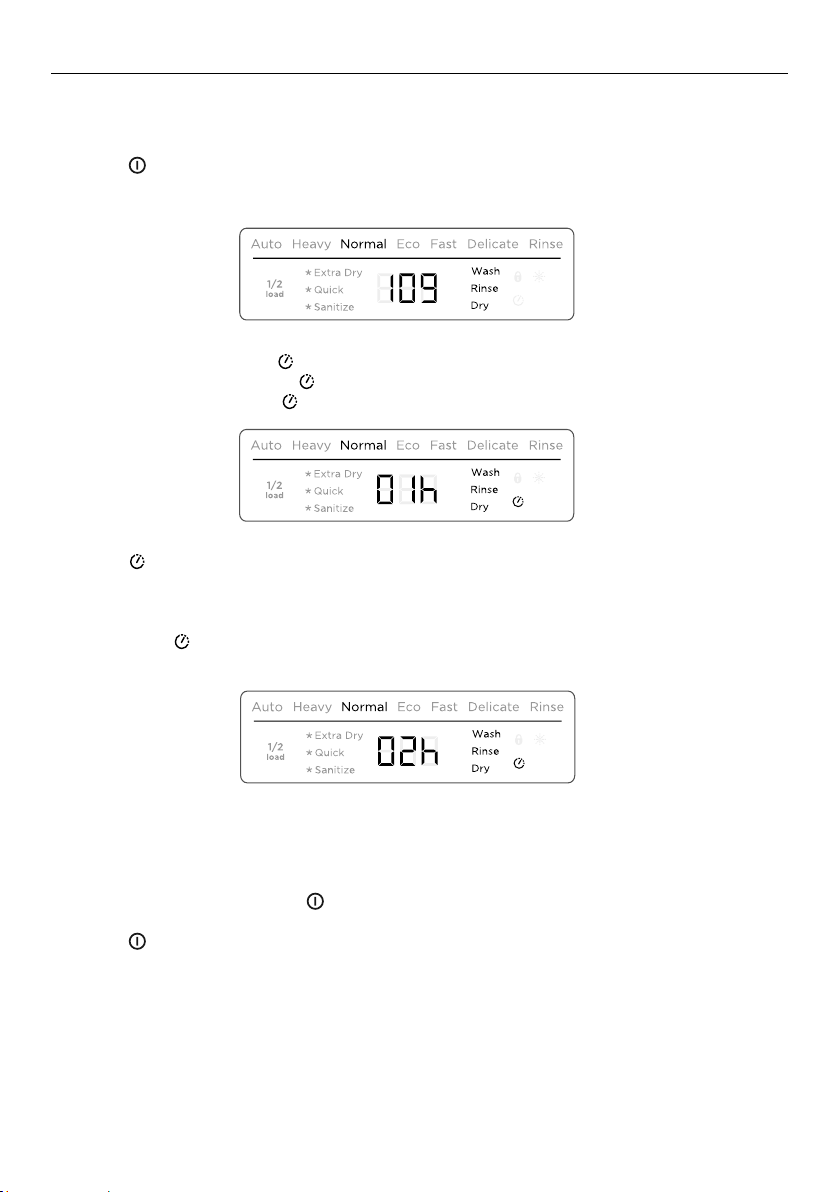
SETTING DELAY START
This feature can delay the start of a wash programme by 1 to 12 hours.
1 Load the dishes, add detergent and close the door.
2 Press
FISHER AND PAYKEL P8 DISHWASHER TOPCAP GRAPHICS
DW60CE
to turn the dishwasher on.
3 Check that the display shows the wash programme you require. If not, see instructions
for ‘Changing the wash programme’.
4 C1/C2/C4 models: Press .
C6 models: Press and hold for a second.
●
The delay start indicator will light up and the display will show the delay
time (hours).
5 Press again for a second to increase the number of hours you wish to delay the
wash by (1hr – 12hr in hour steps).
Note:
●
Hold down to scroll more quickly to your desired delay time.
●
Scrolling past 12 hours will exit delay start.
6 Delay start is now set. The display will countdown in hours. The wash programme will
automatically start when the delay time is over.
To cancel Delay start, press
FISHER AND PAYKEL P8 DISHWASHER TOPCAP GRAPHICS
DW60CE
.
Press
FISHER AND PAYKEL P8 DISHWASHER TOPCAP GRAPHICS
DW60CE
to exit delay start and cancel the delay time.
C2, C4 Dishwasher
C6 Dishwasher
C2, C4 Dishwasher
C6 Dishwasher
C2, C4 Dishwasher
C6 Dishwasher
6
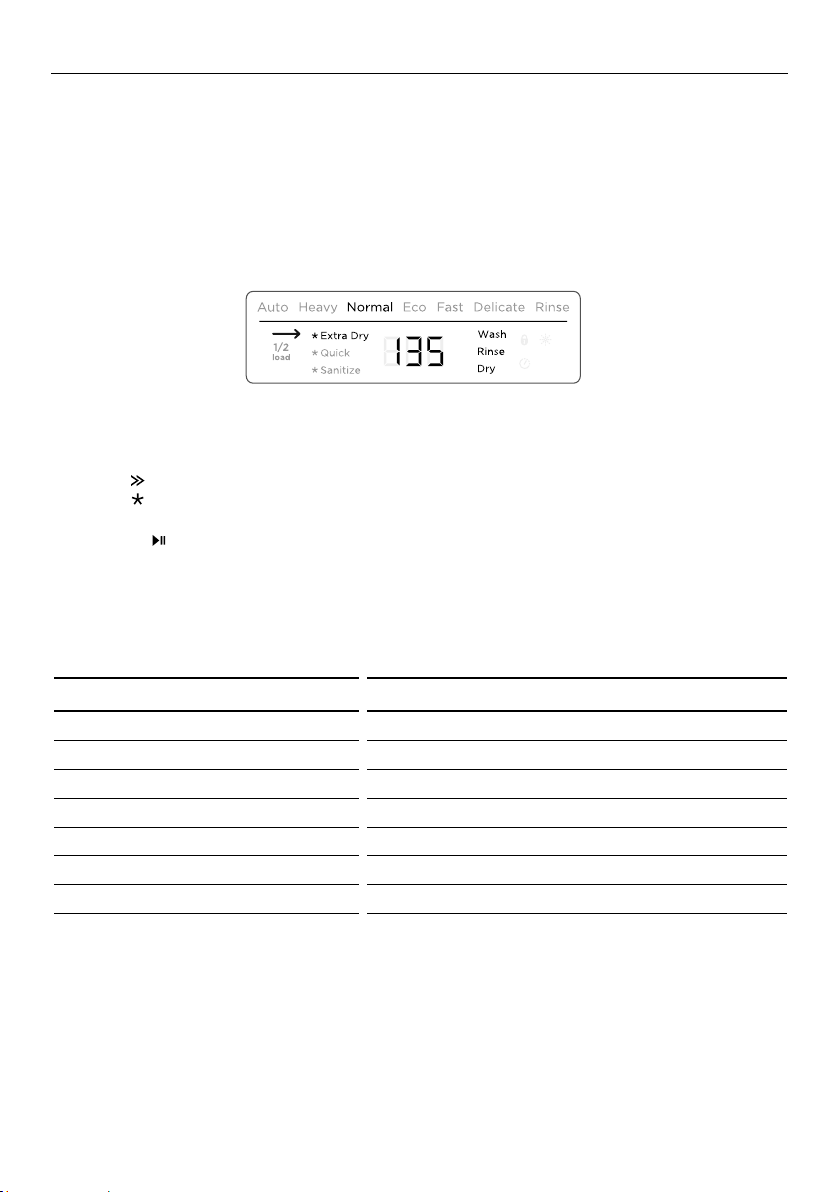
SETTING WASH MODIFIERS (DW60FC6 AND DW60UC6 MODELS)
Along with setting the wash programme, you may select one of the following the
additional options:
●
Extra dry: Increases the wash temperature and the length of the drying phase for
improved drying performance. This is especially useful for plastic items.
●
Quick: Uses additional water and energy for a faster wash time, while maintaining
wash performance.
●
Sanitize: Raises the water temperature during the rinse phase to sanitize dishes. Ideal
for washing items such as baby bottles and preserving jars.
To set a wash modifier
1 Make sure the dishwasher is on and detergent (and rinse aid if necessary)
has been added.
2 Press
C2, C4 Dishwasher
C6 Dishwasher
to select a wash programme.
3 Press
C2, C4 Dishwasher
C6 Dishwasher
to scroll through the wash modifier options.
●
The selected wash modifier indicator will light up on the display.
●
Press
C2, C4 Dishwasher
C6 Dishwasher
to start the wash
Note:
●
Only one modifier can be set at a time
●
Not all modifiers are available for every wash programme. If a wash modifier is not
available for the chosen wash program, then that modifier cannot be selected.
C2, C4 Dishwasher
C6 Dishwasher
WASH PROGRAMME MODIFIER AVAILABLE
Auto - - -
Heavy Extra Dry Quick Sanitize
Normal Extra Dry Quick Sanitize
Normal Eco - - -
Fast Extra Dry - Sanitize
Delicate Extra Dry Quick -
Rinse - - -
7
SETTING WASH MODIFIERS (DW60FC6 AND DW60UC6 MODELS)
Using sanitize
The sanitize wash modifier adjusts the wash programme to meet the conditions required
by Section 6, NSF 184 for sanitization to occur.
While sanitize is running, the wash programme is monitored to ensure that these
conditions are met.
IMPORTANT!
●
For sanitization to occur, the temperature of the water needs to reach 70
0
C.
Check that all items in the dishwasher are dishwasher safe before running the
sanitize modifier.
●
If the wash is interrupted or the water supply is turned off during the cycle, then the
heating conditions for sanitization may not be met. You may need to run the cycle
again to ensure sanitization of your dishes.
●
Only cycles utilising the sanitize wash modifier are designed to meet the conditions
required by Section 6, NSF 184. Other wash programs may not reach the temperatures
required for sanitization to occur. See table on previous page for wash programs that
have sanitize available
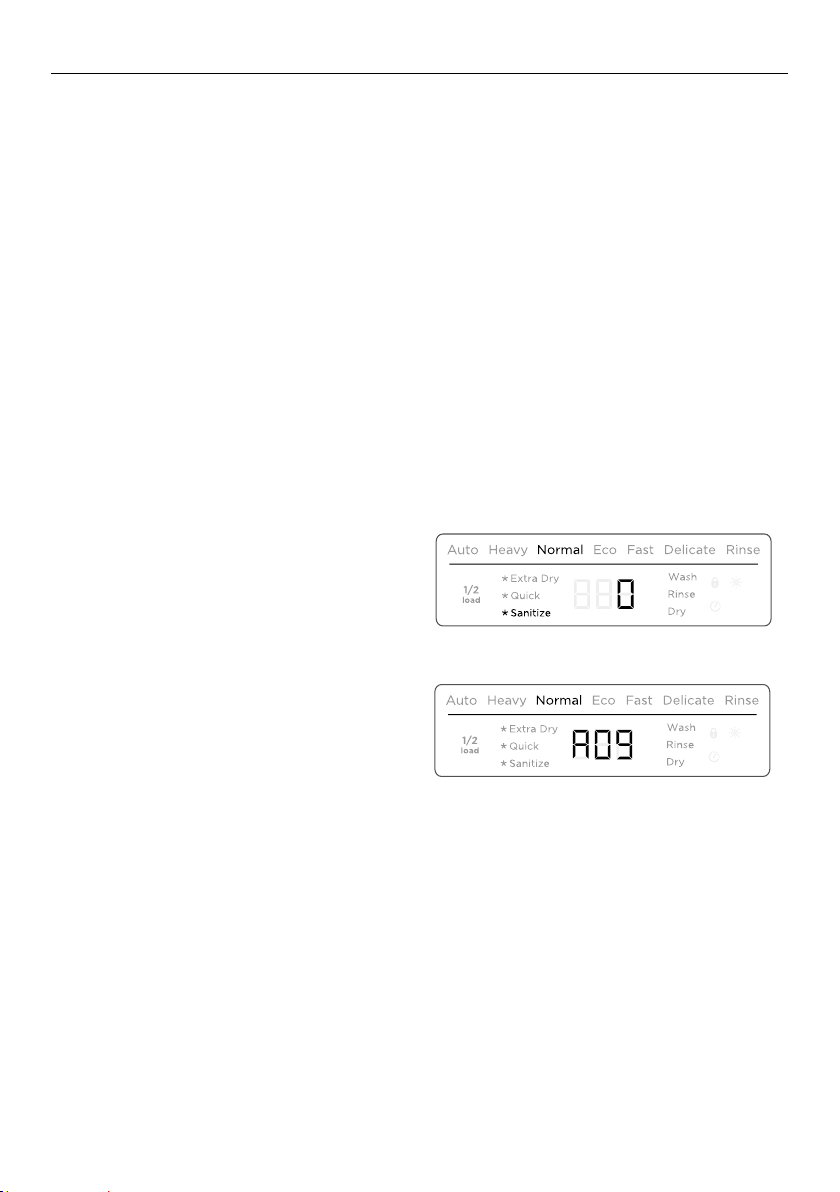
At the end of a wash programme with sanitize, always check the display to make sure
that sanitization has been successful.
If sanitization has been successful:
●
The dishwasher will beep
●
0 will show in the display
●
The sanitize indicator will remain lit.
●
After 30 seconds the display will turn off.
If sanitization has not been successful:
●
An alert will sound
●
An alert code will show in the display
●
The sanitize indicator will not be lit.
C2, C4 Dishwasher
C6 Dishwasher
C2, C4 Dishwasher
C6 Dishwasher
8
SETTING A 1/2 LOAD (DW60FC6 AND DW60UC6 MODELS)
Half load Option
●
If you don’t have a full load of dishes to wash, you can choose to use the 1/2 load
option. This may be useful if, for example, you only wish to wash the breakfast dishes.
The dishes should fill only half the dishwasher, but may be placed in both upper and
lower baskets.
●
This option is available with the following wash programmes and modifiers:
To select 1/2 load
1 Press
FISHER AND PAYKEL P8 DISHWASHER TOPCAP GRAPHICS
DW60CE
to turn the dishwasher on.
2 Press
C2, C4 Dishwasher
C6 Dishwasher
to select a wash programme, and
C2, C4 Dishwasher
C6 Dishwasher
to select a wash modifier (if required).
3 Press and hold
FISHER AND PAYKEL P8 DISHWASHER TOPCAP GRAPHICS
DW60CE
for a second until you hear a beep. The half load indicator will
light up.
To cancel 1/2 load
1 Press and hold
FISHER AND PAYKEL P8 DISHWASHER TOPCAP GRAPHICS
DW60CE
for a second until you hear a beep.
●
The half load indicator will go out.
Note: 1/2 load cannot be cancelled while a wash programme is running.
C2, C4 Dishwasher
C6 Dishwasher
WASH PROGRAMME MODIFIER AVAILABLE WITH 1/2 LOAD
Heavy Extra Dry, Sanitize
Normal Extra Dry, Sanitize
Normal Eco -
Delicate Extra Dry
9
USER PREFERENCE SETTINGS
These allow you to:
●
Change the rinse aid setting or turn rinse aid on or off.
●
Turn the beeps on or off.
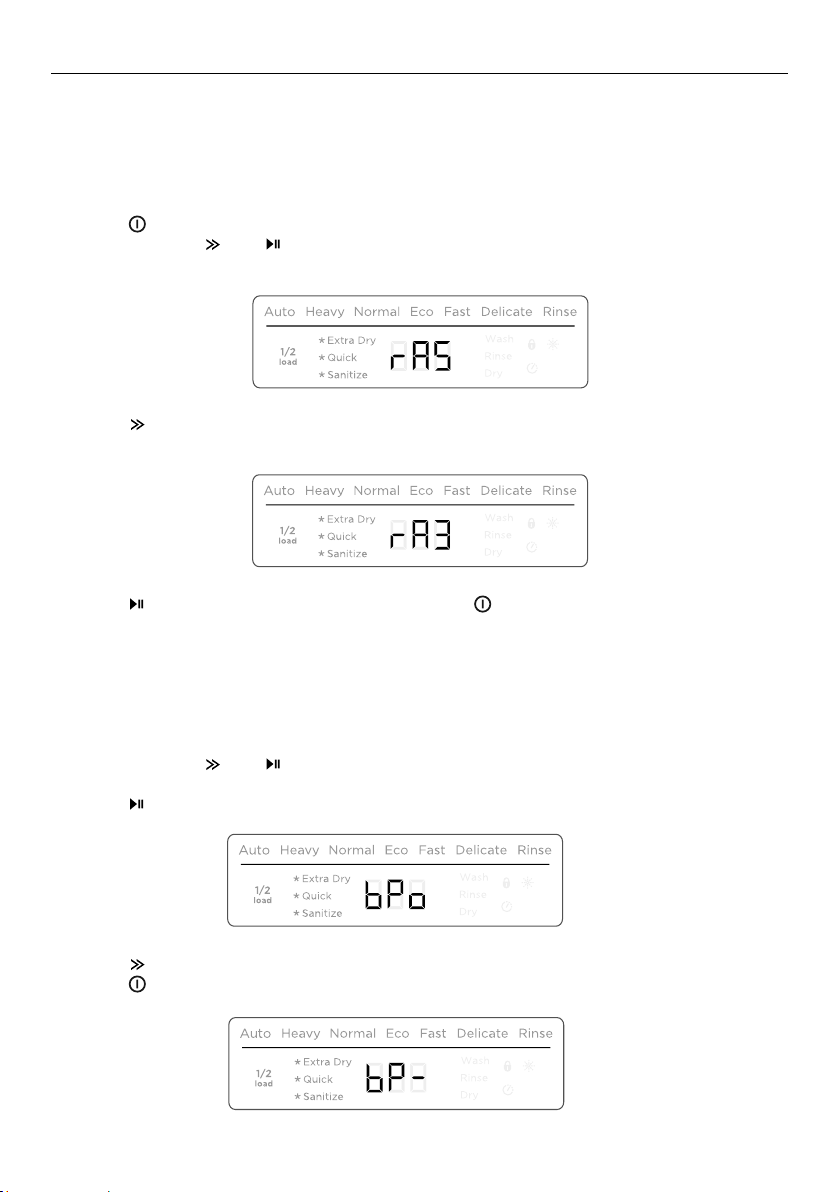
To change the rinse aid setting
1 Press
FISHER AND PAYKEL P8 DISHWASHER TOPCAP GRAPHICS
DW60CE
to turn the dishwasher on.
2 Press and hold
C2, C4 Dishwasher
C6 Dishwasher
and
C2, C4 Dishwasher
C6 Dishwasher
together for five seconds to enter the user preference menu.
The display will show the current Rinse Aid setting.
3 Press
C2, C4 Dishwasher
C6 Dishwasher
to scroll between rA1 (minimum dispense) to rA6 (maximum dispense)
or rA- (rinse aid off).
4 Press
C2, C4 Dishwasher
C6 Dishwasher
to move on to the next setting or press
FISHER AND PAYKEL P8 DISHWASHER TOPCAP GRAPHICS
DW60CE
to exit the user preference menu.
To turn the Beeps on or off
This turns off all sounds on the dishwasher (except for fault alerts).
1 Make sure the dishwasher is on.
2 Press and hold
C2, C4 Dishwasher
C6 Dishwasher
and
C2, C4 Dishwasher
C6 Dishwasher
together for five seconds to enter the user preference menu.
The display will show the current Rinse Aid setting.
3 Press
C2, C4 Dishwasher
C6 Dishwasher
to scroll to the Beeps menu.
4 Press
C2, C4 Dishwasher
C6 Dishwasher
to toggle between bPo (Beeps On) and bP- (Beeps Off)
5 Press
FISHER AND PAYKEL P8 DISHWASHER TOPCAP GRAPHICS
DW60CE
to exit the user preference menu.
C2, C4 Dishwasher
C6 Dishwasher
C2, C4 Dishwasher
C6 Dishwasher
C2, C4 Dishwasher
C6 Dishwasher
C2, C4 Dishwasher
C6 Dishwasher
WASH PROGRAMME MODIFIER AVAILABLE WITH 1/2 LOAD
Heavy Extra Dry, Sanitize
Normal Extra Dry, Sanitize
Normal Eco -
Delicate Extra Dry

10
CARING FOR YOUR DINNERWARE
The combination of high temperatures and dishwasher detergent may cause damage
to some items if they are washed in the dishwasher. Remember, if in any doubt about
any aspect concerning items washed in the dishwasher, follow the instructions from the
manufacturer of the items, or wash the item by hand.
IMPORTANT!
Never put highly absorbent materials, such as sponges and towels in your dishwasher.
Do not put dishes or cutlery that have been soiled by tobacco ash, wax, lubricating
grease or paint in your dishwasher.
Cutlery and silverware
All cutlery and silverware should be rinsed immediately after use to prevent tarnishing
caused by some foods. Silver items should not come into contact with stainless steel,
e.g. other cutlery. Mixing these items can cause staining. Remove silver cutlery from the
dishwasher and hand dry immediately after the programme has finished.
Aluminium
Aluminium can be dulled by dishwasher detergent. The degree of change depends on
the quality of the item.
Other metals
Iron and cast iron objects can rust and stain other items. Copper, pewter and brass tend
to stain. Wash these items by hand.
Woodware
Wooden items are generally sensitive to heat and water. Regular use in the dishwasher
may cause deterioration over time. If in doubt, wash by hand.
Glassware
Most everyday glassware is dishwasher safe. Crystal, very fine and antique glassware
may etch that is, become opaque. You may prefer to wash these items by hand.
Plastic
Some plastic may change shape or colour with hot water. Check the manufacturer’s
instructions about washing plastic items. Washable plastic items should be weighted
down so they do not flip over and fill with water or fall through the basket during
the wash.
Decorated items
Most modern china patterns are dishwasher safe. Antique items, those with a pattern
painted over the glaze, gold rims or hand-painted china may be more sensitive to
machine washing. If in doubt, wash by hand.
Glued items
Certain adhesives are softened or dissolved in machine washing. If in doubt, wash
by hand.
11
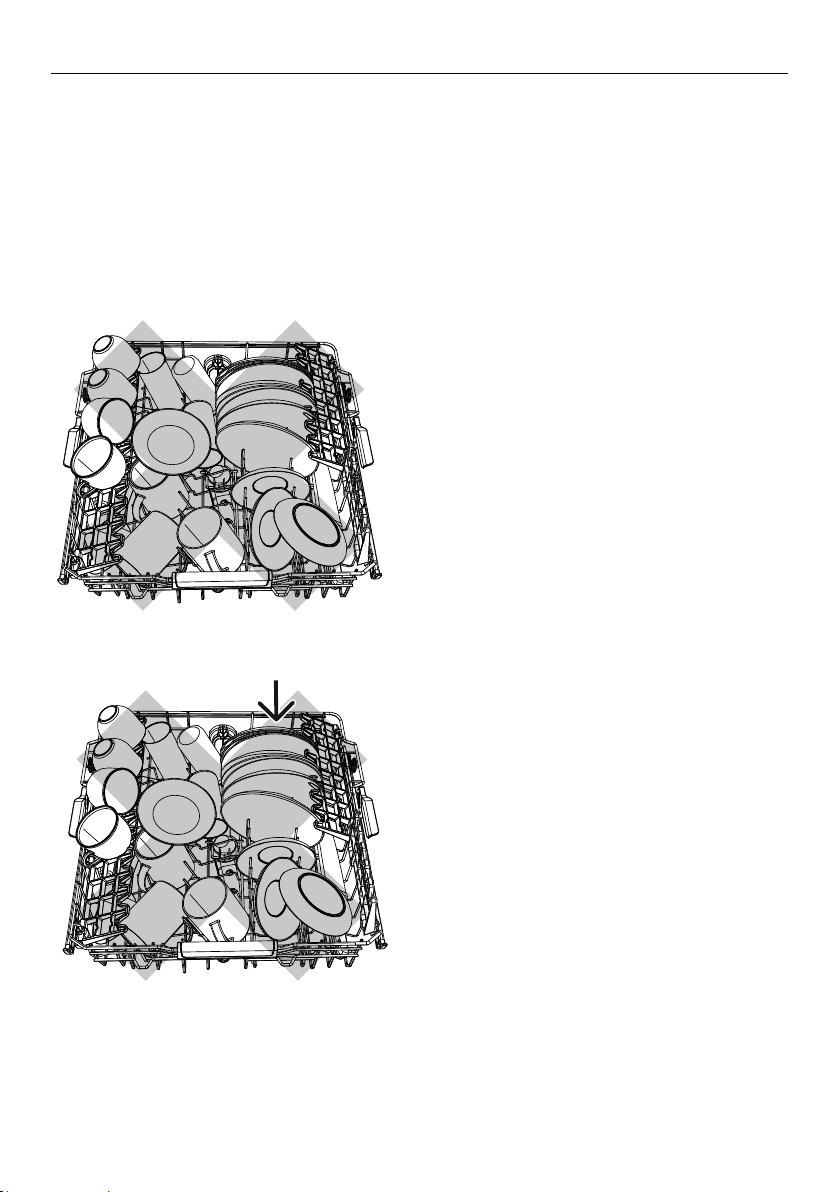
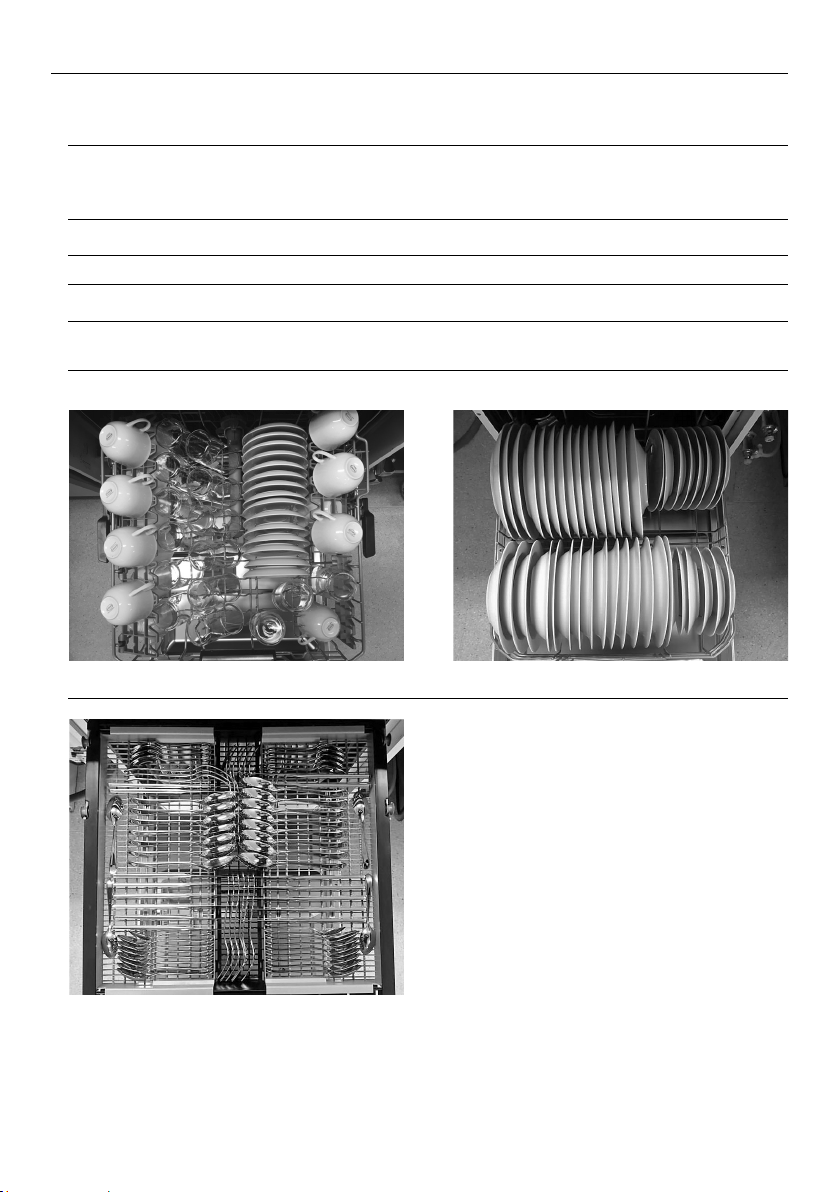
LOADING ADVICE
When loading your dishwasher
●
Place items so that water coming from the rotating spray arms below can reach all
areas. Especially items on the foldaway cup racks. Wash performance will be reduced if
it can’t.
●
Ensure glass and other fragile items are stable, so that they do not accidentally topple
and break during the wash.
●
Any flimsy or light plastic items should be either weighted down or placed on the cup
racks or in the cutlery tray.
●
Ensure there are no dishware items that will stop the spray arms from rotating.
●
Overcrowded and wash water will not
reach some of the dinnerware.
●
Cups, glasses and bowls must have
their openings facing down.
●
The plates are nesting together and
wash water may not get through.
●
Ensure cutlery and utensils are not
nesting or stuck together. They need to
be evenly spread out.

12
LOADING ADVICE
●
The large mug below is blocking wash
water reaching the mug on the cup rack.
●
Locate sharp items safely to prevent
injuring the user and damaging the
lid assembly.
●
Sharp or pointed items must be placed
horizontally or with sharp edges/points
facing down to avoid risk of injury.
●
Ensure cutlery has not fallen through the
base rack and stopped the spray arms
from rotating.
●
Large utensils should be placed on
the foldaway cup racks so they do not
become dislodged and stop the spray
arms from rotating.
●
Check the bottom of the cutlery basket
to ensure sharp or pointed items have
not come through as they may stop
spray arm rotation.
●
Ensure large utensils are not jammed
against the door as this may stop the
detergent dispenser from opening.

13
WATER HARDNESS AND DISHWASHING
What is water hardness?
Hard water is water with a high concentration of minerals such as calcium and
magnesium. In soft water, this concentration is low. Water hardness varies by
geographical location.
How does water hardness affect dishwashing?
●
Hard water can be detrimental to the performance of your dishwasher. Over time,
glassware washed in hard water will become opaque and dishes will become spotted
or covered in a white film. Using very hard water can cause dishwasher parts to fail
over time.
●
Naturally soft or softened water has no detrimental effects if used with the correct
amount of detergent. However, excess detergent combined with hot, soft water may
cause irreversible etching on glassware. Etching first appears as a rainbow-coloured film
and – if allowed to continue – can make glassware permanently opaque.
What can I do to minimise any detrimental effects?
Contact your local water company to find out about water hardness in your area.
If your home has hard water
●
Increase the amount of detergent used.
●
Use a detergent with high phosphate content. Phosphate softens the water and this
improves wash results. You could also try using multi-purpose tablets.
●
Use rinse aid. We recommend you turn the rinse aid on and to at least setting 5 to help
improve wash performance.
●
Use a dishwasher cleaner/descaler regularly, or whenever you notice a build-up of
limescale deposits in your dishwasher.
IMPORTANT!
We recommend fitting a water softener to the household water supply. If the water
hardness in your home is above 250 ppm/14.6 gpg, a water softener has to be fitted
to maintain the performance of your dishwasher.
If your home has naturally soft water or a water softener fitted
●
Avoid using too much detergent. Follow the quantity recommendations on the
following page.
●
Ensure the dishwasher is not overloaded and water can reach all the dishes.

14
WASH PROGRAMMES AND DETERGENT QUANTITIES
●
The quantities in the table below are for powdered detergent and typical levels of
soiling. If your home has softer or harder water, or to suit the particular load, you may
need to adjust these quantities.
●
If you are using tablets, follow the tablet manufacturer’s recommendations.
●
The indicator light will show which option has been selected.
PROGRAMME RECOMMENDED LOAD
QUANTITY OF POWDERED DETERGENT
FOR EACH COMPARTMENT (grams)
Main Wash Pre-Wash
Auto Any type of load. The
dishwasher automatically
selects the optimum
wash programme
20 – 35 g
depending on soils
none
Heavy Heavily soiled pots, pans,
baking dishes
35 g 5 g
Normal Dishes with normal soils
for optimum wash and
dry performance
35 g 5 g
Normal Eco Normally soiled dishes
for optimum energy and
water usage
27.5 – 28.75 g 5 g
Fast Very lightly soiled
mixed dishes
20 g none
Delicate
(some models
only)
Lightly soiled delicate
(e.g. heat-sensitive) items
20 g none
Rinse Prevents odours and soils
drying on dishes before
they are washed
none none
15
ADDING DETERGENT
IMPORTANT!
●
Only use detergents recommended for automatic dishwashers.
●
Dishwasher detergents are strongly alkaline. They can be extremely dangerous if
swallowed. Avoid contact with the skin and eyes and keep children and infirm persons
away from the dishwasher when it is open. Check that the detergent dispenser is
empty after completion of each wash programme.
●
Never sprinkle or pour detergent directly onto any item in the dishwasher. Detergent
and dishwasher tablets should not be in direct contact with dishes or cutlery.
●
Do not use hand washing liquids, soap, laundry detergents or disinfectants, as these
will damage the dishwasher.
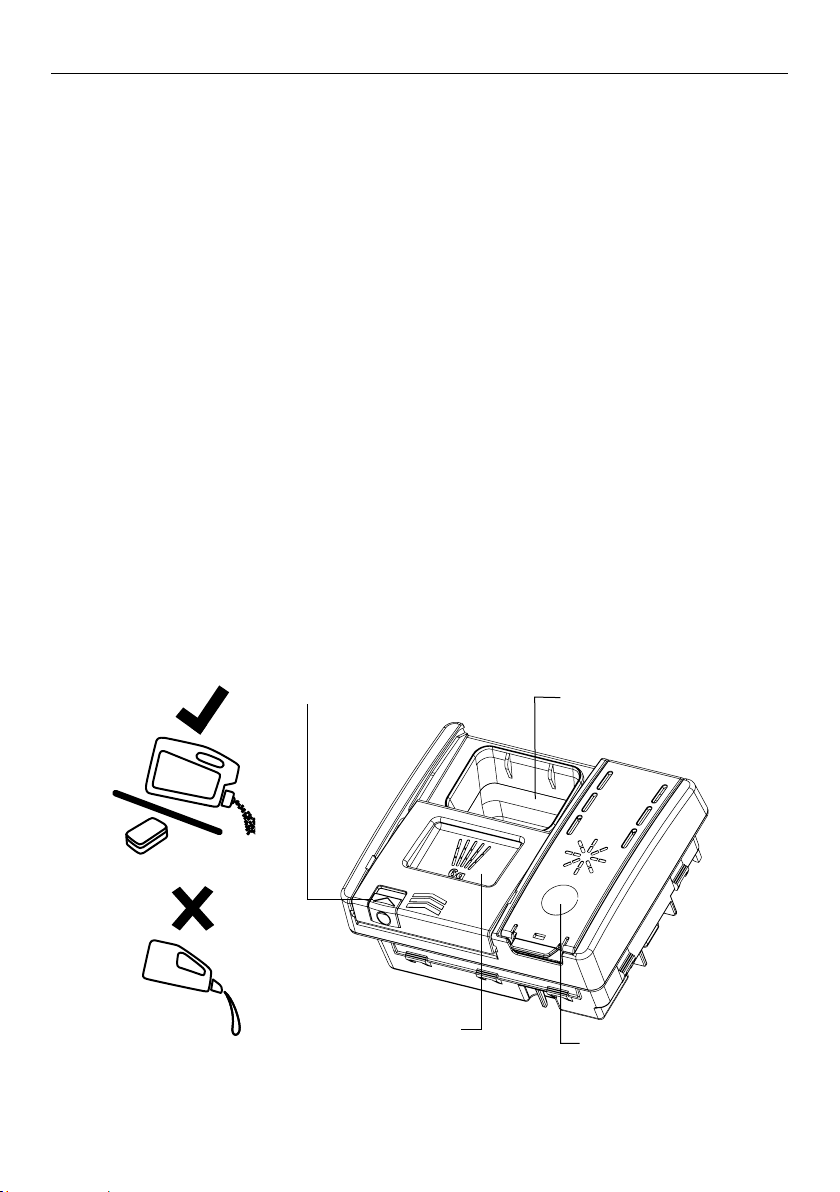
Filling the detergent dispenser
1 Press the button on the left of the dispenser.
IMPORTANT!
Approach the dispenser from the right-hand side to prevent the cover from snapping
open on your hand.
2 Add detergent into the appropriate compartment(s). If you are using powdered
detergent, see the recommended quantities on the previous page. The ‘20’ and ‘30’
markings in the main wash compartment correspond to grams of powdered detergent.
IMPORTANT!
Tablets should only be placed in the main wash (larger) compartment.
3 Remove any excess detergent from the edges of the dispenser.
4 Close the cover and press down until it clicks shut. The detergent will automatically be
released into the dishwasher during the wash programme.
Open the cover here
Rinse aid compartment
Main wash compartment
Pre-wash compartment
16
USING RINSE AID
We highly recommend using liquid rinse aid regularly to get the best drying results.
Rinse aid gives a streak-free, sparkling clean look to glass and chinaware. In addition, it
prevents metal from tarnishing.
When to refill the rinse aid dispenser
When rinse aid level becomes low, the rinse aid
indicator on the control panel will light up to
remind you to refill the dispenser.
When you have the dishwasher door open you can
also check the rinse aid level using the indicators
on the dispenser inside the dishwasher.
Adjusting the rinse aid dosage
The normal, factory-set dosage level is 5, but you
may need to adjust this to suit your water conditions.
●
If there is excessive foaming at the end of the wash,
reduce the dosage.
●
If you live in a hard water area or if dishes are wet
or streaky after drying, increase the dosage.
●
To adjust the rinse aid setting:
see ‘User preference settings’ for how to do this.
●
If you are using tablets with built-in rinse aid, we
recommend setting the rinse aid dosage level to off (rA-).
How to refill the rinse aid dispenser
1 Press the button to snap the dispenser cover open.
2 Pour rinse aid into the circular opening, making sure not
to fill beyond the MAX marking.
IMPORTANT!
Take care not to spill rinse aid into the dishwasher.
Any spills must be wiped up to prevent excess
foaming. Failure to do so may result in a service
call, which will not be covered by warranty.
3 Close the cover, making
sure it clicks shut.
Rinse aid level indicators
(rinse aid dispenser)
Rinse aid indicator
(on control panel)
C2, C4 Dishwasher
C6 Dishwasher
End tab
Fill opening

17
Rinse aid indicator
(on control panel)
AFTER THE WASH
When the wash programme is over, the dishwasher will beep six times, then
automatically turn off in a few seconds.
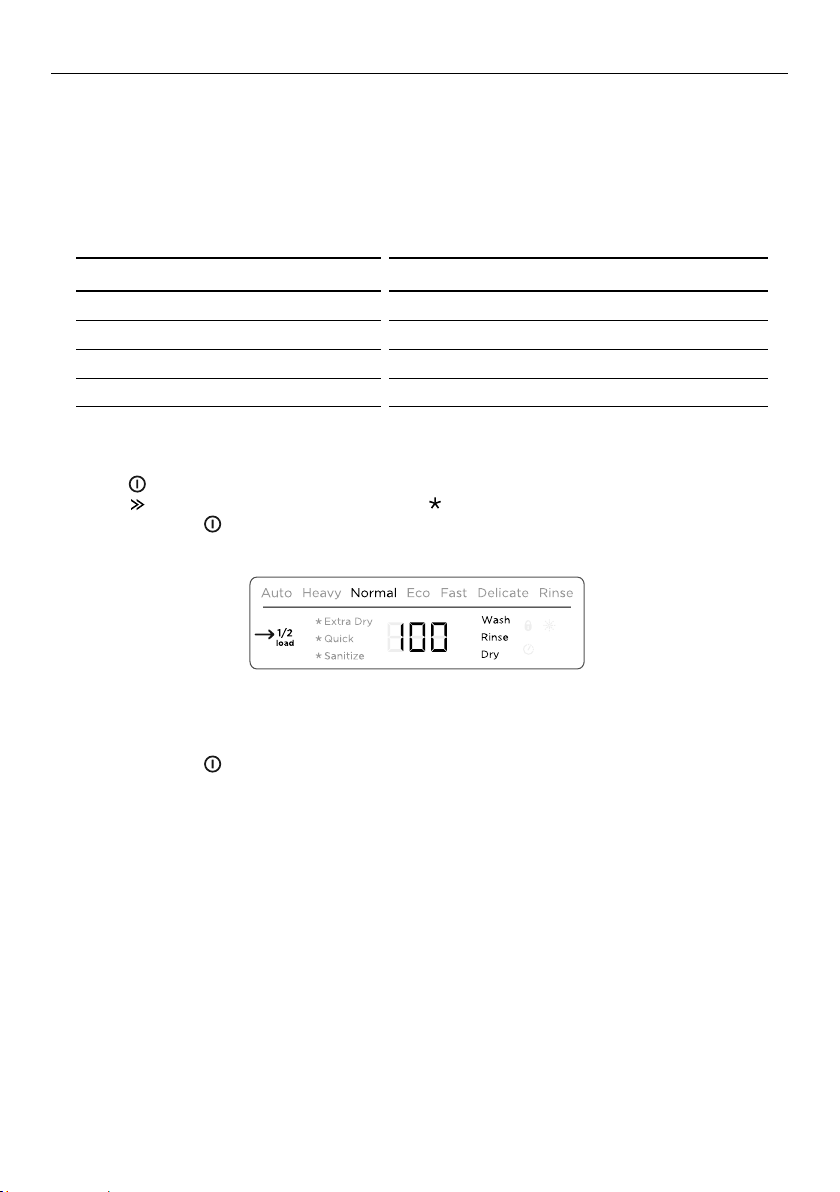
1 Open the door slightly and leave it ajar (about 100mm) to help the drying process.
2 Once the dishes are cool to touch, they can be removed.
IMPORTANT!
Never leave the dishwasher door in the fully open position, as this could present a
tripping hazard.
3 Check that the detergent dispenser is completely empty. If it isn’t, wipe out with a
damp cloth.
4 Inspect your dishwasher regularly to see if it needs any cleaning or maintenance:
●
Check that no grease or limescale deposits have accumulated on the inside.
●
If there are food particles in the filters, these need to be cleaned as well.
●
See section ‘Care and cleaning’ for cleaning and maintenance instructions.
Holiday time
If the dishwasher is not going to be used for some time:
●
Ensure the baskets are empty.
●
Leave the inside of the dishwasher clean.
●
Leave the dishwasher door ajar to allow air to circulate.
●
Turn off both the power and water supply to the dishwasher.

18
CARE AND CLEANING
Over time, food residue or limescale deposits may accumulate inside your dishwasher.
These may reduce efficiency, and food residue may produce a bad odour. Inspect and
clean your dishwasher regularly.
IMPORTANT !
●
Before any cleaning or maintenance, always disconnect the dishwasher from the
power supply, turn off the water supply, and wait until all parts of the dishwasher
have cooled.
●
Do not use the following cleaning aids, as they may damage the surfaces:
– plastic or stainless steel scouring pads
– abrasive, solvent, household cleaners
– acid or alkaline cleaners
– laundry detergents or disinfectants
– stainless steel cleaners or polishes
– hand-washing liquids or soap
●
Where there is broken crockery or glass in the dishwasher, it must be carefully
removed to prevent personal injury or damage to the appliance.
●
After cleaning, always check that the spray arms and filters are all correctly in place.
19
CARE AND CLEANING
Cleaning the dishwasher exterior
●
To clean exterior surfaces of the dishwasher, wipe with a clean, soft damp cloth and dry
with a clean, lint-free cloth.
●
For non-flush surfaces wipe along or around the surface. For example, to wipe down the
exterior control buttons, use a circular wiping motion around the button.
●
Take care not to cause excessive wetting of the control panel area.
Note: before cleaning the control panel, it is useful to disable the buttons by
activating Keylock.
Cleaning the door seal and dishwasher interior
Clean thoroughly with warm water on a soft, lint-free cloth. If the interior is heavily
soiled, use a dishwasher cleaner/descaler following the manufacturer’s instructions.
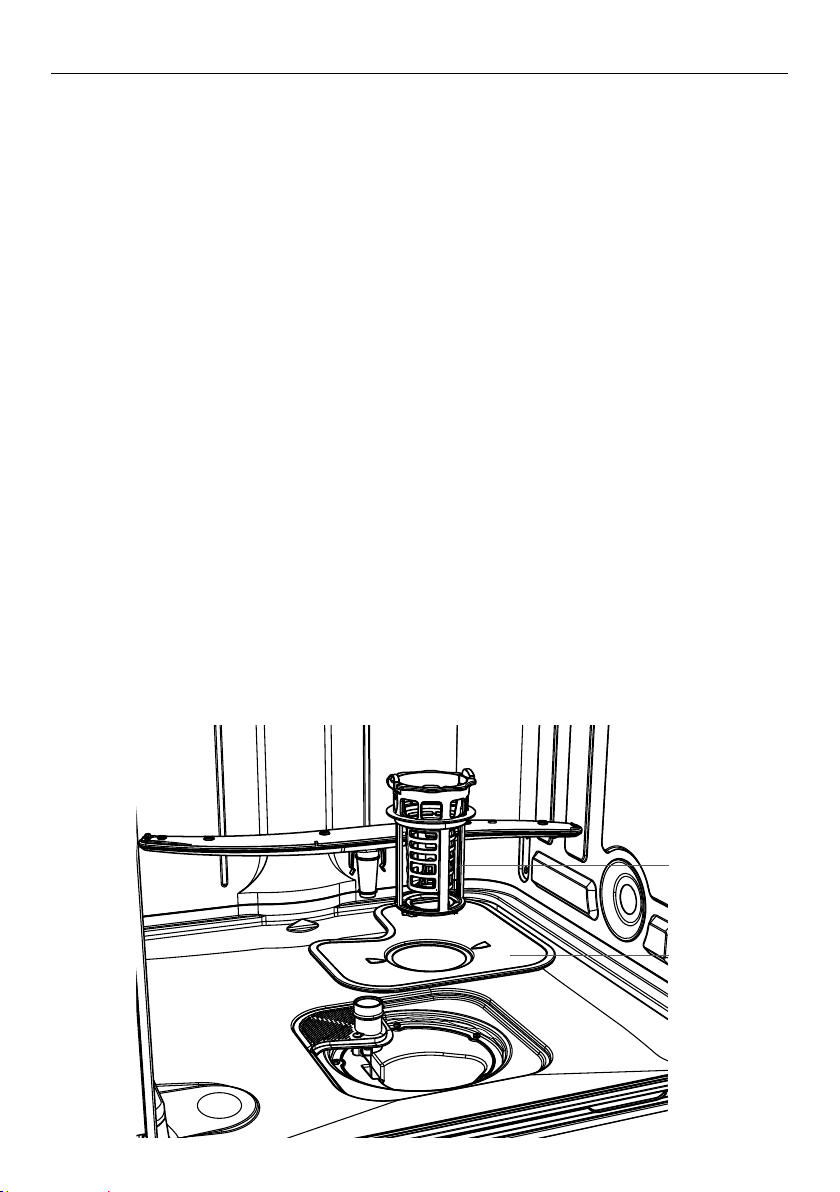
Cleaning the filters
The filters prevent larger food particles in the wash water from reaching the pump.
These particles may occasionally block the filters. We recommend cleaning the filters
whenever there is evidence of food particles.
●
To remove the drain filter, turn the filter anti-clockwise to release, then lift out.
●
Once the drain filter has been removed you can lift the filter plate out.
●
Rinse them thoroughly under running water and then replace.
IMPORTANT !
When cleaning the underside of the filter plate, take care handling its sharp
outer edge.
●
Replace the filters correctly after cleaning, making sure the filter plate is flush with the
dishwasher base.
Drain filter
Filter plate
20
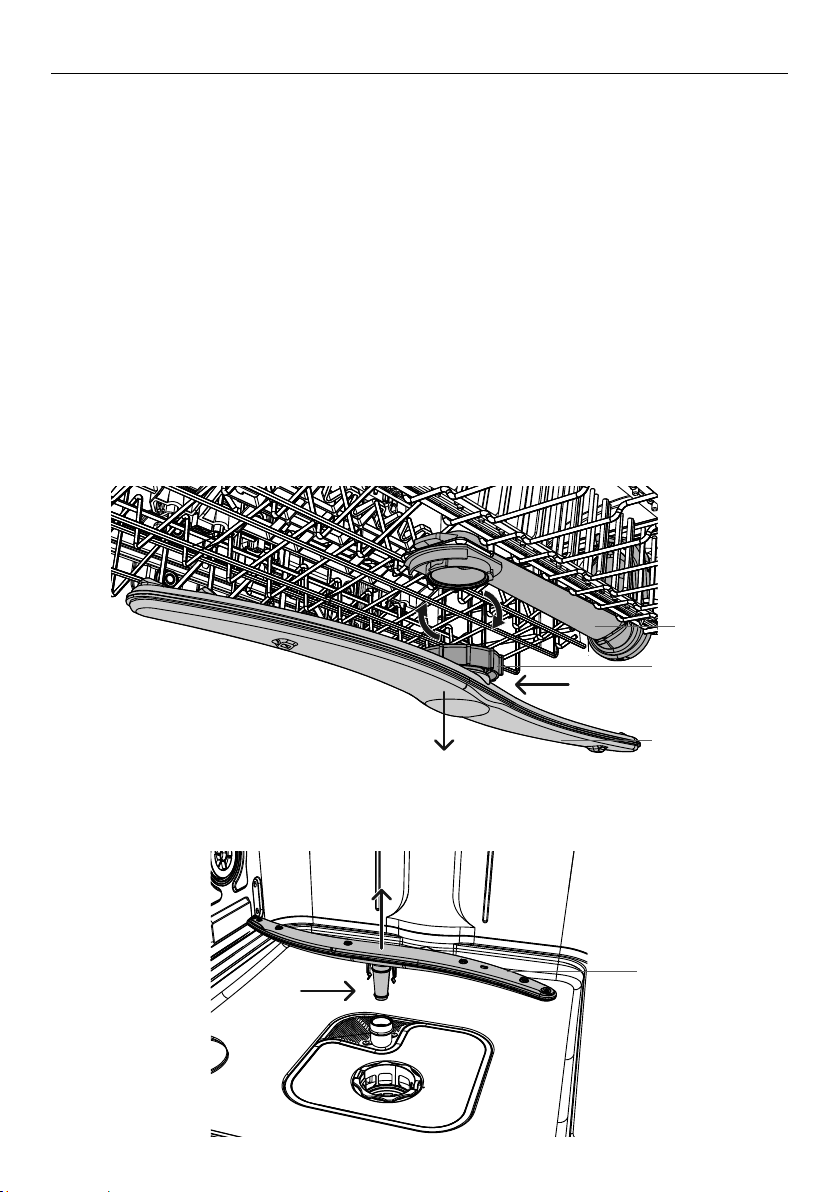
Cleaning the spray arms
Limescale and food particles in the wash water can block the holes in the spray arms
and the arm mountings. Clean these parts about once a month, or more often should
the need arise.
Cleaning the upper spray arm/head
Do not remove the upper spray arm for cleaning. Clean with a small plastic-bristled
brush, or if heavily soiled or blocked use a dishwasher cleaner/descaler following the
manufacturer’s instructions.
Cleaning the centre spray arm
●
To remove the centre spray arm, carefully unscrew its locking nut.
●
Rinse the spray arm thoroughly under running water, then refit.
IMPORTANT !
Make sure you twist the locking nut on the centre spray arm firmly back on the water
supply tube.
Check that the centre spray arm is firmly locked in place and rotates freely.
Cleaning the lower spray arm
●
To remove the lower spray arm, simply lift the spray arm off its mounting.
●
Rinse the spray arm thoroughly under running water, then refit it on its mounting.
Lower spray arm
Centre spray arm
Locking nut
Water
supply tube
CARE AND CLEANING

21
FAULT CODES
If the dishwasher malfunctions, it will display a fault code and beep. Check the
following table below to see if you can correct the fault yourself.
If the dishwasher still will not work, or shows any other fault code
1 Press
FISHER AND PAYKEL P8 DISHWASHER TOPCAP GRAPHICS
DW60CE
to turn the dishwasher off and wait a few minutes.
2 Press
FISHER AND PAYKEL P8 DISHWASHER TOPCAP GRAPHICS
DW60CE
again to turn the dishwasher back on.
If the dishwasher still does not function and/or the problem persists, disconnect
the dishwasher from the power supply, turn the water supply off, then contact
Fisher & Paykel Customer Care with the fault code information.
FAULT
CODES AND
DESCRIPTIONS
POSSIBLE CAUSES WHAT TO DO
A20
Drain fault
Drain hose is
crimped or bent.
Check the drain hose and straighten if needed.
The waste water is
not draining out.
Ensure that the drain hose is connected in
accordance with the installation instructions.
The turbidity
sensor is dirty and
requires cleaning.
Gently clean the turbidity sensor with a soft
brush (ie toothbrush) to remove any buildup.
A10
No water
Water tap not
turned on.
Ensure the water is connected and turned on.
Press
FISHER AND PAYKEL P8 DISHWASHER TOPCAP GRAPHICS
DW60CE
to restart the dishwasher.
Insufficient water
supply pressure.
Check household water pressure.
Water inlet hose is
crimped or bent, so
no or not enough
water gets to the
dishwasher.
Check the water inlet hose and straighten if
needed. Press
FISHER AND PAYKEL P8 DISHWASHER TOPCAP GRAPHICS
DW60CE
to restart the dishwasher.
Drain hose is not
connected correctly.
Ensure that the drain hose is connected in
accordance with the installation instructions.
Turbidity
sensor
22
FAULT CODES
FAULT
CODES AND
DESCRIPTIONS
POSSIBLE CAUSES WHAT TO DO
F30
Flooding
Flood switch
activated.
Turn the dishwasher OFF and ON again. If
fault persists, turn water off and disconnect
the dishwasher from the power supply. Call
Customer Care.
F40
Water flow error. Switch dishwasher OFF and ON again. If fault
persists call Customer Care.
F50
Electronics error. Switch dishwasher OFF and ON again. If the
fault persists call Customer Care.
A60
Water temperature
error.
Switch dishwasher OFF and ON again. If fault
persists call Customer Care.
F90
(DW60FC6 only)
Data/electronics
error.
Switch dishwasher OFF and ON again. If fault
persists call Customer Care.
FA0
Electronics/power
supply error.
Switch dishwasher OFF and ON again. If fault
persists call Customer Care.
AD0
(DW60FC6 only)
Doorlock
signal error.
Switch dishwasher OFF and ON again. If fault
persists call Customer Care.
FCO
(DW60FC6 only)
Motor fault. Switch dishwasher OFF at the power supply.
Wait a few moments and switch ON again.
If the fault persists, turn water off and
disconnect from the power supply. Call
Customer Care.
23
TROUBLESHOOTING
PROBLEM POSSIBLE CAUSE WHAT TO DO
Dishwasher
will not start.
No power. Ensure the dishwasher is plugged in and
the power supply is turned on at the wall.
The door is not
properly closed.
Close the door.
Start/Pause button
FISHER AND PAYKEL P8 DISHWASHER TOPCAP GRAPHICS
DW60CE
has
not been pressed.
Press the Start/Pause button
FISHER AND PAYKEL P8 DISHWASHER TOPCAP GRAPHICS
DW60CE
.
Water tap not turned on. Ensure water is connected and turned on.
Blocked strainer in water
inlet hose.
Check the strainer and clean if necessary
– it is located where the water inlet hose
screws into the tap.
Keylock is activated. Cancel Keylock by pressing and holding
C2, C4 Dishwasher
C6 Dishwasher
and (C1, C2 & C4 models) or
C2, C4 Dishwasher
C6 Dishwasher
and
C2, C4 Dishwasher
C6 Dishwasher
(C6 models) together for
4 seconds until the keylock indicator
goes out.
Lower
spray arm
rotates with
difficulty.
Spray arm holes are
blocked by small items or
food particles.
Clean the spray arm. See ‘Care
and cleaning’ for instructions.
Cover of
detergent
dispenser
cannot be
closed.
Detergent compartment has
been overfilled.
Remove detergent until the cover can
be closed.
Detergent dispenser is
clogged with remnants of
detergent.
Wipe dispenser out with a damp
cloth. Dry the dispenser before
adding detergent.
Remnants
of detergent
stuck inside
dispenser.
Compartment was damp
when filled with detergent.
Wipe dispenser out with a damp
cloth. Dry the dispenser before
adding detergent.
Utensils are blocking the
detergent dispenser
from opening.
Ensure there are no large utensils
positioned in a way that will stop the
dispenser cover from opening when
the dishwasher door is closed.
Buttons beep
and do not
respond.
Keylock is activated. Cancel Keylock by pressing and holding
C2, C4 Dishwasher
C6 Dishwasher
and (C1, C2 & C4 models) or
C2, C4 Dishwasher
C6 Dishwasher
and
C2, C4 Dishwasher
C6 Dishwasher
(C6 models) together for
4 seconds until the keylock indicator
goes out.
Water
remains
inside
dishwasher
after wash
has
ended.
Drain hose is crimped, bent,
or blocked.
Check the drain hose and straighten
if needed.
Pump is jammed. Call your Fisher & Paykel Authorised
Service Centre or Customer Care.
Filter(s) blocked. Clean the filter(s). See ‘Care and cleaning’
for instructions.
24
TROUBLESHOOTING
PROBLEM POSSIBLE CAUSE WHAT TO DO
Foaming. Incorrect amount or type of
detergent used.
See section ‘Adding detergent’ or
consult the detergent manufacturer’s
instructions.
Too much egg in the
wash load.
Increase the amount of detergent.
Rinse aid dosage level too high. Decrease the rinse aid dosage.
Rinse aid spills not wiped up. Ensure that all rinse aid spills are wiped
up when they occur.
The dish-
washer stops
suddenly
during the
wash.
Power or water supply has
been interrupted.
Check the power and water supplies.
Knocking
or rattling
sound during
wash.
Spray arm knocking
against dishes.
Pause the wash and rearrange dishes.
See sections ‘Controls and starting a
wash’ and ‘Loading’.
Dishes have been stacked
incorrectly.
Unclean
dishes.
Wash programme unsuitable
for load.
See section ‘Wash programmes and
detergent quantities’ and select a
suitable programme.
Soils were too heavily baked on. Dishes may need soaking.
Spray arm(s) unable
to rotate.
Ensure no items are obstructing the
spray arm path.
Dishwasher overloaded or
incorrectly loaded.
See the ‘Loading’ section.
The filters are
incorrectly inserted.
See section ‘Care and cleaning’.
Detergent put in the
wrong compartment.
See sections ‘Wash programmes and
detergent quantities’ and ‘Adding detergent’.
Excessive food not removed
from dishes before loading.
Scrape all food scraps off dishes
before loading.
Unsuitable detergent. Only use powdered or tablet detergent
designed for domestic dishwashers.
Not enough detergent. See ‘Wash programmes and detergent
quantities’ for recommended quantities.
You may need to adjust these to suit
your particular load and the hardness of
your water supply.
Spray arm holes are blocked. Clean the spray arm(s). See ‘Care and
cleaning’ for instructions.
The filters are blocked. Clean the filters. See ‘Care and cleaning’
for instructions.
25
TROUBLESHOOTING
PROBLEM POSSIBLE CAUSE WHAT TO DO
Plastic
items are
discoloured
(e.g. stain left
by tomato
sauce).
Not enough detergent,
not pre-rinsed.
Pre-rinse plastic dishes before
placing in the dishwasher and/or add
more detergent.
Alternatively, using the Rinse programme
after adding dishes may minimise
staining.
Display
flashing while
Keylock is on.
This is normal. The display
remains on although the
buttons are disabled.
No action required.
White stains
are left
on dishes;
glasses
have a milky
appearance.
Not enough detergent. See section ‘Wash programmes and
detergent quantities’ for recommended
quantities. You may need to adjust these
to suit the hardness of your water supply.
Rinse aid dosage too low. Increase rinse aid dosage.
See ‘Using rinse aid’.
Dishes,
cutlery have
not dried.
Rinse aid dosage too low. Increase rinse aid dosage.
See ‘Using rinse aid’.
Items removed too soon. After the end of the wash programme,
leave the door ajar and wait for several
minutes to help drying.
Rinse aid dispenser empty.
(The rinse aid indicators
are lit.)
Add rinse aid. See section
‘Using rinse aid’ for instructions.
Glasses
have dull
appearance.
Rinse aid dosage too low. Increase rinse aid dosage.
See ‘Using rinse aid’.
Tea stains
or traces of
lipstick have
not been
completely
removed.
Not enough detergent. See section ‘Wash programmes and
detergent quantities’ for recommended
quantities. You may need to adjust these
to suit your particular load.
Wash temperature too low. Select a wash programme with
a higher temperature (see section
‘Wash programme data’ for information).
Traces of rust
on cutlery.
Cutlery is not
sufficiently rustproof.
Wash by hand.
Glasses
clouded and
discoloured;
milky coating
Hard water situation. Increase detergent quantities.
Glasses are not
dishwasher proof.
Wash by hand.

26
PROBLEM POSSIBLE CAUSE WHAT TO DO
Water marks
left on
glasses and
cutlery.
Rinse aid level or dosage
setting is too low.
Ensure there is rinse aid in dispenser. If
necessary, increase the rinse aid setting
or try using a wash programme with a
higher temperature. See sections ‘Using
rinse aid’ and ‘Wash programme data’.
Hard water Increase the rinse aid setting and the
amount of detergent. See section ‘Water
hardness and dishwashing’.
If living in an area with very hard
water, consult a plumber on installing a
household water softener.
TROUBLESHOOTING

27
Before you call for service or assistance
Check the things you can do yourself. Refer to the installation instructions and your
user guide and check that:
1 Your product is correctly installed.
2 You are familiar with its normal operation.
If after checking these points you still need assistance or parts, please refer to the
Service & Warranty book for warranty details and your nearest Authorised Service
Centre, Customer Care, or contact us through our website www.fisherpaykel.com.
Complete and keep for safe reference:
Model
Serial No.
Purchase Date
Purchaser
Dealer
Suburb
Tow n
Country
WARRANTY AND SERVICE
28
AUTO NORMAL
NORMAL
ECO*
FAST HEAVY RINSE
Stages
pre-wash pre-wash pre-wash pre-wash rinse
45°C
main wash
45 – 68°C
main wash
60°C
DW60FC1:
main wash 45°C
DW60FC2, DW60UC2:
main wash 44°C
main wash
45°C
main wash
68°C
post-rinse post-rinse post-rinse post-rinse
final rinse
70°C
final rinse
70°C
DW60FC1:
main wash 44°C
DW60FC2:
main wash 46°C
final rinse
55°C
final rinse
70°C
drying drying drying drying drying
DW60FC1, DW60FC2, DW60UC2
AUTO NORMAL
NORMAL
ECO*
FAST HEAVY RINSE
Stages
pre-wash pre-wash pre-wash pre-wash rinse
45°C
main wash
45 – 68°C
main wash
60°C
main wash
47°C
main wash
45°C
main wash
68°C
post-rinse post-rinse post-rinse
final rinse
70°C
final rinse
70°C
final rinse
46°C
final rinse
55°C
final rinse
70°C
drying drying drying drying drying
DW60FC4
AUTO HEAVY NORMAL
NORMAL
ECO*
FAST DELICATE RINSE
Stages
pre-wash pre-wash pre-wash pre-wash rinse
45°C
main wash
45 – 68°C
main wash
68°C
main wash
60°C
main wash
47°C
main wash
45°C
main wash
45°C
post-rinse post-rinse post-rinse post-rinse 45
°
C
final rinse
70°C
final rinse
55°C
final rinse
55°C
final rinse
46°C
final rinse
55°C
final rinse
50°C
drying drying drying drying drying drying
*Reference programme for energy label compliance with AS/NZS 2007.
DW60FC6, DW60UC6
WASH PROGRAMME DATA

29
STANDARDS TEST (DW60FC1 MODELS ONLY)
The dishwasher is tested to AS/NZS 2007 standards for both wash and dry performance
using the parameters detailed below.
Wash programme Normal Eco
When the programme is finished, open the
door 100mm to help with drying
Powdered detergent quantities 5 g pre-wash + 27.5 g main wash
Rinse aid dosage level 5
Maximum number of place settings 14
Height adjustment of upper basket Ensure the upper basket is in its
uppermost position
Recommended loading patterns
Upper basket
Cutlery basket
Lower basket
Upper basket with Utensil tray
1
1
1
1
1
1
1
1
1
3
3
3 3 3
3
3
2
1
1
1
2
2 2
2
2
2
2 2
22
2
2
2
3
3 3
3
3 3
3
1
1
3
3
3
3
3
1
3
3
3
3
3
3
3
3
3 1
1 1 1 1 1
1 1
1
2
2
2
2
1
2
2
2
2
2
1
2
2
2
2
2
1
1 2 3
1 2 3 4 5
1
3
3
3
3
3
1
3
3
3
3
3
3
3
3
3 1
1 1 1 1 1
1 1
1
2
2
2
2
1
2
2
2
2
2
1
2
2
2
2
2
1
1 2 3
3 1
1
1
1
1
1
1
2
2
2
2
2
2
2
2
2
2
2
2
2
2
2
3
3
3
3
3
3
3
3
1
1
1
1
1
1
1
1
4
4
4
4
4
4
4
4
4
4
4
4
4
5 5
5 5
5 5
5 5
5 5
5 5
5 5 5
5 5
4 4
3
3
3
3
3
3

30
STANDARDS TEST (DW60FC2 AND DW60UC2 MODELS ONLY)
The dishwasher is tested to AS/NZS 2007 standards for both wash and dry performance
using the parameters detailed below.
Wash programme Normal Eco
When the programme is finished, open the
door 100mm to help with drying
Powdered detergent quantities 5 g pre-wash + 28.75 g main wash
Rinse aid dosage level 5
Maximum number of place settings 15
Height adjustment of upper basket Ensure the upper basket is in its
uppermost position
Recommended loading patterns
Upper basket
Cutlery basket
Lower basket
1 2 3 4 5
1
3
3
3
3
3
1
3
3
3
3
3
3
3
3
3 1
1 1 1 1 1
1 1
1
2
2
2
2
1
2
2
2
2
2
1
2
2
2
2
2
1
1 2 3
3 1
1
1
1
1
1
1
2
2
2
2
2
2
2
2
2
2
2
2
2
2
2
3
3
3
3
3
3
3
3
1
1
1
1
1
1
1
1
4
4
4
4
4
4
4
4
4
4
4
4
4
5 5
5 5
5 5
5 5
5 5
5 5
5 5 5
5 5
4 4
3
3
3
3
3
3
1 2 3 4 5
1
3
3
3
3
3
1
3
3
3
3
3
3
3
3
3 1
1 1 1 1 1
1 1
1
2
2
2
2
1
2
2
2
2
2
1
2
2
2
2
2
1
1 2 3
3 1
1
1
1
1
1
1
2
2
2
2
2
2
2
2
2
2
2
2
2
2
2
3
3
3
3
3
3
3
3
1
1
1
1
1
1
1
1
4
4
4
4
4
4
4
4
4
4
4
4
4
5 5
5 5
5 5
5 5
5 5
5 5
5 5 5
5 5
4 4
3
3
3
3
3
3
31
STANDARDS TEST (DW60FC4/C6 AND DW60UC6 MODELS ONLY)
The dishwasher is tested to AS/NZS 2007 standards for both wash and dry performance
using the parameters detailed below.
Wash programme Normal Eco
When the programme is finished, open the
door 100mm to help with drying
Powdered detergent quantities 5 g pre-wash + 28.75 g main wash
Rinse aid dosage level 5
Maximum number of place settings 15
Height adjustment of upper basket Ensure the upper basket is in its
lowermost position
Recommended loading patterns
Upper basket Lower basket
Cutlery tray

NZ AU
591216E / 0120500575E 02.20
FISHERPAYKEL.COM
© Fisher & Paykel Appliances 2020. All rights reserved.
The product specifications in this document apply to the specific
products and models described at the date of issue. Under our policy
of continuous product improvement, these specifications may change
at any time. You should therefore check with your Dealer to ensure this
document correctly describes the product currently available.