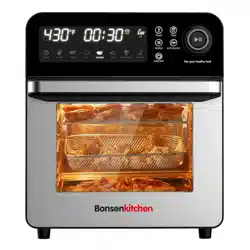
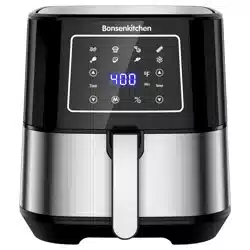
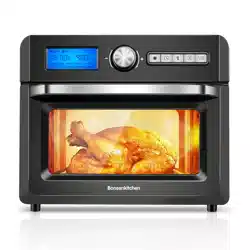
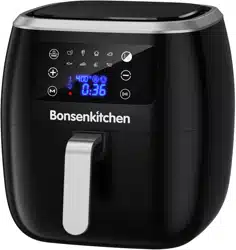
Bonsenkitchen AF8001 6QT Air Fryer
Product's Documents
Below are documents related to this product, you can read online or download:
- Owner's manual - (English) Read Online | Download pdf

NOTE: Please flip the food by following the operation as below if necessary.
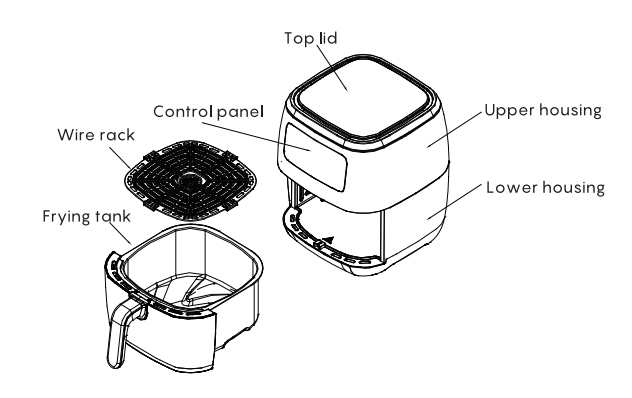
Food flipping
To assure even cooking/browning, move the frying tank out when half of the cooking time is reached, and then check, turn or vigorously shake foods on the wire rack.
IMPORTANT: The appliance should be powered off when you take the frying tank out of the air fryer. Reload the frying tank within 10 minutes and the appliance will continue to work.
• Before using the appliance for the first time, remove all the packaging materials, labels and/or stickers from the appliance.
Remove all the detachable parts and wash them in soapy water, and then rinse them with clean water and dry them with a clean cloth or paper towel.
Assemble all the parts of the appliance well in position and place the appliance on a suitable position. Do not put the appliance in the closet or at a place which is close to the wall.
Connect the appliance with power source. When the appliance is used for the first time, odor or smoke will occur, which is caused by the protective film on the heating element. This is normal. So it is recommended that the appliance should work without load for about 15 minutes remove the odor. Please open the door and window and make the room be ventilated when the appliance is used for the first time.
NOTE: Make sure all the packaging materials are removed before adding food. The frozen food need to be defrosted. And please immediately cook the food which has been defrosted.
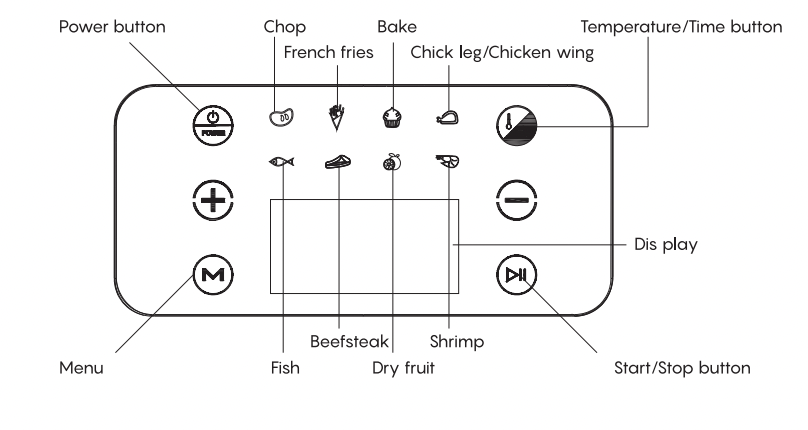
• Connect the appliance with power source. One beep can be heard and all the indicators on the control panel illuminate. Press Menu button "  " to select the "French fries" “
  ", and the default temperature and time of "French fries" setting are 400 T and 20 minutes separately, which are indicated in the display. And you can adjust your desired temperature and time by following the operation specified in the section of "SET THE TEMPERATURE AND TIME MANUALLY", and the display will indicate the new temperature and time.
NOTE: The appliance will enter into the standby mode if there is not any operation within 10 minutes after the appliance is powered on. At that time, only the Power button " " and its corresponding indicator are activated while other buttons and their corresponding indicator are deactivated. And you can press the Power button " " to activate all the functional buttons and indicators.
 then the appliance starts to work.
NOTE: During working, press the Start/Stop button " ”, its corresponding indicator flashes and the appliance will pause working. Press the Start/Stop button " " again, the appliance will continue to work. To make the appliance stop working, hold and press the Start/Stop button " ".
When the appliance finishes working, five beeps can be heard, and the food are fried well.
" to select the "Chop" " ", and the default temperature and time of "Chop" setting are 400
 and 15 minutes separately, which are indicated in the display. And you can adjust your desired temperature and time by following the operation specified in the section of "SET THE TEMPERATURE AND TIME MANUALLY”, and the display will indicate the new temperature and time.
NOTE: The appliance will enter into the standby mode if there is not any operation within 10 minutes after the appliance is powered on. At that time, only the Power button " " and its corresponding indicator are activated while other buttons and their corresponding indicator are deactivated. And you can press the Power button " " to activate all the functional buttons and indicators.
”, then the appliance starts to work.NOTE: During working, press the Start/Stop button " ", its corresponding indicator flashes and the appliance will pause working. Press the Start/Stop button " " again, the appliance will continue to work. To make the appliance stop working, hold and press the Start/Stop button " ".
" to select the "Bake" "  ", and the default temperature and time of "Bake" setting are 360 and 30 minutes separately, which are indicated in the display. And you can adjust your desired temperature and time by following the operation specified in the section of "SET THE TEMPERATURE AND TIME MANUALLY", and the display will indicate the new temperature and time.
NOTE: The appliance will enter into the standby mode if there is not any operation within 10 minutes after the appliance is powered on. At that time, only the Power button " " and its corresponding indicator are activated while other buttons and their corresponding indicator are deactivated. And you can press the Power button " " to activate all the functional buttons and indicators.
”, then the appliance starts to work.NOTE: During working, press the Start/Stop button " " its corresponding indicator flashes and the appliance will pause working. Press the Start/Stop button " " again, the appliance will continue to work. To make the appliance stop working, hold and press the Start/Stop button " ".
Connect the appliance with power source. One beep can be heard and all the indicators on the control panel illuminate. Press Menu button " " to select the "Chicken leg, chicken wing" ", and the default temperature and time of "Chicken leg, chicken wing" setting are 400 and 20 minutes separately, which are indicated in the display. And you can adjust your desired temperature and time by following the operation specified in the section of "SET THE TEMPERATURE AND TIME MANUALLY", and the display will indicate the new temperature and time.
NOTE: The appliance will enter into the standby mode if there is not any operation within 10 minutes after the appliance is powered on. At that time, only the Power button " " and its corresponding indicator are activated while other buttons and their corresponding indicator are deactivated. And you can press the Power button " " to activate all the functional buttons and indicators.
”, then the appliance starts to work.NOTE: During working, press the Start/Stop button " ", its corresponding indicator flashes and the appliance will pause working. Press the Start/Stop button " " again, the appliance will continue to work. To make the appliance stop working, hold and press the Start/Stop button " ".
NOTES:
[1] Please pay attention to the food to avoid it being scorched during working process, and it is necessary apply some seasonings on the food at the end of the work.
[2] Be careful when removing food after the food is cooked well. Use special gloves to prevent being burnt.
Connect the appliance with power source. One beep can be heard and all the indicators on the control panel illuminate. Press Menu button " " to select the "Fish" " ", and the default temperature and time of "Fish" setting are 400 and 12 minutes separately, which are indicated in the display. And you can adjust your desired temperature and time by following the operation specified in the section of "SET THE TEMPERATURE AND TIME MANUALLY", and the display will indicate the new temperature and time.
NOTE: The appliance will enter into the standby mode if there is not any operation within 10 minutes after the appliance is powered on. At that time, only the Power button " " and its corresponding indicator are activated while other buttons and their corresponding indicator are deactivated. And you can press the Power button " " to activate all the functional buttons and indicators.
" then the appliance starts to work.NOTE: During working, press the Start/Stop button " ", its corresponding indicator flashes and the appliance will pause working. Press the Start/Stop button " " again, the appliance will continue to work. To make the appliance stop working, hold and press the Start/Stop button " ".
" to select the "Beefsteak" " " and the default temperature and time of "Beefsteak" setting are 400 and 25 minutes separately, which are indicated in the display. And you can adjust your desired temperature and time by following the operation specified in the section of "SET THE TEMPERATURE AND TIME MANUALLY", and the display will indicate the new temperature and time.
NOTE: The appliance will enter into the standby mode if there is not any operation within 10 minutes after the appliance is powered on. At that time, only the Power button " " and its corresponding indicator are activated while other buttons and their corresponding indicator are deactivated. And you can press the Power button " " to activate all the functional buttons and indicators.
”, then the appliance starts to work.NOTE: During working, press the Start/Stop button " ", its corresponding indicator flashes and the appliance will pause working. Press the Start/Stop button " " again, the appliance will continue to work. To make the appliance stop working, hold and press the Start/Stop button " ".
Dry fruit
" to select the "Dry fruit" "  ", and the default temperature and time of "Dry fruit" setting are 90 and 4 hours separately, which are indicated in the display. And you can adjust your desired temperature and time by following the operation specified in the section of "SET THE TEMPERATURE AND TIME MANUALLY", and the display will indicate the new temperature and time.
NOTE: The appliance will enter into the standby mode if there is not any operation within 10 minutes after the appliance is powered on. At that time, only the Power button " " and its corresponding indicator are activated while other buttons and their corresponding indicator are deactivated. And you can press the Power button " " to activate all the functional buttons and indicators. •
"then the appliance starts to work.NOTE: During working, press the Start/Stop button " ", its corresponding indicator flashes and the appliance will pause working. Press the Start/Stop button " " again, the appliance will continue to work. To make the appliance stop working, hold and press the Start/Stop button " ".
" to select the "Shrimp" " ", and the default temperature and time of "Shrimp" setting are 360 and 12 minutes separately, which are indicated in the display. And you can adjust your desired temperature and time by following the operation specified in the section of "SET THE TEMPERATURE AND TIME MANUALLY”, and the display will indicate the new temperature and time.
NOTE: The appliance will enter into the standby mode if there is not any operation within 10 minutes after the appliance is powered on. At that time, only the Power button " " and its corresponding indicator are activated while other buttons and their corresponding indicator are deactivated. And you can press the Power button " " to activate all the functional buttons and indicators.
”, then the appliance starts to work.NOTE: During working, press the Start/Stop button " ", its corresponding indicator flashes and the appliance will pause working. Press the Start/Stop button " " again, the appliance will continue to work. To make the appliance stop working, hold and press the Start/Stop button " ".
Connect the appliance with power source, press the Menu button " " to select your desired menu, and its corresponding indicator flashes, then press Temperature/Time button "  " to set the temperature and time. When the display indicates "
  ", press "
  " or"
" or"  " to adjust the temperature. After finish setting temperature, press Temperature/Time button " " again to enter into the time-setting mode. When the display indicates "
  ”, press " ” or" " to adjust the time. After finish setting time, press the Start/Stop button " " and the appliance starts working according to the selected menu with new temperature and time.
Before using the electrical appliance, the following basic precautions should always be followed including the following:
• Read all instructions.
• Before using check that the voltage of wall outlet correspond to the one shown on the rating plate.
• Do not operate any appliance with a damaged cord or plug or after the appliance malfunctions, or is dropped or damaged in any manner. Return appliance to the nearest authorized service facility for examination, repair or electrical or mechanical adjustment.
• To protect against fire, electric shock and injury to persons do not immerse cord, plugs, or appliance in water or other liquid.
• The use of accessory not recommended by the manufacturer may cause injuries to persons.
• Do not touch the hot surface. Use the handle or the button.
• Do not use the appliance for other than intended use.
• Do not let the cord hang over the edge of a table or counter or touch a hot surface.
• Do not place on or near a hot gas or electric burner or in a heated oven.
• Do not leave the appliance unattended when it is being operated.
• Children should be supervised to ensure that they do not play with the appliance.
• The appliance must not be immersed.
• Unplug from outlet when not in use and before cleaning. Allow to cool down before putting on or taking off parts, and before cleaning the appliance.
• Use special gloves when moving the appliance.
• Before use, always ensure that the frying tank is positioned correctly.
• Though the detachable frying tank can be completely immersed in water and clean, it must be thoroughly dried before next use to prevent electric shock.
• To prevent fire, do not place the appliance close to flammable materials such as curtains, and do not place anything above the appliance.
• Make sure all papers, cardboard or plastic have been removed before frying food.
• The appliance can not be used for storing things, especially papers, cardboard or plastic.
• Always disconnect the appliance from the supply before close the appliance.This appliance is not intended for used by persons (including children) with reduced physical, sensory or mental capabilities, or lack of experience and knowledge, unless they have been given supervision or instruction concerning use of the appliances by a person responsible for their safety.
• Children should be supervised to ensure that they do not play with the appliance.
SAVE THESE INSTRUCTIONS FOR HOUSEHOLD USE ONLY NOTES ON THE POLARIZED PLUG.
This appliance has a polarized plug, to reduce the risk of elecfric shock, this plug is intended to fit into a polarized outlet only one way, if the plug does not fit fully into the outlet, reverse the plug, if it still does not fit, contact a qualified electrician, do not attempt to modify the plug in any way.