Loading ...
Loading ...
Loading ...
7
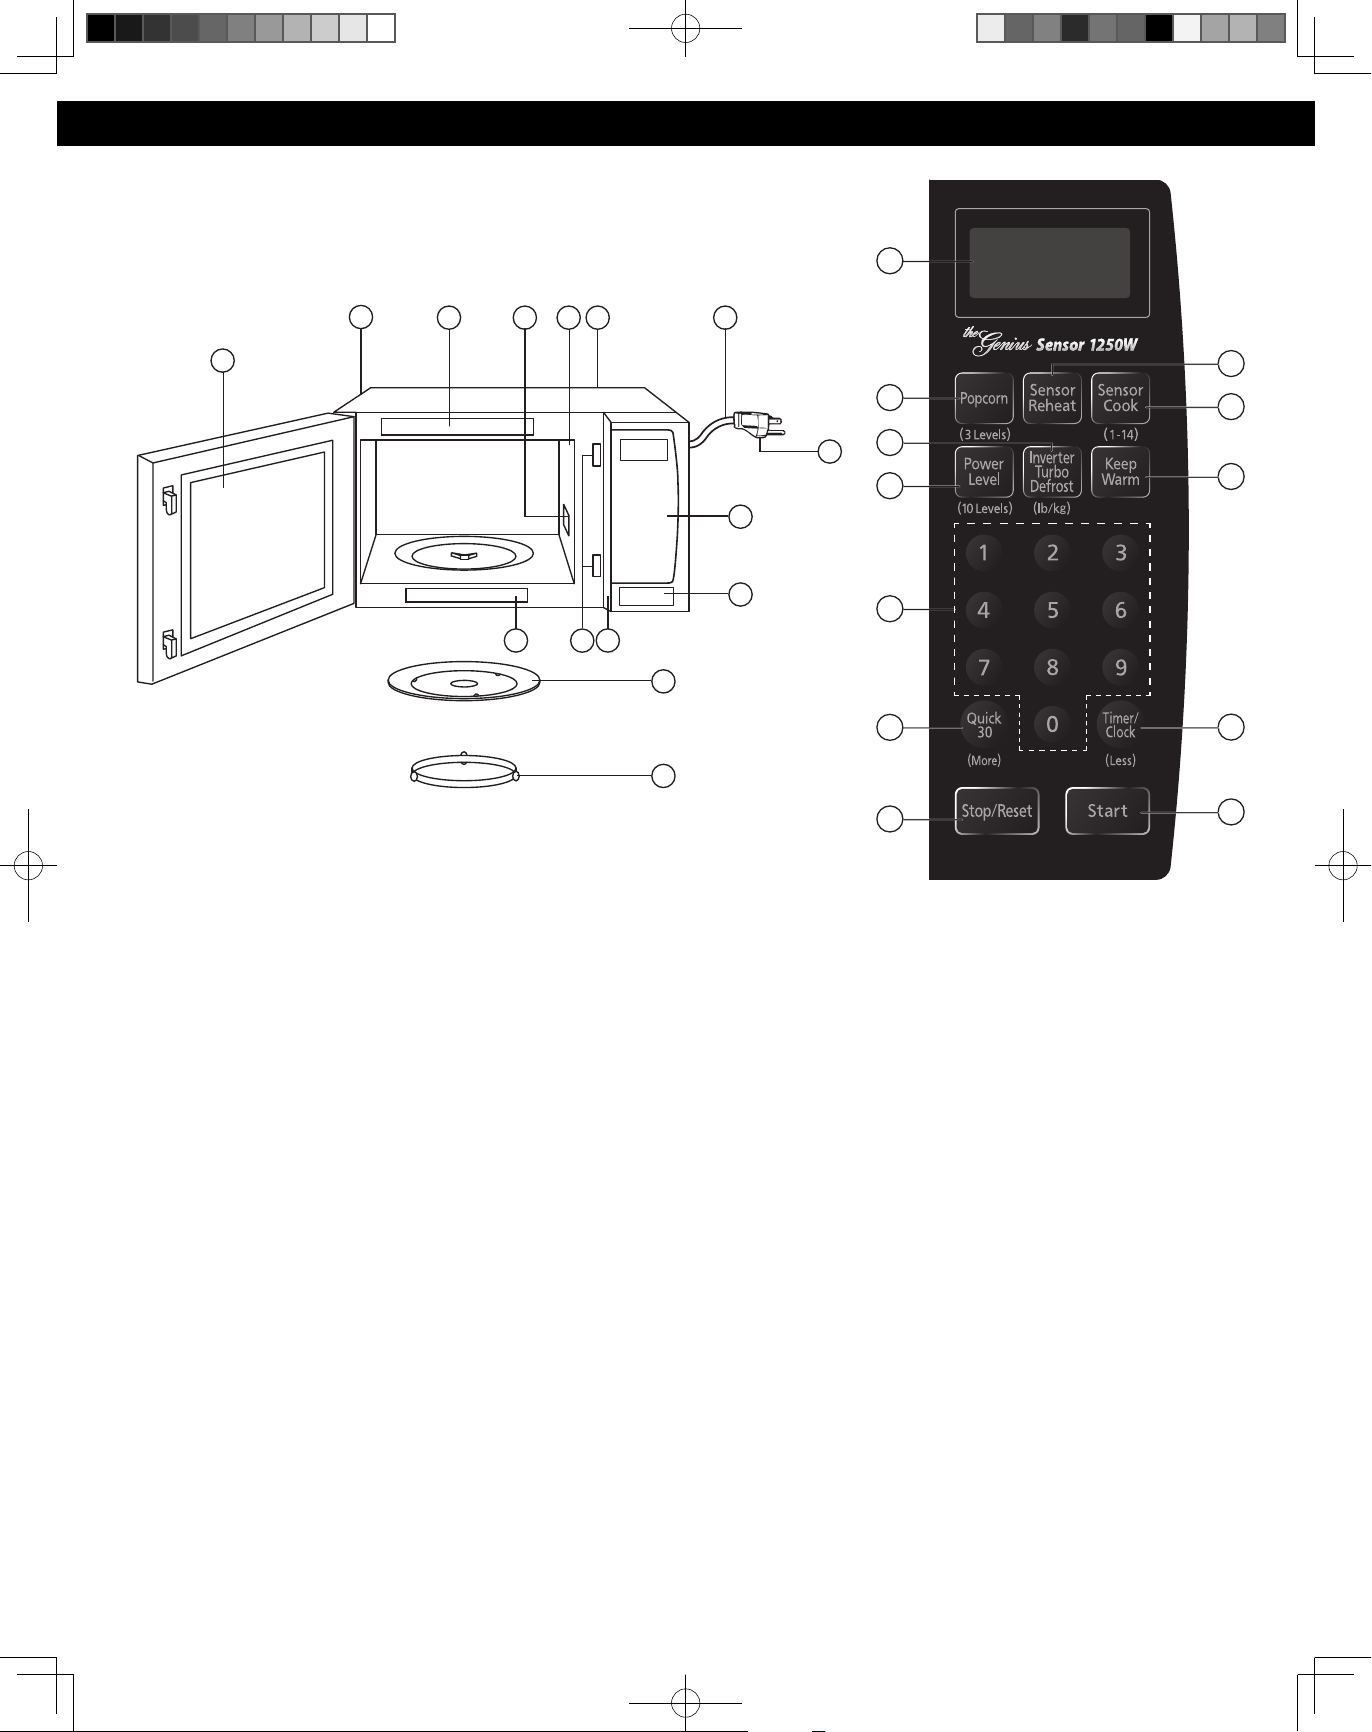
Location of Controls
1 External Air Vent
2 Internal Air Vent
3 Door Safety Lock System
4 Exhaust Air Vent
5 Control Panel
6 Identification Plate
7 Glass Tray
8 Roller Ring
9 Heat/Vapor Barrier Film
(do not remove)
10 Waveguide Cover
(do not remove)
11 Door Release Button
12 Warning label
13 Menu label
14 Power Supply Cord
15 Power Supply Plug
16 Display Window
17 Popcorn Pad (See page 11)
18 Sensor Reheat Pad
(See page 13)
19 Sensor Cook Pad (See page 13)
20 Inverter Turbo Defrost Pad
(See page 12)
21 Power level Pad (See page 9)
22 Keep Warm Pad (See page 11)
23 Number Pads
24 Quick 30/More Pad
(See page 11)
25 Timer/Clock/Less Pad
(See page 8-10)
26 Stop/Reset Pad
Before cooking: One tap clears
all your instructions. During
cooking: one tap temporarily
stops the cooking process.
Another tap cancels all your
instructions, and time of day
or colon appears in the display
window.
27 Start Pad
After cooking program setting,
one tap allows oven to begin
functioning. If door is opened or
Stop/Reset Pad is pressed once
during oven operation, Start
Pad must be pressed again to
restart oven.
Beep Sound:
When a pad is pressed correctly, a
beep will be heard. If a pad is pressed
and no beep is heard, the unit did
not or cannot accept the instruction.
When operating, the oven will beep
twice between programmed stages.
At the end of any complete program,
the oven will beep 5 times.
NOTE:
If no operation after cooking
program setting, 6 minutes later, the
oven will automatically cancel the
cooking program. The display will
return to clock or colon display.
NOTE:
The illustration is for reference only.
16
17
18
21
23
24
26
20
19
22
25
27
1
613
4
212 10 14
15
9
3
5
11
7
8
* The control panels of NN-SN966S/NN-SN766S have same key layout.
F0003BR60AP_web_00_20160129.indd 7F0003BR60AP_web_00_20160129.indd 7 2016/2/2 14:28:522016/2/2 14:28:52
Loading ...
Loading ...
Loading ...