Loading ...
Loading ...
Loading ...
9
BEFORE USING THE MACHINE
1
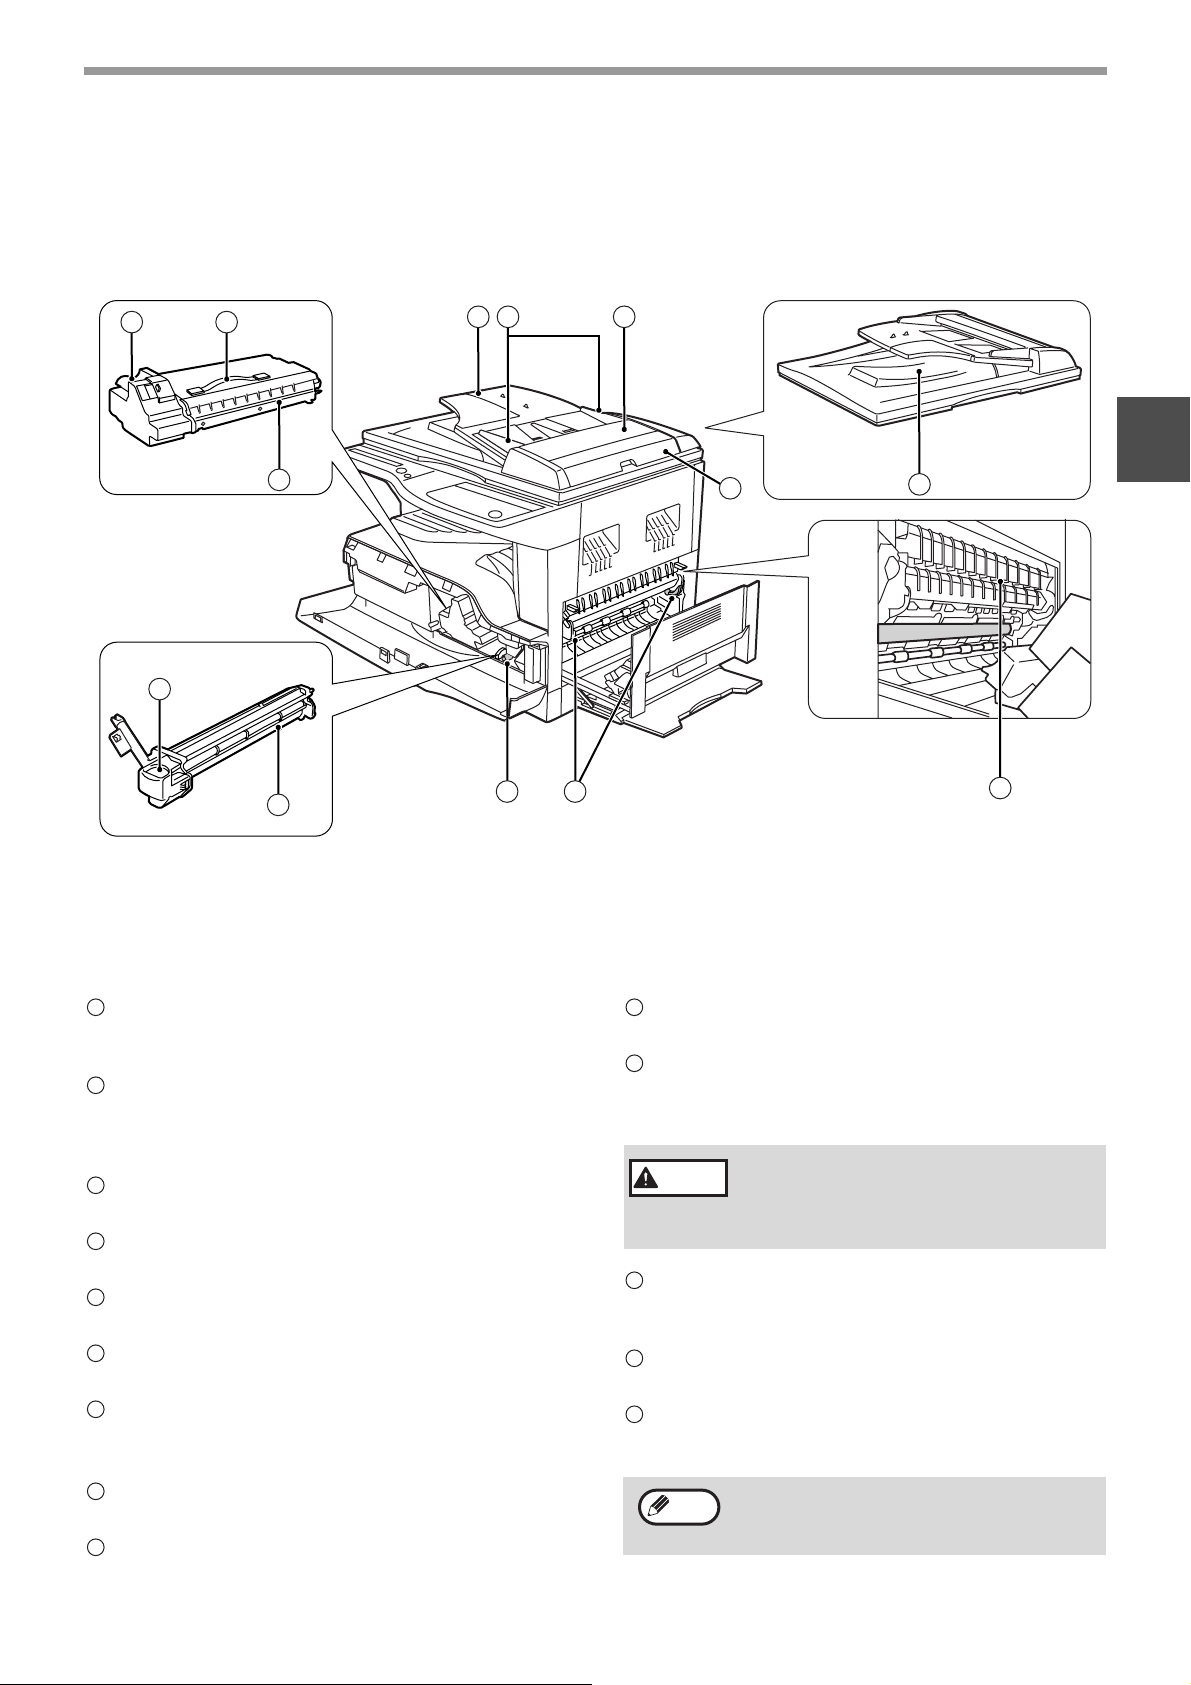
Parallel connector
Connect to your computer to use the printer
function. (Software Setup Guide)
Document feeder tray (when the SPF is
installed)
Place the original(s) that you wish to scan face up
here. Holds up to 40 originals.
Original guides (when the SPF is installed)
Adjust to the size of the originals.
Feeding roller cover (when the SPF is installed)
Open to remove misfed originals. (p.47)
Right side cover (when the SPF is installed)
Open to remove misfed originals. (p.47)
Exit area (when the SPF is installed)
Originals exit the machine here after copying.
TD cartridge
Contains toner.
See p.53 to install the TD cartridge.
TD cartridge strap
Lift to remove the TD cartridge (p.53)
TD cartridge lock release lever
To replace the TD cartridge, pull out the TD cartridge
while pulling up on this lever. (p.53)
Roller rotating knob
Turn to remove misfed paper. (p.49, p.50)
Fusing unit release levers
To remove a paper misfeed from the fusing unit, push
down on these levers and remove the paper. (p.50)
Drum cartridge
Copy images are formed on the photoconductive
drum. (p.54)
Drum cartridge handle
Hold to pull out the drum cartridge. (p.54)
Fusing unit paper guide
Open to remove misfed paper.
2018
21
26 27
19
25 24
23
28
29
22
30
17
18
19
20
21
22
23
24
25
The fusing unit is hot. Do not touch
the fusing unit when removing misfed
paper. Doing so may cause a burn or
injury.
The model name can be seen on the machines
front cover.
26
27
Warning
28
29
30
Note
AR-5316-5320-EX.book 9 ページ 2005年4月8日 金曜日 午前9時35分
Loading ...
Loading ...
Loading ...