PROBLEM | CAUSE | SOLUTION |
| Display does not show a time | - The appliance is unplugged
| Plug in unit |
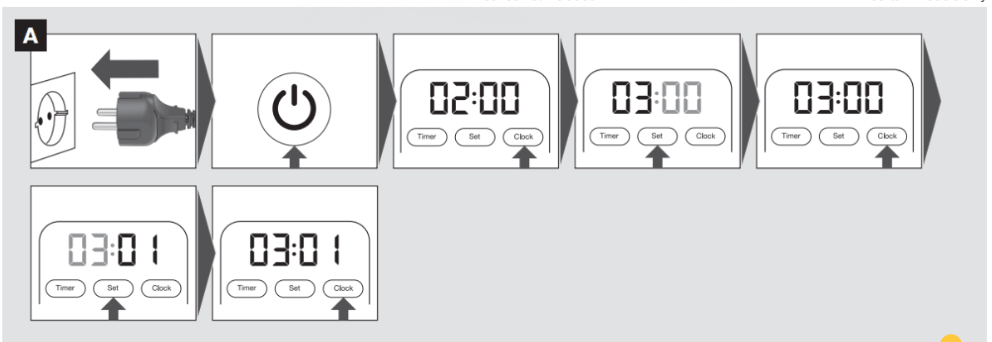
| Display flashes “2:00” | - Initial operation
- There was a power outage
| Set clock |
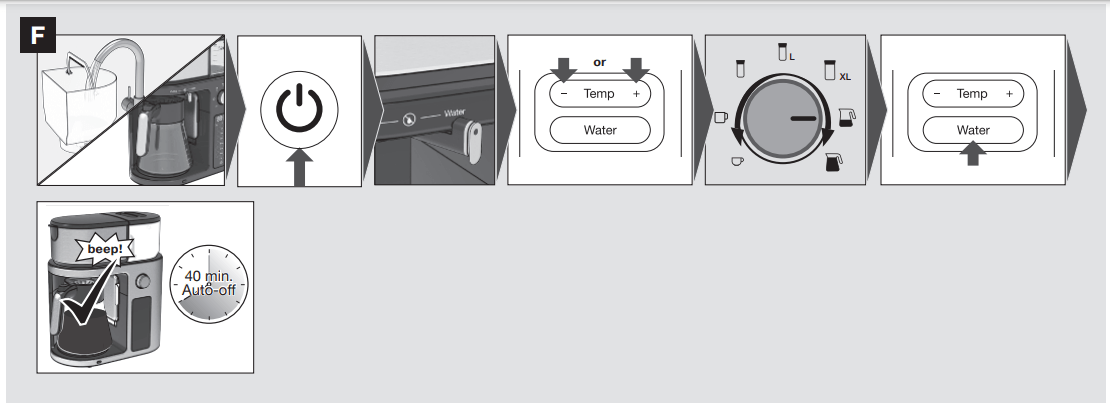
| It is not possible to set the TIMER | - Lever not positioned in “Coffee” position
- Clock has not been set
| - Position lever in position “Coffee”
- Set clock time
|
| It is not possible to activate the TIMER | TIMER has not been set | |
| Coffee is not brewing | - The appliance is unplugged
- Power outage
- Brew mode has not been selected
- There is no water in the water tank
- The appliance is in stand-by mode
- TIMER has not been activated
- Lever is positioned on
 - Filter lid is not closed
| - Plug unit in
- Wait for power to be restored
- Select brew mode to start
- Fill water in the water tank
- Switch appliance on
- Activate the TIMER
- Place lever in position “Coffee”
- Close filter lid
|
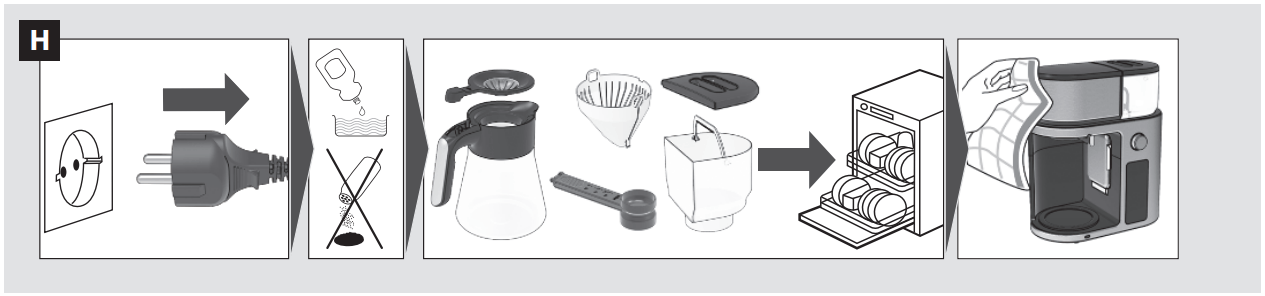
| The coffee maker is only brewing water | There are no coffee grounds in the filter basket | Add desired amount of coffee to the filter |
| Lever is positioned on “Water” | Place lever in position “Coffee” |
| The coffee maker is overflowing | The filter basket is not properly inserted | Insert the filter basket correctly |
| Using too much coffee grounds | Remove filter from filter basket and restart brewing process with proper amount of coffee grounds |
| Using coffee that is too finely ground | Use only coffee that is ground for trip coffee makers |
| The filter basket spring popped out during cleaning | Reattach the spring to the filter basket |
| There are coffee grounds at the bottom of the carafe | The paper filter was not inserted correctly into the filter basket | Remove filter, rinse filter basket, set filter into the filter basket and restart brewing |
| Paper filter collapsed | Remove filter, rinse filter basket, set filter into the filter basket and restart brewing |
| | Coffee powder is too finely ground | Use only coffee that is ground for drip coffee makers |
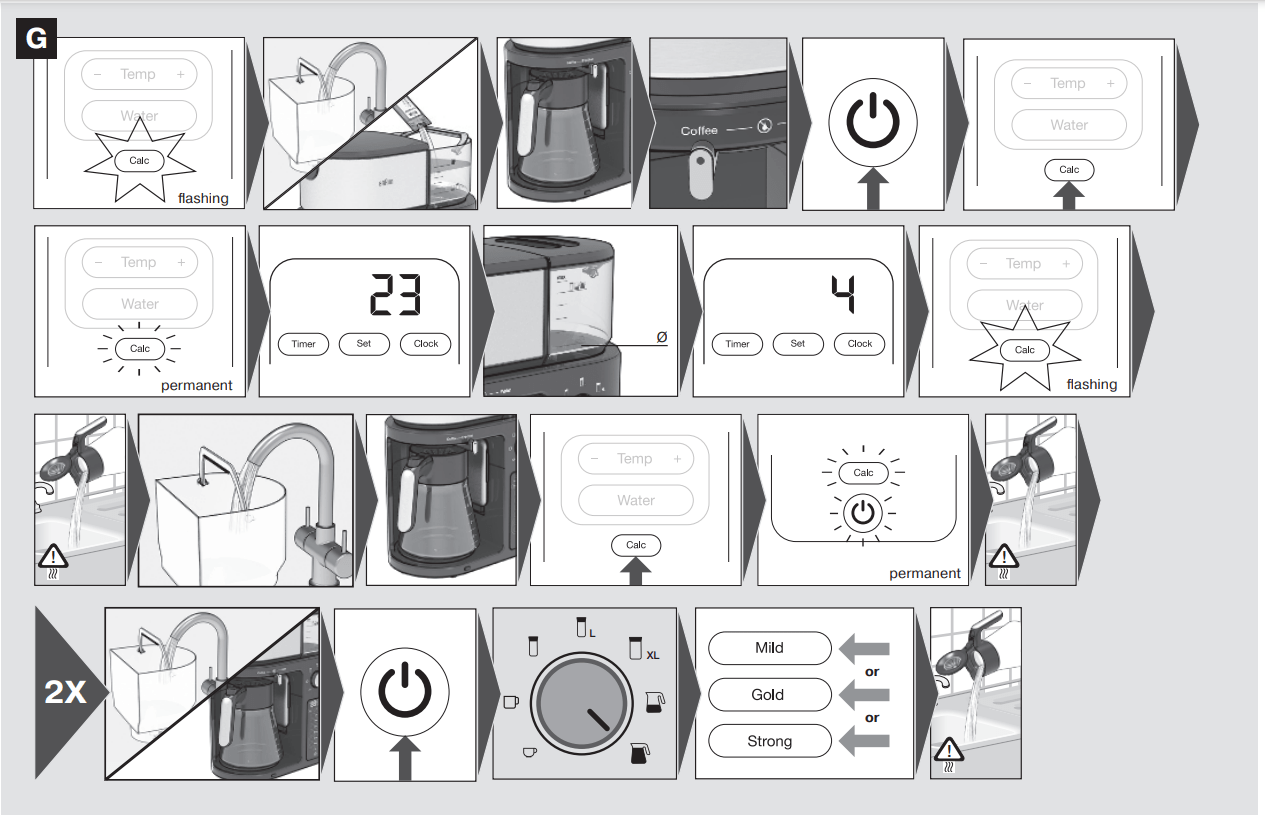
| Display shows “Lid” | Lid of the filter is open | Close the lid |
| Display show E02, E05, E08, E09, E16, E18 | | Remove the carafe. Unplug the appliance, wait for 5 minutes and plug in again. Perform a decalcification. If the error persists contact an authorised Braun customer service. |
| Display shows E03, E04, E06, E07, E10, E11, E12, E14, E15, E17 | | Remove the carafe. Unplug the appliance, wait for 5 minutes, plug in again and retry. If the error occurs again contact an authorised Braun customer service. |
| Display shows E13 | „Over ice“ function has not been selected when ice cubes are filled in the carafe |
| Display shows E21 | | Fill the water tank. Switch off and switch on again. If the error remains contact an authorised Braun customer service. |
| Display shows E19 | The beverage size option selector is not positioned correctly | Unplug the appliance, rotate the beverage size option selector to single-cup position  , wait for 5 minutes and plug-in again. If the error occurs again contact an authorized Braun customer service. , wait for 5 minutes and plug-in again. If the error occurs again contact an authorized Braun customer service. |


 or
or  have been selected. The LED (9) turns on.