

TRENDnet User’s Guide TV-DVR104K / TV-DVR208K
© Copyright 2017 TRENDnet. All Rights Reserved. 2
TableofContents
TableofContents.........................................................................................2
ProductOverview........................................................................................6
Features............................................................................................................................6
PackageContents..........................................................................................................6
BackPanel........................................................................................................................7
Hardwareinstallation.................................................................................7
WiringforSystemSetup..............................................................................................7
ConnectDVRtoyournetwork(optional).........................................................7
Connecttothecameras.........................................................................................7
ConnecttothemonitororTV..............................................................................8
Connectthemouse..................................................................................................8
DVRInstallation..............................................................................................................8
CameraInstallation.......................................................................................................8
Viewingangle.............................................................................................................8
Weatherconditions.................................................................................................8
BasicSystemSetup......................................................................................9
SoftKeyboardInstruction...........................................................................................9
Keyboardstyles.........................................................................................................9
SetupWizard...................................................................................................................9
SystemManagement(local)...................................................................12
UsingtheShortMenu................................................................................................12
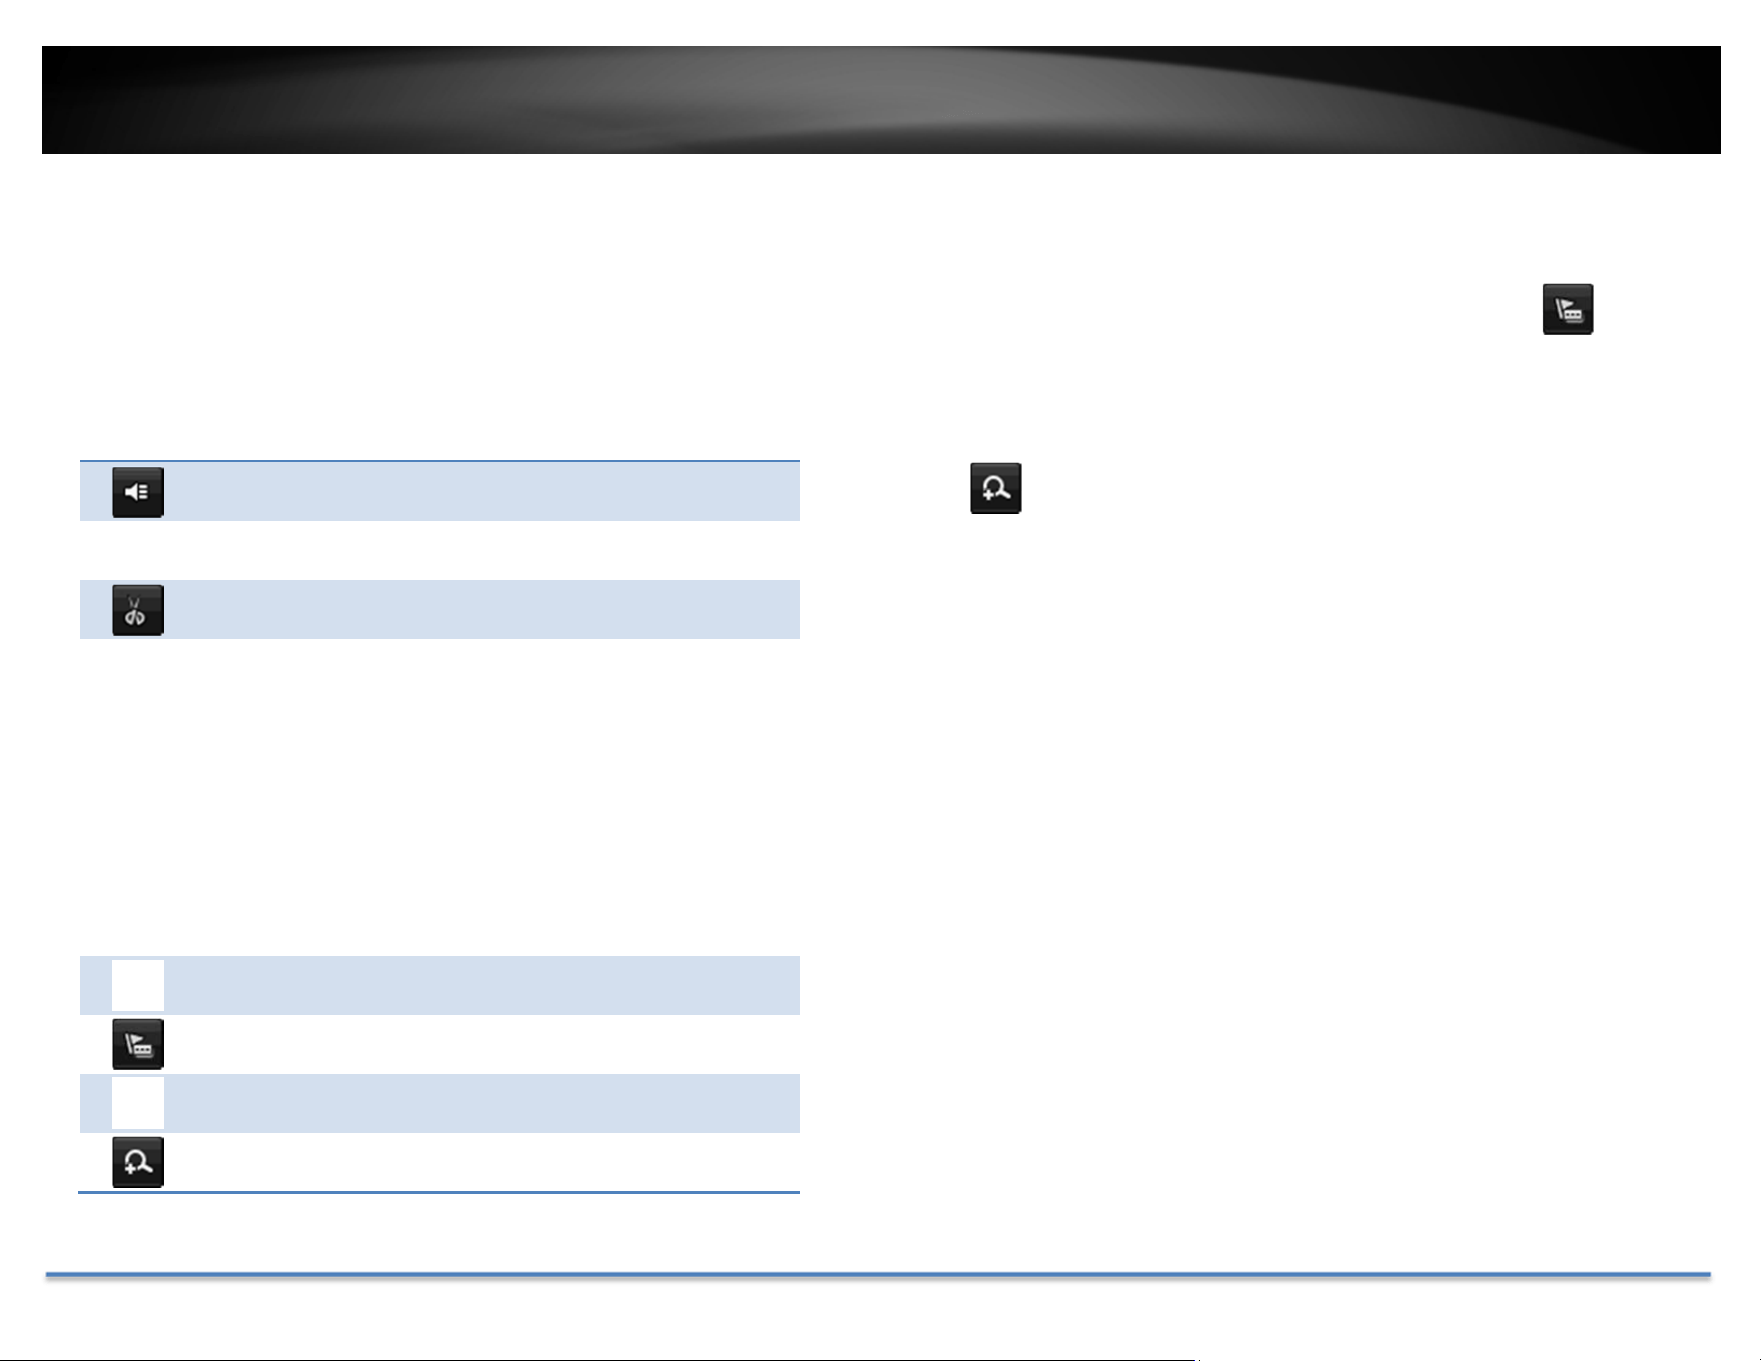
ShortcutMenu..........................................................................................14
Instantplayback......................................................................................................14
Audio...........................................................................................................................14
PTZcontrol................................................................................................................14
Digitalzoom..............................................................................................................14
Imagesettings..........................................................................................................15
Close............................................................................................................................15
UsingtheMainMenu...............................................................................15
LogintotheManagementPages............................................................................16
Logout,startup,orshutdowntheDVR......................................................16
StartupyourDVR.........................................................................................................16
ShutdownyourDVR....................................................................................................16
RebootingyourDVR....................................................................................................17
LogoutfromDVRmanagement.............................................................................17
CameraManagement..............................................................................17
OSD...................................................................................................................................17
DisplaySettings............................................................................................................18
PTZ....................................................................................................................................18
MotionDetection........................................................................................................19
PrivacyMask..................................................................................................................19
VideoTamper................................................................................................................20
Videotampersettings...........................................................................................20
VideoLoss......................................................................................................................22
Videolosssettings..................................................................................................22

TRENDnet User’s Guide TV-DVR104K / TV-DVR208K
© Copyright 2017 TRENDnet. All Rights Reserved. 3
VideoQualityDiagnostics.........................................................................................24
VideoQualitysettings...........................................................................................24
SystemConfigurationMenu..............................................................25
Configuration................................................................................................................25
General......................................................................................................................25
DSTsettings..............................................................................................................26
Moresettings...........................................................................................................27
Network..........................................................................................................................27
General......................................................................................................................27
DDNS...........................................................................................................................28
NTP..............................................................................................................................29
Email...........................................................................................................................29
NAT..............................................................................................................................30
Moresettings...........................................................................................................31
LiveView........................................................................................................................31
General......................................................................................................................31
View............................................................................................................................32
Channel‐ZeroEncoding.........................................................................................33
Exceptions......................................................................................................................33
UserAccounts...............................................................................................................34
Add..............................................................................................................................34
Edit..............................................................................................................................35
SystemMaintenanceMenu....................................................................35
Systeminformation....................................................................................................35
DVRinformation.....................................................................................................35
CameraInformation...............................................................................................36
RecordingInformation..........................................................................................36
AlarmInformation..................................................................................................36
StorageInformation...............................................................................................37
LogInformation............................................................................................................38
LogSearch.................................................................................................................38
ConfigurationFile........................................................................................................39
Upgrade..........................................................................................................................40
LocalUpgrade..........................................................................................................40
RemoteUpgrade.....................................................................................................40
FactoryDefault.............................................................................................................41
NetworkMonitoring...................................................................................................41
Traffic..........................................................................................................................41
Tools............................................................................................................................42
NetworkStatistics...................................................................................................42
HardDriveMaintenance...........................................................................................43
S.M.A.R.TSettings..................................................................................................43
BadSectorDetection.............................................................................................43
HardDriveManagement.........................................................................44
Format/InitiatetheHardDrive................................................................................44
ScheduledRecording..................................................................................................45
Schedule.........................................................................................................................45
VideoSettings...............................................................................................................47
SubStream................................................................................................................48
Advanced........................................................................................................................48

TRENDnet User’s Guide TV-DVR104K / TV-DVR208K
© Copyright 2017 TRENDnet. All Rights Reserved. 4
Holidayscheduling......................................................................................................49
BackupVideoRecordings........................................................................50
Export..............................................................................................................................50
Videoplayback..........................................................................................51
Playbackscreen............................................................................................................51
Searchforvideorecordings................................................................................52
Timeline....................................................................................................................52
Playbackbuttons....................................................................................................52
Playbackoperations...............................................................................................53
Playbackmodes......................................................................................................54
AccessyourDVRwiththeWebBrowser..............................................56
DefaultSettingsandFactoryReset........................................................................56
SystemRequirement..................................................................................................56
Logging‐intotheDVRfortheFirstTime(Windows).......................................57
Logging‐intotheCamerafortheFirstTime(OSX)..........................................59
BasicSettings..........................................................................................63
LiveView........................................................................................................................63
Playback..........................................................................................................................65
Searchforvideorecordings................................................................................65
TimeLine...................................................................................................................65
Playvideo..................................................................................................................66
Sliceimagesfromvideoplayback.....................................................................66
Downloadrecordedvideos.................................................................................67
WherecanIfindsavedfiles?..............................................................................67
Log....................................................................................................................................67
Searchforlogs.........................................................................................................68
WherecanIfindsavedfiles?..............................................................................68
SystemInformation.....................................................................................................69
AdvancedSettings....................................................................................70
System.............................................................................................................................7 0
DeviceSettings........................................................................................................70
UserAccounts..........................................................................................................70
TimeSettings............................................................................................................71
DaylightSavings......................................................................................................72
LiveViewSettings...................................................................................................72
Maintenance............................................................................................................73
NetworkSettings.........................................................................................................74
TCP/IP.........................................................................................................................74
Port..............................................................................................................................75
DDNS...........................................................................................................................76
VideoSettings...............................................................................................................76
VideoFormat............................................................................................................76
OnScreenDisplay(OSD)Settings......................................................................77
TextOverlay..............................................................................................................78
PrivacyMask.............................................................................................................78
RecordingSchedule................................................................................................79
HolidaySettings.......................................................................................................79
Events..............................................................................................................................80

TRENDnet User’s Guide TV-DVR104K / TV-DVR208K
© Copyright 2017 TRENDnet. All Rights Reserved. 5
MotionDetection...................................................................................................80
VideoTampering....................................................................................................82
Exception...................................................................................................................83
Email...........................................................................................................................83
VideoLoss.................................................................................................................84
Storage............................................................................................................................85
StorageManagement...........................................................................................85
NetworkStorage.....................................................................................................85
Regulations................................................................................................86
FederalCom municationCommissionInterferenceStatement.........................86
FCCRadiationExposureStatement..................................................................86
Europe–EUDeclarationofConformity...............................................................87
Safety..........................................................................................................................87
EMC.............................................................................................................................8 7
Directives...................................................................................................................87
RoHS.................................................................................................................................88
LimitedWarranty......................................................................................89

TRENDnet User’s Guide TV-DVR104K / TV-DVR208K
© Copyright 2017 TRENDnet. All Rights Reserved. 6
ProductOverview
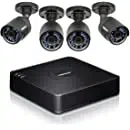
TV‐DVR104K
TV‐DVR208K
Features
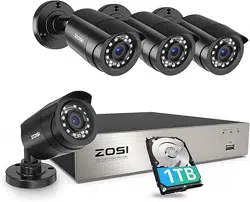
TRENDnet’s4or8‐ChannelHDCCTVDVRSurveillanceKit,modelTV‐
DVR104K or TV‐DVR208K, offers a comprehensive video, storage, and
managementsolution.TheDVRkitcomeswithapre‐installed1TBhard
driveplusfour1080pHDIRanalogcameras,eachwithanIP66outdoor
weather rating. With a plug and play camera installation, the DVR is
simpletouseandconvenientlypowersallfouroreightcameras.Connect
yourTRENDnetDVRkittoyournetworkforlocalandremoteaccessto
your surveillance system. Record one week of continuous video and
utilize the advanced video playback features from the intuitiveuser
interface.
PackageContents
TV‐DVR104K/TV‐DVR208Kpackageincludes:
TV‐DVR104orTV‐DVR208
4or8xTV‐AC100cameras
4or8xBNC/powercables
1TBHDD
Camerapowersplittercable(2forTV‐DVR208K)
Networkcable(1.8m/6ft.)
HDMIcable
Opti
calmouse
CD‐ROM(Utility/User’sGuide)
QuickInstallationGuide
PoweradapterforDVR(12VDC,1.5A)
Poweradapterforcameras(12VDC,2A)(2forTV‐DVR208K)
Ifanypackagecontentismissingordamaged,pleasecontacttheretailstore,online
retailer,orreseller/distributorfromwhichtheproductwaspurchased.

TRENDnet User’s Guide TV-DVR104K / TV-DVR208K
© Copyright 2017 TRENDnet. All Rights Reserved. 7
BackPanel
PictureshowingTV‐DVR208Kasexample
Power: PowersocketofDVR(12VDC)
Note:UseonlytheadapterthatcamewithyourDVR
AudioIn: RCAconnectortoactivemicrophone
AudioOut: RCAconnectortospeaker
VGA:
ConnecttoVGAmonitorwith1024x768resolutionor
higher.
HDMI: ConnecttomonitororHDTVwithHDMIinterface
USB: Connecttoopticalmouseand/oroptionalkeyboard.
NetworkPort:
Connecttoyourofficeorhomenetworkforremote
accessandviewing.
BNC: ConnectAnalogcameras.
Grounding
Point:
Connecttogroundingwire.Thisisespeciallyimportant
whenyouinstallyourcameraoutdoor.
Hardwareinstallation
TV‐DVR104K/TV‐DVR208Kcomeswitheverythingyouneedtosetupabasic
networksurveillancesystem.JustconnecttoamonitororHDTV(notincluded
inthispackage),youcandotheliveviewandsettingsontheDVR.
Itisrecommendedtosetupthesystemonyourtablebeforephysicallywiring
andm
ountingthecameras.
WiringforSystemSetup
ConnectDVRtoyournetwork(optional)
IfyouwanttoremoteaccesstheDVRandwanttoinstalltheDVRonyour
homenetwork,youcanconnecttheDVRtothenetworkinthefirstbeginning,
byconnectingoneendofyournetworkcabletoyourhomerouterornetwork
switch,andthenconnecttheotherendofth
ecabletothenetworkporton
theDVR.
TheDVRinstallcamerasautomaticallyafterpowerup.Ifyoudecidethelet
the DVR gets its IP dynamically or setup the IP address to your network,
pleasesetupyourDVRwithoutcameraconnected.AftertheIPsetup,power
offtheDVRan
dthengoingthroughtheinstallationagain.
Connecttothecameras
UsingtheincludedBNCcablesconnecttheTV‐AC100camera’sBNCportto
anyoftheBNCportsontheDVR.Andthecamerapoweradapterwillprovide
powertothecamerasviathepowersplitter.

TRENDnet User’s Guide TV-DVR104K / TV-DVR208K
© Copyright 2017 TRENDnet. All Rights Reserved. 8
ConnecttothemonitororTV
ConnectamonitortoeithertheHDMIorVGAport.
Connectthemouse
ConnecttheincludedmousetooneoftheUSBports.
DVRInstallation
SetupasafeandsecuredplaceforyourDVR.Placeitinalockedornoteasy
accessedplace can add more factors in the security. Connecting toaUPS
(UninterruptiblePowerSupply)isrecommended.
Provideagoodventilationandawayfromclustersanddampenvironmentis
alsoimportanttotheloca
tionofyourDVRdevice.MaketheDVRinstallation
accessibleforannualmaintenancetocleanupthefanorreplacethehard
driveisadecentconsiderationformaintenance.
CameraInstallation
There are number of factors involved in a successful camera installation.
Followthesuggestedinstallationstepsandgothroughthechecklists.This
guidewillhelpyoumakeyourcamerainstallationsmoothlyandeasily.
Viewingangle
TheTV‐AC100isabulletcamerawithafocusedviewingangle(83horizontal)
thatprovidesnon‐distortedanddetailedimages.Choosethelocationwhere
hasgoodangletoshoottheimageyouexpecttosee.Themotiondetection
areashouldalsobeconsideredwheninstallingthecamera.
Weatherconditions
TheTV‐AC100isasmallbulletcamera,whichfitsmostinstallationsindoor
andoutdoor.Thecameracanworkunderawiderangeofweatherconditions.
For severe weather conditions, a camera housing with temperature and
moisture control is recommended. Using the camera in milder weather
conditionswillhelpextendthecamera’sprodu
ctlifeandpreservethequality
ofthevideoimage.
• Moisture:Avoiddampormoistenvironmentswheneveryoucan.The
TV‐AC100isanIP66gradewaterproofcamera,anditwillworkinmoist
environments.However,rainmayaffectthepicturequality,especially
atnight,watermayreflectthelightfromtheinfra‐re
dilluminationand
degradepicturequality.
• Temperature:TV‐AC100workswithinaspecifiedtemperaturerange.
Areaswithseveretemperaturesshouldbeavoidedwheninstallingthe
camera.It’srecommendedthatyouuseanenclosurewithaheaterand
blower if you plan on using this ca
mera outside of the specified
temperaturerange.
• Sunlight:Avoiddirectsunlightexposureintothelens.Directsunlight
willdamagetheimagesensor.Ifsunlightisnecessaryforyourviewing
purposes,provideprotectionfortheimagesensor.
• Lighting:Considerinstallingyourcamerafacesthesamedirectionof
thelightsources.Shootingimageswithtop‐downpo
sitionoutdooror
nexttotheexistinglightsourcearegoodchoices.Avoidthelightsource
ifitcreatesashadethatdarkenstheviewingarea.

TRENDnet User’s Guide TV-DVR104K / TV-DVR208K
© Copyright 2017 TRENDnet. All Rights Reserved. 9
BasicSystemSetup
SoftKeyboardInstruction
Keyboardstyles
Therearethreekeyboardstylesavailable,Englishletter,numeric,andspecial
characters.ThedefaultkeyboardstyleisEnglishletterkeyboardinlowercase
lettermode.Clickthekeyboard stylebuttonifyouwant to changeitinto
anotherstyle.
Specialcharacters
Clickon#++keytothelowerleftcornertoenabl
ethespecialcharactermenu.
Clickonthespecialcharacterofyourchoice.
SetupWizard
IfyouareaccessingtheDVRforthefirsttime,thedevicewillgothroughthese
basic settings. Please follow the onscreen display to complete these
information.
1. IfyouareaccessingtheDVRthefirsttime,pleaseactivatethedeviceby
followingthepasswordsetup.
2. Oncethenewpasswordisset,thedevicewillbeactivated.
Capital
Special
Characters

TRENDnet User’s Guide TV-DVR104K / TV-DVR208K
© Copyright 2017 TRENDnet. All Rights Reserved. 10
3. Createtheunlockpatternforquickaccesslater.
4. Setup wizard will show up after the DVR is powered up. Select the
languageandclickNexttostartthewizard.
5. ClicktheselectionlisttotherightofTimeZone.
Selectyourtimezone,clicktheselectionlisttotherightofDa
teFormat
andthenselectadateformat.
ClicktheselectionlisttotherightofSystemDate.
Selecttheyearbyclickingonleftorrightarrow.
Selectthemonthbyclickingonleftorrightarrow.
Selectthedaybyclickingonthedate.
5.TimeZone
6.DateFormat
7.Date
8.Time

TRENDnet User’s Guide TV-DVR104K / TV-DVR208K
© Copyright 2017 TRENDnet. All Rights Reserved. 11
ClicktheselectionlisttotherightofSystemTimeandthenenterthetime
with24‐hourformat.
ClickNext.
6. ConfiguretheIPv4addressoftheDVRthenclick“Next”.
7. ConfigurethedesiredportvaluesanddynamicDNSaccountinformation
thenclick“Next”.
8. SelecttheharddriveandthenclickInittoinitiateyourharddriveifyou
arerunningthesetupwizardinlatertimeandwanttocleanupthevideo
ontheharddrive.Thenclick“OK”.
9. ConfiguretheDVRtocontinuouslyrecordatalltimesortorecordonly
motiondet
ectedevents
10. Congratulations!YouhavecompletedtheconfigurationoftheDVR.
Youcannowviewlivecamerasandaccessadditionaloptionsbyright
clickingonthedisplaytobringuptheconfigurationmenu.

TRENDnet User’s Guide TV-DVR104K / TV-DVR208K
© Copyright 2017 TRENDnet. All Rights Reserved. 12
SystemManagement(local)
Withthebasicsystemsetup,yoursystemisnowupandrunning.Now,you
canuseyourmousepointerandmonitortoview,setup,andmanageyour
networkvideorecorder.
UsingtheShortMenu
Rightclickyourmousewh ileyouareviewingthelivevideo.Theshortmenu
willbepoppedout.
ShortMenu
Menu: Clicktoshowthemainmenu
SingleScreen: Displayvideoliveviewoneatatime.Clickon
SingleScreenandthenchoosethecamerayou
want.(Thevideoyouchoosewillbereplacedwith
othervideoiftheauto‐switchison,andtheauto‐
switchisonbydefault.)
Multi‐screen: Displayallfourvideoliveviewsatthesametime.
Bydefault,thevideoliveviewissetintheMulti‐
screenmode.IfyouarenowinSingleScreen
mode,clickonMulti‐Screenandthenchoose2x2
toswitchtomulti‐screenliveviewmode.
PreviousScreen: InSingleScreenmode,youcanmanuallyswitch
thevideotothepreviouschannel.

TRENDnet User’s Guide TV-DVR104K / TV-DVR208K
© Copyright 2017 TRENDnet. All Rights Reserved. 13
NextScreen: InSingleScreenmode,youcanmanuallyswitch
thevideotothenextchannel.
Stop/StartAuto‐
switch:
Start(default)orstopautomaticliveviewswitch.
Theliveviewvideowillbechangedbychannel
sequence.
StartRecording: StartContinuousorMotionDetectionrecording.
Tosetupmotiondetectionarea,orstopcontinuousand
motiondetectionrecordings,youneedtonavigatetothe
detailedsettingsthroughthemainmenu.
Playback: ClickPlaybacktogofullplaybackmenu.Formore
information,pleasereferencethepleaseseethe
Videoplaybackonpage51formoredetails.
PictureMode: Select a monitor display setting from Standard,
Bright,Gentle,andVividofyourchoice.ClickOKto
confirmyourchoice
Note:PTZcamerasarenotincludedinthepackage,thereforethePTZcontrol
isnotsupported.

TRENDnet User’s Guide TV-DVR104K / TV-DVR208K
© Copyright 2017 TRENDnet. All Rights Reserved. 14
ShortcutMenu
Each video in live view has a short cut menu to perform the frequent
adjustmentsofthevideo.Moveyourmousepointeroverthecameradisplay
youwanttobringuptheShortcutMenu.Clickonthevideo.Theframeofthe
video shows active (yellow frame). And then click on the button of the
selectedjobs.
Instantplayback
Clickontoplaybackthela st5minutesofrecording.
Audio
Clickontoenabletheaudioonselectedchannel.Click tomutethe
audio.
PTZcontrol
ClickontoproceedPTZoperations.PTZcamerasarenotincludedinthe
package,thereforethePTZcontrolisnotsupported.
Digitalzoom
Clickontoenabledigitalzoom.Thedigitalzoomisnotsupportedwith
theincludedcameras
TRENDnet User’s Guide TV-DVR104K / TV-DVR208K
© Copyright 2017 TRENDnet. All Rights Reserved. 15
Imagesettings
Clickontoadjustthevideodisplaysettings.
Usetheslidertoadjustthebrightness.
Usetheslidertoadjustthecontrast.
Usetheslidertoadjustthesaturation.
Usetheslidertoadjustcolorhue.
Usetheslidertoadjustthesharpness.
Useslidertoadjusttonoiselevel.
Close
Clickontoclosetheshortcutmenu.
UsingtheMainMenu
Rightclickyourmousewh ileyouareviewingthelivevideo.Theshortmenu
willbepoppedout.MouseovertheMenuandclickthebuttontobringup
theMainMenu.

TRENDnet User’s Guide TV-DVR104K / TV-DVR208K
© Copyright 2017 TRENDnet. All Rights Reserved. 16
LogintotheManagementPages
TheDVRwillaskyoutoenterthepasswordeverytimeyouwanttologin to
themanagementpage.EnterthepasswordandthenclickonOKtobringup
themainmenu.
Logout,startup,orshutdowntheDVR
WhenyouwanttochangetheDVRsettings,managethecamerasproceed
systemmaintenanceorsoftwareupgrade,youneedtologin,logout,restart,
orshutdownyourDVRgently.
Pullingoutthepowersourcemay causeunexpectedharddrivedamageand
systemmalfunctionwhichisnotasuggestedwaytopowerdownyou
rDVR.
StartupyourDVR
Makesurethepowersupplyispluggedintoanelectricaloutlet.Itishighly
recommended that an uninterruptible power supply (UPS) to be used in
conjunctionwiththeunit.
ShutdownyourDVR
Bringupthemainmenu.ClickonShutdownMenuicon.TheShutdown
submenuisshowingup.

TRENDnet User’s Guide TV-DVR104K / TV-DVR208K
© Copyright 2017 TRENDnet. All Rights Reserved. 17
ClickShutdowntogracefullyendtherecordingsessionsandpreparethe
harddriveforshuttingdown.ThenclicktheYestoconfirmthatyouwantto
shutdowntheDVR.
RebootingyourDVR
ClickReboottorebootyourDVRwithoutpowerdown.
LogoutfromDVRmanagement
WhenyouhavedonetheDVRsettingsandmanagements,you’llwanttolock
yourDVRbeforeyouleave.ClickLogouttoexittheDVRmanagement.
Note:Youcanalsosetautomatictimeout.Thedefaultsettingis5minuteswithout
managementinteraction.
CameraManagement
Setting and manage your cameras by brin g up the main menu. Click on
CameraManagementicon.
OSD
Camera: Displaythecurrentcameranumber.
Status: Enteracameraname.
DisplayName: Enablethistodisplaythecameranameonthe
screen.
DisplayDate: Enablethistodisplaythedateonthescreen.
DisplayWeek: Enablethistodisplaytheweekinfoonthescreen.
DateFormat: Selectthedateformatyouwouldliketouse.
TimeFormat: Selectthetimeformatyouwouldliketouse.

TRENDnet User’s Guide TV-DVR104K / TV-DVR208K
© Copyright 2017 TRENDnet. All Rights Reserved. 18
DisplayMode: Selecttheidealdisplaystyleonthescreen.
OSDFont: SelectthefontfortheOSD,thereare16x16,32x32
and64x64formats.
ClickApplytoapplythesettings.
DisplaySettings
Adjustvideoimagequality,lightness,andcolorsettingshere.
Camera: Clicktochoosethecamerayouwanttochangethe
settings.
TimeSegment: Thenameofthechosencamera.
Brightness: Usethesliderorenteranumber(0‐255)toadjustthe
imagebrightness.Default:128
Contrast: Usetheslidertoadjusttheimagecontrast.Default:128
Saturation: Use the slider to adjust the color saturation. The
greater number means the color will be more
saturated.Default:128
Hue: UsetheslidertoadjusttheimageHUEsetting.Default:
128
Sharpness: Adjustthesharpnessoftheimage.
Denoising Adjustthenoiseaffectlevel.
SelecttheCameraParametersSettingstoadjustthesensitivityoftheIR.
ClickApplytoapplythesettings.
PTZ
TV‐DVR104K / TV‐DVR208K come with fixed cameras, this section do not
applytoeithermodels.

TRENDnet User’s Guide TV-DVR104K / TV-DVR208K
© Copyright 2017 TRENDnet. All Rights Reserved. 19
MotionDetection
Setuphowthemotiondetectioneventwillbetriggeredandwhatactionswill
betriggered.
Camera: Click to choose the camera you want to change the
settings.
EnableMotion
Detection:
Checkthisboxtoenablemotiondetection.ClickApply
toapplythechoice.
Settings: Setupthemotiondetectiondetail.
Sensitivity: Movetheslidertoadjustdetectionsensitivity.Slidingto
the right means the motion event is easier to be
triggered.
DrawArea: Clickanddragontheareayouwanttosetupthemotion
detectionorclickFullScreenforthewholeimagearea.
Theredgridsrepresentthemotiondetectionarea.
ClickCleartoclearthemotiondetectionareas.
PrivacyMask
Createamaskingareatokeepyourpriv acy.
Camera: Clicktochoosethecamerayouwanttochangethe
settings.
EnablePrivacy
Mask:
Checkthisboxtoenableprivacymasking.
DrawArea: Clickanddragontheareayouwanttosetupthe
privacymask.
ClearAll: Clickthisbuttontoclearallthemaskingarea.
ClearZone1to4: Clickthisbuttontoclearspecificmaskingarea.
ClickApplytoapplythesettings.

TRENDnet User’s Guide TV-DVR104K / TV-DVR208K
© Copyright 2017 TRENDnet. All Rights Reserved. 20
VideoTamper
Detectsifacamerahasbeentamperedwithandsurveillanceiscompromised.
Youcanset up videotampernotifications toalertthesystemmanager to
checkthecamera.
Camera: Clicktochoosethecamerayouwanttochangethe
settings.
EnableTamper‐
proof:
Checkthisboxtoenablevideotamper.
DrawArea: Clickanddragontheareayouwanttosetupthe
videotamper.
Clear: Clickthisbuttontoclearthevideotamperarea.
Sensitivity: Move the slider to adjust detection sensitivity.
Slidingtotherightmeansthemotioneventiseasier
tobetriggered.
Videotampersettings
ClickSettingstobringoutthedetailedsetupmenu.
ArmingSchedule
1. SelectdayoftheweekyouwanttoeditontherowofWeek.
2. Entertheperiodoftimeyouwanttoactivelydetectthemotion
events.

TRENDnet User’s Guide TV-DVR104K / TV-DVR208K
© Copyright 2017 TRENDnet. All Rights Reserved. 21
Copyto:
Toquicklysetupthesamescheduleovertheweek,clickCopy.Click
anotherdayoftheweek(1:Monday,2:Tuesday,3:Wednesday,4:
Thursday,5:Friday,6:Saturdayand7:Sunday).ClickAlltoselectthe
wholeweek.ClickOKafteryouselectthedayoftheweekyouwa
ntto
copyto.
InducedAction
Whenmotioneventdetected,thecorrespondingactionswillbeexecuted.
SelecttheoptionstoenablethenotificationactionandclickOK.

TRENDnet User’s Guide TV-DVR104K / TV-DVR208K
© Copyright 2017 TRENDnet. All Rights Reserved. 22
VideoLoss
Detectsifacamerahaslostitsvideo.Youcansetupvideolossnotifications
toalertthesystemmanagertocheckthecamera.
Camera: Clicktochoosethecamerayouwanttochangethe
settings.
ClickApplytoapplythesettings.
Videolosssettings
ClickSettingstobringoutthedetailedsetupmenu.
ArmingSchedule
1. SelectdayoftheweekyouwanttoeditontherowofWeek.
2. Entertheperiodoftimeyouwanttoactivelydetectthemotion
events.

TRENDnet User’s Guide TV-DVR104K / TV-DVR208K
© Copyright 2017 TRENDnet. All Rights Reserved. 23
Copyto:
Toquicklysetupthesamescheduleovertheweek,clickCopy.Click
anotherdayoftheweek(1:Monday,2:Tuesday,3:Wednesday,4:
Thursday,5:Friday,6:Saturdayand7:Sunday).ClickAlltoselectthe
wholeweek.ClickOKafteryouselectthedayoftheweekyouwa
ntto
copyto.
InducedAction
Whenmotioneventdetected,thecorrespondingactionswillbeexecuted.
SelecttheoptionstoenablethenotificationactionandclickOK.

TRENDnet User’s Guide TV-DVR104K / TV-DVR208K
© Copyright 2017 TRENDnet. All Rights Reserved. 24
VideoQualityDiagnostics
Detectsifacamera’svideoquality.Youcansetupvideoqualitynotifications
toalertthesystemmanagertocheckthecamera.
VideoQualitysettings
ClickSettingstobringoutthedetailedsetupmenu.
ArmingSchedule
1. SelectdayoftheweekyouwanttoeditontherowofWeek.
2. Entertheperiodoftimeyouwanttoactivelydetectthemotion
events.
Copyto:
Toquicklysetupthesamescheduleovertheweek,cl
ickCopy.Click
anotherdayoftheweek(1:Monday,2:Tuesday,3:Wednesday,4:
Thursday,5:Friday,6:Saturdayand7:Sunday).ClickAlltoselectthe

TRENDnet User’s Guide TV-DVR104K / TV-DVR208K
© Copyright 2017 TRENDnet. All Rights Reserved. 25
wholeweek.ClickOKafteryouselectthedayoftheweekyouwantto
copyto.
InducedAction
Whenmotioneventdetected,thecorrespondingactionswillbeexecuted.
SelecttheoptionstoenablethenotificationactionandclickOK.
SystemConfigurationMenu
SettingandmanageyourDVRsystembybringupthemainmenu.Clickon
SystemConfigurationMenuicon.
Configuration
General
Setupthebasictime,displayresolution,andoperationsettingshere.

TRENDnet User’s Guide TV-DVR104K / TV-DVR208K
© Copyright 2017 TRENDnet. All Rights Reserved. 26
General
Language: DVRdefaultlanguageissettingtoEnglish.
Resolution: Thedefaultmonitorresolutionissettothelowest
option(1024by768)tomaximizethemonitor
compatibility.Chooseabetterresolutionforyour
monitortoseebetterqualityvideo.
TimeZone: ClicktheselectionlisttotherightofTimeZone.
DateFormat: ClicktheselectionlisttotherightofDateFormat
andthenselectadateformat.
SystemDate: ClicktheselectionlisttotherightofSystemDate.
SystemTime: ClicktheselectionlisttotherightofSystemTime
andthenenterthetimewith24‐hourformat.
MousePointer
Speed:
Settingthemousecursormovingspeed.Adjusting
totherightforfasterspeed.
EnableWizard: Enableordisablesetupwizardeverytimethe
systemisbootup.Default:Enabled.
Enable
Password:
Youneedtologinforsystemmanagement.Enable
passwordwillaskenteringpasswordwhenlogin.
Uncheckthisboxwillsetthemanagementfreeto
anyonephysicallyaccesstheDVR.Default:Enabled.
ClickApplytoapplythechanges.
DSTsettings
SetupDaylightSavingTime.
Daylightsavingtime
AutoDST
adjustment:
The daylight saving time adjustment is setting to
automatic adjustment according to the time zone
setting by default. If you want to set the daylight
settings manually, uncheckthis box to disable the
automaticDSTadjustment.
EnableDST: Manually enable or disable daylight saving time
adjustment.
From/To: Enterthedaylightsavingtimestartingandend
dates.
TimeZone: ClicktheselectionlisttotherightofTimeZone.
DSTBias: Choosetheamountoftimeshiftingfordaylight
savingadjustment.
ClickApplytoapplythechanges.
TRENDnet User’s Guide TV-DVR104K / TV-DVR208K
© Copyright 2017 TRENDnet. All Rights Reserved. 27
Moresettings
Moresettings
DeviceName: ThisisthenameoftheDVR.Default:TV‐DVR104
Autologout: SetupthetimeouttologoutDVRmanagementafter
managementinactiveforaperiodoftime.
MenuOutput
Mode:
ThevideooutputisactiveforbothHDMIandVGA
interfaces.
ClickApplytoapplythechanges.
Network
SetupDVRnetwork,DDNS,NTP,Email,andUPnPsettings.
General
SetupthenetworkinterfaceconnectingtotheInternet.
NetworkGeneralSettings
NICType: ChooseoneoftheEthernetduplexandspeedto
match your network. Default: 10/100M Auto
detection.
EnableDHCP: Check this box if the IP address is assigned by
DHCPserver.
IPv4Address: TheIPv4dynamicorstaticaddress
IPv4SubnetMask: Networkrangeofthesubnet
IPv4Default
Gateway:
ThedefaultroutegoingfurtherfromTV‐AC100IPv4
subnet

TRENDnet User’s Guide TV-DVR104K / TV-DVR208K
© Copyright 2017 TRENDnet. All Rights Reserved. 28
IPv6Address1: IPv6 self‐assigned address including the subnet
prefixexpressionintheendofthestring.
IPv6Address2: IPv6 static address including the subnet prefix
expressionintheendofthestring.
IPv6Default
Gateway:
ThedefaultroutegoingfurtherfromIPv6subnet
MACAddress: TheMACaddressoftheDVRnetworkinterface.
MTU: Maximum transmission unit.Themaximumfield
sizeintheEthernetpacket.Default:1500
PreferredDNS: EnteryourfirstIPv4orIPv6DNSserveraddress
AlternateDNS: EnteryoursecondIPv4or IPv6DNSserveraddress
ClickApplytoapplythechanges.
DDNS
DynamicDomainNameService,DDNS,allowsyoutofindyourDVRfromthe
Internetwithaneasytorememberdomainname.
DDNS
EnableDDNS: CheckthisboxtoenableDDNSService.
DDNSType: Select a DDNS service provider: dyn.com or no‐
ip.com.
ServerAddress: EntertheDDNSserveraddress.
DeviceDomain
Name:
Enteryourregistereddomain/hostnameonselected
DDNSservice.
Status: TheDDNSconnectionstatus.
UserName: Entertheaccountname.
Password: Enterthepassword.
Confirm: Enterthepasswordagain.
ClickApplytoapplythechanges.

TRENDnet User’s Guide TV-DVR104K / TV-DVR208K
© Copyright 2017 TRENDnet. All Rights Reserved. 29
NTP
NetworkTimeProtocolService.Theaccuracyofthesystemclockisimportant
forschedulingandaccuratelogging.Youcanautomaticallycheckthetime
accuracywithanetworktimeserver(NTPserver).
NTPsettings
EnableNTP: CheckthisboxtoenableNTPService.
Interval: ThetimeintervalthattheTV‐DVR104willsynchronize
thetimewithNTPserver.Default:60minutes
NTPServer: Specifyatimeserver(NTPserver)tosynchronizewith.
(e.g.pool.ntp.org)
NTPPort: Theserverportnumber.Default:123.
ClickApplytoapplythechanges.
Email
Setupemailaccountsfornotifications.
Email
EnableServer
Authentication:
Checkthisboxifyourserverrequiresapasswordin
order to send email. Most email servers require
authenticationwhensendinganemail.
Username: Entertheusernameofoutgoingemailaccount
Password: Enterthepassword
SMTPServer: SimpleMailTransportationProtocolServeraddress,
the outgoing email server address. It may has
address the same as your incoming email server,
maybenot. Pleaseaskyouremailserviceprovider
fordetail.
SMTPPort: Serviceportnumberforoutgoingemail.*
Sender: Enterthenametobeappearedastheemailsender.
Sender’s
Address:
Entersender’semailaddress.

TRENDnet User’s Guide TV-DVR104K / TV-DVR208K
© Copyright 2017 TRENDnet. All Rights Reserved. 30
SelectReceiver: Selectthepulldownmenutoselectthereceiveryou
wanttosetupthedetail.Youcansendto3accounts
atthesametime,butjustsetupseparately.
Receiver: Thereceiver’sname.
Receiver’s
Address:
Thereceiver’semailaddress.
*Note: Many ISPs does not allow service port 25 going through their network.
PleaseconsultyouremailserviceproviderandISPfordetail.
ClickApplytoapplythechanges.
ClickTesttotestifalltheinformationareenteredcorrectly.
NAT
ToadjusttheportsettingsfortheDVR.
Ports
PortType: Theservicetypeforeachport.
HttpPort: Theporttoaccessthecamera’sconfigurationpage.
Defaultvalueisport80.
RTSPPort: The Real‐Time Streaming Protocol port for video
streaming. You can change the port. The default
portnumberis554.
ServerPort: TheserviceportnumberforDVRmanagement.The
defaultserviceportis8000.
HTTPSPort: Securedporttoaccessthecamera’sconfiguration
page.Defaultvalueisport443.
ClickApplytoapplythechanges.
TRENDnet User’s Guide TV-DVR104K / TV-DVR208K
© Copyright 2017 TRENDnet. All Rights Reserved. 31
Moresettings
MoreSettings
ServerPort: The service port number for DVR management.
ThedefaultserviceportofTV‐DVR104is8000.
HTTPPort: Thedefaultwebaccessport.Youcanchangethe
portnumber.Thedefaul tportnumberis80.
RTSPPort: TheReal‐TimeStreamingProtocolportforvideo
streaming.Youcanchangetheport.Thedefault
portnumberis554.
Output
BandwidthLimit:
Enabletheoutputbandwidthcanlimittheoutput
bandwidthforremoveliveviewandplayback.
Output
Bandwidth
(Mbps):
Theminimumoutputbandwidthis2Mbps
ClickApplytoapplythechanges.
LiveView
Changetheliveviewsettings.
General
Liveviewgeneralsettings
VideoOutput
Interface:
ThevideooutputinterfaceisVGAorHDMI
LiveViewMode: ChoosethedefaultLiveViewmodetobe1x1single
videoonthescreenor2x2fourvideoonthescreen
atthesametime.Default:2x2.
DwellTime: Setuphowlongeachdisplaywillbeshowedupon
thescreen.There’snoeffecton2x2displaymode.
On 1x1 mode, each video will be shown on the
screenforDwellTimeandthenchangetothenext
video.Default:10seconds.
EnableAudio
Output:
EnableordisableaudiooutputontheDVR.Default:
disabled
TRENDnet User’s Guide TV-DVR104K / TV-DVR208K
© Copyright 2017 TRENDnet. All Rights Reserved. 32
EventOutput: Define where the video is going out when event
triggered. TheTV‐DVR104 is set to both VGA and
HDMI.
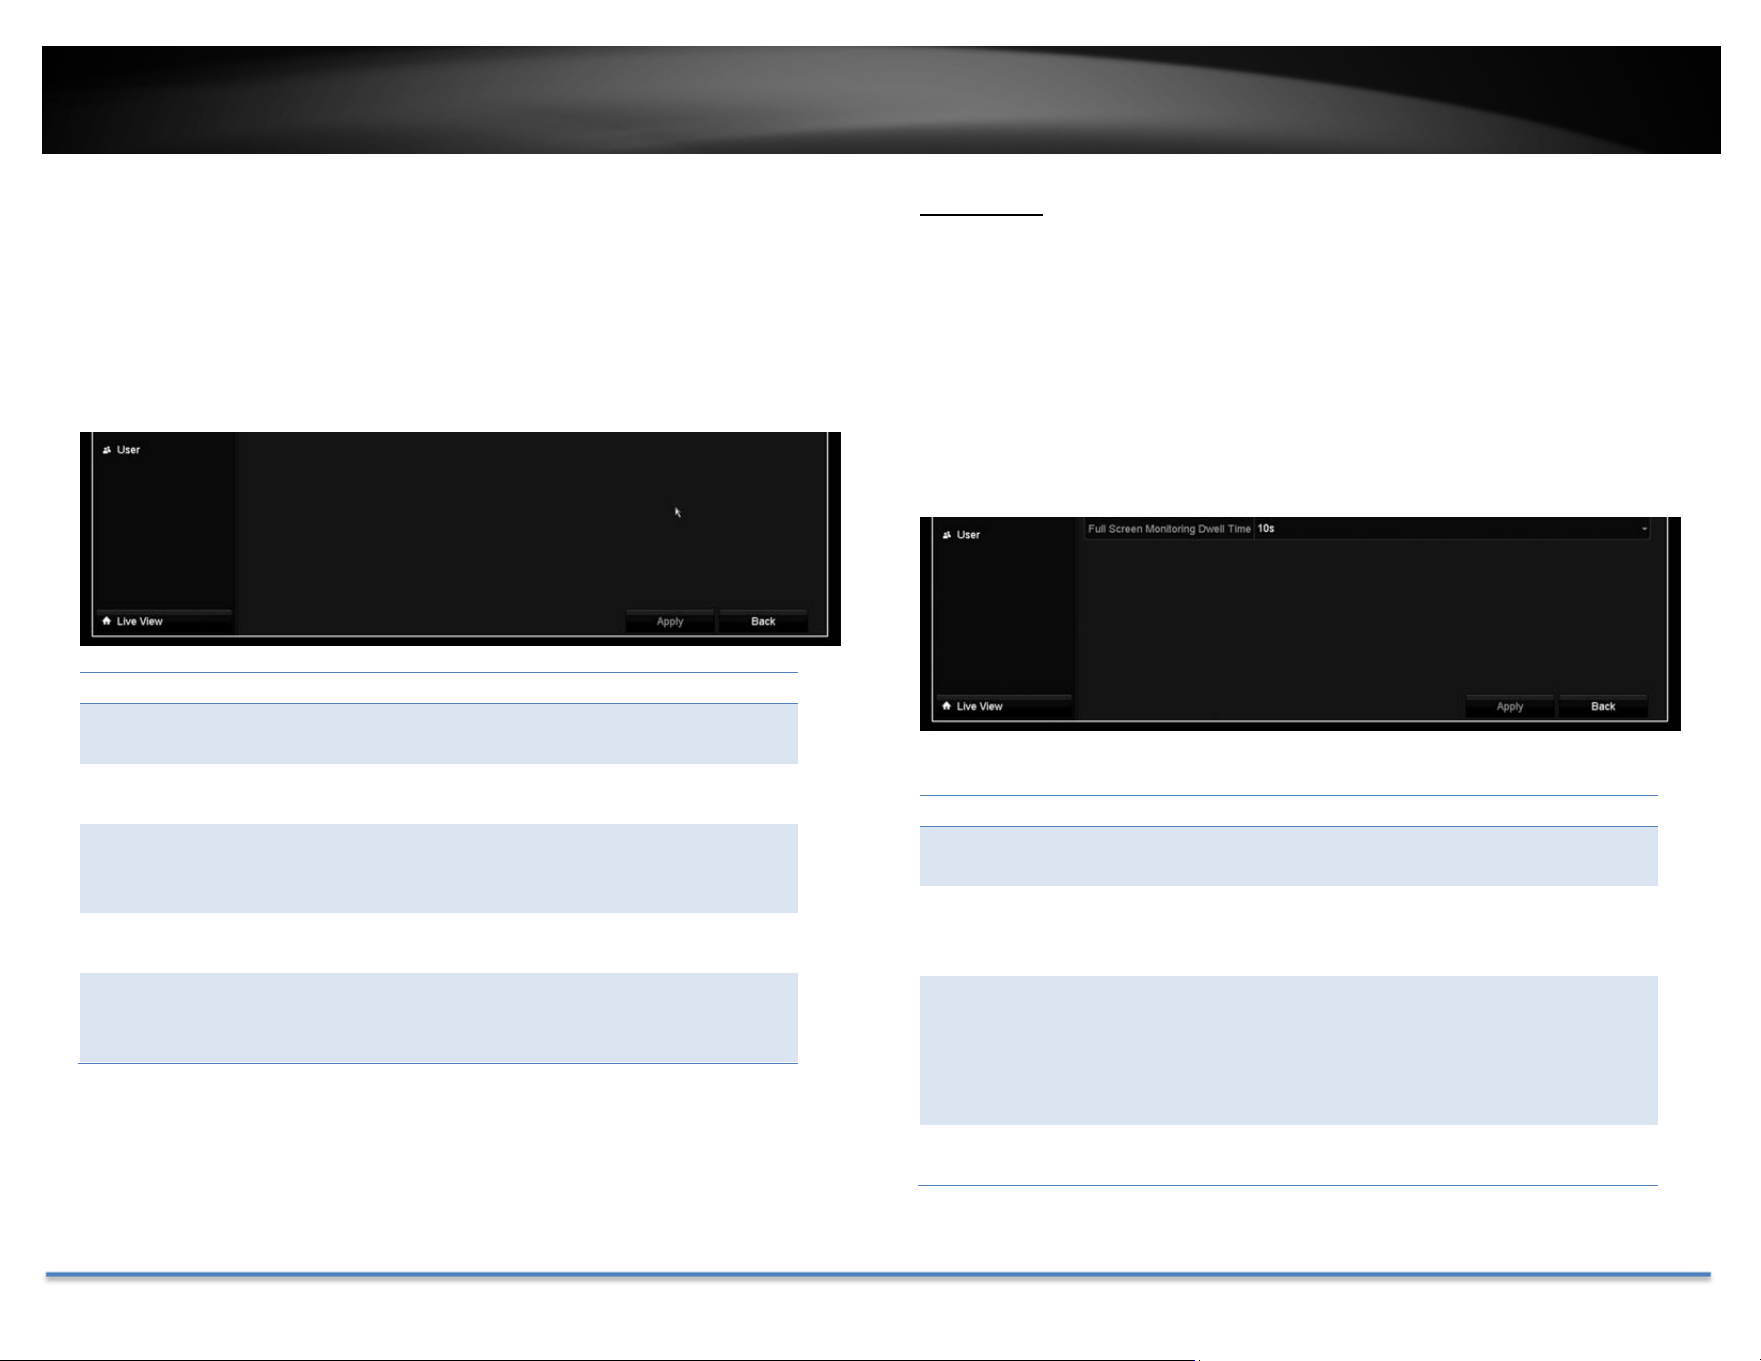
FullScreen
Monitoring
DwellingTime:
Wheneventtriggeredfullscreendisplay,wholong
thevideoisgoingtostayonthescreen.Default:10
seconds.
ClickApplytoapplythechanges.
View
Settingliveviewdisplayarrangementandsequence.
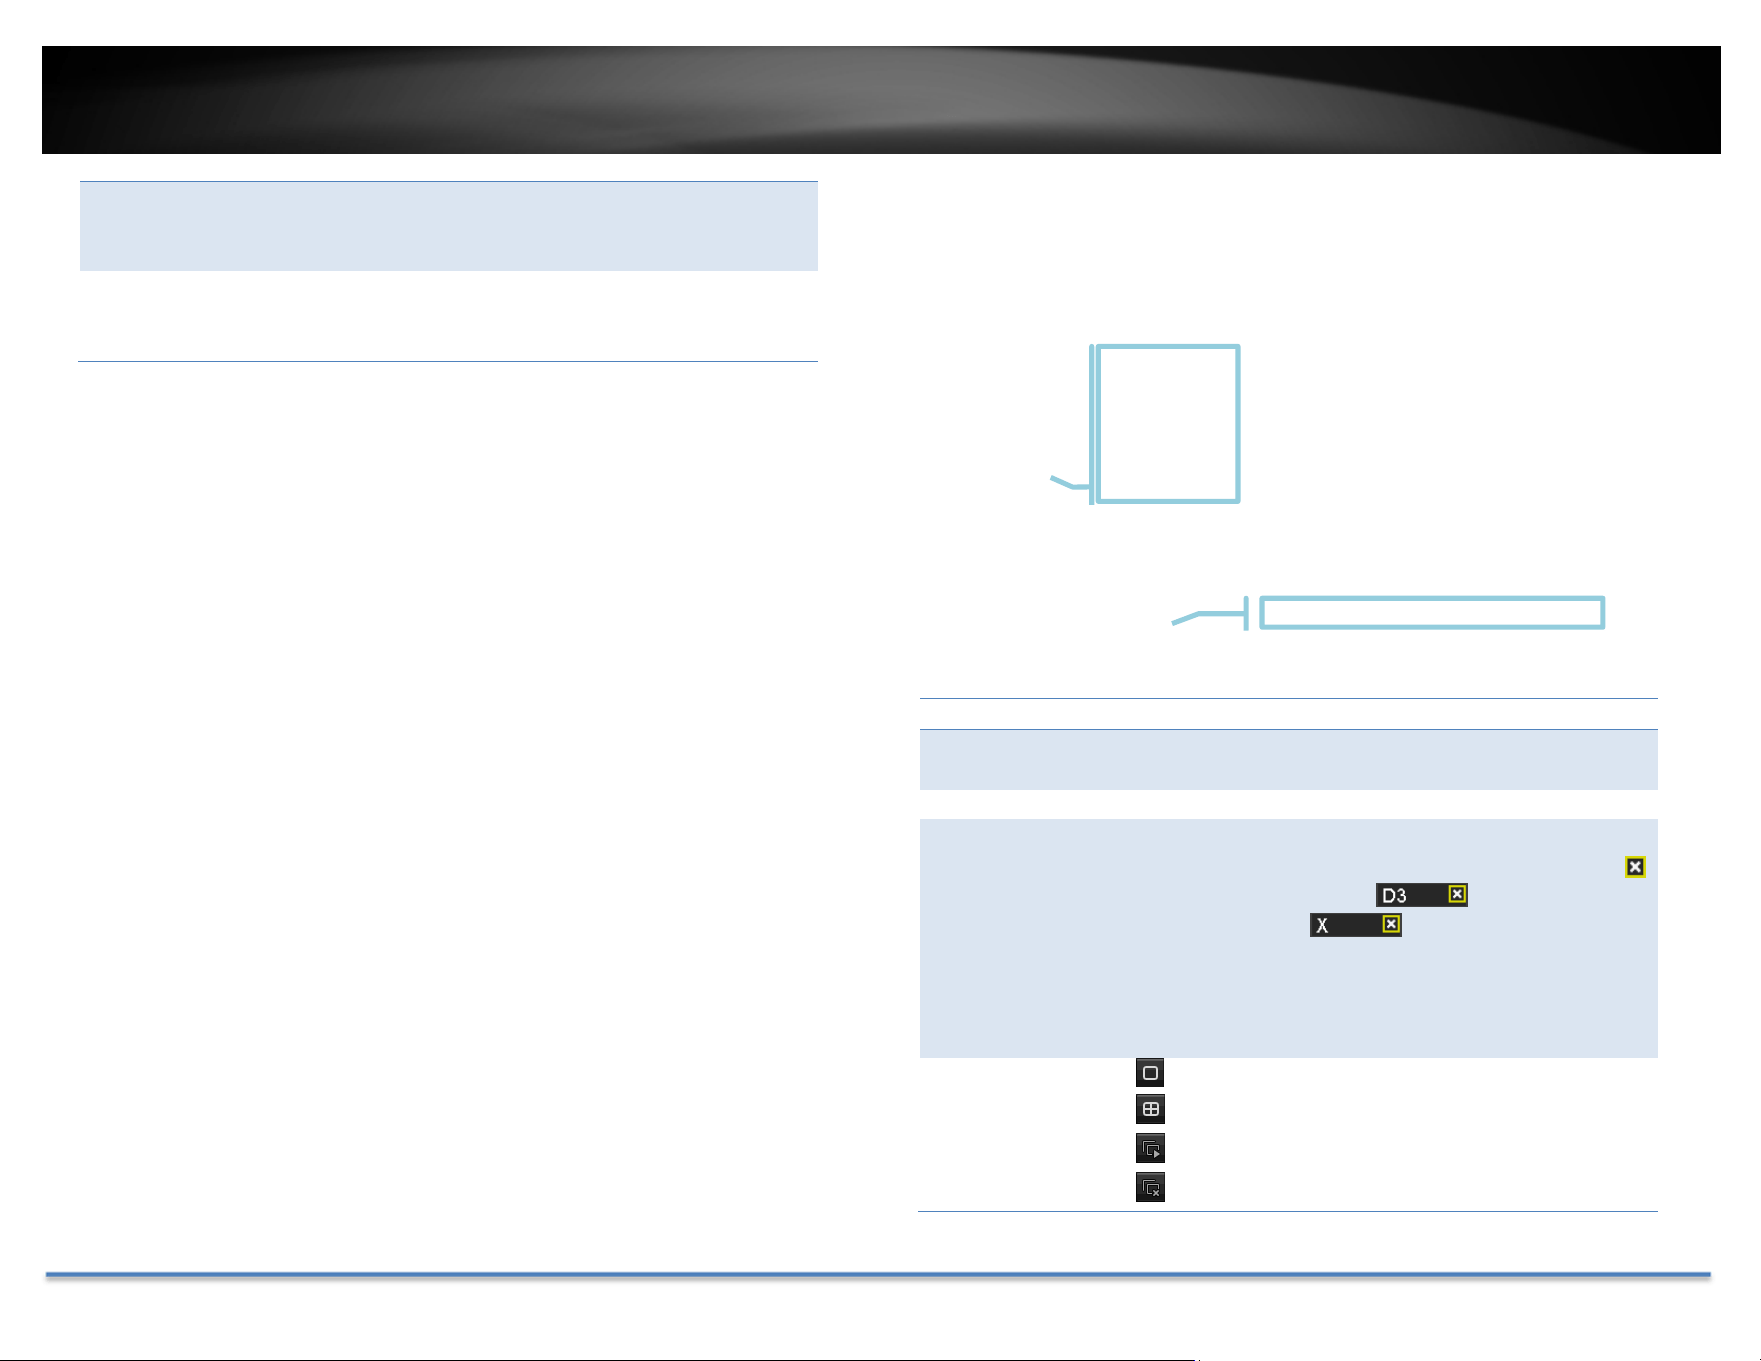
LiveViewLayoutandSequenceSettings
VideoOutput
Interface:
ThevideooutputinterfaceisVGAorHDMI
CameraList: Installedcameraswillbelistedherebychannel.
LayoutPanel: Previewhowthelayoutthevideodisplay.
Toremoveacamerafromthedisplay,justclick
on the selected cellto remove the
channelnumber.
Toassignachanneltoadisplaycell,choosethe
MissingVideo:Ifyouassignachanneltoa display
cell and there's no video stream, the cell will be
blank.
ControlPanel:
:Singlechanneldisplay
:Quadchanneldisplay
:Automaticchannelassignment
:Removeallchannelassignments
Camera
List
Control
Panel
TRENDnet User’s Guide TV-DVR104K / TV-DVR208K
© Copyright 2017 TRENDnet. All Rights Reserved. 33
:Previouspage
:NextPage
:Currentpage/Totalpage
Note:Insinglechanneldisplay,youcansetupthedisplay
sequencewiththepagenumbers.
ClickApplytoapplythechanges.
Channel‐ZeroEncoding
Settings to improve remote multi‐channel live view quality, it helps to
decreasethebandwidthwithoutaffectingtheimage.
EnableEncoding: Enabletheservice
FrameRate: Configuretheframeratefrom1/16fpstofullfps.
Max.Bitrate
(Kbps):
Adjustthenumberbetween448to2048.Default
valueis1024.
ClickApplytoapplythechanges.
Exceptions
Setuptheactionwhenexceptionhappened.Selecttheexceptionyouwant
tomonitorandthenchoosetheaudiblewarningoremailnotification.Click
Applytoapplythechangesandremembertosetupyouremailaccountifyou
choosetheemailnotification
ExceptionType
All: Any of the following exceptions will trigger the
notification.
HDDFull: Bydefault,therecordingvideodoesnotoverwrite
whentheharddriveisfull.Youcansetupanaudio
warning or send email to system manager to
removetherecording.(YoucanalsosetuptheDVR
for automatic overwrite the recordings when the
diskisfull.Pleaseseepage48formoredetail
.)
HDDError: Whentheharddrivereadingorwritingerror,the
DVR can make audible sound or send email to
systemmanagerfortheerror.Youcanusethehard
TRENDnet User’s Guide TV-DVR104K / TV-DVR208K
© Copyright 2017 TRENDnet. All Rights Reserved. 34
drivemaintenancetoolsontheDVR checkingand
managing your hard drive. See page 43 for more
detail.)
Network
Disconnected:
The exception is triggered when ne twork port is
disconnected.
IPConflicted: The DVR is constantly monitoring if there’s an IP
conflictishappening. Exceptionistriggeredwhen
there’sanIPconflict.
IllegalLogin: ExceptionistriggeredwhenDVRdetecttheattempt
loginwithwrongcredential.
Record
Exception:
Exception will be triggered when anything goes
wrongduringvideorecordingprocess.
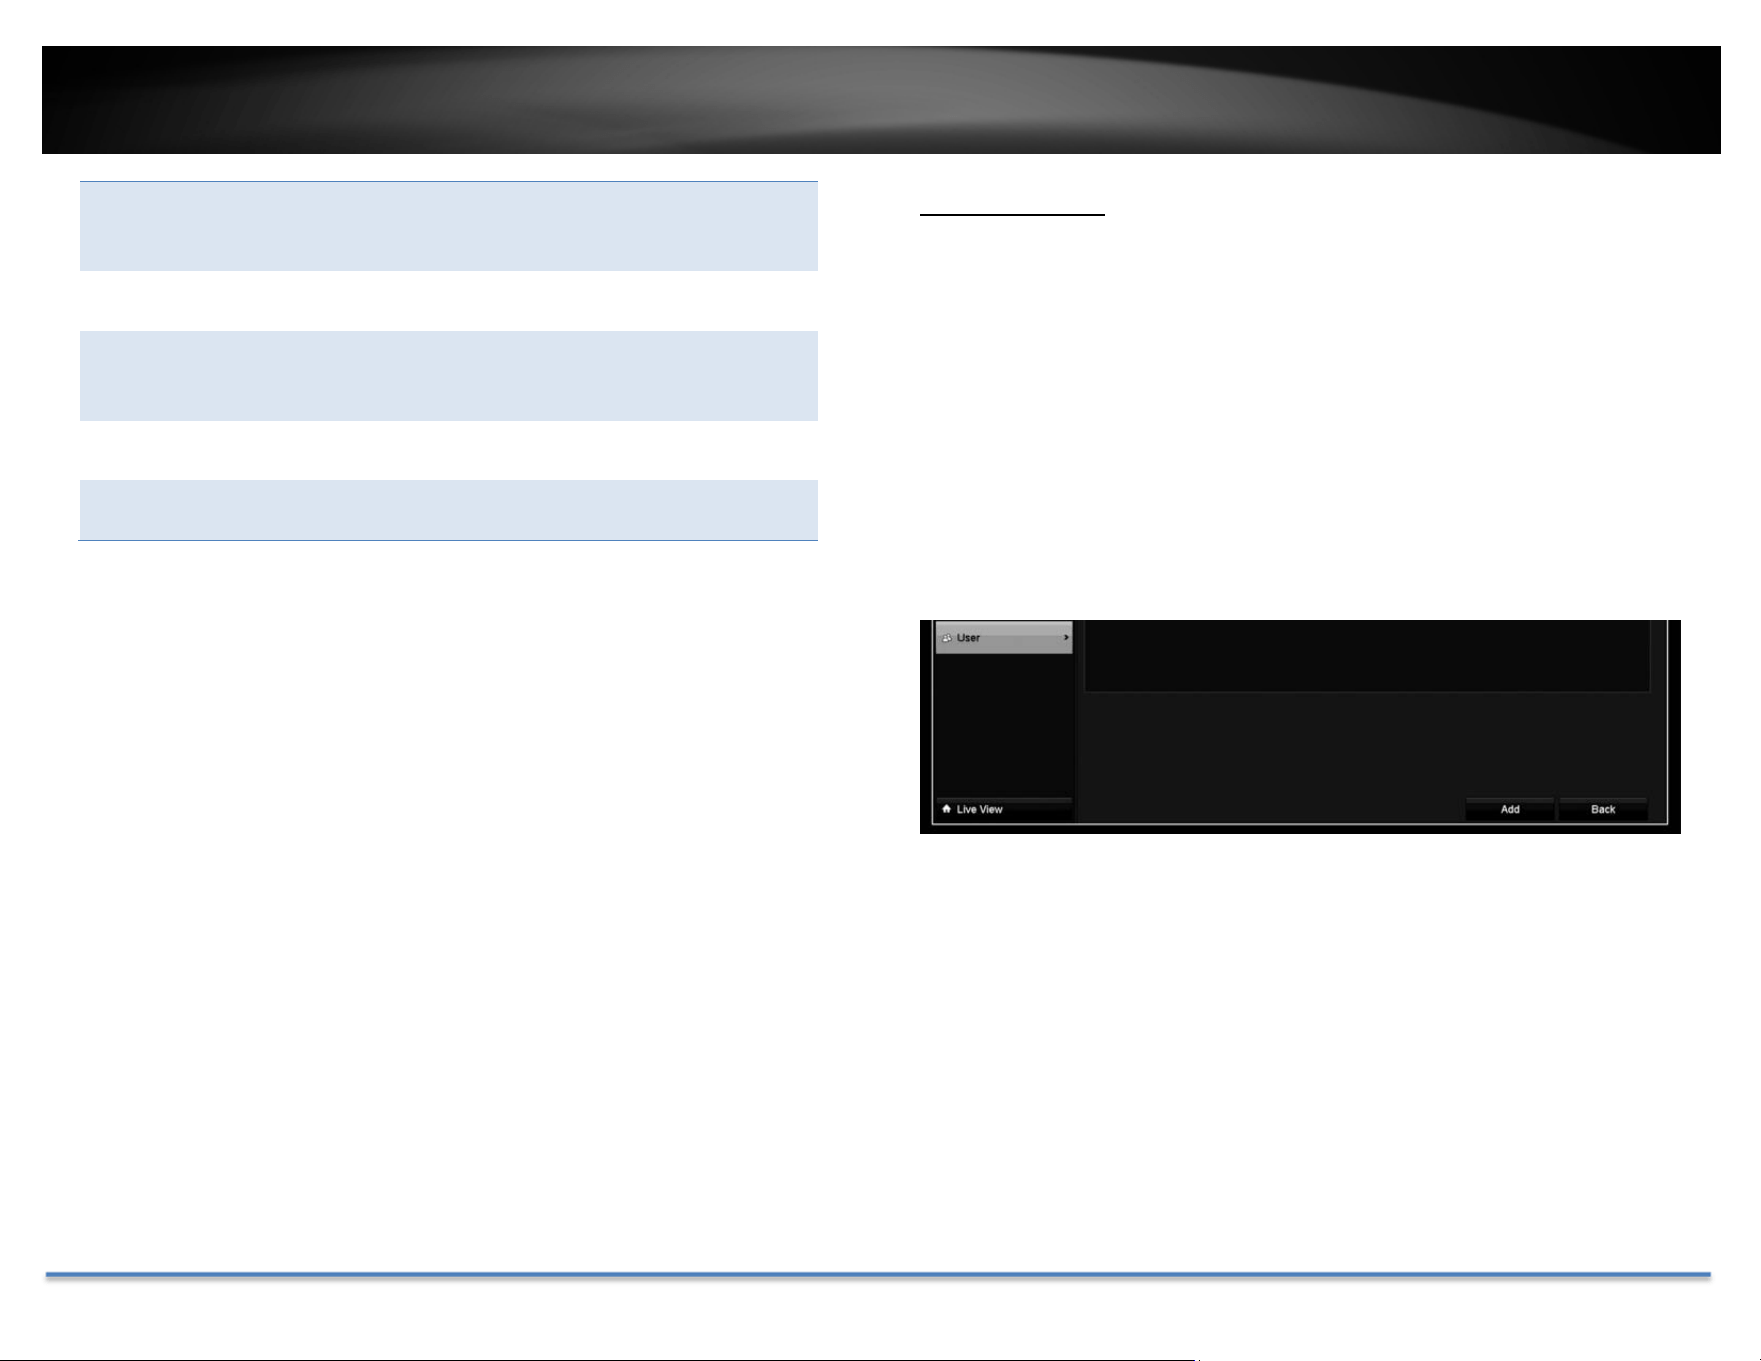
UserAccounts
Youcansetupmultipleuseraccountstoaccessthecamera’svideostream
withawebbrowserorrealtimevideostream(RTSP).Onlyoneadministrator
account(username:admin)canbe setuptoconfigureDVRandcannotbe
deleted.
Add
ClickAddbuttontoaddanaccount

TRENDnet User’s Guide TV-DVR104K / TV-DVR208K
© Copyright 2017 TRENDnet. All Rights Reserved. 35
Addaccount
User: Entertheusername.
Password: Enterthepassword.
Confirm: Enterthepasswordagain.
Level: Selecttheuser’slevelfromGuestorOperatorforthe
presetpermissions.Bydefault,anoperatorcanviewthe
videoandoperatethecamerapan,tilt,andzoom.Guest
canonlyviewthevideo.DVRsettingsareonlyallowedto
bechangeswithadministratoraccount.
User’s
MAC
Address:
Entertheuser’sMACaddresslimittheaccesstoaddon
security.Leaveit00:00:00:00:00:00aswildcardaddressif
youdon’tlimittheaccess.
Edit
ClickEdit onusertochangetheaccountsettings.
SystemMaintenanceMenu
Manage your DVR system by bring up the main menu. Click on System
MaintenanceMenuicon.
Systeminformation
SystemInformationisdisplayinghereforsystemmaintenance.
DVRinformation
DVRInformation
DeviceName: Humanreadabledevicenameforeasy
identification.YoucanchangethisnameinSystem
configuration>Moresettingsonpage27.
Model: ThemodelnameoftheTV‐DVR104.
SerialNumber: Theuniqueidentificationnumberofthisdevice.
FirmwareVersion: Firmwareversion
EncodingVersion: Encodingversion

TRENDnet User’s Guide TV-DVR104K / TV-DVR208K
© Copyright 2017 TRENDnet. All Rights Reserved. 36
CameraInformation
CameraInformation
CameraNo.: Thechannelnumbercameraassignedinto.
CameraName: Cameradevicename
Status: Showingthecameraisconnectedordisconnected.
MotionDetection: Showingthestatusandsetupofthecamera
motiondetection.
Tamper‐proof: Showingthestatusandsetupofthecameravideo
tamperdetection.
VideoLoss: Showingthestatusandsetupofthevideoloss
detection.
RecordingInformation
RecordingStatusInformation
CameraNo.: Thechannelnumbercameraassignedinto.
RecordingStatus: Showingthestatusandsetupofthevideo
recording.
FrameRate: Showingthecamerarecordingframerate.
Bitrate: Showingthecamerarecordingvideostreambitrate
inthousandsbitspersecond.
Resolution: Showingthecamerarecordingvideoresolution.
RecordType: Showingthetypeofrecording.
Encoding
Parameters:
Showingtheencodingparameters.
AlarmInformation
AlarmfunctionisnotsupportedontheseDVRs.
TRENDnet User’s Guide TV-DVR104K / TV-DVR208K
© Copyright 2017 TRENDnet. All Rights Reserved. 37
NetworkInformation
NetworkInterfaceInformation
NIC: Network Interface Card. LAN1 is the assigned
networkinterfacewhich represent tothenon‐PoE
networkport.
IPv4Address: TheIPv4addressonthisinterface
IPv4Subnet
Mask:
Networkrangeofthesubnet
IPv4Default
Gateway:
ThedefaultroutegoingfurtherfromTV‐AC100IPv4
subnet
IPv6Address1: IPv6 self‐assigned address including the subnet
prefixexpressionintheendofthestring.
IPv6Address2: IPv6 static address including the subnet prefix
expressionintheendofthestring.
IPv6Default
Gateway:
ThedefaultroutegoingfurtherfromIPv6subnet
EnableDHCP: TheIPaddressis assignedbyDHCPserverornot.
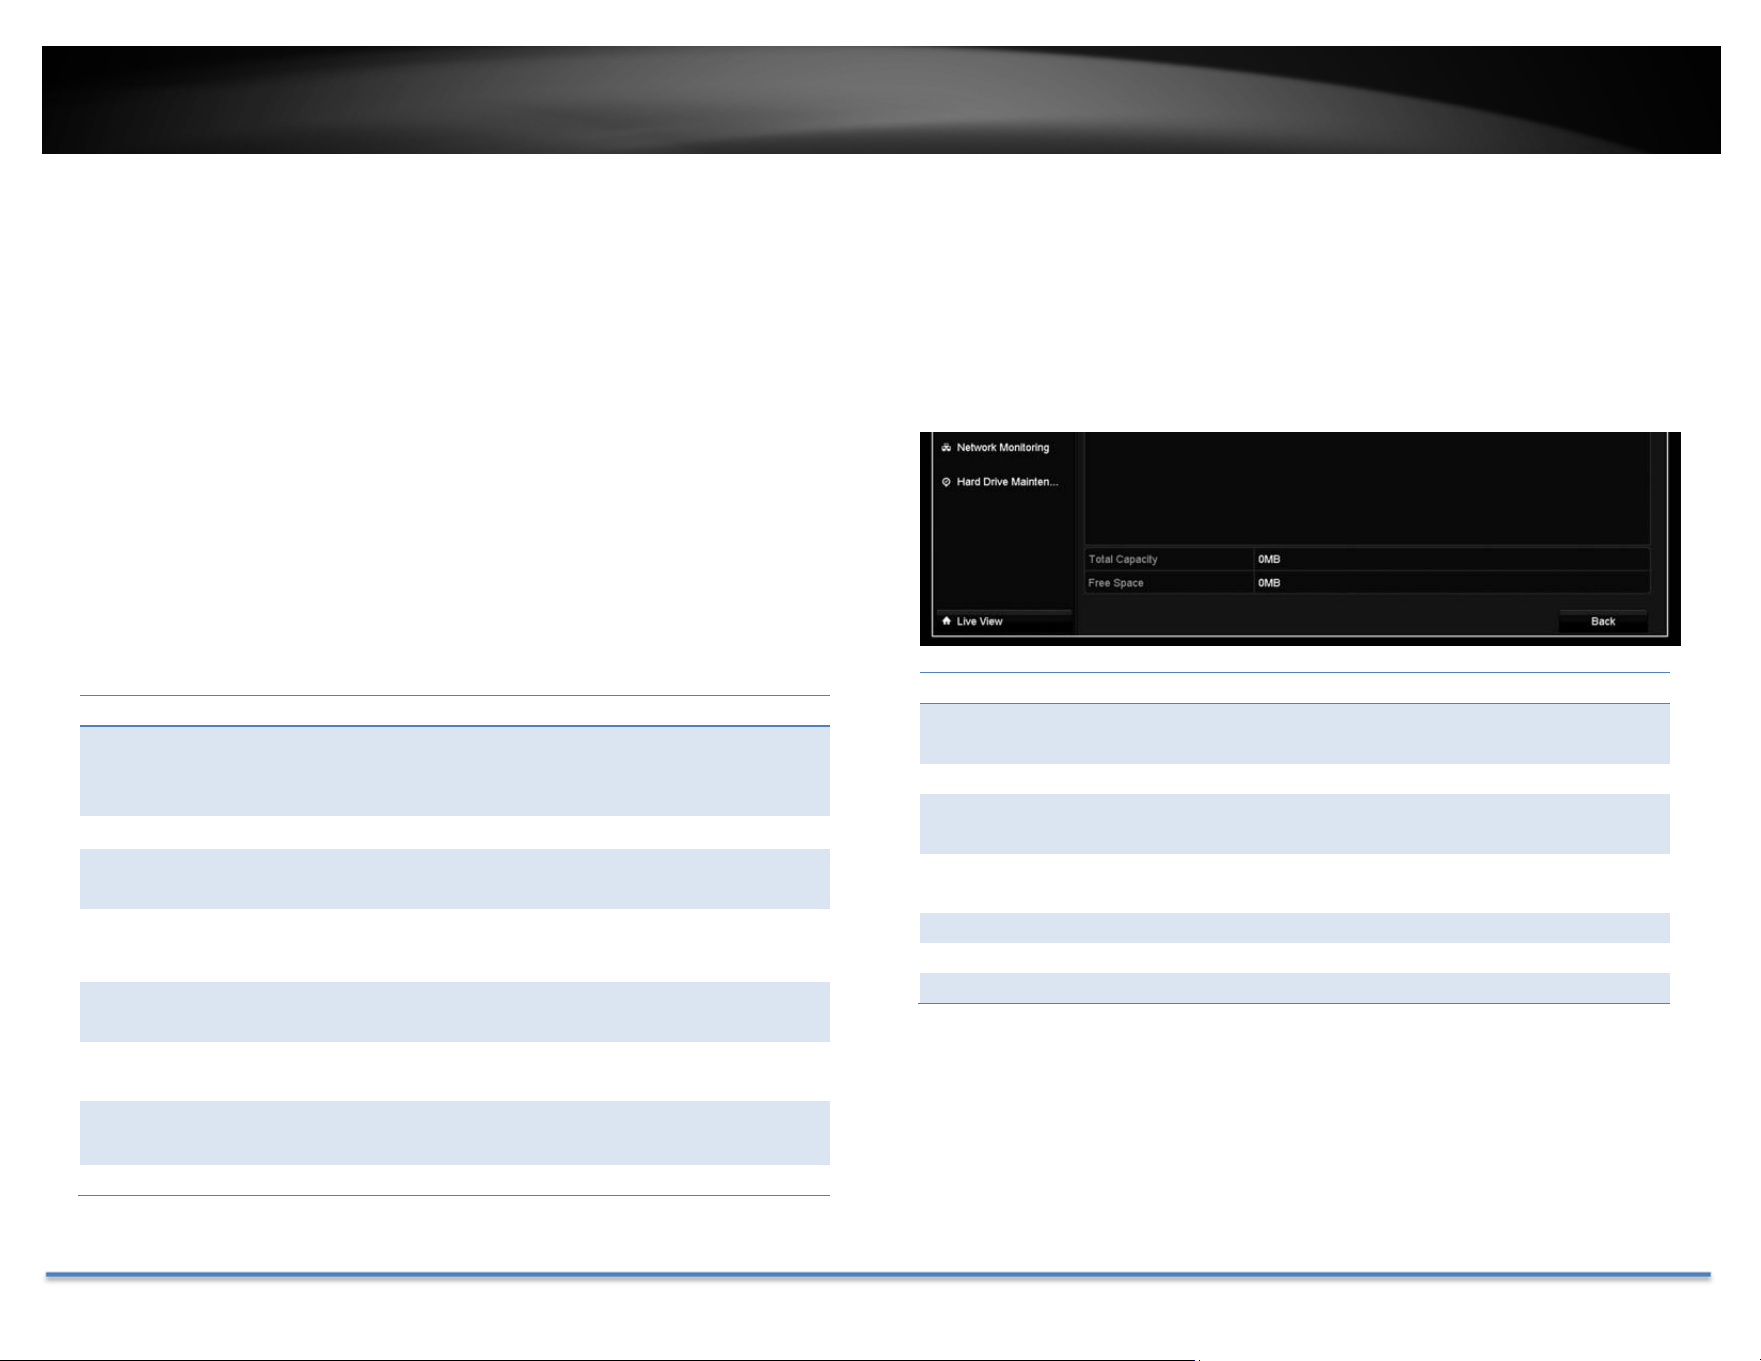
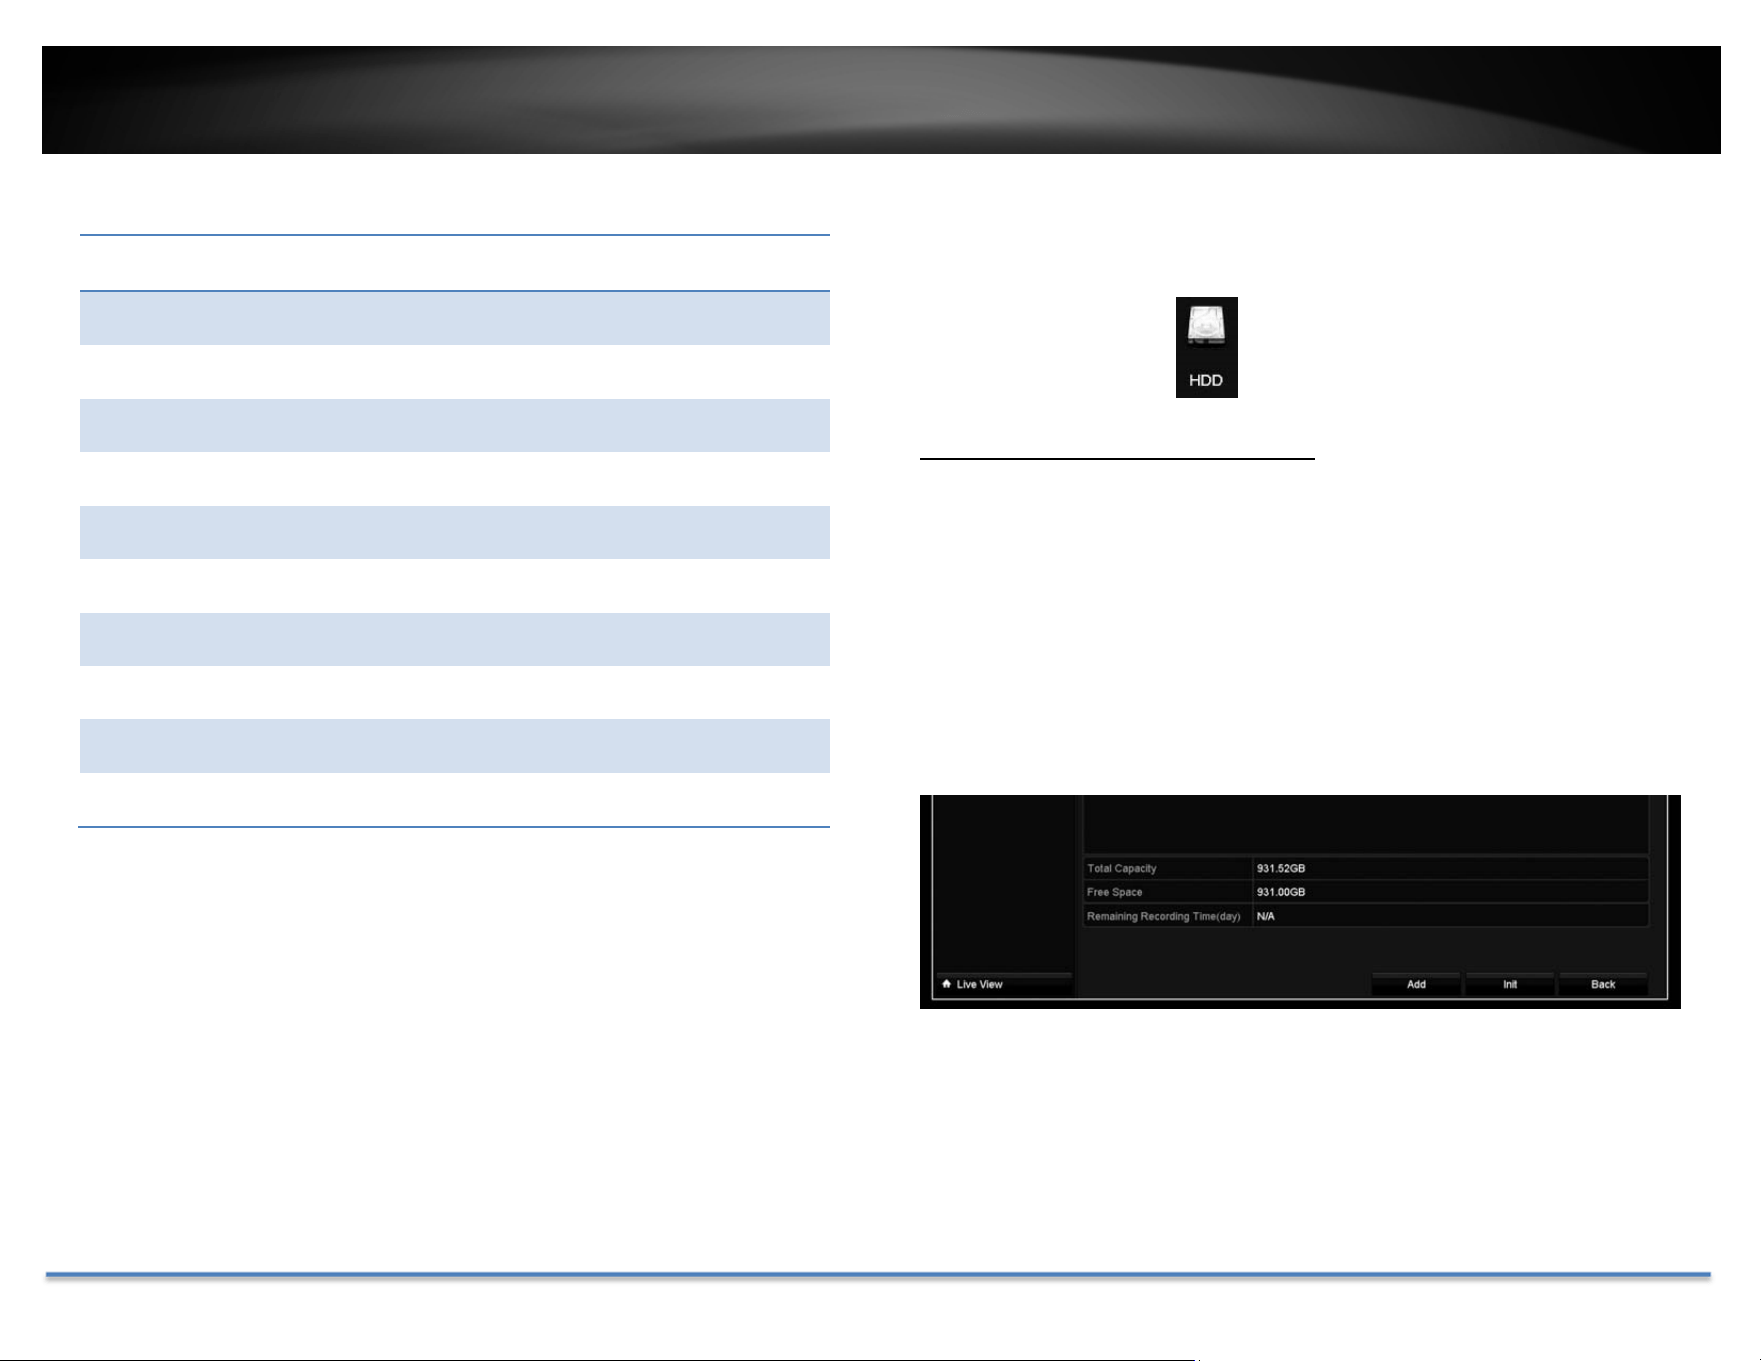
StorageInformation
HDDStatusInformation
Label: IndexoftheHDD.DVRhasonlyoneharddrive
whichisassignedonnumberone.
Status: Showingtheharddriveworkingcondition.
Capacity: Thetotalharddrivestoragecapacityafter
formatting.
Freespace: Displayshowmuchspaceisavailablefreeforvideo
recordings.
Property: R/W:Allowreadandwrite.
Type: Local:TheharddriveisinstalledontheDVR.
Group: TheHDDonDVRisassignedtothegroup1.

TRENDnet User’s Guide TV-DVR104K / TV-DVR208K
© Copyright 2017 TRENDnet. All Rights Reserved. 38
LogInformation
AllDVRactivitiesareregisteredonthelog.Findtheactivitybysearchingwith
timerangeandlogtype.ClickSearchtostartthesearch.
LogSearch
LogSearch
StartTime: Thestartingtimeofalogsearch.
EndTime: Theendtimeofthetimerangeforthelogsearch.
MajorType: Filterthesearchbytypeoflogs:all,alarm,
exceptions,operation,andinformation.
MinorType: Filterthesearchbytypeoflogs.Selectthemajor
typeandthenchoosetheminortype.
Alarm:Startmotiondetection,stopmotion
detection,starttemper‐proof,stoptamper‐
proof,andIPCameraAlarm.
Exception:videoloss,illegallogin,HDDfull,HDD
error,IPconflict,networkdisconne
ct,
recordingexception,IPcameradisconnection,
IPcameraaddressconflict,recordingbuffer
overflow.
Operation:
poweron,abnormalshutdown
Localoperations:shutdown,reboot,login,
logout,configureparameters,upgrade,
startrecording,stoprecording,PTZcontrol,
lockfile,unlockfile,initializeHDD,addIP
camera,deleteIPcamera,setIPcamera,
playbackbyfile,playbackbytime,export
configurationfile,importconfigurationf
ile,
exportrecordings,restoreadministrator’s
password,operatetag,andHDDdetect.
Remoteoperations:reboot,login,logout,
configureparameters,upgrade,start
recording,stoprecording,PTZcontrol,lock
file,unlockfile,initializeHDD,addIP
camera,deleteIPcamera,setIPcamera,
playback/downloadbyfile,playback/
downloadbytime,exportconfiguration
file,importconfigurationf
ile,export
recordings,interrogateparameters,
interrogateworkingstatus,start‐twoway
audio,stoptwo‐wayaudio,alarmarming,
alarmdisarming,andoperatetag.
Information:localHDDinformation,HDD
S.M.A.R.T.startrecording,stoprecording,delete
expiredrecording,andsystemrunningstatus.
TRENDnet User’s Guide TV-DVR104K / TV-DVR208K
© Copyright 2017 TRENDnet. All Rights Reserved. 39
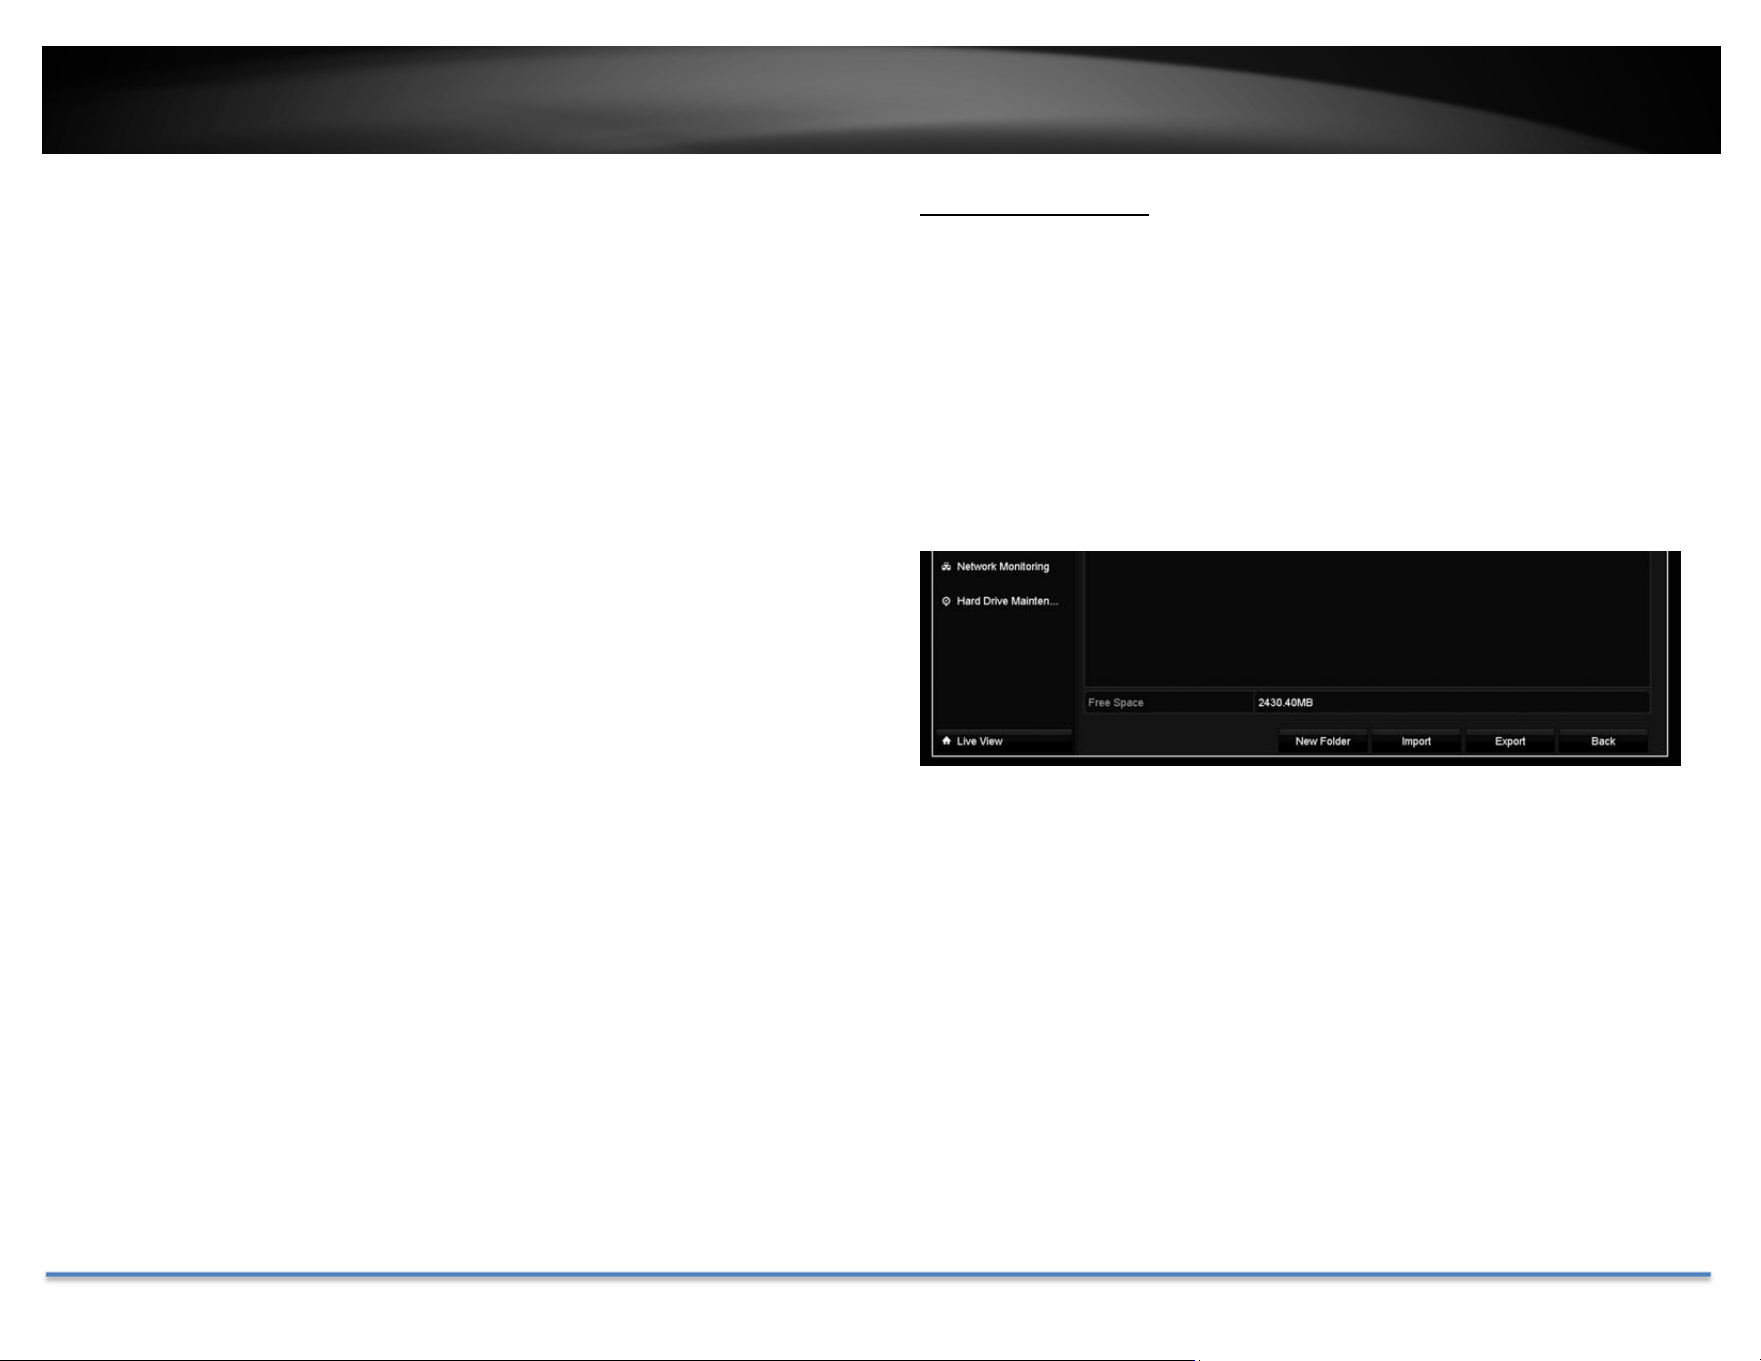
Export
ClickExportonthispagetoexportlogonthelist.
ClickExportagaintoexportthelogtotheUSBdriveofyourchoice.Select
theUSBdriveontheDeviceNameandthenclickRefreshifyouwantto
changethedrive.ClickNewFoldertocreateanewfol
deroncurrent
directory.ClickFormattoformatthisUSBstorage.
ConfigurationFile
TosavecurrentorloadpreviousDVRsettings,choosetheConfigurationFile
pageandthenexportthefiletotheUSBdriveorimportthefile.
ClickExporttoexportthesettingstoafileontheUSBdriveofyourchoice.
SelecttheUSBdriveontheDeviceNameandth
enclickRefreshifyouwant
tochangethedrive.ClickNewFoldertocreateanewfolderoncurrent
directory.ClickFormattoformatthisUSBstorage.
TRENDnet User’s Guide TV-DVR104K / TV-DVR208K
© Copyright 2017 TRENDnet. All Rights Reserved. 40
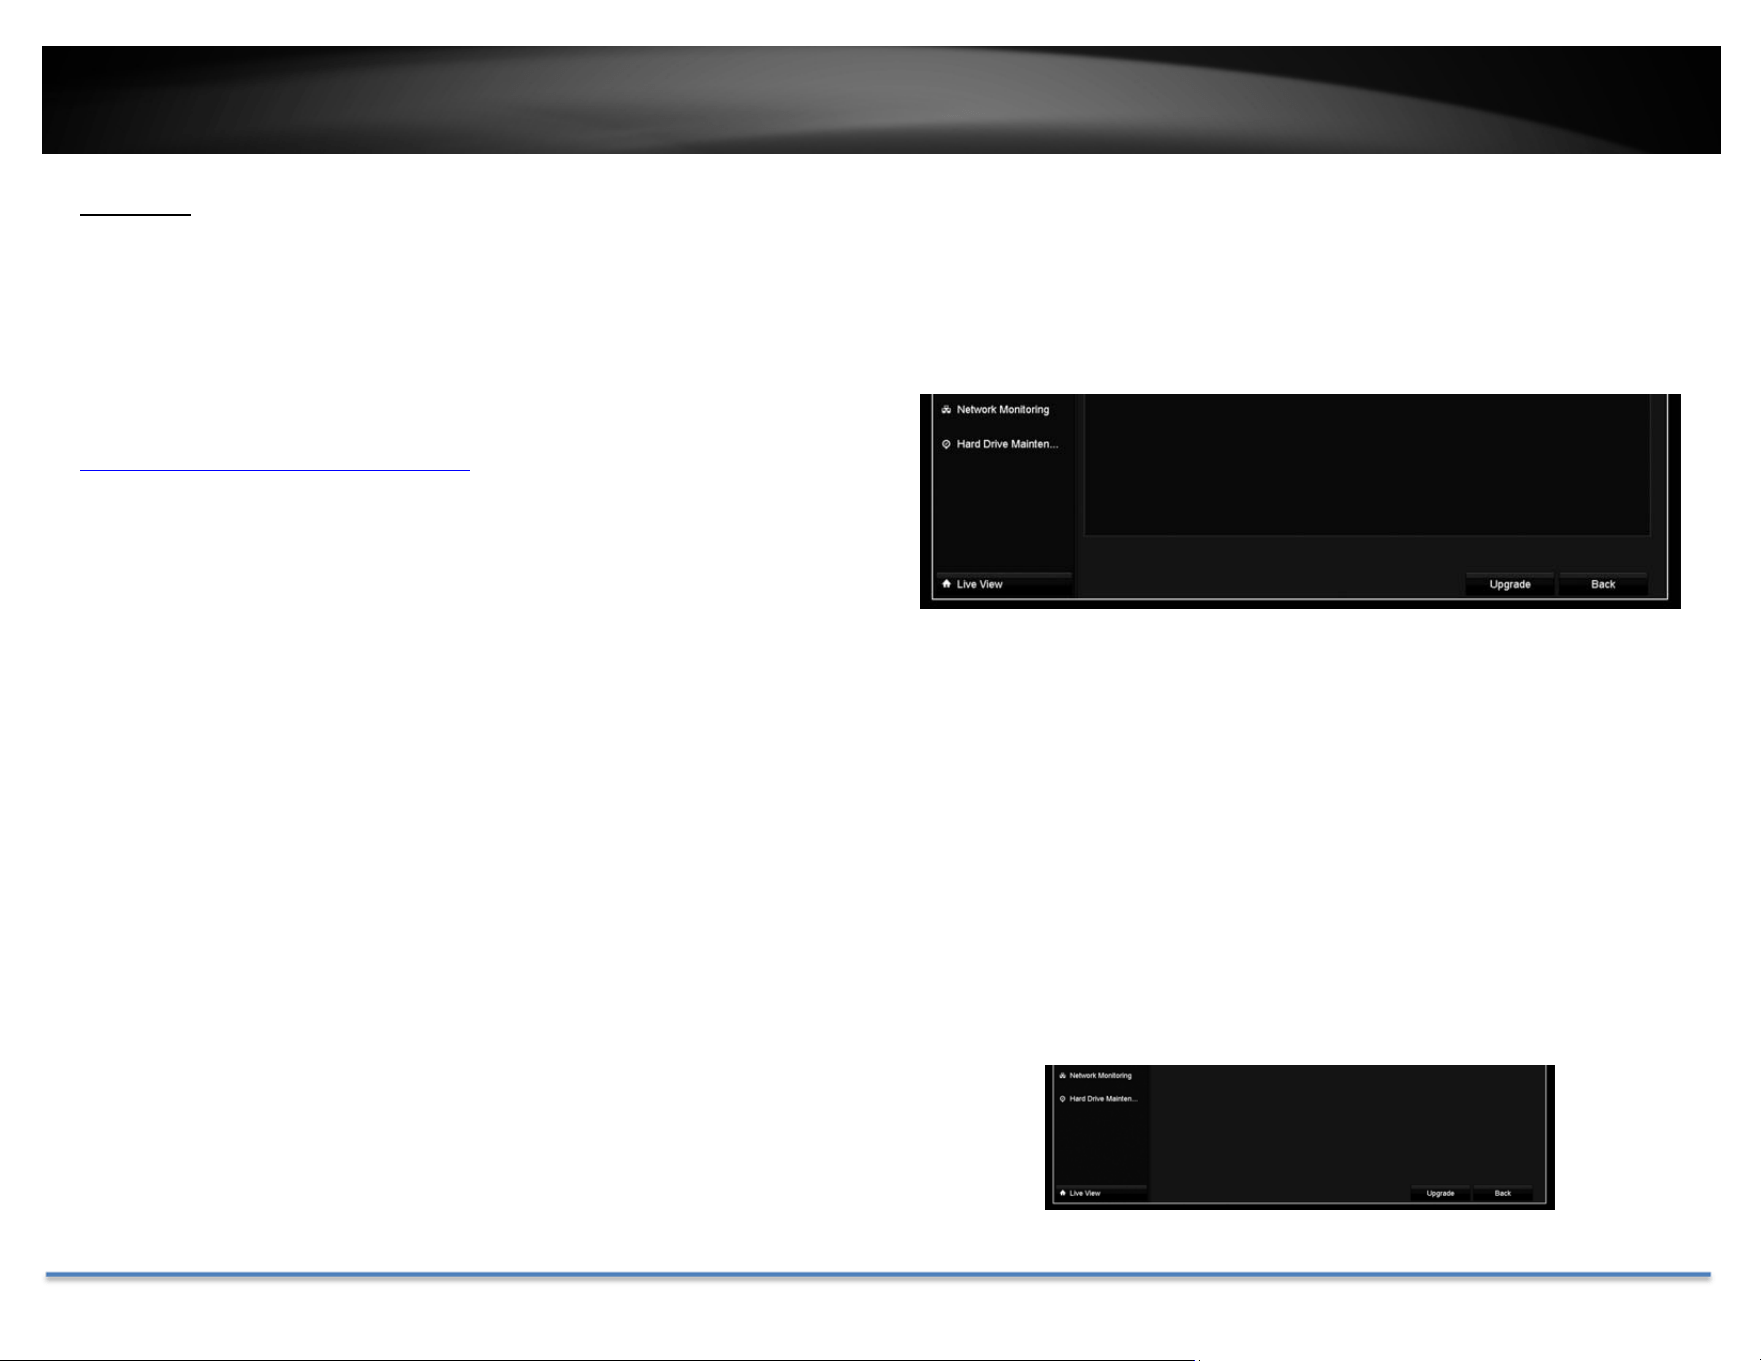
Upgrade
LocalUpgrade
TRENDnet may periodically release firmware upgrades that might add
featuresorfixproblemsassociatedwithyourTRENDnetmodelandversion.
Tofindoutifthereisafirmwareupgradeavailableforyourdevice,please
checkyourTRENDnetmodelandversionusingthelink.
http://www.trendnet.com/downloads/
1. Ifafirmwareupgradeisavailable,downloadthefirmwaretoyour
computer.
2. Unzipthefiletoafolderonyourcomputer.
3. Readthefir mwareupgradeinstructionforspecificversionupdate
information.
4. LogintotheTV‐DVR104K/TV‐DVR208K.
5. GettingtothisMaintenancepagetoupgradefirmwar
e.
Extractthefirmwarefilefromthedownloaded zipfileandthensaveittothe
USBdrive. PlugintheUSBdrivetooneoftheavailableUSBslotontheDVR.
ChooseUpgradepageandthenclickonUpgrade.
RemoteUpgrade
YoucansetuptheupgradeoverthenetworkwithFTPprotocol.Toproceed
FTPupgrade,youneedtoprepareaFTPserveronthelocalnetworkwith
username:ftpandpassword:ftp.Placethefirmware fileontherootdirectory
whentheftpaccountisloggingintheFTPserver.
Navigatetotheremoteup
grade(FTP)page.EntertheFTPserveraddress,and
thenclickonUpgrade.
TRENDnet User’s Guide TV-DVR104K / TV-DVR208K
© Copyright 2017 TRENDnet. All Rights Reserved. 41
FactoryDefault
ToresetyourDVRtothefactorydefault,navigatetothisDefaultpageand
thenclickonOKtoresetallDVRsettingsbacktofactorydefault.
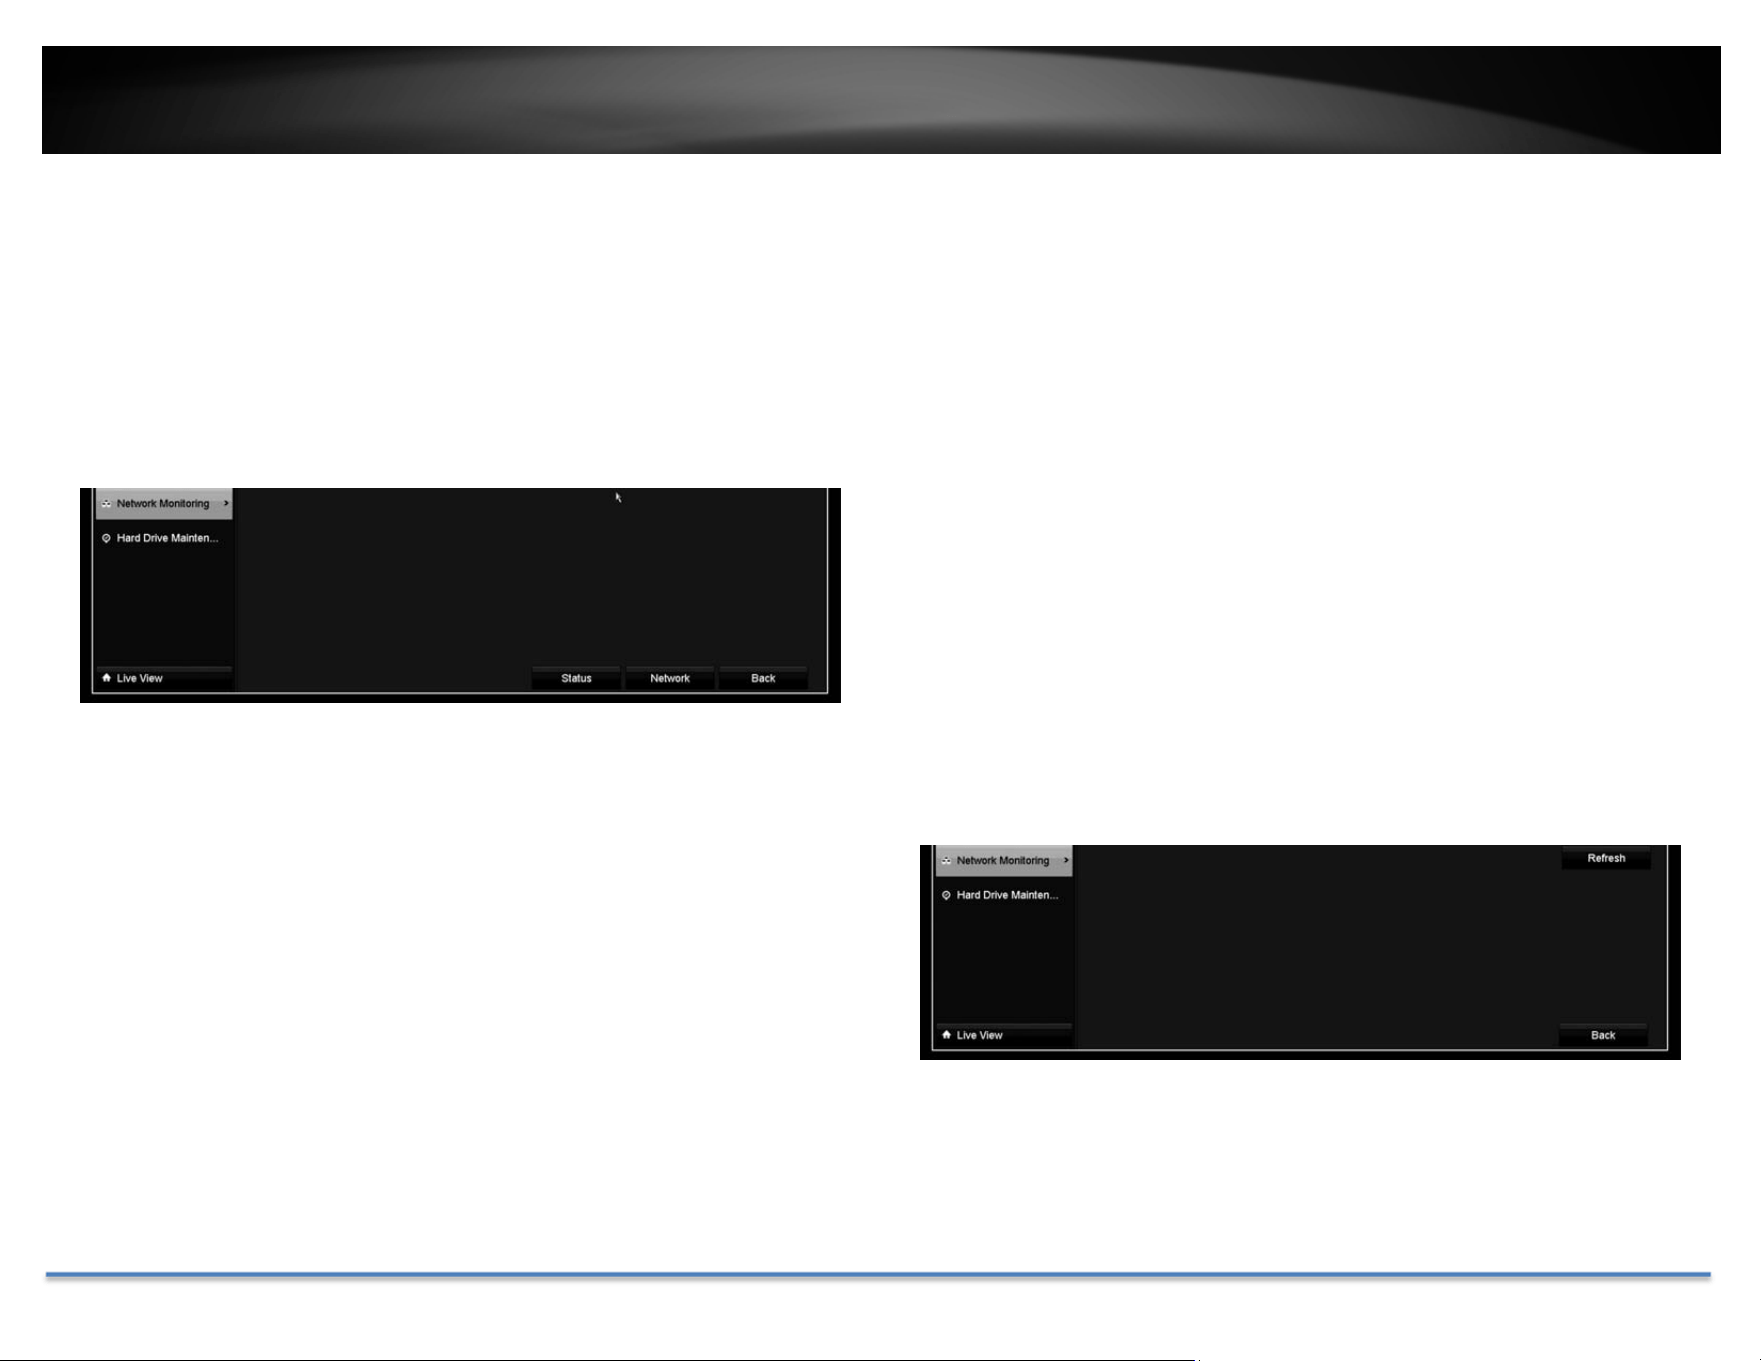
NetworkMonitoring
Traffic
Tomonitorthenetworktraffic,navigatetothetrafficchart.
Traffic
LinkStatus: Thenetworklinkingstatus.
Type: Typeofnetwork,Ethernet.
MACAddress: MediaAccessAddressofthenetworkinterface.
Link: MaximumLinkSpeed.
TRENDnet User’s Guide TV-DVR104K / TV-DVR208K
© Copyright 2017 TRENDnet. All Rights Reserved. 42
Tools
UseToolsontheDVRtotestthenetworkstatus.
Networkdelayandpacketlosstest
ThebasicPINGtesttool.EnterthetestingdestinationIPaddressandthen
clickontheTest.
Networkpacketexport
CapturepacketsandsavetoexternalUSBstoragefornetworkanalysis.Plug‐
inyourUSBnet
workdriveandthenclickExporttoexportthepacketcapture
files.ClickRefreshtolistthedirectoryonyourUSBstorageagain.
NetworkStatistics
To review the network statistic information, navigate to the Network
Statisticspage.ClickRefreshtoupdatetheinformation.

TRENDnet User’s Guide TV-DVR104K / TV-DVR208K
© Copyright 2017 TRENDnet. All Rights Reserved. 43
HardDriveMaintenance
S.M.A.R.TSettings
TheS.M.A.R.T.(Self‐Monitoring,AnalysisandReportingTechnology)isamonitoring
technologytodetectandreportonvariousperformanceandreliabilityfactorstohelp
predictandpreventdiskfailures.
S.M.A.R.T.Settings
Continuetouse: ChecktheContinuetousethisdiskwhensel
f
‐evaluation
isfailedifyouwantittodoso.ClickApplyifyouchange
thissetting.
HDD: TheDisknumber.TheNVRhasoneHDD.
Capacity: Thetotalharddrivestoragecapacityafterformatting.
Sel
f
‐testStatus: Showingtheself‐testingstatus.
Sel
f
‐testType: Choose atypeofS.M.A.R.T. test: short, expanded,and
conveyancetests.
S.M.A.R.T.:
ClicktostartS.M.A.R.T.test.
Temperature: ThetemperatureoftheharddriveinCelsius.
Powerondays: Daystheharddriveison.
Sel
f
‐evaluation: Theresultofself‐evaluation.
All‐evaluation: Functionalevaluations.
S.M.A.R.T.
Information:
DetailedS.M.A.R.T.harddriveinformation.
BadSectorDetection
Detectifthere’sanybadsectoronthediskdrive.
TRENDnet User’s Guide TV-DVR104K / TV-DVR208K
© Copyright 2017 TRENDnet. All Rights Reserved. 44
BadSectorDetection
HDDNo.: TheDisknumber.TheNVRhasoneHDD.
Capacity: Thetotalharddrivestoragecapacityafterformatting.
TypeofDetections: Selectkeyareadetectionorfulldetection.
Detect: Clickthisbuttontostartbadsectordetection.
HDDCapacity: Thestoragecapacityofthehard drive.
BlockCapacity: Theblockcapacity.
Status: Thestatusofbadsectordetection.
Errorcount: Thetotalerrorcountdetected.
ErrorInfo. Detailedsectordamageorshieldinformation.
Pause: Pausethebadsectordetectiononceitstartrunning.
HardDriveManagement
Manageandallocateyourstoragespacebybringupthemainmenu.Clickon
HDDMaintenanceMenuicon.
Format/InitiatetheHardDrive
Selecttheharddriveand thenclickonInittoformatandinitializethehard
drive.

TRENDnet User’s Guide TV-DVR104K / TV-DVR208K
© Copyright 2017 TRENDnet. All Rights Reserved. 45
ScheduledRecording
Setup the video recording settings by bring up the main menu. Click on
ScheduledRecordingMenuicon.
Schedule
Selectthevideochannel,typeofrecording,andthenclickanddragonthe
weeklyschedule.ClickEdittobringupthedetailedschedulesettingtableor
clickCopytocopythesamescheduletootherchannel.
1. Selectchannel.
2. Selectrecordingtype.ChoosefromContinuousorMotion
recording.Ifyouwanttoclearoutsomesche
duledrecordingtime,
chooseNone.
3. Selectthetimeslotsyouwanttomakethescheduledrecording.
Eachtimeslotrepresentsahalfhourinterval.Therownumber
representstheweekofthedaystartingfromMonday.

TRENDnet User’s Guide TV-DVR104K / TV-DVR208K
© Copyright 2017 TRENDnet. All Rights Reserved. 46
4. Ifyouwanttodefinethescheduleinfinerintervals,clickonEdit
button.
5. MakeyourselectionandthenclickApplytoapplythechanges.
Schedule: Selectthedayoftheweek
AllDay: Selectifyouwanttosetuptheall‐dayrecording.
Start/EndTime: Specifythestartingandendofrecordingtimein
24‐hourformat.
Type: SelectContinuousorMotionDetectionrecording
Copyto:
Toquicklysetupthesamescheduleovertheweek,clickCopy.Select
thecamerayouwouldliketocopythesettingstothenclickOK.By
selectingtheAnalogoption,thesettingswillcopytoallcameras.
TRENDnet User’s Guide TV-DVR104K / TV-DVR208K
© Copyright 2017 TRENDnet. All Rights Reserved. 47
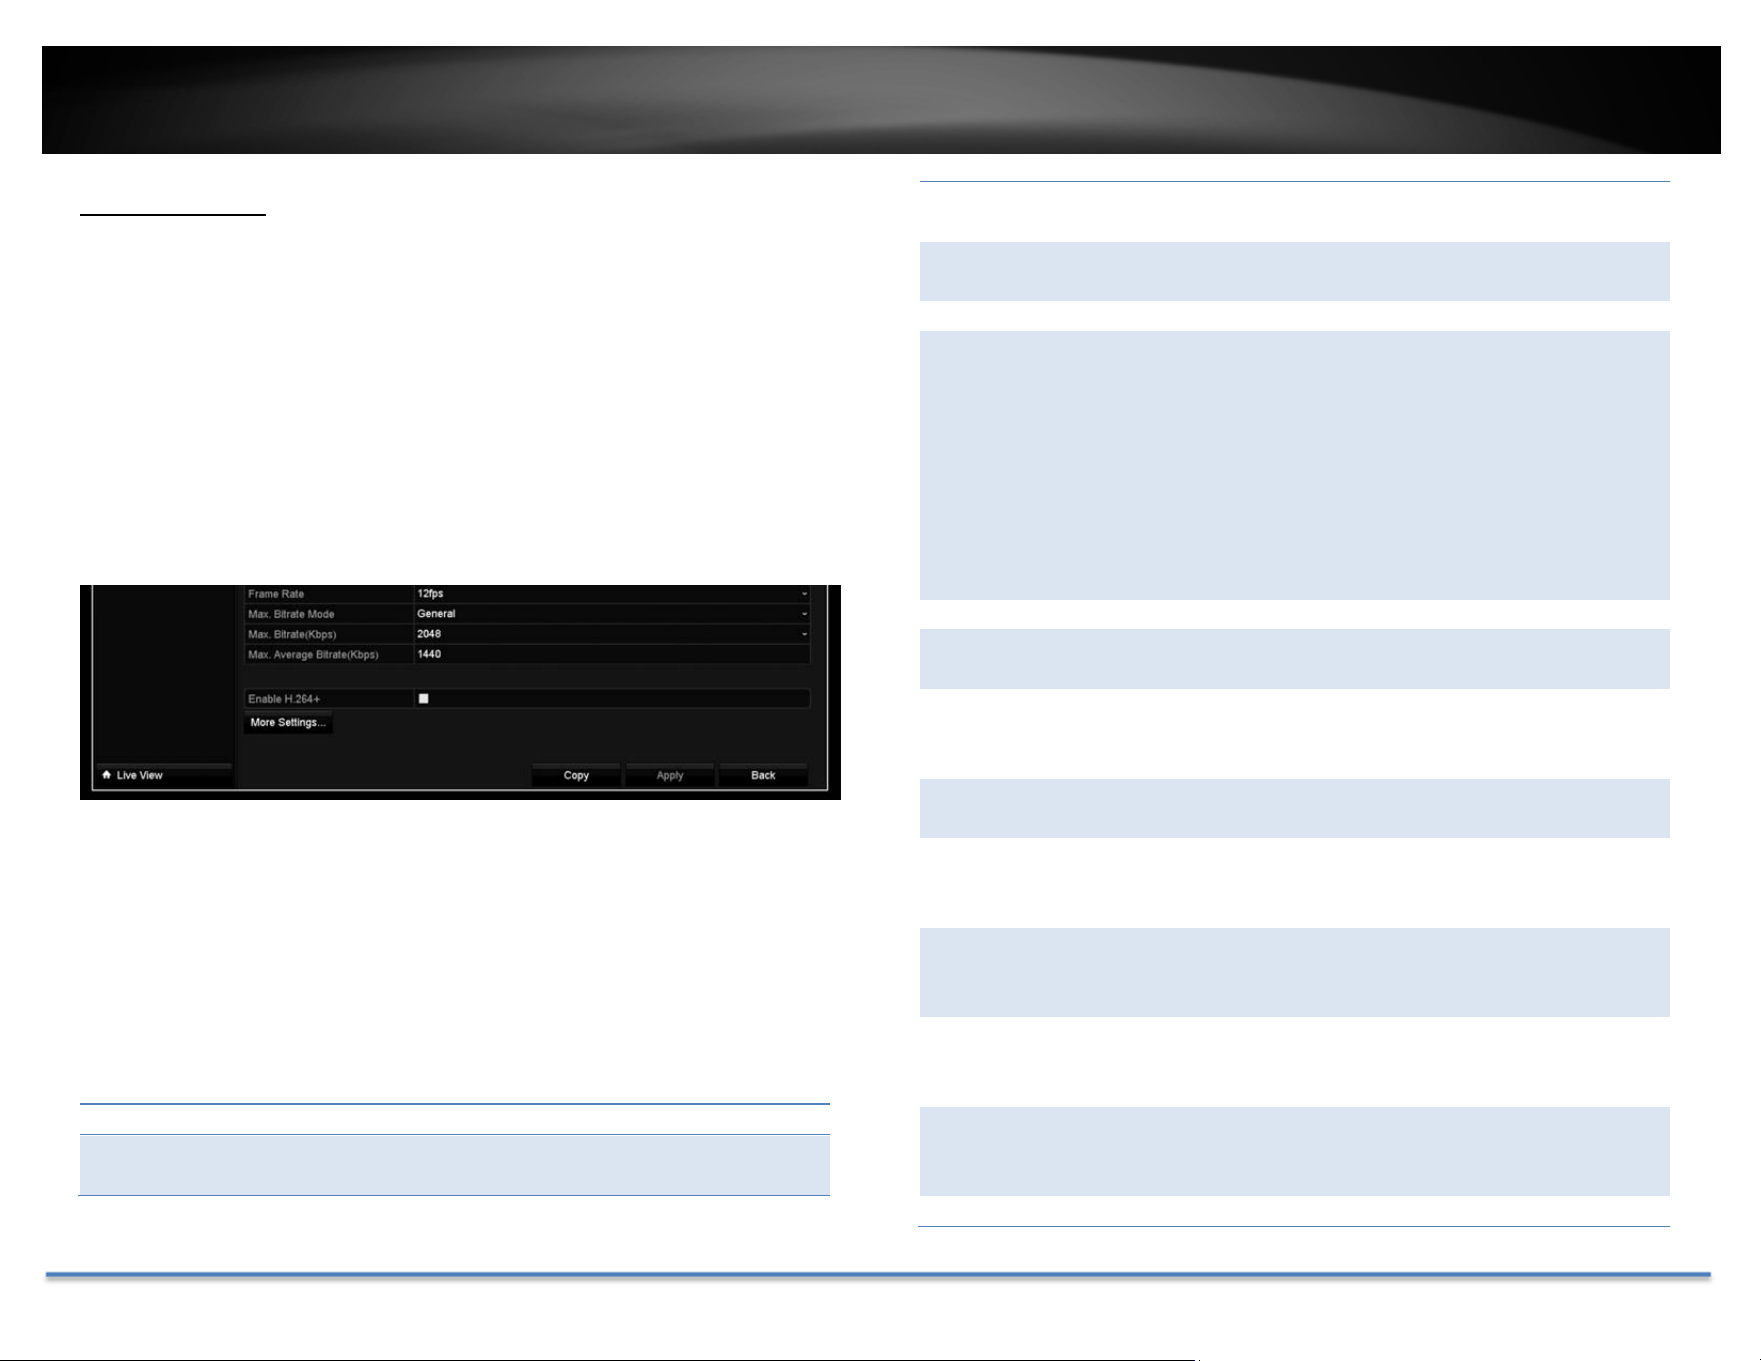
VideoSettings
Setupthevideoqualityforrecording(mainstream),thehighervideoquality
requirelargerstoragespaceandbetternetworkcondition.Pleasechoosethe
bestprofileofyourchoice.
Note:Settingsinthissectionarenotavailableallcameras.TheDVRwillpromptthe
messagetoremindyouthesettingisnotavailableonselectedcamera.
MainStream(Record)Settings
Camera: Selectthecamerayouwanttochangethe
recordingvideoquality.
Encoding
Parameters:
Thetypeofvideofromthecamera.
StreamType: Selectyouwanttostreamvideoonlyorvideoand
audio.
Resolution: Selectthevideoresolution.
Bitratetype: Thebitrateistherateofinformationgenerated
fromthevideo.Thehigherbitratemeansmore
dataandmoretrafficandbettervideoquality.
Constantbitrategeneratessameamountof
informationoverthesameperiodoftime.Variable
biteratetakesonestepfurthertocompressthe
informationwheneveritcan,therefore,generates
thesameorloweramountofinformationcompare
totheconstantbitrate.
VideoQuality: Selectthevideocompressionalgorithm.
Framerate: Selecttheframeratetodecidehowmanypictures
youwanttotakeineachsecond.
Max.Bitrate
Mode:
SelectGeneraltosetthemaximumbitratein
certainbrackets.ChooseCustomizedtosetthe
maximumbitrateonyourown.
Max.Bitrate: Themaximuminformationallowedtorecordon
theDVRinthousandsofbitspersecond.
Max.Bitrate
Range
Recommended:
Recommendedbitratesetting.
Pre‐Record: Iftherecordingistriggeredbythemotionevent,
thisvaluespecifiestostartrecordingsomeperiod
oftimebeforethemotioneventhappened.
Post‐Record: Iftherecordingistriggeredbythemotionevent,
thisvaluespecifiestorecordvideosomeperiodof
timeafterthemotioneventhappened.
ExpiredTime: Locktherecordingvideoforsomeperiodoftime
(indays)topreventaccidentallybeenoverwriteor
delete.
RecordAudio: Recordingaudioornot.

TRENDnet User’s Guide TV-DVR104K / TV-DVR208K
© Copyright 2017 TRENDnet. All Rights Reserved. 48
SubStream
ThesubstreamvideoismainlyforDVRliveview.Changeyourcamera
optiontolowerresolutionifyourcamerageneratestoomuchinformation
totheDVRforliveview.
SubStream
Camera: Selectthecamerayouwanttochangethe
recordingvideoquality.
StreamType: Streamingtypeisvideoonly.
Resolution: Selectthevideoresolution.
Bitratetype: Thebitrateistherateofinformationgenerated
fromthevideo.Thehigherbitratemeansmore
dataandmoretrafficandbettervideoquality.
Constantbitrategeneratessameamountof
informationoverthesameperiodoftime.Variable
biteratetakesonestepfurthertocom
pressthe
informationwheneveritcan,therefore,generates
thesameorloweramountofinformationcompare
totheconstantbitrate.
VideoQuality: Selectthevideocompressionalgorithm.
Framerate: Selecttheframeratetodecidehowmanypictures
youwanttotakeineachsecond.
Max.Bitrate
Mode:
SelectGeneraltosetthemaximumbitratein
certainbrackets.ChooseCustomizedtosetthe
maximumbitrateonyourown.
Max.Bitrate: Themaximuminformationallowedtorecordon
theDVRinthousandsofbitspersecond.
Max.Bitrate
Range
Recommended:
Recommendedbitratesetting.
Advanced
WhentheLitemodeisenabled,theencodingresolutionis1080pliteinreal‐
time.

TRENDnet User’s Guide TV-DVR104K / TV-DVR208K
© Copyright 2017 TRENDnet. All Rights Reserved. 49
Holidayscheduling
Recordingvideoinholidaysmayhasdifferentrequirements.Youcansetup
to11holidaysofayearsharingthesameholidayprofile.
Setuptheholidayschedulebyclickonbutton.
EditHolidaySchedule
HolidayName: Changetheholidaynametomeaningfulname
insteadofindexnumbers.
Enable: Enableordisablethisholidayrule.
Mode: Selecttheholidayisforaday,aweekoramonth.
Daymode:Selectthestartandenddatestospecify
theperiodofholidays.Thissettingisgoodforone
timeonly.Itdoesnotrepeatperiodically.
Weekmode:Selectthestartandenddatesofthe
weektospecifytheperiodofholidays.Thissetting
isrepeatingeveryyear.
Monthmode:Selectthestartandenddatesto
specifytheperiodofholidays.Thissettingis
repeatingeveryyear.
StartDate: Selectthedaywhentheholidaystarts.
EndDate: Selectthedaywhentheholidayends.
ClickApplybuttontoapplythechangeandclicktheOKbuttontofinishthe
editing.

TRENDnet User’s Guide TV-DVR104K / TV-DVR208K
© Copyright 2017 TRENDnet. All Rights Reserved. 50
BackupVideoRecordings
Quicklyandbackupandexportyourvideorecordingswiththefileexporting
menu.BringupthemainmenuthenclickonExportMenuicon.
Export
SelectthevideochannelandrangeoftimeandthenclickonSearchtosearch
thevideoyouwanttoexport.
Exportwithsearch
Selectthevideoclipsyouwanttoexportbycheckoruncheckthevideoclip.
ThenclickExporttoexportthevideorecordings.
Clicktopreviewth
evideoclip.
ClickExportagaintoexportthevideorecordingstotheUSBdriveofyour
choice.SelecttheUSBdriveontheDeviceNameandthenclickRefreshif
youwanttochangethedrive.ClickNewFoldertocreateanewfolderon
currentdirectory.ClickFormattoformatthisUSBstorage.

TRENDnet User’s Guide TV-DVR104K / TV-DVR208K
© Copyright 2017 TRENDnet. All Rights Reserved. 51
Videoplayback
BringupthemainmenuthenclickonExportMenuicon.
Playbackscreen
Typeof
Playback
LiveView
Channel
Selection
Recording
search
Action
Buttons
Playback
Buttons
TimeLine
Scale
Buttons
TRENDnet User’s Guide TV-DVR104K / TV-DVR208K
© Copyright 2017 TRENDnet. All Rights Reserved. 52
Searchforvideorecordings
Checkon thecamerayouwanttoseetheplaybackorcheckon Camerato
selectallchannels.Then,choosethedatefortherecording.Iftherearevideo
recording in selected channel, the date on the calendar will show blue.
Doubleclickthedatetostartplayback.
Timeline
Thereisaplaybackheadinthecenterofthetimelinerepresentedinayellow
verticalline.Tolookforaspecificvideorecording,movetheplayheadby
clickinganddragging it.Iftherecordingisshort,zoominbyclicking
button.Click
tozoomoutthetim
escale.
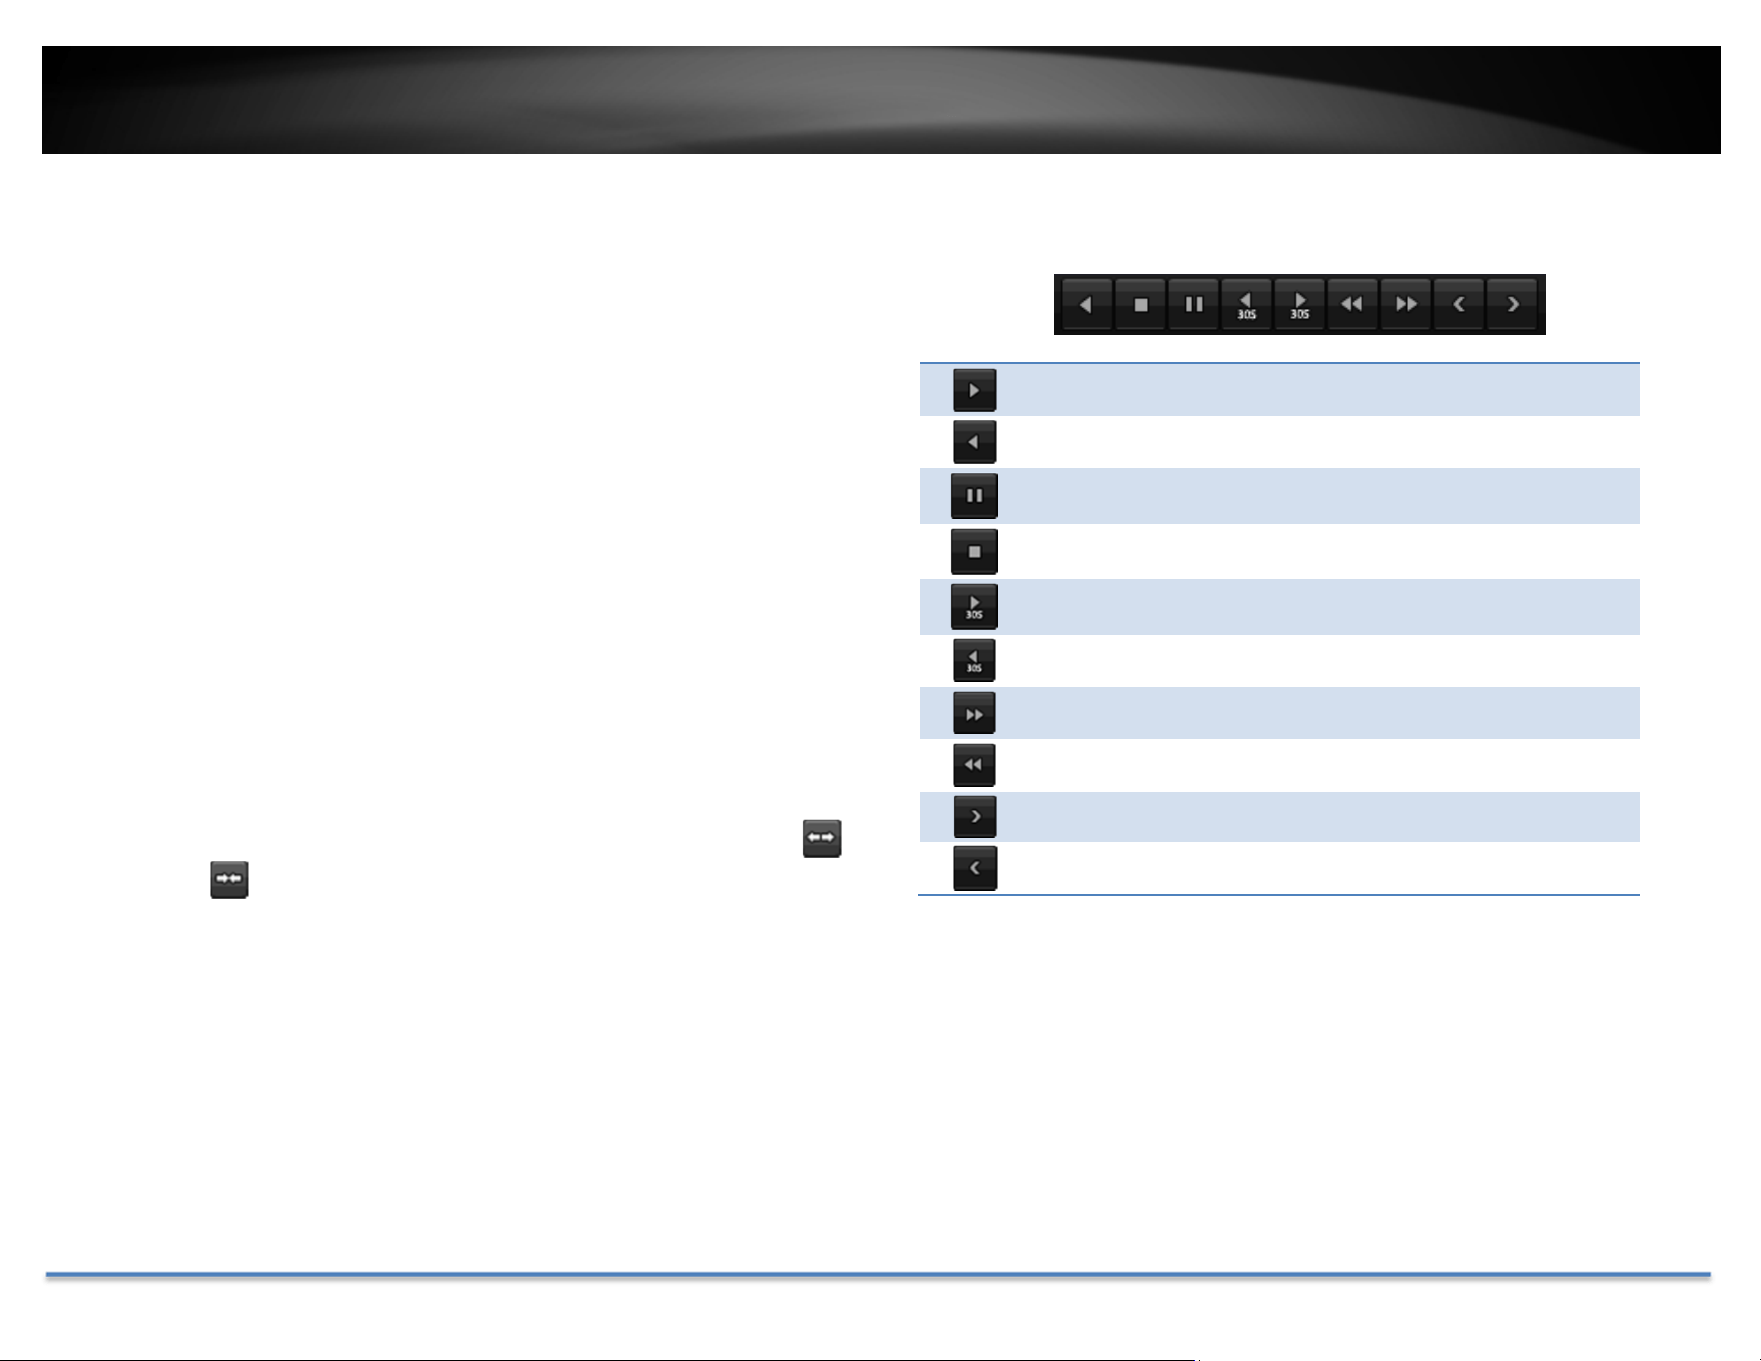
Playbackbuttons
Useplaybackcontrolstoplaybackthevideorecording.
Clickthisbuttontoplaythevideobackward.
Clickthisbuttontoplaythevideo.
Clickthisbuttontopausevideoplayback.
Clickthisbuttontostopplayback.
Clickthisbuttontoskipforward30seconds.
Clickthisbuttontoskipbackward30seconds.
Clickthisbuttonincreaseplaybackspeed*.
Clickthisbuttondecreaseplaybackspeed*.
Clickthisbuttontojum ptothenextday.
Clickthisbuttontojum ptothepreviousday.
*Note:Thereare5stepsofplaybackspeedyoucanchoosefrom:1/4,1/2,1,2,and
4timesoforiginalspeed.
TRENDnet User’s Guide TV-DVR104K / TV-DVR208K
© Copyright 2017 TRENDnet. All Rights Reserved. 53
Playbackoperations
Moreplaybackoperationssuchasmutetheaudio,clipacustomizedvideo,
addandmanagetags,andzoomintheviewingare availableontheaction
buttonssection.
Theaudioison.Clickthisbuttontomutetheaudio.
Theaudioismuted.Clickthisbuttontoenableaudio.
Clickthisbuttontostartvideoclipping.
Click this button to stop video clipping. You can make
multiplevideoclips.Whenyoufinishallclippingandexit
theliveview,theDVRwillpromptandaskingyoutosave
thevideoclips.
Clickthisbuttontoaddatagwithdefaulttagname.
Clickthisbuttontoaddatagwithcustomizedtagname.
Clickthisbuttontomanagethetags
Clickthisbuttontozoomintheliveview.
Tagging
Tagging on video recordings help you to mark the critical time of video
recordingandeasiertrackingandediting.Findthevideoiscriticalandclick
ontomakethetagwithdefaulttagname“tag”.Clickontomake
the tag with customized tag name. Search the video on Tagged video
playb
ackmodeexplainedinfollowingsections.
Zoom
Clicktozoomtheplayback.Anavigatewindowwillshoweduponright
lowerscreencorner.Draganddropordoubleclicktodefinetheareayou
wanttozoomin.Thedefinedareaisshowedinredrectangular.Rightclickto
exitthezoommode.

TRENDnet User’s Guide TV-DVR104K / TV-DVR208K
© Copyright 2017 TRENDnet. All Rights Reserved. 54
Playbackmodes
Thevideoplaybacknotonlycanplaybackthevideorecorded onthehard
drive indexed by the time. You can also search the video with motion
detectionevent,tag,orplaybackthevideostoredontheUSBexternalhard
drive.
Event
To search video with motion detection event, click and select the Even
t
playbackmode.
Selectthechannelyouwanttosearchthemotiondetection.Enterthestart
andstoptime.And,thenclickonSearch.
The motion recording events are showed on
thelist.Clicktoviewthevideo.
Usethescrollbartobrowse
therecordingsandadjustthe
pre‐play an
d post‐play
between 5 seconds and the
maximumamountofasingle
sectionofrecordingtodecide
thelengthofplaybackbefore
andafterthemotionevent.

TRENDnet User’s Guide TV-DVR104K / TV-DVR208K
© Copyright 2017 TRENDnet. All Rights Reserved. 55
Tag
Ifyousetupthetagsandwanttosearchvideowiththetags,clickandselect
theTagplaybackmode.
Selectthechannelyouwanttosearchthetags.Enterthestartandstoptime.
Ifyouwanttosearchforspecifictagname,enterthetagnameorleaveit
blankforalltags.And,the
nclickonSearch.
Thetagssearchedareshowedonthelist.Click
toviewthevideo.
Usethescrollbartobrowsetherecordingsand
adjust the pre‐play and post‐play between 5
seconds and the maximum
amountofasinglesectionof
recording to deci
de the
lengthofplaybackbeforeand
afterthemotionevent.

TRENDnet User’s Guide TV-DVR104K / TV-DVR208K
© Copyright 2017 TRENDnet. All Rights Reserved. 56
Externalfile
To playback the video files saved on the USB drive, click and select the
ExternalFileplaybackmode.
SelecttheUSBdevicetobrowsethefiles.ClickRefreshtoupdatethelist
whennecessary.
Clickto view the video and use the playback control to control the
playback.
AccessyourDVRwiththeWebBrowser
DefaultSettingsandFactoryReset
To manage your DVR through the web browser, you have to setup the
network connection first. If you didn’t set up your DVR attaching to your
home/businessnetwork,pleaseenableDVR’sDHCPclient.ClickApplyand
thenrestarttheDVR.Ifyouhavealreadyinstalledyourcameras,youhaveto
manuallycha
ngetheirsettings.WhennecessarytomakesuretheDVRgets
theIPaddressfromyournetwork.
Here’sthelistofyourDVR’sfactorydefaultsettings:
SystemDefault
ManagementIP: 192.168.10.60.
Administratorname: admin
Administratorpassword: admin
SystemRequirement
ToaccessyouDVRwiththebrowser,youneedaWindowsorOSXbased
computer and up‐to‐date browser (Internet Explorer, Safari, Chrome, or
Firefox).Awebbrowserplug‐inmustbeinstalledtosupportedcomputerand
browsertowatchthevideo.
YouneedtosetuptheIPaddressinthesamenet
workofDVR.(192.168.10.x
network or yourhome network). For example,setup your computer with
192.168.10.2staticIPaddress.
ForWindowssystem,pleasegotothenextparagraph.
ForOSXsystem,pleasegodirectlytopage60.

TRENDnet User’s Guide TV-DVR104K / TV-DVR208K
© Copyright 2017 TRENDnet. All Rights Reserved. 57
Logging‐intotheDVRfortheFirstTime(Windows)
1. ConnectyourcomputertoyouhomenetworkandlookfortheDVR
bybrowsingyourNetworkinFileExplorerandthendoubleclickthe
icontovisit theDVR.Or,youcanfindtheDVRIPaddressassignedby
yourhomegatewaybyvisitinghomegateway’sweb management
page,andth
enpressEnter.
2. Entertheusername,admin,
andthepasswordyousetupthroughthebasicsetup.If
youdidn’tsetupyourpassword,thechangepasswordwindowwillpop
upon step9toguideyouthroughthepasswordchanging.Thedefault
passwordisadmin.
3. TheDVRma
nagementpagewilldetectifyouinstalledthecameravideo
streamingplug‐inornot.ClickOKtodownloadtheplug‐infromtheDVR.
4. Downloadtheplug‐intoyourcomputerandthenandcloseyourbrowser.
ClickRuntoinstalltheplug‐in.
5. Permission request may show up de
pends on the Internet security
settingsonyourcomputer.ClickMore Info and then Run anyway to
installtheplug‐in.

TRENDnet User’s Guide TV-DVR104K / TV-DVR208K
© Copyright 2017 TRENDnet. All Rights Reserved. 58
6. ClickNexttoinstalltheplug‐in.
7. ClickFinishtofinishtheinstallation.
8. Openthebrowserandloginagain.
9. DVRwillaskyoutochangeyourpasswordfromdefaultsetting.Please
enter the new password twice and click OK. The password must be
between8and16characters.(Alp
hanumeric:a‐z,A‐Z,0‐9,!,@,#,$).
10. Enter the usernameadminandnew password again to start secured
session.

TRENDnet User’s Guide TV-DVR104K / TV-DVR208K
© Copyright 2017 TRENDnet. All Rights Reserved. 59
11. TheLiveViewpagewillshowupandbeginstreamingvideo.
Note:Ifyouwerenotgothroughthebasicsetup,thecameraplug‐and‐playprocess
willbeginafteryousetupthepassword.WaitafewminutesandpressF5torefresh
thebrowserforthelivevideo.
Logging‐intotheCamerafortheFirstTime(OSX)
ItisrecommendedtosetupthedeviceusingWindowsPCandCameraUtilty
firstbeforeaccessingthecamerawithMac.Macplug‐inneedstobeinstalled
first before accessing the camera, you can run the file from the CD or
downloadfromwww.trendnet.com
1. GototheFinderandnavigatetotheDownloadfolder.Command‐Click
theWebComponents.pkgandthenclickOpen.(Ifyouareinstalltheplug‐
in from the CD, just browse to /Mac folder and double click the
WebComponents.pkgfile.)

TRENDnet User’s Guide TV-DVR104K / TV-DVR208K
© Copyright 2017 TRENDnet. All Rights Reserved. 60
2. ClickOpentostartinstallation.
3. ClickContinuetoinstalltheplug‐in.
4. Selectadestinationtoinstalltheplug‐in.ThenclickContinue.
5. UsethedefaultlocationandclickInstall.

TRENDnet User’s Guide TV-DVR104K / TV-DVR208K
© Copyright 2017 TRENDnet. All Rights Reserved. 61
6. EnteryourpasswordandclickInstallSoftware
7. Installationwillprocessautomatically.
8. ClickClosetoexittheinstallation.
9. OpenthebrowserandloginagainwiththedefaultIP192.168.10.60or
theIPthatwasdynamicallyassignedbyyourrouter.
10. Entertheusername,admi
n,andthepassword,andthenclickOK.

TRENDnet User’s Guide TV-DVR104K / TV-DVR208K
© Copyright 2017 TRENDnet. All Rights Reserved. 62
11. TheLiveViewpageshowsupandthevideo startstostream.
Note:Ifyouwerenotgothroughthebasicsetup,thecameraplug‐and‐playprocess
willbeginafteryousetupthepassword.Waitafewminutesandpresscommand‐R
torefreshthebrowserforthelivevideo.
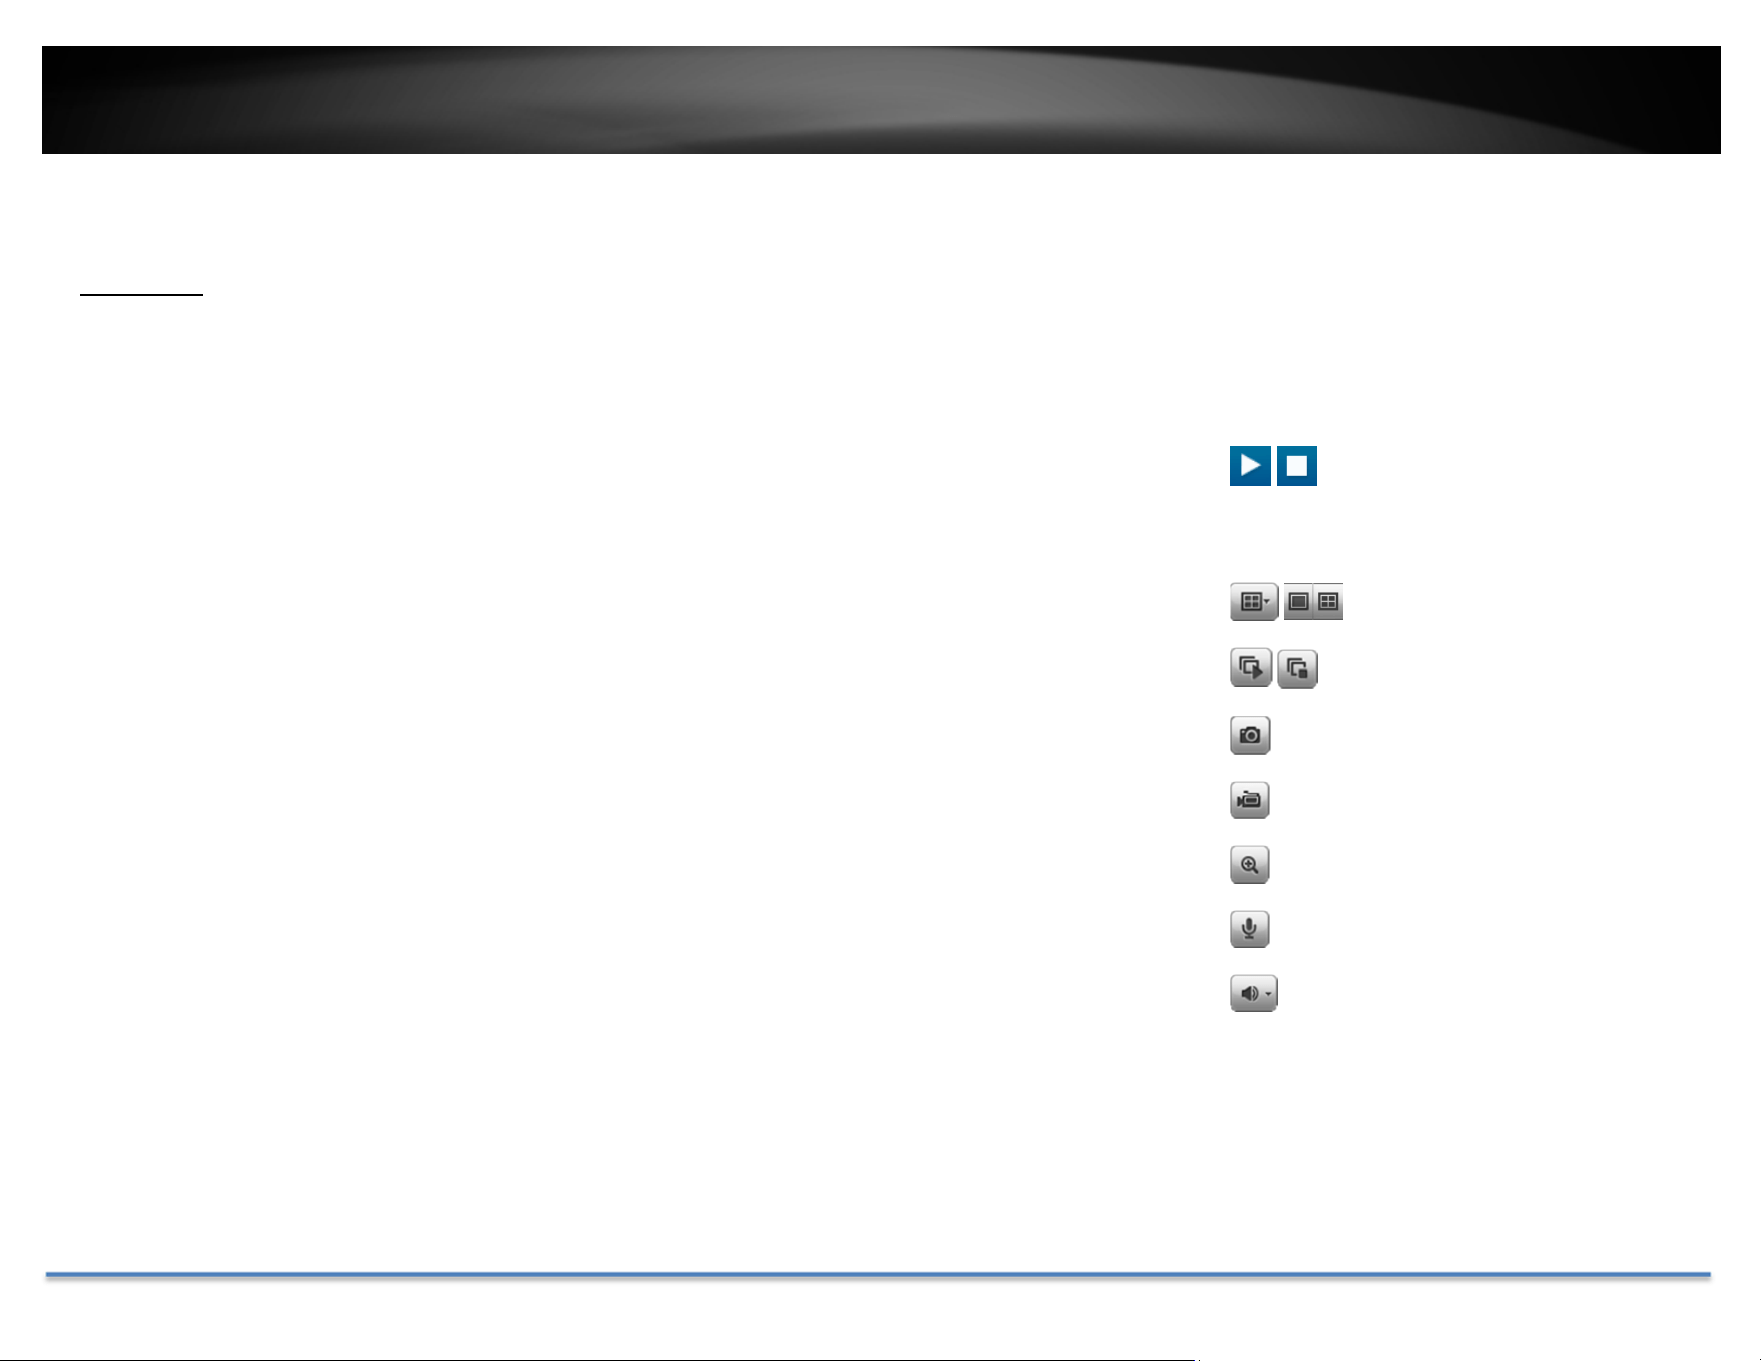
TRENDnet User’s Guide TV-DVR104K / TV-DVR208K
© Copyright 2017 TRENDnet. All Rights Reserved. 63
BasicSettings
LiveView
Afteryoulog‐inintothecameramanagementpage,you’llseetheLiveViewpage.
Start/StopStreaming
VideoStream
DisplayMode
Start/StopAllStreams
Snapshot
Start/StopRecording
Zoom
Microphone
Speaker
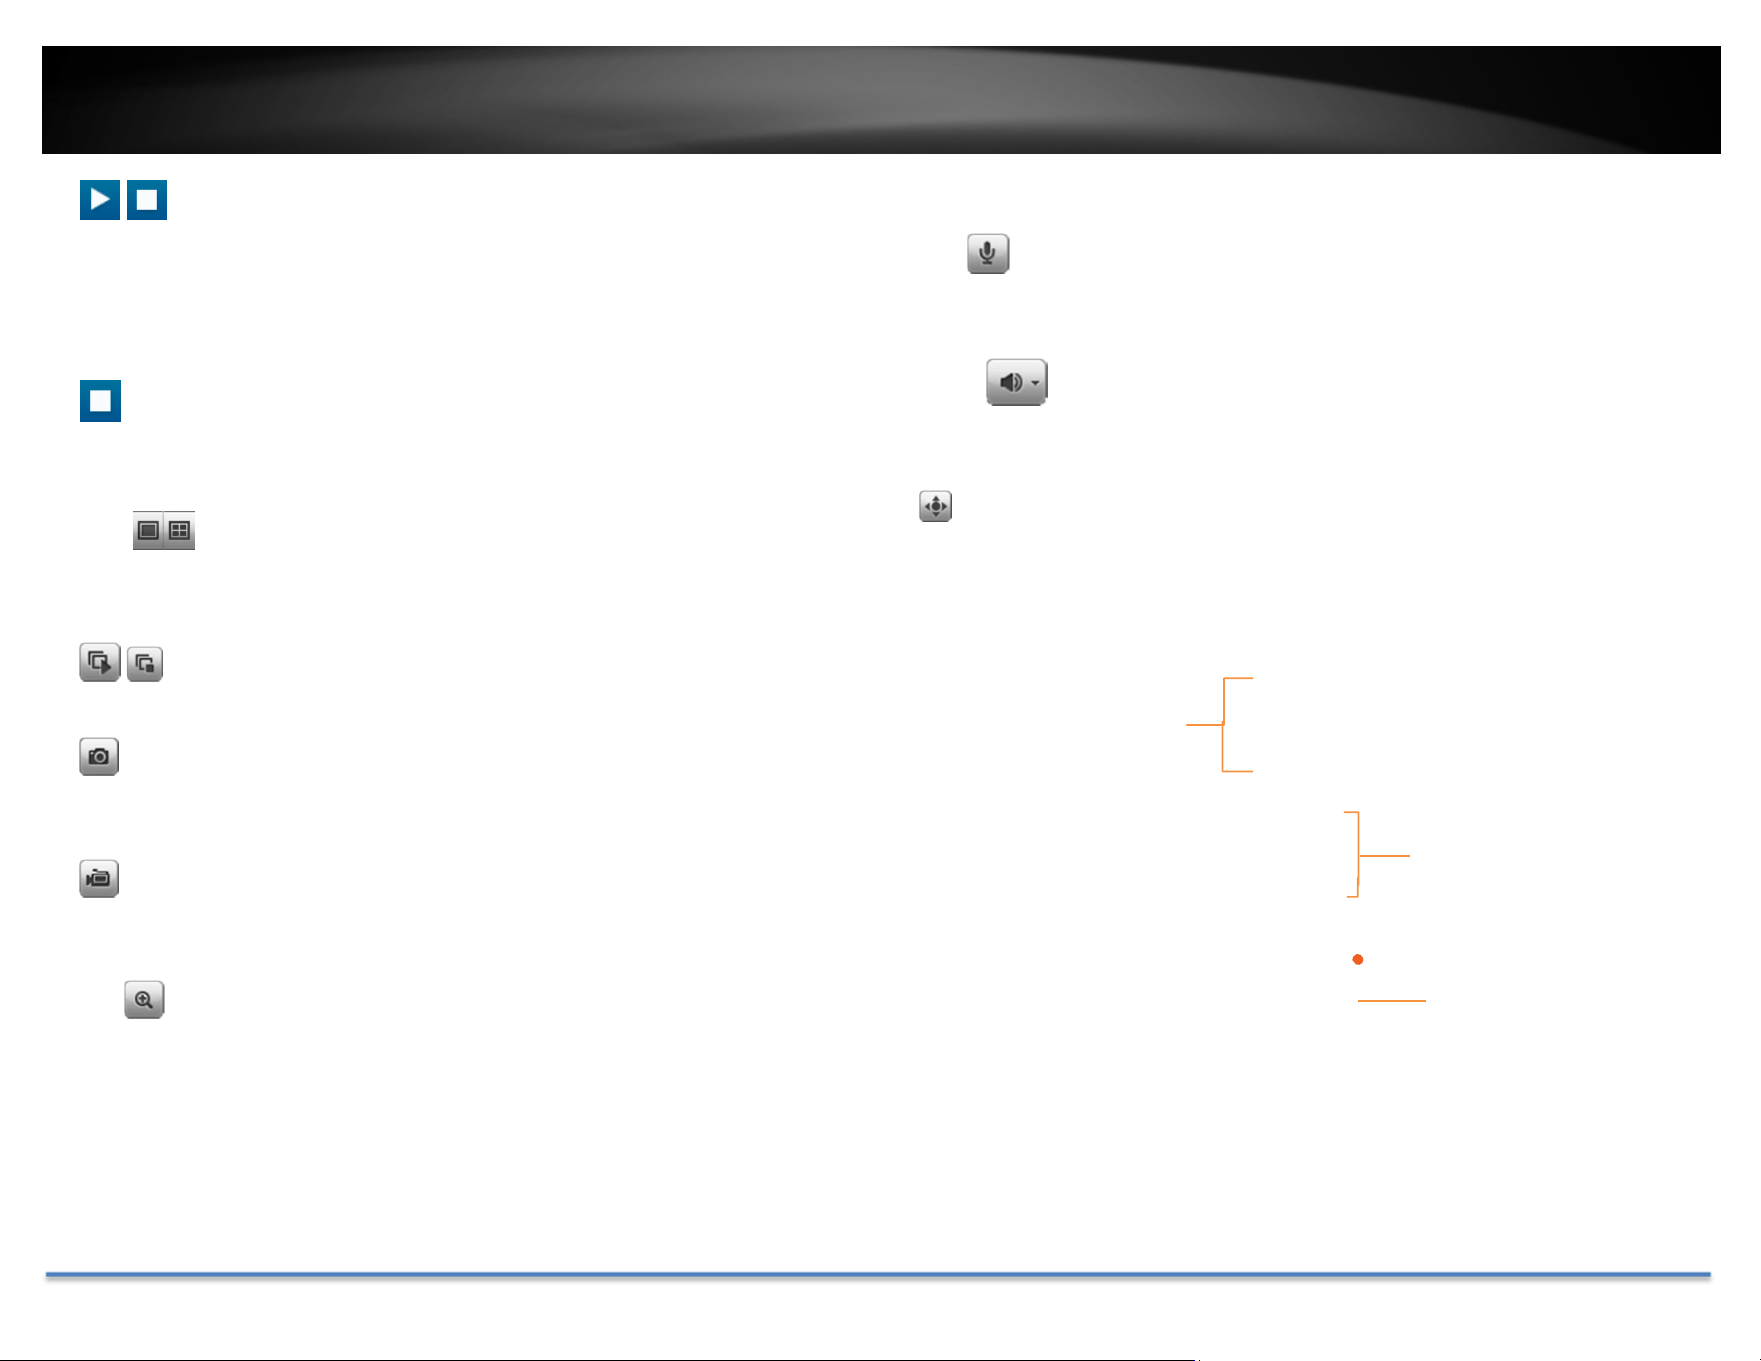
TRENDnet User’s Guide TV-DVR104K / TV-DVR208K
© Copyright 2017 TRENDnet. All Rights Reserved. 64
Start/StopStreaming
Clickthisbuttontostartorstopstreaming.Selectthedisplaycellbyclick on
it,(Theyellowframewillwraparoundtheselecteddisplaycell.)thenclickon
theiconofthestreamyouwant.Ifthechannelhasbeenselectedbyothers,
stopthatstreamingbeforeyouchange.
VideoStream
Clickthisbuttontochoosethevideostreambetweenmainstreamandsub
stream.1:mainstream;2:substream.
DisplayMode
Clickthisbuttontoselectthedisplaymodetodisplayasingle videoonthe
screenordisplayfourvideosonthescreenatthesametime.
Start/StopAllStreams
Clickthisbuttontostartorstopallvideostreams.
Snapshot
Selectthevideoyouwanttotakeasnapshotandthenclickthisicontotakeavideo
snapshot.
Start/StopRecording
Selectthevideoyouwanttorecordandthenclickthisicontostartorstopvideo
recording.
Zoom
Selectsinglevideodisplayandthenclick oncetoenablezoom.Whenenabled,click
anddragtheareaonthepicturetozoomin.Rightclicktoresume100%zoom.Click
theiconagaintodisablezoom.Thezoomfunctionworks
infullscreenmodeas
well.
Microphone
Selectthevideochannelandthenclickonthisbuttontostart/stoptalkingthrough
thecamera.
Speaker
Selectthevideochannelandthenclickonthisbuttontostart/stoplisteningfromthe
camera.Usetheslidebelowtoadjustthevolume.
PTZControl
Click this button to bring up the PTZ user interface.
(not supported with the
includedcameras)
WherecanIfindsavedfiles?
VideosandsnapshotscapturedfromLiveViewwillbesavedtoyourcomputer.
Panandtilt
controls
Zoom
Focus
Aperture(Iris)
Presets
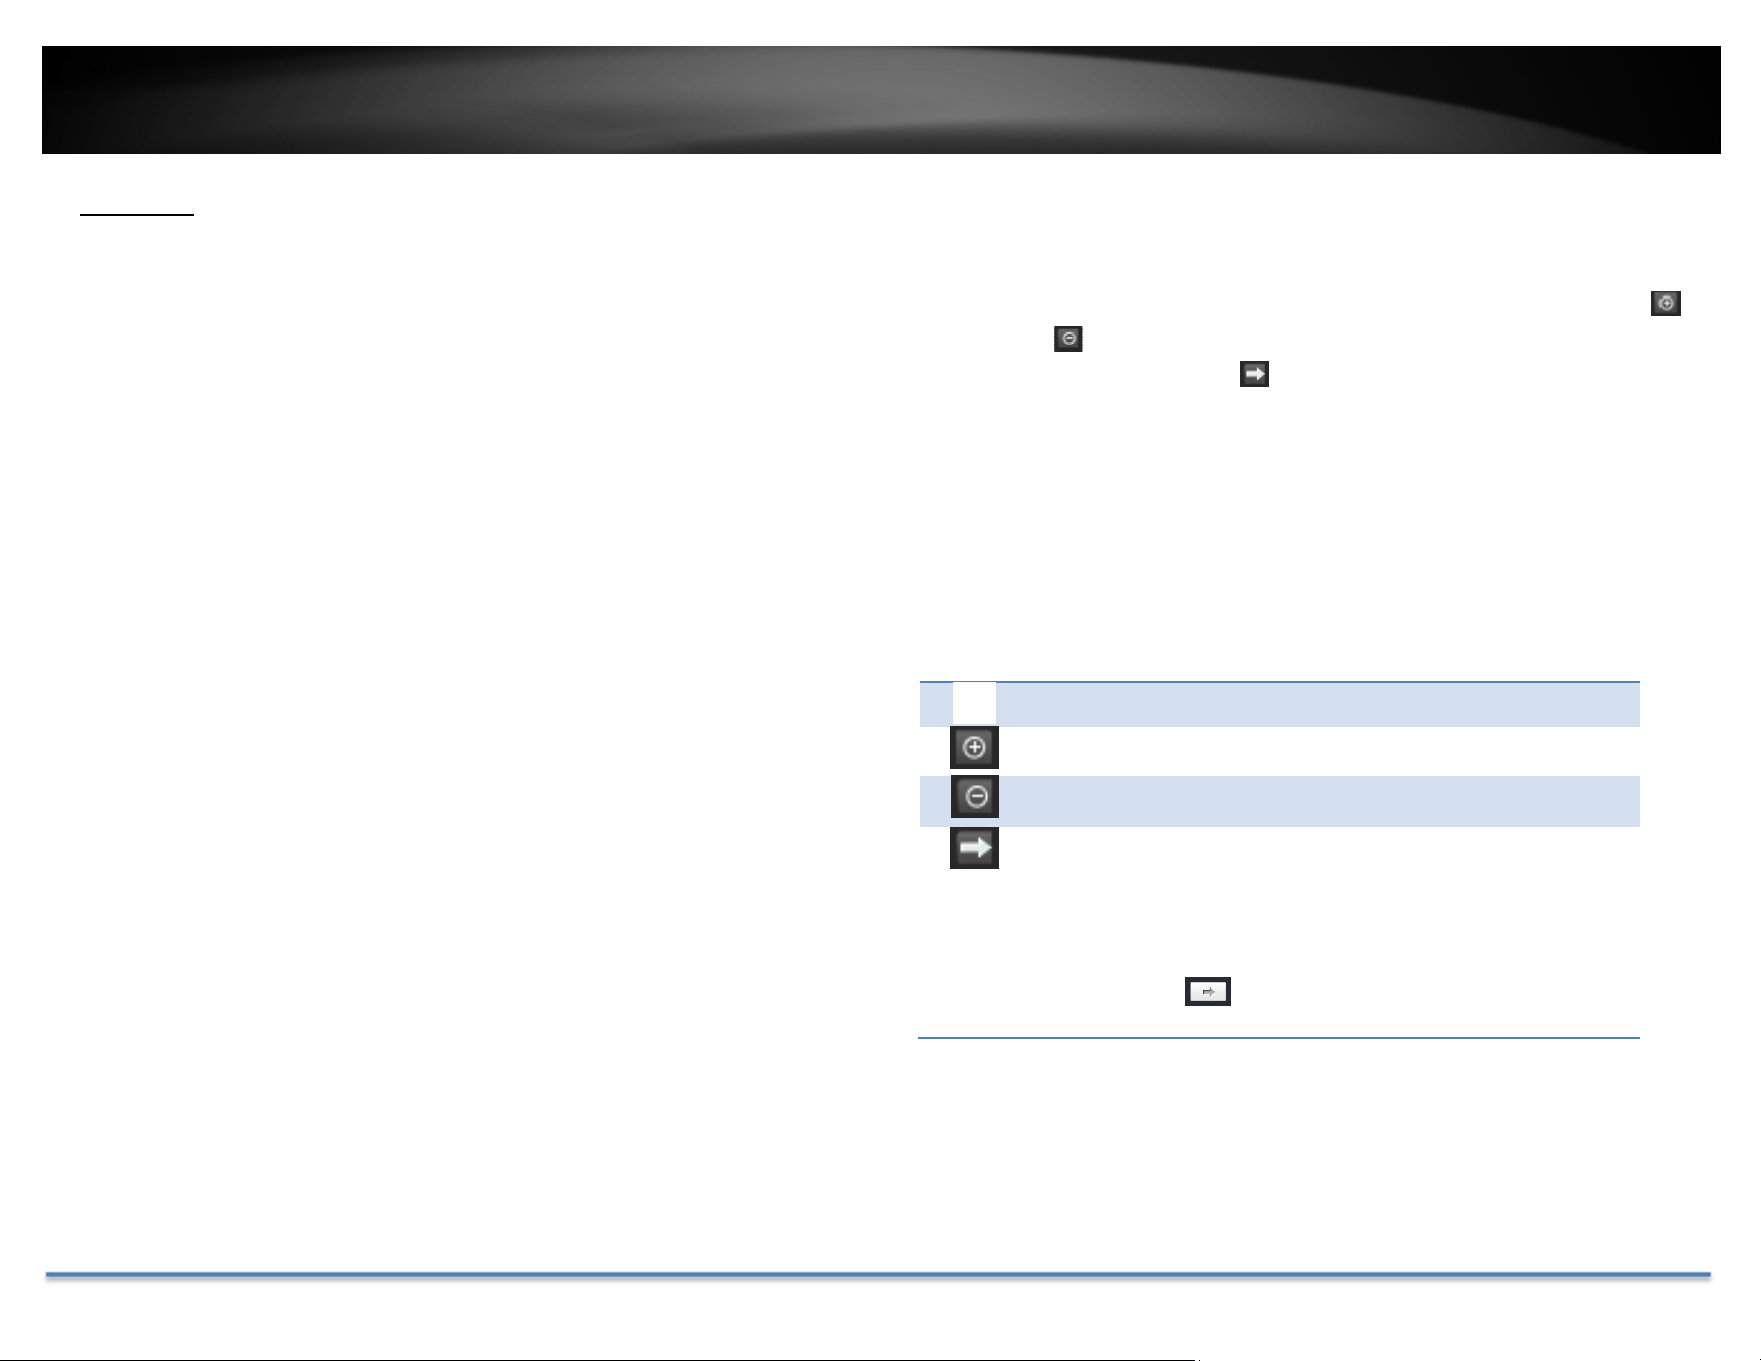
TRENDnet User’s Guide TV-DVR104K / TV-DVR208K
© Copyright 2017 TRENDnet. All Rights Reserved. 65
Playback
Youcanplaybackthevideorecordingoneatatimeatthispage.Youcanalso
downloadthevideoclipand snapshots toyourlocalcomputer.Selectthe
videochannelonthelefthandsideandthensearchforthevideo.
Searchforvideorecordings
Clickthedateselection,andthenchooseadateasthedaterangeofsearching.
ClickSearchtostartsearching.
TimeLine
Thereisaplaybackheadinthecenterofthetimelinerepresentedinayellow
verticalline.Tolookforaspecificvideorecording,movethetimelineby
clickinganddraggingit. If the recording is short, zoom in by clicking
button.Click
tozoom outtheti
mescale.Ifyouknowtheexacttimeof
thedayyouarelookingfor,click
thenenterthetimeyouwanttoplayback.
Different types of recordings are identified differently. The scheduled
recordings are marked in blue, and the recordings triggered by motion
detectionaremarkedinred.
Clickanddragthetimelinetomoveyourtimemanually.
Clickthisbuttontozoominthescale
Clickthisbuttontozoomoutofthescale
Clickthisbuttontospecifyaspecifictimeoftheday.
andthenclicktoconfirmselectionandthenclickXto
closethisdialogbox.
TRENDnet User’s Guide TV-DVR104K / TV-DVR208K
© Copyright 2017 TRENDnet. All Rights Reserved. 66
Playvideo
Useplaybackcontrolstoplaybackthevideorecording.
Clickthisbuttontoplaythevideo.
Clickthisbuttontopausevideoplayback.
Clickthisbuttontostopplayback.
Clickthisbuttonincreaseplaybackspeed*.
Clickthisbuttondecreaseplaybackspeed*.
Clicktoplaybackvideoframebyframe.Clickagainfor
thenext
fr
ame
�
*Note:Thereare5stepsofplaybackspeedyoucanchoosefrom:1/4,1/2,1,2,and
4timesoforiginalspeed.
Sliceimagesfromvideoplayback
Youcantakesnapshotsfromplaybackvideoormakenewvideoclipsfrom
thevideoyouareplayingback.
Clickthisbuttontostopvideoplaybackstreams.
Clickthisbuttontotakeasnapshotofcurrentplayback.
Clickthisbuttontostartclippingavideofromplayback.
Clickthisbuttonoranywhereonthetimelinetostop
clippingavideofromplayback.
Clickthisbuttontodownloadthefiles.
Clickthisbuttontoenableordisabletheaudioplayback.
Clickthisbuttonforfullscreenplayback.

TRENDnet User’s Guide TV-DVR104K / TV-DVR208K
© Copyright 2017 TRENDnet. All Rights Reserved. 67
Downloadrecordedvideos
Tosavecompletevideosections,youcandownloadthefilesdirectly.
Clickbuttontodownloadfiles.
Checkthetimeoftherecording,selectthevideosyouwanttodownload,and
thenclickDownload.
WherecanIfindsavedfiles?
VideosandsnapshotscapturedfromPlaybackwillbesavedtoyourcomputer.
See
LiveViewSettingsonpage72fordetails.
Log
ThelogoftheTV‐DVR104issavingontheharddiskdrive.Youcansearchthe
relevantrecordsandsavetoyourlocalcomputer.

TRENDnet User’s Guide TV-DVR104K / TV-DVR208K
© Copyright 2017 TRENDnet. All Rights Reserved. 68
Searchforlogs
ClickthetypeoflogandthentheStartTimeandEndTime.ClickSearchto
startsearching.
ClickFirstPage,PrevPage,NextPage,andLastPagetoshowthelogs.Click
SaveLogtosavethelogstoyourcomputer.
WherecanIfindsavedfiles?
VideosandsnapshotscapturedfromPlaybackwillbesavedtoyourcomputer.
See
LiveViewSettingsonpage72fordetails.
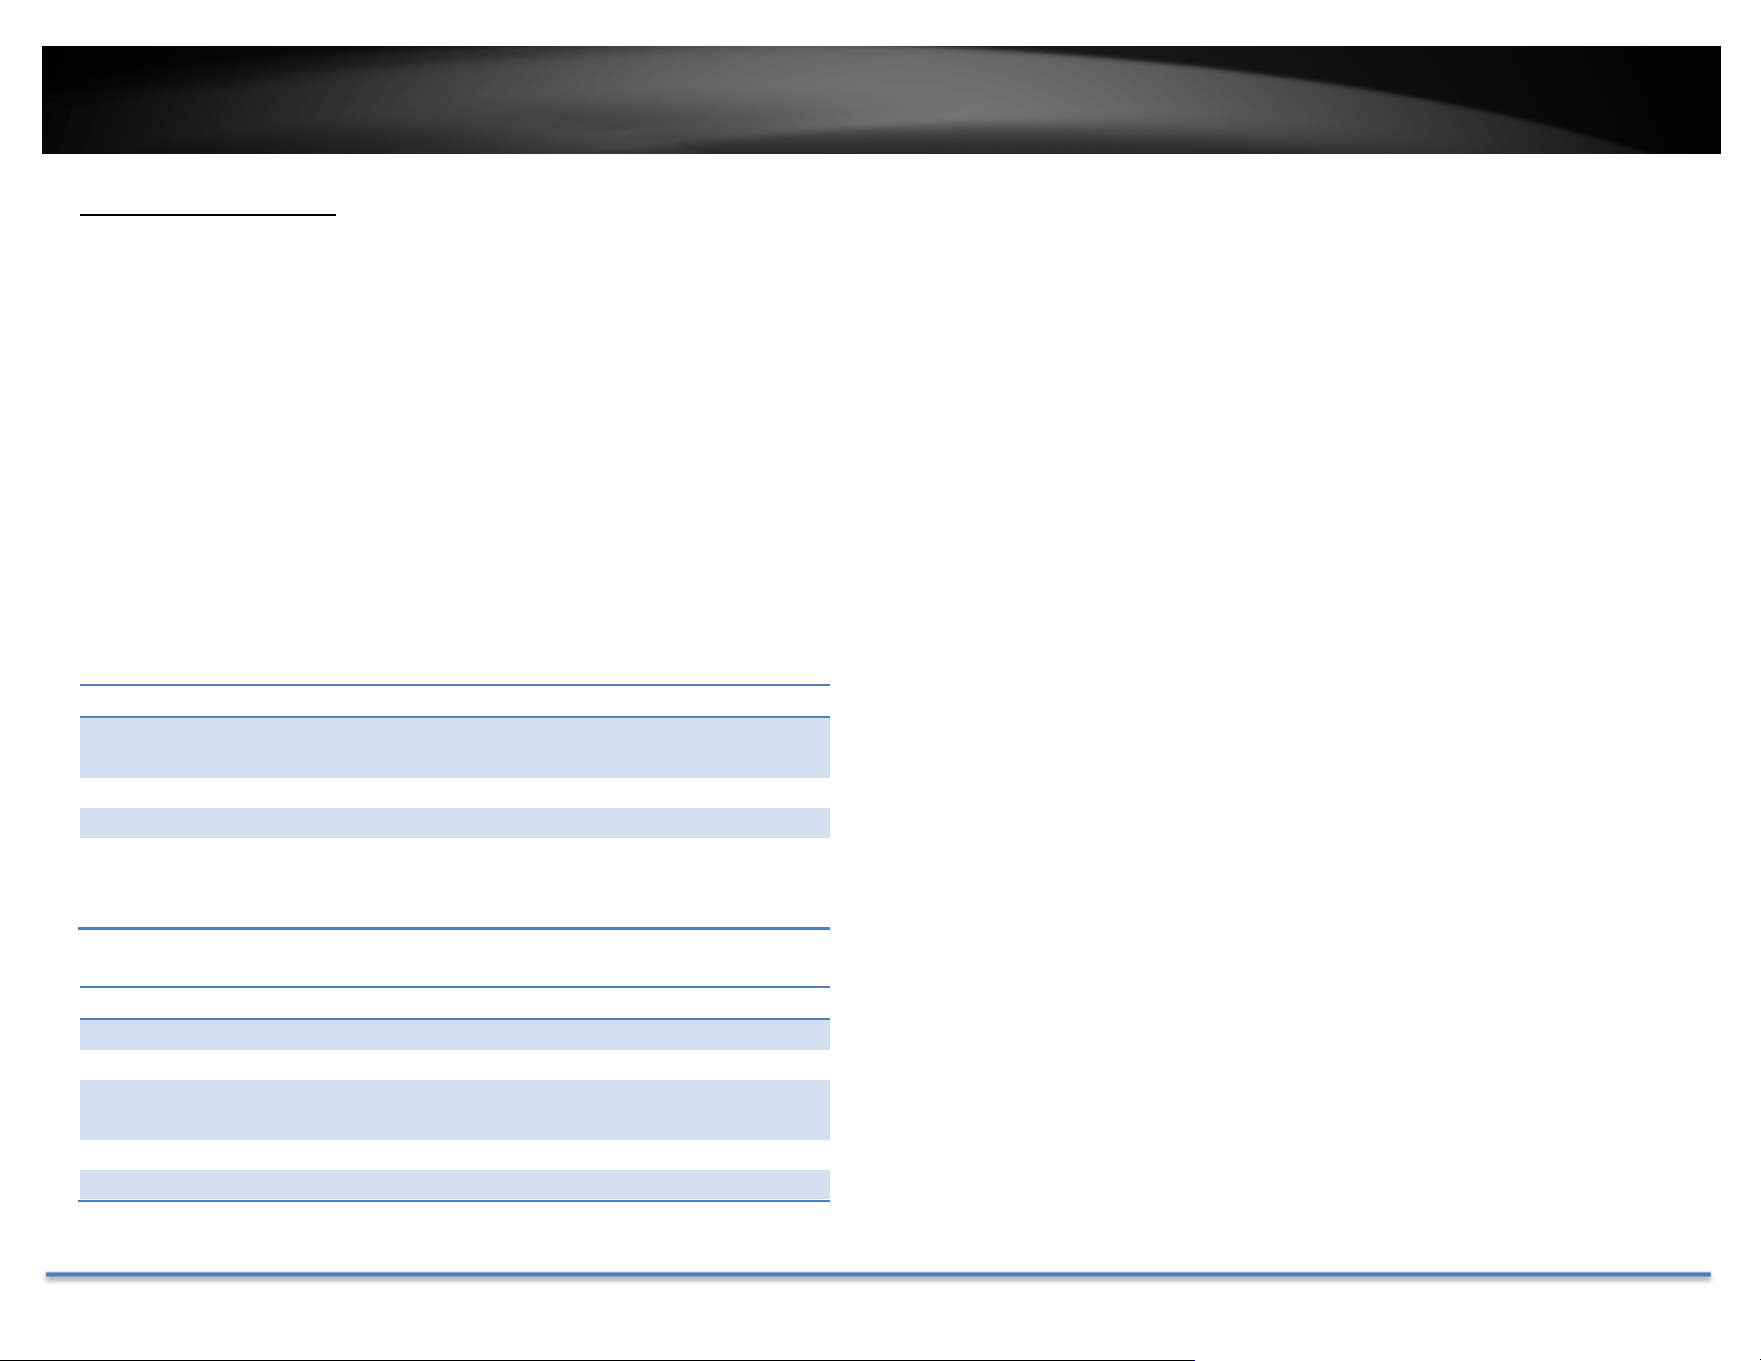
TRENDnet User’s Guide TV-DVR104K / TV-DVR208K
© Copyright 2017 TRENDnet. All Rights Reserved. 69
SystemInformation
System Information page shows the TV‐DVR104’s basic information. Click
SystemthenclickSystemInfotoshowthepage.
BasicInformation
DeviceName: Humanreadabledevicenameforeasy
identification.
FirmwareVersion: Firmwareversion
MACAddress: TheMACaddressofEthernetInterface
SystemTime: Thesystemtimesetupinthecamera.Keepingthis
timecorrectisimportantforrecording,scheduled
controlandloggingaccurately.
NetworkInformation
IPAddress: IPaddressoftheTV‐DVR104
SubnetMask: NetworkrangeofIPaddress
DefaultGateway: ThedefaultroutegoingfromtheTV‐DVR104
subnet.
PrimaryDNS: PrimaryDNSserveraddress
SecondaryDNS: SecondaryDNSserveraddress

TRENDnet User’s Guide TV-DVR104K / TV-DVR208K
© Copyright 2017 TRENDnet. All Rights Reserved. 70
AdvancedSettings
System
DeviceSettings
Setupyoursystemnameforeasyidentification.Thisdevicenamewillalsobe
recognizedbyothernetworkcamerasoftwareasthenameofthiscamera.
OSD,OnScreenDisplay,cameranameisreferringtothissettingaswell.
EnterthecustomizeddevicenameandtheclickonSavetosavethe
settings.
UserAccounts
Youcansetupupto16useraccountstoaccesstheDVR’svideostreamwith
a web browser or real time video stream (RTSP). Only one administrator
accountcanbesetuptoconfiguretheDVRandcannotbedeleted.
UserAccounts
Add: ClickAddbuttontoaddoneuseraccount
Modify: Tochangeauser’snameandpassword,highlighttheuserby
clickingonit.Then,clickModifybutton.Youcanchangethe
user’snameandpassword.Youcanalsochangethe
administrator’spasswordhere.But,theadministrator’sname
isfixed,youcannotchangethat.
ClickOKtosavethechanges.

TRENDnet User’s Guide TV-DVR104K / TV-DVR208K
© Copyright 2017 TRENDnet. All Rights Reserved. 71
TimeSettings
Theaccuracyofthesystemclockisimportantforschedulingandaccurate
logging. You can synchronize the system time with your computer, or
automatically check the time accuracy with a network time server (NTP
server).
AutomaticUpdate
NTP
Server:
Specifyatimeserver(NTPserver)tosynchronizewith.
(e.g.pool.ntp.org)
Interval: ThetimeintervalthattheDVRwillsynchronizethetimewith
NTPserver.Default:1440minutes(24hours)
ClickSavetosavethechanges
ManualTimeSync
DeviceTime: Thesystemtimeofthiscamera.
SetTime: Click the calendar icon and manually select the date.
Check the Sync. with computer time to copy the time
fromyourcomputer.
ClickSavetosavethechanges

TRENDnet User’s Guide TV-DVR104K / TV-DVR208K
© Copyright 2017 TRENDnet. All Rights Reserved. 72
DaylightSavings
Setupdaylightsavings.
AutomaticUpdate
EnableDST: Checkthisboxifyourtimezonehasdaylightsavings.
StartTime: Enterthedatethatdaylightsavingsstarts
EndTime: Enterthedatethatdaylightsavingsends
DSTBias Enter how much time the daylight s aving adjusted by
daylightsavings.
ClickSavetosavethechanges
LiveViewSettings
Setuptheliveviewvideoquality,filesizeandfilesavingdirectories.
LiveViewParameters
LiveView
Buffer:
Configurethebuffersizeforliveviewvideostream.With
low buffer size setting, you can get real‐time video
stream,butthevideomaybestopandgoifthenetwork
is congested. With high buffer setting, you can have
smoothvideostreaming, butthevideoisdelayedfrom
the time happening. Medium size can have moderate
videostreamsmoothnessandtimedelay.

TRENDnet User’s Guide TV-DVR104K / TV-DVR208K
© Copyright 2017 TRENDnet. All Rights Reserved. 73
RecordFileSettings
Recordfilesize: Thissizeofliveviewvideorecording.Youcanchoose
256MB,512MB,or1GBafile.Smallerfilesizeisgood
formanyshortrecordings.
Saverecord
filesto:
By default, files will be saved under the folder with
your user name, under the subdirectory
TRENDnet/RecordFiles.ClickBrowseandthenchoose
a new destination if you want to save the file
somewhereelse.
Save
downloaded
filesto:
By default, files will be saved under the folder with
your user name, under the subdirectory
TRENDnet/DownloadFiles. Click Browse and then
chooseanewdestinationifyouwanttosavethe file
somewhereelse.
PictureandClipSettings
Savesnapshots
in
liveviewto:
By default, files will be saved under the folder with
your user name, under the subdirectory
TRENDnet/SnapshotFiles. Click Browse and then
chooseanewdestinationifyouwanttosavethe file
somewhereelse.
Savesnapshots
whenplayback
to:
By default, files will be saved under the folder with
your user name, under the subdirectory
TRENDnet/PlaybackPics. Click Browse and then
chooseanewdestinationifyouwanttosavethe file
somewhereelse.
Saveclipsto: By default, files will be saved under the folder with
your user name, under the subdirectory
TRENDnet/PlaybackFiles. Click Browse and then
chooseanewdestinationifyouwanttosavethe file
somewhereelse.
ClickSavetosavethechanges
Maintenance
Youcanrestart,loadcamerasettingsandupgradethecamerafir mwareon
thispage.
Reboot
Reboot: Clickthisbuttontorebootthiscamera.
Reset
Reset: ResetallDVRsettings,excepttheIPnetworksettingsand
userinformation.
Default: Loadcompletefactorydefaulttothecamera.

TRENDnet User’s Guide TV-DVR104K / TV-DVR208K
© Copyright 2017 TRENDnet. All Rights Reserved. 74
ImportConfig.File
ConfigFile: Toloadpreviouslysavedsettings,clickBrowsetofindthe
configurationfileandthenclickImport.
Status: Showsthestatusinloadingconfigurationfile.
ExportConfig.File
Export: ClickExporttodownloadconfigurationfile.Thefilewill
bedownloadedtotheDownloadfolderbydefault.
RemoteUpgrade
Firmware: Click Browseto find the latest firmware and then click
Upgrade.
Status: Showsthestatusinfirmwareupgrade.
TRENDnet may periodically release firmware upgrades that might add
featuresorfixproblemsassociatedwithyourTRENDnetmodelandversion.
Tofindoutifthereisafirmwareupgradeavailableforyourdevice,please
checkyourTRENDnetmodelandversionusingthelink.
http://www.trendnet.com/downloads/
1. Ifafirmwareupgradeisavailable,downloadthefirmwaretoyour
computer.
2. Unzipthefiletoafolderonyourcomputer.
3. Readthefir mwareupgradeinstructionforspecificversionupdate
information.
4. LogintotheDVR.
5. GettingtothisMaintenancepagetoupgradefirmware.
NetworkSettings
TCP/IP
SetupyourbasicIPv4networksettingsonthispage.
TRENDnet User’s Guide TV-DVR104K / TV-DVR208K
© Copyright 2017 TRENDnet. All Rights Reserved. 75
NetworkInterface
Duplexand
Speed:
Choose one of the Ethernet duplex and speed to
matchyournetwork.Default:auto.
MACAddress: Clickthisbuttontorebootthiscamera.
MTU: Maximumtransmissionunit.Themaximumfieldsize
intheEthernetpacket.
PrimaryDNS: EnteryourfirstIPv4orIPv6DNSserveraddress
SecondaryDNS: EnteryoursecondIPv4orIPv6DNSserveraddress
IPv4
DHCP: CheckthisboxiftheIPaddressisassignedbyDHCP
server.
IPv4Address: TheIPv4dynamicorstaticaddress
SubnetMask: Networkrangeofthesubnet
DefaultGateway: ThedefaultroutegoingfurtherfromTV‐AC100IPv4
subnet
IPv6
IPv6Address: IPv6self‐assignedaddressofTV‐DVR104
IPv6Default
Gateway:
ThedefaultroutegoingfurtherfromTV‐DVR104IPv6
subnet
Port
YoucanchangetheserviceportnumbersofTV‐DVR104andenable/disable
RTSPorHTTPservices.
PortNumbers
HTTPPort: Thedefaultwebaccessport.Youcanchangetheport
number. However, you cannot disable the web
service.Thedefaultportnumberis80.
RTSPPort: The Real‐Time Streaming Protocol port for video
streaming. You can change the port number or
disabletheservicebyuncheckthebox.Thedefault
portnumberis554.
HTTPSPort: Youcanusehttpssecuredloginwiththedefaultport
numberof443oryoucanchangetoanotherdesire
port.
ClickSavetosavethechanges
TRENDnet User’s Guide TV-DVR104K / TV-DVR208K
© Copyright 2017 TRENDnet. All Rights Reserved. 76
DDNS
DynamicDomainNameService,DDNS,allows youtofindyourcamerafrom
theInternetwithaneasytorememberdomainname.
DDNS
EnableDDNS: CheckthisboxtoenableDDNSService.
DDNSType: SelectaDDNSserviceprovider.
ServerAddress: EntertheDDNSserveraddress.
Domain: Enteryourregistereddomain/hostnameonselected
DDNSservice.
UserName: Entertheaccountname.
Password: Enterthepassword.
Confirm: Enterthepasswordagain.
ClickSavetosavethechanges
VideoSettings
VideoFormat
Adjustthesettingsofvideostreams.
Channel: Selectwhichvideostreamforvideoformat
changes.
StreamType: Choosethemainstreamorsubstreamofthevideo
channeltochangeitsvideoformats.
VideoEncoding: H.264istheusedfortheDVR.

TRENDnet User’s Guide TV-DVR104K / TV-DVR208K
© Copyright 2017 TRENDnet. All Rights Reserved. 77
Resolution: Resolutionofthevideostream.
BitrateType: Choosebetweenvariablebitrateandconstantbit
rateforvideocompression.Thedefaultisvariable
rate.
VideoQuality: Choosethevideoquality.Thedefaultismedium
quality.
FrameRate: Choosethecapturingframerate.Reducetheframe
ratetoreducethecapturefilesize.
Max.Bitrate: Choosethemaximumvideosamplingbitrate.
ClickSavetosavethechanges
OnScreenDisplay(OSD)Settings
Displaythecameranameandthetimethevideo.Selectthevideochannel
youwanttochangethesetting,thenchangethesettings.Movetheredbox
topositionthetext.ClickonSavetosavethechanges.
Channel: Selectthevideochannelyouwanttoedit.
DisplayName: Check this boxto display the product name that
wassetupinthedevicesettings.
DisplayDate: Checkthisboxtodisplaysystemtime.
DisplayWeek: Checkthisboxtodisplaytimeoftheweek.
TimeFormat: Select12or24‐hourtimeformat.
DateFormat: Selectthedateformat
DisplayMode: Choosehowthetextwillshowonthescreen.

TRENDnet User’s Guide TV-DVR104K / TV-DVR208K
© Copyright 2017 TRENDnet. All Rights Reserved. 78
TextOverlay
Displayextrainformationonthescreenovertheimage.Movetheredboxto
positionthetext.ClickonSavetosavethechanges.
Channel: Selectthevideochannelyouwanttoedit.
CheckBox: Checkthisboxtoenabletextoverlay.
TextField: Enterthetextyouwanttodisplay.Thelengthofthe
textisdecidedbylimitationofthecamera.
PrivacyMask
Create a masking area to keep your privacy. You can create up to four
independentmaskingareasbyclickinganddraggingonthescreen.
Channel: Selectthevideochannelyouwanttoedit.
EnablePrivacyMask: Checkthisboxtoenableprivacymasking.
StopDrawing: Clickthisbuttontostopdrawing.
ClearAll: Clickthisbuttontoclearallthemaskingareas.
ClickSavetosavethechanges

TRENDnet User’s Guide TV-DVR104K / TV-DVR208K
© Copyright 2017 TRENDnet. All Rights Reserved. 79
RecordingSchedule
Edit: ClickDaytoedittherecordingscheduleandtypes
1. Selectdayoftheweekyouwanttoedit.
2. SelectRecordingtype
3. Setthetimeperiodandtheeventyou
wanttotriggerthevideorecording
continuous(alwaysrecording)ormotion
detection.
4. ClickSelectAllortheweekdayyouwant
tohavethesamescheduleondifferent
day.
5. Clickanotherdayoftheweekbyclicking
onitstabtosetthenextschedule.Click
OKwhenyouhavefinishedyoursettings.
HolidaySettings
Recordingvideoinholidaysmayhasdifferentrequirements.Youcansetup
to11holidaysofayearsharingthesameholidayprofile.
Setuptheholidayschedulebyclickonbutton.

TRENDnet User’s Guide TV-DVR104K / TV-DVR208K
© Copyright 2017 TRENDnet. All Rights Reserved. 80
EditHolidaySchedule
HolidayName: Changetheholidaynametomeaningfulname
insteadofindexnumbers.
Enable: Enableordisablethisholidayrule.
Type: Selecttheholidayisforaday,aweekoramonth.
Daymode:Selectthestartandenddatestospecify
theperiodofholidays.Thissettingisgoodforone
timeonly.Itdoesnotrepeatperiodically.
Weekmode:Selectthestartandenddatesofthe
weektospecifytheperiodofholidays.Thissetting
isrepeatingeveryyear.
Monthmode:Selectthestartandenddatesto
specifytheperiodofholidays.Thissettingis
repeatingeveryyear.
StartDate: Selectthedaywhentheholidaystarts.
EndDate: Selectthedaywhentheholidayends.
ClickOKtosavethechanges
Events
MotionDetection
Setuphowthemotiondetectioneventwillbetriggeredandwhatactionswill
betriggered.
Note:Thisfeatureiscameradependent.
Channel: Selectthevideochannelyouwanttoedit.
Enable
Motion
Detection:
Check this box to enable motion detection. Click
Savetosavethechoice.
DrawArea: ClickDraw Areabuttontostartdrawing.Clickand
drag on the area you want to set up the motion

TRENDnet User’s Guide TV-DVR104K / TV-DVR208K
© Copyright 2017 TRENDnet. All Rights Reserved. 81
detection. The number of areas you can set up
dependsoncamera models.ClickStop Drawingto
stopdrawingmotiondetectionareas.Theredgrids
representthemotiondetectionarea.
Sensitivity: Movetheslidertoadjustdetectionsensitivity.
ClearAll: Clickthisbuttontoclearallthesetupareas.
ArmingSchedule
Edit: ClickDay/Timetoeditthearmingschedule.
3. ClickSavewhenfinish.
LinkageMethod
Youcansendalertswheneventtriggerbysound,emailorjumptofullscreen
monitoringbyselectingtheoptionsabove.
Note:Alarmisnotsupportedforthismodel.
ClickSavetosavethechanges

TRENDnet User’s Guide TV-DVR104K / TV-DVR208K
© Copyright 2017 TRENDnet. All Rights Reserved. 82
VideoTampering
Setuphowthevideotamperingdetectioneventwillbetriggeredandwhat
actions will be triggered. When video is suddenly blocked or blacken,
tampered,thevideotampernotificationswillalertthesystemmanagerto
checkthecamera.
Channel: Selectthevideochannelyouwanttoedit.
Enable
Tamper
Detection:
Checkthisboxtoenabletamperdetection.ClickSave
tosavethesettings.
DrawArea: ClickDrawAreabuttontostartdrawing.Clickanddrag
ontheareayouwanttosetupthetamperdetection.
ClickStopDrawingtostopdrawingmotiondetection
areas.Thegrayblockrepresentsthedetectionarea.
Sensitivity: Movetheslidertoadjustdetectionsensitivity.
ClearAll: Clickthisbuttontoclearallthesetupareas.
ArmingSchedule
Edit: ClickDay/Timetoeditthearmingschedule.
ClickSavetosavethechanges

TRENDnet User’s Guide TV-DVR104K / TV-DVR208K
© Copyright 2017 TRENDnet. All Rights Reserved. 83
Exception
Providenotificationsforothersystemevents,setupyournotificationshere.
Notification
ExceptionType: First,choosetheexceptiontype,andthenchoose
thecorrespondingaction.
Audible
Warning:
Activatetheaudibleonboardbuzzer.
SendEmail: Checkthisboxtosendan e‐mailnotificationwhen
motionisdetected.
ClickSavetosavethechanges
Email
Setupemailaccountsfornotifications.
Sender
Sender: Enterthenametobeappearedastheemailsender.
Sender’s
Address:
Entersender’semailaddress.
SMTPServer: SimpleMailTransportationProtocolServeraddress,
the outgoing email server address. It may be has
addressasyourincomingemailserver,maybenot.
Pleaseaskyouremailserviceproviderfordetail.
SMTPPort: Serviceportnumberforoutgoingemail.*
Authentication: Checkthisboxifyourserverrequiresapasswordin
order to send email. Most email servers require
authenticationwhensendinganemail.

TRENDnet User’s Guide TV-DVR104K / TV-DVR208K
© Copyright 2017 TRENDnet. All Rights Reserved. 84
Username: Entertheusernameofoutgoingemailaccount
Password: Enterthepassword
Confirm: Enter the password again to confirm that the
passwordwasenteredcorrectly.
ClickSavetosavethechanges
Receiver
Receiver1: Thefirstreceiver’sname.
Receiver1’s
Address:
Thefirstreceiver’semailaddress.
Receiver2: Thesecondreceiver’sname.
Receiver2’s
Address:
Thesecondreceiver’semailaddress.
Receiver3: Thethirdreceiver’sname.
Receiver3’s
Address:
Thethirdreceiver’semailaddress.
ClickSavetosavethechanges
*Note:ManyISPsdoesnotallowserviceport25goingthroughtheirnetwork.Please
consultyouremailserviceproviderandISPfordetail.DVRdoesnotsupportSSLorTLS.
Pleaseselecttherightemailserviceforthenotifications.
VideoLoss
Sendsalertwhenvideoislost.
Channel: Selectthevideochannelyouwanttoedit.
EnableVideo
Loss
Detection:
Check this box to enable video loss detection. Click
Savetosavethesettings.
ClickSavetosavethechanges

TRENDnet User’s Guide TV-DVR104K / TV-DVR208K
© Copyright 2017 TRENDnet. All Rights Reserved. 85
Storage
StorageManagement
Tosetupandinitiatetheharddriveremotely,checktheharddiskdriveand
thenclickonFormat.
Format: SelectthestoragevolumeandthenclickFormattoformat
yourharddiskdrive.Thisactionwillformatthevolumefor
video recording. Placeholder files (formatting files) will be
createdtomakesurediskallocationisappropriateandthe
filesearchingisoptimized.
Capacity: The total capacity of the hard disk can be used for video
recordingandlog.
FreeSpace: Thefreespaceleftforvideorecordingandlog.
Status: Thediskstatus.
Property: Thisnetworkstorageisreadonlyorcanbereadandwrite.
NetworkStorage
NetworkStoragemustbesetupbeforeitcanbemanaged.Youcanaddupto
8networkstoragesforyourDVR.Therecordingswillsubsequentlybestored
inthesespaces.Savevideofromthefirststorageandthenthenextwhenthe
firstoneisfull.Clickontheentrytochan
gethesettingsandclickSavetosave
thesettings.
Server
Address:
EntertheIPaddressofyournetworkstorage.
FilePath: Enterthesharedfolderasfilepathfornetworkstorage.You
cancreateafolderunderthesharedfolderandmakeita
networkvolumehere.Justcreatethefolderandenterthe
correctpathnamehere.
Type: ChoosebetweenNASorIPSANforstorageType.
Delete: Clickthedeletextoremovethestoragesettings.

TRENDnet User’s Guide TV-DVR104K / TV-DVR208K
© Copyright 2017 TRENDnet. All Rights Reserved. 86
Regulations
FederalCommunicationCommissionInterference Statement
Thisequipmenthasbeentestedandfoundtocomplywiththelimitsfora
ClassBdigital device,pursuanttoPart15oftheFCCRules.Theselimitsare
designedtoprovidereasonableprotectionagainstharmfulinterferenceina
residentialinstallation.Thisequipmentgeneratesusesandcanradiateradio
frequency energy and, if not ins
talled and used in accordance with the
instructions, may cause harmful interference to radio communications.
However,thereisnoguaranteethatinterferencewillnotoccurinaparticular
installation.Ifthisequipmentdoescauseharmfulinterferencetoradioor
televisionreception,whichcanbedeterminedbyturningtheeq
uipmentoff
andon,theuserisencouragedtotrytocorrecttheinterferencebyoneof
thefollowingmeasures:
• Reorientorrelocatethereceivingantenna.
• Increasetheseparationbetweentheequipmentandreceiver.
• Connecttheequipmentintoanoutletonacircuitdifferentfrom
thattowhi
chthereceiverisconnected.
• Consultthedealeroranexperiencedradio/TVtechnicianforhelp.
FCCCaution:Anychangesormodificationsnotexpresslyapprovedbythe
partyresponsibleforcompliancecouldvoidtheuser’sauthoritytooperate
thisequipment.
ThisdevicecomplieswithPart15oftheFCCRules.Operationissubjecttothe
followingtwoconditions:(1)Thisdevicemaynotca
useharmfulinterference,
and (2) this device must accept any interference received, including
interferencethatmaycauseundesiredoperation.
IMPORTANTNOTE:
FCCRadiationExposureStatement
ThisequipmentcomplieswithFCCradiationexposurelimitssetforthforan
uncontrolledenvironment.Thisequipmentshouldbeinstalledandoperated
withminimumdistance20cmbetweentheradiator&yourbody.
Thistransmittermustnotbeco‐locatedoroperatinginconjunctionwithany
otherantennaortransmitter.
The availability of some specific chan
nels and/or operational frequency
bandsarecountrydependentandarefirmwareprogrammedatthefactory
tomatchtheintendeddestination.Thefirmwaresettingisnotaccessibleby
theenduser.
TRENDnet User’s Guide TV-DVR104K / TV-DVR208K
© Copyright 2017 TRENDnet. All Rights Reserved. 87
Europe–EUDeclarationofConformity
TRENDnetherebydeclarethattheproductisincompliancewiththeessential
requirementsandotherrelevantprovisionsunderoursoleresponsibility.
Safety
EN60590‐1:2006+A11:2009+A1:2010+A12:2011+A2:2013
EMC
EN55022:2010+AC:2011ClassA
EN50130‐4:2011
ThisproductisherewithconfirmedtocomplywiththeDirectives.
Directives
LowVoltageDirective2014/35/EU
EMCDirective2014/30/EU
RoHSDirective2011/65/EU
WEEEDirective2012/19/EU
REACHRegulation(EC)No.1907/2006
Česky[Czech] TRENDnettímtoprohlašuje,žetentoTV‐DVR104K/TV‐DVR208K
jeveshoděsezákladnímipožadavkyadalšímipříslušnými
ustanovenímisměrnice2004/108/ES,2006/95/ ES a2009/125/ES.
Dansk[Danish] UndertegnedeTRENDneterkl ærerherved,atfølgendeudstyrTV‐
DVR104K/TV‐DVR208Koverholderdevæsentligekravogøvrige
relevantekravidirektiv2004/108/EF,2006/95/EFog
2009/125/EF.
Deutsch
[German]
Hiermiterklärt TR ENDnet,dasssichdasGerätTV‐DVR104K/TV‐
DVR208KinÜbereinstimmungmitdengrundlegenden
AnforderungenunddenübrigeneinschlägigenBestimmungender
Richtlinie2004/108/EG,2006/95/EGund2009/125/EGbefindet.
Eesti[Estonian] KäesolevagakinnitabTRENDnetseadmeTV‐DVR104K/TV‐
DVR208Kvastavu stdirektiivi2004/1 08 / EÜ,2006/95/EÜja
2009/125/EÜpõhinõuetelejanimetatud direktiivisttulenevatele
teisteleasjakohastelesätetele.
English Hereby,TREND net,declaresthatthisTV‐DVR104K/TV‐DVR 208K
isincompliancewiththeessentialrequirementsandother
relevantprovisionsofDirectiv e2004/108/CE2006/95/CE,and
2009/125/CE.
Español[Spanish] PormediodelapresenteTREN DnetdeclaraqueelTV‐DVR104K/
TV‐DVR208Kcumpleconlosrequisitosesencialesycualesquiera
otrasdisposicionesaplicablesoexigiblesdelaDirectiva
2004/108/CE,2006/95/CE y2009/125/CE.
Ελληνική[Greek] ΜΕΤΗΝΠΑΡΟΥΣΑTRENDnetΔΗΛΩΝΕΙΟΤΙTV‐DVR104K/TV‐
DVR208KΣΥΜΜΟΡΦΩΝΕΤΑΙΠΡΟΣΤΙΣΟΥΣΙΩΔΕΙΣΑΠΑΙΤΗΣΕΙΣΚΑΙ
ΤΙΣΛΟΙΠΕΣΣΧΕΤΙΚΕΣΔΙΑΤΑΞΕΙΣΤΗΣΟΔΗΓΙΑΣ2004/108/E K,
2006/95/EK,2009/125/ΕΚκαι.
Français[French] ParlaprésenteTRENDnetdéclarequel'appareilTV‐DVR104K/TV‐
DVR208Kestconformeauxexigencesessentiellesetauxautres
dispositionspertinentesdeladirective2004/108/CE,2006/95/CE
et2009/125/CE.
Italiano[Italian] ConlapresenteTRENDnetdichiarachequestoTV‐DVR104K/TV‐
DVR208Kèconformeairequisitiessenzialiedallealtre
disposizionipertinentistabilitedalladirettiva2004/108/CE,
2006/95/CEe2009/125/CE.
Latviski[Latvian] AršoTRENDnetdeklarē,kaTV‐DVR104K/TV ‐DVR208K
atbilstDirektīvas2004/108/EK,2006/95 /E K un2009/125/EK
būti sk ajāmprasībāmunciti emar to saistītajiemnote ikumiem.
Lietuvių
[Lithuanian]
ŠiuoTRENDn etdeklar uo ja,kadšisTV‐DVR104K/TV‐DVR 208K
atitinkaesminiusreikalavimusirkitas2004/108/EB,2006/95/EBir
2009/125/EBDirektyvosnuostatas.
TRENDnet User’s Guide TV-DVR104K / TV-DVR208K
© Copyright 2017 TRENDnet. All Rights Reserved. 88
Nederlands
[Dutch]
Hierbijverklaart TRENDnetdathettoestelTV‐DVR104K/TV ‐
DVR208Kinovereenstemmingismetdeessentiëleeisenende
andererelevantebepalingenvanrichtlij n2004/108/EG,
2006/95/EGen2009/125/EG.
Malti[Maltese] Hawnhekk,TRENDnet,jiddikjaralidanTV‐DVR104K/TV‐DVR208K
jikkonformamal‐ħtiġijietessenzjaliumaprovve dim en t i oħrajn
relevantilihemmfid‐Dirrettiva2004/108/KE,2006/95/ KEu
2009/125/KE.
Magyar
[Hungarian]
Alulírott,TRENDnetnyilatkozom,hogyaTV‐DVR104K/TV‐
DVR208Kmegfelelavonatkozó alapvetõkövetelményeknekésaz
2004/108/EK,2006/95/EK ésa2009/125/EKirányelvegyéb
elõírásainak.
Polski[Polish] NiniejszymTRENDnetoświ ad cz a,żeTV‐DVR104K/TV‐DVR208K
jestzgodnyzzasadniczymiwymogamiorazpo zo s tałymi
stosownymipostanowieniamiDyrektywy2004/108/WE,
2006/95/WEi2009/125/WE.
Português
[Portuguese]
TRENDnetdeclaraqueesteTV‐DVR104K/TV ‐DVR208Kestá
conformecomosrequisitosessenciaiseoutrasdisposiçõesda
Directiva2004/108/CE,2006/95/CEe2009/125/CE.
Slovensko
[Slovenian]
TRENDnetizjavlja,dajetaTV‐DVR104K/TV‐DVR208Kvskladuz
bistvenimizahtevamiinostalimirelevantni m i določili
direktive2004/108/ES,2006/95/ESin2009/125/ES.
Slovensky
[Slovak]
TRENDnettýmtovyhlasuje,žeTV‐DVR104K/TV‐DVR208K
spĺňazákladnépožiadavkyavšetkypríslušnéustanoveniaSmernice
2004/108/ES,2006/95/ES a2009/125/ES.
Suomi[Finnish] TRENDnetvakuuttaatätenettäTV‐DVR104K/TV‐DVR208K
tyyppinenlaiteondirektiivin2004/108/EY,2006/95/EYja
2009/125/EYoleellistenvaatimustenjasitäkoskeviendirektii vi n
muidenehtojenmukainen.
Svenska
[Swedish]
HärmedintygarTRENDnetattdennaTV‐DVR 104K/TV‐DVR208K
stårIöverensstämmelsemeddeväsentligaegenskapskravoc h
övrigarelevantabestämmelsersomframgåravdirektiv
2004/108/EG,2006/95/EGoch2009/125/EG.
RoHS
ThisproductisRoHScompliant.

TRENDnet User’s Guide TV-DVR104K / TV-DVR208K
© Copyright 2017 TRENDnet. All Rights Reserved. 89
LimitedWarranty
TRENDnetwarrantsitsproductsagainstdefectsinmaterialandworkmanship,under
normaluseandservice,forthefollowinglengthsoftimefromthedateofpurchase.
• DVR–2YearsWarranty
• Camera–2YearsWarranty
• Included1TBHardDiskDrive–Manufacturer’sWarranty
Ifaproduct doesnot ope
rate aswarrantedduringtheapplicable warrantyperiod,
TRENDnet shall reserve the right, at its expense, to repair or replacethedefective
product or part and deliver an equivalent product or par t to the customer. The
repair/replacementunit’swarrantycontinuesfromtheoriginaldateofpurchase.All
productsthatarere
placedbecomethepropertyofTRENDnet.Replacementproducts
may be new or reconditioned. TRENDnet does not issue refunds or credit. Please
contactthepoint‐ofpurchasefortheirreturnpolicies.
TRENDnetshallnotberesponsibleforanysoftware,firmware,information,ormemory
dataofcustomercontainedin,storedon,orintegr
atedwithanyproductsreturnedto
TRENDnetpursuanttoanywarranty.
Therearenouserserviceablepartsinsidetheproduct.Donotremoveorattemptto
servicetheproductbyanyunauthorizedservicecenter.Thiswarrantyisvoidedif(i)the
producthasbeen modified or repairedby any unauthorizedservicecenter,(ii)th
e
productwassubjecttoaccident,abuse,orimproperuse(iii)theproductwassubject
toconditionsmoreseverethanthosespecifiedinthemanual.
Warranty service may be obtained by contacting TRENDnet within the applicable
warrantyperiodandprovidingacopyofthedatedproofofthepurchase. Uponproper
submissionofrequireddocu
mentationaReturnMaterialAuthorization(RMA)number
willbeissued.AnRMAnumberis requiredinordertoinitiatewarrantyservicesupport
forallTRENDnetproducts.ProductsthataresenttoTRENDnetforRMAservicemust
havetheRMAnumbermarkedontheoutsideofreturnpackagesandsenttoTRENDne
t
prepaid,insuredandpackagedappropriatelyforsafeshipment.Customersshipping
from outside of the USA and Canada are responsible for return shipping fees.
Customers shipping from outside of the USA are responsible for custom charges,
includingbutno t limitedto,duty,tax,andotherfees.
WARRANTIES EXCLUSIVE: IF THE TRENDNET PRODUCT DOES NOT OPE
RATE AS
WARRANTED ABOVE, THE CUSTOMER’S SOLE REMEDY SHALL BE, AT TRENDNET’S
OPTION, REPAIR OR REPLACE. THE FOREGOING WARRANTIES AND REMEDIES ARE
EXCLUSIVEANDAREINLIEUOFALL OTHERWARRANTIES,EXPRESSEDORIMPLIED,
EITHERINFACTORBYOPERATIONOFLAW,STATUTORYOROTHERWIS
E,INCLUDING
WARRANTIESOFMERCHANTABILITYANDFITNESSFORAPARTICULARPURPOSE.
TRENDNETNEITHERASSUMESNORAUTHORIZESANYOTHERPERSONTOASSUMEFOR
IT ANY OTHER LIABILITY IN CONNECTION WITH THE SALE, INSTALLATION
MAINTENANCEORUSEOFTRENDNET’SPRODUCTS.
TRENDNET SHALL NOT BE LIABLE UNDER THIS WARRANTY IF ITS TES
TING AND
EXAMINATION DISCLOSE THAT THE ALLEGED DEFECT IN THE PRODUCT DOES NOT
EXISTORWASCAUSEDBYCUSTOMER’SORANYTHIRDPERSON’SMISUSE,NEGLECT,
IMPROPER INSTALLATION OR TESTING, UNAUTHORIZED ATTEMPTS TO REPAIR OR
MODIFY,ORANYOTHERCAUSEBEYONDTHERANGEOFTHEINTENDEDUSE,ORBY
ACCIDENT,FIRE,LIGHTNING,OROTHERHAZARD.
LIMITA
TIONOFLIABILITY:TOTHEFULLEXTENTALLOWEDBYLAWTRENDNETALSO
EXCLUDES FOR ITSELF AND ITS SUPPLIERS ANY LIABILITY, WHETHER BASED IN
CONTRACTORTORT(INCLUDINGNEGLIGENCE),FORINCIDENTAL,CONSEQUENTIAL,
INDIRECT,SPECIAL,ORPUNITIVEDAMAGESOFANYKIND,ORFORLOSSOFREVENUE
OR PROFITS, LOSS OF BUSINESS, LOSS OF INFORMATION OR DATE, OR OTHER
FINANCIALLOSSARISING OUTOFORINCONNECTIONWITHTHESALE,INSTALLATION,
MAINTENANCE,USE,PERFORMANCE,FAILURE,ORINTERRUPTIONOFTH
EPOSSIBILITY
OFSUCHDAMAGES,ANDLIMITSIT S LIABILITYTOREPAIR,REPLACEMENT,ORREFUND
OFTHEPURCHASEPRICEPAID,ATTRENDNET’SOPTION.THISDISCLAIMEROFLIABILI
TY
FORDAMAGESWILLNOTBEAFFECTEDIFANYREMEDYPROVIDEDHEREINSHALLFAIL
OFITSESSENTIALPURPOSE.
GoverningLaw:ThisLimitedWarrantyshallbegovernedbythelawsofthestateof
California.
SomeTRENDnetproductsinclude softwarecodewritten bythirdpartydevelopers.
These codes aresubjectto th
eGNUGeneralPublic License(“GPL”)orGNULess e r
GeneralPublicLicense(“LGPL”).
Gotohttp://www.trendnet.com/gplorhttp://www.trendnet.comDownloadsection
andlookforthedesiredTRENDnetproducttoaccesstotheGPLCodeorLGPLCode.
ThesecodesaredistributedWITHOUTWARRANTYandare subjecttothecopyrightsof
thedevelopers.TRENDnetdoesnotprovidetechnicalsupp
ortforthesecodes.Please
gotohttp://www.gnu.org/licenses/gpl.txtorhttp://www.gnu.org/licenses/lgpl.txtfor
specifictermsofeachlicense.
December28,2016 TV‐DVR104K/TV‐DVR208K1.01