042914-JA www.elitescreens.com 1
6”, 12” (L) Bracket Pair
Installation Guide
1. Parts List
Only a pair of either 6 or 12 inch brackets is included. Drawings for reference only.
L brackets hardware kit
A. Snap link x2
B. Eyebolt x2
C. Nut x4
D. Wing Nut x4
E. Washer X4
F. Screw/Wall anchor set x6
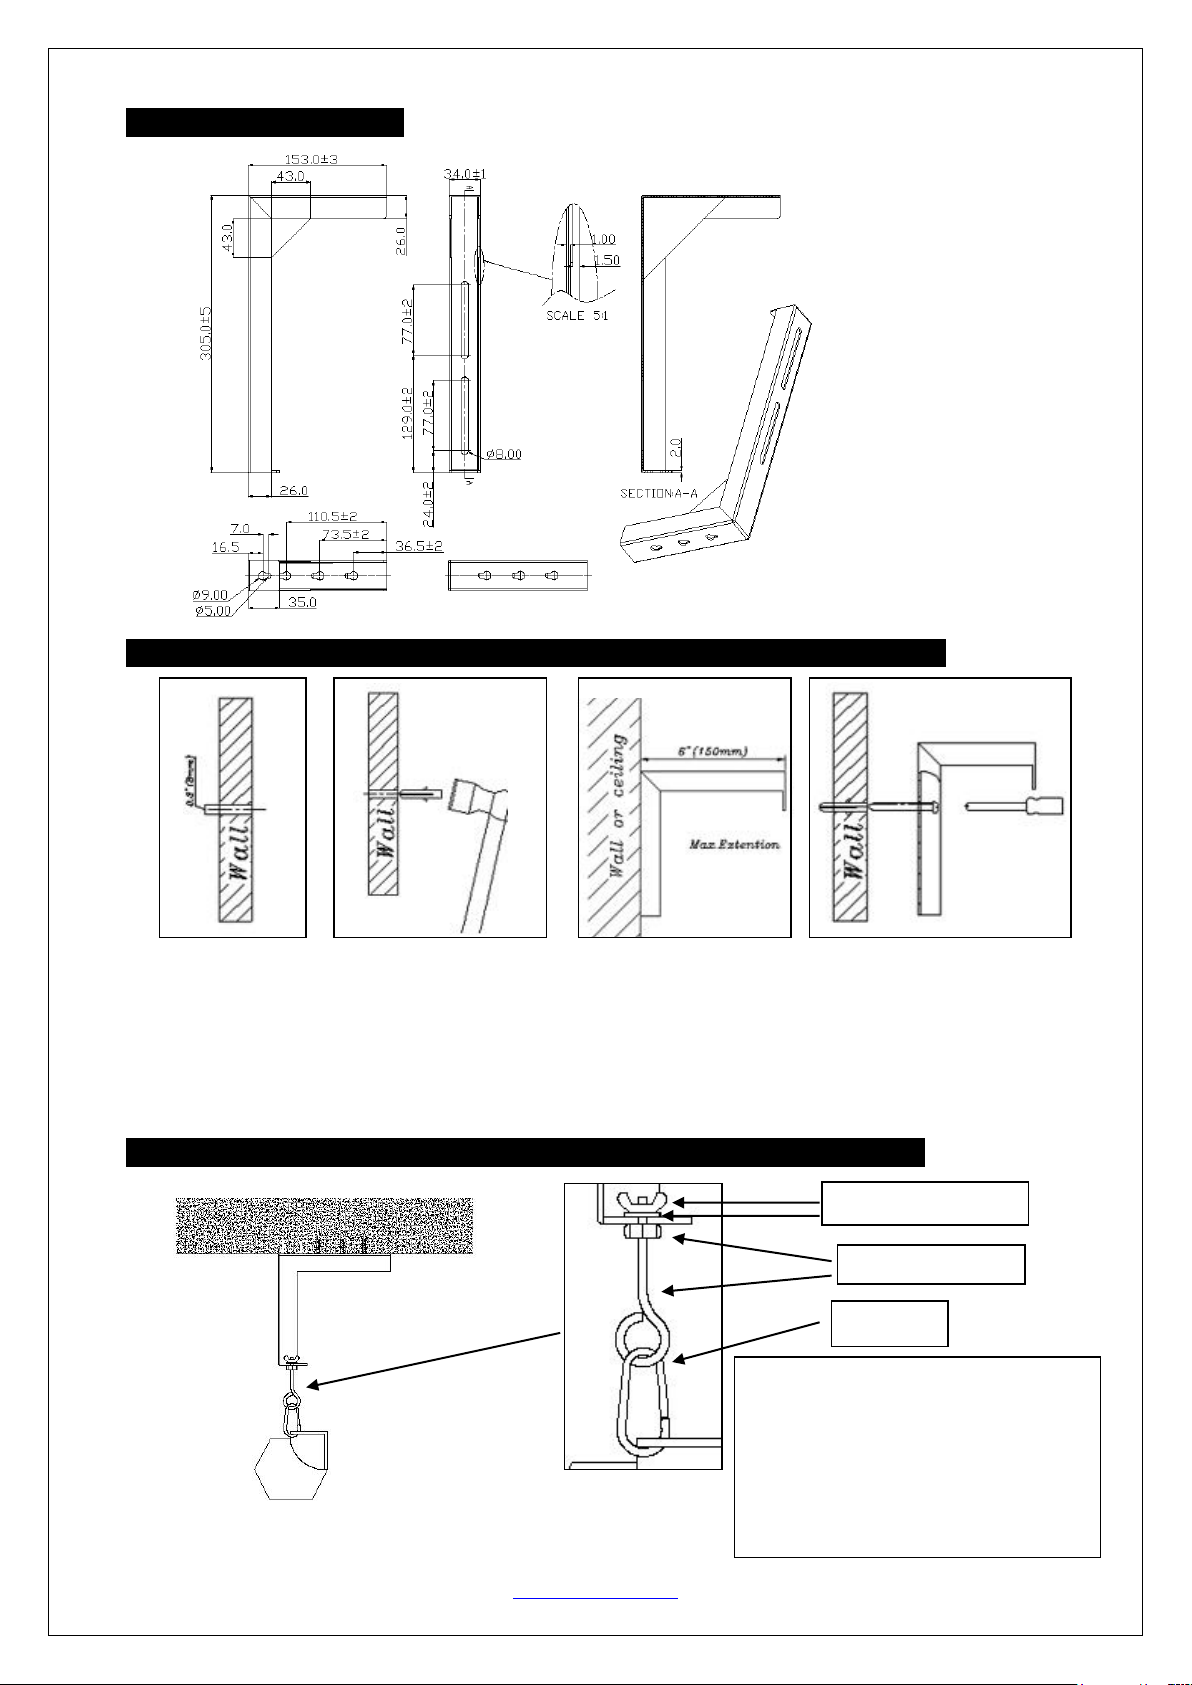
2. 6″ (L) bracket dimensions
Unit: mm
6 inch bracket Part Numbers:
ZVMAXLB6-W (white)
ZVMAXLB6-B (black)
12 inch bracket Part Numbers:
ZVMAXLB12-W (white)
ZVMAXLB12-B (black)
042914-JA www.elitescreens.com 2
3. 12” (L) bracket dimensions
4. Installation on Drywall Wall/Ceiling Using Drywall Anchors if Studs are Not Located
Instructions for mounting (L) bracket to the wall/ceiling.
①Drill hole.
②Insert flangeless anchor into predrilled hole.
③Place (L) bracket into predrilled hole.
④Insert pan head Phillips screw into pre-drilled hole for (L) bracket mounting.
5. Examples for Hanging your Elite Screen with the (L) Brackets on a Wall or Ceiling
1. Ceiling Installation
Unit: mm
②
①
③
④
Insert the eyebolt with the nut through the
L bracket’s keyhole and secure with the
washer and wing nut
as shown in
diagram. Then attach the snap link
to the
eyebolt
. The snap link then attaches to the
screen’s end caps keyhole or d-ring.
Wing nut (D) & Washer (E)
Nut (C) & Eyebolt (B)
Snap link (A)

042914-JA www.elitescreens.com 3
2. Wall Installation
Method 1:
Method 2:
1. Insert the nut in the eyebolt.
2. Put the eyebolt through the L bracket’s top opening and secure it with the washer and
wing nut.
3. Hang the screen on the eyebolt with the snap link
For more information, technical support or your local Elite
Screens contact, please visit www.elitescreens.com
Hang the screen on the front of
the bracket with the snap link.
②
③
①
Slide eyebolt in preferred
position before tightening
with wing nut.