Loading ...
Loading ...
Loading ...
13
INSTALLATION INSTRUCTIONS
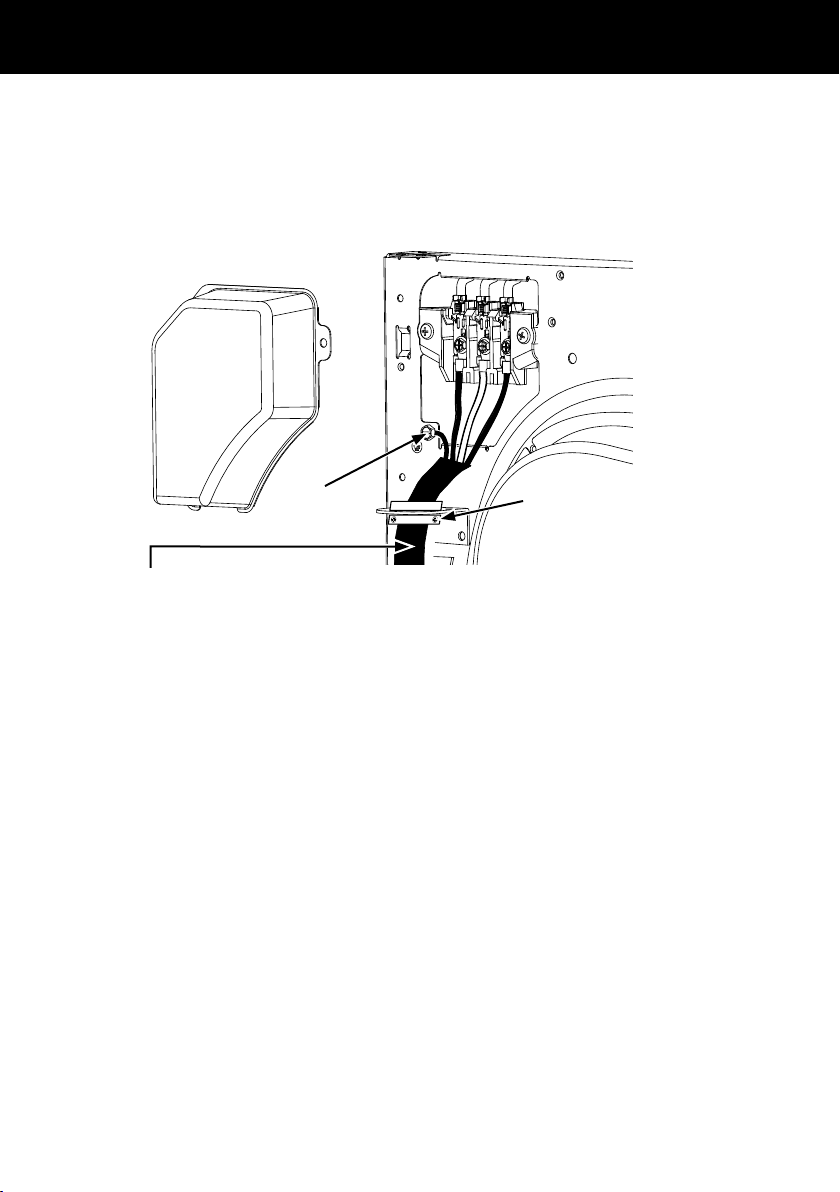
Connecting dryer using 4-wire connection (must be used for mobile home installation)
Note:
Since January 1, 1996, the National Electrical Code requires that new constructions use a
4-wire connection to an electric dryer. A 4-wire cord must also be used where local codes
do not permit grounding through the neutral. 3-wire connection is NOT for use on new
construction.
L1
N
L2
Cover
Green wire from
power cord
3/4” Strain relief
and bracket
4 #10 AWG minimum copper conductors or 120/240V 30A power supply cord kit marked for use with
dryers and provided with closed loop or spade terminals with upturned ends (not supplied)
1 Turn off the circuit breaker(s) (30 amp) or remove the dryer’s circuit fuse at the
electrical box.
2 Be sure the dryer cord is unplugged from the wall receptacle.
3 Remove the power cord cover located at the upper back.
4 Remove green ground screw and retain for use in Step
7
. Remove center screw
(markedN) in terminal block. Remove and discard ground strap.
5 Install 3/4 in. UL-recognized strain relief to power cord entry hole. Bring power cord
through strain relief and bracket.
6 Connect power cord as follows:
z
Connect the 2 hot lines to the outer screws of the terminal block (marked L1 and L2).
z
Connect the neutral (white) line to the center of the terminal block (marked N).
7 Attach ground wire of power cord with the green ground screw (hole above strain
reliefbracket). Tighten all terminal block screws (3) securely.
8 Properly secure power cord to strain relief and bracket.
9 Reinstall the cover.
IMPORTANT!
Never leave the cover off of the terminal block.
EN
Loading ...
Loading ...
Loading ...