Color Television
OWNER'S MANUAL
Please read this manual carefully before operating your set.
Retain it for future reference.
Record model number and serial number of the set.
See the label attached on the back cover and quote this
information to your dealer when you require service.

WARNING : TO REDUCE THE RISK OF FIRE OR ELECTRIC SHOCK, DO NOT EXPOSE THIS
PRODUCT TO RAIN OR MOISTURE.
CAUTION : TO REDUCE THE RISK OF ELECTRIC SHOCK, DO NOT REMOVE COVER(OR
BACK). NO USER-SERVICEABLE PARTS IN SIDE. REFER SERVICING TO
QUALIFIED SERVICE PERSONNEL.
Safety Precautions
Writing Model And Serial Numbers
The serial number and model number are found
on the back of this unit. The serial number is
unique to this unit. You should record requested
information here and retain this guide as a
permanent record of your purchase. Please retain
your purchase receipt as your proof of purchase.
Date of Purchase
Dealer Purchased from
Dealer Address
Dealer Phone No.
Model No.
Serial No.
Cleaning
Unplug this television receiver from the wall outlet
before cleaning. Do not use liquid cleaners or
aerosol cleaners. Use a damp cloth for cleaning.
Do not use attachments not recommended by the
television receiver manufacturer as they may
cause hazards.
Power Supply
This television receiver should be operated only
from the type of power source indicated on the
marking label. If you are not sure of the type of
power supplied to your home, consult your
television dealer or local power company.
Installation
Do not use this television receiver near water, for
example, near a bathtub, washbowl, kitchen sink,
or laundry tub, in a wet basement, or near a swim-
ming pool, etc.
Do not place this television receiver on an
unstable cart, stand, or table. The television
receiver may fall, causing serious injury to a child
or an adult, and serious damage to the appliance.
Use only with a cart or stand recommended by the
manufacturer, or sold with the television receiver.
Wall or shelf mounting should follow the manu-
facturer's instructions and should use a mounting
kit approved by the manufacturer.
Slots and openings in the cabinet and the back or
bottom are provided for ventilation, and to insure
reliable operation of the television receiver, and to
protect it from overheating. These openings must
not be blocked or covered. The openings should
never be blocked by placing the television receiver
on a bed, sofa, rug, or other similar surface. This
television receiver should not be placed in a built-
in installation such as a bookcase unless proper
ventilation is provided.
It is recommended not to operate this unit near
speakers or big metallic furnitures in order to keep
their magnetism from disturbing colors purity
(uniformity) on the screen.
Wet Location Marking:
Apparatus shall not be exposed to dripping or
splashing and no objects filled with liquids, such
as vases, shall be placed on the apparatus.
Use
Do not allow anything to rest on the power cord.
Do not locate this television receiver where the
cord will be abused by persons walking on it.
Do not overload wall outlets and extension cords
as this can result in fire or electric shock.
Never push objects of any kind into this television
receiver through cabinet slots as they may touch
dangerous voltage points or short out parts that
could result in a fire or electric shock.
Never spill liquid of any kind on the television
receiver.
Service
Do not attempt to service this television yourself
as opening or removing covers may expose you
to dangerous voltage or other hazards. Refer all
servicing to qualified personnel.
2

Description of controls ................................................................................................4 ~ 6
Basic TV operation .............................................................................................................7
Turning on/off the TV .....................................................................................................7
Selecting the on screen language .................................................................................7
Memorizing Channels ....................................................................................................8
Memorizing the Channels by AUTO PROGRAM ..........................................................8
Memorizing the Channels by MANUAL PROGRAM .....................................................9
Selecting the Channel ...................................................................................................9
Adjusting the Volume .....................................................................................................9
Various function ...............................................................................................................10
Setting the Clock .........................................................................................................10
Setting the OFF TIMER ................................................................................................10
Setting the ON TIMER .................................................................................................10
Setting the Sleep Time ................................................................................................11
Auto Off .......................................................................................................................11
Operating the degauss (some models) ........................................................................11
Key Lock.......................................................................................................................12
Tilt (some models) ........................................................................................................12
Adjusting the Fine.........................................................................................................12
Favorite channel memory .............................................................................................13
Auto Demonstration .....................................................................................................13
Game (some models) ...................................................................................................13
Picture control ..................................................................................................................14
Auto Picture Control ....................................................................................................14
Adjusting the Picture.....................................................................................................15
XD (some models)........................................................................................................15
Sound control ...................................................................................................................16
Enjoying the Stereo/SAP Broadcast.............................................................................16
Auto Sound Control ......................................................................................................16
AVL (Auto Volume Leveler) .........................................................................................16
Adjusting the balance ...................................................................................................17
Adjusting the DBS (Dynamic Bass Sound) (some models)..........................................17
X-WAVE (some models)...............................................................................................17
Turbo Sound (some models) ........................................................................................18
Adjusting the equalizer (User mode in Auto Sound Control) .......................................18
Closed caption function....................................................................................................19
Using Closed Captions ................................................................................................19
Operating the Caption and Text ...................................................................................20
PIP function (some models) .............................................................................................21
Watching the PIP (Picture in Picture) ..........................................................................21
Selecting the Input Signal (in PIP and Double Window Mode).....................................21
Channel Search............................................................................................................22
Moving the Sub Picture (in PIP mode) .........................................................................22
Swapping Screens........................................................................................................22
Still Picture....................................................................................................................22
Antenna Connections .......................................................................................................23
Connection of external equipment (some models) ................................................24 ~ 25
Connecting DVD player (some models) ..........................................................................26
Troubleshooting check list ...............................................................................................27
CONTENTS
3
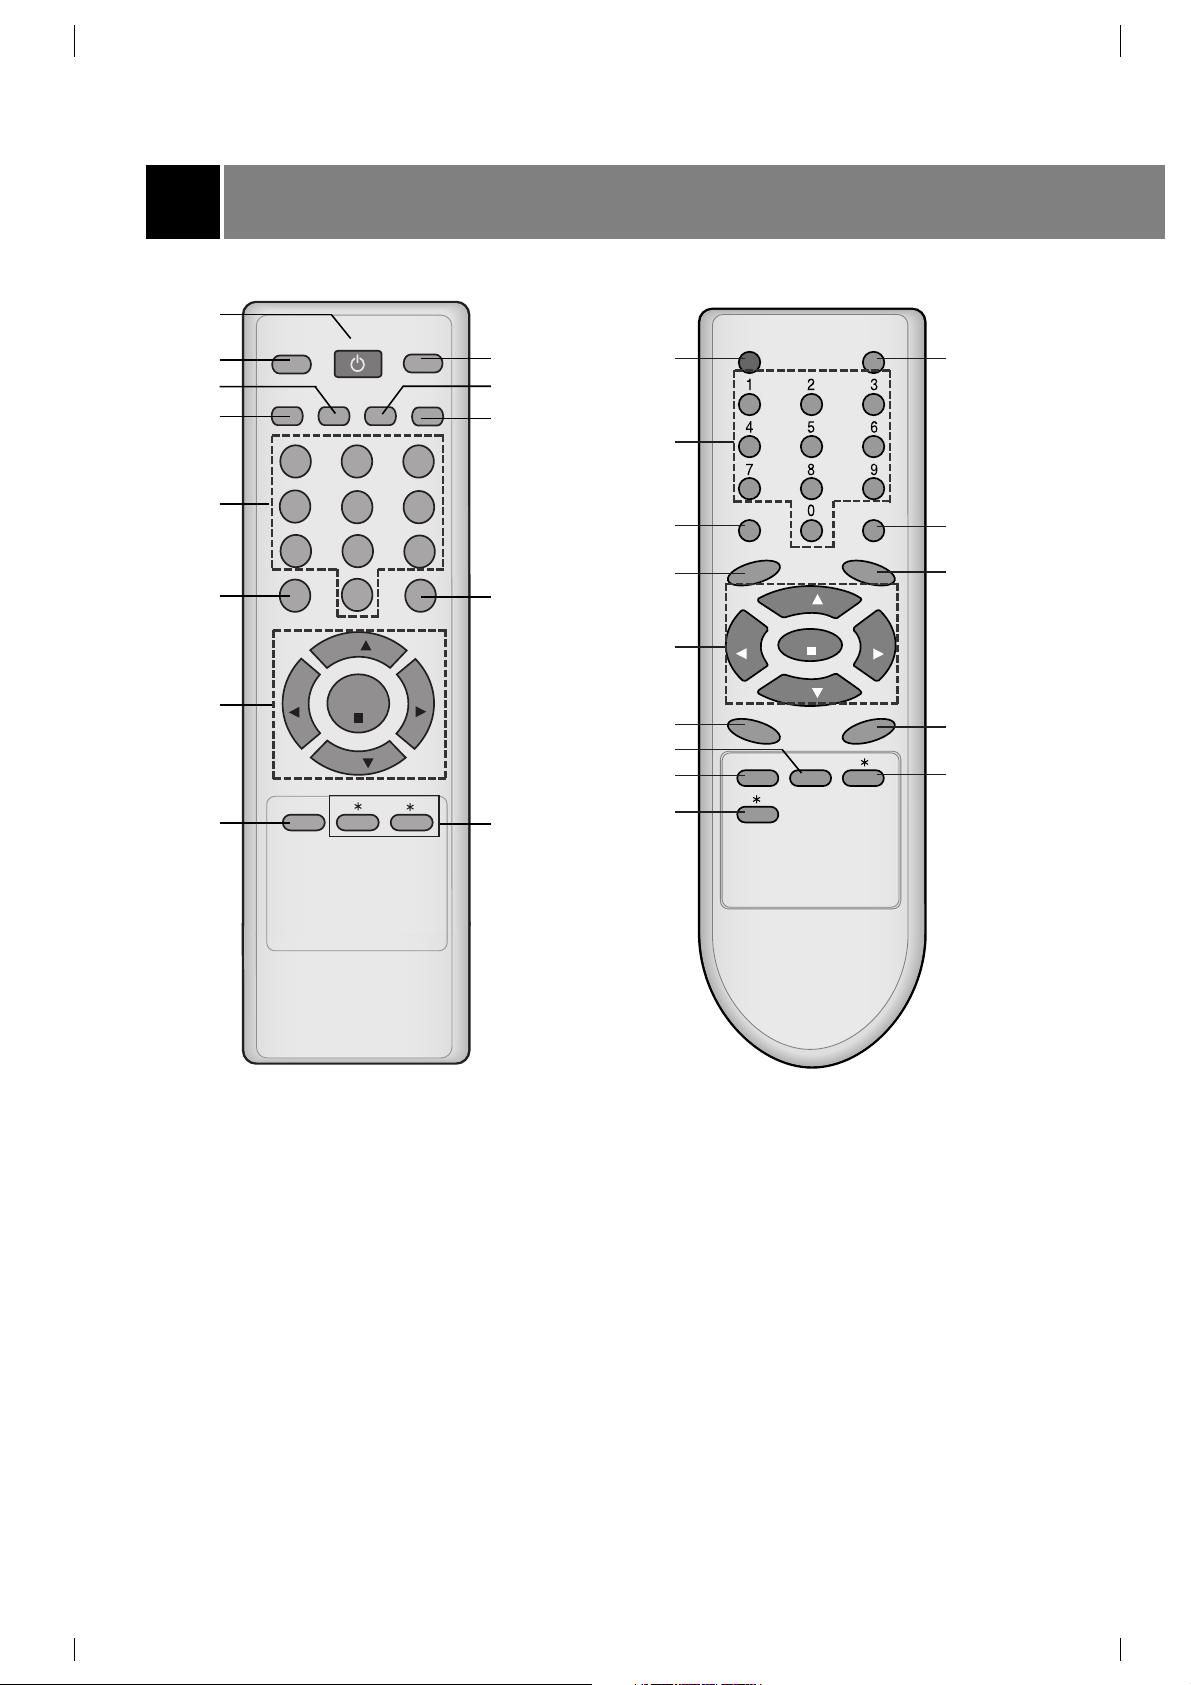
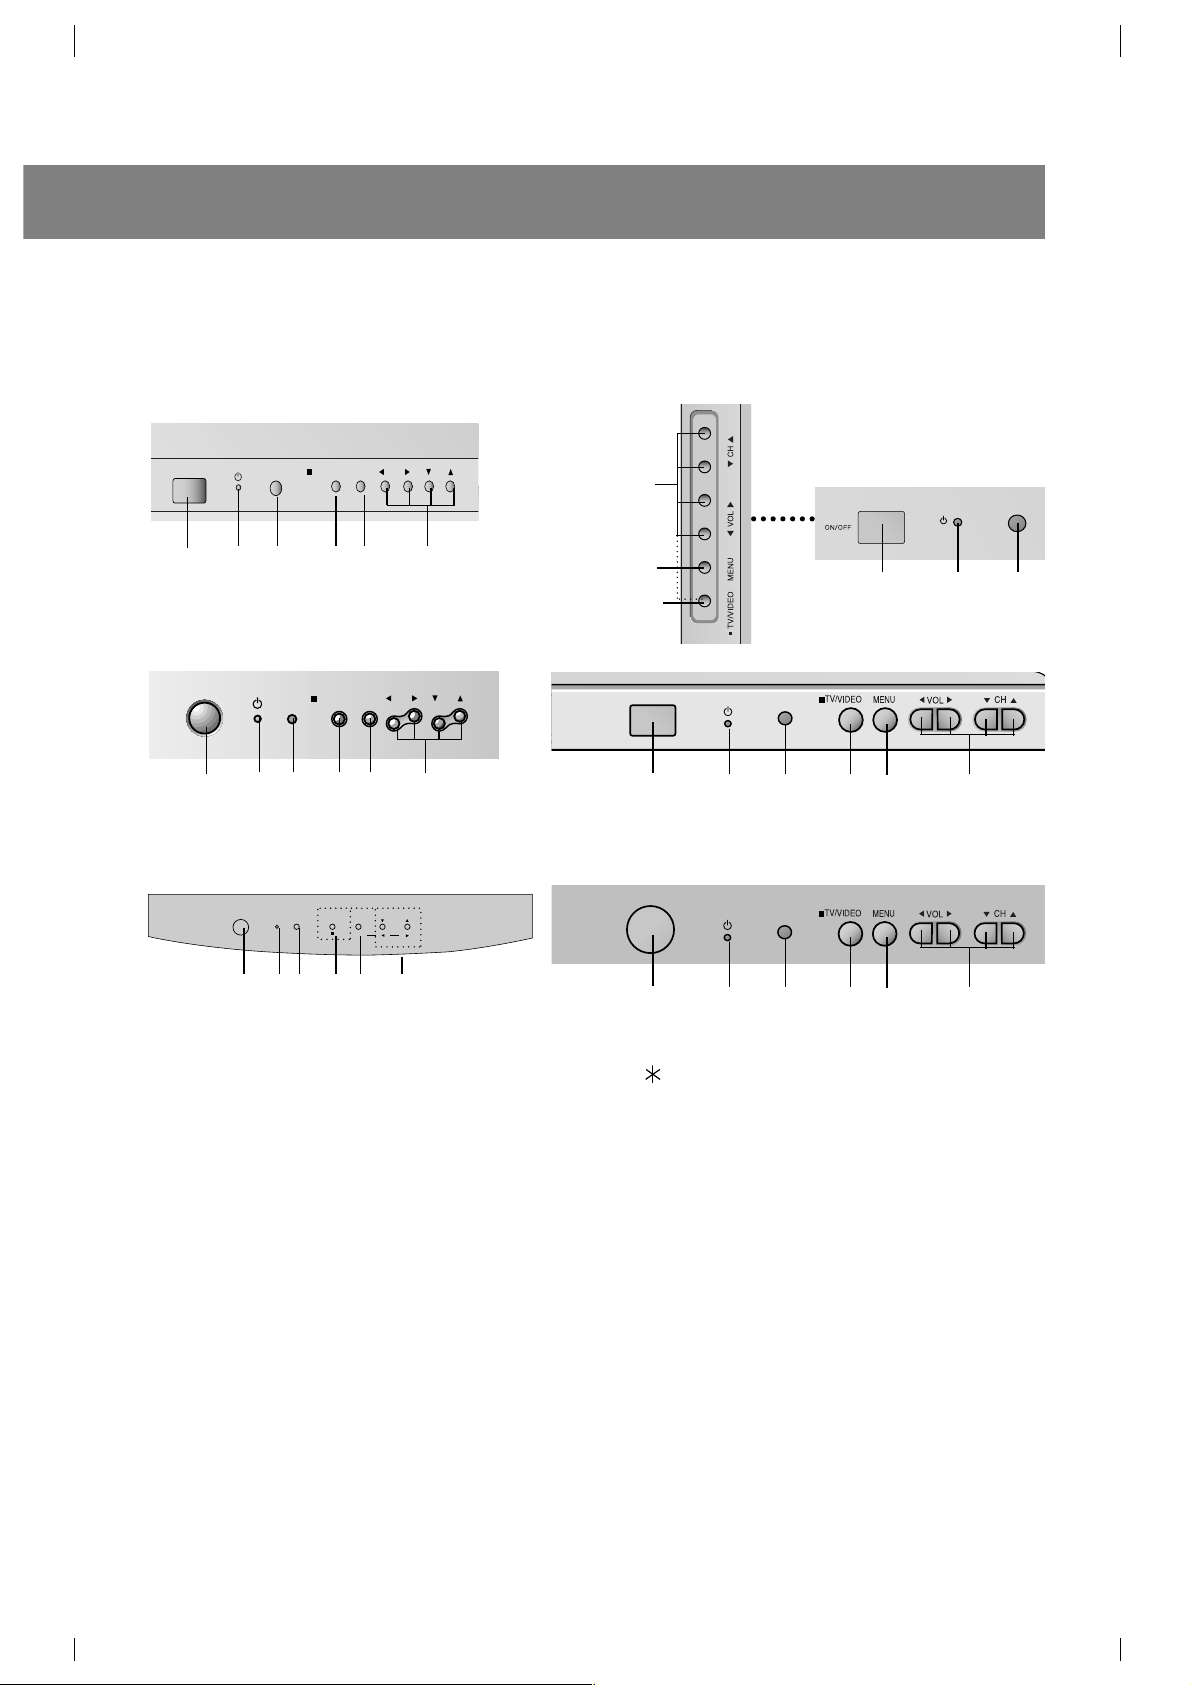
Description of controls
4
SLEEP
MUTE
TV/VIDEO
POWER
123
4
5
6
7
8
9
0
ENTER
FCR
MTS
A.PROG
MEMORY/ERASE
CAPTION
MENU
VOL
VOL
CH
CH
2
6
5
8
7
9
11
12
13
1
4
3
10
1. POWER BUTTON (or ON/OFF )
Refer to "Turning on/off the TV".
2. SLEEP BUTTON
To set the desired sleep time.
3. A. PRGO (Auto program) BUTTON
To memorize channels by AUTO PROGRAM.
4. MTS BUTTON (some models)
To listen to the MTS sound.
5. NUMBER BUTTONS
To select the desired channel directly.
6. MUTE BUTTON
To mute the sound. Again to restore the
muted sound.
7. CH UP/DOWN (
D
/
E
) BUTTONS
• To select the desired channel.
• To select the desired menu item when
menu
is displayed on the screen.
VOLUME UP/DOWN (
F
/
G
) BUTTONS
• To increase or decrease volume level.
• To enter or adjust the selected menu when
menu is displayed on the screen.
ENTER (
A
) BUTTON
• To exit from the displayed menu.
• To memorize the adjusted menu.
• To recall the current TV mode (by remote
control only).
POWER
CAPTION
CH
VOL VOL
ENTER
CH
MENU
MEMORY/ERASE
TV/VIDEO
MTS
FCR
SLEEP
A. PROG
MUTE
1
11
5
8
7
3
4
13
12
6
9
2
10
13
5
MENU
TV/VIDEO
VOL CH
ON/OFF
14 9 8
7
15
ON/OFF
114
9
8
7
15
TV/VIDEO
MENU VOL
ON/OFF
CH
1
1514 9 8
5
ON/OFF
STAND BY
TV/VIDEO
MENU
VOL
CH
( ) ( )
1 14 15 9 8 7
This is a simplified representation of front panel.
If your product has a protection film attached, remove the film and then wipe the product with a
polishing cloth.
1
14
9
8
7
15
1
8. MENU BUTTON
To display on-screen.
9. TV/VIDEO BUTTON
To select TV, VIDEO or COMPONENT mode.
10. MEMORY/ERASE BUTTON (some models)
To memorize or erase the desired channel.
11. CAPTION BUTTON (some models)
To select the CAPTION mode.
Refer to "Closed caption function".
12. FCR (Favorite Channel Review) BUTTON
To select the favorite channel.
Refer to "Favorite channel memory".
13. : No function.
14. STAND BY INDICATOR (STAND BY or
rr
)
Illuminates red when the TV is in standby
mode. Refer to "Turning on/off the TV".
15. REMOTE CONTROL SENSOR
ON/OFF
1
14
9
8
7
15

This is a simplified representation of front panel.
If your product has a protection film attached, remove the film and then wipe the product with a
polishing cloth.
6
1
14
15
9
8
7
14
15
1
Description of controls
Fitting Batteries in the Remote Control Unit
The remote control is powered by batteries. This requires AAA type batteries for operation. To ensure
consistent operation, change the batteries about once a year.
Caution : Batteries installed incorrectly may leak and damage the remote control. Do not mix old and
new batteries or different types of batteries (for example, standard and alkaline).
1. Remove the battery compartment cover by sliding it in the arrowhead direction.
2. Insert new batteries as indicated by the polarity markings (+ and -) inside the compartment.
3. Replace the battery compartment cover.

Before operating your TV, make sure the following instructions have been completed.
• Your TV has been connected to an antenna or a cable system.
• Your TV has been plugged in a power outlet.
• In this manual, the OSD (On Screen Display) may be different from your TV’s because it is just an
example to help you with the TV operation.
Basic TV operation
Turning on/off the TV
Press the POWER (or ON/OFF) button on the set. At this time, the set
switches to standby mode and the standby indicator lights up in red.
To switch the TV on from standby mode, press the TV/VIDEO, CH
D
/
E
button on the set or POWER, TV/VIDEO, CH
D
/
E
or number
button on the remote control.
A channel number will be displayed on the screen. The on-screen
display will disappear after a few seconds.
Press the POWER button on the remote control. It reverts to standby
mode.
To switch the TV off, press the POWER button on the set.
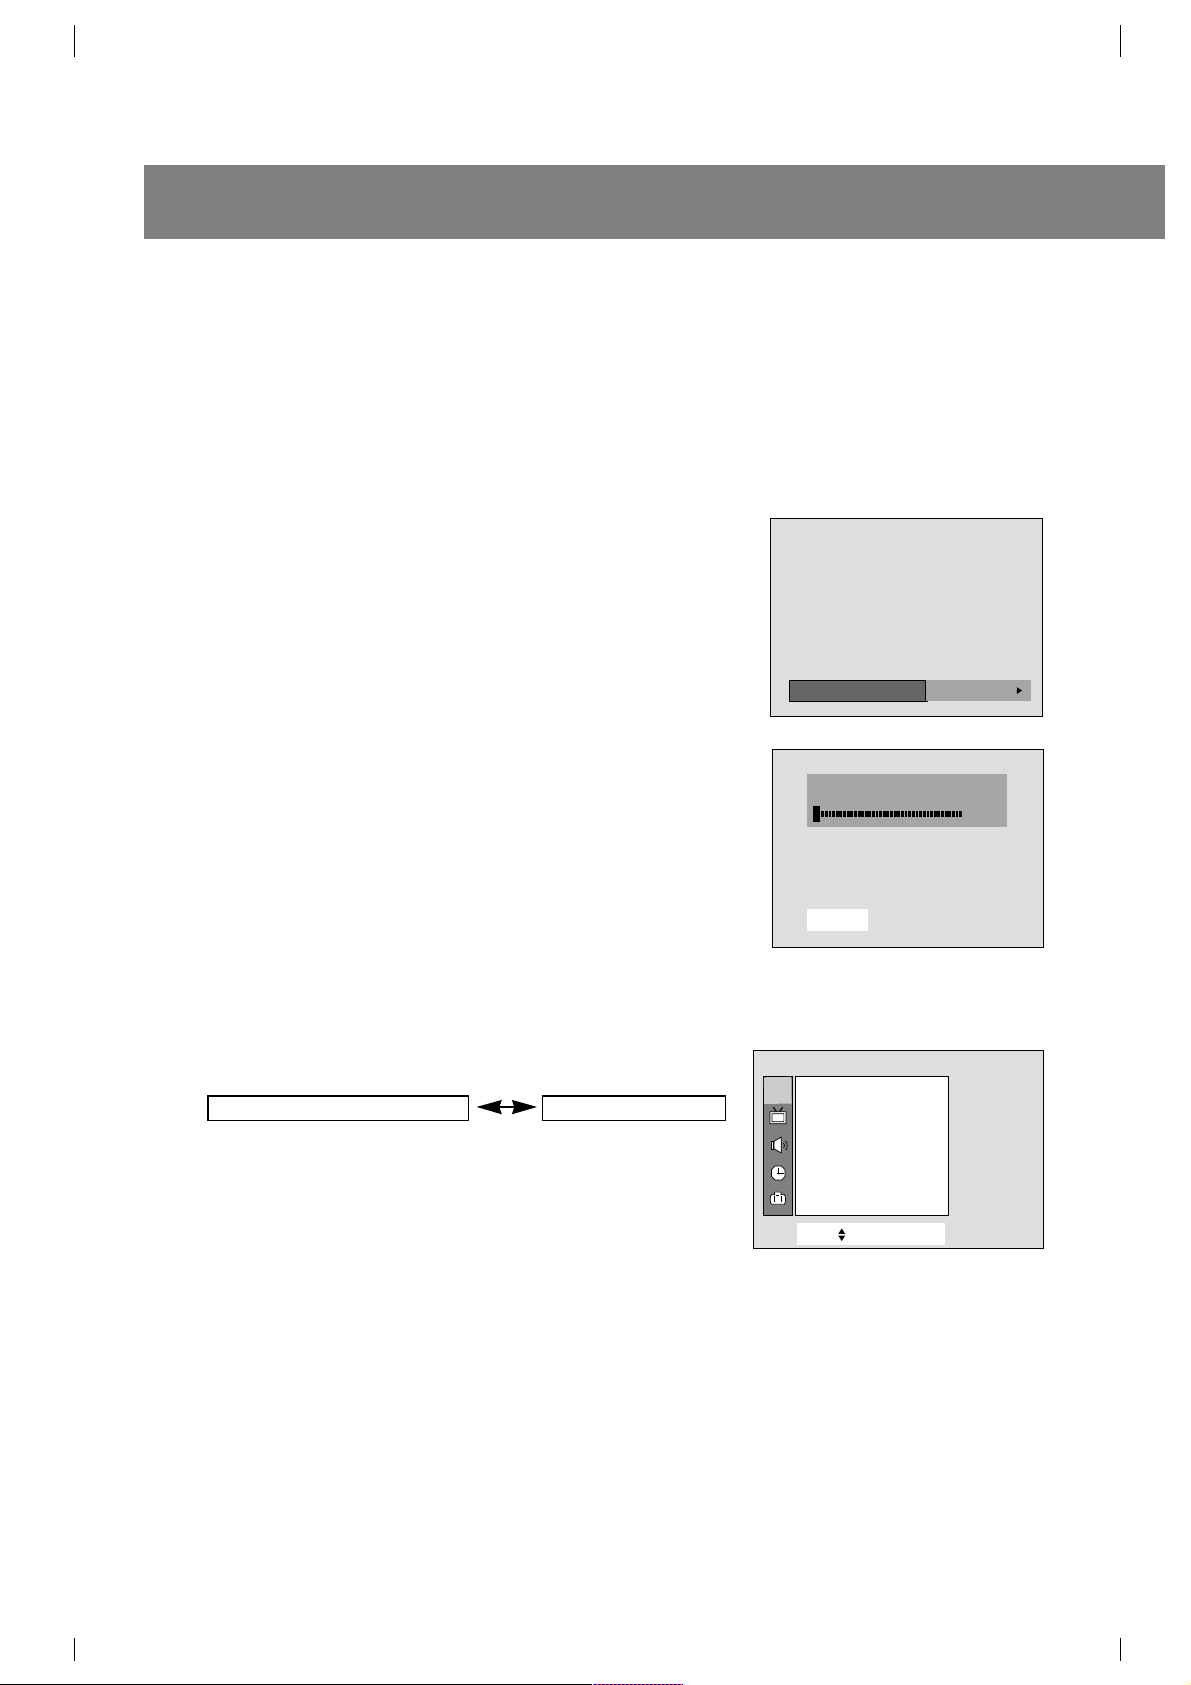
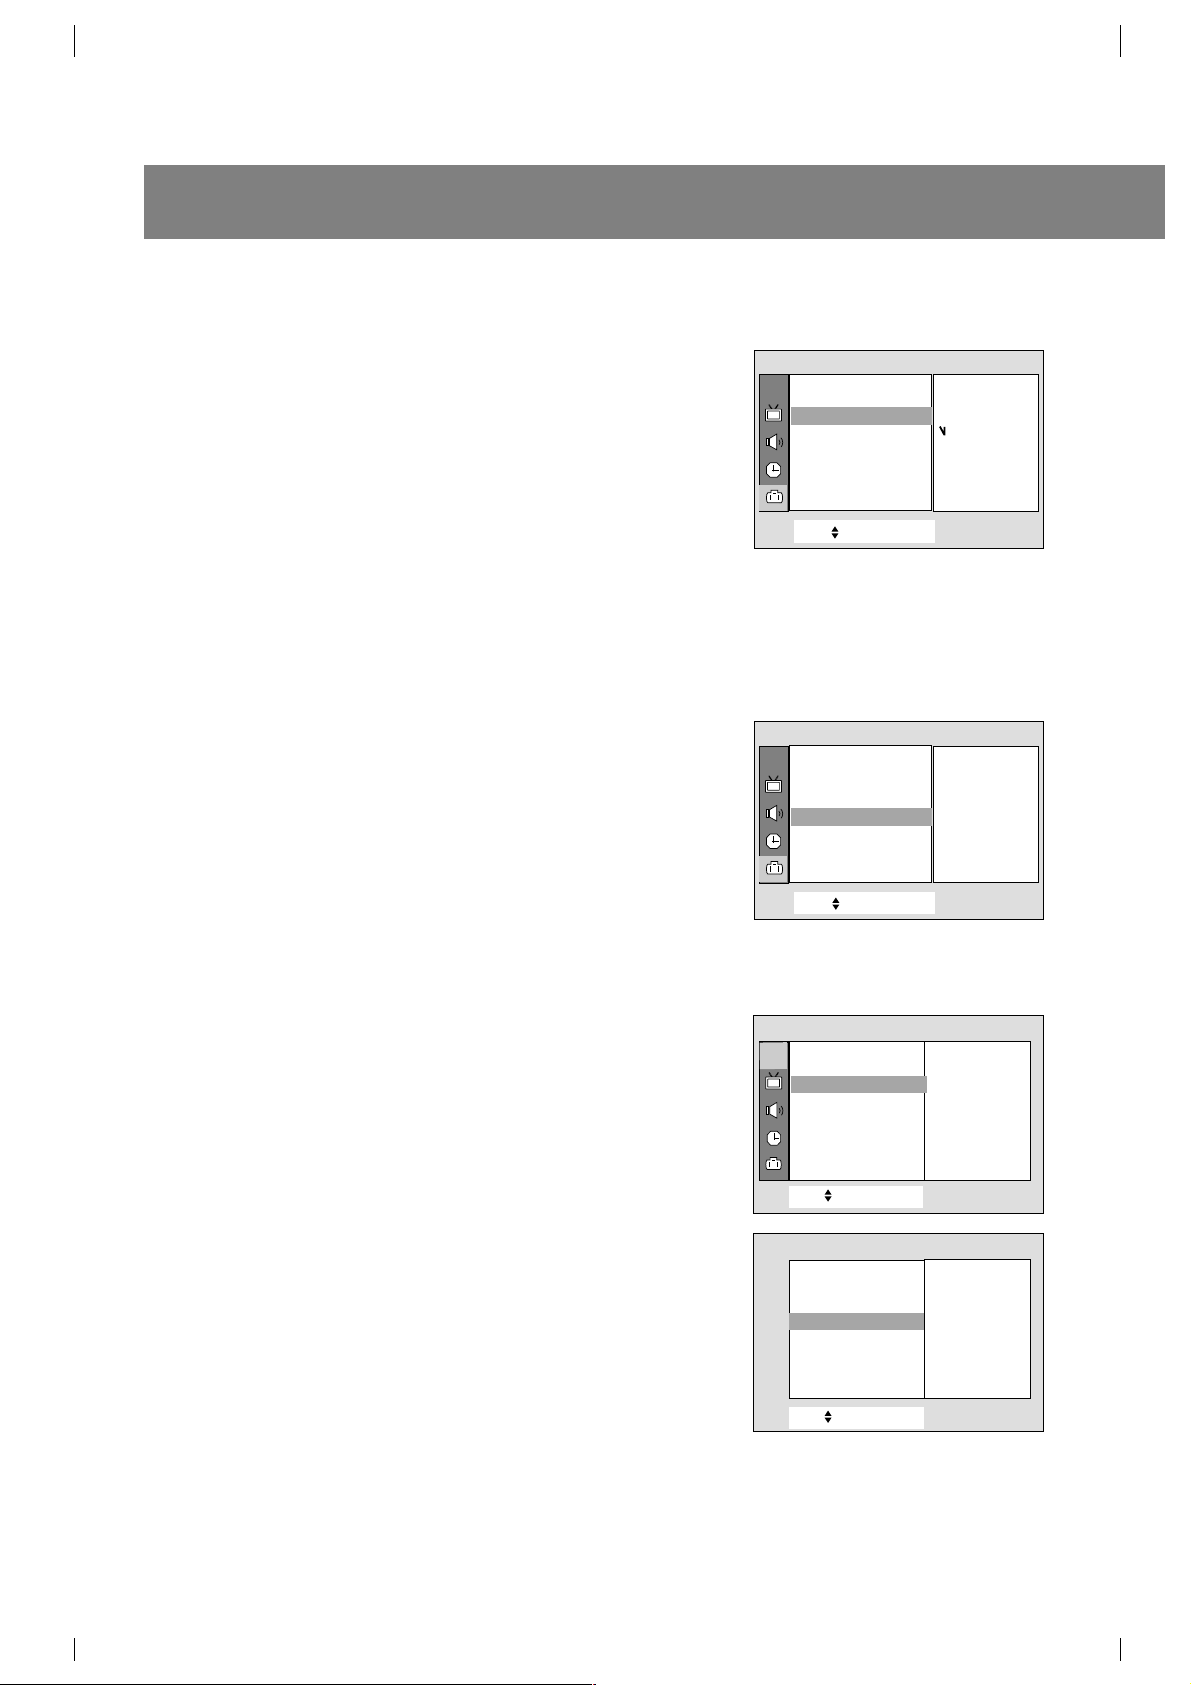
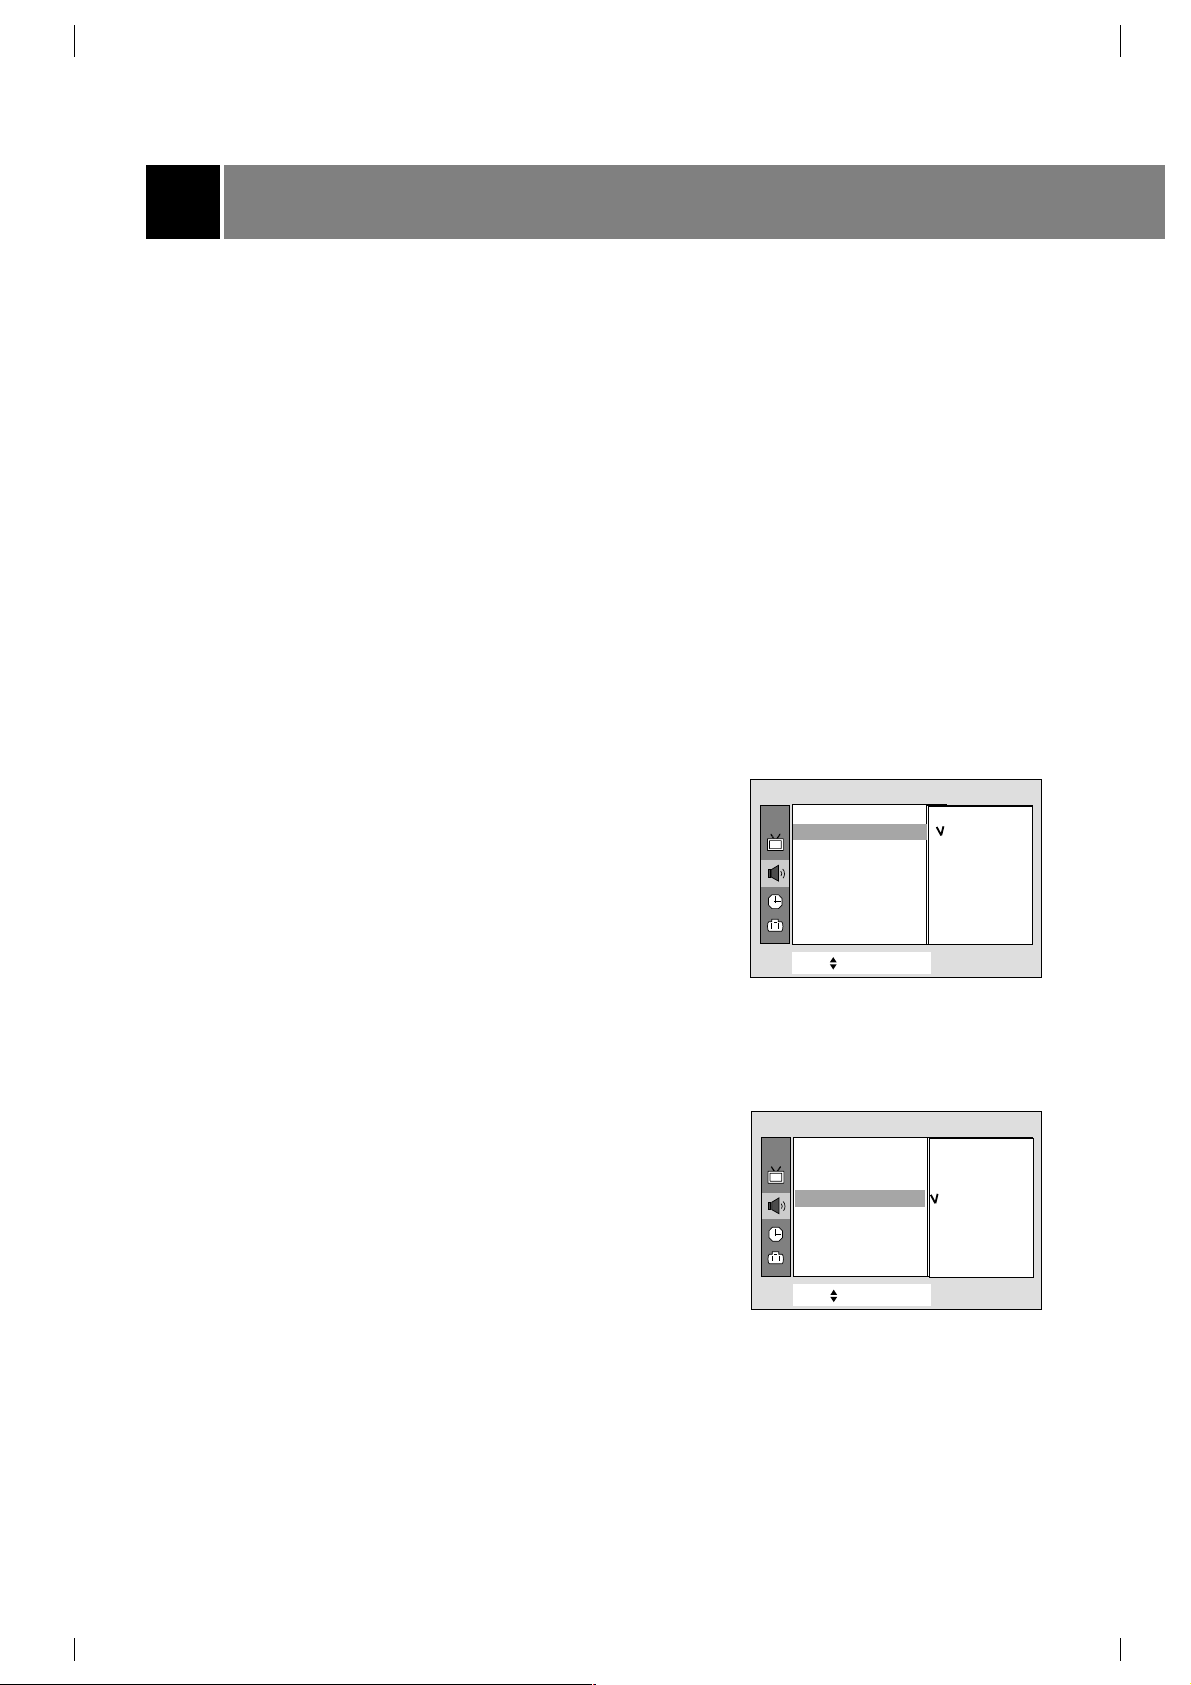
Selecting the on screen language
1. Press the MENU button and then
D
/
E
button until the menu is
displayed as shown right.
2. Press the
G
and then
D
/
E
button to select Language.
3. Press the
G
and then use
D
/
E
button to select the desired
language.
From this point on, the on-screen display will be presented in the
language of your choice.
4. Press the MENU button to exit.
7
CH.
Move++Next+{
+
Exit}
Language {
Input {
Key+lock {
Caption+ {
Tilt {
Degauss {
Special
Memorizing Channels
This is the function to memorize all the active channels in your area before you can use the TV.
There are two ways of memorizing channels. You can use either.
One is called AUTO PROGRAM and the other is called MANUAL PROGRAM.
In AUTO PROGRAM the TV will memorize the channels in ascending order. If there are additional
channels you want to add or delete, you can manually add or delete those channels.
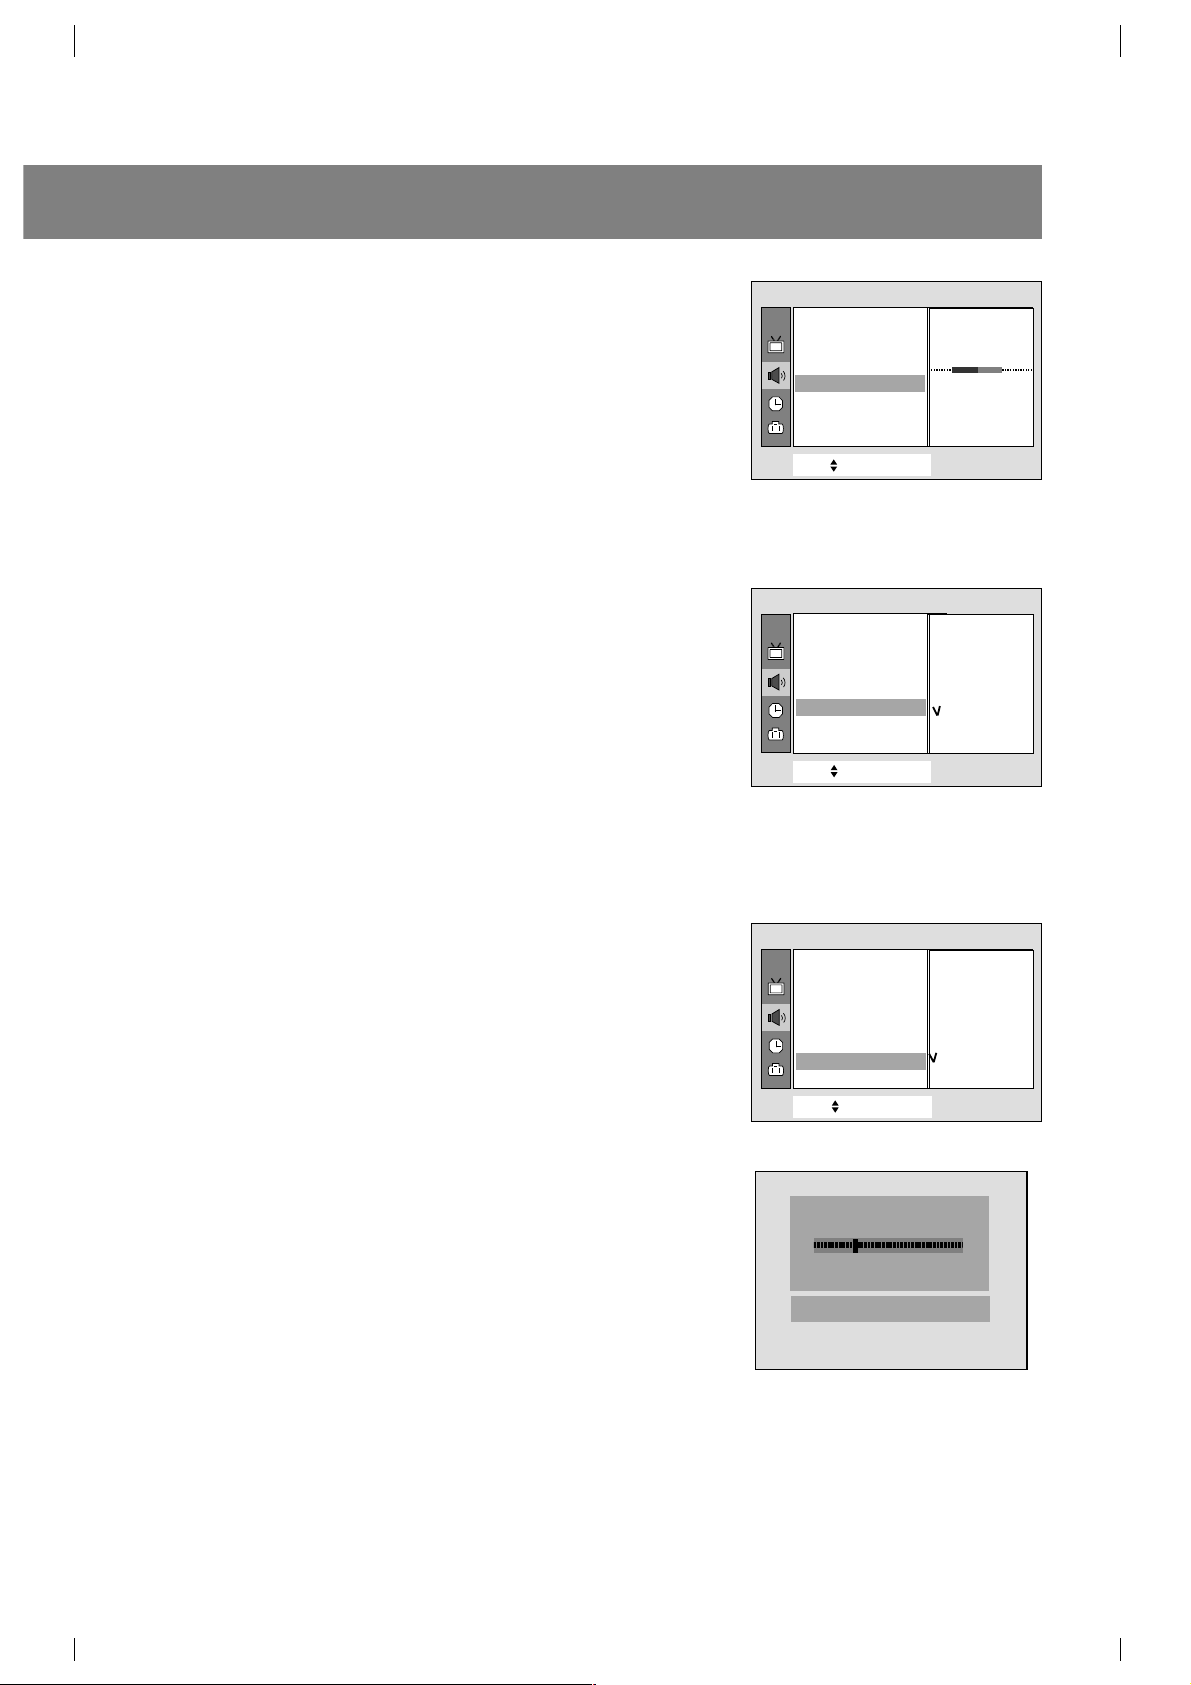
Memorizing the Channels by AUTO PROGRAM
AUTO PROGRAM searches and memorizes all the active channels in
your area then you can select the desired channel with the
D
/
E
buttons.
Using the A.PROG button
You can conveniently perform AUTO PROGRAM using the A.PROG
button on the remote control.
1. Press the A.PROG button.
2. Press the
G
or A.PROG button.
The AUTO PROGRAM starts now.
If you want to stop auto programming, press the ENTER (
A
) button.
Only the channels searched up to that time are memorized.
Notes : • If the programmed signal has poor quality, memorize again
in the
Auto program.
• AUTO PROGRAM stores all receivable channels regardless
of receiving signal (RF, Cable).
• If channels of general wireless TV and cable TV are
duplicated, press the number buttons (0 ~ 9) to change as .
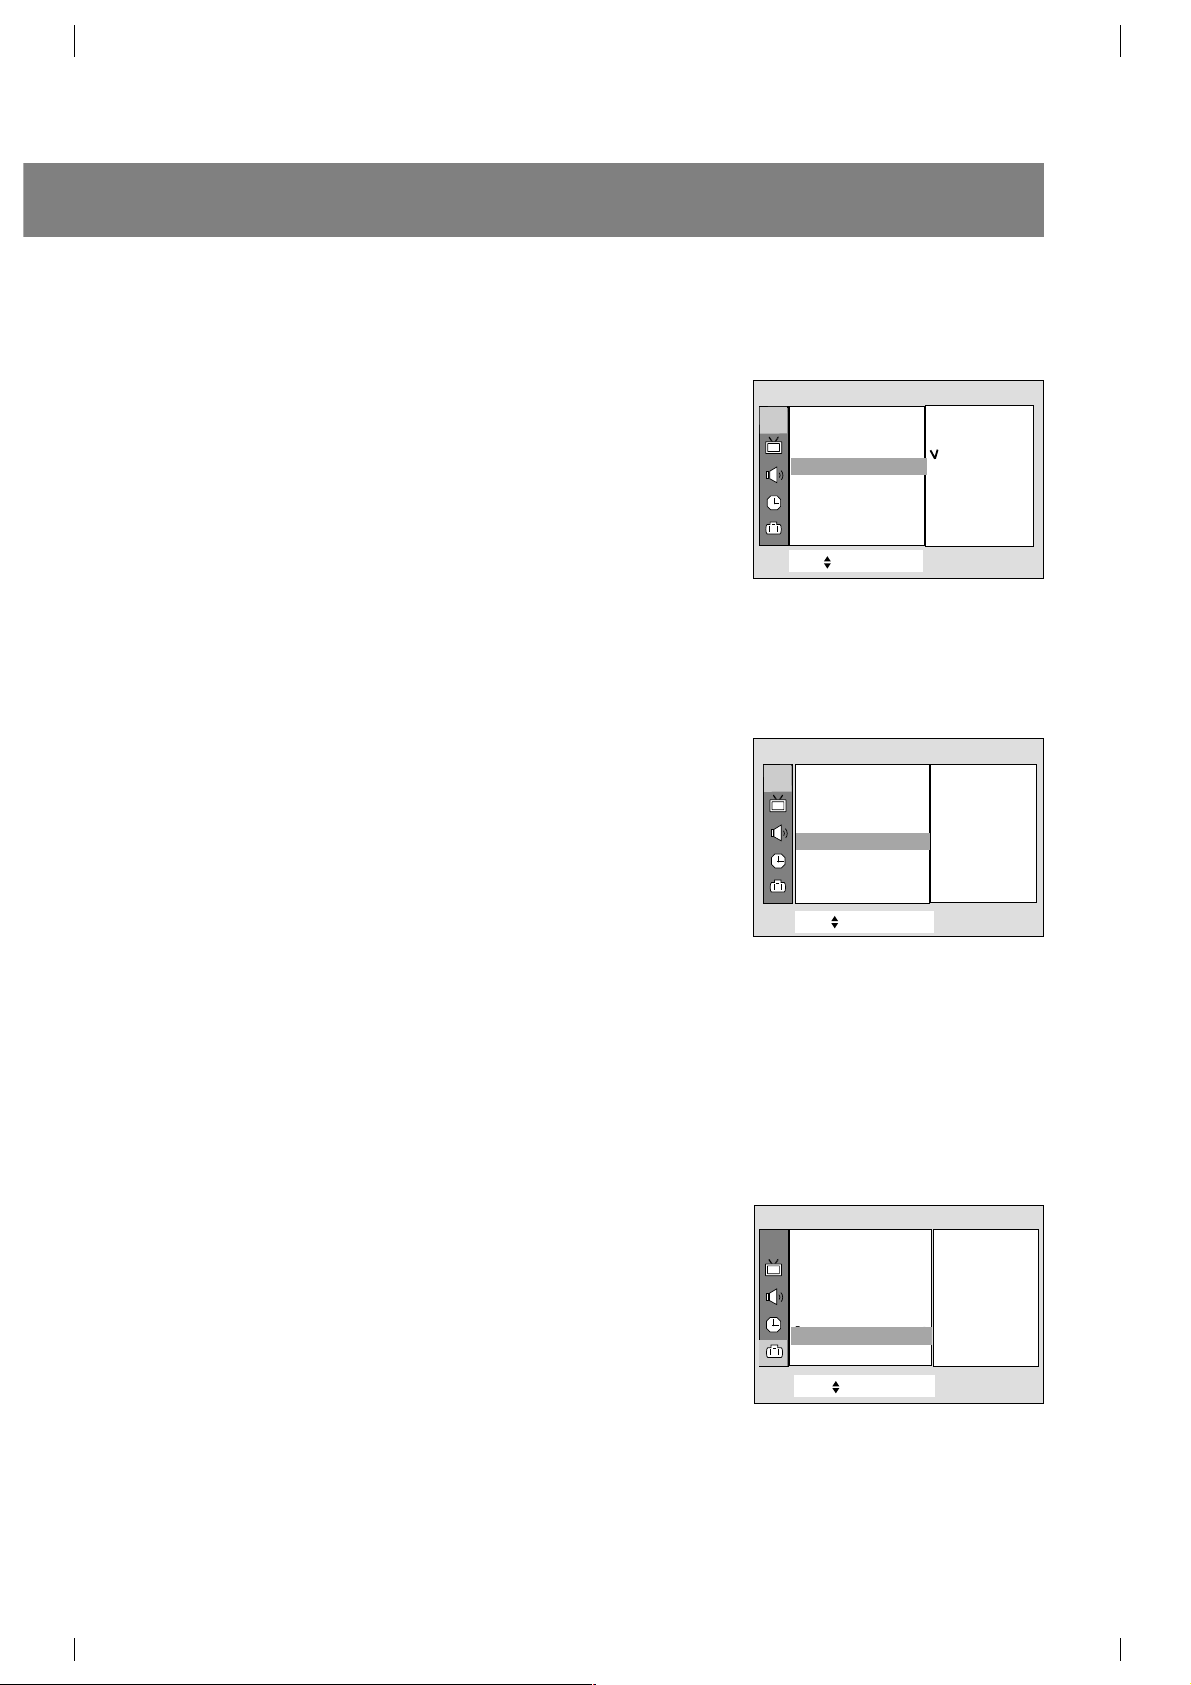
Using the MENU button
1. Press the MENU button and then use
D
/
E
button to select the
channel menu.
2. Press the
G
and then
D
/
E
button to select Auto program.
3. Press the
G
button to enter the Auto program mode.
4. The AUTO PROGRAM starts now.
8
Basic TV operation
++Auto+program
OToOOstart
StopÅ
OAutoOprogramOOOOOOOOTVO19
O5%
CH.
Move++Next+{+Exit}
Auto+program {
Manual program {
Favorite+channel++ {
Auto+demo+ ++++ {
Channel
Channels of general wireless TV Channels of Cable TV
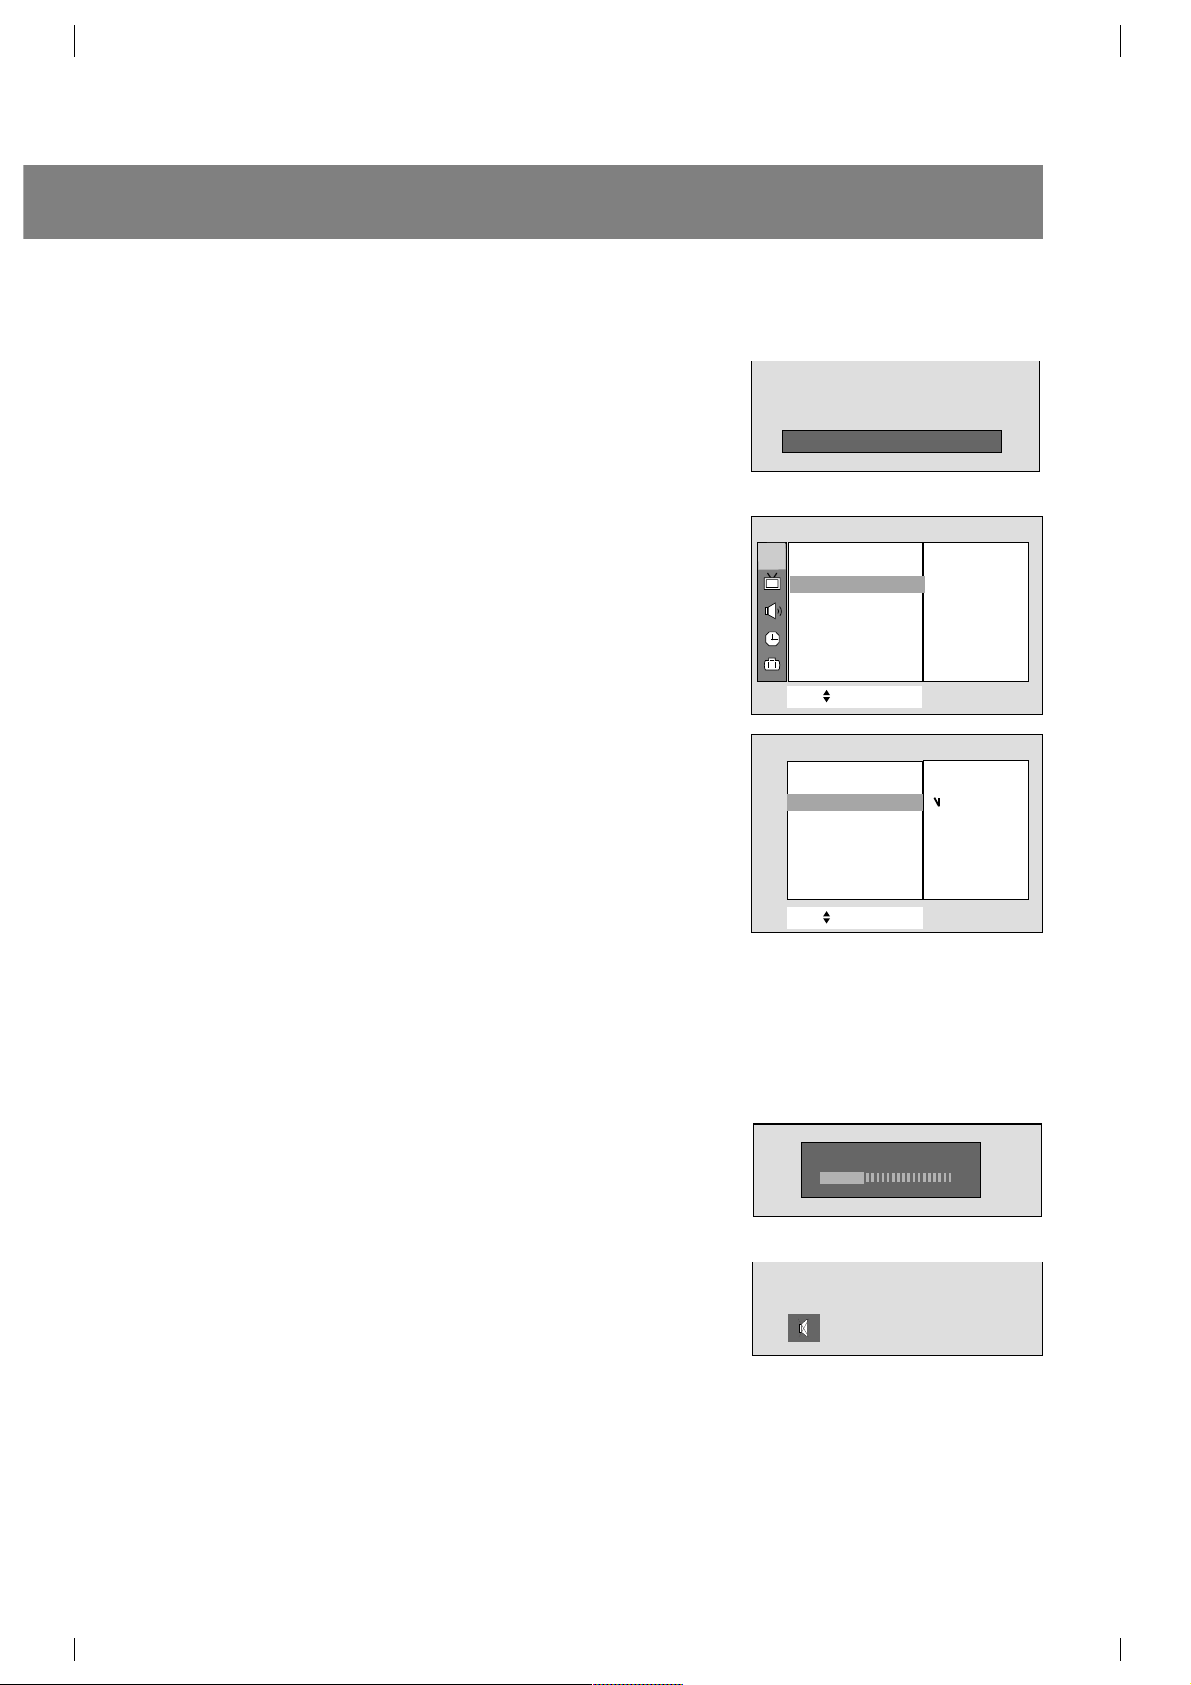
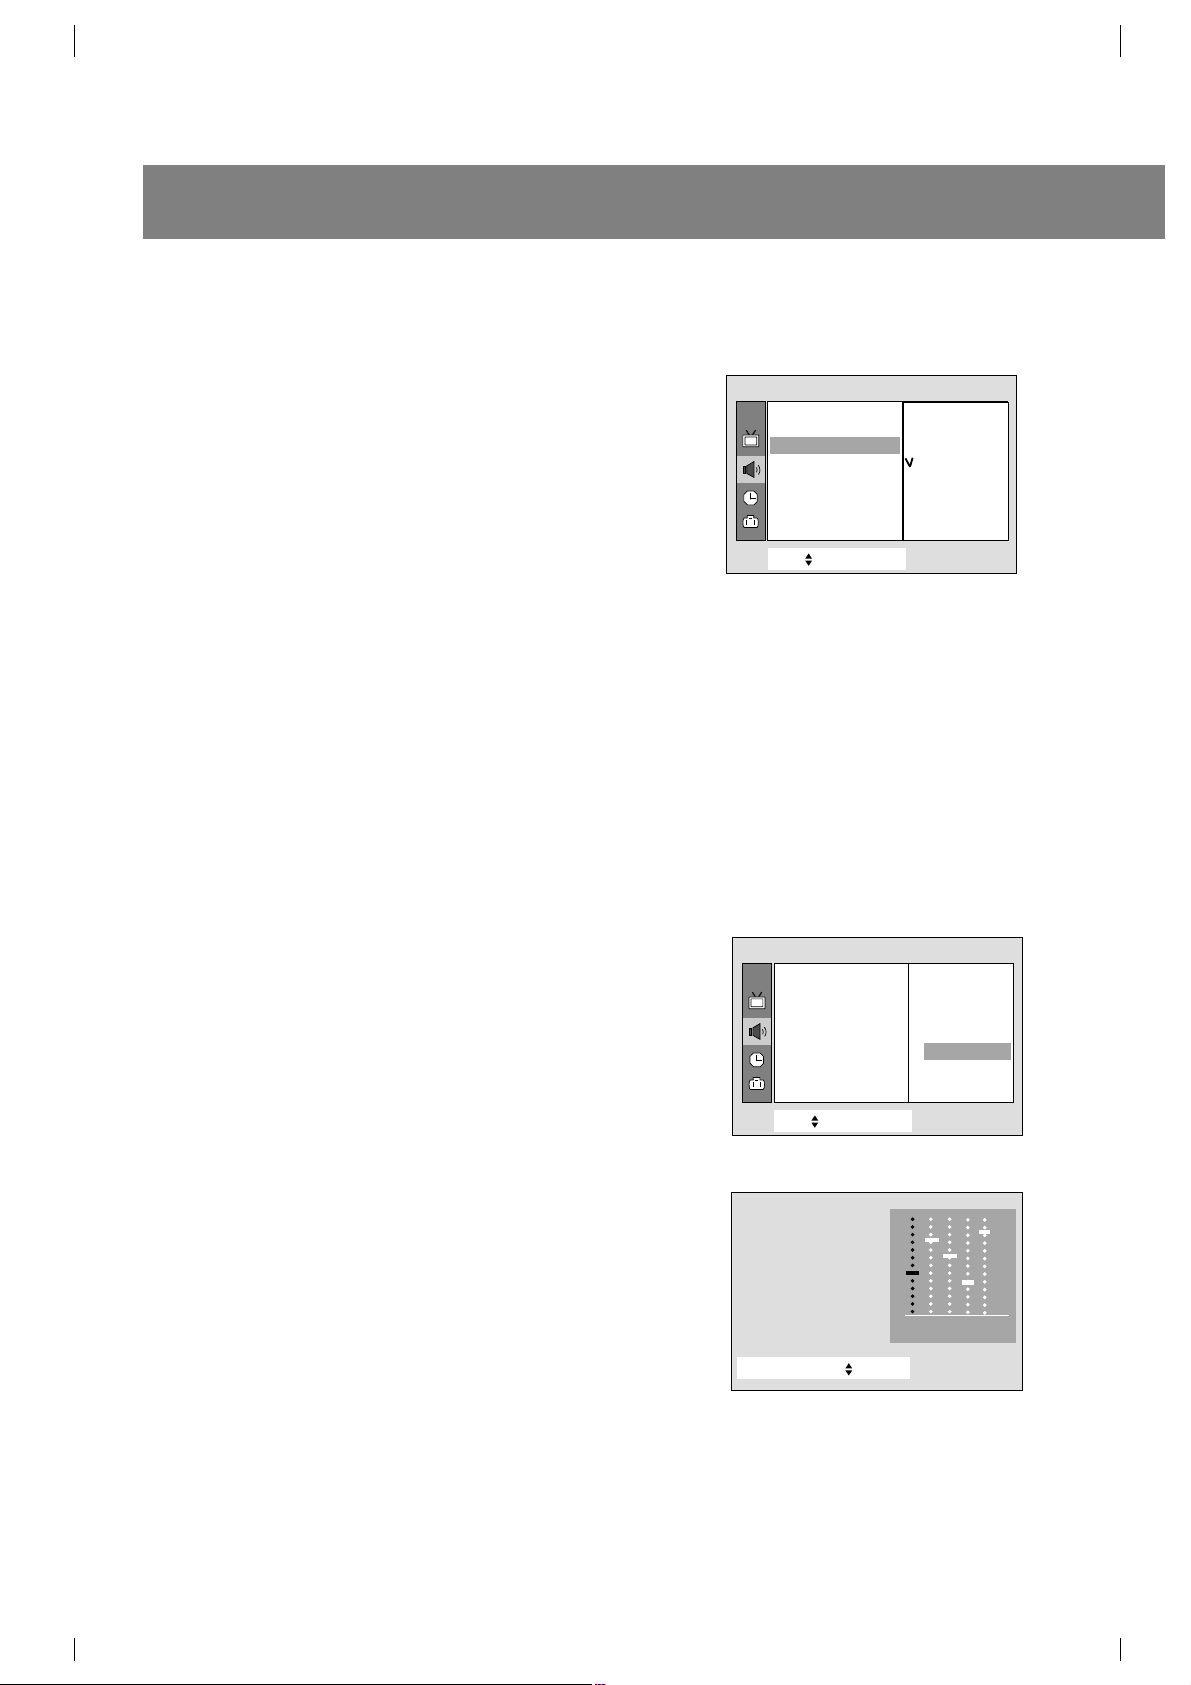
Memorizing the Channels by MANUAL
PROGRAM
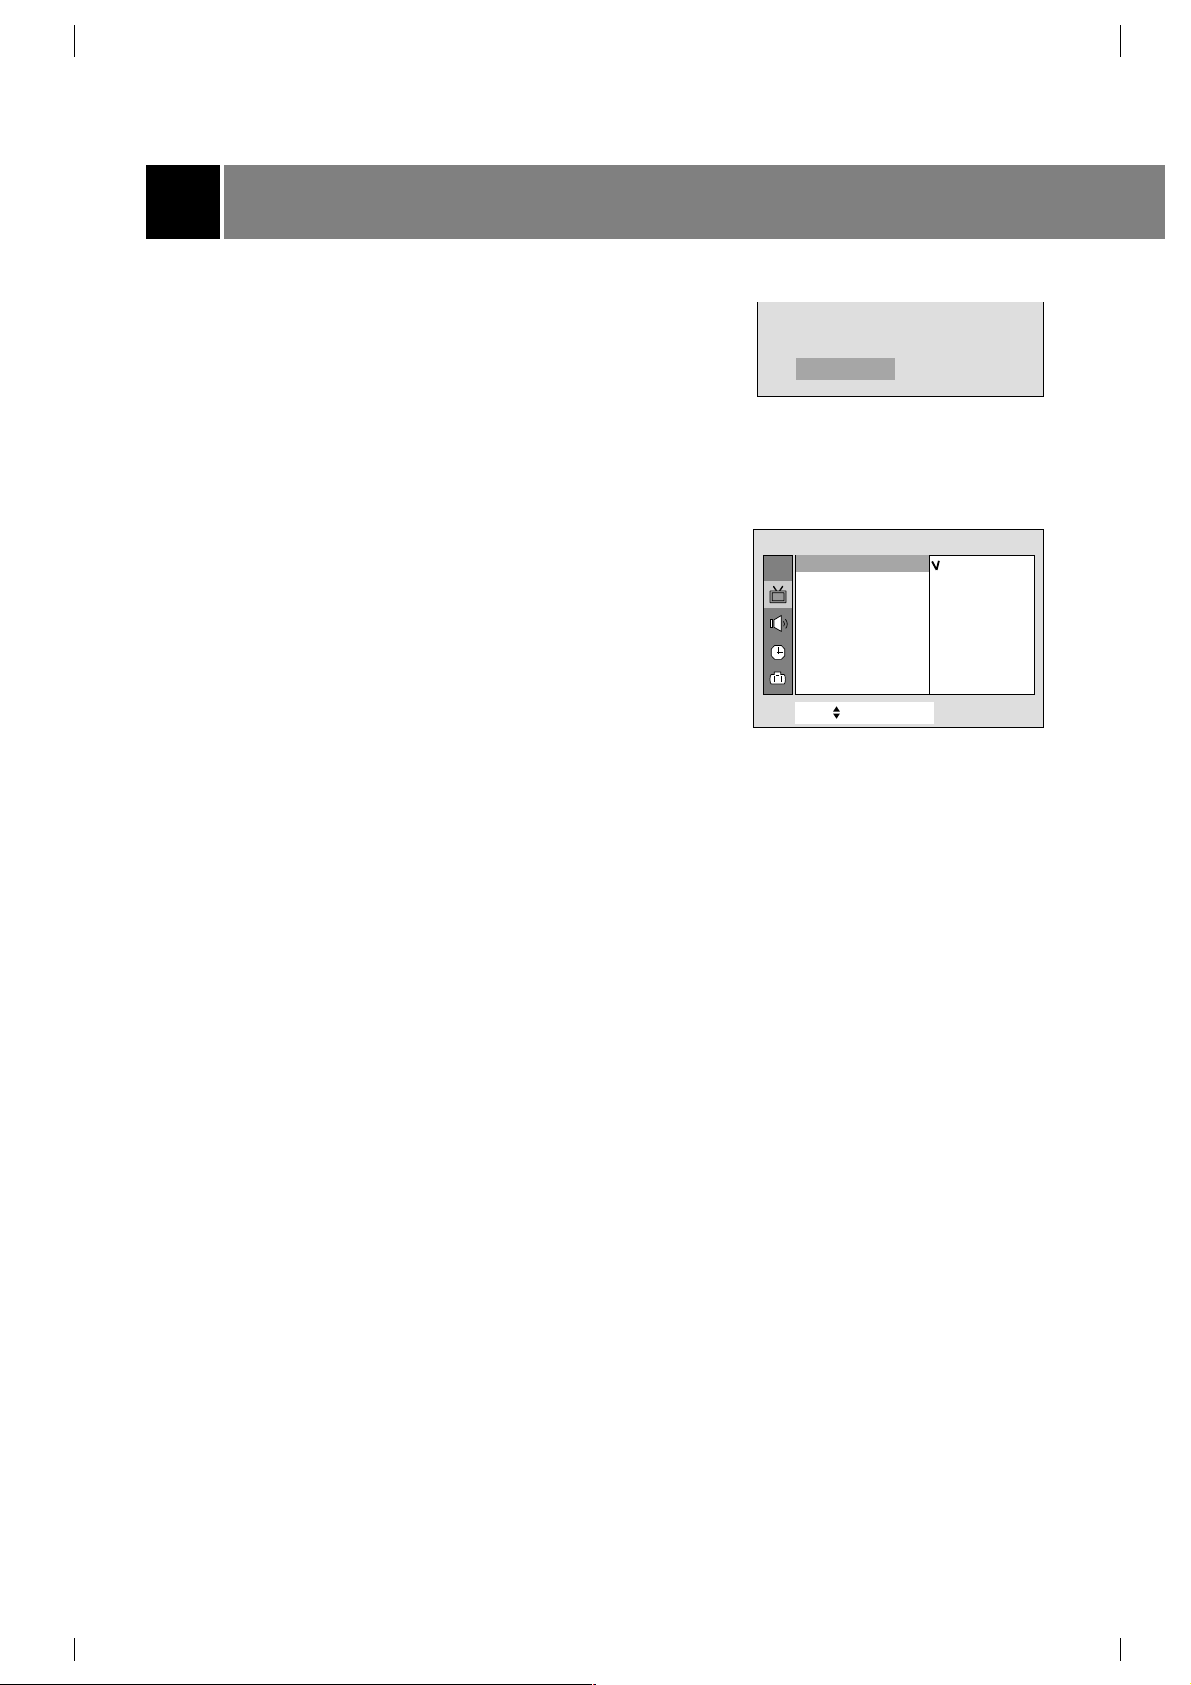
Using the MEMORY/ERASE button
You can conveniently perform MANUAL PROGRAM using the
MEMORY / ERASE button on the remote control.
1. Press the
D
/
E
or NUMBER buttons to select the channel number
you want to memorize or erase.
2. Press the MEMORY/ERASE button to select
Memory or Erase.
The on screen display appears as shown right.
Using the MENU
1. Press the MENU button and then use
D
/
E
button to select the
channel menu.
2. Press the
G
and then use
D
/
E
button to select Manual
program .
3. Press the
G
button and then use
D
/
E
button to select Channel.
4. Press the
G
button and then use
D
/
E
button to select the channel
number you want to memorize or erase.
5. Press the
F
button and then use
D
/
E
button to select Memory.
6. Press the
G
button and then
D
/
E
to select Memory or Erase.
7. Press the
F
button and then use
D
/
E
button to select Ch.name.
You can make a channel name.
8. Press the
G
button and then use
F
/
G
button to select a word
position and then
D
/
E
button to enter alphabet A to Z, number 0
to 9, or blank.
9. Repeat steps 3 to 8 to memorize or erase other channels.
10.Press the MENU button to exit.
Selecting the Channel
Press the
D
/
E
button to conveniently select the upper or lower
channel then the channel being viewed, or NUMBER buttons to
directly select the desired channel.
Adjusting the Volume
Press the
G
button to increase the volume level or
F
button to
decrease the volume level.
To mute the sound, Press the MUTE button.
It's convenient when you get the telephone calls.
To restore the muted sound, press the MUTE button again or VOL
F
/
G
button.
9
++CATV+++95+++Memory
CH.
Move++Next+{+Back}
Auto+program {
Manual program {
Favorite+channel+{
Auto+demo+ + {
Move++Next+{+Back}
Channel {
Memory {
Fine {
Ch.+name {
Channel
+
Memory {
++Memory
++Erase
oVolume 15
_
+++++++
+
Manual+program
To +set
Manual program {
Various function
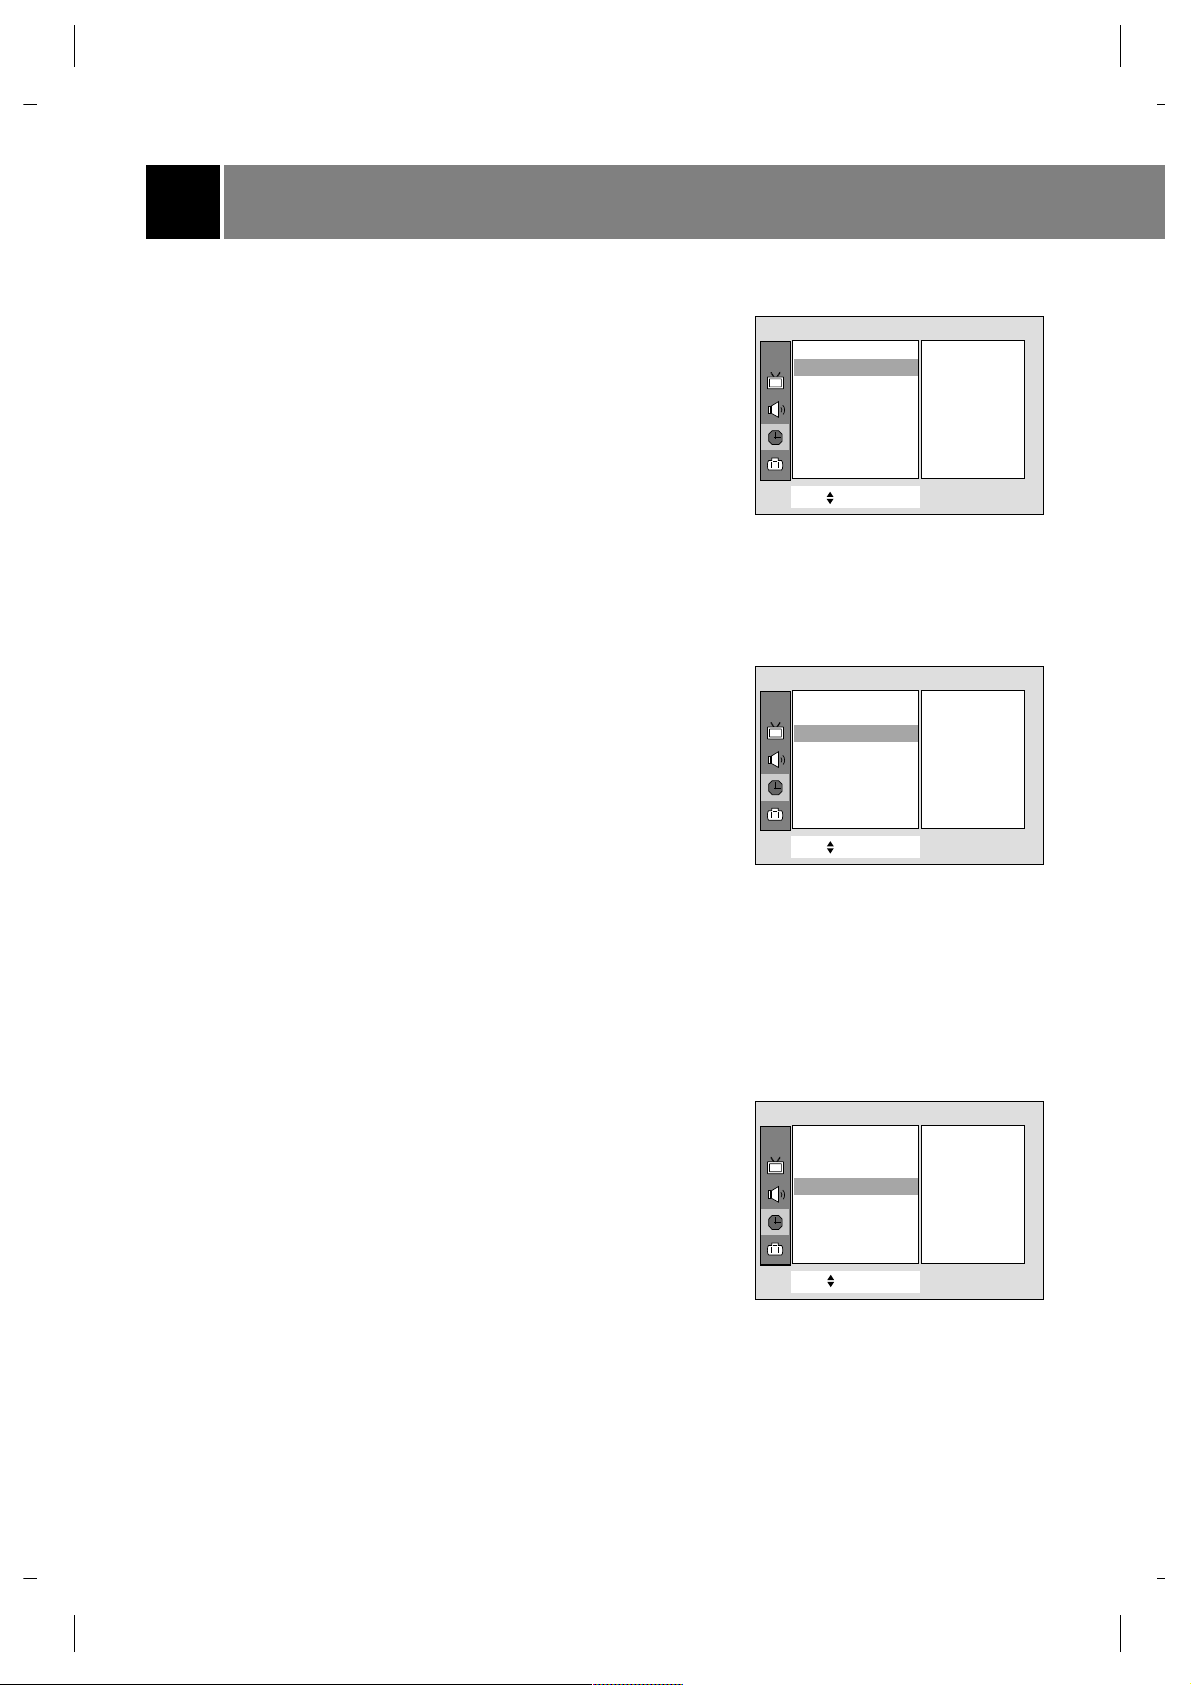
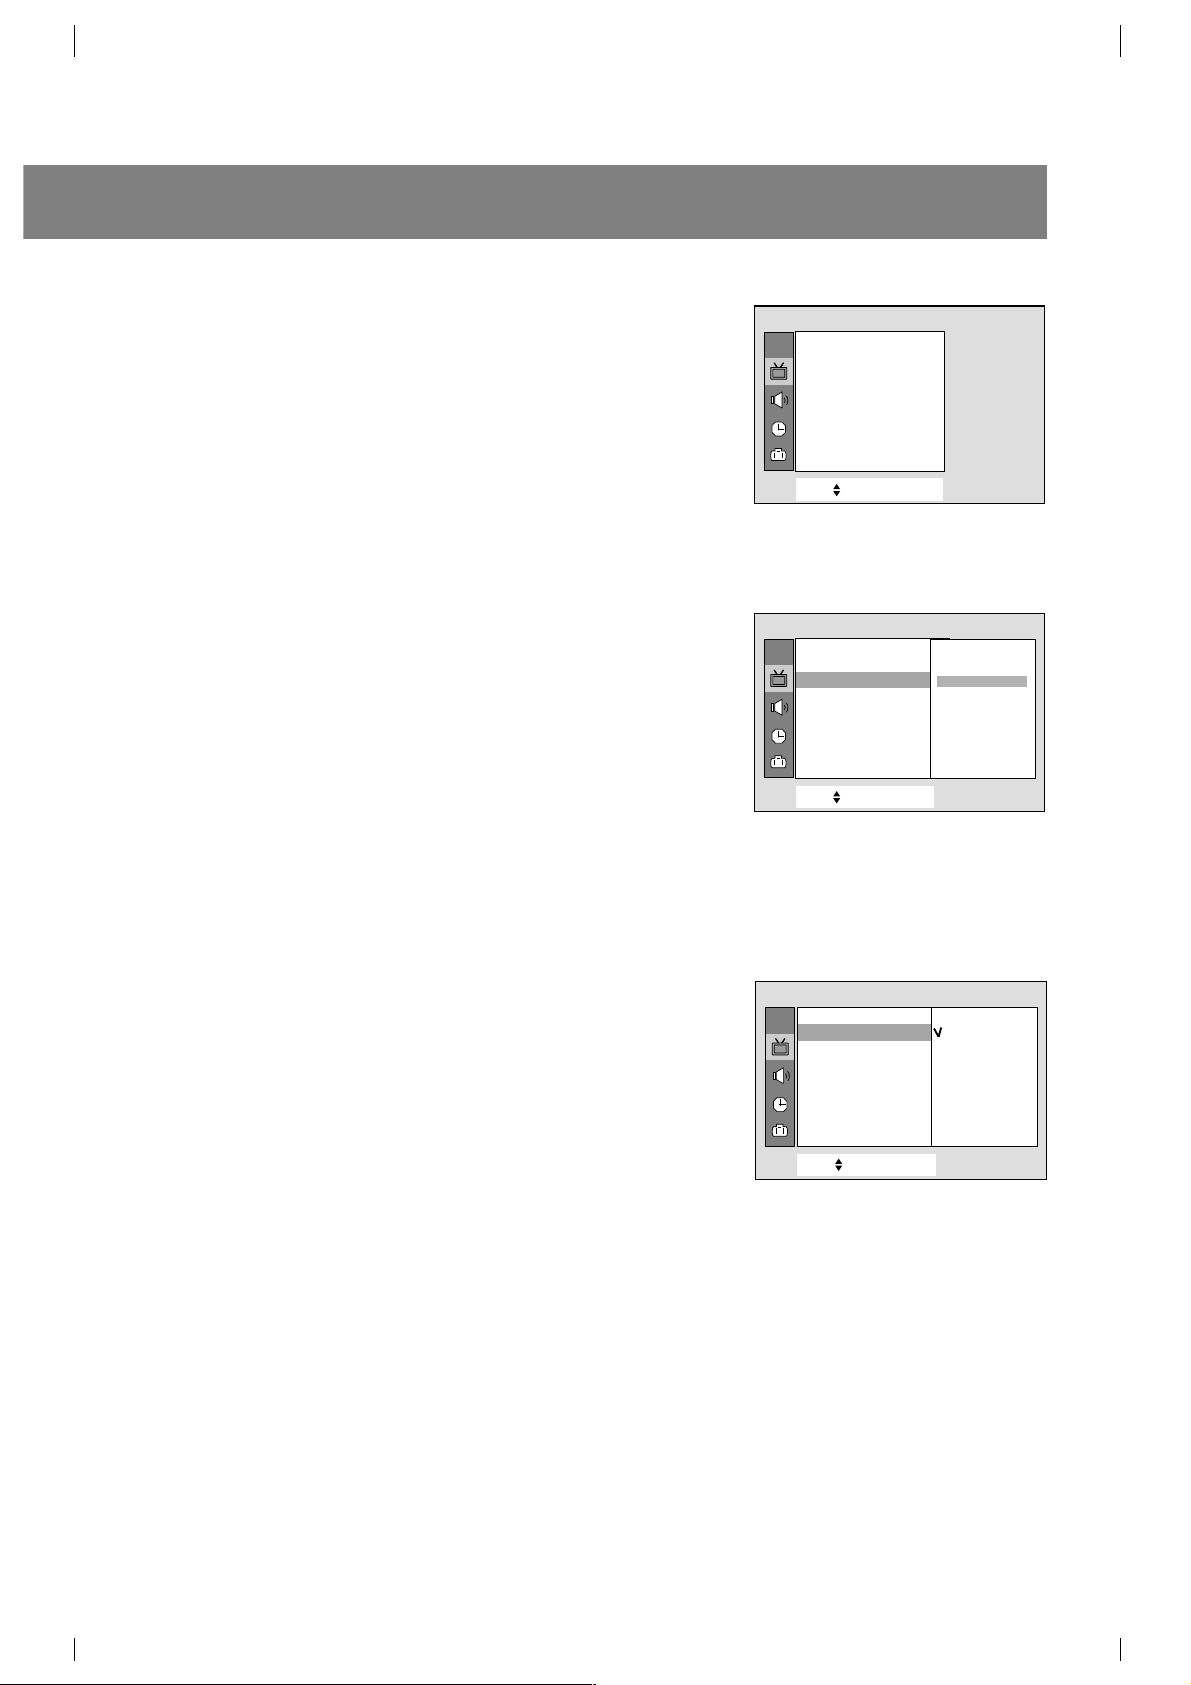
Setting the Clock
Before setting the on/off timer, first you should set the current time.
1. Press the MENU button and then use
D
/
E
button to select the
Timer menu.
2. Press the
G
and then
D
/
E
button to select Clock .
3. Press the
G
button and then press the
D
/
E
button to adjust the hour.
4. Press the
G
button and then press the
D
/
E
button to adjust the
minute.
5. Press the MENU button to exit.
Setting the OFF TIMER
This is the function to automatically switch the TV to standby mode at
a preset time.
1. Press the MENU button and then use
D
/
E
button to select the
Timer menu.
2. Press the
G
and then
D
/
E
button to select Off timer.
3. Press the
G
button and then press the
D
/
E
button to adjust the
hour.
4. Press the
G
button and then press the
D
/
E
button to adjust the
minute.
5.
Run/Hold is used to activate or deactivate preset on/off times.
Press the
G
and then
D
/
E
button to select Hold or Run.
6. Press the MENU button to exit.
Note: If the same time is set for the on time and off time, only the off
time operates.
Setting the ON TIMER
This is the function to automatically turn the TV on at a preset time and
channel.
1. Press the MENU button and then use
D
/
E
button to select the
Timer menu.
2. Press the
G
and then
D
/
E
button to select On timer.
3. Press the
G
and then use
D
/
E
button to adjust the hour.
4. Press the
G
and then use
D
/
E
button to adjust the minute.
5. Press the
G
and then use
D
/
E
button to select the desired channel
among the memorized channels in auto program.
6. Press the
G
and then use
D
/
E
button to adjust the desired volume
level.
7.
Run/Hold is used to activate or deactivate preset on/off times.
Press the
G
button and then use
D
/
E
button to select Hold or
Run.
8. Press the MENU button to exit.
Notes: •If you don’t press any button within 2 hours after turning on the
TV set by ON TIMER function, the set will be automatically
switched back to standby mode.
•TV must be in standby mode for the On timer to work.
10
CH.
Move++Next+{+Back}
Clock {
Off_timer {
On+_timer {
Auto+_off+ {
Timer
__:__
+
AMAM__
CH.
Move++Next+{+Back}
Clock {
Off_timer {
On+_timer {
Auto+_off+ {
Timer
__:40
+
AM
0
Hold
PM11
Clock {
Off_timer {
CH.
Move++Next+{+Back}
Clock {
Off_timer {
On+_timer {
Auto+_off+ {
Timer
On_timer {
__:40
+
AM
PM
TV 0000006
Volume030
Hold
11
Setting the Sleep Time
You don't have to remember to switch the TV to standby mode before
you go to sleep. The sleep timer automatically turns the TV off after
the preset time elapses.
Press the SLEEP button to select the desired sleep time.
Each time you press this button, the sleep time is displayed one by
one as shown below. The timer begins to count down from the number
of minutes selected.
Notes: •After a few seconds, the desired sleep time will disappear and
be operated automatically.
• To view the remaining sleep time, press the SLEEP button
once and the remaining sleep time will be displayed.
• To cancel the sleep time, select the
Sleep - - - mode by using
the SLEEP button.
Auto Off
If there is no input signal, the TV is switched to standby mode
automatically in 10 minutes.
1. Press the menu button and then use
D
/
E
button to select the
Timer menu.
2. Press the
G
and then
D
/
E
button to select Auto off.
3. Press the
D
/
E
button to select On or Off.
4. Press the MENU button to exit.
Operating the degauss (some models)
In this TV set the magnetic field of the earth may influence on the color
purity of picture by neighbor magnetic substance or installation
direction of the TV set. The stripes may appear on the screen or the
color may not be equal in the corner. You can enjoy the program in
high color quality by operating the Degauss.
1. Press the menu button and then use
D
/
E
button to select the
Special menu.
2. Press the
G
and then
D
/
E
button to select Degauss.
3. Press the
G
button and then use
D
/
E
button to select On or Off.
After the degaussing function works, On mode switches to Off
mode automatically.
4. Press the MENU button to exit.
Notes: •Do not operate this function often because the lifetime of CPT
may be shorten.
• If you cannot adjust the screen condition by degaussing, try it
again after about 4 minutes.
11
eSleepeee ___
CH.
Move++Next+{+Back}
Clock {
Off_timer {
On+_timer {
Auto+_off+ {
Timer
Auto+_off+_ {
On
Off
CH.
Move++Next+{+Back}
Language {
Input {
Key+lock {
Caption+ {
Tilt+ {
Degauss {
Degauss {
On
Off
--- → 10 → 20 → 30 → 60 → 90 → 120 → 180 → 240
Special
Key Lock
The TV can be set so that the remote control is needed to control it.
This feature can be used to prevent unauthorized viewing.
1. Press the menu button and then use
D
/
E
button to select the
Special menu.
2. Press the
G
and then
D
/
E
button to select Key lock.
3. Press the
G
button and then
D
/
E
button to select On or Off.
4. Press the MENU button to exit.
Notes : • With the key lock on, the display
Key lock appears on the
screen if any button on the front panel is pressed while
viewing the TV.
• This programmed to remember which option it was last set to
even if you switch the TV from standby mode.
Tilt (some models)
The picture of the set may tilt to left or right if the set is moved to
another direction. This function is to adjust the tilt.
1. Press the menu button and then use
D
/
E
button to select the
Special menu.
2. Press the
G
and then
D
/
E
button to select Tilt.
3. Press the
G
button and then use
F
/
G
button to adjust the tilt.
4. Press the MENU button to exit.
Adjusting the Fine
This function is to adjust the picture to stable condition when it is poor,
for example, a horizontal stripe, twisted picture or no color in broad-
casting.
1. Press the MENU button and then use
D
/
E
button to select the
channel menu.
2. Press the
G
and then
D
/
E
button to select Manual..
3. Press the
G
and then
D
/
E
button to select Fine.
4. Press the
G
button to enter the Fine mode.
5. Press the
F
/
G
button to tune the desired picture condition.
6. Press the ENTER (
A
) button to memorize.
7. Repeatedly press the MENU button to exit.
Notes : • To release the memorized fine tuning, program again the fine-
tuned channel by AUTO PROGRAM or MANUAL PROGRAM.
• If the finely tuned channel is memorized, the color of the
channel number changes to yellow.
Various function
12
CH.
Move++Next+{
+
Back}
Language {
Input {
Key+lock {
Caption+ {
Tilt+ {
Degauss {
Key+lock {
On
Off
CH.
Move++Next+{
+
Back}
Language {
Input {
Key+lock {
Caption+ {
Tilt+ {
Degauss {
Tilt {
++++00
Special
Special
CH.
Move++Next+{+Back}
Auto+program {
Manual program {
Favorite+channel+{
Auto+demo+ + {
Move++Next+{+Back}
Channel {
Memory {
Fine {
Ch.+name {
Channel
+
Fine {
Manual+program
To +set
Manual program {
0
13
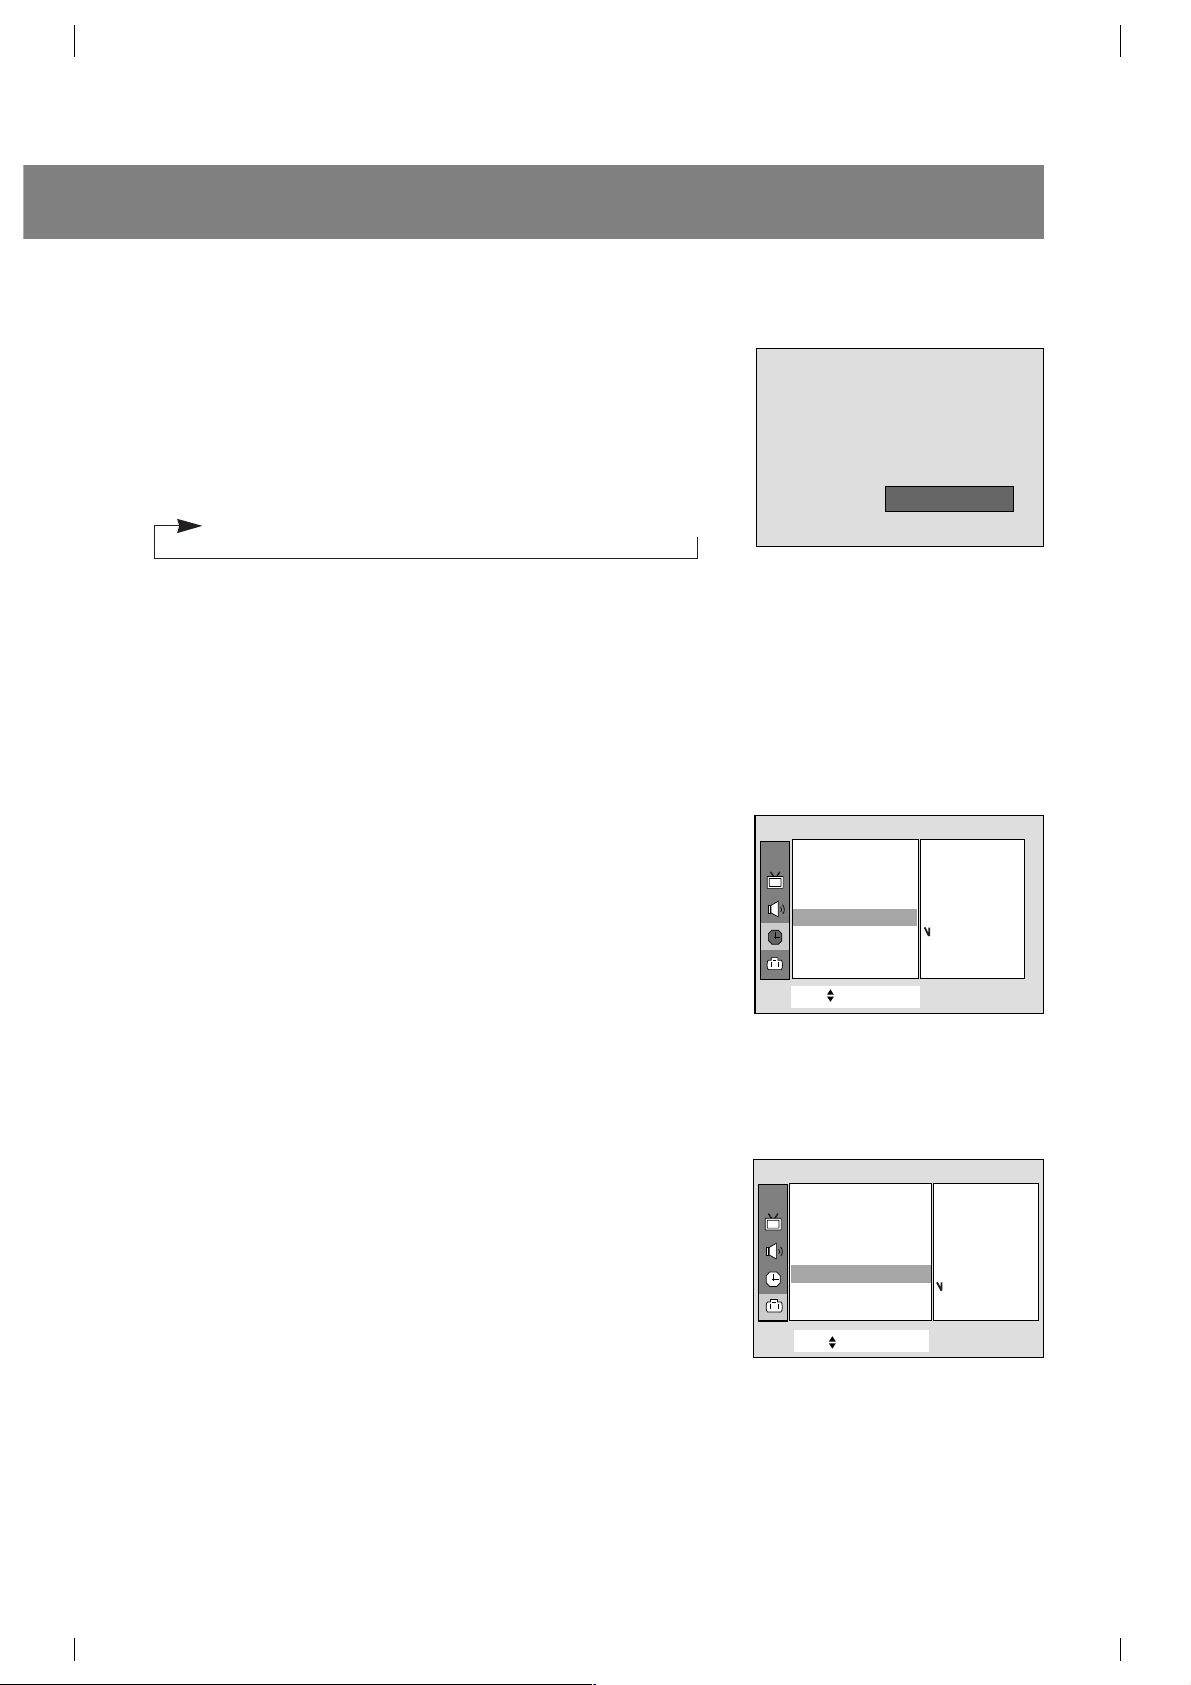
Favorite channel memory
Favorite channel memory is a convenient feature that lets you quickly
scan up to five channels of your choice without having to wait for the
TV to scan through all the in-between channels.
1. Press the MENU button and then use
D
/
E
button to select the
Channel menu.
2. Press the
G
and then
D
/
E
button to select Favorite channel.
3. Press the
G
button and then use
D
/
E
button to select a favorite
channel position.
4. Use the
F
/
G
button to select the desired channel number.
5. Repeat steps 3 to 4.
6. Press the MENU button to exit.
To select the favorite channel, repeatedly press the FCR (Favorite
Channel Review) button. Eight channels programmed appear on the
screen one by one.
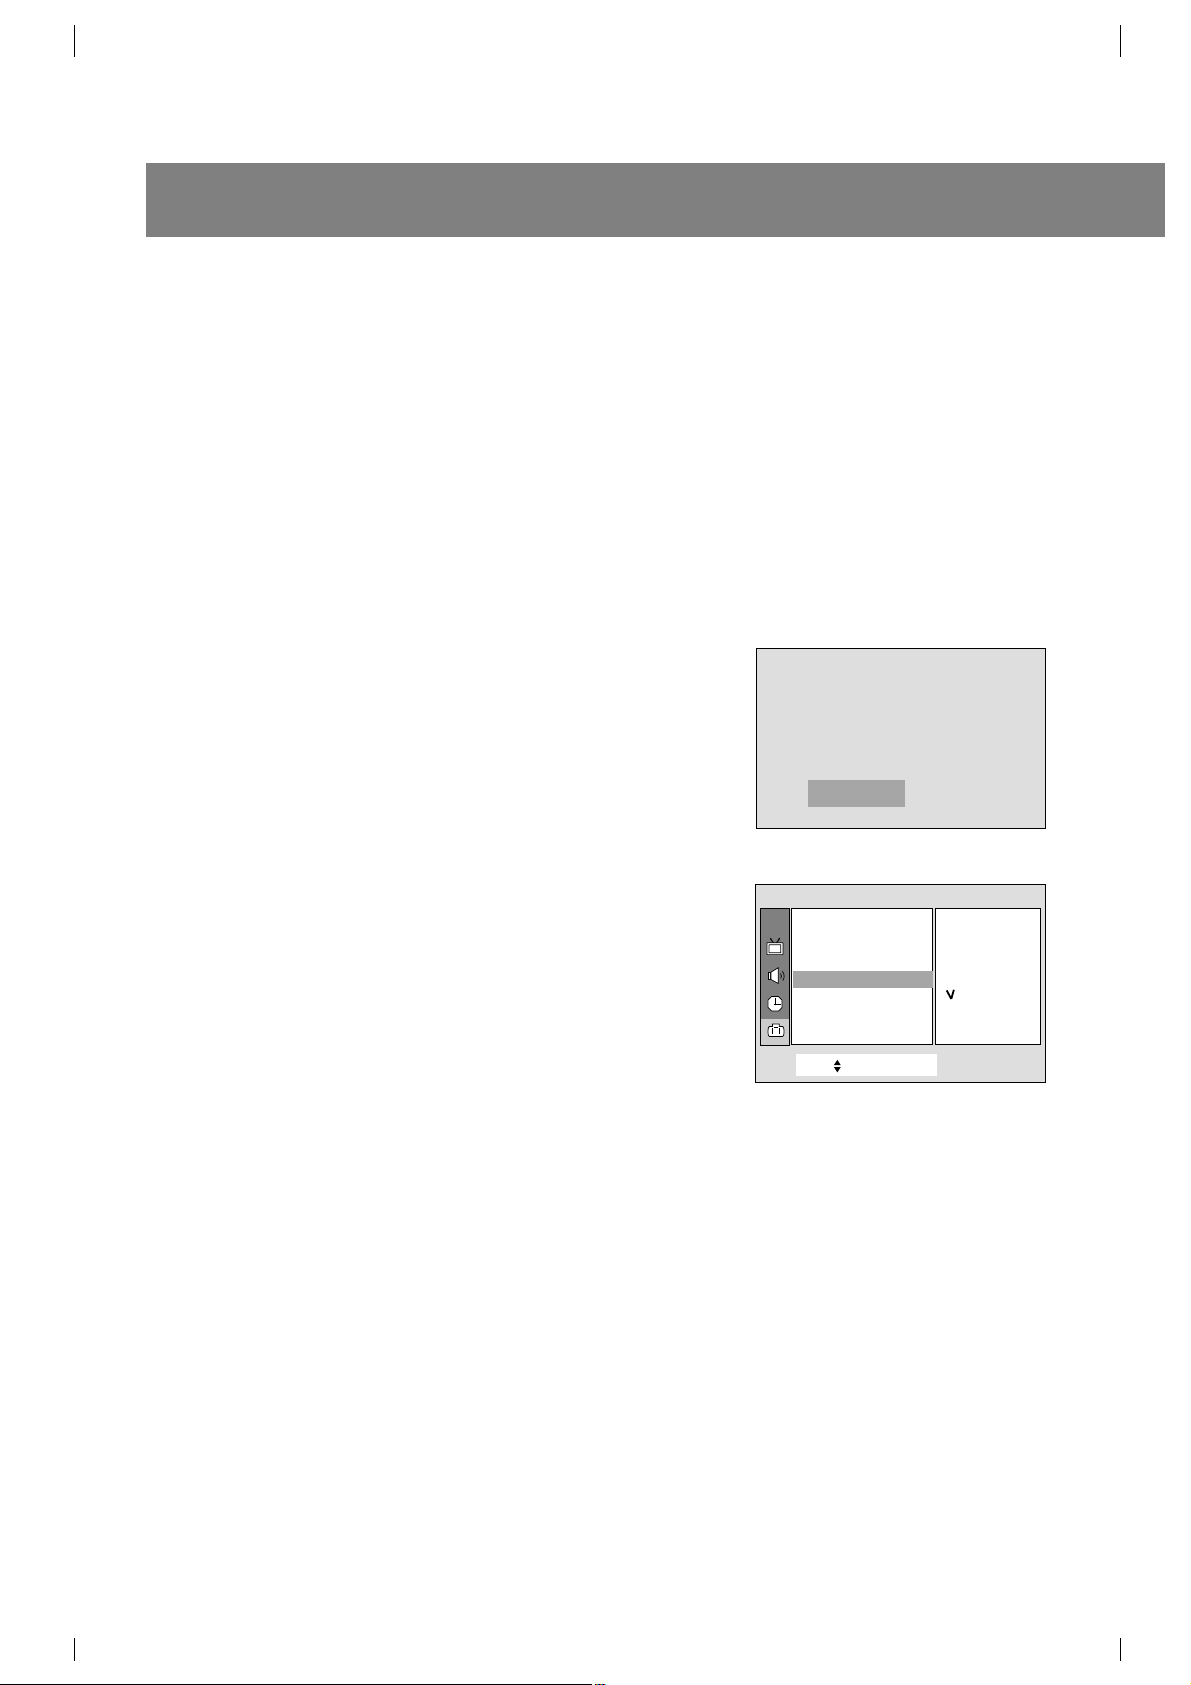
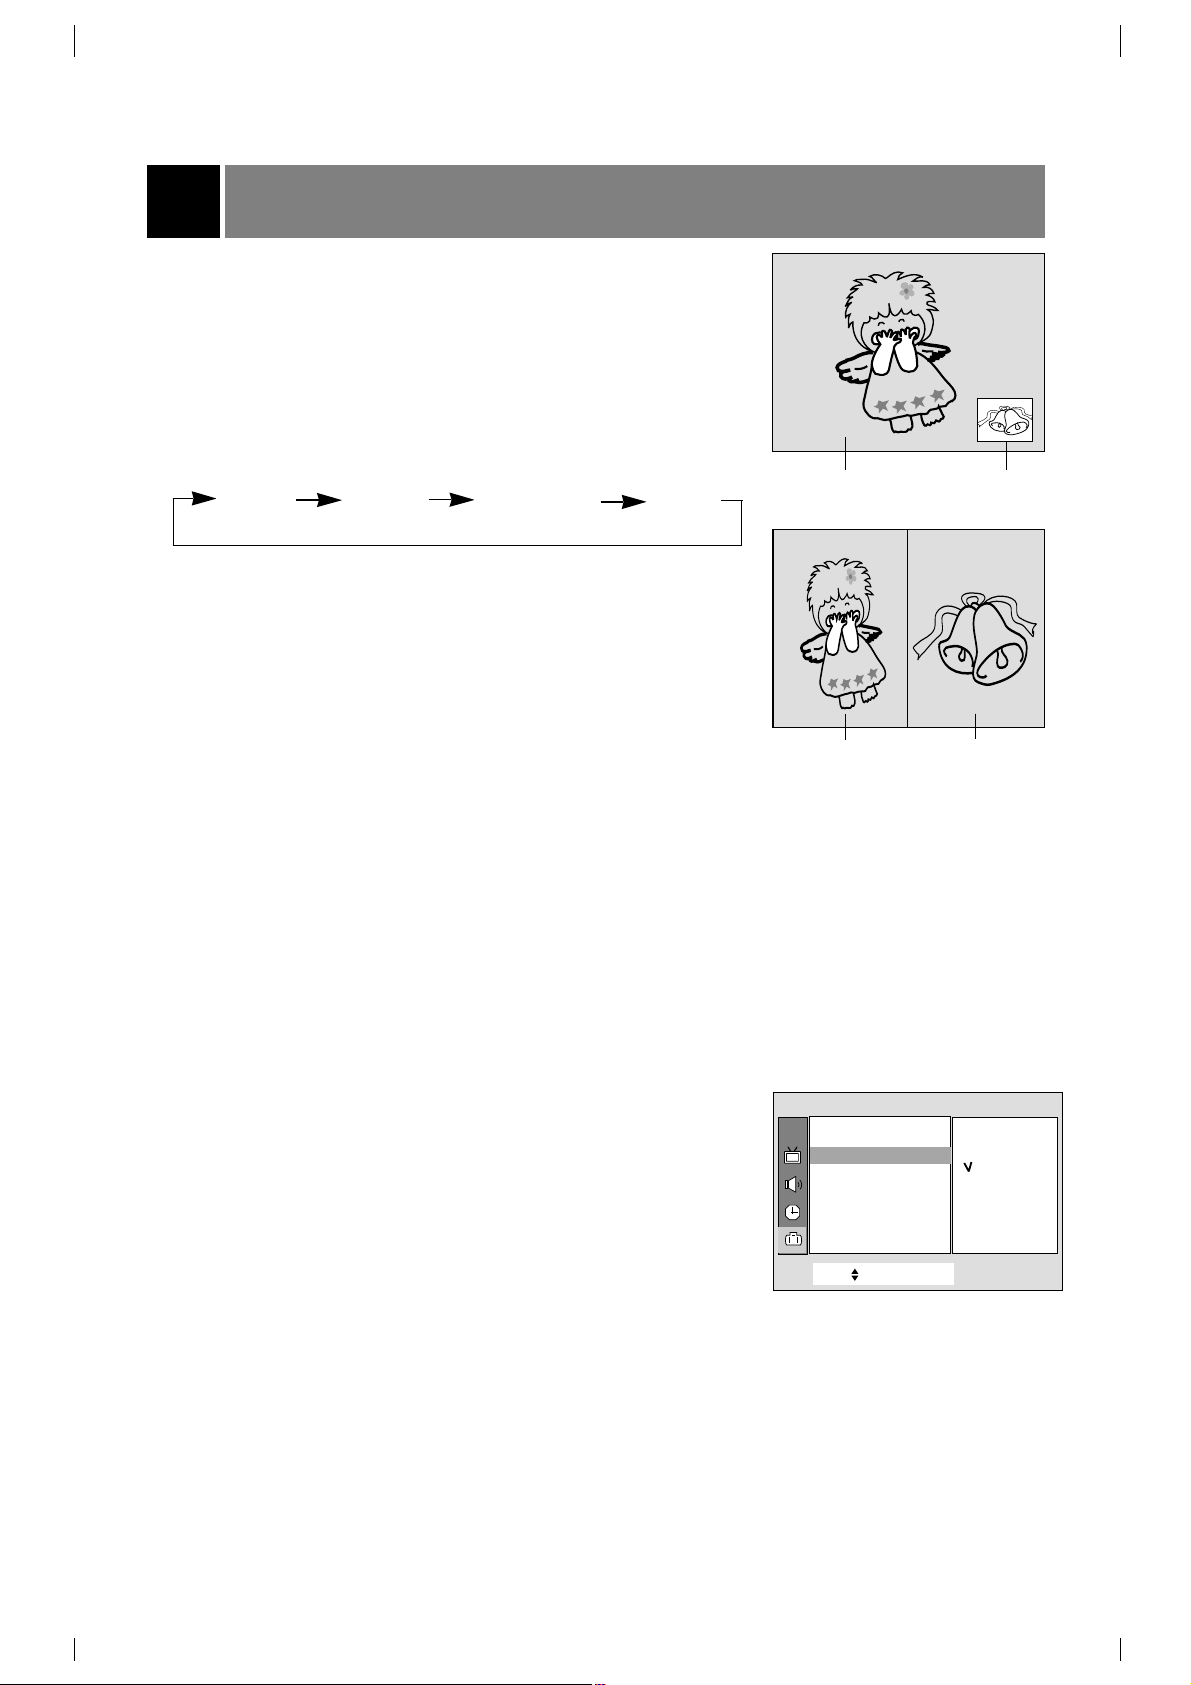
Auto Demonstration
Auto demo allows you to review all the menus available on the TV set.
1. Press the menu button and then use
D
/
E
button to select the
Channel menu.
2. Press the
G
button and then use
D
/
E
button to select Auto
demo
.
3. Press the
G
button, and the demonstration starts.
When the demonstration reaches the last display, it starts again
from the beginning.
To stop auto demonstration, press any button.
Game (some models)
You can enjoy the TV game with this set.
1. Press the MENU button and then use
D
/
E
button to select the
Special menu.
2. Press the
G
and then
D
/
E
button to select Game.
3. Press the
G
button to enter the game mode.
4. Press the
D
/
E
button to select the desired game.
5. Press the ENTER (
A
) button to repeatedly start a game.
6. Repeatedly press the MENU button to exit game mode.
If you want to return the game list, press the
D
/
E
button.
For further information, refer to the game manual.
CH.
Move++Next+{+Back}
Auto+program {
Manual program {
Favorite+channel+
{
Auto+demo+ + {
Channel
CATV++95
_____
_____
_____
_____
_____
_____
_____
CH.
Move++Next+{+Back}
Auto+program {
Manual program {
Favorite+channel{
Auto+demo+ + {
Auto+demo++{
Favorite+channel+{
ToOstart
Channel
CH.
Move++Next+{
+
Back}
Language {
Input {
Key+lock {
Caption+ {
Tilt+ {
Degauss {
Game {
Game {
To +start
Special
Picture control
Auto Picture Control
You can select picture modes programmed at factory as you prefer.
Using the APC button
1. Press the APC button.
2. Press the APC button to select
Clear, Optimum, Soft or User.
3. Press the ENTER(
A
) button to exit.
Using the MENU button
1. Press the MENU button and then use
D
/
E
button to select the
Picture menu.
2. Press the
G
and then
D
/
E
button to select APC.
3. Press the
G
button to enter the APC mode.
4. Press the
D
/
E
button to select Clear, Optimum, Soft or User.
5. Press the MENU button to exit.
14
Clear
CH.
Move++Next+{+Back}
APC ++{
XD {
Contrast {
Brightness + {
Color ++++++++{
Sharpness + {
Tint
++++++
+ {
Picture
+
APC {
Clear
Optimum
Soft
User
Adjusting the Picture
This is the function to manually adjust the desired picture levels
(Contrast, Brightness, Color, Sharpness, Tint) of the screen as
you like. If the picture you set is not satisfactory, you can select a
factory preset picture. In the broadcasting system PAL-M/N, the
picture item
Tint is not displayed.
1. Press the MENU button and then use
D
/
E
button to select the
Picture menu.
2. Press the
G
and then
D
/
E
button to select the desired picture
mode.
3. Press the
G
button.
4. Press the
F
/
G
button to adjust the level.
The level of displayed is adjusted.
5. Press the MENU button to exit.
XD (some models)
XD is LG Electronic’s unique picture improving technology to display a
real HD source through an advanced digital signal processing
algorithm.
1. Press the menu button and then use
D
/
E
button to select the
Picture menu.
2. Press the
G
and then
D
/
E
button to select XD.
3. Press the
G
button and then
D
/
E
button to select On or Off.
4. Press the MENU button to exit.
Note : When selecting APC options (Clear, Optimum and Soft), XD is
automatically change to On.
15
CH.
Move++Next+{+Back}
APC ++{
XD {
Contrast {
Brightness + {
Color ++++++++{
Sharpness + {
Tint
++++++
+ {
Picture
+
Contrast {
CH.
Move++Next+{+Back}
APC ++{
XD {
Contrast {
Brightness + {
Color ++++++++{
Sharpness + {
Tint
++++++
+ {
Picture
100
CH.
Move++Next+{+Back}
APC ++{
XD {
Contrast {
Brightness
+ {
Color ++++++++{
Sharpness + {
Tint
++++++
+ {
Picture
+
XD {
On
Off
Enjoying the Stereo/SAP Broadcast
This TV set can receive MTS stereo programs and any SAP
(Secondary Audio Program) that accompanies the stereo program, as
the system to be transmitted one additional sound signal as well as the
original one. MTS function doesn't operate in the video mode.
Using the MTS Button
1. Press the MTS button to select your desired MTS mode.
Each time you press this button, the
MONO, STEREO or SAP mode
appears in turn.
2. Press the ENTER (
A
) button to exit.
Notes:
• Stereo or SAP can only be received if the TV station transmits those
signals, even though you have selected
STEREO or SAP.
• Mono sound is automatically received if the broadcast is only in
Mono; even though
STEREO or SAP has been selected.
• Select
MONO if you want to listen to mono sound in remote fringe
areas during stereo/SAP broadcasting.
Auto Sound Control
You can enjoy the best sound without any special adjustment because
this TV set automatically adjusts the sound appropriate to viewing
program character by self-intelligence.
1. Press the MENU button and then use
D
/
E
button to select the
Sound menu.
2. Press the
G
and then the
D
/
E
button to select DASP.
3. Press the
G
and then the
D
/
E
button to select Flat, Music,
Movie, Sports or User.
4. Press the MENU button to exit.
AVL (Auto Volume Leveler)
AVL automatically keeps on an equal volume level even if you change
channels.
Using the MENU Button
1. Press the MENU button and then use
D
/
E
button to select the
Sound menu.
2. Press the
G
and then
D
/
E
button to select AVL.
3. Press the
G
and then
D
/
E
button to select On or Off.
4. Press the MENU button to exit.
Sound control
16
CH.
Move++Next+{+Back}
DASP ++{
Turbo +Sound {
AVL {
Balance {
Sound
DASP ++{
Flat
Music
Movie
Sports
User
{
CH.
Move++Next+{+Back}
DASP +
+{
Turbo +Sound {
AVL { \
Balance {
Sound
AVL {
On
Off
17
Adjusting the balance
1. Press the MENU button and then use
D
/
E
button to select the
Sound menu.
2. Press the
G
and then
D
/
E
button to select Balance.
3. Press the
G
and then
F
/
G
button to adjust the balance level.
4. Press the MENU button to exit.
Adjusting the DBS (Dynamic Bass Sound)
(some models)
1. Press the MENU button and then use
D
/
E
button to select the
Sound menu.
2. Press the
G
and then
D
/
E
button to select DBS.
3. Press the
G
and then
D
/
E
button to adjust the DBS level.
4. Press the MENU button to exit.
X-WAVE (some models)
1. Press the MENU button and then use
D
/
E
button to select the
Sound menu.
2. Press the
G
and then
D
/
E
button to select X-WAVE.
3. Press the
G
and then
D
/
E
button to select Set Frequency.
4. Press the
G
button to tune in a frequency on the X-wave menu.
5. Use the number
0 to 9 or press the
F
/
G
button to match the TV’s
frequency and the FM receiver’s.
Note:
1. If the reception is poor or weak, select a different frequency.
2. For best results, there should be no more that 19ft between the TV
and FM Receiver.
3. In certian areas, the FM transmitter ability may be weak, such as
near a broadcast tower.
4. The reception sensitivity may depend on the kinds of receiver (FM
radio).
CH.
Move++
Next+{+Back}
DASP ++{
Turbo +Sound {
AVL { \
Balance {
Sound
Balance {
050
CH.
Move++Next+{+Back}
DASP ++{
Turbo +Sound {
AVL { \
Balance {
DBS + {
DBS {
On
Off
Sound
CH.
Move++Next+{+Back}
DASP ++{
Turbo +Sound {
AVL { \
Balance {
DBS
+ {
X +wave + {
X
+WAVE
{
Set+Frequency+{
Off
Sound
-
Adjust}{+0
-
9+Back Å
OXOWAVE
88 MHz 107MHz
O
FM 95.0 MHz
-
Sound control
18
Turbo Sound (some models)
With this function sound will be more emphasized and amplified
than normal sound. You can enjoy the Turbo sound so much
better than normal sound.
Using the MENU Button
1. Press the MENU button and then use
D
/
E
button to select the
Sound menu.
2. Press the
G
and then
D
/
E
button to select Turbo Sound.
3. Press the
G
and then
D
/
E
button to select On or Off.
4. Press the MENU button to exit.
Adjusting the equalizer
(User mode in Auto Sound Control)
1. Press the MENU button and then use
D
/
E
button to select the
Sound menu.
2. Press the
G
and then
D
/
E
button to select DASP.
3. Press the
G
and then
D
/
E
button to select User, then press
G
button to enter the User mode.
4. Press the
F
/
G
button to select the sound band and then press
the
D
/
E
button to adjust the desired level.
5. Press the MENU button to exit.
CH.
Move++Next+{+Back}
DASP ++{
AVL { \
Balance {
DBS {
Sound
Flat
Music
Movie
Sports
User
+User++++++{
Move}{
++Adjust++++Back
Å
0.1O0.5O1.5O5.0O10OkHz
CH.
Move++Next+{+Back}
DASP ++{
Turbo +Sound {
AVL { \
Balance {
Sound
Turbo +Sound {
On
Off
Closed captioning is a process which converts the audio portion of a television program into written
words, which then appear on the television screen in a form similar to subtitles. Closed captions allow
viewers to read the dialogue and narration of television programs.
Using Closed Captions
Captions are the subtitles of the dialogue and narration of television
programs. For prerecorded programs, program dialogue can be
arranged into captions in advance. It's possible to caption a live
program by using a process called “real-time captioning”, which
creates captions instantly. Real-time captioning is normally done by
professional reporters using a machine shorthand system and
computer for translation into English.
Captioning is an effective system for the hearing-impaired, and it can
also aid in teaching language skills.
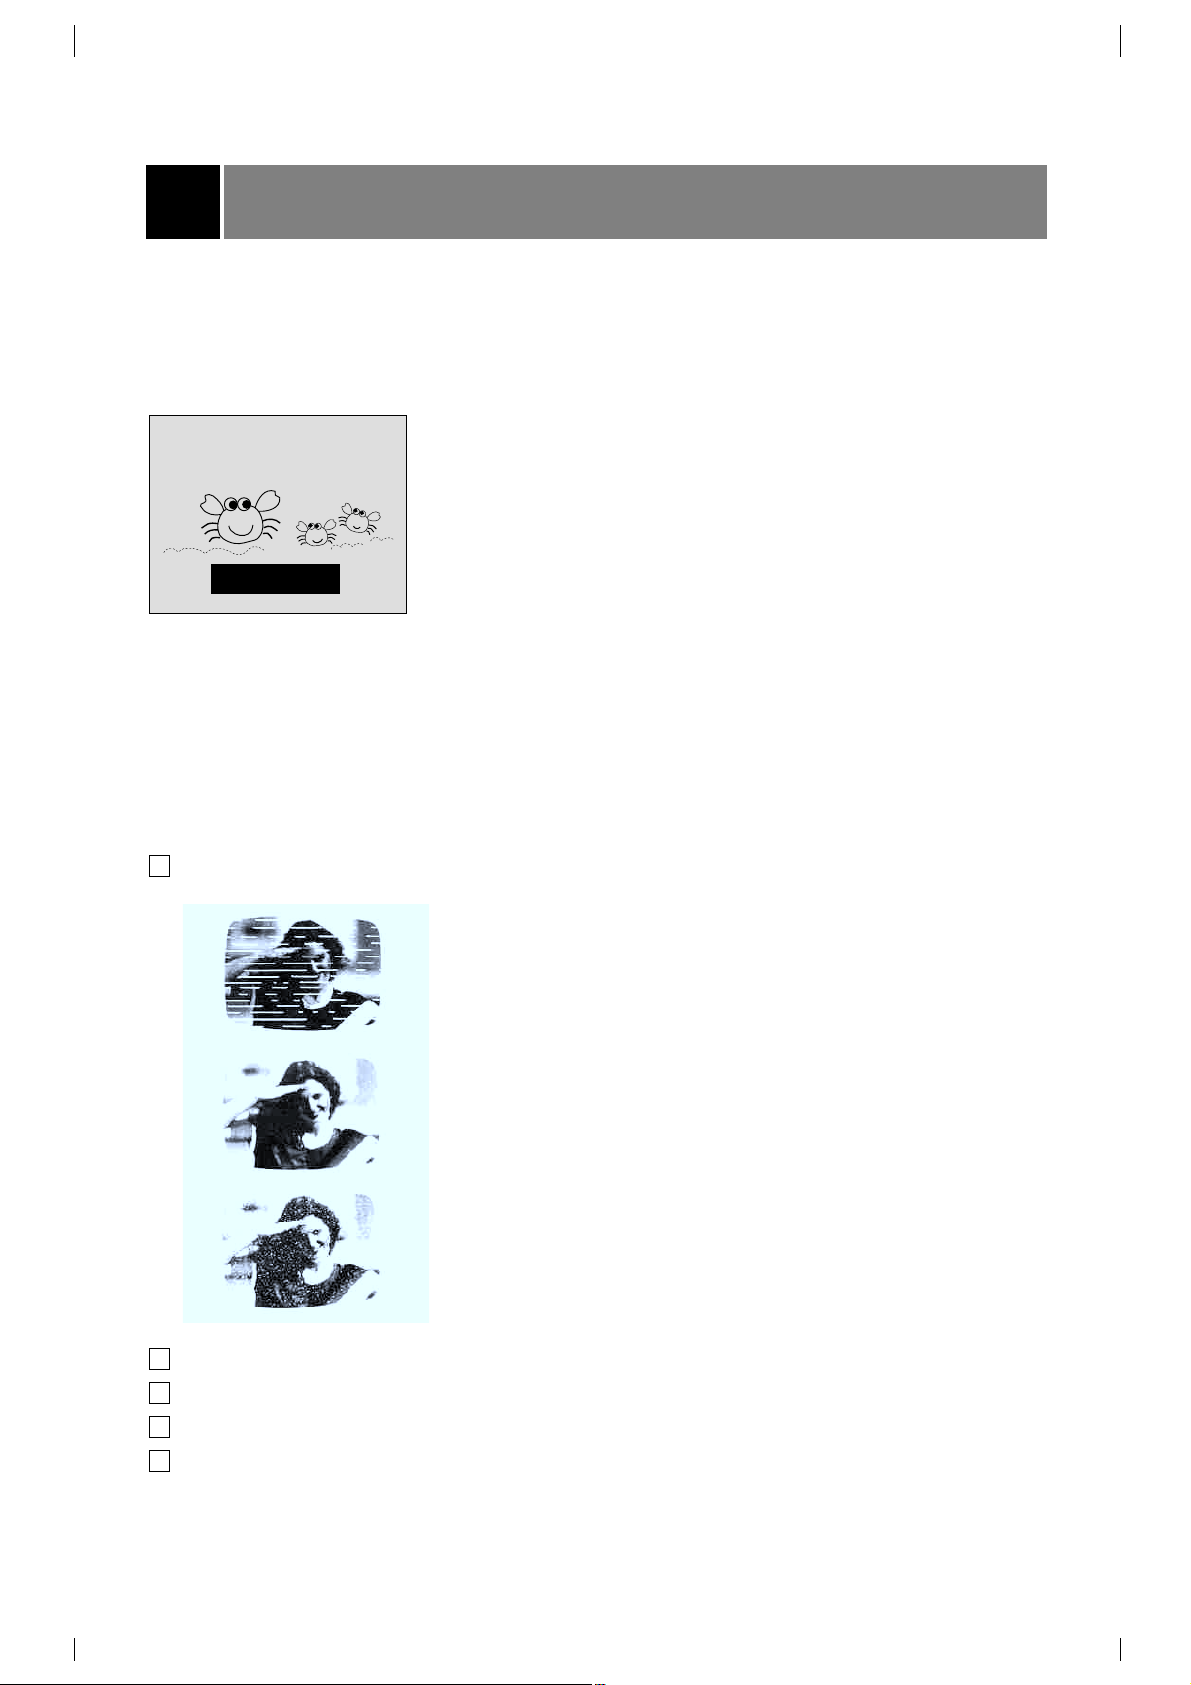
• The picture at left shows a typical caption.
Caption Tips
• Not all TV broadcasts include closed caption signals.
• Sometimes TV stations broadcast two different caption signals on the same channel. By selecting
MODE 1 or MODE 2, you can choose which signal you view. MODE 1 is usually the signal with the
captions, while MODE 2 might show demonstration or programming information.
• Your TV might not receive caption signals normally in the following situations.
Poor reception conditions are encountered:
An old, bad or illegally recorded tape is played.
Strong, random signals from a car or airplane interfere with the TV signal.
The signal from the antenna is weak.
The program wasn't captioned when it was produced, transmitted or taped.
Closed caption function
A
IGNITION:
Picture may flutter, drift, suffer from black spots or horizontal
streaking. Usually caused by interference from automobile ignition
systems, neon lamps, electrical drills and other electrical
appliances.
A
GHOSTS:
Ghosts are caused when the TV signal splits and follows two paths.
One is the direct path and the other is reflected off tall buildings,
hills or other objects. Changing the direction or position of the
antenna may improve reception.
A
SNOW:
If your receiver is located at the weak, fringe area of a TV signal,
your picture may be marred by small dots. It may be necessary to
install a special antenna to improve the picture.
FOLLOW ME
19
1
2
3
4
5
Using the Text Function
Text services give a wide variety of information on all kind of subjects
(ex. captioned program lists, weather forecasts, stock exchange
topics, news for hearing-impaired---) through the full TV screen.
But not all stations offer text services, even though they might offer
captioning.
Note: In the event you receive a poor signal, an empty black box may
appear and disappear, even when the text mode is selected.
This is normal function in such an event.
Operating the Caption and Text
Using the CAPTION button
1. Press the CAPTION button.
2. Press the CAPTION button to select
OFF, Mode 1, Mode 2, Text 1
or Text 2.
3. Press the ENTER (
A
) button to exit.
Using the MENU button
1. Press the MENU button and then use
D
/
E
button to select the
Special menu.
2. Press the
G
and then
D
/
E
button to select Caption.
3. Press the
G
button and then use
D
/
E
button to select Off, Mode
1, Mode 2, Text 1 or Text 2.
4. Press the MENU button to exit.
Note: This TV is programmed to remember which mode it was last set
to, even if you turn the TV off.
Closed caption function
20
SSOff
CH.
Move++Next+{
+
Back}
Language {
Input {
Key+lock {
Caption+ {
Tilt+ {
Degauss {
Caption+ {
+++Off
+++Mode1
+++Mode2
+++Text1
+++Text2
Special
PIP function (Some models)
Watching the PIP (Picture in Picture)
This is the function to call up a little picture (PIP : picture in picture)
within the main picture. Thus at the same time you can watch two
different programs.
1. Press the PIP/DW button to select PIP mode or double window
mode. Repeatedly press the PIP/DW button to select the desired
sub picture size. The sub picture appears as below.
2. Press the CH
+
/
-
button of the PIP buttons to select the desired
channel in the sub picture.
Notes: •Press the
D
/
E
button to select the upper or lower channel in
main picture and press the CH
+
/
-
button of the PIP buttons
to select the upper or lower channel in sub picture.
• 4:3 and Zoom don’t operate in PIP [L] mode.
Selecting the input signal (in PIP and Double
window mode)
Using the PIP MENU Button
1. Press the PIP MENU button.
2. Press the
D
/
E
button to select Input.
3. Press the
G
and then use
D
/
E
button to select TV, AV 1, AV 2,
AV 3
.
4. Press the VOLUME (
F
) button to exit.
Using the MENU Button
1. Press the MENU button and then use
D
/
E
button to select the
Special menu.
2. Press the
G
and then use
D
/
E
button to select the PIP input.
3. Press the
G
and then use
D
/
E
button to select the TV, AV 1, AV 2,
AV 3
.
4. Press the
F
button to exit.
11
+
24
Sub Picture
Sub Picture
Main Picture
Main Picture
11
+
24
< PIP mode >
< Double window mode >
PIP [S]
PIP [M]
PIP [L] : DW PIP off
CH.
Move++Next+{
+
Back}
Language {
Main+Input {
PIP+Input {
Key+lock {
Caption+ {
ARC+ {
Tilt+ {
Degauss {
PIP+Input+ {
+++TV
+++AV1
+++AV2
+++AV3
Special
21
PIP function (Some models)
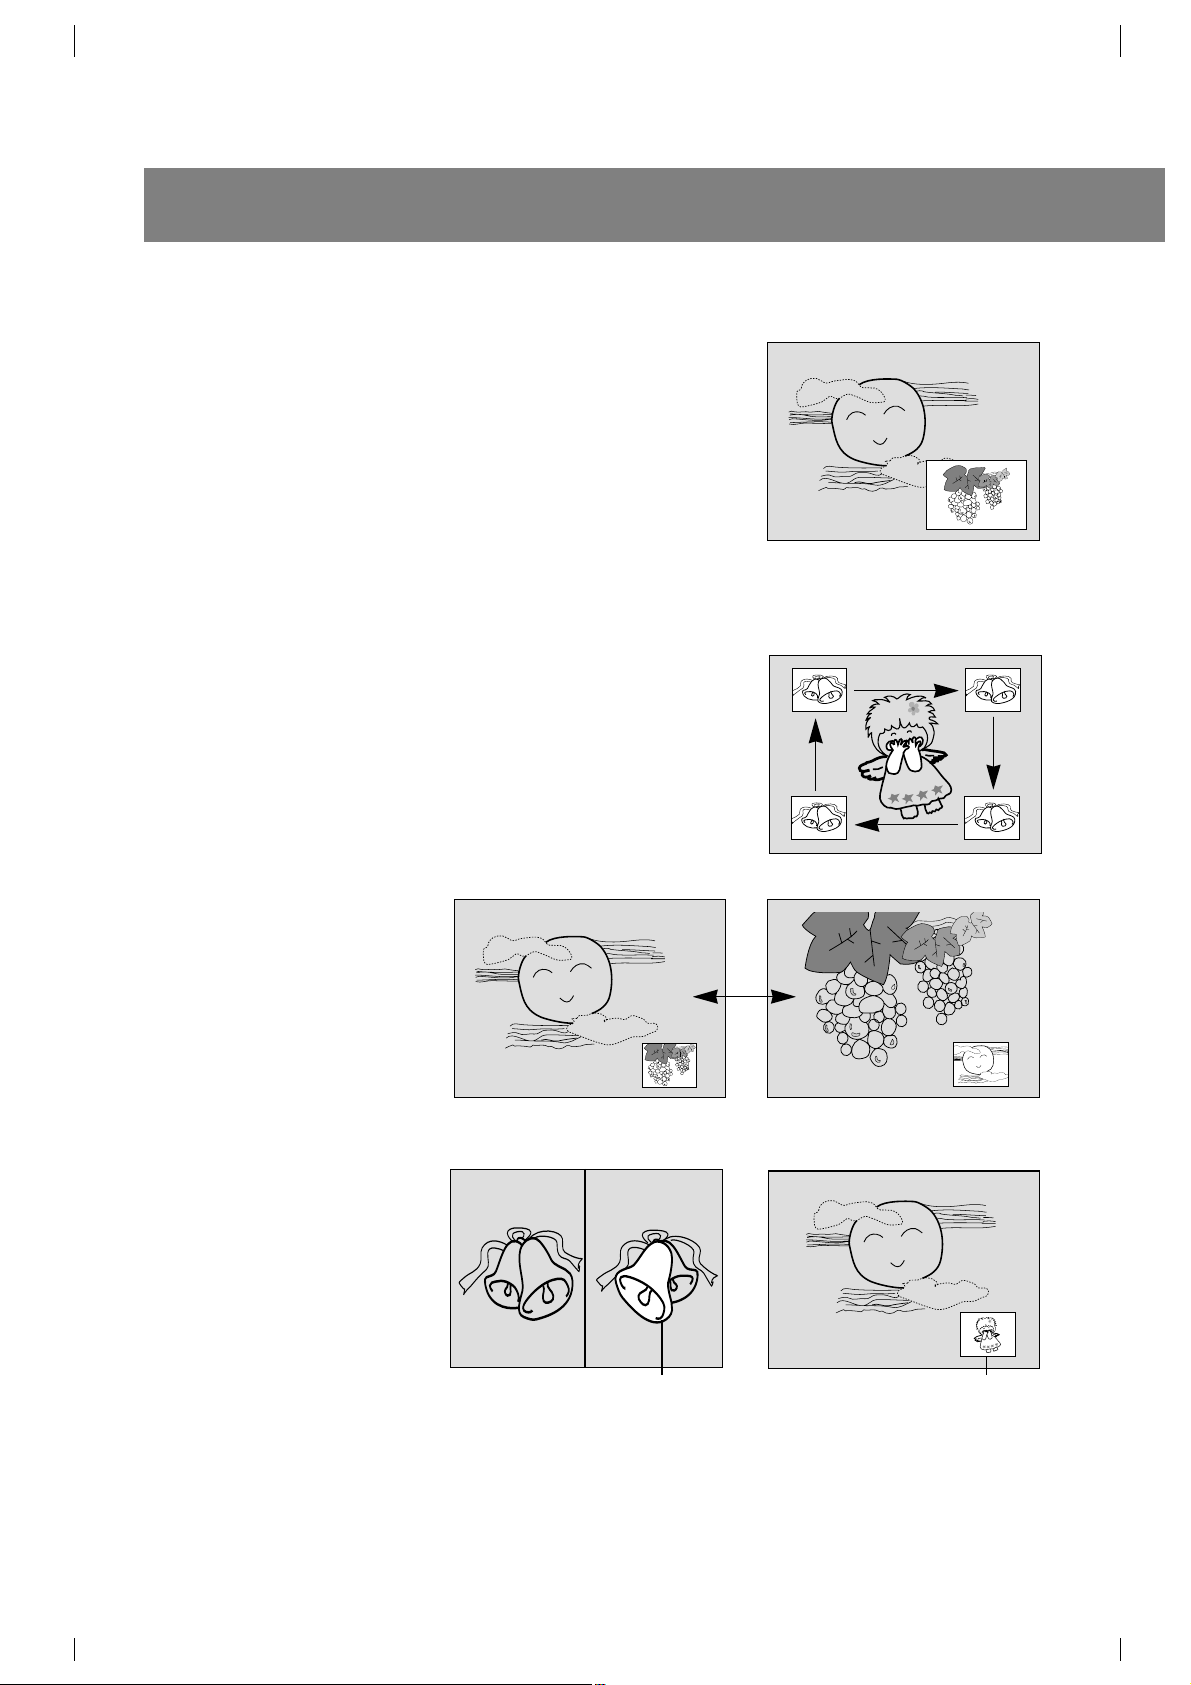
Channel Search
This is the function to search one by one the pictures of all the
programmed channels through the PIP screen while the main screen
remains as a current channel.
Press the CH. SEARCH button.
The pictures of all the programmed channels are searched through
one PIP screen, as shown right.
To release the channel search, press the CH. SEARCH.
Note: By pressing the SWAP button, you can see the channel being
searched on the PIP screen through the main screen.
Moving the Sub Picture (in PIP mode)
Press the POSITION button to select the desired position of sub
picture.
Swapping Screens
Press the SWAP button.
Each time you press this button,
the main picture and sub picture
exchange places.
Still Picture
Press the STILL button.
The still picture is displayed.
In PIP mode, the still picture is
displayed in the sub picture.
To cancel the still picture, press
the STILL button again.
Press the MAIN STILL button. In
PIP mode, the still picture is
displayed in the main picture.
To cancel the still picture, press
the
MAIN STILL button again.
24
SWAP
24
5
5
24
< PIP mode >
< Double window mode >
Still pictureStill picture
22
Antenna Connections
23
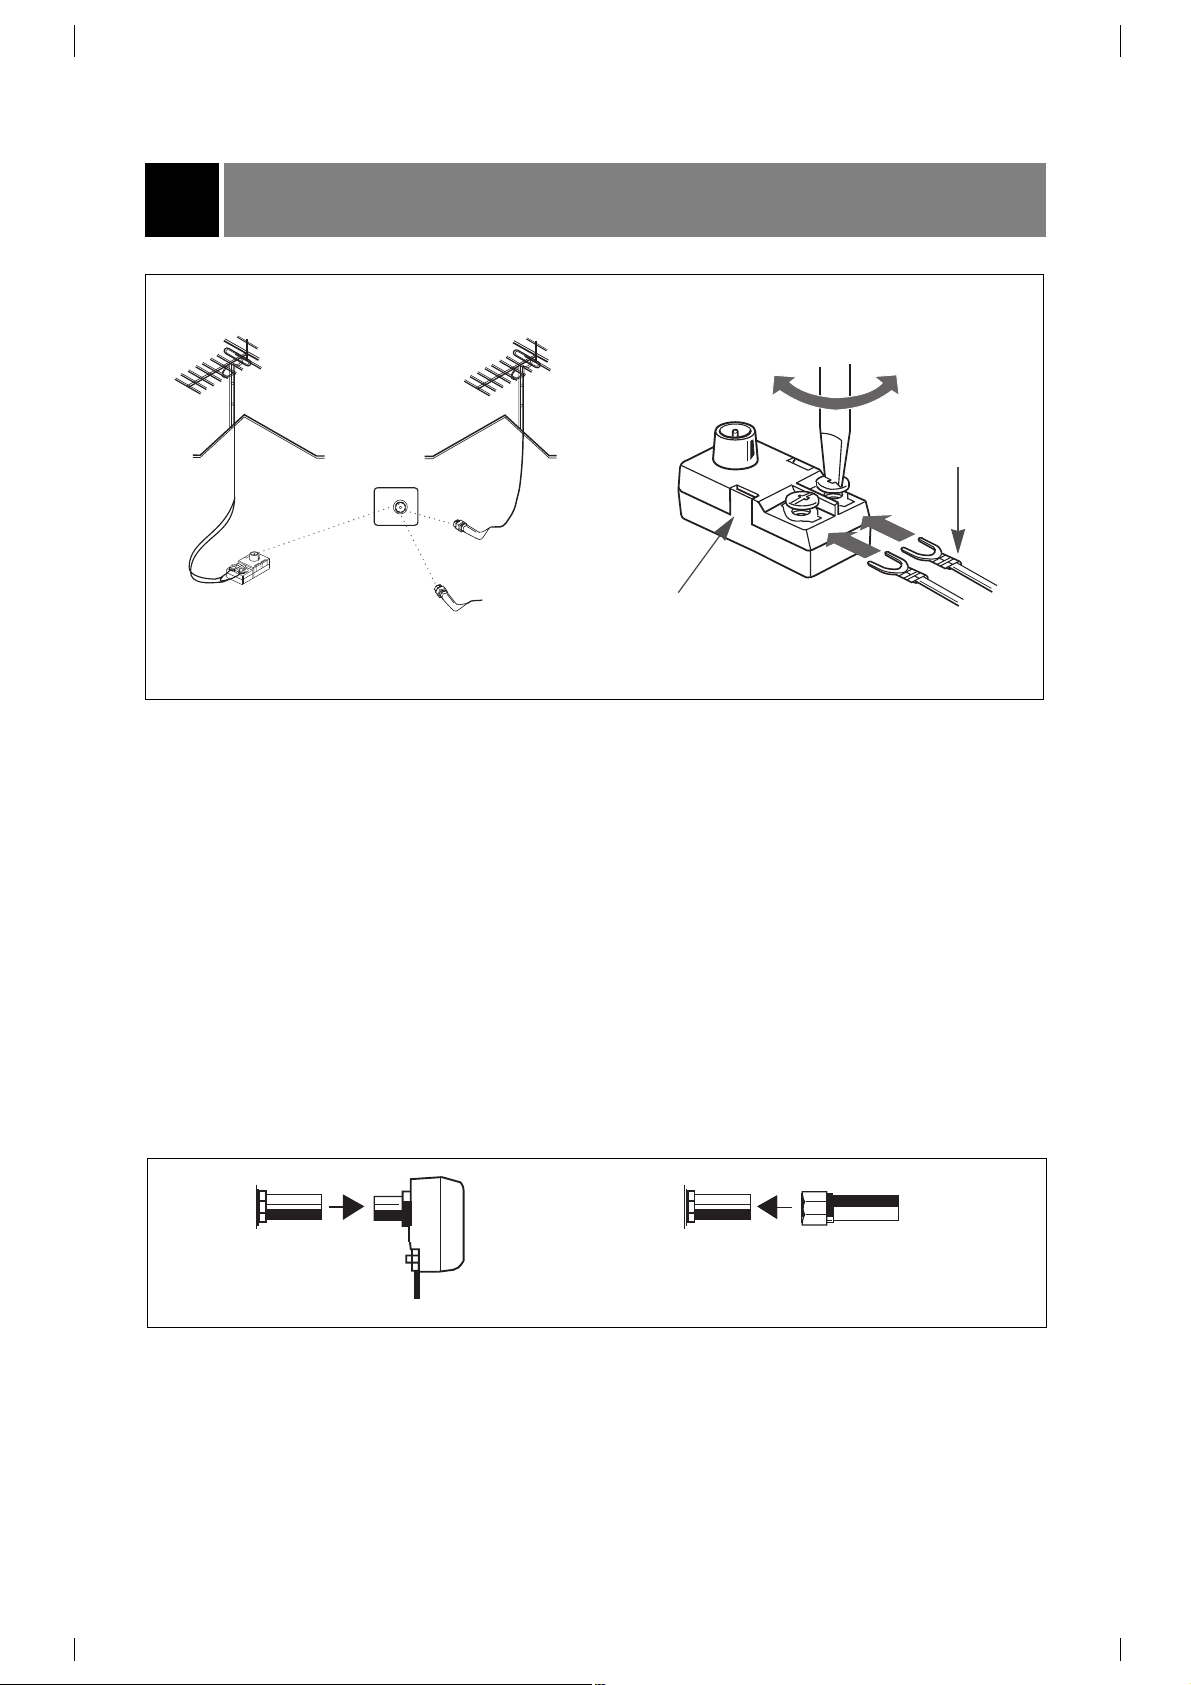
Connecting an Outdoor Antenna
For the best reception, we recommend you use an outdoor antenna.
Severely weathered antennas and antenna cables can reduce the signal quality. Before connecting it,
necessarily inspect them. Any service center can explain the various outdoor antennas available to you.
Connecting a CATV Cable
If you subscribe to a CATV system, change the antenna connection as described below.
1. Remove the 300 to 75 ohm adapter or the cable from the set if attached.
2. Connect the CATV cable (75 ohm coaxial cable) to the 75 ohm antenna jack.
300 Ohm Flat Wire
1. Connect the 300 ohm flat wire to screws on the
300 ohm to 75 ohm adapter.
2. Push the end of 300 ohm to 75 ohm adapter
into 75 ohm antenna jack.
75 Ohm Coaxial Cable
1. Connect the 75 ohm coaxial cable directly to
the 75 ohm antenna jack.
75 ohm
Antenna Jack
from cable TV source
Combination
VHF/UHF Antennas
300 ohm
Flat Wire
300 to 75
ohm Adapter
75 ohm
CATV Cable
75 ohm
Antenna
Jack
75 ohm
Coaxial
Cable
75 ohm CATV Cable
300 to 75
ohm Adapter
300 ohm Flat Wire
300 to 75 ohm
Adapter
1.
2.
TV rear
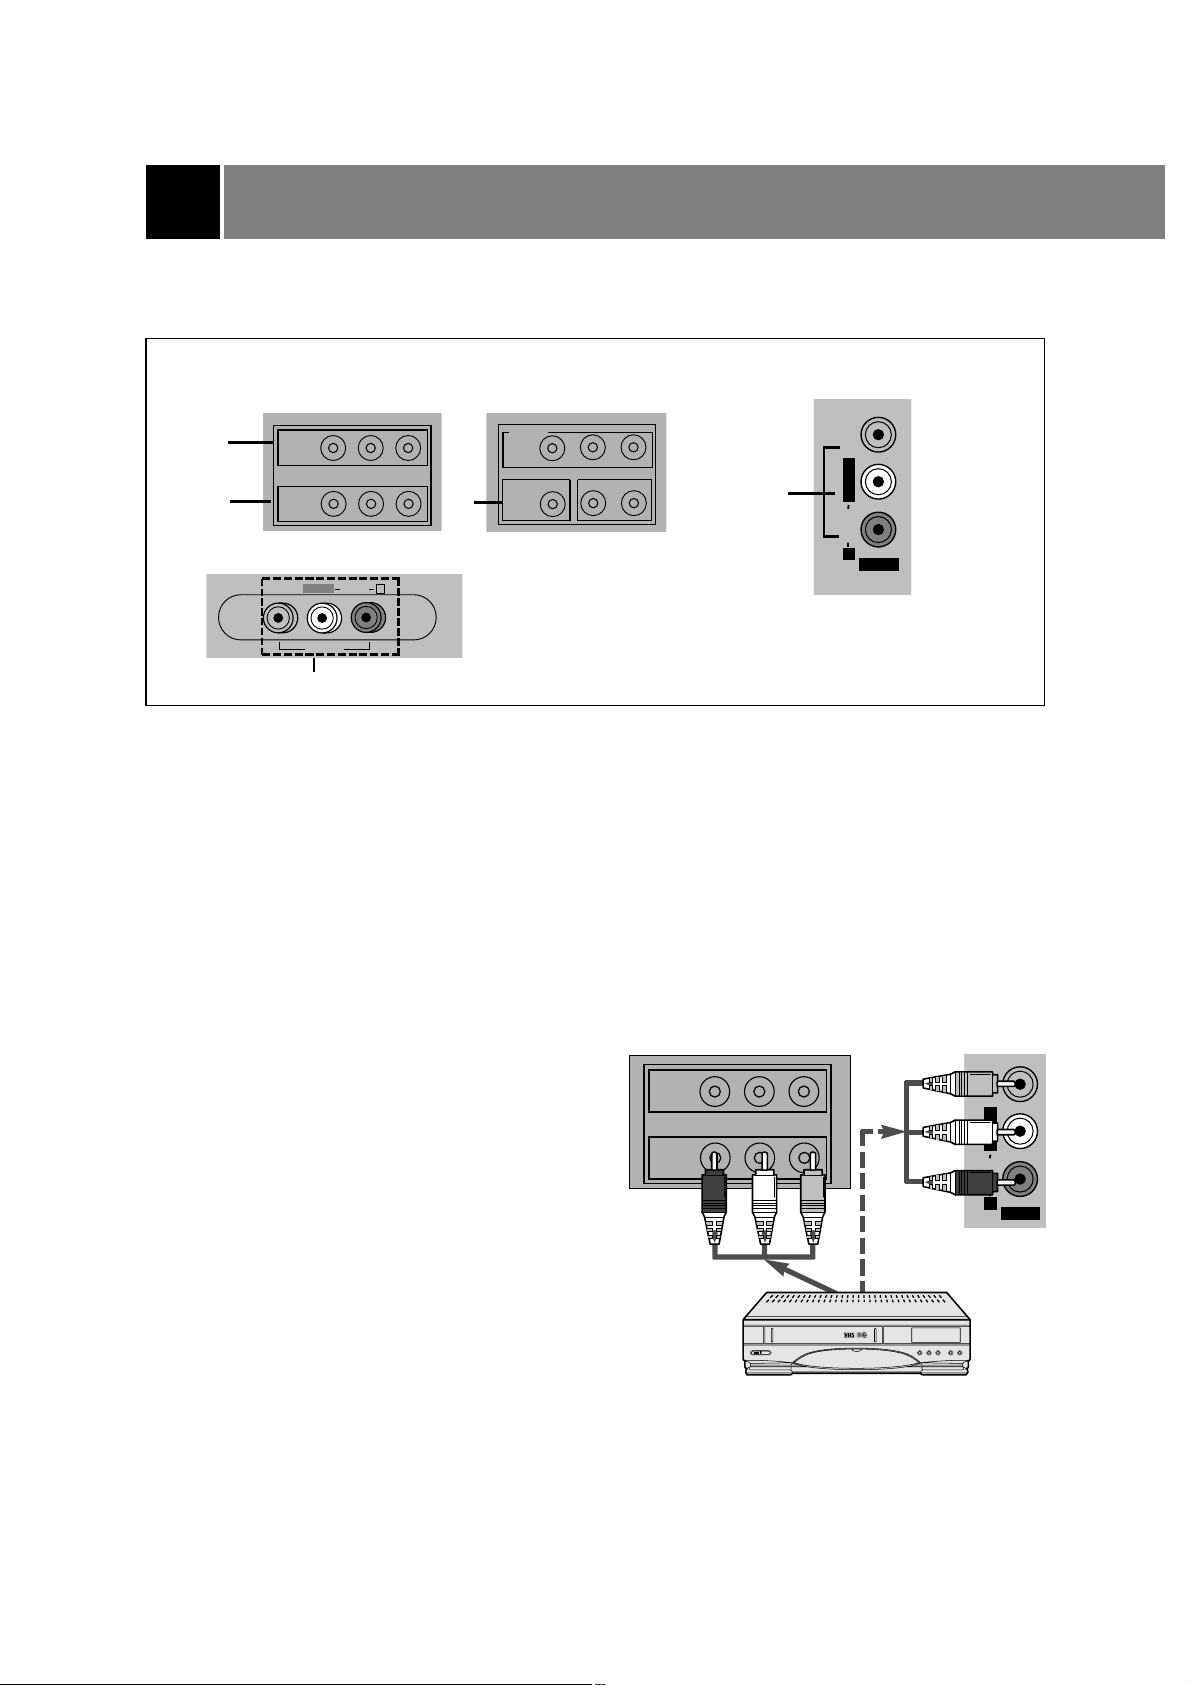
You can connect additional equipment, such as VCRs, camcorders etc. to your set.
Here shown may be somewhat different from your set.
These are an example drawing of typical jack layout.
1. IN 1 JACKS : Connect external equipment outputs (VCR, LASER DISC, CAMCORDER) to these
inputs. Press the TV/VIDEO button to select
AV1.
2. IN 2 JACKS : Connect external equipment outputs (VCR, LASER DISC, CAMCORDER) to these
inputs. Press the TV/VIDEO button to select
AV2.
3. IN 3 JACKS : Connect external equipment outputs (VCR, LASER DISC, CAMCORDER) to these
inputs. Press the TV/VIDEO button to select
AV3.
4. OUT JACKS: Connect external equipment inputs (VCR, Audio amplifier) to these outputs for recording
or monitering the selected program.
Note: This TV is programmed to remember which mode it was last set to, even if you turn the
TV off.
Connection of external equipment (some models)
Connecting AUDIO/VIDEO IN Jacks
1. Connect the audio/video output jacks of the VCR to
IN 1 or IN 2(A/V) jacks on the side or back of TV.
If you connect the audio jack only, you can't hear the
sound from the TV.
2. Press the TV/VIDEO button to select
AV1 or AV2.
Note: In some stereo models, if you connect the
audio/video output jacks of the VCR to the AV
AV IN 3(A/V) jacks on the front or side of TV,
select
AV3.
3. Press the PLAY button on the VCR.
The video playback is on the TV screen.
Note: In case of MONO VCR, connect the output jack of VCR to the AUDIO L/MONO IN jack of TV so
that the sound can be heard from both speakers. If you connect it to the AUDIO R IN jack of TV
the sound is heard only from right speaker.
24
OUT
IN1
AUDIO
(L/MONO) (R)
VIDEO
OUT
IN1
AUDIO
(L/MONO) (R)
VIDEO
COMPONENT
DVD IN(480i)
Y
PB PR
IN2
VIDEO (L/MONO) (R)AUDIO
1
4
2
VIDEO
AUDIO
L/MONO
R
AV IN 3
VIDEO
AUDIO
L/MONO
R
AV IN 3
3
< TV >
< TV >
< Playback VCR >
VID
EO
AV IN
3
AU
DIO
R
L/M
O
N
O
3
25
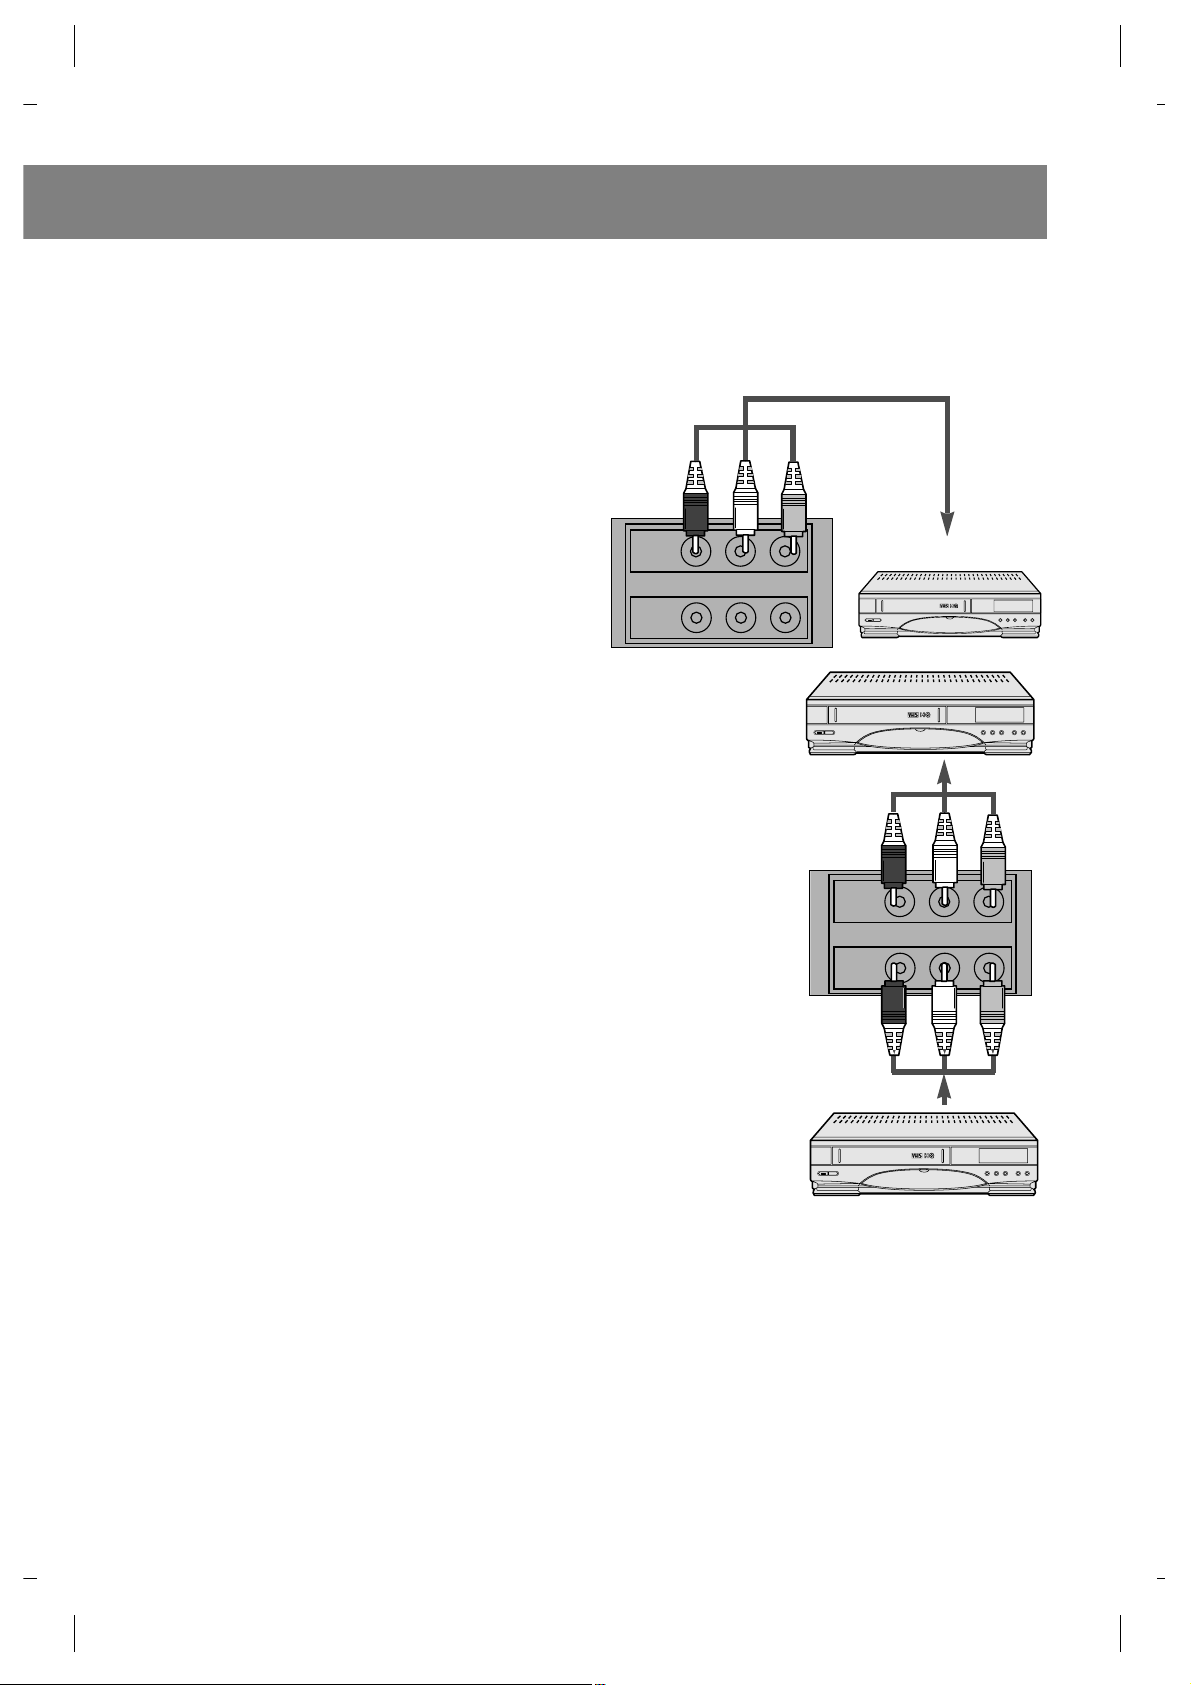
VCR Recording
(some models)
1. Connect the audio/video input jacks of the
recording VCR to the OUT (A/V) jacks on the
back.
2. Select the program number on the TV.
3. Set the recording VCR to record.
Recording a program from con-
nected other equipment
(some models)
1. Connect the output jacks of the playback VCR
to the IN 1 or IN 2 (A/V) jacks on the side or
back of TV (or IN 3 jacks on the side of TV ).
2. Connect the input jacks of the recording VCR
to the OUT (A/V) jacks on the back of TV.
3. Press the TV/VIDEO button to select
AV-1 or
AV-2.
If you connect it to the IN 3 (A/V) jacks on the
side of TV, you should select
AV-3.
4. Press the PLAY button on the playback VCR
and set the recording VCR to record.
Note: In some mono models, when the input jacks on the front panel and back panel are connected to
external equipments at the same time, the input jacks on the front panel have priority over the
input jacks on the back panel of the TV.
OUT
IN1
AUDIO
(L/MONO) (R)
VIDEO
OUT
IN1
AUDIO
(L/MONO) (R)
VIDEO
< Recording VCR >
< Recording VCR >
< TV >
< TV >
< Playback VCR >
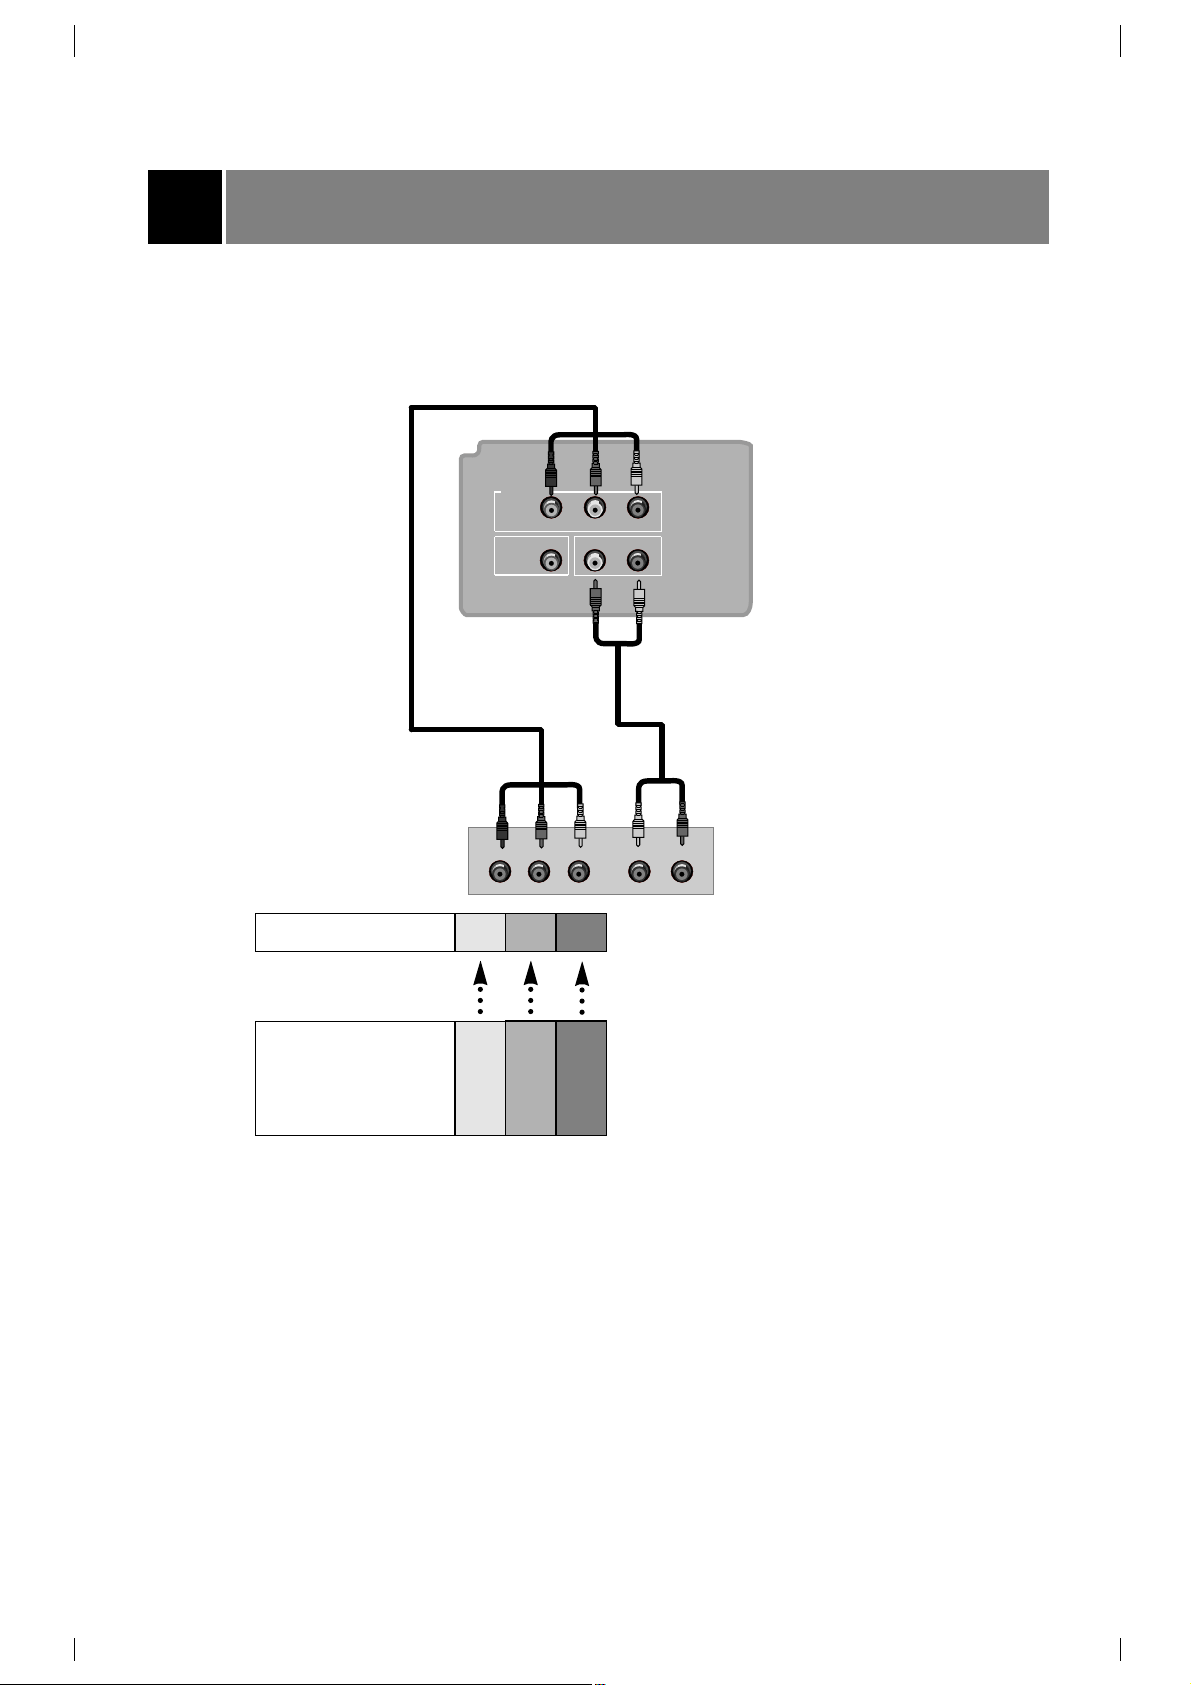
Connecting DVD player
26
• Connect component video inputs to Y, P
B
, P
R
(480i) and audio IN2 to audio(L/R) ports.
•
Note: This TV is programmed to remember which mode it was last set to, even if you turn the TV off.
1.How to connect
Note:
< Back panel of DVD >
2.How to use
• Turn the set on and press the TV/VIDEO button on the remote control or
TV/VIDEO button on the front panel to select
COMPONENT.
•Try this after turning on the DVD set.
AUDIO
PB PRY (R) (L)
Y
IN2
PB PR
DVD IN (480i)
VIDEO
(L/MONO) AUDIO(R)
COMPONENT
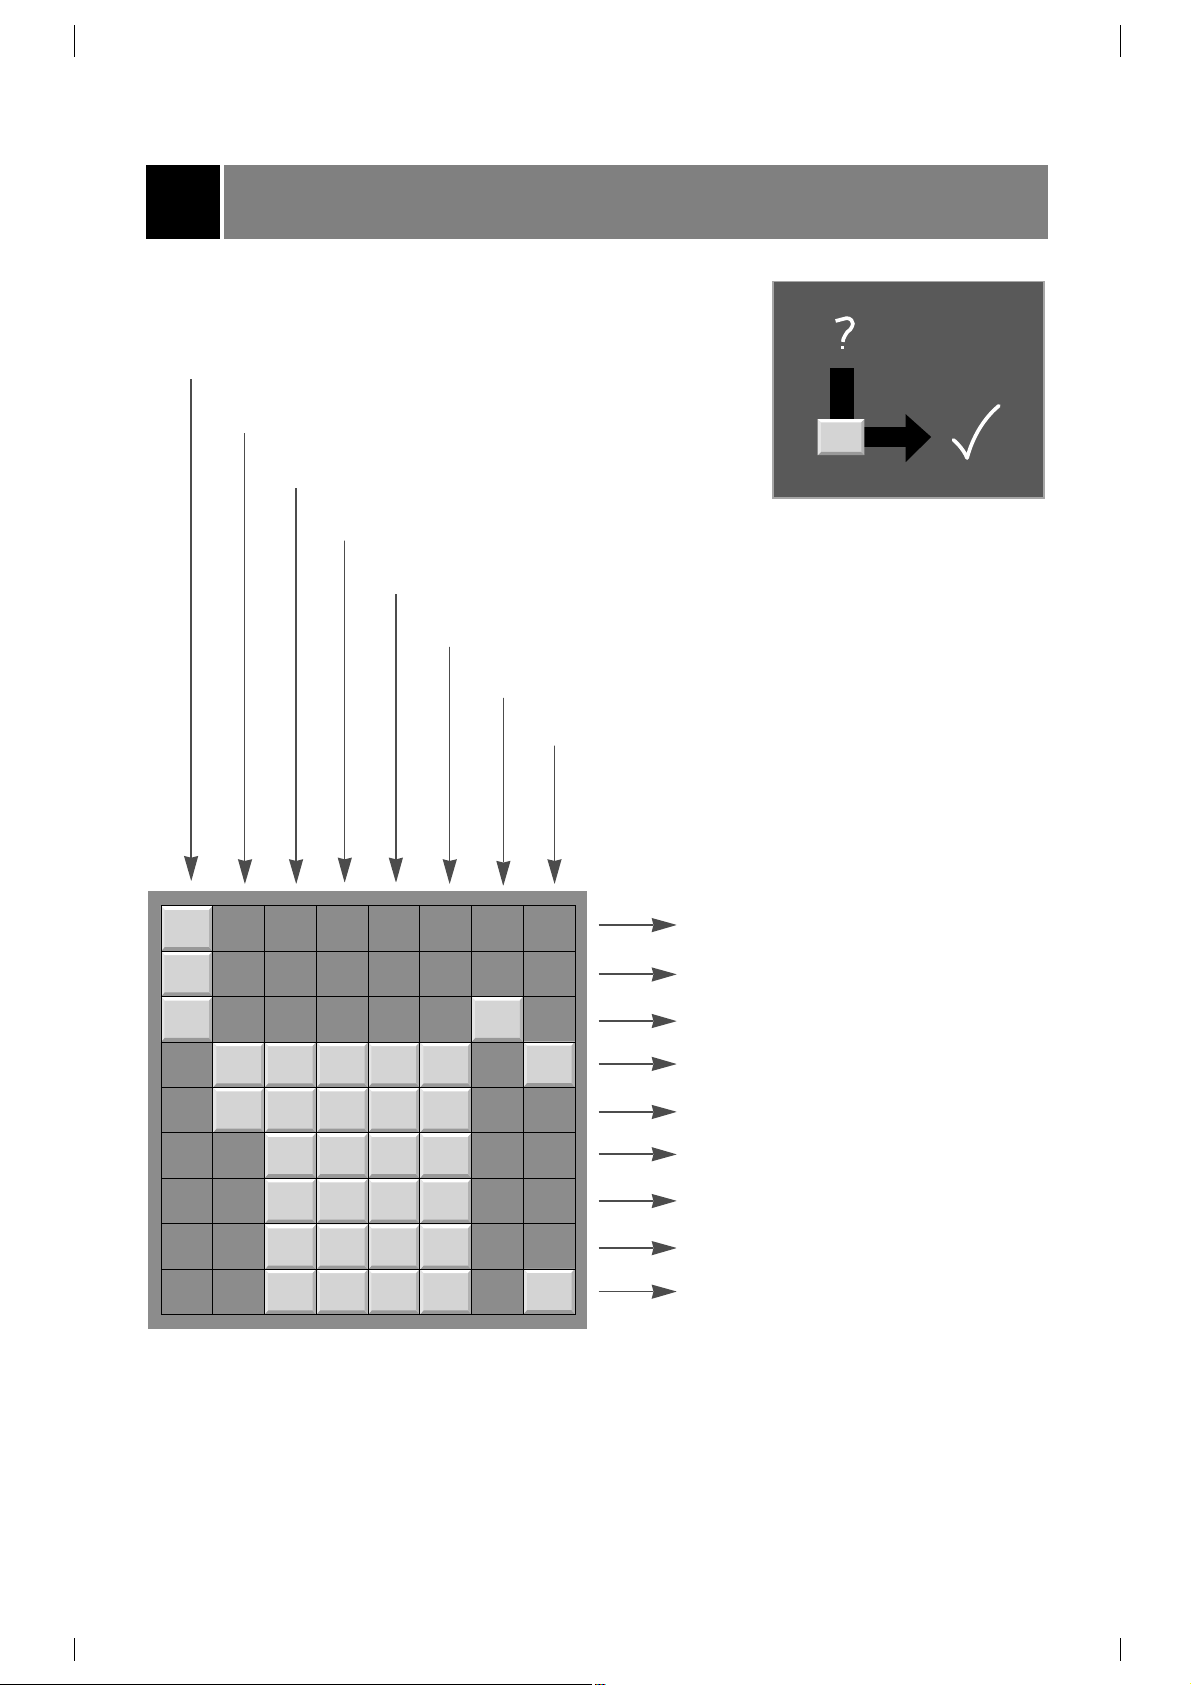
< TV connection panel >
TV INPUT
Y P
B
P
R
DVD OUTPUT
Cb
B -Y
Pb
P
B
Cr
R -Y
Pr
P
R
Y
Y
Y
Y
Troubleshooting check list
SYMPTOMS
No power
No picture or sound
Poor picture but good sound
Poor reception
Lines in picture
Ghosts (multiple images)
Remote control does not work.
Cannot tune desired channel.
CHECK THESE THINGS
Is power cord plugged in?
Is television turned on?
Check batteries in remote control.
Try another channel (station trouble).
Check antenna connectings.
Check for local interference.
Adjust the antenna.
Adjust the picture control.
Program channel using AUTO
PROGRAM.
27