Loading ...
Loading ...
Loading ...
20
US
Getting Started
– Subject to vibrations
– Subject to direct sunlight
• Use caution when placing the speakers and/or speaker stands attached to the speakers on a specially treated (waxed,
oiled, polished, etc.) floor, as staining or discoloration may result.
• Do not use any type of abrasive pad, scouring powder, or solvent such as alcohol or benzine.
• Do not lean or hang on the speaker, as the speaker may fall down.
Ti
p
• When you change the positions of the speakers, Sony recommends that you change the settings. For details, see
“Getting Optimal Surround Sound for a Room” (page 89) and “Calibrating the Appropriate Settings Automatically”
(page 90).
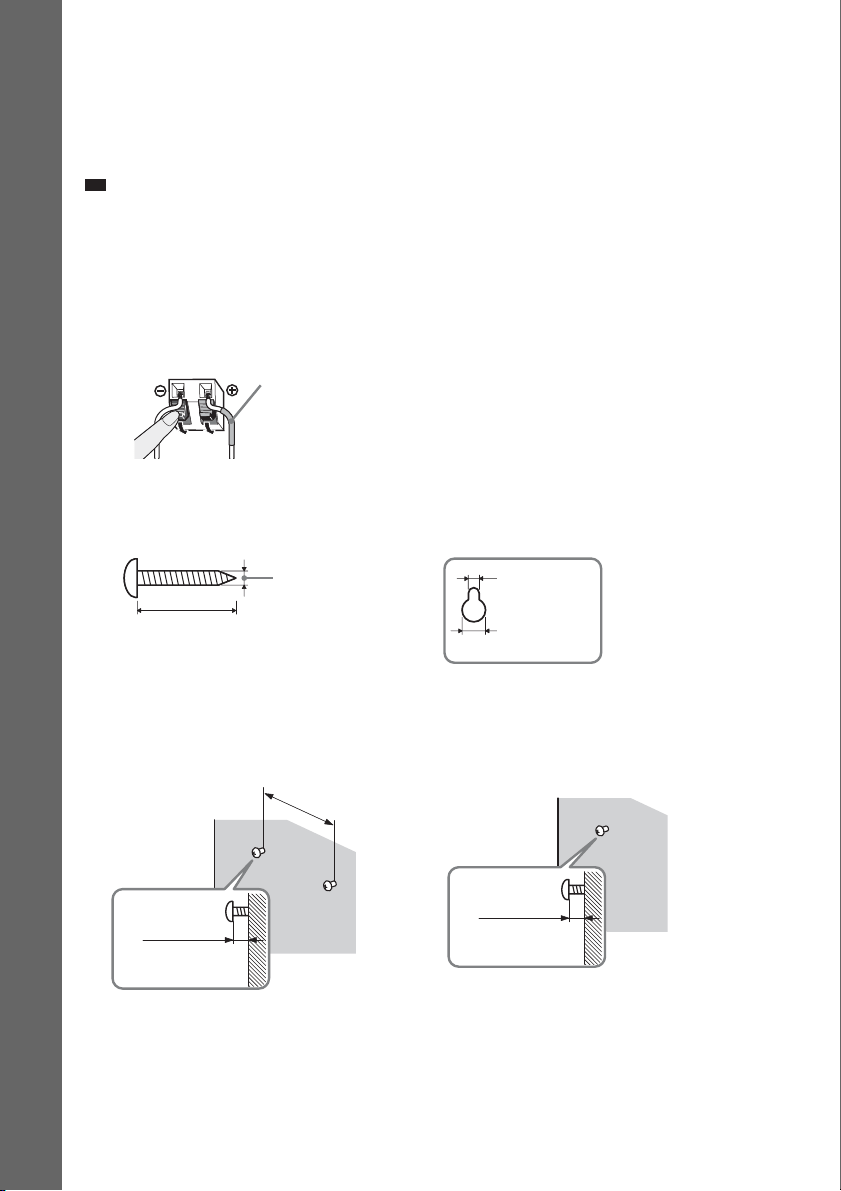
To install the speakers on a wall
Before installing the speakers on a wall, connect the speaker cord to the speaker.
Be sure to match the speaker cords to the appropriate terminals on the speakers: the speaker cord with
the color tube to 3, and the speaker cord without the color tube to #.
1 Prepare screws (not supplied) that are suitable for the hole on the back of each speaker.
See the illustrations below.
2 Fasten the screws to the wall.
DAV-HDX277WC/DAV-HDX279W
Color tube
Front speaker (L): White
Front speaker (R): Red
Center speaker: Green
Surround speaker (L): Blue
Surround speaker (R): Gray
30 mm (1
3
/
16
inches)
4 mm (
5
/
32
inch)
Hole on the back of
the speaker
5 mm
(
7
/
32
inch)
10 mm
(
13
/
32
inch)
8 to 10 mm
(
11
/
32
to
13
/
32
inch
)
145 mm
(5
3
/
4
inches)
For the center speaker
For the other speakers
8 to 10 mm
(
11
/
32
to
13
/
32
inch
)
Loading ...
Loading ...
Loading ...