Loading ...
Loading ...
Loading ...
19
US
Getting Started
Notes
• Be sure to turn on the receiver when the video and
audio signals of a playback component are being
output to a TV via the receiver. Unless the power is
turned on, neither video nor audio signals will be
transmitted.
• When connecting optical digital cords, insert the
plugs straight in until they click into place.
• Do not bend or tie optical digital cords.
Tips
• To output the sound of the TV from the speakers
connected to the receiver, be sure to
– connect the audio output jacks of the TV to the
TV IN jacks of the receiver.
– turn off the TV’s volume or activate the TV’s
muting function.
• All the digital audio jacks are compatible with
32 kHz, 44.1 kHz, 48 kHz, and 96 kHz sampling
frequencies.
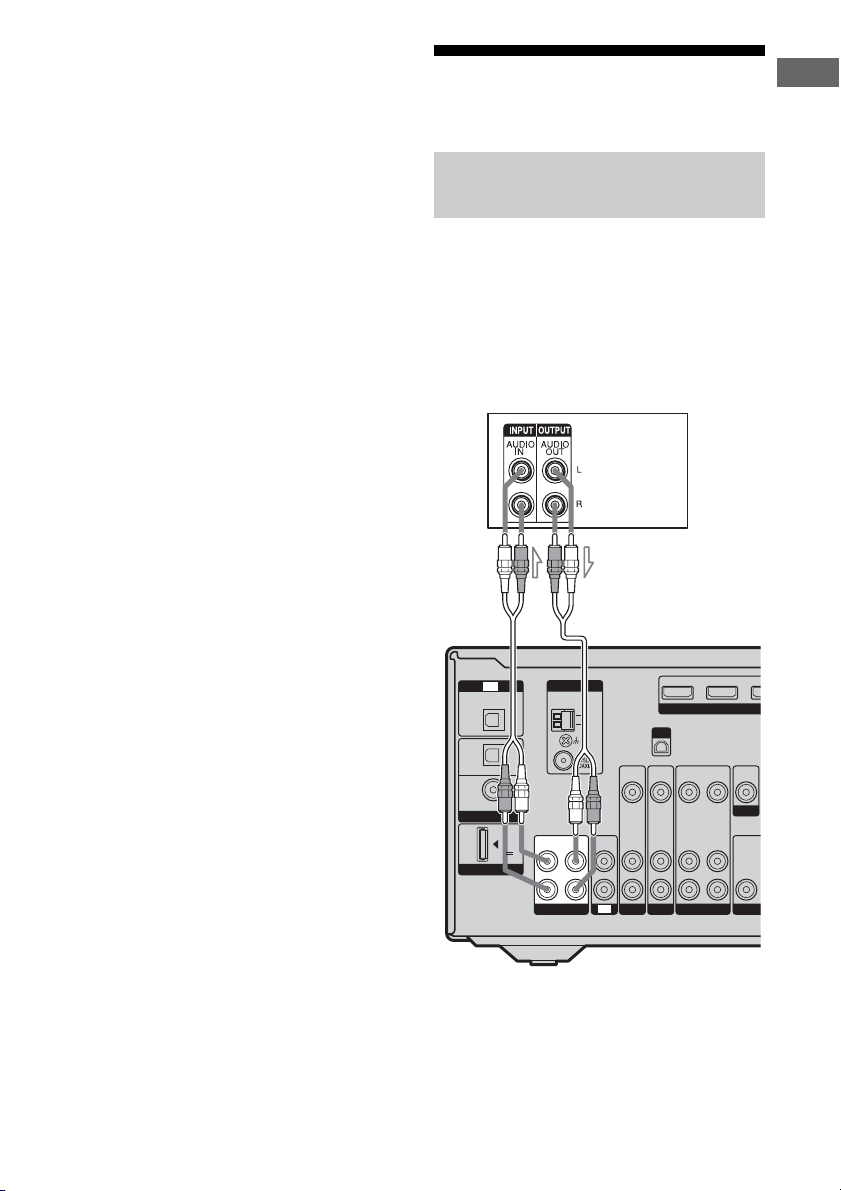
4a: Connecting the audio
components
The following illustration shows how to
connect a Super Audio CD player, CD player
or CD recorder. Before connecting the cords,
be sure to disconnect the AC power cord.
After connecting your audio component,
proceed to “4b: Connecting the video
components” (page 20).
Connecting a Super Audio CD/CD
player/CD recorder
AM
HD
XM
SAT IN DVD IN
IN
DIGITAL
(ASSIGNABLE)
OPTICAL
OPTICAL
SAT
IN
DVD
IN
COAXIAL
ANTENNA
IN
TV
TV
SUB WOO
F
AUDIO
IN
VIDEO
IN
SAT
MONITOR
AUDIO
IN
VIDEO
IN
AUDIO
IN
VIDEO
IN
DVD
AUDIO
OUT
AUDIO
OUT
VIDEO
OUT
VIDEO
OUT
VIDEO 1
SA-CD
/
CD
/
CD-R
OUT
L
R
IN
DMPORT
DC5V
0.7A MAX
Super Audio
CD player/
CD player/
CD recorder
A Audio cord (not supplied)
A
Loading ...
Loading ...
Loading ...